• Home
  • Recipe Index
    • Desserts
    • Dinner
    • Appetizer
    • Drinks
  • About
  • Contact
  • Privacy Policy
menu icon
go to homepage
  • Home
  • Recipe Index
    • Desserts
    • Dinner
    • Appetizer
    • Drinks
  • About
  • Contact
  • Privacy Policy

search icon
Homepage link
  • Home
  • Recipe Index
    • Desserts
    • Dinner
    • Appetizer
    • Drinks
  • About
  • Contact
  • Privacy Policy

×

Cat Litter Cake: The Quirky Dessert That Will Surprise Your Guests

Published: Sep 2, 2024 · by Taling · Leave a Comment

WANT TO SAVE THIS RECIPE?

1 shares
  • Facebook
Get ready to wow your guests with the hilarious and delicious Cat Litter Cake! This quirky dessert mimics a cat's litter box, complete with cookie litter and a plastic scoop for serving. Perfect for Halloween, April Fools' Day, or pet-themed parties, this cake combines creativity, humor, and yummy flavors that will have everyone talking. Discover the fun ingredients and step-by-step instructions to elevate your dessert game! #CatLitterCake #PartyDesserts #FunBaking #CreativeBaking #DessertIdeas

Introduction

If you’re looking for a dessert that is bound to get everyone talking at your next gathering, look no further than the infamous Cat Litter Cake. This whimsical creation is not only a feast for the eyes but also a delightful treat that tantalizes your taste buds. Imagine a cake that resembles a litter box, complete with edible “litter” and a playful spin on traditional baking. The concept of Cat Litter Cake has captured the imagination of bakers and party hosts alike, making it a popular choice for fun-filled occasions.

If you’re looking for a dessert that is bound to get everyone talking at your next gathering, look no further than the infamous Cat Litter Cake. This whimsical creation is not only a feast for the eyes but also a delightful treat that tantalizes your taste buds. Imagine a cake that resembles a litter box, complete with edible "litter" and a playful spin on traditional baking. The concept of Cat Litter Cake has captured the imagination of bakers and party hosts alike, making it a popular choice for fun-filled occasions.

What sets this cake apart is its perfect blend of humor and creativity. It’s not just a dessert; it’s an experience that invites laughter and surprise from your guests. Whether you’re hosting a Halloween party, an April Fools’ Day celebration, or even a pet-themed gathering, this cake provides a unique and humorous twist that will leave everyone amused. The Cat Litter Cake is a brilliant way to showcase your baking skills while also demonstrating how creativity can transform a simple dessert into a memorable centerpiece.

Understanding the Cat Litter Cake

At first glance, you might be puzzled by the appearance of the Cat Litter Cake. Its unusual look is designed to mimic a cat’s litter box, complete with cookie “litter” on top and a plastic cat scoop for serving. But don’t let its playful design fool you; this cake is as delicious as it is quirky. The base of the cake typically consists of a moist vanilla cake layered with rich chocolate cake, creating a harmonious balance of flavors.

The fun factor of the Cat Litter Cake lies in its ability to play on the idea of humor in desserts. It challenges the conventional notions of what a cake should look like and invites bakers to think outside the box. This cake is particularly popular at gatherings where fun is the name of the game. Its unique presentation and surprising taste make it a conversation starter, ensuring that your dessert is the highlight of the event.

Common occasions for serving this cake include Halloween parties, where its spooky theme fits perfectly, and April Fools’ Day, where the playful deception of the cake can elicit laughter and surprise. Additionally, pet-themed parties are a natural fit, as the cake pays homage to our feline friends in a fun and light-hearted way.

Ingredients Overview

Creating the Cat Litter Cake requires a variety of ingredients that contribute to its unique flavor and appearance. Below is a complete list of the essential ingredients you will need, along with detailed descriptions of each component.

1. Vanilla Cake Mix: This forms the base of your cake and provides a light, fluffy texture. Using a pre-made mix simplifies the baking process, although you can opt for a homemade recipe if you prefer.

2. Chocolate Cake Mix: The rich flavor of chocolate adds depth to the cake, creating a delightful contrast with the vanilla layers. Similar to the vanilla mix, you can use a boxed mix or make your own from scratch.

3. Eggs: Essential for binding the ingredients together, eggs add moisture and richness to the cake. They also help the cake rise during baking.

4. Vegetable Oil: This ingredient helps keep the cake moist and tender. The oil works in conjunction with the eggs to create a perfect texture.

5. Milk: Adding milk to the cake batter enhances its flavor and contributes to the cake’s overall moistness. You can substitute almond milk or soy milk for a dairy-free option.

6. Oreo Cookies: Crushed Oreos are the star of the show when it comes to simulating cat litter. Their dark color and crumbly texture make them the perfect choice for this whimsical cake.

7. Vanilla Pudding Mix: This ingredient adds creaminess and enhances the overall flavor profile of the cake. It also provides a lovely filling when mixed with the other components.

8. Whipped Topping: For the finishing touch, whipped topping is used to create a smooth layer on the cake, making it look more like a litter box. You can use store-bought or homemade whipped cream, depending on your preference.

9. Plastic Cat Scoop: While not an edible ingredient, a clean plastic cat scoop is essential for the final presentation of the cake, adding to its playful and humorous appeal.

Ingredient Substitutions

If you have dietary preferences or restrictions, there are several substitutions you can consider:

  1. Gluten-Free Cake Mix: You can easily swap the traditional cake mixes for gluten-free versions, ensuring everyone can enjoy the cake.
  2. Egg Replacements: If you’re looking for an egg-free option, consider using flaxseed meal or applesauce as a binding agent.
  3. Dairy-Free Options: As mentioned, almond milk or soy milk can replace regular milk, and you can use coconut whipped topping instead of dairy-based whipped cream.

These substitutions allow you to cater to various dietary needs while still delivering a fabulous Cat Litter Cake that everyone will enjoy.

Step-by-Step Instructions

Baking the Cakes

The first step in creating your Cat Litter Cake is to bake the cakes that will form the base of your dessert. Follow these detailed instructions to ensure your cakes turn out perfectly.

1. Preheat the Oven: Begin by preheating your oven to 350°F (175°C). This is a crucial step to ensure that your cakes bake evenly.

2. Prepare the Cake Pans: Grease and flour two round cake pans (9-inch is ideal) to prevent the cakes from sticking. You can also line the bottom with parchment paper for easy removal.

3. Mix the Cake Batter: In separate mixing bowls, prepare the vanilla and chocolate cake mixes according to the package instructions. This typically involves combining the cake mix with eggs, oil, and milk. Make sure to mix until smooth and well combined, being careful not to overmix.

4. Bake the Cakes: Pour the vanilla cake batter into one of the prepared pans and the chocolate batter into the other. Bake them in the preheated oven for approximately 25 to 30 minutes, or until a toothpick inserted in the center comes out clean.

5. Cool the Cakes: Once baked, remove the cakes from the oven and allow them to cool in their pans for about 10 minutes. After that, carefully turn them out onto wire racks to cool completely. This step is essential to prevent any melting or sagging of the cake during assembly.

Crumbling the Cookies

While the cakes are cooling, it’s time to prepare the “litter” that will top your cake. The texture of the crushed cookies is crucial for achieving that authentic cat litter look.

1. Choose Your Tools: To effectively crumble the Oreo cookies, you can use a food processor for a finer texture or simply place them in a zip-top bag and crush them with a rolling pin for a chunkier look. Both methods work well, so choose based on your preference.

2. Crush the Cookies: If using a food processor, pulse the Oreos until they resemble fine crumbs. If using a bag, make sure to remove as much air as possible before sealing it, then crush the cookies until you reach your desired consistency.

3. Set Aside: Once your cookies are crushed, set them aside in a bowl. This will be used to simulate the cat litter on top of your cake, so it’s important to have them ready for the final assembly.

By following these initial steps carefully, you’re well on your way to creating a show-stopping Cat Litter Cake that will surely impress your guests with its unique appearance and delightful taste. Stay tuned for the next part of this article, where we will dive into the assembly and decoration process, bringing this quirky cake to life!

If you’re looking for a dessert that is bound to get everyone talking at your next gathering, look no further than the infamous Cat Litter Cake. This whimsical creation is not only a feast for the eyes but also a delightful treat that tantalizes your taste buds. Imagine a cake that resembles a litter box, complete with edible

Preparing the Frosting

To create a delicious and visually appealing Cat Litter Cake, the frosting is a pivotal element that not only contributes to the cake’s flavor but also aids in achieving its signature “litter” appearance. For this cake, you’ll need two types of frosting: a classic buttercream frosting that will serve as the filling and a secondary frosting that incorporates green food coloring to mimic the look of cat litter.

Ingredients for Frosting:

  1. 1 cup unsalted butter, softened
  2. 4 cups powdered sugar
  3. ¼ cup heavy cream
  4. 1 teaspoon vanilla extract
  5. Green food coloring (gel or liquid)

Instructions for Frosting:

1. In a mixing bowl, beat the softened butter with an electric mixer on medium speed until creamy.

2. Gradually add the powdered sugar, mixing until well combined.

3. Pour in the heavy cream and vanilla extract. Beat on high speed for about 3-4 minutes until the frosting is light and fluffy.

4. Divide half of the frosting into another bowl. Add green food coloring to this portion until you achieve the desired shade. Mix well until the color is uniform.

Achieving the Perfect “Litter” Look with Green Food Coloring

To replicate the look of cat litter, it’s essential to find the right shade of green. Typically, a light, pastel green works best, as it simulates the appearance of clay cat litter. You can start with a small amount of food coloring and gradually add more until you reach the perfect tone.

Tips for Mixing Frosting to the Right Consistency

The consistency of your frosting plays a crucial role in both the taste and appearance of your Cat Litter Cake. Here are some tips to ensure your frosting is just right:

  1. Creamy Texture: Ensure your butter is at room temperature for a smooth blend.
  2. Adjust Thickness: If your frosting is too thick, add a tablespoon of milk or cream to thin it out. If it’s too thin, gradually add more powdered sugar until you reach the desired consistency.
  3. Stiff Peaks for Decoration: If you plan to pipe any decorations, the frosting should be thick enough to hold its shape, usually achieved by reducing the liquid.

Assembling the Cake

Now that your cakes are baked, cooled, and your frostings are prepared, it’s time to assemble the Cat Litter Cake.

1. Layering the Cakes: Start with one of the cooled cake layers. Place it on a serving platter or a clean cat litter box for that authentic presentation. Spread a generous layer of the plain frosting on top of this layer.

2. Adding the Second Layer: Carefully place the second cake layer on top of the frosted first layer. Repeat the frosting process, adding more frosting in between the layers to enhance flavor and moisture.

3. Final Layer: Once the second layer is in place, use the remaining frosting to cover the top and sides of the cake. Don’t worry about making it look perfect; a slightly messy application will add to the cake’s “littered” appearance.

Importance of Moisture and Flavor Balance in the Cake Assembly

Maintaining a good moisture balance is crucial in cake assembly. The frosting not only adds flavor but also helps to keep the cake moist. If you find that the cake layers are a bit dry, consider brushing them lightly with a simple syrup made from equal parts sugar and water heated until dissolved. This will enhance the flavor and moisture of the layers.

Decorating the Cake

Once the cake is assembled, it’s time to add the finishing touches that will turn this ordinary cake into a whimsical Cat Litter Cake.

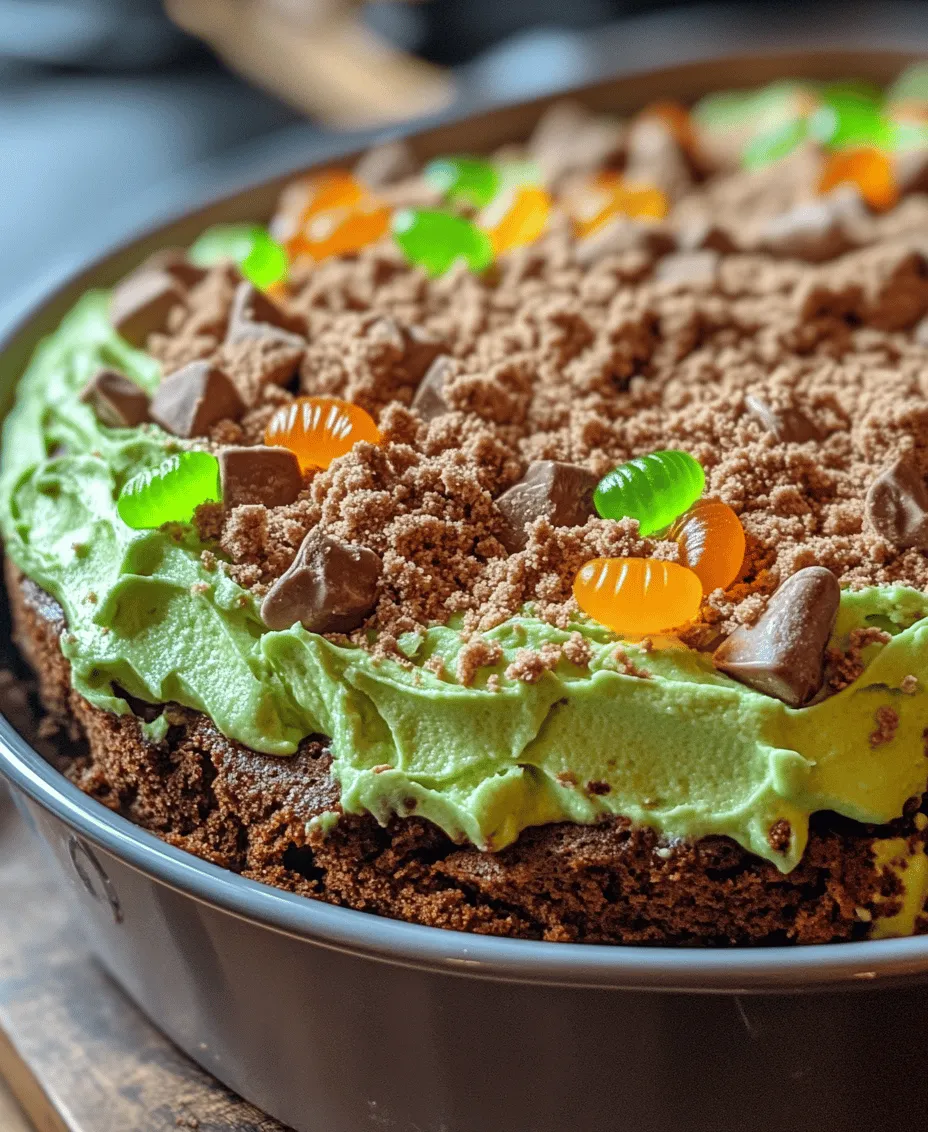
1. Applying Cookie Crumbs: Use crushed chocolate cookies (such as Oreos) to create the “litter” effect. Sprinkle the cookie crumbs generously over the top of the cake and along the sides. For an added touch, leave some areas of frosting visible to mimic patches of “clean” litter.

2. Creative Arrangement of Gummy Worms: To enhance the visual appeal, arrange gummy worms crawling out of the cake or resting on top. You can twist and turn the worms for a more dynamic look. Consider placing them strategically at the edges or partially buried in the cookie crumbs for maximum effect.

3. Final Touches: For added visual interest, use some leftover green frosting to pipe small dots or swirls around the cake. You can also sprinkle a few more cookie crumbs around the base of the cake to create a cohesive look.

Serving Suggestions

The presentation of your Cat Litter Cake is just as important as its taste. Here are some unique serving ideas to enhance the dessert’s whimsical theme:

  1. Presentation in a Clean Cat Litter Box: For an authentic look, serve the cake in a brand new, clean cat litter box lined with a clean piece of parchment paper. This will enhance the humor and surprise factor when guests see the cake.
  2. Serving Utensils: Use themed utensils such as a shovel-style cake server or small scoops to serve the cake, adding to the fun.
  3. Accompanying Beverages and Snacks: Pair your Cat Litter Cake with fun, themed beverages. Consider a minty green punch or a bright lemonade to complement the cake’s colors. For snacks, keep it light with some crunchy veggie sticks or chips to balance the sweetness of the cake.

Nutritional Information

As with any indulgent dessert, it’s important to be aware of the nutritional content. Here’s a breakdown of the estimated nutritional values per serving (assuming 12 servings):

  1. Calories: 470
  2. Total Fat: 22g
  3. Saturated Fat: 12g
  4. Cholesterol: 45mg
  5. Sodium: 210mg
  6. Carbohydrates: 63g
  7. Dietary Fiber: 2g
  8. Sugars: 45g
  9. Protein: 4g

While the Cat Litter Cake makes for an exciting dessert, remember that moderation is key. Enjoying a slice with friends or at a party can be a delightful way to indulge without overdoing it.

Conclusion

The Cat Litter Cake is not just a dessert; it’s an experience that combines creativity, humor, and deliciousness. This fun and whimsical cake is bound to be a conversation starter at any gathering, bringing joy and laughter to your friends and family. Whether you’re celebrating a birthday, hosting a themed party, or just looking to impress with a unique dessert, the Cat Litter Cake is sure to delight.

Embrace your creativity in both baking and presentation, and don’t hesitate to put your unique spin on this recipe. After all, memorable desserts are about sparking joy and laughter—this cake does just that. So, gather your ingredients, roll up your sleeves, and get ready to bake a cake that’s sure to leave a lasting impression!

If you’re looking for a dessert that is bound to get everyone talking at your next gathering, look no further than the infamous Cat Litter Cake. This whimsical creation is not only a feast for the eyes but also a delightful treat that tantalizes your taste buds. Imagine a cake that resembles a litter box, complete with edible "litter" and a playful spin on traditional baking. The concept of Cat Litter Cake has captured the imagination of bakers and party hosts alike, making it a popular choice for fun-filled occasions.

Cat Litter Cake 🍰

Get ready to wow your guests with the hilarious and delicious Cat Litter Cake! This quirky dessert mimics a cat's litter box, complete with cookie litter and a plastic scoop for serving. Perfect for Halloween, April Fools' Day, or pet-themed parties, this cake combines creativity, humor, and yummy flavors that will have everyone talking. Discover the fun ingredients and step-by-step instructions to elevate your dessert game! #CatLitterCake #PartyDesserts #FunBaking #CreativeBaking #DessertIdeas
Print Recipe Pin Recipe

Ingredients
  

1 box of vanilla cake mix

1 box of chocolate cake mix

1 (15 oz) can of chocolate frosting

1 (15 oz) can of vanilla frosting

1 (12 oz) package of vanilla sandwich cookies

1 (12 oz) package of gummy worms

Green food coloring

1 new, clean cat litter box and scoop (for presentation)

Instructions
 

Bake the Cakes: Prepare the vanilla and chocolate cake mixes according to the package directions. Divide the batter evenly between two 9-inch round cake pans and bake as instructed. Once done, allow them to cool completely.

    Crumble the Cookies: While the cakes are cooling, place the sandwich cookies in a food processor and pulse them until finely crushed. Set aside about 1 cup of the crumbs for later decoration.

      Prepare the Frosting: Mix the vanilla frosting and a few drops of green food coloring in a bowl to create a “litter” look. It should resemble a pale green shade.

        Assemble the Cake: Once the cakes are cooled, crumble the chocolate cake into a large bowl. This will serve as the litter base. Layer half of the chocolate cake in the bottom of the clean cat litter box.

          Frost the Cake: Spread a generous layer of chocolate frosting over the crumbled chocolate cake for added moisture and flavor. Then sprinkle a layer of the crushed vanilla cookies on top to simulate cat litter.

            Add the Layers: Next, place the vanilla cake over the chocolate layer, breaking it up slightly to allow the layers to mix. Spread another layer of chocolate frosting followed by a sprinkling of more crushed cookies.

              Decorate: Carefully place gummy worms on top, burying them into the crushed cookies to make them look like they are crawling through the litter.

                Final Touches: Use the remaining vanilla frosting (colored green from earlier) to frost the top and edges of the cake lightly one last time. Sprinkle the remaining cookie crumbs on top and around sides.

                  Serve: Use the scoop to serve the cake in the litter box, presenting it as a quirky dessert at your next gathering.

                    Prep Time: 30 minutes | Total Time: 2 hours | Servings: 12-15

                      Related Recipes

                      • To make these tasty cookies, you need some key ingredients: - 1 cup rolled oats - 1 cup all-purpose flour - 1/2 teaspoon baking soda - 1/2 teaspoon cinnamon - 1/4 teaspoon salt - 1/2 cup unsalted butter, softened - 1/2 cup brown sugar, packed - 1/4 cup honey - 1 large egg - 1 teaspoon vanilla extract These ingredients create a chewy texture. The oats give a hearty feel, while honey adds natural sweetness. You can make your cookies even better with some add-ins: - 1/2 cup raisins or chocolate chips (optional) - 1/2 cup chopped nuts (e.g., walnuts or pecans, optional) Raisins bring a hint of chewiness, and nuts add a nice crunch. Chocolate chips make everything sweeter, and you can mix and match! If you need substitutions, there are many options: - Use gluten-free flour instead of all-purpose flour for a gluten-free version. - Replace the egg with 1/4 cup of applesauce for a vegan choice. - Swap honey with maple syrup if you want a different flavor. These changes allow you to make cookies fit your needs. Enjoy experimenting and find what works best for you! {{ingredient_image_1}} Start by gathering your ingredients. You need rolled oats, flour, baking soda, cinnamon, salt, butter, brown sugar, honey, an egg, and vanilla extract. If you want, add raisins, chocolate chips, or nuts. 1. Preheat your oven to 350°F (175°C). Line a baking sheet with parchment paper. 2. In a medium bowl, mix the oats, flour, baking soda, cinnamon, and salt. Stir these until they blend well. 3. In a large bowl, cream the softened butter and brown sugar. Beat until it looks smooth and fluffy. 4. Add honey, the egg, and vanilla extract. Mix these together till smooth. 5. Gradually add the dry mix. Stir just until combined. Do not overmix. 6. If you choose, fold in raisins, chocolate chips, or nuts. 1. Use a tablespoon to scoop portions of the dough. Place them on the baking sheet. Leave space between each scoop for spreading. 2. Bake for 10-12 minutes. Watch for the edges to turn golden brown. The centers can look soft but will firm up as they cool. 3. For best results, rotate your baking sheet halfway through. This helps cookies bake evenly. 1. When done, take the cookies out of the oven. Let them cool on the baking sheet for 5 minutes. 2. After that, transfer them to a wire rack. Allow them to cool completely. 3. Serve these cookies on a pretty plate. Drizzle honey on top for extra sweetness. A sprinkle of powdered sugar also looks nice. Enjoy your warm and chewy cookies! To make the best honey oatmeal cookies, focus on the butter. Use softened butter, not melted. Creaming the butter and brown sugar helps create a light texture. Don't overmix your dough. Mix until just combined for chewy cookies. Bake them until the edges are golden but the centers seem soft. They will firm up as they cool. One mistake is not preheating the oven. Always preheat to 350°F (175°C). This helps the cookies bake evenly. Another issue is using the wrong flour. All-purpose flour works best for this recipe. Lastly, avoid crowding the baking sheet. Leave space between cookies to allow for spreading. Store leftover cookies in an airtight container. They stay fresh for about a week. If you want to keep them longer, freeze them. Just place them in a freezer-safe bag. To thaw, leave them at room temperature for a few hours. Enjoy your cookies soft and chewy again! Pro Tips Chill the Dough: For even chewier cookies, refrigerate the dough for at least 30 minutes before baking. This helps to prevent spreading and enhances the flavor. Use Fresh Ingredients: Ensure your baking soda and spices are fresh for the best flavor and texture. Old ingredients can lead to flat or bland cookies. Customize Your Add-ins: Feel free to experiment with various mix-ins like dried fruits, seeds, or different types of chocolate to suit your taste preferences. Perfect Storage: Store cookies in an airtight container at room temperature for up to a week. For longer freshness, freeze them in a single layer and transfer to a container once solid. {{image_2}} You can make these cookies healthier with some simple swaps. Instead of all-purpose flour, try using whole wheat flour. This adds fiber and nutrients. You can also replace some butter with unsweetened applesauce. This change cuts fat and adds moisture. Using less brown sugar can also help. Try just a third of a cup to reduce sugar while still keeping sweetness. Add-ins can change the flavor of your cookies in fun ways. Instead of raisins, try dried cranberries or cherries for a tart touch. For a nutty flavor, use chopped almonds or pecans. You can also mix in dark chocolate chips for a rich taste. If you want a spice kick, add a pinch of nutmeg or ginger. These add-ins make each batch unique and fun to explore. Seasonal changes inspire great variations. In fall, add pumpkin spice and chopped apples for a cozy vibe. During winter, mix in peppermint chips for a festive flair. In the summer, fresh berries can give a bright burst of flavor. These seasonal twists let you enjoy honey oatmeal cookies all year round. Each season brings a new taste adventure! Each Honey Oatmeal Cookie has about 100 calories. This number can change based on the add-ins you choose. If you use chocolate chips or nuts, the calories may go up a bit. To keep track, you can divide the total calories by the number of cookies you bake. These cookies have oats, which are good for heart health. Oats can help lower bad cholesterol. Honey gives a natural sweetness and has antioxidants. It can also help soothe a sore throat. Brown sugar adds flavor but is less processed than white sugar. Using nuts can add healthy fats and protein, making the cookies more filling. You can cut sugar by using less brown sugar or honey. Replace some of the sugar with mashed bananas or applesauce. This change keeps cookies moist and sweet. You can also try using whole wheat flour for more fiber. If you skip the raisins or chocolate chips, you lower the calories too. To make these cookies vegan, swap the butter for a plant-based option. Use coconut oil or vegan butter. Replace the egg with a flax egg. To make a flax egg, mix one tablespoon of ground flaxseed with two and a half tablespoons of water. Let it sit for five minutes until it thickens. You can still use honey, but for a fully vegan cookie, substitute it with maple syrup or agave nectar. If you want to skip the eggs, use a flax egg or applesauce. A quarter cup of unsweetened applesauce works great in place of one egg. You can also use mashed banana or yogurt as alternatives. Each option adds moisture and keeps your cookies chewy. Yes, you can freeze these cookies! After baking, let them cool completely. Place the cookies in an airtight container or a freezer bag. They will last for about three months. To enjoy later, thaw them overnight in the fridge or microwave them for a few seconds. They will taste fresh and delightful! In this article, we explored how to make delicious honey oatmeal cookies. We covered key ingredients, step-by-step instructions, and tips for success. You can try different flavors and healthier swaps to suit your taste. Remember to avoid common mistakes for the best texture. Finally, enjoy these cookies fresh or store them well for later. Each bite offers great taste and health benefits that you can feel good about.
                        Honey Oatmeal Cookies Comforting and Chewy Delight
                      • To make your blondies, you need simple yet tasty items: - 1 cup unsalted butter - 1 cup packed brown sugar - 1/2 cup granulated sugar - 2 large eggs - 1 teaspoon vanilla extract - 2 cups all-purpose flour - 1 teaspoon baking powder - 1/2 teaspoon baking soda - 1/4 teaspoon salt - 1 cup chocolate chips (semisweet or milk) - 1/2 cup chopped nuts (optional, like walnuts or pecans) Each ingredient plays a key role. The butter gives rich flavor. The sugars add sweetness and texture. Eggs bind everything together. Flour gives structure. Baking powder and baking soda help them rise. You can take your blondies up a notch with some fun add-ins! Here are some ideas: - 1/2 cup of shredded coconut for a tropical flair - 1/2 cup of dried fruit like cranberries or apricots for a chewy bite - A sprinkle of sea salt on top to enhance sweet flavors These add-ins let you customize your blondies. You can make each batch unique and exciting. If you need to swap some items, here are great options: - Use coconut oil instead of butter for a dairy-free treat - Replace all-purpose flour with oat flour for a gluten-free option - Try maple syrup in place of granulated sugar for a deeper flavor These substitutions will still give you delicious blondies. You can enjoy them no matter your dietary needs. {{ingredient_image_1}} Start by preheating your oven to 350°F (175°C). Line a 9x13 inch baking pan with parchment paper. Leave some paper over the sides to help lift out the blondies later. In a medium saucepan, melt one cup of unsalted butter over medium heat. Stir it often. Cook until the butter turns a golden brown and smells nutty. This takes about 5 to 7 minutes. Be careful not to burn it. After that, pour the browned butter into a mixing bowl and let it cool for a few minutes. Once cooled, mix in one cup of packed brown sugar and half a cup of granulated sugar. Stir until the mix is smooth. Add two large eggs, one at a time, mixing well after each egg. Next, stir in one teaspoon of vanilla extract. In another bowl, whisk together two cups of all-purpose flour, one teaspoon of baking powder, half a teaspoon of baking soda, and a quarter teaspoon of salt. Gradually add this dry mix to the wet ingredients, stirring until just combined. Be careful not to overmix. Finally, gently fold in one cup of chocolate chips and half a cup of chopped nuts, if you like. Now, pour the batter into your prepared baking pan. Spread it out evenly. Place the pan in the oven and bake for 20 to 25 minutes. The edges should look lightly golden. To check if they are done, insert a toothpick in the center. If it comes out with a few moist crumbs, your blondies are ready! After baking, let the blondies cool in the pan for about 10 minutes. Use the parchment paper to lift them out. Move them to a wire rack to cool completely. Once cool, cut them into squares. Enjoy your chewy brown butter blondies! To get that chewy texture, don’t overmix your batter. Mix just until the flour disappears. Adding brown sugar helps keep your blondies moist and chewy. The brown butter also adds richness that boosts the chewiness. Finally, let them cool before cutting. This helps them set and hold their shape. Brown butter is key to making these blondies shine. Melt your butter slowly over medium heat. Keep stirring until it turns a beautiful golden brown. You’ll know it’s done when it smells nutty. This process adds a deep, rich flavor that makes your blondies special. Remember to let it cool before mixing it with sugar and eggs. One common mistake is not measuring ingredients correctly. Use a kitchen scale for accuracy if you can. Another mistake is opening the oven door too soon. This can cause the blondies to sink. Always check for doneness with a toothpick. It should come out with a few moist crumbs, not wet batter. Avoiding these mistakes will help you bake perfect blondies every time. Pro Tips Use Fresh Ingredients: Always use fresh eggs and quality chocolate chips for the best flavor and texture in your blondies. Don't Overmix: When combining the wet and dry ingredients, mix just until combined to maintain a chewy texture. Cool Before Cutting: Allow the blondies to cool completely before cutting to ensure clean edges and prevent them from falling apart. Experiment with Mix-ins: Feel free to add your favorite mix-ins like dried fruit or different types of nuts for a unique twist on the classic blondie. {{image_2}} If you want nut-free blondies, simply skip the nuts. You can still enjoy a chewy texture and rich flavor. The chocolate chips will add enough sweetness. If you like, add a bit more flour to keep the texture nice. This way, those with nut allergies can enjoy this treat too! You can change the flavor of your blondies easily. Adding spices like cinnamon or nutmeg gives a warm taste. A teaspoon of almond extract can add a nice twist. Want a tropical touch? Add some shredded coconut. These small changes can create a whole new dessert experience. Taste buds will thank you! Using different types of chocolate is simple. If you love dark chocolate, swap in dark chocolate chips. They will give a richer flavor. For a sweeter treat, use white chocolate chips. You can even mix them for a fun blend. Each type of chocolate brings its own magic to these blondies. Enjoy experimenting! To keep your chewy brown butter blondies fresh, store them in an airtight container. This helps keep them soft and chewy. Place parchment paper between layers to prevent sticking. Store them at room temperature for up to five days. If you want them to last longer, the fridge can work too. Just know that cold blondies may lose some chewiness. Freezing blondies is easy and a smart choice. Start by letting them cool completely. Once cool, cut them into squares. Wrap each square in plastic wrap. Then, place the wrapped blondies in a freezer bag. They can stay in the freezer for up to three months. When you’re ready to enjoy, simply take one out and let it thaw at room temperature. If you want to warm up your blondies, the oven is best. Preheat your oven to 350°F (175°C). Place the blondies on a baking sheet for about 5-10 minutes. This warms them and brings back their chewy texture. You can also use a microwave. Heat them for about 10-15 seconds. Be careful not to overheat; you want them warm, not hot. Enjoy every bite! Blondies and brownies look alike, but they taste very different. Blondies use brown sugar, while brownies use cocoa powder. That gives blondies a sweet, butterscotch flavor. Brownies have richer chocolate flavor. The texture is also different. Blondies are chewy and soft, while brownies can be fudgy or cake-like. To check if your blondies are done, look at the edges. They should be lightly golden. Insert a toothpick in the center. If it comes out with a few moist crumbs, they are ready. If it comes out wet with batter, bake them a bit longer. This usually takes about 20 to 25 minutes. You can use margarine, but it will change the flavor a bit. Butter gives blondies a rich taste. Margarine may not brown like butter, which adds a nutty flavor. If you need to use margarine, choose one that has a higher fat content for better results. In this post, I covered key ingredients for chewy brown butter blondies and helpful tips for baking. You learned how to prepare the batter, bake your blondies, and cool them properly. I shared storage tips and answered common questions about blondies. Brown butter adds a rich taste you will love. Baking is fun, so don’t be afraid to try new flavors. Enjoy your blondies and share with friends.
                        Chewy Brown Butter Blondies Perfectly Delicious Treat
                      • To make a flourless chocolate lava cake, you need: - 1 cup semi-sweet chocolate chips - 6 tablespoons unsalted butter - 3 large eggs - 1/2 cup granulated sugar - 1 teaspoon vanilla extract - 1/4 teaspoon salt - 1/4 cup unsweetened cocoa powder These simple ingredients create a rich and gooey dessert that everyone loves. You can enhance your cake with these extras: - Powdered sugar for dusting - Vanilla ice cream for serving These additions make your lava cake even more delightful. This dessert is naturally gluten-free since it uses no flour. If you want to make it dairy-free, you can swap the butter and chocolate for dairy-free options. Always check labels to ensure they meet your needs. {{ingredient_image_1}} Start by preheating your oven to 425°F (220°C). Grease four ramekins with unsalted butter. Make sure to cover the entire inside. Then, dust each ramekin with cocoa powder. This step helps the cakes pop out easily after baking. In a microwave-safe bowl, mix the semi-sweet chocolate chips with the unsalted butter. Heat them in the microwave for 30 seconds. Stir the mixture well after each interval. Keep doing this until it is smooth and shiny. This blend is the heart of your lava cake. In another bowl, crack three large eggs. Add the granulated sugar, vanilla extract, and salt. Whisk these together until the mix is pale and frothy. Next, pour the melted chocolate mixture into this egg mix. Fold the two together gently. Be careful not to overmix; we want a rich, smooth batter. Sift the unsweetened cocoa powder over your batter. Gently fold it in until combined. Now, divide the batter evenly among the prepared ramekins, filling each about 3/4 full. Place the ramekins on a baking sheet for easy handling. Bake in your preheated oven for 12-14 minutes. The edges should be firm, but the center will still jiggle slightly. After baking, let the cakes cool for 1-2 minutes. Carefully flip each ramekin onto a serving plate. The cakes should slide out easily. If you want, dust them with powdered sugar for a nice touch. Serve warm, and don't forget a scoop of vanilla ice cream for extra delight! To get that gooey center, watch your baking time closely. Bake the cakes for 12 to 14 minutes. The edges should feel firm, but the center must jiggle. If you bake too long, the center will cook through. Use a timer to help you avoid overbaking. Every oven is different, so check a minute early. Trust me, the perfect lava cake is all about timing. If you have any leftover lava cakes, store them in the fridge. Place them in an airtight container to keep them fresh. They will last for about three days. When you’re ready to eat them, reheat in the microwave. Heat for about 20 seconds. This warms them without losing the gooey center. Enjoy them warm for the best taste. The type of chocolate you use makes a big difference. I recommend semi-sweet chocolate chips for a rich flavor. Dark chocolate works too, if you want a more intense taste. Just remember, the better the chocolate, the better the cake. Look for high-quality brands with simple ingredients. Always choose chocolate you love to eat on its own. Pro Tips Perfect Chocolate Melting: To avoid scorching the chocolate, melt it in short 30-second intervals, stirring in between to ensure even melting without burning. Check for Doneness: The ideal lava cake should have firm edges and a soft, gooey center. If unsure, do a toothpick test; it should come out with moist crumbs, not wet batter. Cooling Time: Allow the cakes to cool for just 1-2 minutes before inverting. This helps set the edges while keeping the center molten. Serving Suggestions: For an extra touch of elegance, serve with a dollop of whipped cream or a fresh raspberry alongside the vanilla ice cream. {{image_2}} You can spice up your flourless chocolate lava cake with fun flavors. Want a minty twist? Just add a few drops of mint extract to the batter. This will give it a cool and fresh taste. If you love coffee, add one tablespoon of instant coffee granules. It brings out the chocolate flavor nicely. For a fruity touch, mix in some orange zest. Each flavor adds a new layer of fun to this dessert. If you want a healthier cake, switch the granulated sugar. You can use coconut sugar or maple syrup. Coconut sugar has a lower glycemic index, so it’s a bit better for your health. If you use maple syrup, reduce the amount of butter slightly. This keeps the cake moist while making it a bit lighter. These swaps keep the richness you love but make it a tad healthier. Want to make this cake gluten-free? You're already set! The recipe contains no flour. For a dairy-free option, use vegan chocolate chips and coconut oil instead of butter. The taste remains rich and delicious. If you have egg allergies, try using flax eggs. Mix one tablespoon of ground flaxseed with three tablespoons of water for each egg. Let it sit until it thickens. These swaps help you enjoy this tasty dessert no matter your dietary needs. To store leftover lava cakes, let them cool first. Place them in airtight containers. Keep them in the fridge for up to three days. If you want to enjoy them later, wait to dust with powdered sugar until you're ready to serve. This keeps them looking fresh. When you're ready to eat, reheat the lava cakes. Preheat your oven to 350°F (175°C). Place the cakes on a baking sheet. Heat for about 8-10 minutes. This warms them without overcooking. You can also use the microwave. Heat on low for about 20-30 seconds. Check to see if they are warm enough. If you want to save lava cakes for later, freezing is a great option. Wrap each cooled cake tightly in plastic wrap. Then, place them in a freezer-safe bag. They can last up to three months. When you want to eat one, take it out and thaw it in the fridge overnight. Then, reheat as needed. Enjoy that molten center again! Yes, you can use dark chocolate or milk chocolate. Dark chocolate gives a rich taste. Milk chocolate offers a sweeter flavor. Just keep the same amount of chocolate chips. Adjust the sugar if you use a sweeter chocolate. Watch the edges closely while baking. They should be firm and set. The center should jiggle slightly when you shake the ramekin. If it looks too firm, it may not have a molten center. You can serve it with a scoop of vanilla ice cream. The cold ice cream pairs well with the warm cake. Fresh berries also add a nice touch. A sprinkle of powdered sugar makes it look fancy too. Yes, you can make the batter ahead of time. Just cover it and keep it in the fridge. When ready to bake, pour it into the ramekins and bake as usual. It’s a great way to save time before a dinner party! In this article, we explored making delicious chocolate lava cakes. You learned about the key ingredients and optional items to serve. I shared step-by-step instructions for perfecting your cakes, along with useful tips to achieve that molten center. We also discussed fun variations to customize your cakes and smart storage practices. As you try this recipe, have fun experimenting! Enjoy the rich flavors and warm centers. Happy baking!
                        Flourless Chocolate Lava Cake Rich and Decadent Dessert
                      • To make Crème Brûlée French Toast, gather these ingredients: - 1 loaf of brioche bread, sliced thick (about 8 slices) - 4 large eggs - 1 cup whole milk - 1/2 cup heavy cream - 1/2 cup granulated sugar - 1 tablespoon vanilla extract - 1 teaspoon ground cinnamon - Pinch of salt - 1/4 cup brown sugar (for topping) - Fresh berries (for garnish) - Whipped cream (optional, for serving) Each ingredient plays a special role in this recipe. - Brioche Bread: This soft bread adds sweetness and richness. Its thick slices soak up the egg mixture well. - Eggs: They bind the mixture and give the toast a custardy texture. Always use large eggs for best results. - Whole Milk and Heavy Cream: These create a creamy base. Whole milk adds richness, while heavy cream boosts flavor. - Granulated Sugar: This sweetens the egg mixture. It helps to create a balanced flavor. - Vanilla Extract: This adds a warm, sweet aroma. It enhances the overall taste. - Ground Cinnamon: It gives a hint of spice. Cinnamon makes the dish cozy and inviting. - Brown Sugar: This forms a crunchy topping. It caramelizes beautifully, adding a nice contrast to the soft bread. If you can't find some ingredients, here are some substitutes: - Brioche Bread: You can use challah or any thick-sliced bread. They work well too. - Heavy Cream: Use half-and-half for a lighter option. It still adds creaminess. - Whole Milk: Almond milk or oat milk can work if you prefer dairy-free. - Granulated Sugar: You can swap it with coconut sugar or honey for a different sweetness. - Brown Sugar: If you don’t have brown sugar, use granulated sugar with a touch of molasses. {{ingredient_image_1}} To start, gather your ingredients. You will need 4 large eggs, 1 cup of whole milk, 1/2 cup of heavy cream, 1/2 cup of granulated sugar, 1 tablespoon of vanilla extract, 1 teaspoon of ground cinnamon, and a pinch of salt. 1. In a large mixing bowl, whisk together the eggs, milk, heavy cream, granulated sugar, vanilla, cinnamon, and salt. Mix until it is smooth and creamy. This mixture is the heart of your French toast. 2. Let the mixture sit for a few minutes. This gives the flavors time to blend well together. Now, it’s time to assemble your French toast. 1. Take a loaf of brioche bread and slice it thickly, about 8 slices. Arrange the slices in a greased baking dish. You can slightly overlap them if needed. 2. Pour your egg mixture over the brioche slices. Make sure each slice is well soaked. This step is key for that rich, custardy texture. 3. Cover the dish with plastic wrap and refrigerate. Let it sit for at least 2 hours or overnight. The longer it sits, the better it tastes. After the soaking time, you’re ready to bake. 1. Preheat your oven to 350°F (175°C). This ensures even cooking. 2. Remove the plastic wrap and sprinkle 1/4 cup of brown sugar evenly over the soaked bread. This will create that lovely caramel top. 3. Bake in the oven for 30-35 minutes. Look for a golden top and a set center. 4. For a special touch, use a kitchen torch to caramelize the brown sugar. Aim for a bubbly, golden finish for that perfect crème brûlée effect. 5. Let it cool for a few minutes before slicing. This helps the toast hold its shape. Enjoy your delicious Crème Brûlée French Toast warm, topped with fresh berries and whipped cream if you like! To get the best texture, use thick slices of brioche bread. This bread soaks up the egg mixture well. I recommend letting it sit in the fridge for at least two hours. Overnight soaking yields even better results. This allows the bread to absorb all the flavors. One common mistake is not soaking the bread long enough. If you skip this step, the toast may turn out dry. Also, avoid using too much heat while baking. Baking at 350°F ensures even cooking without burning the top. Remember, caramelizing the sugar with too much heat can lead to burnt sugar. Serve your Crème Brûlée French Toast warm. Top it with fresh berries for a burst of flavor. A dollop of whipped cream adds a nice touch, too. You can sprinkle some extra cinnamon on top for added warmth. Consider pairing it with maple syrup for sweetness or a drizzle of honey for a unique twist. Pro Tips Use Day-Old Brioche: For the best texture, use day-old brioche bread. It will absorb the custard mixture better without becoming too soggy. Customize Your Flavors: Feel free to experiment with different extracts like almond or orange for a unique twist on the classic flavor. Check for Doneness: To ensure your French toast is perfectly set, gently shake the baking dish. If the center jiggles too much, it needs more time in the oven. Serving Suggestions: Serve with a drizzle of maple syrup or a dusting of powdered sugar for an extra touch of sweetness. {{image_2}} You can add fun flavors to your Crème Brûlée French Toast. Chocolate is a great choice. You can use chocolate chips or a drizzle of chocolate sauce. Fresh fruit is another tasty addition. Strawberries, blueberries, and bananas work well. You can also mix fruit into the egg mix. It adds a fresh taste and color. Want to try something different? Add a splash of orange or almond extract for a unique twist. You can make this dish fit your needs. For a gluten-free option, use gluten-free bread. Many brands offer great gluten-free choices. If you want a dairy-free version, substitute almond milk or oat milk for whole milk. Use coconut cream instead of heavy cream. This keeps the creaminess while making it dairy-free. Just adjust the sugar if you use sweetened milk. Serving your Crème Brûlée French Toast can be fun! You can stack the slices high for a tall, impressive look. Add whipped cream on top for a treat. Fresh berries add color and flavor. For a fancy touch, sprinkle powdered sugar over the top. You could also serve it with maple syrup or a fruit compote on the side. This makes breakfast feel special. After you enjoy your Crème Brûlée French Toast, you might have some left. To store leftovers, let them cool completely first. Place the slices in an airtight container. Keep them in the fridge for up to three days. This way, they stay fresh and tasty. When you're ready to eat the leftovers, reheating is simple. Preheat your oven to 350°F (175°C). Place the French toast on a baking sheet. Cover it with foil to keep it moist. Heat for about 10-15 minutes. You can also use the microwave if you’re in a hurry. Just warm it for 30-60 seconds, but the oven gives better results. If you want to save some for later, freezing works well too. Wrap each slice in plastic wrap tightly. Then, place them in a freezer bag. They can last up to two months in the freezer. When you're ready to eat, thaw them in the fridge overnight. After that, reheat as mentioned earlier. Crème Brûlée French Toast is a sweet breakfast dish. It combines the creamy texture of crème brûlée with the classic French toast. You soak thick slices of brioche bread in a rich mixture of eggs, milk, and heavy cream. After soaking, you bake it until it is golden. Then, you top it with brown sugar and caramelize it for a crunchy finish. This dish is both decadent and comforting, perfect for special mornings. You can easily prepare this dish ahead of time. After you mix the egg mixture, pour it over the brioche slices. Cover the baking dish with plastic wrap and place it in the fridge. Let it soak for at least 2 hours or overnight for best results. This way, it’s ready to bake when you are. Just preheat your oven and bake it in the morning. You’ll enjoy a warm, tasty breakfast without stress. Yes, you can use different types of bread for this recipe. While brioche gives a rich flavor, you can try challah or French bread. These types also soak up the egg mixture well. Just make sure the bread is thickly sliced. Thin slices may not hold up during baking. Experiment with what you have on hand for a fun twist on this dish! We explored the key ingredients and step-by-step instructions for Crème Brûlée French Toast. I shared tips for perfect texture and common mistakes to avoid. You learned about different variations and storage options to keep your dish fresh. In conclusion, with a few simple steps and tweaks, you can make this dish shine. Experiment with flavors and enjoy every bite. Happy cooking!
                        Crème Brûlée French Toast Delicious Morning Treat

                      WANT TO SAVE THIS RECIPE?

                      1 shares
                      • Facebook

                      Leave a Reply Cancel reply

                      Your email address will not be published. Required fields are marked *

                      Recipe Rating


                      Hi I’m Taling

                      I love sharing perfected dishes from my kitchen. I’m sure they’ll earn a spot in your heart. Let’s savor this journey together!.

                      More about me

                      Recent Desserts

                      • - 3 ripe bananas, mashed - 1 cup Greek yogurt (plain, unsweetened) - 2 large eggs - 1/2 cup honey or maple syrup - 1/4 cup melted coconut oil (or vegetable oil) - 1 teaspoon vanilla extract - 1 teaspoon baking soda - 1/2 teaspoon baking powder - 1/2 teaspoon salt - 1 teaspoon ground cinnamon - 1 1/2 cups all-purpose flour - 1/2 cup chopped walnuts or pecans - 1/2 cup dark chocolate chips The key to this Greek yogurt banana bread lies in the balance of flavors and textures. The ripe bananas give it sweetness and moisture. The Greek yogurt adds creaminess and a slight tang, making your bread rich and soft. This recipe uses two eggs for binding and structure. Honey or maple syrup serves as a natural sweetener, which you can adjust to fit your taste. Coconut oil brings a lovely richness, but you can swap it with vegetable oil if you prefer. For the dry mix, baking soda and baking powder make the bread rise. Salt enhances all the flavors, while cinnamon adds warmth. Finally, all-purpose flour gives the bread its structure. Feel free to customize your banana bread! Adding walnuts or dark chocolate chips can transform the flavor and texture. You can mix and match to create your perfect loaf. {{ingredient_image_1}} - Preheat your oven to 350°F (175°C). - Grease or line a 9x5-inch loaf pan. - In a large bowl, combine the mashed bananas, Greek yogurt, eggs, honey (or maple syrup), melted coconut oil, and vanilla extract. - Whisk everything until smooth and well-combined. - In another bowl, whisk together the baking soda, baking powder, salt, ground cinnamon, and all-purpose flour. - Gradually fold the dry ingredients into the wet mixture. Mix until just combined. - If you like, fold in walnuts or dark chocolate chips. - Pour the batter into the prepared loaf pan and smooth the top. - Bake for 50-60 minutes. Check doneness with a toothpick; it should come out clean. - Don't over-mix the batter. This keeps your bread light and fluffy. - Let the ingredients come to room temperature before mixing. Cold ingredients can make the bread dense. - Experiment with adding vanilla extract or spices to boost flavor. A little can go a long way! - Add a pinch of nutmeg for additional warmth. It gives a nice touch to the overall taste. - Cool in the pan for 10 minutes before transferring to a wire rack. This helps it set properly. - Serve warm or at room temperature. Enjoy it plain or with a dollop of Greek yogurt for extra creaminess. Pro Tips Use Overripe Bananas: The riper the bananas, the sweeter and more flavorful your banana bread will be. Look for bananas with brown spots for optimal sweetness. Don’t Overmix the Batter: Mix the wet and dry ingredients until just combined to ensure a tender loaf. Overmixing can lead to a dense texture. Add Flavor Variations: Consider adding nuts, chocolate chips, or spices like nutmeg for extra flavor. Make it your own by experimenting with different mix-ins! Cool Properly: Let the banana bread cool in the pan for a few minutes before transferring it to a wire rack. This helps maintain its structure and prevents sogginess. {{image_2}} You can make simple swaps to boost the health factor of your Greek yogurt banana bread. - Replace honey with agave syrup for a lower glycemic option. - Use whole wheat flour instead of all-purpose flour. Whole wheat flour adds fiber and nutrients. Get creative with flavors to make your banana bread unique. - Add dried fruit like raisins or cranberries for extra sweetness. - Incorporate zests like lemon or orange for a fresh twist. The zests bring brightness to the dish. You can modify the recipe to fit different diets. - Make it vegan by swapping eggs with flaxseed meal mixed with water. - Use maple syrup instead of honey for a plant-based sweetener. These changes keep the bread moist and tasty. Let the bread cool completely before storing. This helps keep the texture nice. Once cool, store it in an airtight container at room temperature. The bread stays fresh for up to 3 days. For long-term storage, freeze slices of banana bread. Wrap each slice in plastic wrap, then in foil. This helps keep the bread from getting freezer burn. You can freeze it for up to 3 months. When ready to eat, thaw it in the refrigerator or at room temperature. To enjoy your banana bread warm, you can microwave it for a few seconds. Alternatively, toast slices for a warm treat. Both methods bring back that fresh-baked taste. Enjoy! Yes, you can use frozen bananas. Just thaw them first. Drain any extra liquid after thawing. This way, your banana bread stays moist and tasty. If you don’t have Greek yogurt, plain yogurt works well. You can also use applesauce for a lighter option. Both will keep your bread moist and delicious. You can replace eggs easily. Mix flaxseed meal with water as a substitute. A commercial egg replacer also works. Both options keep your banana bread fluffy. To check if your banana bread is ready, insert a toothpick into the center. If it comes out clean or with a few moist crumbs, your bread is done. This simple test ensures perfect baking every time. In this post, I covered how to make delicious banana bread, detailing its main and dry ingredients, and offering step-by-step instructions. I also shared tips for baking and storing, plus variations and FAQs. With this guide, you can easily bake banana bread at home. Try different flavors and modifications to suit your taste. Enjoy the process, and share your tasty results with friends and family!
                        Greek Yogurt Banana Bread Simple and Tasty Recipe
                      • - 2 ripe avocados - 1/2 cup unsweetened cocoa powder - 1/3 cup maple syrup (or honey) - 1/4 cup almond milk (or any milk of choice) - 1 teaspoon vanilla extract - Pinch of sea salt - Fresh berries and mint leaves for garnish - Food processor - Measuring cups and spoons - Serving bowls or cups Gathering the right ingredients is key to making this creamy treat. Start with two ripe avocados. You want them soft but not brown. The cocoa powder gives the mousse its rich chocolate flavor. I use unsweetened cocoa to keep it healthy. Next, grab your sweetener. Maple syrup works well, but honey is great too. You can use either one, based on your taste. Almond milk helps blend it all together. You can swap it for any milk you prefer. Don't forget the vanilla extract! It adds a nice touch of flavor. A pinch of sea salt balances the sweetness. For garnishing, fresh berries and mint leaves make it look beautiful and fresh. Prepare your tools ahead of time. A food processor will make blending easy. Use measuring cups and spoons for accuracy. Finally, have serving bowls or cups ready for a fun presentation. With everything in place, you can dive into making this delicious avocado chocolate mousse! {{ingredient_image_1}} To start, take two ripe avocados. Ripe avocados are key to a smooth mousse. If they are hard, they won’t blend well. Slice each avocado in half, and remove the pit carefully. Use a spoon to scoop out the green flesh. Make sure you get every bit of the creamy avocado. Place the avocado in your food processor. This is the base of your mousse. Now, let’s add the other ingredients. Start with 1/2 cup of unsweetened cocoa powder. Then, pour in 1/3 cup of maple syrup or honey for sweetness. Next, add 1/4 cup of almond milk for creaminess. Don’t forget 1 teaspoon of vanilla extract and a pinch of sea salt. The order matters! Blend on high until it is smooth. Scrape the sides of the bowl to mix well. If it’s too thick, add a bit more milk. Taste your mousse, and if you want it sweeter, add more maple syrup. Blend again to combine everything. Once your mousse is smooth and creamy, it’s time to serve. Transfer the mousse into small bowls or cups. Cover them with plastic wrap. Refrigerate the mousse for at least 30 minutes. This chilling time helps the flavors mix and the texture firm up. When ready, serve the mousse chilled. Top it with fresh berries and a sprig of mint for a lovely finish. Enjoy your delicious treat! To get a velvety consistency, blend the mousse well. Use a food processor to mix everything until smooth. If it's too thick, add a splash of almond milk. If it's too thin, blend in a bit more cocoa powder. Sometimes, you may find little lumps. This can happen if the avocados are not ripe enough. Make sure to use ripe avocados for the best results. You can tell they are ripe if they feel soft when you press them gently. Tasting the mousse is key. After blending, take a small spoonful. If it needs more sweetness, add a bit more maple syrup. Blend again to mix it well. You can also try honey if you prefer. For a healthier option, consider using agave nectar or stevia. Both can give you sweetness without too many calories. Just remember to adjust the amount to your taste. Creative toppings can make your mousse look amazing. Fresh berries, like strawberries or raspberries, add color and taste. Mint leaves not only look good but also add a fresh flavor. Using berries has health benefits too. They are full of vitamins and antioxidants. Mint also helps with digestion. So, topping your mousse with these can make it both pretty and good for you. Pro Tips Use Ripe Avocados: Ensure your avocados are perfectly ripe for the best creamy texture and flavor. They should yield slightly to gentle pressure when squeezed. Adjust Sweetness: After blending, taste the mousse and adjust the sweetness to your preference. A little extra maple syrup or honey can enhance the flavor. Chill for Best Results: Allow the mousse to chill in the refrigerator for at least 30 minutes before serving. This helps the flavors to meld and improves the texture. Garnish Creatively: Top your mousse with a variety of fresh fruits, nuts, or a drizzle of chocolate sauce for an attractive presentation and added flavor. {{image_2}} You can boost the flavor of your avocado chocolate mousse in fun ways. Try adding a shot of espresso or a tablespoon of coffee. This gives the mousse a rich mocha taste. If you want to change the milk, use different nut milks. Almond milk adds a subtle flavor, but cashew or coconut milk offers a creamier touch. Want to make this mousse vegan? Just swap honey for maple syrup. Use plant-based milk to keep it dairy-free. If you're watching sugar intake, use less maple syrup or try a sugar substitute. You can enjoy this treat without guilt. For extra creaminess, add nut butters like almond or cashew. These add flavor and a smooth texture. Coconut is another great choice. You can also spice things up! A pinch of cinnamon gives warmth, while a hint of cayenne adds a kick. Experimenting with these options makes your mousse unique and tasty. To store leftover mousse, place it in an airtight container. This helps keep the mousse fresh. You can also cover the serving bowls with plastic wrap. Make sure the wrap touches the mousse to prevent air exposure. The mousse will stay fresh in the fridge for up to three days. Before serving, check the texture. If it seems too thick, stir in a little almond milk. This will restore its creamy goodness. Yes, you can freeze avocado chocolate mousse! To do this, scoop the mousse into a freezer-safe container. Make sure to leave some space at the top since it will expand when frozen. The mousse can last in the freezer for up to two months. When you want to enjoy it, remove it from the freezer. Let it thaw in the fridge for several hours or overnight. This keeps the texture smooth and creamy. If it feels a bit icy, blend it again to restore the velvety feel. Yes, you can make this mousse ahead of time. It stays fresh in the fridge for up to three days. Just store it in an airtight container to keep it from drying out. This makes it perfect for parties or special dinners. Making it ahead also lets the flavors blend nicely. The texture should be rich and creamy. It should feel smooth in your mouth. When you blend the ingredients well, it becomes velvety. If it’s too thick, add a bit more almond milk. If it’s too thin, blend it longer. You want a luscious mousse that feels indulgent. Yes, avocados offer many health benefits. They are high in healthy fats that are good for your heart. They also add fiber, which is great for digestion. Plus, avocados have vitamins like E and K. Using them in dessert gives you a treat that’s not only tasty but also nutritious. Absolutely! You can experiment with different chocolates. Dark chocolate gives a bold flavor. Milk chocolate makes it sweeter and creamier. You can even use white chocolate for a unique twist. Just keep in mind that the sweetness may vary, so adjust the maple syrup accordingly. This blog post walked you through making a creamy avocado chocolate mousse. We covered ingredients, tools needed, and step-by-step instructions. I shared tips for perfecting texture and sweetening to your taste. You learned fun variations and how to store your mousse for later enjoyment. Incorporating avocados into desserts gives a tasty twist and boosts nutrition. Now you can impress others with this healthy treat that everyone will love. Enjoy your delicious mousse!
                        Avocado Chocolate Mousse Creamy and Decadent Treat
                      • - 1 cup pumpkin puree - 1/2 cup granulated sugar - 1/2 cup brown sugar, packed - 1/2 cup unsalted butter, softened - 1 large egg - 1 teaspoon vanilla extract To make soft pumpkin pie cookies, you need key ingredients. First, pumpkin puree gives the cookies their rich flavor. Granulated sugar and brown sugar add sweetness, while butter makes them soft. One large egg binds everything together. Finally, vanilla extract gives a lovely taste. - 2 cups all-purpose flour - 1 teaspoon baking powder - 1/2 teaspoon baking soda - 1 tablespoon pumpkin pie spice - 1/4 teaspoon salt Next, you need dry ingredients for texture. All-purpose flour is the base. Baking powder helps the cookies rise, while baking soda adds softness. Pumpkin pie spice brings warmth and flavor, and salt balances the sweetness. - 1/2 cup white chocolate chips - Additional pumpkin pie spice for dusting For a twist, consider adding white chocolate chips. They create a sweet surprise in every bite. You can also sprinkle extra pumpkin pie spice on top for more flavor and a beautiful finish. {{ingredient_image_1}} - Preheat the oven to 350°F (175°C). - Line a baking sheet with parchment paper. This step is key for easy cleanup. The parchment helps cookies bake evenly and prevents sticking. - Cream butter with sugars. - Incorporate pumpkin puree, egg, and vanilla. Start by mixing the softened butter with both sugars. Beat them until fluffy. Then, add pumpkin puree, the egg, and vanilla. Mix well until it's smooth and creamy. This mixture gives the cookies their soft texture and flavor. - Whisk together flour, baking powder, baking soda, pumpkin pie spice, and salt. - Gradually combine with wet ingredients. In a separate bowl, whisk the flour with the baking powder, baking soda, pumpkin pie spice, and salt. This blend adds flavor and lift. Gradually mix it into the wet ingredients until just combined. Be careful not to overmix. - Drop rounded tablespoons on the baking sheet. - Bake for 12-15 minutes. Use a spoon to drop rounded tablespoons of dough onto the sheet. Space them about 2 inches apart. Bake them for 12-15 minutes until the edges are golden and the centers look set. Watch closely to avoid overbaking. - Let cool on baking sheet for 5 minutes. - Transfer to wire rack and dust with pumpkin pie spice. After baking, let the cookies cool on the sheet for 5 minutes. Then, move them to a wire rack to cool completely. Finally, dust with extra pumpkin pie spice for added flavor and a beautiful look. To get soft cookies, do not overmix the dough. Overmixing can make the cookies tough. Mix just until the flour disappears. That’s the key to soft texture. Monitor baking time closely. Cookies bake fast, so check them at 12 minutes. The edges should be golden, but the centers need to look soft. They will firm up after cooling. You can always add more pumpkin pie spice for extra flavor. If you love spice, try adding a bit more. It adds warmth and depth. You can also use different types of chocolate chips, like dark or milk chocolate. Nuts like pecans or walnuts can add crunch too. These options make your cookies unique and tasty. One big mistake is overbaking cookies. They should stay soft and chewy, so set a timer. If you forget, they can turn hard. Another mistake is not measuring ingredients accurately. Use measuring cups for dry and liquid ingredients. This helps ensure your cookies turn out perfect every time. Pro Tips Use Fresh Pumpkin Puree: For the best flavor, consider making your own pumpkin puree from fresh pumpkins instead of using canned. This will give your cookies a richer taste. Chill the Dough: If your cookie dough feels too soft, chill it in the refrigerator for about 30 minutes. This will help the cookies hold their shape while baking. Don’t Overbake: Keep an eye on your cookies as they bake. They should look slightly underbaked in the center when you take them out, as they will continue to firm up as they cool. Spice it Up: Feel free to experiment with additional spices like cinnamon or nutmeg for a personalized flavor. Just a pinch can elevate your cookies to the next level. {{image_2}} To make gluten-free pumpkin pie cookies, use a gluten-free flour blend. Look for a blend that has xanthan gum for the best texture. Start with a 1:1 blend. This means you can swap it directly for all-purpose flour. Make sure to check the packaging for specific instructions. You want your cookies to be soft and chewy. If you want vegan pumpkin pie cookies, you can replace the egg. Here are some great options: - Flaxseed meal: Mix 1 tablespoon of flaxseed meal with 3 tablespoons of water. Let it sit for 5 minutes before adding to your mix. - Chia seeds: Use 1 tablespoon of chia seeds with 3 tablespoons of water in the same way. For butter, use dairy-free alternatives like coconut oil or vegan butter. These options keep your cookies rich and tasty. Spices can change the flavor of your cookies. You can use cinnamon, nutmeg, or ginger for a twist. Try adding 1 teaspoon of cinnamon or 1/2 teaspoon of nutmeg. If you want more kick, add a pinch of ginger. Adjust the pumpkin pie spice to keep balance. This way, your cookies stay flavorful and soft. To keep your soft pumpkin pie cookies fresh, store them in an airtight container. This will shield them from air and moisture. You can stack the cookies with a layer of parchment paper in between. This layer helps prevent sticking. For added freshness, place a slice of bread in the container. The bread helps absorb moisture, keeping the cookies soft and tasty for longer. You can freeze these cookies to enjoy later. First, let the cookies cool completely after baking. Then, place them in a single layer on a baking sheet. Freeze them for about an hour. This step helps keep their shape. Once frozen, transfer the cookies to a freezer-safe bag. Label the bag with the date. To thaw, just take out the cookies and leave them at room temperature for about 30 minutes. You can also warm them in the oven for a few minutes if you prefer them warm. Soft pumpkin pie cookies can last up to a week at room temperature. Keep them in an airtight container to maintain freshness. If you store them in the fridge, they can last up to two weeks. The cooler temperature slows down spoilage, but they may dry out a bit. So, enjoy them fresh or store them wisely! Yes, you can use fresh pumpkin. Start by choosing a sugar pumpkin, also known as a pie pumpkin. Cut it in half and scoop out the seeds. Roast the pumpkin halves cut-side down on a baking sheet at 350°F (175°C) for about 45 minutes. Once soft, scoop out the flesh and blend it until smooth. Use this puree in your cookie recipe. Fresh pumpkin gives a nice flavor and texture. To make soft cookies, use room temperature butter. This helps create a light and fluffy mix. Do not overmix the dough; mix until just combined. Keep an eye on the baking time. Bake until the edges are golden but the centers are soft. If you want, add an extra egg yolk. This adds moisture and helps keep cookies soft. Yes, you can use other sweeteners. Try using coconut sugar for a richer taste. Maple syrup can also work, but reduce other liquids in the recipe. Honey is another option, but it may change the texture a bit. Adjust the amount based on how sweet you like your cookies. These cookies pair well with warm drinks. Try serving them with a cup of hot apple cider or chai tea. You can also enjoy them with a scoop of vanilla ice cream for a tasty treat. For a fun twist, serve with whipped cream and a sprinkle of cinnamon on top. Soft pumpkin pie cookies are easy to make and full of flavor. We explored the essential and optional ingredients, as well as step-by-step instructions for perfect cookies. I shared tips to enhance texture and flavor, along with common mistakes to avoid. You can also try gluten-free or vegan options. Remember to store your cookies properly to keep them fresh. With this guide, you can bake delicious cookies that everyone will love. Enjoy your time in the kitchen and share your treats with friends!
                        Soft Pumpkin Pie Cookies Delightful Fall Treats
                      • To make this tasty dip, gather the following items: - 2 medium apples (use Granny Smith for tartness) - 1 cup caramel sauce (store-bought or homemade) - 1/2 teaspoon ground cinnamon - 1/2 teaspoon nutmeg - 1 package (8 oz) cream cheese (softened) - 1/2 cup powdered sugar - 1 teaspoon vanilla extract - 1 cup whipped topping (like Cool Whip) - Optional: Graham crackers, apple slices, or vanilla wafers for dipping You can swap out some ingredients based on what you have: - Apples: Try Honeycrisp or Fuji for a sweeter taste. - Cream cheese: Use Greek yogurt for a lighter dip. - Caramel sauce: Make it from scratch with sugar, butter, and cream. - Whipped topping: Whip heavy cream instead for a fresh option. Here are some quick conversions: - 1 cup = 8 ounces - 1/2 cup = 4 ounces - 1 teaspoon = 5 milliliters - 1 tablespoon = 15 milliliters These conversions help you adjust the recipe as needed. {{ingredient_image_1}} Start by softening the cream cheese. You can leave it out for about 30 minutes. In a medium bowl, mix the cream cheese, powdered sugar, and vanilla extract. Use a hand mixer to beat them together until smooth. This mix will be the base of our dip. Next, fold in the whipped topping gently. This makes the dip light and fluffy. Make sure it is well combined but don’t overmix. Grab a serving dish or bowl. Spread the cream cheese mixture at the bottom. Smooth the top with a spatula. Now, take the caramel sauce and pour it over the cream cheese layer. Let it drizzle down the sides for a nice look. In another bowl, mix the diced apples with ground cinnamon and nutmeg. Toss them until each piece is coated. Spread the spiced apples evenly over the caramel layer. If you want, drizzle some extra caramel on top for decoration. Serve the dip right away for the best taste. I love to pair it with graham crackers, apple slices, or vanilla wafers. These options give a nice crunch and balance the dip's creaminess. You can also arrange the dippers around the dip for a fun display. Enjoy your delicious Caramel Apple Pie Dip with friends or family! To make your Caramel Apple Pie Dip burst with flavor, use fresh apples. I prefer Granny Smith for their tartness. The sharp taste balances well with the sweet caramel. Mix in ground cinnamon and nutmeg for that warm, cozy feel of fall. These spices enhance the apple taste and add depth. Always use high-quality caramel sauce. If you want to make it homemade, that’s even better! It adds a personal touch that guests will love. When serving, choose a clear dish to show off the layers. Start with the cream cheese layer at the bottom. Then, pour on the caramel sauce. Lastly, top with the spiced apples. Drizzle extra caramel on top for a touch of shine. To make it even more inviting, serve with a variety of dippers. Place graham crackers, apple slices, and vanilla wafers around the dip. This adds color and texture to your presentation. One mistake is not softening the cream cheese enough. This can lead to lumps in your dip. Always let it sit out for about 30 minutes before mixing. Another error is overmixing the whipped topping. You want a light and airy texture, not dense. Also, don’t skip the spices; they make a big difference in flavor. Finally, serve the dip right after making it. If it sits too long, the apples may brown and the dip may lose its freshness. Pro Tips Choose the Right Apples: Use tart apples like Granny Smith for a nice contrast against the sweetness of the caramel and cream cheese. Make It Ahead: Prepare the cream cheese mixture and spiced apples ahead of time and assemble just before serving for a fresh taste. Customize Your Dippers: Experiment with different dippers like pretzels or fresh fruit for a fun twist on the classic flavors. Warm the Caramel: If using store-bought caramel sauce, warm it slightly to make it easier to drizzle over the dip. {{image_2}} You can make this dip even better with fun flavors. Try adding chocolate chips for a sweet twist. Just sprinkle them on top of the apples. You can also mix in some peanut butter for a nutty flavor. Start with a few spoonfuls and taste as you go. These changes can make your dip unique and tasty. If you want a lighter dip, use yogurt instead of cream cheese. Greek yogurt works well for a creamy texture. You can also swap the whipped topping for a lighter version. This keeps the taste but cuts down on calories. Choose low-sugar caramel sauce for a healthier option too. Fall brings great flavors, so add pumpkin spice for a seasonal touch. Just mix in a teaspoon to your apple mix. You can also use chopped pecans or walnuts for crunch. This adds to the cozy feel of the dip. These changes make it perfect for holiday gatherings. To store leftovers, put the dip in an airtight container. You can cover it tightly with plastic wrap. Keep it in the fridge. It should last for about three days. Make sure to keep it cold, so it stays fresh. If you notice any changes in smell or color, it’s best to throw it away. I do not recommend freezing this dip. The cream cheese and whipped topping can change texture when frozen. If you freeze it, the dip may become watery and separate when thawed. To enjoy the best flavor and texture, stick to refrigeration. You don’t need to reheat this dip. It tastes great cold and is meant to be served chilled. However, if you prefer it warm, gently heat it in the microwave for a few seconds. Stir it well to ensure even warming. Enjoy it right away for the best experience! Yes, you can use different types of apples. I like Granny Smith for their tartness. Other good choices are Fuji, Honeycrisp, or Gala. Each type adds a unique flavor. Sweet apples balance well with the caramel. Tart apples add a nice zing. Mix and match for fun flavor. You can keep the dip in the fridge for about three days. Store it in an airtight container. This helps keep it fresh and tasty. After a day or two, the apples may soften. They still taste good but change in texture. If you notice any browning, that's normal. You can serve the dip with many items. Graham crackers add crunch and sweetness. Apple slices are perfect for dipping. They pair well with the dip's flavors. Vanilla wafers also make a great choice. You can even use pretzels for a salty twist. Get creative with your dippers! In this blog post, we covered how to make a delicious Caramel Apple Pie Dip. You learned about key ingredients, substitutions, and how to prepare the dip step by step. We also shared tips for flavor and common mistakes to avoid. Explore variations like healthier options or fun seasonal twists to keep things fresh. Lastly, you have storage tips to enjoy your dip later. With these ideas, you can make a dip that everyone will love, whether it's a party snack or a cozy treat at home.
                        Caramel Apple Pie Dip Irresistible Flavor for Fall

                      Recent Drinks

                      • To make Poisoned Apple Cider, you need these key items: - 4 cups apple cider - 1 small pumpkin, peeled and cubed - 2 cups dark red cranberries (fresh or frozen) - 1 teaspoon cinnamon - 1 teaspoon nutmeg - 1 teaspoon allspice These ingredients work together to create a warm, cozy drink. The apple cider forms the base. The pumpkin adds creaminess. Cranberries give a tart taste. Spices like cinnamon and nutmeg add warmth. Allspice adds depth, making this drink special. You can use these optional items to enhance the flavor: - 1 tablespoon brown sugar (optional) - 1 tablespoon vanilla extract Adding brown sugar can sweeten the cider a bit. Vanilla extract adds a nice aroma. These ingredients can make your cider taste even better. Feel free to adjust them based on your taste. Presentation is key for this spooky drink! For a fun touch, use: - 1/2 cup blackberries for garnish - Sprigs of rosemary for garnish Blackberries add a pop of color. Rosemary looks like little witchy sprigs. These garnishes make your cider look festive and inviting. Serve in spooky mugs for an extra thrill! {{ingredient_image_1}} To start, gather your ingredients. You need: - 4 cups apple cider - 1 small pumpkin, peeled and cubed - 2 cups dark red cranberries (fresh or frozen) - 1 teaspoon cinnamon - 1 teaspoon nutmeg - 1 teaspoon allspice - 1 tablespoon brown sugar (optional) - 1 tablespoon vanilla extract In a large pot, combine the apple cider, cubed pumpkin, and cranberries. The pumpkin adds a nice texture. The cranberries bring a tart balance. Next, add the cinnamon, nutmeg, allspice, and brown sugar if you choose. Stir well to mix everything together. Now, heat the pot over medium heat. Watch closely until it starts to simmer. This usually takes about 5 to 10 minutes. Once it simmers, reduce the heat to low and cover the pot. Let it simmer for about 30 minutes. This step is key. It lets the flavors meld together beautifully. You’ll notice a lovely aroma filling your kitchen. After 30 minutes, you need to blend the mixture. Use an immersion blender to puree it until smooth. If you don’t have one, transfer it to a regular blender. Do this in small batches to avoid spills. Once blended, return the smooth mixture to the pot. Stir in the vanilla extract for an extra layer of flavor. Heat it for another 10 minutes to warm it through. Now your poisoned apple cider is ready to serve! To make the best poisoned apple cider, balance is key. The tartness of cranberries goes well with sweet apple cider. Use fresh or frozen cranberries. The pumpkin adds creaminess and a rich taste. Spices like cinnamon, nutmeg, and allspice bring warmth. If you want more sweetness, add brown sugar. This helps round out the flavors. Don’t forget the vanilla extract! It enhances the overall taste and aroma. Using the right equipment helps achieve the best cider. A large pot is essential for cooking the mixture. An immersion blender makes it easy to puree the cider smoothly. If you don’t have one, a regular blender works too. Just be careful when transferring hot liquid. Prepare heat-resistant mugs for serving. They keep your drink warm and look great too. Make your cider look as good as it tastes! Serve it in spooky mugs. For extra flair, add blackberries on top. They look like little dark gems. A sprig of rosemary adds a creepy touch. For a foggy effect, place dry ice in a separate container. This gives the cider a bubbling potion look. Your guests will love the spooky vibe! Pro Tips Choose Fresh Ingredients: Opt for fresh cranberries and seasonal pumpkins to enhance the flavor and quality of your cider. Adjust Sweetness: Taste the mixture before serving and adjust the sweetness by adding more brown sugar if desired, depending on your taste preference. Garnish Creatively: Use additional spooky garnishes like gummy worms or spooky-shaped ice cubes to make your presentation even more festive. Make Ahead: This cider can be made a day in advance. Just reheat gently before serving, allowing the flavors to deepen even more. {{image_2}} You can change the flavor of your poisoned apple cider by swapping or adding ingredients. Try using pear cider instead of apple cider for a different taste. You can also add a splash of orange juice for a zesty twist. Want some spice? Toss in a few cloves or a slice of fresh ginger. These simple swaps can make your drink unique and fun. You can enjoy poisoned apple cider in two ways. For a non-alcoholic drink, just follow the recipe as is. It’s perfect for kids and anyone who wants a tasty treat. If you want a kick, try adding rum or bourbon. Just mix in about a cup when you heat the cider. This gives it a warm, cozy feel for adults. You can make your cider special for any holiday. For Halloween, keep the spooky theme with creepy garnishes like gummy worms or spooky mugs. During Thanksgiving, focus on flavors like maple syrup or caramel. For Christmas, add some peppermint extract or even some cranberries on top for a festive look. These variations keep your poisoned apple cider fun and fresh all year round! Store your poisoned apple cider in a clean glass jar or airtight container. Make sure it cools to room temperature first. Label the container with the date. This helps you remember when you made it. Keep it in the fridge to stay fresh. Avoid metal containers as they can change the flavor. When stored properly, your poisoned apple cider can last up to five days in the fridge. After that, it may spoil. Always check for any off smells or changes in color. If it looks or smells bad, throw it out. Safety first! When reheating, do it on low heat. This helps keep the flavors intact. Stir often to avoid hot spots. Heat until it is warm but not boiling. If you have leftovers, never reheat more than once. Enjoy your spooky drink safely! If apple cider is poisoned, you may feel sick. Common symptoms include nausea, vomiting, and stomach pain. You might also have headaches or dizziness. In serious cases, you could feel confused or have trouble breathing. If you notice any of these signs after drinking cider, seek help fast. To check if apple cider is safe, start with your senses. Look for strange colors or floating bits. Smell it; if it smells off, do not drink it. Taste a small amount. If it tastes sour or strange, it might be bad. Always buy cider from a trusted source to stay safe. If you think the cider is poisoned, stop drinking it right away. Call poison control or seek medical help. Tell them what you drank and when. Keep the cider container for testing if needed. Do not wait for symptoms to appear; act quickly! Yes, there have been news stories about poisoned apple cider. Some cases involved people getting sick after drinking unregulated cider from local farms. These cases remind us to be careful when enjoying seasonal drinks. Always check where your cider comes from to ensure it is safe. In this blog post, we covered the core ingredients for a tasty apple cider. You learned step-by-step how to prepare and simmer it to boost flavor. We also discussed tips for the best taste and fun ways to serve it. Variations let you create seasonal drinks too. Lastly, we tackled storage tips and answered common questions about cider safety. Enjoy your delicious apple cider, and remember, safety first!
                        Poisoned Apple Cider Shocking Safety Tips Revealed
                      • - 2 cups orange juice (freshly squeezed) - 1 cup sparkling water - 1 teaspoon ground cinnamon - 1 tablespoon honey or maple syrup - 1 orange (for garnish) - 2 cinnamon sticks (for garnish) - Ice cubes - Mint leaves (optional garnish) To make the Cinnamon Orange Cozy Mocktail, you need fresh orange juice. I suggest squeezing the oranges yourself for the best taste. You'll also need sparkling water to add some fizz. Ground cinnamon gives it that warm flavor we love. For sweetness, you can use honey or maple syrup. Taste it after mixing to see if you like it sweeter. Don't forget the garnishes! Slices of orange and cinnamon sticks make it look nice. Mint leaves add a fresh touch but are optional. Gather all these ingredients, and you’re ready to make a cozy drink that brightens your day! {{ingredient_image_1}} - First, grab a large pitcher. - Combine 2 cups of orange juice with 1 cup of sparkling water. - Add 1 teaspoon of ground cinnamon and 1 tablespoon of honey or maple syrup. - Stir the mix well until the honey or syrup dissolves completely. - This step helps the cinnamon blend in nicely. - Now, fill your serving glasses with ice cubes. - Carefully pour the orange mixture over the ice-filled glasses. - Make each drink special by garnishing with orange slices and a cinnamon stick. - If you want, add a few mint leaves for a fresh touch. - Serve your cozy mocktail right away and enjoy! To customize the sweetness of your Cinnamon Orange Cozy Mocktail, start with the honey or maple syrup. You can add one tablespoon, then taste it. If it needs more sweetness, add a little more. Remember, you can always add more sweetener, but you can't take it out. So, taste test before serving to get it just right. Garnishing makes your drink look nice. Use fresh orange slices to enhance the color. Adding a cinnamon stick brings warmth to the drink and makes it smell great. If you want a fresh touch, add mint leaves. They not only look good but also add a cool flavor. Arrange everything nicely in the glass to make your mocktail pop! Pro Tips Use Fresh Ingredients: Freshly squeezed orange juice enhances the flavor significantly compared to store-bought juice. Adjust Sweetness: Taste the mixture before serving and adjust the honey or maple syrup to your preferred sweetness level. Chill the Glasses: For an extra refreshing experience, chill your serving glasses in the freezer for 15 minutes before pouring the mocktail. Experiment with Garnishes: Feel free to add other garnishes like star anise or pomegranate seeds for a unique twist. {{image_2}} You can change the taste of your cozy mocktail by adding more spices. Try adding nutmeg for a warm, sweet note. Cloves can also add a unique flavor. Just a pinch of these spices can transform your drink. For sweetness, you have options. Use agave syrup, coconut sugar, or even stevia. Each sweetener adds its own twist. Adjust based on your taste. Always taste as you go to find the right balance. Seasonal fruits can make your mocktail even more special. In fall, add sliced apples or pears for a crisp touch. In summer, mix in fresh berries like strawberries or blueberries. They not only taste great but also look beautiful. You can also use seasonal spices. In winter, try ginger or allspice. They add warmth and depth to your drink. For spring, fresh herbs like basil can brighten the flavor. Experiment to find your favorite seasonal mix! To keep your Cinnamon Orange Cozy Mocktail fresh, store it in the fridge. Use an airtight container. A glass jar or a pitcher works great. If you have extra garnishes, store them separately. This prevents them from getting soggy. This mocktail is best served cold. If you want to refresh it, add ice. You can also mix in more sparkling water. For the best taste, drink it within two days. After that, the flavors may fade. Always check if it smells or tastes off before drinking. Can I make this mocktail ahead of time? Yes, you can. Make the drink mix ahead of time. Store it in the fridge. Just add ice and garnish when you serve. What are the health benefits of cinnamon and orange? Cinnamon helps with blood sugar control. It also has antioxidants. Oranges are high in vitamin C. They boost your immune system and keep your skin healthy. Is this recipe vegan-friendly? Yes, this recipe is vegan. Use maple syrup instead of honey for a vegan option. What snacks pair well with this mocktail? This mocktail goes great with light snacks. Try cheese and crackers, fruit platters, or veggie sticks. These snacks balance the sweetness of the drink. Can it be served at parties or gatherings? Absolutely! This mocktail is perfect for parties. It is easy to make and looks beautiful. Guests will love its fresh taste and cozy vibe. This blog post guides you through making a fresh cinnamon orange mocktail. We covered the simple ingredients and easy steps, plus tips for sweetness and garnish. You learned about flavor variations and how to store leftovers. Enjoy mixing this drink at home. It’s fun and healthy, perfect for any occasion. Try different spices and fruits to make it your own. You're ready to impress your friends with a tasty and eye-catching mocktail!
                        Cinnamon Orange Cozy Mocktail Refreshing Drink Recipe
                      • - Fresh raspberries - Raspberry syrup - Club soda - Coconut cream - Lime juice - Fresh mint leaves - Ice cubes Gathering the right ingredients is key. Start with fresh raspberries. They should be bright and firm. Next, get raspberry syrup. This adds sweetness and flavor. Use club soda for a fizzy lift. You will also need coconut cream. This makes your drink creamy and rich. Don't forget lime juice. It adds a nice zing that balances the sweetness. Fresh mint leaves give your drink a fresh touch. Finally, grab some ice cubes. They cool everything down. With these ingredients, you're ready to create a refreshing Raspberry Dream Dirty Soda. Each part plays a role in making this drink a summer favorite! Start by blending 1 cup of fresh raspberries with 1/2 cup of raspberry syrup. Blend until smooth. If you prefer no seeds, strain the mixture through a fine mesh sieve. This step gives you a smooth, bright raspberry puree. Next, take the raspberry puree and pour it into a large pitcher. Add 2 cups of club soda to the puree. Stir gently to mix. Then, squeeze in 1 tablespoon of lime juice. The lime adds a zesty kick to the drink. In a separate bowl, whip 1/2 cup of coconut cream. Use a hand mixer or whisk until it reaches a smooth and fluffy texture. This cream will top your drink and provide a nice contrast to the tart raspberry. Now, grab your glasses and fill them with ice cubes. Pour the raspberry soda mixture over the ice. Make sure each glass gets a nice amount. Finally, top each drink with a generous dollop of whipped coconut cream. For a final touch, garnish with fresh mint leaves. Enjoy your refreshing Raspberry Dream Dirty Soda! To make a great raspberry puree, choose ripe raspberries. Look for berries that are deep red and firm. Avoid any that are mushy or have dark spots. Ripe berries will give you the best flavor. To avoid seed chunks, blend the raspberries with raspberry syrup until smooth. Then, strain the mixture through a fine mesh sieve. This step helps you get a silky texture. Push the puree through with a spatula for best results. You can add more flavor to your drink easily. Consider mixing in a splash of vanilla or a hint of ginger. Both will give your drink a nice twist. Adjust the sweetness based on your taste. If you like it sweeter, add more raspberry syrup. If you prefer less sugar, use fresh lime juice to balance the sweetness. Serving your drink can be fun and creative. Use clear glasses to show off the vibrant colors. You can also layer the coconut cream on top for a beautiful look. For garnishing, add fresh mint leaves on top. They add a pop of color and a fresh scent. You might also consider adding a slice of lime on the rim of the glass for an extra touch. {{image_2}} You can switch up the fruits in your Raspberry Dream Dirty Soda. Try using other berries like strawberries or blueberries. These fruits add a fun twist and color to your drink. If you want a tropical vibe, use pineapple or mango. They give a refreshing taste that pairs well with the soda. If you want a non-dairy option, almond milk or oat cream works well. These alternatives keep your drink creamy without coconut. For a coconut-free choice, you can use soy or cashew cream. These will still add richness and flavor to your soda. You can make a fun cocktail version of this soda. Try adding light or dark rum for a kick. The rum blends nicely with the raspberry and lime flavors. Mix it well in a shaker for a smooth drink. A Raspberry Dream Dirty Soda with rum can be a great choice for summer parties. After making the raspberry puree, store it in the fridge. Use an airtight container for best results. The puree stays fresh for up to three days. If you want to keep it longer, freeze it. Pour the puree into ice cube trays. Once frozen, transfer the cubes to a bag. This method makes it easy to use later. Do not store the assembled drink in the fridge. The club soda will lose its fizz. Instead, prepare the drink just before serving. You can mix the raspberry soda and coconut cream separately. Keep them cool until you are ready to serve. This way, your drink will stay refreshing and bubbly. Fresh raspberries last about one week in the fridge. Watch for soft spots or mold as signs of spoilage. Raspberry syrup can last up to a month when stored in a cool, dark place. For club soda, check the expiration date on the can. Proper storage helps keep your ingredients fresh and tasty. Raspberry Dream Dirty Soda is a fun and fizzy drink. It blends fresh raspberries, raspberry syrup, and club soda. This drink also has a creamy touch from coconut cream. It is refreshing and perfect for hot days. Many people love it for its bright flavor. The drink became popular in recent years, often seen at summer parties and events. It has roots in the "dirty soda" trend that started in Utah. Yes, you can prepare parts of this drink ahead. You can make the raspberry puree and store it in the fridge for up to three days. Keep it in an airtight container. Mix the raspberry puree with the club soda right before serving for the best fizz. Do not whip the coconut cream until you are ready to serve. Whipped cream does not store well. If you want alternatives to raspberry syrup, consider these options: - Strawberry syrup for a different berry flavor. - Agave syrup for a natural sweetness. - Honey can also work, but it has a strong taste. You can also use fruit juice, like pomegranate or cherry, for a fruity twist. Adjust the sweetness to your liking. Raspberry Dream Dirty Soda has some healthy parts. Fresh raspberries are full of vitamins and fiber. The drink does contain added sugar from the syrup. If you want a healthier option, try these tips: - Use less raspberry syrup or a sugar-free version. - Replace coconut cream with lighter options like almond milk. - Add more fresh fruits for extra nutrients. In this blog post, we covered how to make a refreshing Raspberry Dream Dirty Soda. We explored the key ingredients and went step-by-step through blending raspberry puree, mixing, and adding the coconut cream. Tips on flavor and presentation help you enhance your drink. We also looked at fun variations and storage tips. Try these methods to impress your guests or enjoy a treat at home. This drink is simple, enjoyable, and perfect for any occasion.
                        Raspberry Dream Dirty Soda Refreshing Summer Treat
                      • To make a rich and creamy pumpkin hot chocolate, gather these key ingredients: - 2 cups milk (dairy or plant-based) - 1/2 cup of pumpkin puree (canned or fresh) - 1/4 cup semi-sweet chocolate chips - 2 tablespoons cocoa powder - 2 tablespoons sugar (or to taste) - 1 teaspoon vanilla extract - 1/2 teaspoon pumpkin pie spice (plus extra for garnish) These ingredients create a warm and cozy drink that makes the fall season special. You can enhance your pumpkin hot chocolate with some fun toppings: - Whipped cream (for topping) - Dark chocolate shavings or chocolate curls (for garnish) - A sprinkle of extra pumpkin pie spice These garnishes add flavor and make your drink look lovely. When picking your ingredients, focus on quality: - Choose fresh pumpkin puree for a brighter taste. - Select high-quality chocolate chips for a rich chocolate flavor. - Use whole milk for creaminess or a good plant-based milk for a lighter option. Quality ingredients make a noticeable difference in flavor. Always check labels for additives or preservatives. This helps ensure your drink is as healthy as it is tasty. Start by gathering your ingredients. You need milk, pumpkin puree, and a whisk. In a medium saucepan, combine 2 cups of milk and 1/2 cup of pumpkin puree. Whisk these together over medium heat. Keep mixing for about 3 to 5 minutes. You want the mixture warm and well blended. Be careful not to let it boil. Now, it’s time for the chocolate! Add 1/4 cup of semi-sweet chocolate chips, 2 tablespoons of cocoa powder, and 2 tablespoons of sugar to the pumpkin mix. Stir continuously for 2 to 3 minutes. The chocolate should melt nicely, making the drink smooth and rich. Next, stir in 1 teaspoon of vanilla extract and 1/2 teaspoon of pumpkin pie spice. Whisk until everything is combined and warm. Remove the saucepan from heat. Taste your hot chocolate and adjust the sweetness if you like. Pour the mixture into mugs. Top each mug with whipped cream. For a special touch, sprinkle some pumpkin pie spice on top. You can also add dark chocolate shavings or chocolate curls for extra flair. Enjoy your creamy fall delight! To make your pumpkin hot chocolate shine, think about adding flavors. A pinch of sea salt boosts sweetness. It balances the rich chocolate and creamy pumpkin. You can also try a dash of cinnamon or nutmeg. These spices add warmth and depth. If you want more chocolate, add extra chocolate chips. For a fun twist, stir in some caramel sauce for a sweet kick. Sweetness is key to a great hot chocolate. After mixing, taste your drink. If it’s not sweet enough, add sugar slowly. Try one tablespoon at a time. Stir well and taste again. You can also use honey or maple syrup for a natural option. Just remember to mix it in fully for even sweetness. Avoid cooking your mixture too fast. Medium heat is best to keep it smooth. Don’t let it boil; that can change the texture. If you add too much cocoa powder, it may taste bitter. Always whisk well to blend everything smoothly. Lastly, don’t skip the whipped cream! It adds a nice touch and makes it look fancy. {{image_2}} To make a vegan version of pumpkin hot chocolate, swap dairy milk for a plant-based milk. Almond, oat, or coconut milk works well. Use dairy-free chocolate chips for a rich taste. Follow the same steps in the recipe, and enjoy this creamy treat! If you want a dairy-free hot chocolate, simply choose non-dairy milk. Almond milk adds a nutty flavor. Coconut milk gives a rich, creamy texture. Soy milk is also a good choice. Each option keeps the drink smooth and delicious. Adjust the sweetness as you mix in the cocoa and chocolate. You can add fun flavors to your pumpkin hot chocolate! Try adding a splash of peppermint extract for a fresh twist. This pairs well with the pumpkin spice. For a sweeter touch, drizzle caramel syrup over the whipped cream. These add-ins make your drink feel special and festive. To store leftover pumpkin hot chocolate, let it cool first. Then, pour it into an airtight container. Make sure to seal it well to keep the flavors fresh. Store it in the fridge for up to three days. If you want to enjoy it later, you can freeze it. Just use a freezer-safe container. Leave some space at the top, as liquids expand when frozen. When you're ready to enjoy your hot chocolate, take it out of the fridge or freezer. If frozen, let it thaw in the fridge overnight. To reheat, pour it into a saucepan. Heat it over medium-low heat, stirring often. This helps it warm evenly without burning. If you prefer, you can use a microwave. Heat it in short bursts of 30 seconds, stirring in between. This way, it stays creamy and smooth. The shelf life of your ingredients varies. Milk lasts about a week after opening, while pumpkin puree is good for about a week once opened. Semi-sweet chocolate chips can last several months if stored well. Sugar and cocoa powder have a long shelf life. They stay fresh for years if kept dry and cool. Always check labels for specific dates, as freshness matters in your drink. To make one serving, simply halve the original recipe. Use 1 cup of milk and 1/4 cup of pumpkin puree. Add 2 tablespoons of chocolate chips, 1 tablespoon of cocoa powder, and 1 tablespoon of sugar. Mix these in a small saucepan over medium heat. Whisk until everything melts and blends well. This takes about 3-5 minutes. Pour into a mug, top with whipped cream, and sprinkle some pumpkin pie spice. Yes, you can use pumpkin pie filling. This filling has spices and sugar mixed in. It can add a nice flavor. Just remember to reduce the sugar in the recipe. Taste your drink first. Adjust the sweetness if needed. Pumpkin pie filling makes the drink sweeter and spicier. Pumpkin is rich in vitamins and minerals. It has a lot of vitamin A, which helps your eyes. It also contains fiber, which aids digestion. Pumpkin is low in calories, making it a healthy choice. You get antioxidants too, which help fight free radicals in your body. Enjoying this drink can add some health benefits to your cozy fall treat! This blog post covered how to make delicious pumpkin hot chocolate. We discussed essential ingredients and tips to choose the best ones. I shared easy steps to prepare, mix, and serve your drink. You learned how to enhance flavors and avoid common mistakes. We explored variations, like vegan options and seasonal add-ins. Finally, I provided storage tips and answered frequent questions. Enjoy creating this warm drink. It’s an easy way to savor fall flavors!
                        Pumpkin Hot Chocolate Rich and Creamy Fall Delight

                      Footer

                      ↑ back to top

                      More information

                      • Drinks
                      • Appetizer
                      • Dinner
                      • Desserts
                      • About
                      • Contact
                      • Privacy Policy

                      Our Policies

                      • Privacy Policy
                      • GDPR Policy
                      • Terms Of Use
                      • Copyright Policy
                      • Cookie Policy
                      • Disclaimer

                      Copyright © 2025 cheftaling