Chef Taling

  • Dinner
  • Desserts
  • Appetizer
  • Drinks
  • Privacy Policy
  • Contact
  • About
menu icon
go to homepage
  • Dinner
  • Desserts
  • Appetizer
  • Drinks
  • Privacy Policy
  • Contact
  • About

search icon
Homepage link
  • Dinner
  • Desserts
  • Appetizer
  • Drinks
  • Privacy Policy
  • Contact
  • About

×

Birthday Cake Popcorn Snack Mix Fun and Tasty Treat

Published: Jul 19, 2025 · by Taling · Leave a Comment

WANT TO SAVE THIS RECIPE?

6 shares

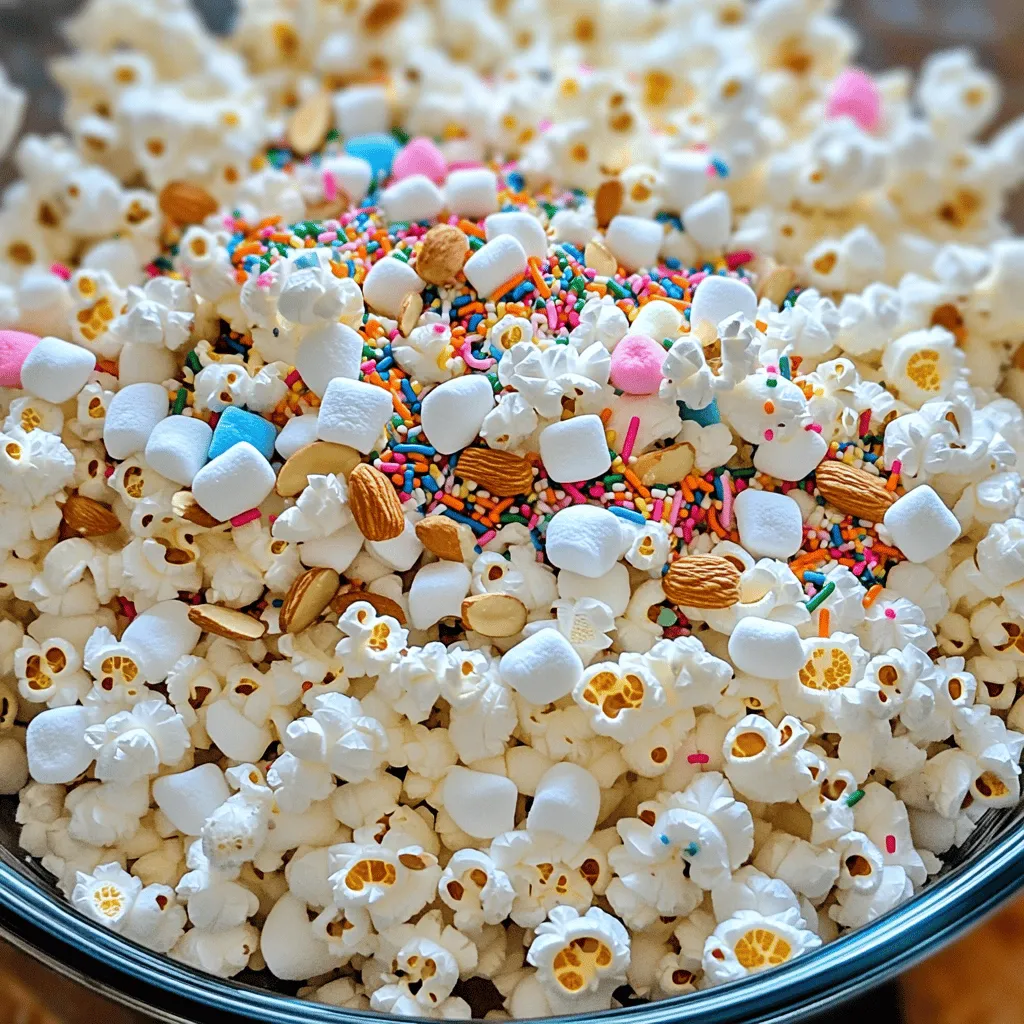
Get ready to celebrate with a delightful twist on popcorn! My Birthday Cake Popcorn Snack Mix is a fun and tasty treat that turns any occasion into a party. With fluffy popcorn, sweet cake mix, and colorful sprinkles, this snack is as festive as it is delicious. It’s quick to make and perfect for sharing. Join me as we dive into the yummy details of this exciting recipe!

- 8 cups popped popcorn (plain, unsalted) - 1 cup white chocolate chips - 1 cup birthday cake mix (dry) - ½ cup rainbow sprinkles - 1 cup mini marshmallows - ½ cup roasted almonds or pecans (optional) - ¼ teaspoon almond extract (optional) - Pinch of salt To make Birthday Cake Popcorn Snack Mix, you need a few simple ingredients. First, start with 8 cups of popped popcorn. I like to use plain, unsalted popcorn for this mix. It lets the other flavors shine. Next, grab 1 cup of white chocolate chips. These give our mix a sweet, creamy taste. If you want a fun cake flavor, add 1 cup of dry birthday cake mix. This is crucial for that birthday cake vibe. For color and texture, use ½ cup of rainbow sprinkles. They add a joyful look and extra sweetness. I also add 1 cup of mini marshmallows for a chewy element that everyone loves. If you want a bit of crunch, you can include ½ cup of roasted almonds or pecans. This is optional, but it brings a nice contrast to the softness of the mix. For an extra birthday cake flavor, add ¼ teaspoon of almond extract. It gives a lovely aroma. Finally, don't forget a pinch of salt to balance the sweetness. With these ingredients ready, you are set to create a delicious and festive snack mix. You can find the Full Recipe to help guide you through the steps! Pop the popcorn according to package instructions. Once it pops, place it in a large bowl. Let it cool completely. This step is key. You want crisp popcorn for the best taste. Next, take your white chocolate chips. Use a microwave-safe bowl to melt them. Microwave in 30-second bursts. Stir between each round. Keep going until smooth. This melting method helps prevent burning. Now, sprinkle the dry birthday cake mix over the popcorn. Add a pinch of salt to enhance flavor. If you like, drizzle almond extract on top. Stir gently to coat the popcorn evenly. This adds a fun cake-like flavor. Time for the fun stuff! Fold in rainbow sprinkles, mini marshmallows, and nuts if you choose to use them. Make sure everything mixes well. Be gentle to keep the popcorn intact. This mix adds color and texture. Spread the mixture on a parchment-lined baking sheet. This keeps it from sticking. Let it sit at room temperature for about 30 minutes. The chocolate needs to harden completely for the best crunch. Once set, break the mix into pieces. You can make them big or small. Place them in a large bowl or fun bags. Now, your Birthday Cake Popcorn Snack Mix is ready to enjoy! To get the best popcorn, start with plain, unsalted kernels. I like to use an air popper. This method keeps the popcorn light and fluffy. Once popped, let it cool. This prevents the chocolate from melting when you mix it in. Don't skip the pinch of salt. It brings out the sweet flavors in your Birthday Cake Popcorn Snack Mix. Customization makes your snack mix unique. Try adding different nuts like pecans or walnuts. You can also switch up the sprinkles. Use chocolate or candy sprinkles for a fun twist. If you want more flavor, add some crushed cookies. You can use cake mix flavors like chocolate or red velvet. This lets you create different themes for parties. Serving is key to making this snack fun. Use colorful bowls or bags for a festive look. You can also layer the mix in clear jars. This makes a great gift or party favor. For parties, set up a snack bar. Let guests scoop their mix into bags. This adds an interactive element to your event. {{image_2}} To make this fun treat gluten-free, choose a gluten-free cake mix. Many brands offer great options that taste just as good as regular cake mix. This small change allows everyone to enjoy the snack without worry. Just swap the regular cake mix for the gluten-free version in the recipe. Your Birthday Cake Popcorn Snack Mix remains delicious and fun! You can easily make a vegan version of this snack. First, use dairy-free chocolate chips instead of white chocolate. Next, skip the mini marshmallows or find vegan ones. You can also use a plant-based butter or coconut oil for a richer flavor. These swaps keep the snack tasty while making it plant-based. Enjoy a guilt-free treat that still feels like a party! Want to mix it up? Try different cake flavors! For example, chocolate cake mix gives a rich taste. Red velvet cake mix adds a fun color. You can even swap the sprinkles for crushed cookies or dried fruit. Each change brings a new twist. Let your creativity shine with your Birthday Cake Popcorn Snack Mix! To keep your Birthday Cake Popcorn Snack Mix fresh, store it in an airtight container. This helps to lock in the crunch and flavor. I recommend using a glass jar or a plastic container with a tight-sealing lid. If you have any leftovers, make sure to let the mix cool completely before sealing. This prevents moisture from building up inside the container. You can keep your Birthday Cake Popcorn Snack Mix for about a week. If stored properly, it stays tasty and crunchy. Just remember, the longer it sits, the softer it may become. If you want to enjoy it longer, consider freezing it. Yes, you can freeze this treat! To freeze, place the mix in a freezer-safe bag. Remove as much air as you can before sealing. When you want to enjoy it again, take it out and let it thaw at room temperature. Enjoy your Birthday Cake Popcorn Snack Mix whenever you like! Yes, you can make this snack mix ahead of time. It stays fresh for days. Just follow these steps: - Make the mix: Prepare the Birthday Cake Popcorn Snack Mix as per the Full Recipe. - Store it: Once it cools, place it in an airtight container. - Keep it cool: Store in a cool, dry place. Avoid heat and moisture to keep it crunchy. Setting the mix takes about 30 minutes. After mixing, spread it on a baking sheet. Let it sit at room temperature. This time allows the chocolate to harden. Absolutely! You can switch white chocolate with: - Milk chocolate: For a creamy taste. - Dark chocolate: For a richer flavor. - Butterscotch chips: For a fun twist. Just remember to melt it the same way. Serving your snack mix can be fun and easy. Here are some ideas: - Snack bowls: Use colorful bowls for a bright display. - Individual bags: Fill small bags for guests to grab. - Cupcake liners: Place portions in cupcake liners for easy serving. These ideas make your mix look festive and inviting! In this post, we explored how to make a fun Birthday Cake Popcorn Snack Mix. You learned about the simple ingredients, from popcorn to rainbow sprinkles. We covered each step, including how to mix and serve. You also picked up tips for storage, variations, and serving ideas. This treat is perfect for parties or just a snack. Don’t hesitate to get creative with flavors and toppings. Enjoy making this tasty mix, and share it with friends! It's a joyful addition to any celebration.

Ingredients

List of Ingredients

  1. 8 cups popped popcorn (plain, unsalted)
  2. 1 cup white chocolate chips
  3. 1 cup birthday cake mix (dry)
  4. ½ cup rainbow sprinkles
  5. 1 cup mini marshmallows
  6. ½ cup roasted almonds or pecans (optional)
  7. ¼ teaspoon almond extract (optional)
  8. Pinch of salt

To make Birthday Cake Popcorn Snack Mix, you need a few simple ingredients. First, start with 8 cups of popped popcorn. I like to use plain, unsalted popcorn for this mix. It lets the other flavors shine.

Next, grab 1 cup of white chocolate chips. These give our mix a sweet, creamy taste. If you want a fun cake flavor, add 1 cup of dry birthday cake mix. This is crucial for that birthday cake vibe.

For color and texture, use ½ cup of rainbow sprinkles. They add a joyful look and extra sweetness. I also add 1 cup of mini marshmallows for a chewy element that everyone loves.

If you want a bit of crunch, you can include ½ cup of roasted almonds or pecans. This is optional, but it brings a nice contrast to the softness of the mix.

For an extra birthday cake flavor, add ¼ teaspoon of almond extract. It gives a lovely aroma. Finally, don’t forget a pinch of salt to balance the sweetness.

With these ingredients ready, you are set to create a delicious and festive snack mix.

Step-by-Step Instructions

Prepare the Popcorn

Pop the popcorn according to package instructions. Once it pops, place it in a large bowl. Let it cool completely. This step is key. You want crisp popcorn for the best taste.

Melt the Chocolate

Next, take your white chocolate chips. Use a microwave-safe bowl to melt them. Microwave in 30-second bursts. Stir between each round. Keep going until smooth. This melting method helps prevent burning.

Mix and Combine

Now, sprinkle the dry birthday cake mix over the popcorn. Add a pinch of salt to enhance flavor. If you like, drizzle almond extract on top. Stir gently to coat the popcorn evenly. This adds a fun cake-like flavor.

Fold in Add-ins

Time for the fun stuff! Fold in rainbow sprinkles, mini marshmallows, and nuts if you choose to use them. Make sure everything mixes well. Be gentle to keep the popcorn intact. This mix adds color and texture.

Cool and Set

Spread the mixture on a parchment-lined baking sheet. This keeps it from sticking. Let it sit at room temperature for about 30 minutes. The chocolate needs to harden completely for the best crunch.

Break Apart and Serve

Once set, break the mix into pieces. You can make them big or small. Place them in a large bowl or fun bags. Now, your Birthday Cake Popcorn Snack Mix is ready to enjoy!

Tips & Tricks

Perfecting Your Popcorn

To get the best popcorn, start with plain, unsalted kernels. I like to use an air popper. This method keeps the popcorn light and fluffy. Once popped, let it cool. This prevents the chocolate from melting when you mix it in. Don’t skip the pinch of salt. It brings out the sweet flavors in your Birthday Cake Popcorn Snack Mix.

How to Customize Your Mix

Customization makes your snack mix unique. Try adding different nuts like pecans or walnuts. You can also switch up the sprinkles. Use chocolate or candy sprinkles for a fun twist. If you want more flavor, add some crushed cookies. You can use cake mix flavors like chocolate or red velvet. This lets you create different themes for parties.

Serving Ideas

Serving is key to making this snack fun. Use colorful bowls or bags for a festive look. You can also layer the mix in clear jars. This makes a great gift or party favor. For parties, set up a snack bar. Let guests scoop their mix into bags. This adds an interactive element to your event.

Variations

Gluten-Free Adaptation

To make this fun treat gluten-free, choose a gluten-free cake mix. Many brands offer great options that taste just as good as regular cake mix. This small change allows everyone to enjoy the snack without worry. Just swap the regular cake mix for the gluten-free version in the recipe. Your Birthday Cake Popcorn Snack Mix remains delicious and fun!

Vegan Alternatives

You can easily make a vegan version of this snack. First, use dairy-free chocolate chips instead of white chocolate. Next, skip the mini marshmallows or find vegan ones. You can also use a plant-based butter or coconut oil for a richer flavor. These swaps keep the snack tasty while making it plant-based. Enjoy a guilt-free treat that still feels like a party!

Flavor Variations

Want to mix it up? Try different cake flavors! For example, chocolate cake mix gives a rich taste. Red velvet cake mix adds a fun color. You can even swap the sprinkles for crushed cookies or dried fruit. Each change brings a new twist. Let your creativity shine with your Birthday Cake Popcorn Snack Mix!

Storage Info

Best Storage Practices

To keep your Birthday Cake Popcorn Snack Mix fresh, store it in an airtight container. This helps to lock in the crunch and flavor. I recommend using a glass jar or a plastic container with a tight-sealing lid. If you have any leftovers, make sure to let the mix cool completely before sealing. This prevents moisture from building up inside the container.

Shelf Life

You can keep your Birthday Cake Popcorn Snack Mix for about a week. If stored properly, it stays tasty and crunchy. Just remember, the longer it sits, the softer it may become. If you want to enjoy it longer, consider freezing it.

Freezing Directions

Yes, you can freeze this treat! To freeze, place the mix in a freezer-safe bag. Remove as much air as you can before sealing. When you want to enjoy it again, take it out and let it thaw at room temperature. Enjoy your Birthday Cake Popcorn Snack Mix whenever you like!

FAQs

Can I make this ahead of time?

Yes, you can make this snack mix ahead of time. It stays fresh for days.

  1. Store it: Once it cools, place it in an airtight container.
  2. Keep it cool: Store in a cool, dry place. Avoid heat and moisture to keep it crunchy.

How long does it take to set?

Setting the mix takes about 30 minutes. After mixing, spread it on a baking sheet. Let it sit at room temperature. This time allows the chocolate to harden.

Can I use other types of chocolate?

Absolutely! You can switch white chocolate with:

  1. Milk chocolate: For a creamy taste.
  2. Dark chocolate: For a richer flavor.
  3. Butterscotch chips: For a fun twist.

Just remember to melt it the same way.

What’s the best way to serve this at a party?

Serving your snack mix can be fun and easy. Here are some ideas:

  1. Snack bowls: Use colorful bowls for a bright display.
  2. Individual bags: Fill small bags for guests to grab.
  3. Cupcake liners: Place portions in cupcake liners for easy serving.

These ideas make your mix look festive and inviting!

In this post, we explored how to make a fun Birthday Cake Popcorn Snack Mix. You learned about the simple ingredients, from popcorn to rainbow sprinkles. We covered each step, including how to mix and serve. You also picked up tips for storage, variations, and serving ideas. This treat is perfect for parties or just a snack. Don’t hesitate to get creative with flavors and toppings. Enjoy making this tasty mix, and share it with friends! It’s a joyful addition to any celebration.

- 8 cups popped popcorn (plain, unsalted) - 1 cup white chocolate chips - 1 cup birthday cake mix (dry) - ½ cup rainbow sprinkles - 1 cup mini marshmallows - ½ cup roasted almonds or pecans (optional) - ¼ teaspoon almond extract (optional) - Pinch of salt To make Birthday Cake Popcorn Snack Mix, you need a few simple ingredients. First, start with 8 cups of popped popcorn. I like to use plain, unsalted popcorn for this mix. It lets the other flavors shine. Next, grab 1 cup of white chocolate chips. These give our mix a sweet, creamy taste. If you want a fun cake flavor, add 1 cup of dry birthday cake mix. This is crucial for that birthday cake vibe. For color and texture, use ½ cup of rainbow sprinkles. They add a joyful look and extra sweetness. I also add 1 cup of mini marshmallows for a chewy element that everyone loves. If you want a bit of crunch, you can include ½ cup of roasted almonds or pecans. This is optional, but it brings a nice contrast to the softness of the mix. For an extra birthday cake flavor, add ¼ teaspoon of almond extract. It gives a lovely aroma. Finally, don't forget a pinch of salt to balance the sweetness. With these ingredients ready, you are set to create a delicious and festive snack mix. You can find the Full Recipe to help guide you through the steps! Pop the popcorn according to package instructions. Once it pops, place it in a large bowl. Let it cool completely. This step is key. You want crisp popcorn for the best taste. Next, take your white chocolate chips. Use a microwave-safe bowl to melt them. Microwave in 30-second bursts. Stir between each round. Keep going until smooth. This melting method helps prevent burning. Now, sprinkle the dry birthday cake mix over the popcorn. Add a pinch of salt to enhance flavor. If you like, drizzle almond extract on top. Stir gently to coat the popcorn evenly. This adds a fun cake-like flavor. Time for the fun stuff! Fold in rainbow sprinkles, mini marshmallows, and nuts if you choose to use them. Make sure everything mixes well. Be gentle to keep the popcorn intact. This mix adds color and texture. Spread the mixture on a parchment-lined baking sheet. This keeps it from sticking. Let it sit at room temperature for about 30 minutes. The chocolate needs to harden completely for the best crunch. Once set, break the mix into pieces. You can make them big or small. Place them in a large bowl or fun bags. Now, your Birthday Cake Popcorn Snack Mix is ready to enjoy! To get the best popcorn, start with plain, unsalted kernels. I like to use an air popper. This method keeps the popcorn light and fluffy. Once popped, let it cool. This prevents the chocolate from melting when you mix it in. Don't skip the pinch of salt. It brings out the sweet flavors in your Birthday Cake Popcorn Snack Mix. Customization makes your snack mix unique. Try adding different nuts like pecans or walnuts. You can also switch up the sprinkles. Use chocolate or candy sprinkles for a fun twist. If you want more flavor, add some crushed cookies. You can use cake mix flavors like chocolate or red velvet. This lets you create different themes for parties. Serving is key to making this snack fun. Use colorful bowls or bags for a festive look. You can also layer the mix in clear jars. This makes a great gift or party favor. For parties, set up a snack bar. Let guests scoop their mix into bags. This adds an interactive element to your event. {{image_2}} To make this fun treat gluten-free, choose a gluten-free cake mix. Many brands offer great options that taste just as good as regular cake mix. This small change allows everyone to enjoy the snack without worry. Just swap the regular cake mix for the gluten-free version in the recipe. Your Birthday Cake Popcorn Snack Mix remains delicious and fun! You can easily make a vegan version of this snack. First, use dairy-free chocolate chips instead of white chocolate. Next, skip the mini marshmallows or find vegan ones. You can also use a plant-based butter or coconut oil for a richer flavor. These swaps keep the snack tasty while making it plant-based. Enjoy a guilt-free treat that still feels like a party! Want to mix it up? Try different cake flavors! For example, chocolate cake mix gives a rich taste. Red velvet cake mix adds a fun color. You can even swap the sprinkles for crushed cookies or dried fruit. Each change brings a new twist. Let your creativity shine with your Birthday Cake Popcorn Snack Mix! To keep your Birthday Cake Popcorn Snack Mix fresh, store it in an airtight container. This helps to lock in the crunch and flavor. I recommend using a glass jar or a plastic container with a tight-sealing lid. If you have any leftovers, make sure to let the mix cool completely before sealing. This prevents moisture from building up inside the container. You can keep your Birthday Cake Popcorn Snack Mix for about a week. If stored properly, it stays tasty and crunchy. Just remember, the longer it sits, the softer it may become. If you want to enjoy it longer, consider freezing it. Yes, you can freeze this treat! To freeze, place the mix in a freezer-safe bag. Remove as much air as you can before sealing. When you want to enjoy it again, take it out and let it thaw at room temperature. Enjoy your Birthday Cake Popcorn Snack Mix whenever you like! Yes, you can make this snack mix ahead of time. It stays fresh for days. Just follow these steps: - Make the mix: Prepare the Birthday Cake Popcorn Snack Mix as per the Full Recipe. - Store it: Once it cools, place it in an airtight container. - Keep it cool: Store in a cool, dry place. Avoid heat and moisture to keep it crunchy. Setting the mix takes about 30 minutes. After mixing, spread it on a baking sheet. Let it sit at room temperature. This time allows the chocolate to harden. Absolutely! You can switch white chocolate with: - Milk chocolate: For a creamy taste. - Dark chocolate: For a richer flavor. - Butterscotch chips: For a fun twist. Just remember to melt it the same way. Serving your snack mix can be fun and easy. Here are some ideas: - Snack bowls: Use colorful bowls for a bright display. - Individual bags: Fill small bags for guests to grab. - Cupcake liners: Place portions in cupcake liners for easy serving. These ideas make your mix look festive and inviting! In this post, we explored how to make a fun Birthday Cake Popcorn Snack Mix. You learned about the simple ingredients, from popcorn to rainbow sprinkles. We covered each step, including how to mix and serve. You also picked up tips for storage, variations, and serving ideas. This treat is perfect for parties or just a snack. Don’t hesitate to get creative with flavors and toppings. Enjoy making this tasty mix, and share it with friends! It's a joyful addition to any celebration.

Birthday Cake Popcorn Snack Mix

Celebrate any occasion with this delicious Birthday Cake Popcorn Snack Mix! This easy recipe combines popped popcorn, sweet white chocolate, birthday cake mix, and colorful sprinkles for a treat that’s perfect for parties or family movie nights. In just 15 minutes, you can whip up this fun and festive snack that everyone will love.
Print Recipe Pin Recipe

Ingredients
  

8 cups popped popcorn (plain, unsalted)

1 cup white chocolate chips

1 cup birthday cake mix (dry)

½ cup rainbow sprinkles

1 cup mini marshmallows

½ cup roasted almonds or pecans (optional)

¼ teaspoon almond extract (optional, for extra birthday cake flavor)

Pinch of salt

Instructions
 

Prepare the Popcorn: Pop the popcorn according to the package instructions. Once done, place it in a large mixing bowl and allow it to cool slightly.

    Melt the Chocolate: In a microwave-safe bowl, melt the white chocolate chips in 30-second intervals, stirring between until smooth.

      Mix the Cake Batter: Sprinkle the dry birthday cake mix over the popcorn, adding a pinch of salt. If you’re using almond extract, drizzle it over the mixture at this stage. Stir gently to coat the popcorn evenly with the cake mix.

        Combine with Chocolate: Pour the melted white chocolate over the coated popcorn. Using a spatula, gently fold the popcorn until the chocolate is evenly distributed throughout.

          Add the Fun Stuff: Fold in the rainbow sprinkles, mini marshmallows, and nuts (if using). Ensure everything is well mixed while still being gentle to prevent the popcorn from breaking apart.

            Cool and Set: Spread the mix onto a parchment-lined baking sheet. Let it sit at room temperature for about 30 minutes or until the chocolate has completely hardened.

              Break Apart and Serve: Once set, break the mix into pieces and place it in a large bowl or individual serving bags for a fun snack!

                Prep Time, Total Time, Servings: 15 minutes | 45 minutes | 8 servings

                  Related Recipes

                  • To make Brown Butter Pumpkin Spice Blondies, gather these key ingredients: - 1 cup unsalted butter - 1 cup brown sugar - 1/2 cup granulated sugar - 2 large eggs - 1 teaspoon vanilla extract - 1 cup pumpkin puree - 2 cups all-purpose flour - 1 teaspoon baking powder - 1 teaspoon baking soda - 1 teaspoon pumpkin pie spice - 1/2 teaspoon salt - 1/2 cup chocolate chips (optional) These ingredients work together to create a rich, moist blondie with a warm pumpkin flavor. The brown butter adds a nutty taste that pairs perfectly with the spices. Using both brown and granulated sugar gives the blondies a nice balance of sweetness. Make sure to use pure pumpkin puree, not pie filling. This keeps your blondies from being too sweet. The chocolate chips are optional, but they add a nice touch if you want a little extra sweetness. Gathering fresh ingredients will ensure your blondies taste their best. Make sure your butter is unsalted for better control of the overall flavor. Each ingredient plays a vital role, so don't skip any! - Preheat the oven to 350°F (175°C). - Grease a 9x13 inch baking pan and line it with parchment paper. - Melt the butter in a medium saucepan over medium heat. - Stir frequently until it turns golden brown and smells nutty. This should take about 5-7 minutes. Watch it closely to avoid burning. - In a large bowl, combine brown and granulated sugar. - Add the eggs one at a time, mixing well after each. - Stir in the vanilla extract and pumpkin puree until smooth. - In a separate bowl, whisk together flour, baking powder, baking soda, pumpkin pie spice, and salt. - Gradually add the dry mix into the wet mixture, stirring until just combined. - Pour the batter into the prepared pan and spread it evenly. - Bake for 25-30 minutes or until a toothpick comes out clean. - Cool in the pan for 10 minutes, then transfer to a wire rack. - Let it cool completely before cutting into squares and serving. To get the best texture, you must brown the butter right. Start with a medium heat. Stir it often until it turns golden brown and smells nutty. This usually takes about 5-7 minutes. Keep an eye on it. If it burns, the flavor will change. When mixing, be gentle. Overmixing makes blondies tough. Mix until the wet and dry ingredients just come together. You want some lumps to keep them soft. If you want to switch things up, you can use other fats instead of butter. Coconut oil works well for a dairy-free option. You can also try using applesauce or yogurt for a lighter treat. For sugars, you can swap brown sugar with coconut sugar. It gives a unique taste. You can also mix in different spices. Try cinnamon or nutmeg for a fun twist. If you love crunch, add nuts like walnuts or pecans. Dust the top of your blondies with powdered sugar. It adds a lovely finish and looks great. For serving, a dollop of whipped cream is a perfect touch. You can also add a scoop of vanilla ice cream for extra creaminess. These small details make your blondies feel special and festive. {{image_2}} You can make these blondies even better! Try adding nuts like walnuts or pecans for crunch. Dried fruits like cranberries or raisins add a nice chew. You can also mix in seeds like pumpkin or sunflower for extra texture. If you want to change the flavor, add a pinch of nutmeg or ginger. These spices add warmth and depth to the taste. Adding chocolate chips makes these blondies rich and sweet. They melt slightly and create gooey pockets. You can also use butterscotch chips or caramel bits for a different treat. Both options bring a new twist to the classic recipe. If you prefer no chocolate, simply leave it out. The blondies will still taste amazing with just pumpkin spice. If you follow a gluten-free diet, you can still enjoy these blondies. Use almond flour or coconut flour instead of all-purpose flour. You can also try a gluten-free baking blend. Just be sure it has xanthum gum for the right texture. This way, you can enjoy these yummy treats without worry. To keep your blondies fresh, let them cool completely. If you store them warm, moisture will build up and make them soggy. Use an airtight container for the best results. This keeps the blondies soft and moist. A covered dish also works but may not keep them as fresh. Remember, air is not your friend here! Want to save some for later? You can freeze the blondies! First, cut them into squares. Wrap each square tightly in plastic wrap. Then, place them in a freezer-safe bag or container. They will stay good for up to three months. When you want to enjoy them, take a square out and let it thaw in the fridge overnight. If you’re in a hurry, just leave it at room temperature for a couple of hours. Enjoy your treat again! You can check if the blondies are done by using a toothpick. Insert it into the center of the blondies. If it comes out clean or with a few moist crumbs, they are ready. If the toothpick has wet batter, bake them a little longer. The blondies should also look golden on top and feel set around the edges. You can use pumpkin pie filling, but it has added spices and sugar. This will change the flavor and sweetness of your blondies. If you do use it, reduce or skip the pumpkin pie spice and sugar in the recipe to balance the flavors. When stored in an airtight container, the blondies last about 3 to 4 days at room temperature. Make sure they are completely cool before sealing them. This helps keep them soft and fresh. Yes, you can double the recipe. Just use a larger baking pan, like a 12x18 inch, and adjust the baking time. Check for doneness with a toothpick, as larger batches may take longer to bake. These blondies pair great with whipped cream or vanilla ice cream. You can also dust them with powdered sugar for a pretty touch. For a fun twist, try serving them with caramel sauce or a drizzle of chocolate. This blog post covered everything you need to make delicious Brown Butter Pumpkin Spice Blondies. We've discussed the key ingredients, the step-by-step instructions, and tips for great texture. You can even explore variations and storage options. These blondies are perfect for fall and can be tailored to your taste. Experiment with flavors, textures, and pairings to make them your own. Enjoy baking and sharing these treats with friends and family!
                    Brown Butter Pumpkin Spice Blondies Soft Autumn Treat
                  • To make these Peanut Butter Chocolate Oat Bars, you need simple and healthy ingredients. Here’s what you will need: - 2 cups rolled oats - 1 cup natural peanut butter (smooth or crunchy) - 1/2 cup honey or maple syrup - 1/2 cup dark chocolate chips - 1/4 cup unsweetened cocoa powder - 1/4 teaspoon salt - 1/2 teaspoon vanilla extract - Optional: 1/4 cup chopped nuts or seeds for added crunch Each ingredient plays a key role in the final taste and texture. Rolled oats provide a hearty base. Natural peanut butter adds creaminess and richness. Honey or maple syrup gives sweetness and binds everything together. Dark chocolate chips bring a delightful burst of flavor. Unsweetened cocoa powder intensifies the chocolate taste. A little salt balances the flavors, and vanilla extract enhances the aroma. You can also add chopped nuts or seeds for extra texture and nutrition. These ingredients work together to create a tasty snack that is easy to make and satisfying to eat. How to Preheat Your Oven First, set your oven to 350°F (175°C). This step warms the oven for even baking. Lining the Baking Pan with Parchment Paper Grab an 8x8 inch baking pan. Place parchment paper inside, letting it hang over the edges. This makes it easy to lift out the bars later. Combining Oats, Cocoa Powder, and Salt In a large bowl, mix 2 cups of rolled oats, 1/4 cup of cocoa powder, and 1/4 teaspoon of salt. Stir well until combined. This mix adds flavor and texture to your bars. Steps for Melting Peanut Butter with Honey/Maple Syrup Take a microwave-safe bowl. Combine 1 cup of natural peanut butter, 1/2 cup of honey (or maple syrup), and 1/2 teaspoon of vanilla extract. Heat for 30-45 seconds until warm. Stir until smooth. This mixture binds the bars together. Pouring and Mixing the Ingredients Together Pour the peanut butter mixture over the dry oats. Use a spatula to mix them well. Make sure everything is sticky and uniform. Incorporating Chocolate Chips and Optional Add-ins Next, fold in 1/2 cup of dark chocolate chips. You can also add 1/4 cup of chopped nuts or seeds if you like extra crunch. Mix until evenly distributed. How to Properly Bake the Mixture Transfer the mixture into the prepared baking pan. Press down firmly to create an even layer. Bake for 15-20 minutes until the edges are slightly golden. Cooling Process and Cutting Instructions After baking, let the bars cool completely in the pan. Once cool, use the parchment paper to lift them out. Cut into squares or rectangles. Enjoy your tasty snack! To get a smooth texture, start with dry ingredients. Mix the oats, cocoa powder, and salt in a big bowl. Stir them well so they blend evenly. For your wet ingredients, heat the peanut butter, honey, and vanilla in the microwave. This makes it easier to mix. When you combine the two mixtures, use a spatula to fold them. This way, you ensure every oat gets coated well. To know when your bars are done, look at the edges. They should be golden brown. The center may still look soft, but that’s okay. It will firm as it cools. Set a timer for 15 minutes and check. If the edges are not golden, bake for another few minutes. Don’t overbake, or the bars will be dry. You can make these bars even better! Add-ins can boost the taste and texture. Try mixing in chopped nuts or seeds for a crunchy bite. You can also add spices like cinnamon for warmth. If you love coconut, shredded coconut works great too. Experiment and find your favorite mix! {{image_2}} You can change the sweet taste of these bars. Using agave nectar can give a nice twist. It’s sweeter than honey and has a lower glycemic index. This option is great for those who want a lighter sweetness. If you prefer sugar-free, try stevia or monk fruit sweetener. These add sweetness without extra calories. You might need to adjust the amount since they are much sweeter than honey. Feel free to swap peanut butter with other nut butters. Almond butter works well and adds a rich, nutty flavor. It’s a tasty choice for those who want to try something new. Cashew butter is another choice. It’s creamier and has a milder taste. Both nut butters give the bars a different texture and flavor. Adding spices can boost the taste of your bars. Try cinnamon for a warm, sweet touch. Just a pinch can make a big difference! Nutmeg is also a great option. It gives a cozy, fall flavor. You can experiment with both spices to find your favorite combo. These small changes can make your bars even more enjoyable! Choosing the right container is key. Use an airtight container to keep your bars fresh. Glass or plastic works well. Make sure the bars cool completely before storing them. This helps prevent moisture build-up and keeps them from getting soggy. How long do these bars last in the fridge? They can stay fresh for up to one week. After that, the taste and texture may change. To enjoy them at their best, eat them within this time. You can freeze these bars for later. To freeze, cut them into squares or rectangles. Wrap each piece in plastic wrap, then place them in a freezer-safe bag. This keeps them fresh for up to three months. To thaw, just take them out and let them sit at room temperature for about 30 minutes. Enjoy your tasty snack anytime! Yes, you can use quick oats. They will make the bars softer. Rolled oats create a chewier texture, which many prefer. If you choose quick oats, reduce the baking time slightly. To make these bars vegan, swap honey for maple syrup or agave. Use a plant-based peanut butter. All other ingredients are already vegan-friendly. You can use agave nectar or brown rice syrup. Both options work well. They maintain moisture and sweetness. Look for golden edges and a firm center. The bars should not jiggle. They will firm up as they cool. Yes, you can add protein powder. Start with 1/4 cup and mix it in with the dry ingredients. Adjust other liquids if needed for texture. You learned how to make tasty Peanut Butter Chocolate Oat Bars. We covered the right ingredients and simple steps to mix, bake, and store them. I shared tips for flavor options and even answered common questions. These bars are easy to customize and great for snacks or desserts. Try different add-ins and enjoy them fresh or stored. Now, it's time to make your own bars and share them with friends! Enjoy your baking adventure!
                    Peanut Butter Chocolate Oat Bars Simple and Tasty Snack
                  • - 2 cups all-purpose flour - 1 cup granulated sugar - 1 tablespoon baking powder - 1/2 teaspoon salt - 1 teaspoon ground cinnamon - 1/2 teaspoon nutmeg - 1/2 cup unsalted butter, melted - 1 cup milk - 2 large eggs - 1 teaspoon vanilla extract - 2 cups diced apples (peeled, such as Granny Smith or Honeycrisp) - 1/4 cup maple syrup (for glaze) - 1/2 cup powdered sugar (for glaze) These ingredients create a muffin that is soft and flavorful. The apples add a nice texture, while the spices give warmth. Use fresh apples for the best taste. The melted butter keeps the muffins moist. - Chopped walnuts or pecans - Extra maple syrup for drizzling If you want a little crunch, add some nuts on top. They add flavor and texture. You can also drizzle more syrup if you love that sweet taste. Each muffin has about 200 calories. They have 4 grams of protein and 8 grams of fat. The apples add vitamins and fiber. This treat is not just tasty, but also offers some nutrients. Enjoy these muffins as a fun snack or breakfast! Start by preheating your oven to 375°F (190°C). This helps the muffins rise well. Next, grab a large mixing bowl. Add 2 cups of all-purpose flour, 1 cup of granulated sugar, 1 tablespoon of baking powder, and 1/2 teaspoon of salt. Now, add in 1 teaspoon of ground cinnamon and 1/2 teaspoon of nutmeg. Whisk these dry ingredients well. Make sure there are no lumps. This mix creates a great base for your muffins. In another bowl, melt 1/2 cup of unsalted butter. Then, mix in 1 cup of milk, 2 large eggs, and 1 teaspoon of vanilla extract. Stir these wet ingredients until they blend smoothly. This step is key for a rich flavor. The melted butter adds moisture, making your muffins soft and tasty. Pour the wet mix into the bowl of dry ingredients. Stir carefully until just combined. It’s okay if some flour shows. Overmixing can make muffins tough. Now, gently fold in 2 cups of diced apples. Use apples like Granny Smith or Honeycrisp for sweetness. Once mixed, divide the batter evenly into muffin cups. Fill each cup about 2/3 full. This allows space for rising. Place the muffin tin in your preheated oven. Bake for 18 to 22 minutes. Check with a toothpick. If it comes out clean, they’re done. Let the muffins cool in the pan for five minutes. Then, move them to a wire rack. While they cool, prepare the glaze. In a small bowl, whisk together 1/4 cup of maple syrup and 1/2 cup of powdered sugar. Adjust if needed. Drizzle the glaze over cooled muffins. Top with nuts if you like. Enjoy your fresh and flavorful muffins! To keep muffins light, mix carefully. After you add wet ingredients to dry, stir just until you see no dry flour. Lumps are okay! Overmixing makes muffins tough. It’s better to be gentle. This helps the muffins rise and stay soft. Choose apples that add flavor and moisture. I love using Granny Smith or Honeycrisp apples. They balance sweetness and tartness. Other good options include Fuji or Gala. They also hold their shape well during baking. For a great glaze, mix maple syrup and powdered sugar. Start with 1/4 cup of syrup and 1/2 cup of sugar. Whisk until smooth. If it’s too thick, add more syrup. If it’s too runny, add more sugar. You want it thick but pourable. This glaze adds a sweet touch to your muffins. {{image_2}} You can make your muffins special by adding fruits or nuts. For a fruity twist, try mixing in 1 cup of blueberries, cranberries, or even diced pears. These fruits add color and enhance the flavor. If you enjoy nuts, consider adding 1/2 cup of chopped walnuts or pecans. They bring a nice crunch and a rich taste. Just fold these extras gently into the batter before baking. If you need gluten-free muffins, swap out regular flour for gluten-free flour. Look for a blend made for baking. Make sure it has a good mix of flours and starches. You might need to add a bit more liquid. Start with an extra tablespoon of milk. This small change helps keep the muffins moist and fluffy. For a vegan version, replace the eggs with flax eggs. Mix one tablespoon of ground flaxseed with three tablespoons of water. Let it sit for a few minutes until it thickens. Use almond milk or oat milk instead of regular milk. Instead of butter, use coconut oil or a plant-based butter. These swaps keep your muffins delicious while making them vegan-friendly. To keep your maple glazed apple muffins fresh, store them in an airtight container. Place the muffins in a single layer, if possible. You can also use plastic wrap for extra protection. Keep them at room temperature for up to three days. If you want them to last longer, refrigerate them. This will keep them fresh for up to a week. Freezing is a great option for these muffins. To freeze, let the muffins cool completely. Wrap each muffin in plastic wrap or foil. Then, place them in a freezer-safe bag or container. Label the bag with the date. You can freeze them for up to three months. When you’re ready to enjoy one, just thaw it at room temperature. Reheating is easy! If you want a warm muffin, preheat your oven to 350°F (175°C). Place the muffin on a baking sheet and heat for about 5-10 minutes. You can also use a microwave. Heat the muffin for about 10-15 seconds. This helps bring back that fresh taste and soft texture. Enjoy your muffins warm! Yes, you can swap some ingredients. For flour, try whole wheat flour for a healthier option. You can use brown sugar instead of granulated sugar for extra flavor. If you don’t have apples, pears work well too. You can also replace eggs with applesauce or mashed bananas for a vegan option. Just remember, each swap may change the taste slightly. These muffins stay fresh for about three days at room temperature. Place them in an airtight container to keep them moist. If you want to store them longer, put them in the fridge, where they can last up to a week. For the best taste, warm them slightly before serving. Serve the muffins warm or at room temperature. Drizzle the maple glaze on top right before serving. You can add sliced apples or extra nuts for a nice touch. Pair them with a cup of coffee or tea for a delicious treat. These muffins also make a great breakfast or snack for any time of day. You learned how to make maple glazed apple muffins, from key ingredients to baking. I shared tips to avoid overmixing and to pick the best apples. You can also explore fun variations like gluten-free or vegan options. Proper storage helps keep your muffins fresh for longer. These muffins are tasty and flexible for many diets. Enjoy sharing them and let your creativity shine in the kitchen!
                    Maple Glazed Apple Muffins Fresh and Flavorful Treat
                  • - 2 cups pecan halves - 1 cup brown sugar - 1/4 cup unsalted butter, melted - 2 teaspoons vanilla extract - 1 teaspoon ground cinnamon - 1/4 teaspoon cayenne pepper (adjust to taste) - 1/4 teaspoon salt - 1 egg white, lightly beaten To make slow cooker candied pecans, start with the main ingredients. You need fresh pecan halves, brown sugar, melted unsalted butter, and vanilla extract. Each of these adds sweetness and depth to the dish. Next, add flavoring ingredients. Ground cinnamon gives warmth, while cayenne pepper adds a kick. Salt balances the sweetness. Finally, the egg white helps the sugar mix stick to the pecans. This blend creates a sweet and spicy treat that is hard to resist. Make sure to have all your ingredients ready. This way, you can easily move from mixing to cooking without any delays. First, let's mix our sugar and butter blend. In a mixing bowl, add: - 1 cup brown sugar - 1/4 cup unsalted butter, melted - 2 teaspoons vanilla extract - 1 teaspoon ground cinnamon - 1/4 teaspoon cayenne pepper - 1/4 teaspoon salt Stir these ingredients until smooth. You want a nice, thick mixture that coats well. Next, whisk the egg white in a separate bowl. Make it light and frothy. This step helps the pecans stick to the sweet mix. Now, let’s get our pecans ready. Take 2 cups of pecan halves and toss them in the bowl with the beaten egg white. Make sure they are well coated. Pour the sugar mix over the pecans. Stir gently to coat each pecan evenly. Transfer the coated pecans to your slow cooker. Spread them out evenly. Set your slow cooker to low heat. Cook for about 2 hours. Stir every 30 minutes to keep them from sticking. Once cooking is done, turn off the slow cooker. Spread the pecans onto a lined baking sheet. Let them cool completely. As they cool, they will become crisp. If you find any clumps, break them apart once cooled. For a nice touch, serve them in a decorative bowl. You can sprinkle a pinch of sea salt on top for extra flavor. Store any leftovers in an airtight container. To make the best candy coating, focus on the sugar mixture. Mix the brown sugar, melted butter, vanilla, cinnamon, cayenne, and salt until smooth. This helps the coating stick well. Use a bowl that allows you to stir easily. A whisk can help blend the ingredients thoroughly. Stirring during cooking is key. Set the slow cooker to low heat and cook for two hours. Stir every 30 minutes to keep the pecans from sticking. This ensures every pecan gets coated evenly. If you skip stirring, some pecans may burn. Want to boost the flavor? Add spices like nutmeg or ginger. A pinch of nutmeg can add warmth. You can also try adding a dash of allspice for a unique taste. Customizing the sweetness is simple. If you like it sweeter, add more brown sugar. You can also mix in some honey or maple syrup. Adjust to your taste. Remember, you can always add but not take away! {{image_2}} You can easily swap pecans for other nuts. Almonds, walnuts, and cashews all work well. Each nut adds a unique crunch and taste. If you want a mix, combine different nuts for a fun treat. This nut blend brings a variety of textures and flavors to your snack. Do you like sweet or spicy? You can adjust the flavor to suit your taste. Add more cayenne pepper for heat. If you prefer a sweeter snack, increase the brown sugar. You can also enhance your pecans with chocolate or caramel. Drizzle melted chocolate over cooled pecans or mix caramel bits in before cooking. Both options give a rich and delightful twist to this snack. To keep your slow cooker candied pecans fresh, use an airtight container. This helps keep out air and moisture. Store them in a cool, dry place away from sunlight. If stored correctly, these tasty pecans can last for up to two weeks. If you want to re-crisp your pecans, preheat your oven to 350°F. Spread the pecans on a baking sheet and heat them for about 5-10 minutes. Keep an eye on them to avoid burning. This method helps restore their crunch. To maintain freshness, seal the container tightly after each use. This way, your candied pecans stay delicious and ready for snacking! Can I use different nuts for this recipe? Yes, you can use other nuts. Almonds, walnuts, or cashews work well. Each nut brings a unique taste. Just follow the same steps. What is the ideal cooking time for the best texture? The best cooking time is about 2 hours on low heat. Stir every 30 minutes. This helps the nuts cook evenly. They should be crunchy when done. How can I adjust the recipe for dietary restrictions? To make it dairy-free, swap the butter for coconut oil. You can use maple syrup instead of brown sugar for a vegan option. Always check for nut allergies before serving. This blog covers how to make slow cooker candied pecans. We explored the key ingredients, easy steps, and tips for a perfect candy coating. You can customize flavors and even substitute nuts. Proper storage keeps them fresh for longer. In conclusion, making these pecans is simple and fun. You can enjoy them as snacks or gifts. Happy cooking!
                    Slow Cooker Candied Pecans Tasty Snack Recipe

                  WANT TO SAVE THIS RECIPE?

                  6 shares

                  Leave a Reply Cancel reply

                  Your email address will not be published. Required fields are marked *

                  Recipe Rating


                  Hi I’m Taling

                  I love sharing perfected dishes from my kitchen. I’m sure they’ll earn a spot in your heart. Let’s savor this journey together!.

                  More about me

                  Recent Desserts

                  • - 1 cup chickpeas, drained and rinsed - ¼ cup natural almond butter (or any nut butter of choice) - ¼ cup maple syrup - 1 teaspoon pure vanilla extract - ½ teaspoon baking soda - ½ cup protein powder (vanilla or chocolate flavor) - ¼ cup mini chocolate chips - A pinch of salt Each ingredient plays an important role in this tasty dip. Let's break it down: - Chickpeas: They form the base and give the dip a creamy texture. They are full of fiber and protein. - Almond butter: This adds healthy fats and a rich flavor. You can also use peanut butter or another nut butter. - Maple syrup: It sweetens the dip naturally. It gives that cookie dough sweetness without refined sugar. - Vanilla extract: This adds a warm and sweet aroma, enhancing the overall flavor. - Baking soda: It helps to create a light texture, making the dip fluffy. - Protein powder: This boosts the protein content. Use vanilla or chocolate for added flavor. - Mini chocolate chips: They provide delightful bursts of chocolate in every bite. - Salt: Just a pinch enhances all the flavors, making the dip taste better. Each serving has about 160 calories. You get around 7 grams of protein, 20 grams of carbs, and 7 grams of fat. This dip is a great snack choice. Using chickpeas adds fiber and protein, which help you feel full. They are a great plant-based source. Protein powder boosts the protein content even more, making this dip a satisfying treat. To make Protein Chocolate Chip Cookie Dough Dip, you need a food processor. Start by adding these to your processor: - 1 cup chickpeas, drained and rinsed - ¼ cup natural almond butter (or your favorite nut butter) - ¼ cup maple syrup - 1 teaspoon pure vanilla extract - ½ teaspoon baking soda Blend these ingredients together until the mix is smooth and creamy. It is important to scrape down the sides as you blend. This helps to mix everything well. Next, add ½ cup of protein powder and a pinch of salt. Blend again until the mix is fully combined. You want the texture to be creamy and delightful. If it feels too thick, add a tiny bit of water to help it blend. Once you have your dip, transfer it to a mixing bowl. Gently fold in ¼ cup of mini chocolate chips. This gives a fun touch to your dip! Taste it and see if you want more sweetness. If it needs it, add a little more maple syrup. Let the dip sit for 30 minutes in the fridge. This waiting time helps the flavors mix together. The dip will also thicken slightly. You can enjoy this dip in many fun ways. Try it with: - Apple slices - Pretzels - Graham crackers These dippers add a nice crunch and sweetness. When serving, use a fun and colorful bowl. This makes the dip look inviting. To impress your guests, sprinkle a few extra mini chocolate chips on top. Enjoy the deliciousness! To make this dip just right, adjust the sweetness. You can add more maple syrup if you like it sweeter. If you want a nutty twist, try different nut butters. Peanut, cashew, or sunflower butter can all work well. Each nut butter gives a unique taste, so feel free to experiment. For storing leftovers, keep the dip in an airtight container. It stays fresh for about five days in the fridge. If you want to enjoy it later, make sure to label the container with the date. Before serving, you may want to stir it a bit. The dip can thicken in the fridge, so a quick mix helps. {{image_2}} You can change the flavor of your dip to match your taste. Here are some ideas: - Peanut Butter: Swap almond butter for peanut butter. This adds a rich, nutty flavor. - Cocoa Powder: Mix in a tablespoon of cocoa powder for a chocolate twist. It pairs well with the vanilla. - Cinnamon: A dash of cinnamon can add warmth and spice. Try it for a cozy touch. - Extracts: Use almond or coconut extract for a unique flavor profile. You can also customize ingredients based on dietary needs. If you want it nut-free, try sunflower seed butter instead. For a vegan option, ensure your protein powder is plant-based. These tweaks will let you enjoy the dip in your own style! Choosing the right protein powder is key. Here are some recommended flavors and brands: - Whey Protein: It has a smooth texture and blends well. Brands like Optimum Nutrition are popular. - Casein Protein: This one digests slowly, making it great for lasting energy. - Plant-Based Protein: Great for vegans, brands like Orgain or Vega offer tasty options. Each type has pros and cons: - Whey: Mixes easily but not vegan-friendly. - Casein: Creamy but can be heavier. - Plant-Based: Good for all diets but may have a grainy texture. Experimenting with different proteins can make your dip even more fun! Eating protein helps you feel full. It can stop cravings for sweet snacks. Protein helps build and repair your muscles too. This dip gives you a tasty way to enjoy protein. You can easily fit high-protein desserts into a balanced diet. They can be a sweet treat without the guilt. Traditional cookie dough is often high in sugar and fat. It uses white flour and butter, which add empty calories. In contrast, this dip uses chickpeas and almond butter. It offers protein and healthy fats. Each serving of this dip has fewer calories and more nutrients. This makes it a smart choice for a sweet snack. You enjoy the same flavors without the extra calories. Yes, you can use other flours, but results may vary. You might try oat flour or coconut flour. Each flour has unique traits. Oat flour makes the dip mild and chewy. Coconut flour absorbs more liquid, so adjust your wet ingredients. Always consider the flavor and texture. This dip can be safe for nut allergies. Use sunflower seed butter or soy nut butter instead of almond butter. Both options give a similar taste and texture. Always check labels for cross-contamination. This helps keep your dip safe. Yes, you can freeze the dip. Place it in an airtight container. It can stay good for about three months. When ready to enjoy, thaw it in the fridge overnight. Stir well before serving. The dip may change texture, but the flavor stays great! This blog post outlines how to make a tasty Protein Chocolate Chip Cookie Dough Dip. I shared the main ingredients and their roles, plus nutritional info showing the benefits of chickpeas and protein powder. I laid out clear steps for preparation and serving, along with helpful tips for enhancing flavor and storing leftovers. You can also explore fun variations to customize the dip. A healthy dessert that satisfies cravings, this dip is a smart choice over traditional cookie dough. Enjoy making and sharing this treat!
                    Protein Chocolate Chip Cookie Dough Dip Delight
                  • To make Chocolate Mocha Overnight Oats, you need the following ingredients: - 1 cup rolled oats - 2 cups almond milk (or any milk of choice) - 2 tablespoons cocoa powder - 1 tablespoon instant coffee granules - 2 tablespoons maple syrup (or honey) - ½ teaspoon vanilla extract - A pinch of salt - ¼ cup Greek yogurt (optional for creaminess) - 2 tablespoons chocolate chips (optional for topping) - Sliced banana or berries for topping These ingredients come together to create a rich, chocolatey breakfast. The oats soak up the almond milk and cocoa, making each bite creamy and satisfying. Using almond milk keeps it light, while maple syrup adds natural sweetness. The instant coffee gives it a nice mocha flavor. If you want extra creaminess, add Greek yogurt. Don’t forget the toppings! Sliced bananas or fresh berries add color and taste. You can even sprinkle some chocolate chips on top for a sweet finish. This mix of ingredients makes the perfect breakfast for any day. Enjoy the ease and deliciousness of Chocolate Mocha Overnight Oats! - In a large bowl, combine: - 1 cup rolled oats - 2 cups almond milk (or any milk of choice) - 2 tablespoons cocoa powder - 1 tablespoon instant coffee granules - 2 tablespoons maple syrup (or honey) - ½ teaspoon vanilla extract - A pinch of salt - If you want creaminess, mix in ¼ cup Greek yogurt. This makes your oats extra smooth. - Now, divide the mixture into two jars. - Seal the jars tightly to lock in flavor. - Place them in the refrigerator. Let them chill overnight or for at least 4-6 hours. - When it’s time to eat, stir the oats well. - If they look too thick, add a splash of milk. - Top with chocolate chips, banana slices, or berries. This adds fun flavors and textures. To get the right thickness, adjust the milk amount. Start with two cups of almond milk. If your oats seem too thick, add a splash of milk. This will help create a creamy texture. Always stir your oats before serving. This mixes the flavors well and ensures every bite is tasty. You can experiment with different types of milk. Oat milk is a great choice for creaminess. Coconut milk adds a tropical twist. For extra flavor, use flavored Greek yogurt. This adds a delicious taste and makes your oats even creamier. Make a big batch of oats for quick breakfasts all week. Divide the mixture into jars. This makes it easy to grab one in the morning. Store the jars in the fridge for a fresh start to your day. {{image_2}} You can change up the flavors easily. - Add nut butter for creaminess and taste. - Try different toppings like nuts or seeds for crunch. Want a lower-calorie option? - Substitute maple syrup with a sugar-free sweetener. - Use dairy-free yogurt for a vegan choice. Make your oats special with seasonal flavors. - Add pumpkin spice in fall or peppermint extract in winter. - For freshness, include fruits like apples in fall or strawberries in summer. Store your overnight oats in the refrigerator. This keeps them fresh and tasty. Use airtight containers to stop any spoilage from happening. Your chocolate mocha overnight oats can last up to 5 days in the fridge. They are best eaten fresh but can stay good this long. Do not freeze them, as the texture will change when thawed. You can enjoy your oats cold right from the fridge. If you prefer them warm, heat in the microwave for a quick breakfast. Stir them well and add a splash of milk if they seem too thick when reheating. Yes, if you prefer a non-caffeinated version, simply omit the coffee. The oats will still taste great with chocolate and other flavors. You can add more cocoa powder or a dash of vanilla to keep it yummy. For best results, soak the oats overnight or for at least 4-6 hours. This helps the oats absorb the milk and flavors. If you rush it, the oats might be too chewy. Letting them soak overnight gives you the best texture. Absolutely! Use plant-based yogurt and a suitable sweetener to keep it vegan-friendly. Almond milk is great, but you can also try oat or coconut milk. This way, everyone can enjoy this tasty breakfast delight! You learned how to make easy overnight oats packed with flavor and nutrition. This recipe uses simple ingredients like oats, cocoa powder, and your choice of milk. I shared tips for personalizing flavors and storage. Remember, meal prep helps you save time during busy mornings. With endless variations, you can enjoy this healthy dish all week long. Now, get started on your tasty and nutritious breakfast!
                    Chocolate Mocha Overnight Oats Easy Breakfast Delight
                  • To make No-Bake Nutella Cheesecake Squares, you need simple ingredients that pack a lot of flavor. Here’s what you will need: - 1 cup graham cracker crumbs - ¼ cup melted butter - ¼ cup granulated sugar - 16 oz cream cheese, softened - 1 cup Nutella - ½ cup powdered sugar - 1 teaspoon vanilla extract - 1 cup heavy whipping cream - Chocolate shavings or cocoa powder for garnish Each ingredient plays a key role in creating a smooth and rich dessert. The graham cracker crumbs form the tasty crust, while the Nutella brings a delightful chocolate hazelnut flavor. Cream cheese adds creaminess, and whipped cream gives it a light texture. When you mix all these ingredients, you create layers of flavor. The sweetness from the sugar balances the rich Nutella. You can also choose your garnish based on your mood. Chocolate shavings add elegance, while cocoa powder gives a nice finish. Make sure to use fresh ingredients, especially the cream cheese and heavy cream, for the best taste. You can find these ingredients at your local grocery store. Enjoy the fun of putting this recipe together! To start, you need to make the crust. In a medium bowl, combine graham cracker crumbs, melted butter, and granulated sugar. Mix until it feels like wet sand. This helps hold the crust together. Next, press the mixture firmly into the bottom of an 8x8 inch square pan. Make sure it's even and packed well. Refrigerate this for about 10 minutes to let it set. Now, let’s make the cheesecake filling. In a large bowl, beat the softened cream cheese until it is smooth. This step is key for a creamy texture. Add the Nutella, powdered sugar, and vanilla extract to the cream cheese. Mix until everything is combined and there are no lumps left. The Nutella gives it a rich, chocolate flavor. Next, whip the heavy cream in a separate bowl. Beat it until stiff peaks form. This means it should hold shape when you lift the whisk. Once that's done, gently fold the whipped cream into the Nutella mixture. Be careful not to deflate the whipped cream. This helps keep the filling light and fluffy. Finally, pour the Nutella cheesecake filling over the chilled crust. Spread it out evenly with a spatula. Cover the pan with plastic wrap and refrigerate for at least four hours or until it sets. Once it’s firm, you can cut it into squares and serve. Enjoy your delicious, no-bake Nutella cheesecake squares! To make a great crust, start with good graham cracker crumbs. You want them fine, like sand. Mix the crumbs with melted butter and sugar. This helps the crust stick together. Press the crust into the pan firmly. Use the bottom of a measuring cup or your hands. You want it to be even. A well-pressed crust gives a nice base for the cheesecake. Refrigerate it for 10 minutes to set. Room temperature cream cheese is key. Cold cream cheese makes it hard to mix. Soft cream cheese blends easily and makes a smooth filling. When mixing in the whipped cream, fold gently. Use a spatula to lift and turn the mixture. This keeps air bubbles in the cream. Air bubbles make the cheesecake light and fluffy. For a stunning look, add chocolate shavings on top. You can also sprinkle cocoa powder for a rich touch. Both options make your cheesecake squares pop. Serve the squares on a pretty plate. This makes them look fancy for parties. You can cut them into different shapes too, like triangles or rectangles. Get creative and impress your guests! {{image_2}} You can easily change the flavor of these cheesecake squares. One fun option is to add espresso for a coffee kick. Just mix in one tablespoon of espresso powder to the Nutella mix. If you love mint, consider adding a few drops of mint extract. This gives your dessert a fresh taste. If you want to swap the Nutella, try different nut spreads. Almond butter or cashew butter can work well. Each choice gives a unique twist to the classic recipe. For a gluten-free version, use gluten-free graham crackers. Many stores sell these now. This simple swap keeps the taste but makes it safe for those with gluten issues. Want a vegan option? Replace cream cheese with a vegan cream cheese alternative. You can also swap the heavy cream with coconut cream. This keeps it rich and creamy while being plant-based. Pair these Nutella cheesecake squares with fresh fruit. Strawberries or raspberries add a nice tartness. You can also serve them with whipped cream for extra indulgence. These squares are perfect for parties or family gatherings. They are easy to transport and look great on a platter. Serve them at birthdays or any celebration for a sweet treat everyone will enjoy. To keep your Nutella cheesecake squares fresh, place them in an airtight container. This helps lock in moisture and flavor. I recommend using a glass or BPA-free plastic container. Always store the cheesecake squares in the fridge. This will keep them cool and tasty. You can freeze leftover squares for later. First, cut them into squares and wrap each piece in plastic wrap. Then, place the wrapped squares in a freezer-safe bag. Press out any air before sealing. To enjoy them later, just thaw them in the fridge overnight. This keeps the taste rich and creamy. These cheesecake squares last about five days in the fridge. Keep an eye out for any off smells or changes in texture. If you see any liquid pooling or the squares look dry, it’s best to toss them. Enjoy these delights while they are fresh for the best taste! The cheesecake needs at least 4 hours to set. For best results, let it chill overnight. This helps the flavors blend well and makes slicing easier. Yes, you can use light cream cheese. It will still work well in this recipe. Just remember, it may change the texture slightly. The cheesecake might not be as rich, but it will still taste great! You can use other chocolate spreads, like chocolate hazelnut spread or peanut butter. For a different flavor, try almond butter or a fruit spread. Each will give a unique taste while keeping the recipe fun. Absolutely! You can make these squares a day or two before serving. Just keep them covered in the fridge. This is great for parties or events when you want to save time. Yes, an 8x8 pan is perfect for this recipe. It helps create nice, thick squares. If you prefer thinner squares, you can use a larger pan. Just adjust the chilling time as needed. This blog post covered how to make delicious Nutella cheesecake squares. We went over the key ingredients and the easy steps to prepare both the crust and the filling. You learned tips for perfecting your dessert's texture and ways to present it beautifully. Feel free to experiment with flavors and adjust for dietary needs. Remember, make it ahead of time, and store it properly to keep it fresh. Enjoy making this treat for any occasion!
                    No-Bake Nutella Cheesecake Squares Delightful Treat
                  • To make delicious apple pie cheesecake bars, gather the following ingredients: - 2 cups graham cracker crumbs - ½ cup unsalted butter, melted - 2 tablespoons granulated sugar - 16 oz cream cheese, softened - 1 cup granulated sugar - 3 large eggs - 1 teaspoon vanilla extract - 1 teaspoon ground cinnamon - 2 cups sautéed apples (from about 2-3 medium apples, peeled and diced) - 1 tablespoon lemon juice - ½ teaspoon nutmeg - ¼ cup caramel sauce (for drizzling) You can make some changes if you need to. Here are a few ideas: - Use coconut oil instead of unsalted butter for a dairy-free option. - Swap granulated sugar with brown sugar for a richer flavor. - If you don’t have cream cheese, try mascarpone cheese. - You can use any apples you like, such as Granny Smith or Honeycrisp. - For a nut-free version, leave out the nutmeg or use allspice. Understanding the nutrition can help you enjoy these bars mindfully. Each bar contains roughly: - Calories: 250 - Total Fat: 15g - Saturated Fat: 8g - Cholesterol: 75mg - Sodium: 180mg - Total Carbohydrates: 28g - Dietary Fiber: 1g - Sugars: 16g - Protein: 3g This information can vary based on ingredient choices. Enjoy these tasty bars as an occasional treat! Start by gathering all your ingredients. You need graham cracker crumbs, butter, sugar, cream cheese, eggs, vanilla, cinnamon, sautéed apples, lemon juice, nutmeg, and caramel sauce. Preheat your oven to 325°F (163°C). Line a 9x13 inch baking pan with parchment paper. Leave some paper hanging over the edges. This makes it easier to lift out your bars later. In a medium bowl, mix 2 cups of graham cracker crumbs, ½ cup of melted butter, and 2 tablespoons of sugar. Stir it until the crumbs are well coated. Press this mixture firmly into the bottom of the prepared pan. Make sure it is even all over. Bake this crust for about 10 minutes. After baking, take it out of the oven and let it cool completely. In a large bowl, beat 16 oz of softened cream cheese until smooth. This step is key for a creamy texture. Slowly add 1 cup of sugar while beating the cream cheese. Next, add 3 eggs, one at a time. Mix well after each egg. Then, stir in 1 teaspoon of vanilla extract, 1 teaspoon of ground cinnamon, and ½ teaspoon of nutmeg. Now, gently fold in the sautéed apples, which you made with 2-3 medium apples and 1 tablespoon of lemon juice. Pour the apple cheesecake filling over the cooled crust. Spread it evenly. Bake in the oven for 35-40 minutes. Check if the center is set but still jiggles slightly. Once done, remove it from the oven and let the bars cool at room temperature for about an hour. After cooling, refrigerate them for at least 4 hours. This helps the bars set completely. When you are ready to serve, drizzle caramel sauce on top. Now your apple pie cheesecake bars are ready to enjoy! To get a smooth and creamy texture, start with softened cream cheese. Cold cheese makes lumps. Beat the cream cheese until it's silky. Add sugar slowly while mixing. This helps blend the sugar evenly. Mix in eggs one at a time. This keeps the filling light and airy. Avoid overmixing after adding eggs. Too much mixing can add air, causing cracks. Sautéing apples gives them a soft and sweet flavor. Use medium heat to cook the apples evenly. Add lemon juice to help them keep their color. This also brightens their taste. Cook the apples until they're just tender, about 5-7 minutes. If you want a spicier taste, sprinkle in some cinnamon while they cook. This adds warmth to your bars. Serve the cheesecake bars chilled for the best flavor. Drizzle caramel sauce on top right before serving. This adds a sweet touch. You can also sprinkle some crushed nuts for crunch. A dollop of whipped cream can make it fancy. For extra fun, pair with vanilla ice cream. It's a treat everyone will love! {{image_2}} You can change the flavor of your Apple Pie Cheesecake Bars. For a spiced apple twist, add more cinnamon and a pinch of ginger. You can also use a mix of apples for a richer taste. If you want to go seasonal, try pumpkin. Replace some cream cheese with pumpkin puree. Add pumpkin spice for a cozy fall vibe. This gives your bars a fun twist while keeping them creamy. You can make these bars gluten-free easily. Swap the graham cracker crumbs with gluten-free crumbs. You can find these in many stores. Make sure your butter and sugar are gluten-free as well. This way, everyone can enjoy these delicious treats without worry. If you want a vegan version, there are simple swaps. Use vegan cream cheese instead of regular cream cheese. Try flax eggs or chia eggs in place of the eggs. Mix one tablespoon of flaxseed meal with three tablespoons of water. Let it sit until it thickens. For the crust, look for vegan butter or use coconut oil. This way, you keep the creamy texture while making it plant-based. To store leftover apple pie cheesecake bars, place them in an airtight container. This keeps them fresh and prevents drying out. If you cut the bars, wrap them individually in plastic wrap. Make sure to refrigerate them right away. You can freeze these cheesecake bars for later. First, let them cool completely. Then, wrap each bar in plastic wrap. Place the wrapped bars in a freezer-safe bag or container. This method helps to keep the flavor and texture intact when you are ready to enjoy them again. When stored in the fridge, these cheesecake bars last about 5-7 days. If frozen, they can last for up to 3 months. Always check for any signs of freezer burn before eating. For the best taste, enjoy them within the recommended time frame. Yes, using a store-bought graham cracker crust is a great option. It saves time and still tastes good. If you choose this, skip the step for making your crust. Just place the crust in your baking pan and fill it with the cheesecake mixture. To check if your cheesecake bars are done, look for a slight jiggle in the center when you shake the pan. The edges should be set, but the middle can still wiggle a bit. This means they will firm up as they cool. Yes! You can use other fruits like peaches or pears. Just make sure to sauté them like you do with apples. This step helps to soften the fruit and bring out its flavor. To cut the bars neatly, use a sharp knife. Dip the knife in warm water and wipe it dry before each cut. This helps prevent sticking and keeps the edges clean. You can also chill the bars before slicing for easier cutting. We explored the key ingredients needed for the perfect cheesecake bars. You learned about substitutes and nutritional facts. Next, we walked through the steps to prepare, bake, and cool your cheesecake. I shared tips for great texture and serving ideas. You can even try variations to make it your own. Remember to store leftovers properly for best taste later. With these insights, you can create delicious cheesecake bars that impress everyone. Happy baking!
                    Apple Pie Cheesecake Bars Tempting Dessert Recipe

                  Recent Drinks

                  • - 1 ripe banana - 2 tablespoons natural peanut butter - 1 cup unsweetened almond milk (or any milk of choice) - 1 scoop vanilla protein powder (plant-based or whey) - 1 tablespoon chia seeds - 1 teaspoon honey (optional for sweetness) - A pinch of cinnamon - Ice cubes (optional, for a thicker texture) Gather these simple items before you start. A ripe banana gives natural sweetness and creaminess. Use two tablespoons of natural peanut butter for a rich flavor. Almond milk is my go-to, but any milk you love works great. The protein powder adds a boost of nutrition. Choose vanilla to match the banana. Chia seeds are tiny but mighty. They add fiber and help keep you full. If you like it sweeter, add honey, but it’s not a must. A pinch of cinnamon brings warmth and depth to this drink. For a thicker texture, toss in some ice cubes. This smoothie is flexible, so feel free to mix and match based on your taste. Now, let's blend it all together! 1. Start by peeling the ripe banana. Break it into small chunks. 2. In a blender, combine the banana chunks, natural peanut butter, almond milk, protein powder, chia seeds, and a pinch of cinnamon. 3. If you like a colder and thicker smoothie, add some ice cubes. 1. Blend all the ingredients on high speed. Keep blending until you have a smooth and creamy mix. 2. Stop the blender and taste your smoothie. If you want it sweeter, add honey. Blend again for a few seconds to mix. 1. Pour the smoothie into a tall glass. Enjoy it right away for the best taste and creaminess. 2. For a fun twist, you can top it with extra chia seeds or banana slices. This makes it look pretty too! To get the perfect texture, use a ripe banana. A ripe banana makes the smoothie creamy. Add ice cubes if you want it thicker. If you prefer a smoother drink, blend longer. Scrape the sides of the blender to mix all the ingredients well. This ensures a silky-smooth result. If your smoothie tastes too bland, add honey or more banana. Start with a teaspoon of honey. Blend and taste again. You can always add more honey if needed. This way, you control the sweetness to match your taste. Remember, ripe bananas also add natural sweetness. Use a high-speed blender for the best results. A strong blender breaks down the ingredients quickly. If you have a less powerful blender, blend in stages. Start with the liquids first, then add the solids. This helps everything mix better. Make sure your blender is clean for the best flavor. {{image_2}} You can switch the peanut butter for other nut butters. Almond butter offers a nutty taste. Cashew butter is creamy and sweet. Sunflower seed butter is a great choice for allergies. Each nut butter brings its own flavor and health benefits. Experiment to find your favorite. You can add many fruits to the smoothie. Frozen berries add sweetness and color. Spinach or kale boosts nutrition without changing the taste. Try mango for a tropical twist. Each fruit adds vitamins and makes the smoothie fun. Mix and match to discover new flavors. Choosing the right protein powder is key. Plant-based powders are great for vegan diets. Whey protein is popular for muscle recovery. Look for flavors that match your taste, like chocolate or vanilla. The right powder can enhance the smoothie’s flavor and nutrition. Test different types to see what you prefer. Store any leftover smoothie in an airtight container. You want to keep it fresh. Place it in the fridge right after making it. It will stay good for about one day. When you are ready to drink it again, shake or stir well. This helps mix any settled ingredients. You can freeze your smoothie for later. Pour it into ice cube trays or freezer-safe bags. This way, you can grab a portion whenever you want. To use, thaw the smoothie overnight in the fridge. You can also blend it again for a fresh taste. In the fridge, your smoothie lasts about 24 hours. In the freezer, it can last up to three months. Just remember, the sooner you drink it, the better the taste and texture will be! Yes, this smoothie is gluten-free. All the ingredients listed are naturally free from gluten. The peanut butter, banana, almond milk, protein powder, chia seeds, and honey do not contain gluten. Always check labels if you use store-bought items to confirm they are gluten-free. Absolutely! To make this smoothie vegan, simply use plant-based protein powder. Ensure your peanut butter is also free from animal products. Replace honey with maple syrup or agave nectar for sweetness. All other ingredients are already vegan-friendly. This smoothie offers many health benefits. It provides protein from the peanut butter and protein powder, which helps build muscle. Bananas add potassium, good for heart health. Chia seeds are packed with fiber, aiding digestion. Almond milk is low in calories and rich in vitamins. Yes, you can use various milk types. Cow’s milk will add creaminess and protein. Soy milk is a great option for extra protein. Coconut milk gives a tropical flavor. Each milk option changes the taste and texture slightly, so choose what you enjoy best. This smoothie recipe combines simple ingredients for great taste and nutrition. You learned step-by-step how to prepare it and tips for perfect texture. Variations let you customize your drink to fit your taste. Remember to store leftovers properly for later enjoyment. Smoothies can be healthy and fun. Try new mixtures to find what you love best. Keep experimenting and enjoy your delicious creations!
                    Peanut Butter Banana Protein Smoothie Easy Recipe
                  • To make a delicious Turmeric Golden Milk Latte, gather these simple ingredients: - 2 cups almond milk (or your preferred milk) - 1 teaspoon ground turmeric - ½ teaspoon ground ginger - ¼ teaspoon cinnamon - 1 tablespoon honey or maple syrup (adjust to taste) - Pinch of black pepper - ½ teaspoon vanilla extract - Optional: a sprinkle of nutmeg for garnish - Almond Milk: This milk is low in calories and rich in vitamins. It helps with heart health. - Turmeric: This spice has curcumin, known for its anti-inflammatory properties. It may help improve brain function. - Ginger: Ginger can help with digestion and nausea. It adds a nice warmth to the drink. - Cinnamon: This spice is rich in antioxidants. It may help lower blood sugar and improve heart health. - Honey or Maple Syrup: Both sweeteners can boost energy. They also provide antioxidants. - Black Pepper: This spice enhances turmeric absorption. It makes the drink more effective. - Vanilla Extract: It adds flavor and can help reduce stress. - Nutmeg: This spice is optional, but it adds warmth and a nice aroma. - Milk Options: You can use oat milk, soy milk, or coconut milk for different flavors. - Sweeteners: If you prefer, try agave syrup or stevia as sugar-free options. - Spices: Experiment with cardamom or cloves for added flavor. - Nutmeg: You can skip it if you don't like nutmeg, or use a touch of cocoa powder instead. 1. Start by taking a small saucepan. 2. Add 2 cups of almond milk to the pan. 3. Measure and add 1 teaspoon of ground turmeric. 4. Next, add ½ teaspoon of ground ginger. 5. Sprinkle in ¼ teaspoon of cinnamon. 6. Sweeten your drink with 1 tablespoon of honey or maple syrup. 7. Don't forget a pinch of black pepper for better absorption of turmeric. 8. Lastly, add ½ teaspoon of vanilla extract. 9. Whisk all the ingredients well in the pan. 10. Place the saucepan on medium heat. 11. Gently warm the mixture while stirring often. 12. Keep an eye on it; do not let it boil. 13. After about 5-7 minutes, it should be hot enough. 14. Remove the pan from heat and let it cool slightly. 15. If you want a frothy drink, use a milk frother or whisk it quickly. 16. Pour the golden milk into your favorite mugs. 17. Optionally, sprinkle a bit of nutmeg on top for a nice touch. 18. Serve warm and enjoy this comforting drink! - Always use a whisk to blend the spices into the milk. - Whisking helps mix the turmeric and other spices evenly. - When heating, keep the heat low to avoid scalding the milk. - Stir often to prevent sticking at the bottom of the pan. - If you see steam but no bubbles, you are at the right temperature. - A milk frother works wonders for a smooth, frothy finish. - If you don’t have a frother, whisk vigorously by hand. - Frothing adds air, giving the latte a creamy feel. - The more you froth, the lighter and fluffier your drink will become. - For an extra touch, froth some almond milk separately and top your latte with it. You can mix spices to make your turmeric latte tastier. Try adding a pinch of nutmeg or a dash of cardamom. These spices add warmth to the drink. You can also use fresh ginger instead of ground ginger. This will give your latte a bright, zesty kick. Just remember, fresh ginger may need more time to steep. Many people rush the heating process. Always warm your milk slowly over medium heat. If you boil it, the spices can lose flavor. Another mistake is not blending the spices well. Make sure to whisk the mixture thoroughly. This helps avoid clumps of turmeric or ginger. Lastly, avoid skipping the black pepper. It helps your body absorb turmeric better. Sweetness is personal. Start with one tablespoon of honey or maple syrup. Taste your latte and add more if you like it sweeter. For creaminess, use full-fat coconut milk for a richer feel. Almond milk is lighter but still delicious. You can also mix almond and coconut milk for the best of both worlds. {{image_2}} You can easily make this latte vegan. Just use almond milk, coconut milk, or oat milk. These milks work great in this recipe. They keep the drink creamy and delicious. If you want a nut-free option, oat milk is the best choice. It blends well with turmeric and spices. To make an iced version, start with brewed turmeric milk. Follow the same steps but let it cool. Pour over ice instead of serving warm. This drink is refreshing on hot days. You can also add some ice cream for a treat! You can mix and match flavors for fun. Try adding matcha for a green twist. This adds a fresh taste and boosts energy. You can also use cocoa for a chocolatey version. The cocoa pairs well with turmeric and spices. For a special touch, add a dash of vanilla extract. This enhances the overall flavor and aroma. To store leftover turmeric golden milk, let it cool first. Then, pour it into an airtight container. Keep it in the fridge for up to three days. This way, you can enjoy the drink again without losing its flavor. When reheating your golden milk, do it gently. Pour it into a small saucepan. Heat it over low to medium heat. Stir it often to avoid burning. Never let it boil, as this can change the taste and texture. You can also use a microwave. Heat in short bursts, stirring in between. Turmeric golden milk lasts about three days in the fridge. Check for signs of spoilage. If it smells sour or has any mold, discard it. Always trust your senses. If it looks or smells off, it’s best to throw it away. Turmeric has many health benefits. It is known for its bright yellow color and active compound called curcumin. Curcumin may help reduce inflammation. It can also support joint health. Some studies suggest it may boost your mood. Turmeric might even help with digestion. Drinking turmeric may also support your immune system. Yes, you can use any milk you like. Almond milk is great, but coconut milk adds creaminess. Oat milk is a good choice for a thicker texture. If you prefer dairy, whole or skim milk works too. Just remember, different types of milk will change the flavor a bit. To make this recipe sugar-free, skip the honey or maple syrup. You can use a sugar substitute like stevia or monk fruit instead. These options will give you sweetness without the calories. Just adjust the amount to your taste. Yes, it is safe for most people to have turmeric daily. Using it in cooking or drinks is a great way to enjoy its benefits. However, if you have health issues or take certain medications, check with a doctor first. Moderation is key, as with any food. In this blog post, we explored the ingredients and health benefits of Turmeric Golden Milk. I shared step-by-step instructions for making it frothy and delicious. We also discovered tips, tricks, and variations to enhance your drink. Proper storage and reheating advice can help you enjoy leftovers. Remember, turmeric offers many health benefits, so enjoy this drink often. Use alternative ingredients if you prefer. With these ideas, you can create the perfect golden milk to suit your taste and health needs. Enjoy your journey to wellness!
                    Turmeric Golden Milk Latte Simple and Creamy Recipe
                  • - 1 ripe mango, peeled and diced - 1 cup fresh pineapple chunks - 1 banana, sliced - 1 cup coconut water (or regular water) - ½ cup plain Greek yogurt (or dairy-free alternative) - 1 tablespoon honey or agave syrup (optional) - A handful of fresh mint leaves (for garnish) - Ice cubes (optional) The key to a delicious mango pineapple smoothie lies in its fresh ingredients. You want ripe fruits for the best flavor. The mango should feel soft when you squeeze it gently. Pineapples should smell sweet and fruity. This smoothie combines sweet mango, tangy pineapple, and creamy banana. Coconut water adds hydration, while Greek yogurt gives it a nice creaminess. You can add honey for extra sweetness if you like. Mint leaves add a refreshing touch when you serve it. Each ingredient plays a role in making this smoothie flavorful and refreshing. Trust me, using fresh ingredients will make a big difference in taste! To make this smoothie, start by gathering your main ingredients. You need a ripe mango, fresh pineapple, and a banana. 1. In a blender, combine the diced mango, pineapple chunks, and banana slices. This mix brings a burst of tropical flavor. 2. Next, add one cup of coconut water to the blender. This not only hydrates but also adds a refreshing twist. 3. For creaminess, pour in half a cup of plain Greek yogurt. If you want it sweeter, drizzle in one tablespoon of honey or agave syrup. 4. Blend on high until the mixture is smooth and creamy. If you like your smoothie chilled, toss in a few ice cubes and blend again until they are fully mixed in. 5. After blending, taste your smoothie. If it needs to be sweeter or thicker, add more honey or coconut water as needed. Once your smoothie is ready, it’s time to serve it. I recommend using tall glasses to show off the vibrant color. For a fun touch, garnish each glass with a few fresh mint leaves on top. This not only looks nice but also adds a fresh aroma. Enjoy your delicious Mango Pineapple Smoothie! For the Full Recipe, please refer back to the ingredient list and instructions. To get your smoothie just right, focus on creaminess. Use ripe fruits like mango and banana. The Greek yogurt adds a nice, smooth texture. If you want a richer taste, try full-fat yogurt. For a lighter feel, use low-fat or dairy-free yogurt. Adjust the thickness by adding more liquid. Coconut water is great for this. If your smoothie is too thick, just pour in a bit more. Blend again until it’s just how you like it. If you want a thicker smoothie, add more banana or ice cubes. Boosting flavor can take your smoothie to the next level. Try adding spices like cinnamon or ginger. These spices not only add warmth but also great health benefits. A dash of cinnamon can make the smoothie taste cozy. A pinch of ginger gives it a nice kick. You can also use flavored yogurts for extra taste. Vanilla or coconut yogurt work well. If you want sweetness, think about honey or agave syrup. These can make your smoothie more enjoyable. For a fun twist, try adding a splash of vanilla extract. It will add a lovely aroma to your drink. For a full taste experience, explore the [Full Recipe]. {{image_2}} You can change the fruit in your smoothie to keep it fresh. Adding strawberries or blueberries gives a sweet twist. These berries add a nice color and taste. You can also try using other tropical fruits like papaya or kiwi. These fruits bring new flavors and nutrients to your drink. Each fruit will change the smoothie’s taste and make it unique. If you want a dairy-free smoothie, swap the Greek yogurt for a plant-based option. Almond, coconut, or soy yogurt works well. These alternatives keep your smoothie creamy without dairy. For sweeteners, you can use maple syrup or agave syrup for a vegan choice. These options add sweetness while keeping your drink plant-based. Enjoy the fruity goodness in many ways! Don't forget to check the Full Recipe for more ideas. You may have some smoothie left after making your Mango Pineapple Smoothie. To keep it fresh, use a glass jar or a BPA-free plastic container. Seal it tightly to prevent air from spoiling the flavor. Store it in the fridge for up to 24 hours. After that, it may lose some taste and texture. If you want to enjoy the smoothie later, freezing is a great option. Pour the smoothie into ice cube trays or freezer-safe bags. Leave some space in the bags for expansion. You can freeze it for up to three months. When you’re ready to drink it, take out what you need. Thaw it in the fridge overnight or blend it straight from the freezer for a slushy treat. Enjoy your refreshing Mango Pineapple Smoothie anytime! Yes, you can make this smoothie ahead of time. If you want to save it, store it in an airtight container. Keep it in the fridge for up to one day. The smoothie may separate, so stir it well before you drink it. If you don’t have coconut water, use regular water or fruit juice instead. Fruit juice can add a nice flavor. You can also try almond milk for a creamier touch. Just remember, the taste will change a bit based on what you use. To make the smoothie thicker, add more Greek yogurt or a banana. You can also use frozen fruit instead of fresh. Frozen fruit gives you a nice, thick texture. Just blend it well, and you’ll get a creamy drink. Yes, this smoothie is great for kids! It is packed with fruits and tastes sweet. You can adjust the sweetness by adding less honey. The bright colors and fresh flavors will appeal to children, making it a fun treat. You can find the Full Recipe for the Tropical Bliss Mango Pineapple Smoothie above in this article. This will guide you through every step to create your own refreshing drink. This blog post covers a simple and tasty smoothie recipe. You learned about the key ingredients and their nutritional benefits. I provided steps to prepare and serve the smoothie perfectly. Tips for texture and flavor help you make it your own. You can explore variations to suit your tastes or dietary needs. Don’t forget storage tips to keep leftovers fresh. Enjoy your smoothie making journey. It’s all about trying new things and having fun!
                    Mango Pineapple Smoothie Refreshing and Flavorful Blend
                  • - 2 packets of frozen açaí puree - 1 ripe banana - 1 cup of fresh pineapple chunks - 1 cup of coconut milk (or any non-dairy milk) - 1 tablespoon of honey or agave syrup (optional) For a vibrant tropical taste, the main ingredients are key. Açaí puree brings rich color and flavor. It is full of antioxidants. Bananas add creaminess and natural sweetness. Fresh pineapple gives a bright, juicy touch. Coconut milk offers a smooth base. You can use any non-dairy milk you prefer. Honey or agave syrup adds sweetness if needed. - Sliced kiwi - Coconut flakes - Granola - Chia seeds - Fresh berries (e.g., strawberries, blueberries) Toppings make your smoothie bowl pop! Sliced kiwi adds a zesty kick. Coconut flakes give it a tropical crunch. Granola provides texture and flavor. Chia seeds offer extra nutrients. Fresh berries, like strawberries and blueberries, add color and taste. You can mix and match these toppings for a fun look. For the full recipe, please refer to the section above. 1. Blend the ingredients Start by adding the frozen açaí puree, ripe banana, fresh pineapple chunks, and coconut milk into a blender. If you want it sweeter, you can add honey or agave syrup. Blend this mixture on high speed until it becomes creamy and smooth. 2. Adjust consistency with coconut milk If your smoothie is too thick, just add a bit more coconut milk. Blend again until you reach the texture you want. This step is key to making your smoothie bowl enjoyable. 3. Pour into a bowl Once blended, carefully pour the smoothie mixture into a bowl. Make sure to use a large enough bowl to hold all the goodness. 4. Add toppings creatively Now comes the fun part! Arrange your toppings, such as sliced kiwi, coconut flakes, granola, chia seeds, and fresh berries, over the smoothie. Try to create a colorful pattern. I love making a circular design to highlight all the vibrant colors. - Tips for presentation Use a shallow bowl to show off your beautiful toppings. You can also sprinkle some extra coconut flakes around the edge for a nice touch. A colorful presentation makes your smoothie bowl more fun to eat. - Recommended serving utensils Serve your smoothie bowl with a regular spoon. If you want to make it more special, use a wooden spoon or a cute, colorful one. Enjoy your tropical treat right away to keep it fresh and tasty. For the full recipe, refer to the earlier sections. To make a great smoothie bowl, start with ripe fruits. Ripe fruits taste better and add natural sweetness. Look for bananas that are yellow with some brown spots. When it comes to pineapples, choose ones that smell sweet. It ensures they are juicy and fresh. Blending is key to your smoothie bowl. You want a smooth and creamy texture. If your mix is too thick, add more coconut milk. Blend again until you reach the right consistency. A good blend makes your bowl enjoyable and easy to eat. A colorful topping arrangement makes your smoothie bowl pop. Use fresh berries, sliced kiwi, and coconut flakes. Lay them out in a pattern. A circular design looks appealing and fun. To elevate your smoothie bowl's look, use bowls with interesting shapes. Tall bowls or wide, shallow ones can change the game. Garnish with a sprinkle of chia seeds for a fancy touch. This not only looks great but adds a bit of crunch too. {{image_2}} You can change the non-dairy milk for this smoothie. Almond, soy, or oat milk work well. Each milk adds a different taste. Try using seasonal fruits too. Mango, papaya, or berries add a fresh twist. You can mix and match to find your favorite blend. Want more nutrients? Add spinach or kale to your smoothie. They blend well and boost health. You won’t even taste them! For extra energy, stir in nut butter or protein powder. Both will make your smoothie more filling. They add great flavor too! You can also experiment with different combinations to find the best taste for you. To store leftovers, place your smoothie bowl in the fridge. Use a tight container to keep it fresh. Glass or BPA-free plastic works well for storage. I prefer glass because it keeps flavors better. You can freeze smoothie bowls for later. Just pour the mixture into an airtight container. Leave some space at the top, as it will expand when frozen. To defrost, place it in the fridge overnight. If you’re in a rush, you can use the microwave. Just heat it in short bursts to avoid cooking. Enjoy your tropical treat later with ease! For the recipe, check out the Full Recipe. What is açaí and what are its benefits? Açaí is a small, dark purple berry from Brazil. It is full of antioxidants, which help fight free radicals in the body. Açaí is also rich in fiber, promoting good digestion. Plus, it has healthy fats that support heart health. You can enjoy its fruity taste in many dishes. Can I make this smoothie bowl ahead of time? Yes! You can prepare the smoothie mix and store it in the fridge for up to 24 hours. Just remember to keep the toppings separate. This way, your bowl stays fresh and tasty. How can I make this recipe vegan or gluten-free? To make it vegan, use agave syrup instead of honey. For gluten-free, ensure your granola and any other toppings are gluten-free. Most fruits and coconut milk are naturally gluten-free, so you’re all set! Can I substitute açaí with other fruits? Yes, you can! If you can’t find açaí, try using frozen berries like blueberries or strawberries. These fruits will add sweetness and a burst of color to your bowl. What to do if the smoothie is too thick? If your smoothie is too thick, just add a little more coconut milk. Blend again until you reach your desired creaminess. This will make it easier to pour and enjoy. How to fix a smoothie bowl that tastes too bland? If your smoothie bowl lacks flavor, try adding a splash of vanilla extract or a pinch of salt. You can also mix in a bit of honey or agave syrup for sweetness. Adjust the toppings to add more taste and texture. This article covers how to make a delicious açaí smoothie bowl. You learned about the key ingredients, easy steps for preparation, and creative topping ideas. I shared tips to improve taste and presentation, plus fun variations to try. Don’t forget storage techniques to keep your bowl fresh. With all this information, you can enjoy a tasty and nutritious treat anytime. Get creative with your favorites and make this recipe truly yours. Enjoy every bite!
                    Tropical Acai Smoothie Bowl Energizing Healthy Treat

                  Footer

                  ↑ back to top

                  More information

                  • Home
                  • Drinks
                  • Appetizer
                  • Dinner
                  • Desserts
                  • About
                  • Contact
                  • Privacy Policy

                  Our Policies

                  • Privacy Policy
                  • GDPR Policy
                  • Terms Of Use
                  • Copyright Policy
                  • Cookie Policy
                  • Disclaimer

                  Copyright © 2025 cheftaling