Berry Smoothie Popsicles Refreshing and Healthy Snack

WANT TO SAVE THIS RECIPE?

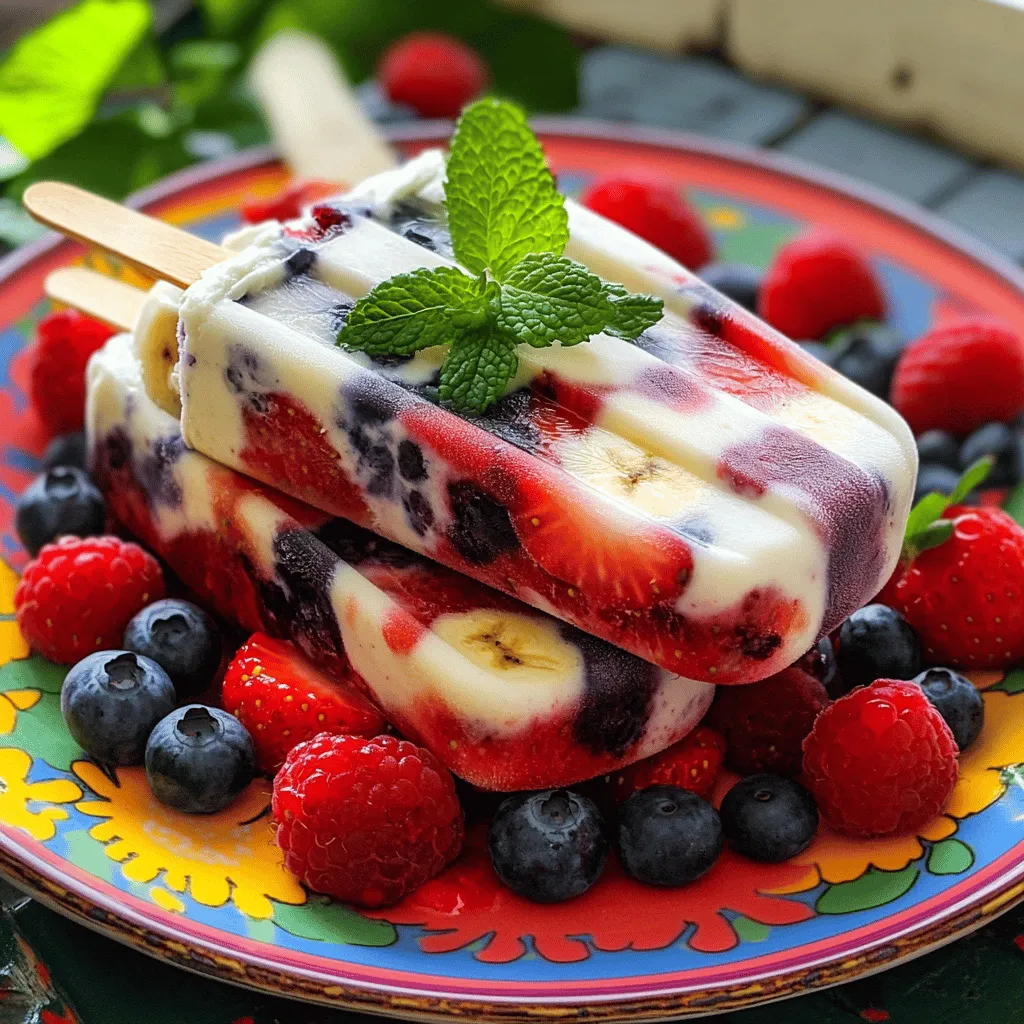
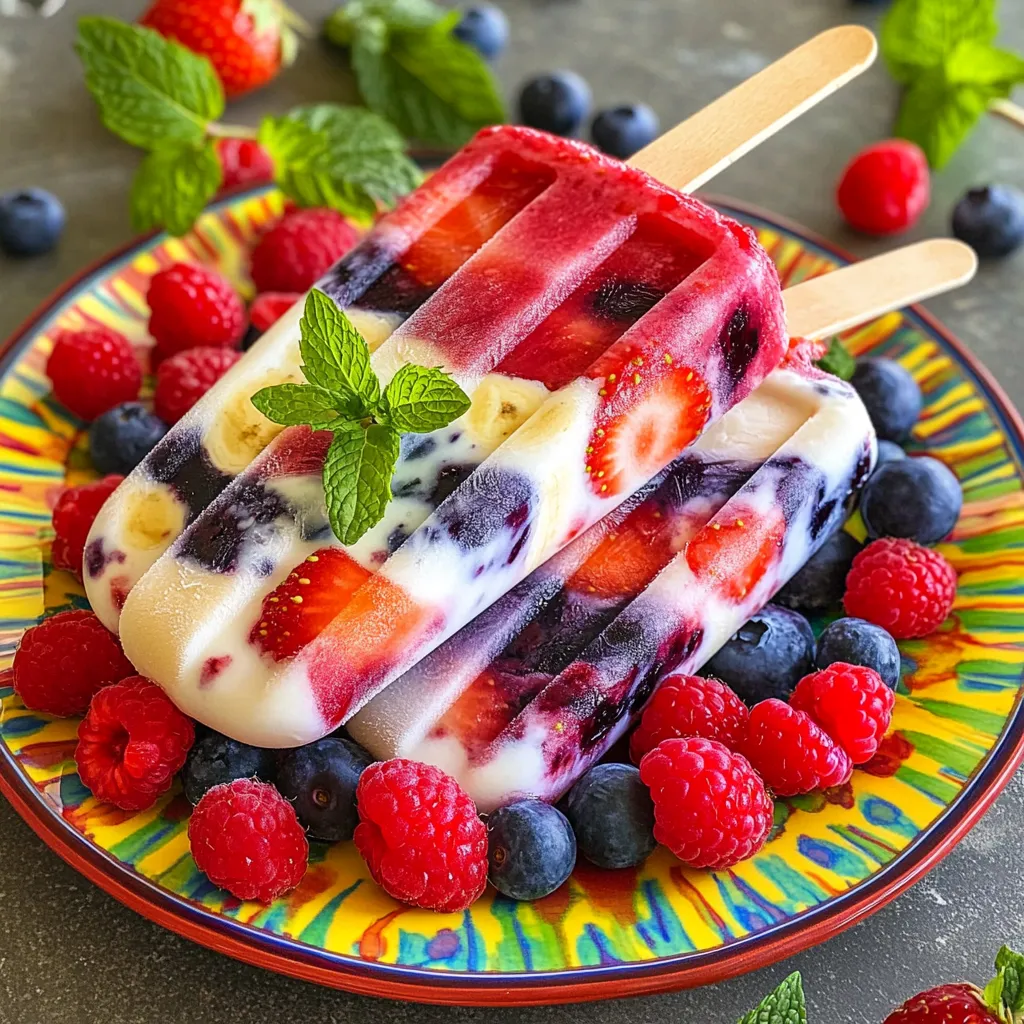
Looking for a fun, tasty treat that’s also healthy? Berry smoothie popsicles are the answer! These colorful, fruity delights not only cool you down but also pack a nutrient punch. In this post, I’ll guide you through simple steps to make these refreshing snacks, plus tips on the best ingredients and fun variations. Get ready to savor the delightful burst of berries in every bite!

Ingredients

List of Ingredients

To make berry smoothie popsicles, you need a few simple items. Here’s the list:

– 1 cup mixed berries (strawberries, blueberries, raspberries)

– 1 banana, sliced

– 1 cup Greek yogurt (plain or vanilla)

– 1 tablespoon honey or maple syrup (adjust based on sweetness preference)

– 1/2 cup coconut water or almond milk

– A squeeze of fresh lemon juice

Fresh vs. Frozen Berries

You can use fresh or frozen berries for these popsicles. Fresh berries taste bright and juicy. They work well if they are in season. Frozen berries are easy to find and often cheaper. They blend smoothly and give a nice texture. You can keep frozen berries on hand for quick treats. Just make sure to thaw them slightly before blending.

Substitutions for Yogurt and Sweeteners

You can swap Greek yogurt for dairy-free options, like coconut yogurt. For sweeteners, try agave syrup or stevia if you want a lower sugar option. If you prefer no sweeteners, skip them entirely! The banana adds natural sweetness, making it a great choice. Feel free to mix and match based on your taste.

For the full recipe, you can check out the complete instructions to create this delightful treat.

Step-by-Step Instructions

Blender Preparation

Start by gathering all your ingredients. You will need mixed berries, a banana, Greek yogurt, honey or maple syrup, coconut water or almond milk, and lemon juice. Place these items in your blender. Blend on high speed until you get a smooth and creamy mixture. This may take about one to two minutes. If the mixture sticks to the sides, stop and scrape it down. Taste the mixture. If it’s not sweet enough, add more honey or syrup and blend again.

Pouring into Molds

Once the mixture is smooth, it’s time to pour it into your popsicle molds. Use a funnel if you have one for less mess. Fill each mold, but leave some space at the top. This space lets the popsicles expand as they freeze. Insert popsicle sticks into each mold, ensuring they stand straight.

Freezing Process

Now, place the molds in the freezer. Let them freeze for at least 4 to 6 hours. For best results, leave them overnight. When you’re ready to enjoy your popsicles, run warm water over the outside of the molds for a few seconds. This helps release the popsicles easily. Gently pull them out, and they are ready to eat. Enjoy your Berry Bliss Popsicles!

Tips & Tricks

How to Achieve the Best Texture

To get a creamy texture, use Greek yogurt. It adds thickness and richness. Blend the fruits well to break them down completely. This makes each bite smooth and tasty. If you want a softer texture, try adding a bit more coconut water or almond milk. This will help the mixture blend nicely.

Tips for Easy Removal from Molds

Removing popsicles can be tricky. To make it easy, run warm water over the molds. Hold the molds under warm water for about 10 seconds. This warms the outside and helps the popsicles slide out. Be gentle when pulling them out to avoid breaking.

Adjusting Sweetness and Flavor

Taste the mixture before you freeze it. If it’s not sweet enough, add more honey or maple syrup. You can also use ripe bananas for added sweetness. If you want a tangy flavor, a squeeze of lemon juice is great. This gives a fresh kick that balances the sweetness.

Variations

Different Berry Combinations

You can mix and match berries for unique flavors. Try strawberries, blueberries, and blackberries. Each berry brings its own taste. Strawberries add sweetness, while blueberries give a nice tartness. Blackberries offer a deep, rich flavor. You can also use raspberries for a fun twist. Experimenting with different berry combos keeps these pops interesting!

Adding Extras (Nuts, Seeds, etc.)

Want to add crunch? Toss in some nuts or seeds. Chopped almonds or walnuts work great. They add texture and healthy fats. You can also sprinkle chia seeds or flaxseeds in the mix. These seeds boost fiber and omega-3s. Just remember to blend them in well for a smooth finish.

Dairy-Free and Vegan Options

If you want a dairy-free version, swap Greek yogurt for coconut yogurt. This keeps the creaminess and makes it vegan. You can also use plant-based milk like almond or oat. Use maple syrup instead of honey for added sweetness. These changes make the popsicles friendly for everyone!

Storage Info

How to Store Leftover Popsicles

To keep your berry smoothie popsicles fresh, store them in the freezer. Make sure they are in a sealed container. You can wrap each popsicle in plastic wrap for extra protection. This will help stop freezer burn and keep them tasty. Aim to eat them within a month for the best flavor.

Best Storage Containers

Use airtight containers or freezer bags for storage. If you want, you can also use popsicle molds with lids. Labels can help you keep track of when you made them. This way, you know how long they have been in the freezer.

Freezing Duration for Optimal Taste

For the best taste, freeze your popsicles for at least 4-6 hours. This time allows them to become solid. If you want to store them longer, they can last for up to two months. However, the longer they freeze, the more they might lose flavor. So, try to enjoy them within a month. For the full recipe, check the earlier section!

FAQs

How long do berry smoothie popsicles last?

Berry smoothie popsicles can last about two months in the freezer. Make sure to keep them in an airtight container. This helps prevent freezer burn and keeps them fresh. Always check for any ice crystals before enjoying. If they look good, they are likely safe to eat.

Can I use different types of fruits?

Yes, you can use many kinds of fruits! Try mango, peach, or even kiwi for a twist. Each fruit adds a unique flavor and color. Just remember to balance sweet and tart fruits for the best taste. Mixing fruits can create a fun surprise with every bite.

Are there any health benefits to these popsicles?

Absolutely! Berry smoothie popsicles offer vitamins, fiber, and antioxidants. Berries help support your immune system. Yogurt adds protein and probiotics, which are great for digestion. These popsicles are a tasty way to enjoy healthy snacks without added sugars.

How do I make popsicles without molds?

If you don’t have molds, use small cups or ice cube trays instead. Pour the mixture into your chosen container and insert sticks carefully. Cover the top with aluminum foil to hold the stick in place. Freeze until solid, then enjoy your homemade treats.

What can I do if my popsicles are too hard?

If your popsicles are too hard, let them sit at room temperature for a few minutes. This softens them slightly for easier eating. You can also run warm water over the outside of the molds to help release them. This will make your berry smoothie popsicles easier to enjoy!

In this blog post, we explored how to make delicious berry smoothie popsicles. We discussed ingredients, like fresh or frozen berries, and yogurt substitutes. The step-by-step guide covered blending, pouring, and freezing. I shared tips for the right texture and easy mold removal. You learned how to create tasty variations and store leftovers properly.

Remember, these popsicles are fun, easy, and healthy. Experiment with flavors and enjoy your refreshing treats!

To make berry smoothie popsicles, you need a few simple items. Here’s the list: - 1 cup mixed berries (strawberries, blueberries, raspberries) - 1 banana, sliced - 1 cup Greek yogurt (plain or vanilla) - 1 tablespoon honey or maple syrup (adjust based on sweetness preference) - 1/2 cup coconut water or almond milk - A squeeze of fresh lemon juice You can use fresh or frozen berries for these popsicles. Fresh berries taste bright and juicy. They work well if they are in season. Frozen berries are easy to find and often cheaper. They blend smoothly and give a nice texture. You can keep frozen berries on hand for quick treats. Just make sure to thaw them slightly before blending. You can swap Greek yogurt for dairy-free options, like coconut yogurt. For sweeteners, try agave syrup or stevia if you want a lower sugar option. If you prefer no sweeteners, skip them entirely! The banana adds natural sweetness, making it a great choice. Feel free to mix and match based on your taste. For the full recipe, you can check out the complete instructions to create this delightful treat. Start by gathering all your ingredients. You will need mixed berries, a banana, Greek yogurt, honey or maple syrup, coconut water or almond milk, and lemon juice. Place these items in your blender. Blend on high speed until you get a smooth and creamy mixture. This may take about one to two minutes. If the mixture sticks to the sides, stop and scrape it down. Taste the mixture. If it's not sweet enough, add more honey or syrup and blend again. Once the mixture is smooth, it’s time to pour it into your popsicle molds. Use a funnel if you have one for less mess. Fill each mold, but leave some space at the top. This space lets the popsicles expand as they freeze. Insert popsicle sticks into each mold, ensuring they stand straight. Now, place the molds in the freezer. Let them freeze for at least 4 to 6 hours. For best results, leave them overnight. When you’re ready to enjoy your popsicles, run warm water over the outside of the molds for a few seconds. This helps release the popsicles easily. Gently pull them out, and they are ready to eat. Enjoy your Berry Bliss Popsicles! To get a creamy texture, use Greek yogurt. It adds thickness and richness. Blend the fruits well to break them down completely. This makes each bite smooth and tasty. If you want a softer texture, try adding a bit more coconut water or almond milk. This will help the mixture blend nicely. Removing popsicles can be tricky. To make it easy, run warm water over the molds. Hold the molds under warm water for about 10 seconds. This warms the outside and helps the popsicles slide out. Be gentle when pulling them out to avoid breaking. Taste the mixture before you freeze it. If it’s not sweet enough, add more honey or maple syrup. You can also use ripe bananas for added sweetness. If you want a tangy flavor, a squeeze of lemon juice is great. This gives a fresh kick that balances the sweetness. {{image_2}} You can mix and match berries for unique flavors. Try strawberries, blueberries, and blackberries. Each berry brings its own taste. Strawberries add sweetness, while blueberries give a nice tartness. Blackberries offer a deep, rich flavor. You can also use raspberries for a fun twist. Experimenting with different berry combos keeps these pops interesting! Want to add crunch? Toss in some nuts or seeds. Chopped almonds or walnuts work great. They add texture and healthy fats. You can also sprinkle chia seeds or flaxseeds in the mix. These seeds boost fiber and omega-3s. Just remember to blend them in well for a smooth finish. If you want a dairy-free version, swap Greek yogurt for coconut yogurt. This keeps the creaminess and makes it vegan. You can also use plant-based milk like almond or oat. Use maple syrup instead of honey for added sweetness. These changes make the popsicles friendly for everyone! To keep your berry smoothie popsicles fresh, store them in the freezer. Make sure they are in a sealed container. You can wrap each popsicle in plastic wrap for extra protection. This will help stop freezer burn and keep them tasty. Aim to eat them within a month for the best flavor. Use airtight containers or freezer bags for storage. If you want, you can also use popsicle molds with lids. Labels can help you keep track of when you made them. This way, you know how long they have been in the freezer. For the best taste, freeze your popsicles for at least 4-6 hours. This time allows them to become solid. If you want to store them longer, they can last for up to two months. However, the longer they freeze, the more they might lose flavor. So, try to enjoy them within a month. For the full recipe, check the earlier section! Berry smoothie popsicles can last about two months in the freezer. Make sure to keep them in an airtight container. This helps prevent freezer burn and keeps them fresh. Always check for any ice crystals before enjoying. If they look good, they are likely safe to eat. Yes, you can use many kinds of fruits! Try mango, peach, or even kiwi for a twist. Each fruit adds a unique flavor and color. Just remember to balance sweet and tart fruits for the best taste. Mixing fruits can create a fun surprise with every bite. Absolutely! Berry smoothie popsicles offer vitamins, fiber, and antioxidants. Berries help support your immune system. Yogurt adds protein and probiotics, which are great for digestion. These popsicles are a tasty way to enjoy healthy snacks without added sugars. If you don’t have molds, use small cups or ice cube trays instead. Pour the mixture into your chosen container and insert sticks carefully. Cover the top with aluminum foil to hold the stick in place. Freeze until solid, then enjoy your homemade treats. If your popsicles are too hard, let them sit at room temperature for a few minutes. This softens them slightly for easier eating. You can also run warm water over the outside of the molds to help release them. This will make your berry smoothie popsicles easier to enjoy! In this blog post, we explored how to make delicious berry smoothie popsicles. We discussed ingredients, like fresh or frozen berries, and yogurt substitutes. The step-by-step guide covered blending, pouring, and freezing. I shared tips for the right texture and easy mold removal. You learned how to create tasty variations and store leftovers properly. Remember, these popsicles are fun, easy, and healthy. Experiment with flavors and enjoy your refreshing treats!

Berry Smoothie Popsicles

Beat the heat with berry smoothie popsicles, your new favorite refreshing and healthy snack! Packed with mixed berries, Greek yogurt, and just the right sweetener, these popsicles are a delicious way to cool down and boost your nutrition. Discover easy step-by-step instructions and creative flavor variations to customize your treats. Click through for the full recipe and enjoy a delightful burst of berry goodness in every bite!

Ingredients
  

1 cup mixed berries (strawberries, blueberries, raspberries)

1 banana, sliced

1 cup Greek yogurt (plain or vanilla)

1 tablespoon honey or maple syrup (adjust based on sweetness preference)

1/2 cup coconut water or almond milk

A squeeze of fresh lemon juice

Instructions
 

In a blender, combine the mixed berries, sliced banana, Greek yogurt, honey or maple syrup, coconut water or almond milk, and lemon juice.

    Blend the mixture on high speed until smooth and creamy, scraping down the sides as needed to incorporate everything thoroughly.

      Taste the mixture and adjust sweetness with more honey or syrup if necessary.

        Carefully pour the blended mixture into popsicle molds, leaving a little space at the top for expansion.

          Insert popsicle sticks into the molds and freeze for at least 4-6 hours, or until completely solid.

            To remove the popsicles, run warm water over the outside of the molds for a few seconds, then gently pull the popsicles out.

              Prep Time: 15 minutes | Total Time: 4-6 hours | Servings: 6-8 popsicles

                - Presentation Tips: Serve the popsicles on a colorful plate or stand them upright in a cup filled with ice. Garnish with additional berries or mint leaves for a refreshing touch.

                  WANT TO SAVE THIS RECIPE?

                  Leave a Comment

                  Recipe Rating