Chef Taling

  • Home
  • Recipe Index
    • Desserts
    • Dinner
    • Appetizer
    • Drinks
  • About
  • Contact
  • Privacy Policy
menu icon
go to homepage
  • Home
  • Recipe Index
    • Desserts
    • Dinner
    • Appetizer
    • Drinks
  • About
  • Contact
  • Privacy Policy

search icon
Homepage link
  • Home
  • Recipe Index
    • Desserts
    • Dinner
    • Appetizer
    • Drinks
  • About
  • Contact
  • Privacy Policy

×

Bakery-Style Apple Streusel Coffee Cake Delight

Published: Sep 20, 2025 · by Natalie · Leave a Comment

WANT TO SAVE THIS RECIPE?

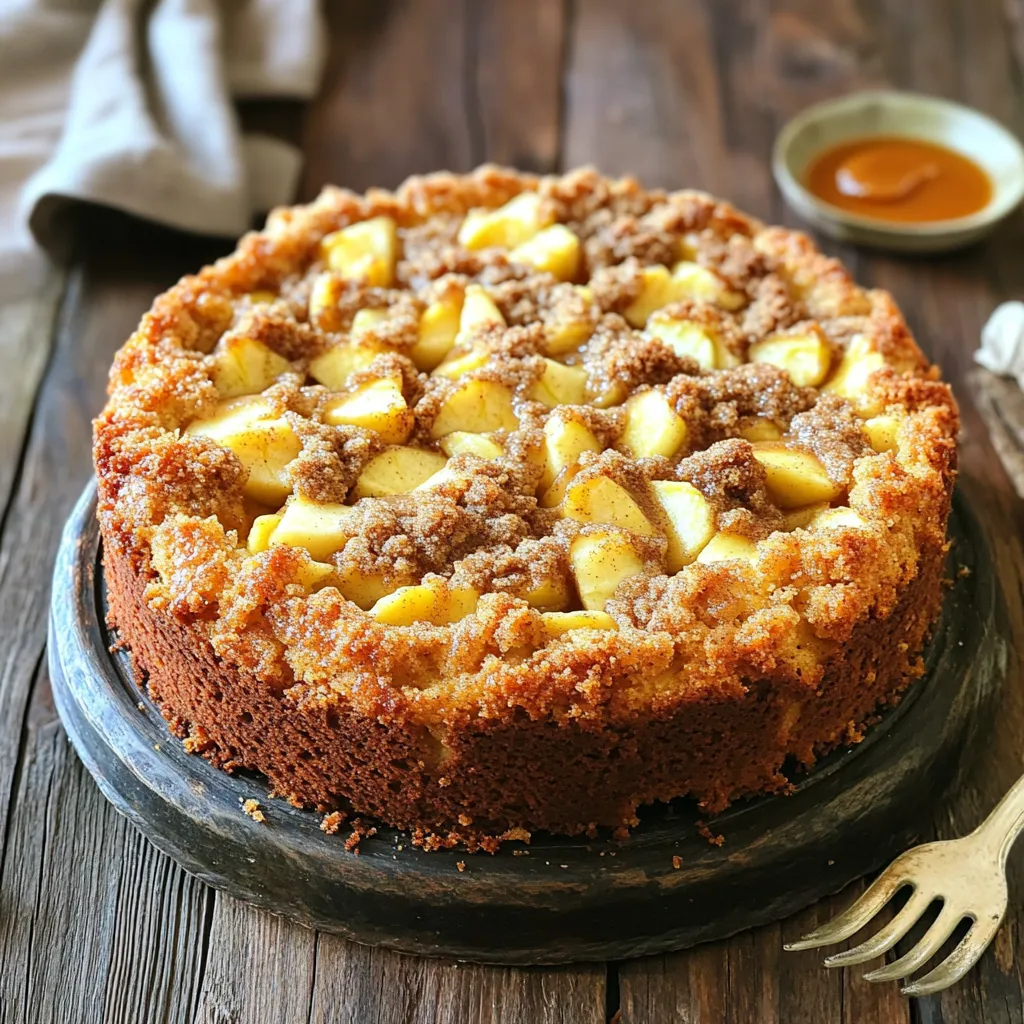
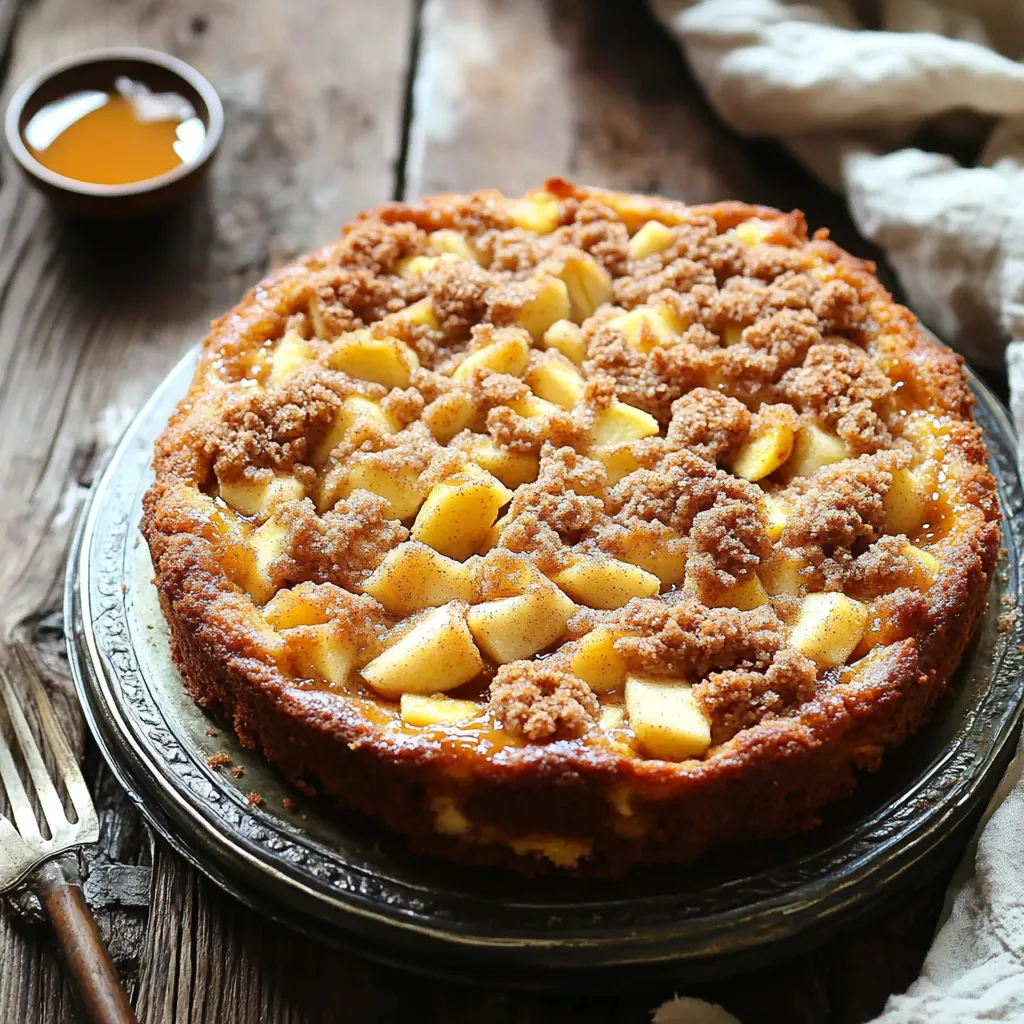
Welcome to your new favorite recipe: Bakery-Style Apple Streusel Coffee Cake Delight! You’ll love how easy it is to make this soft, moist cake with a crunchy topping. Perfect for breakfast or dessert, this cake bursts with apple flavor and warmth. Buckle up as we guide you step-by-step through making this delightful treat. Get ready to impress your friends and family with your baking skills!

- 2 medium apples, peeled, cored, and diced - 1 teaspoon lemon juice - 2 cups all-purpose flour - 1 ½ cups granulated sugar, divided - 1 tablespoon baking powder - ½ teaspoon baking soda - ½ teaspoon salt - 1 teaspoon ground cinnamon - ½ cup unsalted butter, softened - 2 large eggs - 1 teaspoon vanilla extract - 1 cup buttermilk The main ingredients for the apple streusel coffee cake create a soft and moist texture. Apples add natural sweetness and flavor. Lemon juice keeps the apples fresh and bright. Flour, sugar, and baking powder help the cake rise and hold its shape. Eggs and butter give richness. - ½ cup all-purpose flour - ½ cup brown sugar - 1 teaspoon ground cinnamon - ¼ cup unsalted butter, melted The streusel topping adds a sweet, crunchy layer. Flour and brown sugar form the base. Cinnamon gives warmth and spice. Melted butter binds everything together, creating a delicious crumb. - 1 cup chopped pecans or walnuts Adding nuts to your coffee cake gives it extra texture and flavor. Pecans and walnuts work well with apples. They add a lovely crunch and richness. Feel free to skip them if you prefer a nut-free cake. First, set your oven to 350°F (175°C). This is the perfect temperature for our coffee cake. Next, grease and flour a 9x13-inch baking pan. You can also use parchment paper for easy removal later. Now, take two medium apples. Peel, core, and dice them into small pieces. Toss the apples with one teaspoon of lemon juice in a bowl. This keeps them fresh and bright. In another large bowl, whisk together two cups of flour, one cup of granulated sugar, baking powder, baking soda, salt, and one teaspoon of cinnamon. Mixing these dry ingredients ensures they blend well in the batter. In a separate bowl, mix half a cup of softened unsalted butter with the remaining half cup of granulated sugar. Beat until it looks light and fluffy. This step adds air to your batter. Next, add two large eggs, one at a time. Mix well after each egg. Finally, stir in one teaspoon of vanilla extract for that sweet flavor. Now, it's time to bring it all together. Alternately add the dry mixture and one cup of buttermilk to the butter mixture. Start and end with the dry ingredients. Mix until just combined. Be careful not to overmix; this keeps your cake tender. Gently fold in the diced apples and chopped nuts if you want some crunch. For the streusel topping, combine half a cup of flour, half a cup of brown sugar, and one teaspoon of cinnamon in a small bowl. Add a quarter cup of melted butter and mix until crumbly. This topping adds a sweet crunch. Pour the batter into the prepared pan and smooth the top with a spatula. Sprinkle the streusel evenly over the batter. Now, place the pan in your preheated oven. Bake for 35 to 40 minutes. To check if it’s done, insert a toothpick into the center. If it comes out clean, your cake is ready! Let it cool in the pan for 10 minutes. Then, transfer it to a wire rack. This helps it cool evenly. Enjoy this warm or at room temperature! To get a soft and fluffy cake, use room-temperature ingredients. This includes butter, eggs, and buttermilk. Mixing the butter and sugar until light and fluffy helps add air. Be gentle when combining wet and dry ingredients. Overmixing can make the cake dense. Spice up the flavor with a pinch of nutmeg or ginger. You can also use different apples, like Granny Smith or Honeycrisp, for a unique taste. If you want a nutty crunch, add chopped pecans or walnuts. You can even try a swirl of caramel for extra sweetness. Store leftover cake in an airtight container. This keeps it fresh for up to three days on the counter. If you want to keep it longer, wrap it in plastic wrap and freeze it. It will stay good for about three months. When ready to eat, just thaw it at room temperature. {{image_2}} You can switch up the apples for other fruits. Peaches add a sweet, juicy twist. Berries like blueberries or raspberries give a nice tart flavor. If you use berries, reduce sugar slightly. This way, you keep the balance of sweetness and tartness. Each fruit brings its unique taste to the cake. It's fun to experiment! To make this cake gluten-free, use a gluten-free flour blend. Many brands work well for baking. Just ensure it has a good mix of starches and proteins. Also, check that your baking powder is gluten-free. The rest of the ingredients usually fit into a gluten-free diet. This way, everyone can enjoy a slice! If you're looking for a vegan option, swap eggs for flax eggs. Mix one tablespoon of flaxseed meal with two and a half tablespoons of water. Let it sit until thick. For buttermilk, combine plant milk with vinegar or lemon juice. Use coconut oil instead of butter for the fat. These swaps keep the cake moist and delicious! Store your apple streusel coffee cake at room temperature for up to three days. Keep it in an airtight container to maintain moisture. If your home is warm, it’s best to refrigerate the cake. It can last up to a week in the fridge. However, the cake may dry out a bit. Always wrap it tightly in plastic wrap or foil. You can freeze this coffee cake for up to three months. Cool the cake completely before wrapping it. Use plastic wrap and then aluminum foil to protect it from freezer burn. Label the package with the date. When you’re ready to enjoy it, thaw in the fridge overnight or at room temperature for a few hours. To reheat, preheat your oven to 350°F (175°C). Place the cake in the oven for about 10-15 minutes. This warms it through and revives the flavors. You can also use the microwave for quick reheating. Heat a slice for about 20-30 seconds, but the oven method is best for taste. Enjoy it warm for the best experience! Yes, you can use different apples. I suggest tart apples like Granny Smith or Honeycrisp. They add a nice balance to the sweet cake. If you want a sweeter taste, try Fuji or Gala apples. Just remember, different apples will change the flavor a bit. To check if the cake is done, insert a toothpick into the center. If it comes out clean, the cake is ready. If there is wet batter, it needs more time. Keep an eye on it after about 30 minutes. Baking times may vary based on your oven. If you don't have buttermilk, you can make your own. Mix 1 cup of milk with 1 tablespoon of vinegar or lemon juice. Let it sit for about 5 minutes. You can also use yogurt or milk mixed with sour cream for a similar effect. This coffee cake stays fresh for about 3 days at room temperature. If you store it in an airtight container, it can last up to a week in the fridge. For longer storage, freeze it for up to 3 months. Just thaw it in the fridge before serving. In this blog post, we explored the key ingredients for apple streusel coffee cake and detailed the steps to make it. We included tips for texture and flavor, plus different variations and storage methods. Remember, this cake is not just for breakfast; it’s great for any time. Enjoy crafting your cake and don’t be afraid to experiment. Happy baking!

Ingredients

Main Ingredients for Apple Streusel Coffee Cake

  1. 2 medium apples, peeled, cored, and diced
  2. 1 teaspoon lemon juice
  3. 2 cups all-purpose flour
  4. 1 ½ cups granulated sugar, divided
  5. 1 tablespoon baking powder
  6. ½ teaspoon baking soda
  7. ½ teaspoon salt
  8. 1 teaspoon ground cinnamon
  9. ½ cup unsalted butter, softened
  10. 2 large eggs
  11. 1 teaspoon vanilla extract
  12. 1 cup buttermilk

The main ingredients for the apple streusel coffee cake create a soft and moist texture. Apples add natural sweetness and flavor. Lemon juice keeps the apples fresh and bright. Flour, sugar, and baking powder help the cake rise and hold its shape. Eggs and butter give richness.

Ingredients for Streusel Topping

  1. ½ cup all-purpose flour
  2. ½ cup brown sugar
  3. 1 teaspoon ground cinnamon
  4. ¼ cup unsalted butter, melted

The streusel topping adds a sweet, crunchy layer. Flour and brown sugar form the base. Cinnamon gives warmth and spice. Melted butter binds everything together, creating a delicious crumb.

Optional Add-ins (e.g., nuts)

  1. 1 cup chopped pecans or walnuts

Adding nuts to your coffee cake gives it extra texture and flavor. Pecans and walnuts work well with apples. They add a lovely crunch and richness. Feel free to skip them if you prefer a nut-free cake.

Step-by-Step Instructions

Prepping the Oven and Baking Pan

First, set your oven to 350°F (175°C). This is the perfect temperature for our coffee cake. Next, grease and flour a 9x13-inch baking pan. You can also use parchment paper for easy removal later.

Preparing the Apples and Mixing Dry Ingredients

Now, take two medium apples. Peel, core, and dice them into small pieces. Toss the apples with one teaspoon of lemon juice in a bowl. This keeps them fresh and bright. In another large bowl, whisk together two cups of flour, one cup of granulated sugar, baking powder, baking soda, salt, and one teaspoon of cinnamon. Mixing these dry ingredients ensures they blend well in the batter.

Creaming Butter and Incorporating Eggs

In a separate bowl, mix half a cup of softened unsalted butter with the remaining half cup of granulated sugar. Beat until it looks light and fluffy. This step adds air to your batter. Next, add two large eggs, one at a time. Mix well after each egg. Finally, stir in one teaspoon of vanilla extract for that sweet flavor.

Combining Everything into the Batter

Now, it's time to bring it all together. Alternately add the dry mixture and one cup of buttermilk to the butter mixture. Start and end with the dry ingredients. Mix until just combined. Be careful not to overmix; this keeps your cake tender. Gently fold in the diced apples and chopped nuts if you want some crunch.

Making the Streusel and Assembling the Cake

For the streusel topping, combine half a cup of flour, half a cup of brown sugar, and one teaspoon of cinnamon in a small bowl. Add a quarter cup of melted butter and mix until crumbly. This topping adds a sweet crunch. Pour the batter into the prepared pan and smooth the top with a spatula. Sprinkle the streusel evenly over the batter.

Baking Time and Cooling Tips

Now, place the pan in your preheated oven. Bake for 35 to 40 minutes. To check if it’s done, insert a toothpick into the center. If it comes out clean, your cake is ready! Let it cool in the pan for 10 minutes. Then, transfer it to a wire rack. This helps it cool evenly. Enjoy this warm or at room temperature!

Tips & Tricks

Achieving the Perfect Cake Texture

To get a soft and fluffy cake, use room-temperature ingredients. This includes butter, eggs, and buttermilk. Mixing the butter and sugar until light and fluffy helps add air. Be gentle when combining wet and dry ingredients. Overmixing can make the cake dense.

Flavor Enhancements and Variations

Spice up the flavor with a pinch of nutmeg or ginger. You can also use different apples, like Granny Smith or Honeycrisp, for a unique taste. If you want a nutty crunch, add chopped pecans or walnuts. You can even try a swirl of caramel for extra sweetness.

Best Practices for Storing Leftovers

Store leftover cake in an airtight container. This keeps it fresh for up to three days on the counter. If you want to keep it longer, wrap it in plastic wrap and freeze it. It will stay good for about three months. When ready to eat, just thaw it at room temperature.

Variations

Different Fruit Options

You can switch up the apples for other fruits. Peaches add a sweet, juicy twist. Berries like blueberries or raspberries give a nice tart flavor. If you use berries, reduce sugar slightly. This way, you keep the balance of sweetness and tartness. Each fruit brings its unique taste to the cake. It's fun to experiment!

Gluten-Free Adaptations

To make this cake gluten-free, use a gluten-free flour blend. Many brands work well for baking. Just ensure it has a good mix of starches and proteins. Also, check that your baking powder is gluten-free. The rest of the ingredients usually fit into a gluten-free diet. This way, everyone can enjoy a slice!

Vegan Substitutes for Key Ingredients

If you're looking for a vegan option, swap eggs for flax eggs. Mix one tablespoon of flaxseed meal with two and a half tablespoons of water. Let it sit until thick. For buttermilk, combine plant milk with vinegar or lemon juice. Use coconut oil instead of butter for the fat. These swaps keep the cake moist and delicious!

Storage Info

Storing the Cake: Room Temperature vs. Refrigerator

Store your apple streusel coffee cake at room temperature for up to three days. Keep it in an airtight container to maintain moisture. If your home is warm, it’s best to refrigerate the cake. It can last up to a week in the fridge. However, the cake may dry out a bit. Always wrap it tightly in plastic wrap or foil.

Freezing the Coffee Cake for Long-term Storage

You can freeze this coffee cake for up to three months. Cool the cake completely before wrapping it. Use plastic wrap and then aluminum foil to protect it from freezer burn. Label the package with the date. When you’re ready to enjoy it, thaw in the fridge overnight or at room temperature for a few hours.

Reheating Tips for Best Taste

To reheat, preheat your oven to 350°F (175°C). Place the cake in the oven for about 10-15 minutes. This warms it through and revives the flavors. You can also use the microwave for quick reheating. Heat a slice for about 20-30 seconds, but the oven method is best for taste. Enjoy it warm for the best experience!

FAQs

Can I use other types of apples?

Yes, you can use different apples. I suggest tart apples like Granny Smith or Honeycrisp. They add a nice balance to the sweet cake. If you want a sweeter taste, try Fuji or Gala apples. Just remember, different apples will change the flavor a bit.

How do I know when the cake is done baking?

To check if the cake is done, insert a toothpick into the center. If it comes out clean, the cake is ready. If there is wet batter, it needs more time. Keep an eye on it after about 30 minutes. Baking times may vary based on your oven.

What can I substitute for buttermilk?

If you don't have buttermilk, you can make your own. Mix 1 cup of milk with 1 tablespoon of vinegar or lemon juice. Let it sit for about 5 minutes. You can also use yogurt or milk mixed with sour cream for a similar effect.

How long does this coffee cake stay fresh?

This coffee cake stays fresh for about 3 days at room temperature. If you store it in an airtight container, it can last up to a week in the fridge. For longer storage, freeze it for up to 3 months. Just thaw it in the fridge before serving.

In this blog post, we explored the key ingredients for apple streusel coffee cake and detailed the steps to make it. We included tips for texture and flavor, plus different variations and storage methods. Remember, this cake is not just for breakfast; it’s great for any time. Enjoy crafting your cake and don’t be afraid to experiment. Happy baking!

- 2 medium apples, peeled, cored, and diced - 1 teaspoon lemon juice - 2 cups all-purpose flour - 1 ½ cups granulated sugar, divided - 1 tablespoon baking powder - ½ teaspoon baking soda - ½ teaspoon salt - 1 teaspoon ground cinnamon - ½ cup unsalted butter, softened - 2 large eggs - 1 teaspoon vanilla extract - 1 cup buttermilk The main ingredients for the apple streusel coffee cake create a soft and moist texture. Apples add natural sweetness and flavor. Lemon juice keeps the apples fresh and bright. Flour, sugar, and baking powder help the cake rise and hold its shape. Eggs and butter give richness. - ½ cup all-purpose flour - ½ cup brown sugar - 1 teaspoon ground cinnamon - ¼ cup unsalted butter, melted The streusel topping adds a sweet, crunchy layer. Flour and brown sugar form the base. Cinnamon gives warmth and spice. Melted butter binds everything together, creating a delicious crumb. - 1 cup chopped pecans or walnuts Adding nuts to your coffee cake gives it extra texture and flavor. Pecans and walnuts work well with apples. They add a lovely crunch and richness. Feel free to skip them if you prefer a nut-free cake. First, set your oven to 350°F (175°C). This is the perfect temperature for our coffee cake. Next, grease and flour a 9x13-inch baking pan. You can also use parchment paper for easy removal later. Now, take two medium apples. Peel, core, and dice them into small pieces. Toss the apples with one teaspoon of lemon juice in a bowl. This keeps them fresh and bright. In another large bowl, whisk together two cups of flour, one cup of granulated sugar, baking powder, baking soda, salt, and one teaspoon of cinnamon. Mixing these dry ingredients ensures they blend well in the batter. In a separate bowl, mix half a cup of softened unsalted butter with the remaining half cup of granulated sugar. Beat until it looks light and fluffy. This step adds air to your batter. Next, add two large eggs, one at a time. Mix well after each egg. Finally, stir in one teaspoon of vanilla extract for that sweet flavor. Now, it's time to bring it all together. Alternately add the dry mixture and one cup of buttermilk to the butter mixture. Start and end with the dry ingredients. Mix until just combined. Be careful not to overmix; this keeps your cake tender. Gently fold in the diced apples and chopped nuts if you want some crunch. For the streusel topping, combine half a cup of flour, half a cup of brown sugar, and one teaspoon of cinnamon in a small bowl. Add a quarter cup of melted butter and mix until crumbly. This topping adds a sweet crunch. Pour the batter into the prepared pan and smooth the top with a spatula. Sprinkle the streusel evenly over the batter. Now, place the pan in your preheated oven. Bake for 35 to 40 minutes. To check if it’s done, insert a toothpick into the center. If it comes out clean, your cake is ready! Let it cool in the pan for 10 minutes. Then, transfer it to a wire rack. This helps it cool evenly. Enjoy this warm or at room temperature! To get a soft and fluffy cake, use room-temperature ingredients. This includes butter, eggs, and buttermilk. Mixing the butter and sugar until light and fluffy helps add air. Be gentle when combining wet and dry ingredients. Overmixing can make the cake dense. Spice up the flavor with a pinch of nutmeg or ginger. You can also use different apples, like Granny Smith or Honeycrisp, for a unique taste. If you want a nutty crunch, add chopped pecans or walnuts. You can even try a swirl of caramel for extra sweetness. Store leftover cake in an airtight container. This keeps it fresh for up to three days on the counter. If you want to keep it longer, wrap it in plastic wrap and freeze it. It will stay good for about three months. When ready to eat, just thaw it at room temperature. {{image_2}} You can switch up the apples for other fruits. Peaches add a sweet, juicy twist. Berries like blueberries or raspberries give a nice tart flavor. If you use berries, reduce sugar slightly. This way, you keep the balance of sweetness and tartness. Each fruit brings its unique taste to the cake. It's fun to experiment! To make this cake gluten-free, use a gluten-free flour blend. Many brands work well for baking. Just ensure it has a good mix of starches and proteins. Also, check that your baking powder is gluten-free. The rest of the ingredients usually fit into a gluten-free diet. This way, everyone can enjoy a slice! If you're looking for a vegan option, swap eggs for flax eggs. Mix one tablespoon of flaxseed meal with two and a half tablespoons of water. Let it sit until thick. For buttermilk, combine plant milk with vinegar or lemon juice. Use coconut oil instead of butter for the fat. These swaps keep the cake moist and delicious! Store your apple streusel coffee cake at room temperature for up to three days. Keep it in an airtight container to maintain moisture. If your home is warm, it’s best to refrigerate the cake. It can last up to a week in the fridge. However, the cake may dry out a bit. Always wrap it tightly in plastic wrap or foil. You can freeze this coffee cake for up to three months. Cool the cake completely before wrapping it. Use plastic wrap and then aluminum foil to protect it from freezer burn. Label the package with the date. When you’re ready to enjoy it, thaw in the fridge overnight or at room temperature for a few hours. To reheat, preheat your oven to 350°F (175°C). Place the cake in the oven for about 10-15 minutes. This warms it through and revives the flavors. You can also use the microwave for quick reheating. Heat a slice for about 20-30 seconds, but the oven method is best for taste. Enjoy it warm for the best experience! Yes, you can use different apples. I suggest tart apples like Granny Smith or Honeycrisp. They add a nice balance to the sweet cake. If you want a sweeter taste, try Fuji or Gala apples. Just remember, different apples will change the flavor a bit. To check if the cake is done, insert a toothpick into the center. If it comes out clean, the cake is ready. If there is wet batter, it needs more time. Keep an eye on it after about 30 minutes. Baking times may vary based on your oven. If you don't have buttermilk, you can make your own. Mix 1 cup of milk with 1 tablespoon of vinegar or lemon juice. Let it sit for about 5 minutes. You can also use yogurt or milk mixed with sour cream for a similar effect. This coffee cake stays fresh for about 3 days at room temperature. If you store it in an airtight container, it can last up to a week in the fridge. For longer storage, freeze it for up to 3 months. Just thaw it in the fridge before serving. In this blog post, we explored the key ingredients for apple streusel coffee cake and detailed the steps to make it. We included tips for texture and flavor, plus different variations and storage methods. Remember, this cake is not just for breakfast; it’s great for any time. Enjoy crafting your cake and don’t be afraid to experiment. Happy baking!

Bakery-Style Apple Streusel Coffee Cake

Indulge in the delightful flavors of Bakery-Style Apple Streusel Coffee Cake with this easy-to-follow recipe! Perfect for breakfast or a sweet treat, this cake combines juicy apples and a crunchy streusel topping for a heavenly experience. With simple ingredients and straightforward steps, you'll have a deliciously moist cake ready in no time. Click through to explore the full recipe and impress your family with this tasty dessert!
Print Recipe Pin Recipe

Ingredients
  

2 medium apples, peeled, cored, and diced

1 teaspoon lemon juice

2 cups all-purpose flour

1 ½ cups granulated sugar, divided

1 tablespoon baking powder

½ teaspoon baking soda

½ teaspoon salt

1 teaspoon ground cinnamon

½ cup unsalted butter, softened

2 large eggs

1 teaspoon vanilla extract

1 cup buttermilk

1 cup chopped pecans or walnuts (optional)

Streusel Topping:

½ cup all-purpose flour

½ cup brown sugar

1 teaspoon ground cinnamon

¼ cup unsalted butter, melted

Instructions
 

Preheat the Oven: Preheat your oven to 350°F (175°C). Grease and flour a 9x13-inch baking pan or line it with parchment paper.

    Prepare the Apples: In a mixing bowl, toss the diced apples with lemon juice. Set aside.

      Mix the Dry Ingredients: In a large bowl, whisk together 2 cups of flour, 1 cup of granulated sugar, baking powder, baking soda, salt, and 1 teaspoon of cinnamon.

        Cream Butter and Sugar: In a separate bowl, mix the softened butter and remaining ½ cup of granulated sugar until light and fluffy. Add the eggs, one at a time, mixing well after each addition. Stir in vanilla extract.

          Combine Ingredients: Alternately add the dry mixture and buttermilk to the butter mixture, starting and ending with the dry ingredients. Mix until just combined, being careful not to overmix.

            Fold in Apples and Nuts: Gently fold in the prepared apples and chopped nuts (if using) into the batter.

              Prepare the Streusel Topping: In a small bowl, combine ½ cup flour, brown sugar, and cinnamon. Mix in the melted butter until crumbly.

                Assemble the Cake: Pour the batter into the prepared baking pan, and smooth the top with a spatula. Sprinkle the streusel topping evenly over the batter.

                  Bake: Bake in the preheated oven for 35-40 minutes, or until a toothpick inserted into the center comes out clean.

                    Cool and Serve: Allow the coffee cake to cool in the pan for 10 minutes before transferring to a wire rack. Slice and serve warm or at room temperature.

                      Prep Time: 20 minutes | Total Time: 1 hour | Servings: 12

                        Related Recipes

                        • - 1 cup pumpkin puree - 1/2 cup Greek yogurt - 2 large eggs - 1/2 cup honey or maple syrup - 1 teaspoon vanilla extract - 1 cup whole wheat flour - 1/2 cup rolled oats - 1/4 cup vanilla protein powder - 1 teaspoon baking powder - 1 teaspoon baking soda - 1 teaspoon pumpkin pie spice - 1/2 teaspoon salt - 1/2 cup dark chocolate chips Each ingredient plays a key role. Pumpkin puree gives moisture and flavor. It adds vitamins like A and C. Greek yogurt brings protein and creaminess. It helps the muffins stay soft. Eggs bind the mixture and add protein. Honey or maple syrup sweetens. They also add moisture and flavor. Whole wheat flour boosts fiber and nutrients. Rolled oats add heartiness and texture. Vanilla protein powder increases protein, making these muffins filling. Baking powder and baking soda help them rise. Pumpkin pie spice gives warmth and that cozy fall taste. Lastly, dark chocolate chips add sweetness and a delicious contrast to the pumpkin. If you want to change the sweetener, you can use agave syrup or brown sugar. These options work well and taste great. For the protein powder, you can switch to chocolate or plant-based protein. Both will still give you that protein boost while adding a different flavor twist. Start by preheating your oven to 350°F (175°C). Line your muffin tin with paper liners or grease it lightly. In a large bowl, mix these wet ingredients: - 1 cup pumpkin puree - 1/2 cup Greek yogurt - 2 large eggs - 1/2 cup honey or maple syrup - 1 teaspoon vanilla extract Stir these until smooth and creamy. Make sure there are no lumps. In a separate bowl, combine the dry ingredients: - 1 cup whole wheat flour - 1/2 cup rolled oats - 1/4 cup vanilla protein powder - 1 teaspoon baking powder - 1 teaspoon baking soda - 1 teaspoon pumpkin pie spice - 1/2 teaspoon salt Whisk these dry ingredients together until well mixed. This helps to distribute the baking powder evenly. Now, slowly add the dry mix to the wet mixture. Stir gently until just combined. Be careful not to overmix; a few lumps are okay. Fold in 1/2 cup dark chocolate chips. They add great flavor! Next, fill each muffin cup about 3/4 full with batter. This allows room for the muffins to rise. Bake in your preheated oven for 18-20 minutes. Check if they are done by inserting a toothpick into the center. If it comes out clean, they are ready! Once baked, let the muffins cool in the tin for about 5 minutes. This helps them firm up. Then, transfer them to a wire rack to cool completely. For serving, I like to present them on a wooden board. Drizzle a little honey over the top and sprinkle some extra chocolate chips. Serve warm or at room temperature for the best taste. Enjoy your delicious creation! To make great muffins, avoid overmixing. Mix just until the dry and wet ingredients meet. A few lumps are okay. Overmixing makes muffins tough. For even chocolate chip distribution, fold them in gently. This keeps them from sinking. You want every bite to have a bit of chocolate. Spices can boost the flavor of your muffins. Consider adding cinnamon or nutmeg. These spices complement pumpkin well. You can also mix in some chopped nuts for extra crunch. To ripen bananas, place them in a paper bag. The bag traps ethylene gas, speeding up ripening. Use ripe bananas for sweeter muffins. They also add moisture. {{image_2}} You can make these muffins even more fun! Try adding nuts or fruits to the batter. Walnuts or pecans give a nice crunch. Chopped apples or bananas add more sweetness and moisture. Just remember to keep the total amount balanced with the pumpkin. Switching up the protein powder flavor is another great idea. You can use chocolate protein powder for a richer taste. Vanilla or even a spice-flavored powder can add a twist, too. Just think about what flavors you enjoy most! If you need gluten-free muffins, it's easy to adapt this recipe. Simply substitute whole wheat flour with a gluten-free blend. Make sure it has xanthan gum to help bind the ingredients. You can also use almond flour for a nutty taste. For vegan muffins, swap eggs for flax eggs. Mix one tablespoon of flaxseed meal with three tablespoons of water. Let it sit for five minutes to thicken. Use plant-based yogurt instead of Greek yogurt, and maple syrup works great for sweetening. With these changes, you can enjoy delicious muffins that fit your diet! To keep your Pumpkin Chocolate Chip Protein Muffins fresh, store them in the fridge. Place them in an airtight container. This way, they stay moist and tasty for up to five days. If you want to store them longer, freezing is a great choice. Wrap each muffin tightly in plastic wrap. Then, place them in a freezer bag. They can last for up to three months. When you want one, just take it out to thaw. Reheating your muffins helps bring back their warm, soft texture. For the best results, use the oven. Preheat it to 350°F (175°C). Place the muffin on a baking sheet for about 10 minutes. This method keeps them fluffy. If you are short on time, the microwave works too. Heat each muffin for about 15-20 seconds. Just be careful not to overheat; you want them warm, not hot! Can I use regular flour instead of whole wheat? Yes, you can use regular all-purpose flour. Whole wheat flour adds more fiber and nutrients. It also gives a hearty texture. If you swap, the muffins may be lighter. How long can I store these muffins? You can store these muffins for about 4 to 5 days. Keep them in an airtight container at room temperature. For longer storage, freeze them. They stay good for up to 3 months in the freezer. How many calories per muffin? Each muffin has about 150 calories. This varies based on the exact ingredients you use. They offer protein, fiber, and healthy carbs. Are these muffins suitable for meal prep? Yes, these muffins are great for meal prep. They are easy to make in bulk. You can grab one for breakfast or a snack. They stay fresh for days, making them perfect for busy weeks. What can I do if my muffins don’t rise? If your muffins don’t rise, check the baking powder and baking soda. These are key to making muffins fluffy. Make sure they are fresh. Overmixing the batter can also cause them to not rise. How can I make muffins more moist? To make your muffins more moist, use Greek yogurt or add extra pumpkin puree. Both help keep them soft. Avoid overbaking, as this can dry them out. Keep an eye on them in the oven! Now you have all the tools to make delicious muffins. You learned the key ingredients and their benefits. We discussed simple substitutions and alternatives to fit your needs. I guided you through each step, from preparation to baking and cooling. You now know tricks to perfect your muffins and explore fun variations. Remember to store them correctly and reheat for the best taste. Enjoy baking and sharing these muffins with friends and family! They’re sure to be a hit!
                          Pumpkin Chocolate Chip Protein Muffins Simple Delight
                        • - 1 cup graham cracker crumbs - 4 tablespoons unsalted butter, melted - 8 oz cream cheese, softened - 1/2 cup powdered sugar - 1 teaspoon vanilla extract The base of our No-Bake S’mores Cheesecake Cups starts with graham cracker crumbs. These give a sweet and crunchy texture. Next, we add melted unsalted butter. This helps bind the crumbs and creates a rich flavor. Cream cheese is key for the cheesecake filling. It provides a creamy and smooth texture. Powdered sugar adds sweetness without grittiness. Don't forget the vanilla extract; it brightens the flavor and adds depth. - 1 cup whipped cream (or whipped topping) - 1/2 cup mini marshmallows - 1/2 cup chocolate chips (semi-sweet or milk chocolate) - Extra mini marshmallows and chocolate for garnish Toppings make this dessert fun and appealing. Whipped cream adds fluffiness and lightness. Mini marshmallows give that classic s'mores touch. Chocolate chips provide rich, melted chocolate goodness. For garnish, you can add extra mini marshmallows and chocolate pieces on top. - Mixing bowls - Serving cups or glasses - Kitchen torch (optional) You will need mixing bowls to combine your ingredients. Serving cups or glasses are perfect for layering your cheesecake. A kitchen torch is optional but fun for toasting the marshmallows on top. This adds a nice, smoky flavor that takes it to the next level. - Combine graham cracker crumbs and melted butter in a medium bowl. - Mix until the crumbs are evenly coated. This forms a tasty base for your cups. - Add the graham cracker mixture to your serving cups. - Press down gently to form a solid crust. This step is key for holding the layers above. - In a mixing bowl, beat together softened cream cheese and powdered sugar until smooth. - Mix in the vanilla extract for a fragrant touch. This adds great flavor to your cheesecake. - Gently fold in the whipped cream to the cream cheese mixture. - This makes the filling light and fluffy. Be careful not to deflate the mixture. - Spoon a layer of the cheesecake filling onto the graham cracker crust in each cup. - Top with mini marshmallows and some chocolate chips for sweetness. - Repeat layers until the cups are filled. This creates a delightful mix of flavors. - Refrigerate the cups for at least 3 hours or until set. - Before serving, you can torch the mini marshmallows for a toasted effect. - Garnish with extra chocolate pieces for a final touch. This will impress your guests! To make your cheesecake smooth, ensure the cream cheese is softened. It should feel like a cloud. If it is cold, your filling will be lumpy. This step is key for a creamy bite. Next, when you fold in the whipped cream, do it gently. This keeps the air in, making it light and fluffy. Over-mixing can make it dense, which we want to avoid. Using clear cups for your s'mores cheesecake cups adds a nice touch. Guests can see the layers, and it looks inviting. I also suggest serving with extra chocolate drizzle. A quick drizzle makes each bite feel special. You can use a squeeze bottle for precision. One common mistake is over-mixing the filling. This can lead to a heavy texture. Mix just until smooth. Another mistake is not chilling long enough. The cups need at least three hours to set. If you rush this step, the layers may run together. Trust the chill! {{image_2}} You can switch things up with fun flavors. A pumpkin spice version is perfect for fall. Just add pumpkin puree and some cinnamon to the cheesecake mix. It gives a warm, cozy taste. Another great choice is a peanut butter s'mores variation. Mix creamy peanut butter into the cheesecake filling. This adds a rich and nutty twist. You can even top it with chopped peanuts for extra crunch. If you need gluten-free options, use gluten-free graham crackers. They make a great base for the cheesecake. Just make sure to check the label for gluten-free labeling. For those who prefer vegan options, substitute cream cheese with vegan cream cheese. Many brands taste just as good. You can also use coconut whipped cream for a light and fluffy texture. You can enhance your cups with seasonal flavors. In summer, add fresh fruit layers like strawberries or blueberries. They bring a refreshing touch and vibrant color. During fall, consider adding dried fruits or nuts. Chopped pecans or cranberries make each bite even more delightful. The mix of flavors and textures will impress everyone. To keep your No-Bake S’mores Cheesecake Cups fresh, store them in the fridge. Use an airtight container to seal them tight. This helps to prevent any odors from your fridge affecting the taste. These cheesecake cups last for about 3 to 5 days in the fridge. Enjoy them within this time for the best taste and texture. After 5 days, they may not taste as fresh or creamy. You can freeze cheesecake cups, but it’s not the best choice. Freezing can change their creamy texture. If you still want to freeze, wrap each cup well in plastic wrap. Place them in a freezer-safe container. Thaw in the fridge before serving. To help your cheesecake set right, chill it well. I recommend at least 3 hours in the fridge. The longer it chills, the firmer it gets. Make sure to cover the cups with plastic wrap. This keeps moisture in and prevents the top from drying out. Yes, you can make these cups a day in advance. Just prepare and assemble them, then chill overnight. This gives the flavors time to meld. If you want, you can add the toppings just before serving. This keeps them fresh and tasty. You can use cookies, like digestive biscuits or vanilla wafers, for the crust. Crushed pretzels add a salty crunch. For a gluten-free option, try gluten-free graham crackers. Just crush them the same way and mix with melted butter. It's best to torch the marshmallows just before serving. This keeps them soft and fluffy. If you torch them too early, they may get hard and lose that nice toasted taste. You can just add extra marshmallows on top for a fun look. This recipe makes 6 to 8 cups, depending on cup size. For a good portion, fill each cup about three-quarters full. This way, everyone gets a nice treat without feeling too full. Perfect for sharing at a party! These cheesecake cups are easy to make and full of flavor. You learned about the key ingredients like graham crackers and cream cheese. The step-by-step guide helped you layer delicious flavors, while tips ensured a perfect texture. You can even try different variations to match your taste. Remember, these cups store well and can last a few days. With a little creativity, you can impress anyone with this treat. Enjoy making these delightful desserts, and let your kitchen be filled with joy!
                          No-Bake S’mores Cheesecake Cups Delightful Treat
                        • - 2 cups all-purpose flour - 1 teaspoon baking powder - 1/2 teaspoon baking soda - 1/4 teaspoon salt - 1 teaspoon ground cinnamon For the base, we start with the dry ingredients. All-purpose flour gives the bars their structure. Baking powder and baking soda help them rise. Salt enhances the flavors and balances sweetness. Cinnamon adds warmth and spice, making each bite comforting and delicious. - 1/2 cup unsalted butter, softened - 1 cup brown sugar, packed - 1/2 cup granulated sugar - 2 large eggs - 2 teaspoons vanilla extract Next, we move to the wet ingredients. Softened butter creates a rich base. Brown sugar adds moisture and deep flavor, while granulated sugar sweetens without overpowering. Eggs bind everything together, and vanilla adds a lovely aroma. These ingredients blend to create a smooth batter. - 1 1/2 cups peeled and diced apples (about 2 medium apples) - 1/2 cup chopped walnuts (optional) - 1 cup powdered sugar (for glaze) - 2 tablespoons maple syrup Finally, we have the stars of our recipe. Diced apples bring freshness and texture. Walnuts add a crunchy touch, but they are optional. For the glaze, powdered sugar mixes with maple syrup to create a sweet topping. This glaze ties everything together, making the bars shine. First, preheat your oven to 350°F (175°C). This gets your oven ready for baking. Next, grease a 9x13-inch baking pan. Use butter or cooking spray. Then, line the pan with parchment paper. Leave some paper hanging over the edges. This makes it easy to lift out the bars later. In a medium bowl, whisk together the dry ingredients. Combine 2 cups of all-purpose flour, 1 teaspoon of baking powder, 1/2 teaspoon of baking soda, 1/4 teaspoon of salt, and 1 teaspoon of ground cinnamon. Make sure the mix is even. This blend gives your bars great flavor and helps them rise. In a large bowl, cream 1/2 cup of softened unsalted butter with 1 cup of packed brown sugar and 1/2 cup of granulated sugar. Mix until light and fluffy. This takes about 3 to 4 minutes. The air you whip in gives the bars a nice texture. Now, add 2 large eggs, one at a time. Mix well after each egg. Then, stir in 2 teaspoons of vanilla extract. After that, gradually add your dry mix to the wet ingredients. Blend until just combined. Do not over-mix; this keeps your bars tender. Finally, fold in 1 1/2 cups of peeled and diced apples and 1/2 cup of chopped walnuts, if you like. Pour the batter into your prepared baking pan. Spread it out evenly. Bake for 25 to 30 minutes. To check if they are done, insert a toothpick into the center. If it comes out clean, the bars are ready. While the bars bake, whisk together 1 cup of powdered sugar and 2 tablespoons of maple syrup in a small bowl. Mix until smooth. This glaze adds a sweet touch to your apple bars. When the bars cool, drizzle the glaze over them for that perfect finish. To get the best texture, avoid over-mixing the batter. When you mix too much, the bars can turn out tough. Mix until just combined. This keeps the bars soft and chewy. The creaming step is key. Cream the butter and sugars together until light and fluffy. This step adds air and helps the bars rise nicely. For a lovely presentation, arrange the bars on a platter. Sprinkle some cinnamon or chopped walnuts on top. You can also add a small bowl of extra maple syrup for drizzling. Pair these bars with a warm cup of tea or coffee. A scoop of vanilla ice cream makes a great side too. You can add fun flavors to the batter. Try mixing in spices like nutmeg or ginger for a warm taste. Walnuts add a nice crunch, but you can also use pecans or almonds. If you want more fruit, toss in some raisins or dried cranberries. These little additions make the bars even more delicious. {{image_2}} The best apples for baking include Granny Smith, Honeycrisp, and Fuji. Granny Smith apples give a nice tart flavor. Honeycrisp apples are sweet and juicy. Fuji apples provide a great crunch. Using a mix of these apples can enhance the taste. Always choose firm apples. Soft apples can make your bars mushy. If you want to switch up the glaze, consider using cream cheese frosting. Mix cream cheese, butter, and powdered sugar for a rich taste. You can also use a simple lemon glaze. Just mix lemon juice and powdered sugar. This gives a bright flavor. Try a caramel sauce if you want something sweet and sticky. Each glaze adds its own twist to the bars. Walnuts add a nice crunch, but you can use other nuts too. Pecans, almonds, or hazelnuts work well. If you love chocolate, mix in chocolate chips. Dried fruits like raisins or cranberries also add great flavor. These options let you create your own unique apple bars. Feel free to experiment and find your favorite mix. Store your maple glazed apple bars at room temperature for up to three days. Keep them in an airtight container to keep them moist. If your kitchen is warm, refrigerate them to prevent spoilage. But, note that refrigeration can make them a bit dense. To freeze the bars, let them cool completely first. Wrap each bar in plastic wrap. Then, place them in a freezer bag or container. They can stay fresh in the freezer for up to three months. When you want to eat one, thaw it overnight in the fridge. Reheat it in the microwave for about 20 seconds for a warm treat. These delicious bars stay fresh for about three days at room temperature. In the fridge, they last about a week. If you freeze them, they can hold their flavor and texture for three months. Enjoy them while they are fresh for the best taste! Yes, you can use other sweeteners. Brown sugar gives a rich flavor. You might try coconut sugar for a similar taste. Honey or maple syrup can work too, but adjust the liquid in the recipe. Just keep in mind that each sweetener changes the final taste and texture. The best apples are firm and sweet. I recommend Honeycrisp, Granny Smith, or Fuji apples. Honeycrisp adds sweetness and crunch. Granny Smith gives a nice tartness. Fuji is juicy and sweet. Mixing two types can add depth to the flavor. Yes, you can! Use a gluten-free all-purpose flour blend. Look for one with xanthan gum for better texture. Almond flour or oat flour can also work. Just remember that baking time might change slightly. Check the bars after 25 minutes. Insert a toothpick into the center. If it comes out clean, they are done. The edges should look golden brown. If it’s still wet, bake a few more minutes, then check again. In this post, we covered the key ingredients and steps to make delicious apple bars. We discussed dry and wet ingredients, baking tips, and ways to enhance flavor. You learned about different apple varieties and glaze options. Enjoy experimenting with the recipe and making it your own. Baking is fun and rewarding. Share your tasty results with friends and family!
                          Maple Glazed Apple Bars Irresistible Flavor Delight
                        • To make Cottage Cheese Chocolate Mousse, you need simple ingredients that pack a punch. Here’s what you’ll need: - 1 cup cottage cheese (low-fat or fat-free) - 1/4 cup unsweetened cocoa powder - 1/4 cup honey or maple syrup - 1/4 cup Greek yogurt - 1 teaspoon vanilla extract - 1/4 cup dark chocolate chips (dairy-free if needed) - Pinch of salt - Fresh berries for garnish (optional) Each ingredient plays a role in making this mousse rich and flavorful. The cottage cheese adds protein and creaminess, while cocoa powder brings that deep chocolate flavor. Honey or maple syrup sweetens the mix, balancing the cocoa's bitterness. Greek yogurt contributes a smooth texture, and vanilla extract enhances the overall taste. Dark chocolate chips add a delightful melt-in-your-mouth experience. Finally, a pinch of salt rounds out the flavors. Fresh berries can add a pop of color and freshness when serving. Gather these ingredients, and you’re ready to whip up a high-protein dessert that satisfies your chocolate cravings! - Combining Ingredients in Blender Start by adding the cottage cheese, cocoa powder, honey (or maple syrup), Greek yogurt, vanilla extract, and a pinch of salt into your blender. Blend these ingredients until they are smooth and creamy. Make sure to scrape down the sides of the blender. This helps mix everything well. - Melting Dark Chocolate Chips Next, take your dark chocolate chips and place them in a microwave-safe bowl. Heat them in the microwave in 30-second bursts. Stir the chocolate in between. Keep going until it is fully melted and smooth. Let it cool for a moment before using it. - Folding Chocolate into Mousse Gently fold the melted chocolate into the cottage cheese mixture. Use a spatula to mix carefully. You want to keep it light and airy, so don’t stir too hard. Make sure the chocolate is mixed in well. - Spoon into Serving Glasses Once your mixture is ready, take it and spoon it into serving glasses or bowls. You can use any glass you like. Make sure to leave some space at the top for garnishing later. - Refrigeration Time Now, place the glasses in the fridge. Let the mousse chill for at least 30 minutes. This helps it set and become firmer. The longer it sits, the better the flavors meld together, so feel free to wait longer if you can! To get the best mousse, blending is key. Use a blender or food processor. This helps mix everything well. Start with the cottage cheese, cocoa, honey, Greek yogurt, and vanilla. Blend until smooth. Scrape down the sides to get all the lumps out. Next, melt the dark chocolate chips. Do this in the microwave at 30-second intervals. Stir in between each interval. This keeps the chocolate from burning. Once smooth, let it cool a bit before adding it to the mixture. For garnishing, fresh fruits work great. Berries like strawberries, raspberries, or blueberries add color and taste. They make your mousse look pretty and taste fresh. You can also add nuts or coconut flakes for crunch. Nuts like almonds or walnuts add a nice texture. Coconut flakes give a tropical flair. Just sprinkle them on top before serving. {{image_2}} You can swap honey or maple syrup for agave or stevia. These options lower the sugar. Agave has a mild taste and mixes well. Stevia is very sweet, so use less. Both sweeteners work great in this mousse. For a sugar-free option, try using erythritol. It adds sweetness without the calories. Make sure to adjust the amount based on your taste. Your mousse will still be rich and creamy! Want to make your mousse unique? Adding espresso powder gives it a coffee kick. Just a teaspoon can enhance the chocolate flavor. It’s perfect for coffee lovers. You can also infuse the mousse with mint or orange zest. Add a few drops of mint extract or the zest of an orange. Both choices add a fresh twist. They brighten up the rich chocolate flavor. Try these variations to find your favorite! To keep your mousse fresh, use an airtight container. Glass or plastic containers work well. Make sure the lid seals tightly. This helps prevent air from getting in. You want to keep the mousse creamy and smooth. Store it in the fridge for up to three days. If you don’t eat it all, it will still taste great! Can you freeze cottage cheese mousse? Yes, you can freeze it! However, the texture might change a bit. It may become a little grainy after thawing. If you want to freeze it, spoon it into small containers. Leave some space at the top because it expands. For thawing instructions, place the container in the fridge overnight. This helps it thaw slowly. If you're in a hurry, you can set it at room temperature for about 30 minutes. Stir before serving to help bring back the creaminess. Enjoy your mousse even days later! Yes, cottage cheese is very healthy. It is rich in protein, which helps build and repair muscles. One cup of low-fat cottage cheese has about 28 grams of protein. That’s more than many other dairy options. It also has calcium, which supports strong bones. You can use other cheeses, but the taste and texture will change. Cream cheese can give a rich flavor. Ricotta can also work, but it will be less smooth. Always choose cheeses that blend well to keep your mousse creamy. The mousse lasts about three to five days in the fridge. Store it in an airtight container to keep it fresh. If you want to enjoy it later, make sure to eat it within this time. In this blog post, I shared how to make a delicious cottage cheese mousse. We covered the ingredients, step-by-step instructions, and key tips for perfecting the recipe. Remember, blending well and melting chocolate smoothly are important. You can also vary the flavors with sweeteners or fruits. This mousse is not just tasty; it's also healthy. With the right storage, it lasts for days. Enjoy your treat and get creative with the toppings!
                          Cottage Cheese Chocolate Mousse High Protein Delight

                        WANT TO SAVE THIS RECIPE?

                        Leave a Reply Cancel reply

                        Your email address will not be published. Required fields are marked *

                        Recipe Rating


                        Hi I’m Taling

                        I love sharing perfected dishes from my kitchen. I’m sure they’ll earn a spot in your heart. Let’s savor this journey together!.

                        More about me

                        Recent Desserts

                        • - 2 medium apples, peeled, cored, and diced - 1 teaspoon lemon juice - 2 cups all-purpose flour - 1 ½ cups granulated sugar, divided - 1 tablespoon baking powder - ½ teaspoon baking soda - ½ teaspoon salt - 1 teaspoon ground cinnamon - ½ cup unsalted butter, softened - 2 large eggs - 1 teaspoon vanilla extract - 1 cup buttermilk The main ingredients for the apple streusel coffee cake create a soft and moist texture. Apples add natural sweetness and flavor. Lemon juice keeps the apples fresh and bright. Flour, sugar, and baking powder help the cake rise and hold its shape. Eggs and butter give richness. - ½ cup all-purpose flour - ½ cup brown sugar - 1 teaspoon ground cinnamon - ¼ cup unsalted butter, melted The streusel topping adds a sweet, crunchy layer. Flour and brown sugar form the base. Cinnamon gives warmth and spice. Melted butter binds everything together, creating a delicious crumb. - 1 cup chopped pecans or walnuts Adding nuts to your coffee cake gives it extra texture and flavor. Pecans and walnuts work well with apples. They add a lovely crunch and richness. Feel free to skip them if you prefer a nut-free cake. First, set your oven to 350°F (175°C). This is the perfect temperature for our coffee cake. Next, grease and flour a 9x13-inch baking pan. You can also use parchment paper for easy removal later. Now, take two medium apples. Peel, core, and dice them into small pieces. Toss the apples with one teaspoon of lemon juice in a bowl. This keeps them fresh and bright. In another large bowl, whisk together two cups of flour, one cup of granulated sugar, baking powder, baking soda, salt, and one teaspoon of cinnamon. Mixing these dry ingredients ensures they blend well in the batter. In a separate bowl, mix half a cup of softened unsalted butter with the remaining half cup of granulated sugar. Beat until it looks light and fluffy. This step adds air to your batter. Next, add two large eggs, one at a time. Mix well after each egg. Finally, stir in one teaspoon of vanilla extract for that sweet flavor. Now, it's time to bring it all together. Alternately add the dry mixture and one cup of buttermilk to the butter mixture. Start and end with the dry ingredients. Mix until just combined. Be careful not to overmix; this keeps your cake tender. Gently fold in the diced apples and chopped nuts if you want some crunch. For the streusel topping, combine half a cup of flour, half a cup of brown sugar, and one teaspoon of cinnamon in a small bowl. Add a quarter cup of melted butter and mix until crumbly. This topping adds a sweet crunch. Pour the batter into the prepared pan and smooth the top with a spatula. Sprinkle the streusel evenly over the batter. Now, place the pan in your preheated oven. Bake for 35 to 40 minutes. To check if it’s done, insert a toothpick into the center. If it comes out clean, your cake is ready! Let it cool in the pan for 10 minutes. Then, transfer it to a wire rack. This helps it cool evenly. Enjoy this warm or at room temperature! To get a soft and fluffy cake, use room-temperature ingredients. This includes butter, eggs, and buttermilk. Mixing the butter and sugar until light and fluffy helps add air. Be gentle when combining wet and dry ingredients. Overmixing can make the cake dense. Spice up the flavor with a pinch of nutmeg or ginger. You can also use different apples, like Granny Smith or Honeycrisp, for a unique taste. If you want a nutty crunch, add chopped pecans or walnuts. You can even try a swirl of caramel for extra sweetness. Store leftover cake in an airtight container. This keeps it fresh for up to three days on the counter. If you want to keep it longer, wrap it in plastic wrap and freeze it. It will stay good for about three months. When ready to eat, just thaw it at room temperature. {{image_2}} You can switch up the apples for other fruits. Peaches add a sweet, juicy twist. Berries like blueberries or raspberries give a nice tart flavor. If you use berries, reduce sugar slightly. This way, you keep the balance of sweetness and tartness. Each fruit brings its unique taste to the cake. It's fun to experiment! To make this cake gluten-free, use a gluten-free flour blend. Many brands work well for baking. Just ensure it has a good mix of starches and proteins. Also, check that your baking powder is gluten-free. The rest of the ingredients usually fit into a gluten-free diet. This way, everyone can enjoy a slice! If you're looking for a vegan option, swap eggs for flax eggs. Mix one tablespoon of flaxseed meal with two and a half tablespoons of water. Let it sit until thick. For buttermilk, combine plant milk with vinegar or lemon juice. Use coconut oil instead of butter for the fat. These swaps keep the cake moist and delicious! Store your apple streusel coffee cake at room temperature for up to three days. Keep it in an airtight container to maintain moisture. If your home is warm, it’s best to refrigerate the cake. It can last up to a week in the fridge. However, the cake may dry out a bit. Always wrap it tightly in plastic wrap or foil. You can freeze this coffee cake for up to three months. Cool the cake completely before wrapping it. Use plastic wrap and then aluminum foil to protect it from freezer burn. Label the package with the date. When you’re ready to enjoy it, thaw in the fridge overnight or at room temperature for a few hours. To reheat, preheat your oven to 350°F (175°C). Place the cake in the oven for about 10-15 minutes. This warms it through and revives the flavors. You can also use the microwave for quick reheating. Heat a slice for about 20-30 seconds, but the oven method is best for taste. Enjoy it warm for the best experience! Yes, you can use different apples. I suggest tart apples like Granny Smith or Honeycrisp. They add a nice balance to the sweet cake. If you want a sweeter taste, try Fuji or Gala apples. Just remember, different apples will change the flavor a bit. To check if the cake is done, insert a toothpick into the center. If it comes out clean, the cake is ready. If there is wet batter, it needs more time. Keep an eye on it after about 30 minutes. Baking times may vary based on your oven. If you don't have buttermilk, you can make your own. Mix 1 cup of milk with 1 tablespoon of vinegar or lemon juice. Let it sit for about 5 minutes. You can also use yogurt or milk mixed with sour cream for a similar effect. This coffee cake stays fresh for about 3 days at room temperature. If you store it in an airtight container, it can last up to a week in the fridge. For longer storage, freeze it for up to 3 months. Just thaw it in the fridge before serving. In this blog post, we explored the key ingredients for apple streusel coffee cake and detailed the steps to make it. We included tips for texture and flavor, plus different variations and storage methods. Remember, this cake is not just for breakfast; it’s great for any time. Enjoy crafting your cake and don’t be afraid to experiment. Happy baking!
                          Bakery-Style Apple Streusel Coffee Cake Delight
                        • To make pumpkin chocolate chip blondies, you’ll need these key ingredients: - 1 cup pumpkin puree - ½ cup unsalted butter, melted - 1 cup brown sugar - ½ cup granulated sugar - 2 large eggs - 1 teaspoon vanilla extract - 2 cups all-purpose flour - 1 teaspoon baking powder - 1 teaspoon baking soda - 1 teaspoon ground cinnamon - ½ teaspoon nutmeg - ¼ teaspoon salt - 1 cup chocolate chips (semi-sweet or dark) - ½ cup chopped nuts (optional) You can make these blondies even better with a few add-ins. Consider using: - White chocolate chips for a creamy twist. - Dried cranberries for a tart flavor. - Shredded coconut for a chewy texture. - Pumpkin seeds for a crunchy bite. These add-ins can change the taste and look of your blondies. If you need to substitute some ingredients, here are a few options: - Instead of pumpkin puree, use mashed sweet potato. - Replace unsalted butter with coconut oil for a dairy-free option. - If you don’t have brown sugar, use an equal amount of granulated sugar. - For a gluten-free option, try almond flour or a gluten-free blend. These swaps can help you tailor the recipe to fit your needs while keeping it tasty. Start by preheating your oven to 350°F (175°C). This step is key for even baking. Next, grab an 8x8-inch baking pan. Grease it lightly to help the blondies release easily. Line the bottom and sides with parchment paper. Leave some paper hanging over the edges. This makes it easy to lift your blondies out later. In a large bowl, combine your melted butter, brown sugar, and granulated sugar. Whisk them together until smooth. Then, add the pumpkin puree, eggs, and vanilla extract. Mix well until everything is blended. In a separate bowl, whisk together the flour, baking powder, baking soda, ground cinnamon, nutmeg, and salt. This mix of dry ingredients helps the blondies rise. Gradually fold the dry mix into the pumpkin blend. Be gentle here! Overmixing can make the blondies tough. Finally, fold in the chocolate chips and any nuts if you want. Now, pour your batter into the greased and lined baking pan. Use a spatula to smooth the top. Place it in your preheated oven. Bake for 25-30 minutes. Check for doneness by inserting a toothpick in the center. It should come out clean or with a few moist crumbs. Once baked, let the blondies cool in the pan for about 10 minutes. Use the parchment paper to lift them out. Set them on a wire rack to cool completely. After that, cut them into squares and enjoy your tasty treat! To bake perfect pumpkin chocolate chip blondies, follow these tips. Use room temperature ingredients. This helps the batter mix well. Measure flour correctly. Too much flour can make blondies dry. Use a light hand when mixing. This keeps your blondies soft and chewy. Overmixing can make your blondies tough. Mix until the dry ingredients just blend in. You want to see some streaks of flour. Then, gently fold in the chocolate chips. This keeps the texture light and fluffy. Remember, less is more when it comes to mixing! To keep your blondies fresh, store them in an airtight container. They stay soft for up to five days. If you want to keep them longer, freeze them. Wrap each blondie in plastic wrap, then place them in a freezer bag. They can last up to three months in the freezer. Enjoy them straight from the freezer for a cold treat! {{image_2}} You can make these blondies your own by adding fun mix-ins. Try swapping in white chocolate chips for a sweet twist. You can also use butterscotch chips for a buttery flavor. Dried cranberries or raisins add a nice chewiness. If you want a crunch, add some chopped pecans or walnuts. These options keep the taste fresh and exciting. To make gluten-free blondies, swap the all-purpose flour for a gluten-free blend. Many brands work well and keep the texture nice. For a vegan version, replace the eggs with flax eggs. Mix one tablespoon of ground flaxseed with three tablespoons of water. Let it sit for a few minutes to thicken. You can also use coconut oil instead of butter for a dairy-free treat. These swaps make the recipe fit more diets. Seasonal spices can really enhance the flavor. In fall, add more cinnamon or some allspice. A pinch of cloves gives a warm touch. In winter, consider using peppermint extract for a festive flavor. For nuts, try adding pumpkin seeds for a seasonal crunch. You can even sprinkle some sea salt on top before baking for a sweet and salty mix. These variations keep your blondies unique and delicious! To keep your pumpkin chocolate chip blondies fresh, store them in an airtight container. This helps lock in moisture and flavor. Place parchment paper between layers to avoid sticking. Keep them at room temperature for up to three days. If you want to store them for longer, use the freezer. Freezing blondies is easy. First, let them cool completely. Cut them into squares and wrap each piece in plastic wrap. Then, place the wrapped squares in a freezer bag. Remove as much air as possible before sealing. These can last for up to three months in the freezer. When you want to enjoy them, thaw them in the fridge or at room temperature. These blondies stay tasty for about a week at room temperature. If you refrigerate them, they may last a bit longer, about ten days. However, expect some changes in texture. Freezing helps maintain their taste and softness over time. Enjoy these sweet treats whenever you crave something delicious! Yes, you can use fresh pumpkin. First, cook the pumpkin until soft. Then, blend it into a smooth puree. Make sure to drain any excess water. This will prevent your batter from becoming too wet. Fresh pumpkin adds a nice flavor. If you lack brown sugar, use granulated sugar. To mimic brown sugar, add a bit of molasses. For each cup of white sugar, add one tablespoon of molasses. This change will keep your blondies sweet and moist. You can also use coconut sugar as a substitute. To check if your blondies are ready, insert a toothpick into the center. If it comes out clean or with a few moist crumbs, they are done. The edges should look set and slightly golden. Don’t overbake them; they will continue to cook as they cool. This article covered everything you need to make tasty pumpkin chocolate chip blondies. We explored the key ingredients, helpful tips, and alternative options. You can mix in new flavors or substitute for health needs. Storing leftovers and understanding baking times are easy with the advice we shared. Trust these insights to bake with confidence. Enjoy your delicious blondies and have fun experimenting!
                          Pumpkin Chocolate Chip Blondies Tasty Fall Treat
                        • To make caramel apple monkey bread, you need a few key ingredients. Here’s the list: - 3 cans (16.5 oz each) refrigerated biscuit dough - 3 apples (peeled, cored, and diced) - 1 cup caramel sauce (store-bought or homemade) - ½ cup brown sugar - 1 teaspoon ground cinnamon - ½ cup butter (melted) - ½ cup chopped walnuts or pecans (optional) - Whipped cream (optional, for serving) Each ingredient plays a role in creating the rich, sweet flavor of this dish. The biscuit dough serves as a soft base. The apples add freshness and texture. Caramel sauce brings sweetness and gooeyness. Brown sugar and cinnamon create warmth and spice. Butter adds richness, and nuts give a nice crunch. If you want to switch things up, you can skip the nuts or use a different type of apple. Granny Smith apples work well for a tart flavor, while Honeycrisp apples add sweetness. Make sure to gather everything before you start cooking. This will help you stay organized and make the process smooth. Enjoy preparing this delightful treat! - Preheat your oven to 350°F (175°C) and grease a bundt pan well. - In a bowl, mix the brown sugar and cinnamon. Set it aside for later. - Open the biscuit dough and cut each biscuit into fourths. Roll each piece into a ball. - In another bowl, mix the diced apples with half of the caramel sauce. Stir well. - Layer half of the biscuit balls in the bundt pan. Then add half of the apple mixture. - Sprinkle any remaining cinnamon-sugar over the apples for extra flavor. - Add the rest of the biscuit balls on top of the apples. Then, layer the remaining apples. - Pour the melted butter evenly over the layers. Drizzle the rest of the caramel sauce on top. - If using nuts, sprinkle them over the top now. - Bake in your preheated oven for about 30 to 35 minutes. Look for a golden brown color. - Once done, take it out and let it cool for about 10 minutes. Then invert it onto a platter. - Drizzle any remaining caramel sauce over the monkey bread. Serve warm, adding whipped cream if you like it. To ensure even cooking through your caramel apple monkey bread, keep a few things in mind. First, cut the biscuit dough into even pieces. This helps them cook at the same rate. Layer the dough balls and apples carefully. Avoid packing them too tightly in the bundt pan. This allows heat to circulate well. When choosing the best apples for baking, look for firm varieties. Granny Smith apples are tart and hold their shape well. Honeycrisp apples add a sweet touch and great texture. Avoid soft apples, as they may turn mushy in the oven. Get creative when serving caramel apple monkey bread! You can pull it apart and serve it warm on a platter. For a fun twist, drizzle extra caramel sauce on top before serving. Add a scoop of whipped cream or a sprinkle of cinnamon for extra flavor. Pair the monkey bread with warm apple cider for a cozy treat. A scoop of vanilla ice cream also makes a delightful addition. To store leftovers, wrap the monkey bread tightly in plastic wrap. You can also place it in an airtight container. Keep it in the fridge for up to three days. This helps keep it fresh and tasty. For reheating, place slices in the microwave for 15 to 20 seconds. This warms it up and keeps it soft. If you prefer a crispier texture, reheat in the oven at 350°F for about 10 minutes. {{image_2}} You can make your caramel apple monkey bread even better! Try adding spices like nutmeg or ginger. A splash of vanilla or almond extract adds a lovely touch. You can also swap out the nuts. Try almonds or pecans instead of walnuts. Adding dried fruits, like cranberries or raisins, gives a nice twist. If you're looking for lighter options, use low-fat biscuit dough. You can also replace the butter with unsweetened applesauce. This keeps the flavor but cuts some calories. For gluten-free needs, there are great gluten-free biscuit mixes. These make it easy to enjoy this treat without worry. Seasonal fruits can change the game! In fall, add pears or even pumpkin. For summer, peaches or cherries work great. You can also top it with a sprinkle of crushed candy canes during the holidays. Another idea is to drizzle chocolate sauce instead of caramel for a fun change! You can store your monkey bread in two ways: refrigeration or at room temperature. If you plan to eat it within two days, keeping it at room temperature works well. Just make sure to wrap it tightly in plastic wrap. For longer storage, refrigeration is best. It stays fresh in the fridge for about five days. If you want to save some for later, freezing is a great option. Cut the monkey bread into portions that suit your needs. Wrap each piece well in plastic wrap and then in aluminum foil. This helps keep it fresh. When you're ready to enjoy it, thaw it overnight in the fridge. Reheat it in the oven at 350°F (175°C) for about 10-15 minutes until warm. Use airtight containers for the best results. Glass or plastic containers with tight lids work great. Make sure to avoid containers that trap moisture. This helps prevent spoilage and keeps your monkey bread tasty. If you notice any extra moisture, add a paper towel inside the container. This will help absorb it and keep your treat fresh longer. Can I use homemade biscuit dough instead? Yes, you can use homemade biscuit dough. Just ensure it is well chilled. This will help it rise and stay fluffy during baking. Homemade dough can add a personal touch to the recipe. How do I know when monkey bread is done baking? You will know it's done when the top is golden brown. A toothpick inserted in the center should come out clean. The dough should feel firm, not gooey. Can I make this recipe ahead of time? Yes, you can prep the monkey bread a day before. Layer the ingredients in the bundt pan and cover it. Just bake it the next day when you are ready. What can I substitute for caramel sauce? You can use butterscotch sauce or chocolate sauce. Maple syrup can work, too, but it will change the flavor slightly. Alternatives for nuts in the recipe If you prefer no nuts, leave them out. You can also use seeds, like pumpkin seeds. They will add a nice crunch without being overpowering. How should I serve caramel apple monkey bread? Serve it warm, right from the oven. Drizzle extra caramel sauce on top for a sweet touch. A dollop of whipped cream can add a nice creaminess. Can I serve it cold or should it be warm? It is best served warm. The gooey caramel and soft bread taste great when fresh. Serving it cold will change the texture. Caramel apple monkey bread is fun and easy to make. We covered the key ingredients, baking steps, and serving tips. Remember, you can customize flavors to make it your own. Try using different fruits or nuts. Perfect for any occasion, this treat always brings joy. Store it properly to keep it fresh. I hope you enjoy making and sharing this delicious recipe. You will impress family and friends with your skills. Happy baking!
                          Caramel Apple Monkey Bread Delightful and Easy Recipe
                        • To make your Salted Caramel Pumpkin Bites, gather these ingredients: - 1 cup pumpkin puree - ½ cup almond butter (or any nut butter of your choice) - ⅓ cup maple syrup - 1 teaspoon vanilla extract - 1 teaspoon pumpkin pie spice - 1 cup rolled oats - ¼ cup coconut flour - ¼ teaspoon sea salt - ½ cup chocolate chips (for drizzling) - Additional sea salt for sprinkling These ingredients blend together to create a sweet and creamy treat. The pumpkin gives it a lovely flavor, while the almond butter adds a nice creaminess. You might not have all the ingredients at home. Here are some easy swaps: - Nut Butter: You can use peanut butter or sunflower seed butter if you prefer. - Maple Syrup: Honey or agave syrup works well too. - Coconut Flour: Try using almond flour if you have it. These substitutions will still keep your bites delicious! Want to make these bites even healthier? Here are some tips: - Use natural nut butter with no added sugar or oil. - Swap maple syrup for a sugar-free sweetener like monk fruit or stevia. - Add chia seeds or flax seeds for extra fiber and nutrients. These changes can boost the nutrition of your tasty bites while keeping them enjoyable! Start with a large bowl. Add 1 cup of pumpkin puree. Next, include ½ cup of almond butter. Pour in ⅓ cup of maple syrup. Add 1 teaspoon of vanilla extract and 1 teaspoon of pumpkin pie spice. Mix these ingredients until smooth and creamy. This base will be the heart of your bites. Now, it’s time for the dry ingredients. Add 1 cup of rolled oats and ¼ cup of coconut flour. Mix everything well. You want a thick dough that holds its shape. If it feels too sticky, add a bit more coconut flour. It should be easy to handle. Once your mixture is ready, use your hands to form small balls. Aim for about 1 inch in diameter. This size is perfect for popping in your mouth. Place each ball on a lined baking sheet. Make sure they are spaced out. This allows for easy handling later. After shaping all the bites, pop the baking sheet into the fridge. Chill them for about 30 minutes. This step helps them firm up. A good chill makes them easier to drizzle with chocolate later on. While the bites chill, it’s time to melt the chocolate. Use ½ cup of chocolate chips. Place them in a microwave-safe bowl. Heat them in 20-second bursts. Stir after each round until melted. Be careful not to overheat the chocolate. Once the pumpkin bites are firm, take them out of the fridge. Use a fork or spoon to drizzle the melted chocolate over each bite. Get creative with your drizzling pattern. It adds a nice touch! Before the chocolate sets, sprinkle a small pinch of sea salt on top. This salt enhances the flavor and gives a salted caramel vibe. After drizzling and salting, place the bites back in the fridge. Let them chill for another 15-20 minutes. This step ensures the chocolate hardens nicely. Now you have delightful no-bake salted caramel pumpkin bites ready to enjoy! To make your pumpkin bites shine, use fresh pumpkin puree. It adds great flavor. Make sure your almond butter is creamy. This helps bind the mixture. If it feels too dry, add a touch more maple syrup. Chill the bites well after shaping. This step helps them hold their shape when drizzling chocolate. When melting chocolate, patience is key. Use a microwave-safe bowl. Heat the chocolate in 20-second bursts. Stir well between each burst. This helps avoid burning. If the chocolate is thick, add a teaspoon of coconut oil. This will make it smoother and easier to drizzle. Serve your pumpkin bites on a colorful plate. Drizzle more melted chocolate around the edges. For a fun touch, sprinkle pumpkin seeds on top. You can also add a dash of cinnamon for extra flavor. These bites are perfect for parties or a cozy night in. Enjoy them with a warm drink for a tasty treat! {{image_2}} You can change the taste of your pumpkin bites easily. Try adding a bit of cinnamon for warmth. A splash of coconut extract can bring a tropical flair. You can also mix in mini chocolate chips for extra sweetness. If you like nuts, chopped pecans or walnuts add a nice crunch. While almond butter is great, you have options. Cashew butter gives a creamier texture. Peanut butter adds a rich flavor and pairs well with chocolate. For a fun twist, try sunflower seed butter for a nut-free alternative. Each nut butter brings its own unique taste to the bites. If you need to avoid nuts, don’t worry! Use sunflower seed butter instead of nut butters. You can also swap in coconut yogurt for creaminess. This keeps the texture smooth while keeping it nut-free. Just make sure to check for allergens in your other ingredients. Enjoy these bites with peace of mind! To keep your salted caramel pumpkin bites fresh, place them in an airtight container. Use parchment paper between layers to prevent sticking. Store them in the fridge for the best taste. This helps maintain their chewy texture and rich flavor. You can freeze these bites for later enjoyment. Place them in a single layer on a baking sheet. Once frozen, transfer them to an airtight freezer bag. They can stay fresh in the freezer for up to three months. Thaw them in the fridge before serving. When stored properly, these pumpkin bites last about one week in the fridge. If you freeze them, they can last up to three months. Enjoy them fresh for the best flavor, but they are still tasty after a week! Yes, you can make these bites ahead of time. I often prepare them a day in advance. Just store them in an airtight container in the fridge. They stay fresh and tasty for about a week. This makes them perfect for parties or snacks. You can pop them out whenever you want a sweet treat. If you can’t find pumpkin puree, try using sweet potato puree. It gives a similar flavor and texture. You could also use butternut squash puree as a great option. Both substitutes work well in this recipe. Just make sure they are smooth and creamy for the best results. To get the chocolate drizzle to harden, melt the chocolate slowly. Use a microwave in short bursts, stirring in between. After drizzling it over the bites, refrigerate them for 15-20 minutes. This helps the chocolate set nicely. If it still feels soft, let it chill a bit longer. In this article, we explored various aspects of making delicious pumpkin bites. We looked at ingredients, step-by-step instructions, and helpful tips. You learned about substitutions and even storage options. Remember, creating these bites can be fun and easy. Don’t hesitate to try new flavors or nut butters. With the right techniques, you’ll impress everyone with your tasty treats! Enjoy experimenting with your pumpkin bites recipe!
                          Salted Caramel Pumpkin Bites No-Bake Delightful Treat

                        Recent Drinks

                        • - 1 ripe banana - 2 tablespoons natural peanut butter - 1 cup unsweetened almond milk (or any milk of choice) - 1 scoop vanilla protein powder (plant-based or whey) - 1 tablespoon chia seeds - 1 teaspoon honey (optional for sweetness) - A pinch of cinnamon - Ice cubes (optional, for a thicker texture) Gather these simple items before you start. A ripe banana gives natural sweetness and creaminess. Use two tablespoons of natural peanut butter for a rich flavor. Almond milk is my go-to, but any milk you love works great. The protein powder adds a boost of nutrition. Choose vanilla to match the banana. Chia seeds are tiny but mighty. They add fiber and help keep you full. If you like it sweeter, add honey, but it’s not a must. A pinch of cinnamon brings warmth and depth to this drink. For a thicker texture, toss in some ice cubes. This smoothie is flexible, so feel free to mix and match based on your taste. Now, let's blend it all together! 1. Start by peeling the ripe banana. Break it into small chunks. 2. In a blender, combine the banana chunks, natural peanut butter, almond milk, protein powder, chia seeds, and a pinch of cinnamon. 3. If you like a colder and thicker smoothie, add some ice cubes. 1. Blend all the ingredients on high speed. Keep blending until you have a smooth and creamy mix. 2. Stop the blender and taste your smoothie. If you want it sweeter, add honey. Blend again for a few seconds to mix. 1. Pour the smoothie into a tall glass. Enjoy it right away for the best taste and creaminess. 2. For a fun twist, you can top it with extra chia seeds or banana slices. This makes it look pretty too! To get the perfect texture, use a ripe banana. A ripe banana makes the smoothie creamy. Add ice cubes if you want it thicker. If you prefer a smoother drink, blend longer. Scrape the sides of the blender to mix all the ingredients well. This ensures a silky-smooth result. If your smoothie tastes too bland, add honey or more banana. Start with a teaspoon of honey. Blend and taste again. You can always add more honey if needed. This way, you control the sweetness to match your taste. Remember, ripe bananas also add natural sweetness. Use a high-speed blender for the best results. A strong blender breaks down the ingredients quickly. If you have a less powerful blender, blend in stages. Start with the liquids first, then add the solids. This helps everything mix better. Make sure your blender is clean for the best flavor. {{image_2}} You can switch the peanut butter for other nut butters. Almond butter offers a nutty taste. Cashew butter is creamy and sweet. Sunflower seed butter is a great choice for allergies. Each nut butter brings its own flavor and health benefits. Experiment to find your favorite. You can add many fruits to the smoothie. Frozen berries add sweetness and color. Spinach or kale boosts nutrition without changing the taste. Try mango for a tropical twist. Each fruit adds vitamins and makes the smoothie fun. Mix and match to discover new flavors. Choosing the right protein powder is key. Plant-based powders are great for vegan diets. Whey protein is popular for muscle recovery. Look for flavors that match your taste, like chocolate or vanilla. The right powder can enhance the smoothie’s flavor and nutrition. Test different types to see what you prefer. Store any leftover smoothie in an airtight container. You want to keep it fresh. Place it in the fridge right after making it. It will stay good for about one day. When you are ready to drink it again, shake or stir well. This helps mix any settled ingredients. You can freeze your smoothie for later. Pour it into ice cube trays or freezer-safe bags. This way, you can grab a portion whenever you want. To use, thaw the smoothie overnight in the fridge. You can also blend it again for a fresh taste. In the fridge, your smoothie lasts about 24 hours. In the freezer, it can last up to three months. Just remember, the sooner you drink it, the better the taste and texture will be! Yes, this smoothie is gluten-free. All the ingredients listed are naturally free from gluten. The peanut butter, banana, almond milk, protein powder, chia seeds, and honey do not contain gluten. Always check labels if you use store-bought items to confirm they are gluten-free. Absolutely! To make this smoothie vegan, simply use plant-based protein powder. Ensure your peanut butter is also free from animal products. Replace honey with maple syrup or agave nectar for sweetness. All other ingredients are already vegan-friendly. This smoothie offers many health benefits. It provides protein from the peanut butter and protein powder, which helps build muscle. Bananas add potassium, good for heart health. Chia seeds are packed with fiber, aiding digestion. Almond milk is low in calories and rich in vitamins. Yes, you can use various milk types. Cow’s milk will add creaminess and protein. Soy milk is a great option for extra protein. Coconut milk gives a tropical flavor. Each milk option changes the taste and texture slightly, so choose what you enjoy best. This smoothie recipe combines simple ingredients for great taste and nutrition. You learned step-by-step how to prepare it and tips for perfect texture. Variations let you customize your drink to fit your taste. Remember to store leftovers properly for later enjoyment. Smoothies can be healthy and fun. Try new mixtures to find what you love best. Keep experimenting and enjoy your delicious creations!
                          Peanut Butter Banana Protein Smoothie Easy Recipe
                        • To make a delicious Turmeric Golden Milk Latte, gather these simple ingredients: - 2 cups almond milk (or your preferred milk) - 1 teaspoon ground turmeric - ½ teaspoon ground ginger - ¼ teaspoon cinnamon - 1 tablespoon honey or maple syrup (adjust to taste) - Pinch of black pepper - ½ teaspoon vanilla extract - Optional: a sprinkle of nutmeg for garnish - Almond Milk: This milk is low in calories and rich in vitamins. It helps with heart health. - Turmeric: This spice has curcumin, known for its anti-inflammatory properties. It may help improve brain function. - Ginger: Ginger can help with digestion and nausea. It adds a nice warmth to the drink. - Cinnamon: This spice is rich in antioxidants. It may help lower blood sugar and improve heart health. - Honey or Maple Syrup: Both sweeteners can boost energy. They also provide antioxidants. - Black Pepper: This spice enhances turmeric absorption. It makes the drink more effective. - Vanilla Extract: It adds flavor and can help reduce stress. - Nutmeg: This spice is optional, but it adds warmth and a nice aroma. - Milk Options: You can use oat milk, soy milk, or coconut milk for different flavors. - Sweeteners: If you prefer, try agave syrup or stevia as sugar-free options. - Spices: Experiment with cardamom or cloves for added flavor. - Nutmeg: You can skip it if you don't like nutmeg, or use a touch of cocoa powder instead. 1. Start by taking a small saucepan. 2. Add 2 cups of almond milk to the pan. 3. Measure and add 1 teaspoon of ground turmeric. 4. Next, add ½ teaspoon of ground ginger. 5. Sprinkle in ¼ teaspoon of cinnamon. 6. Sweeten your drink with 1 tablespoon of honey or maple syrup. 7. Don't forget a pinch of black pepper for better absorption of turmeric. 8. Lastly, add ½ teaspoon of vanilla extract. 9. Whisk all the ingredients well in the pan. 10. Place the saucepan on medium heat. 11. Gently warm the mixture while stirring often. 12. Keep an eye on it; do not let it boil. 13. After about 5-7 minutes, it should be hot enough. 14. Remove the pan from heat and let it cool slightly. 15. If you want a frothy drink, use a milk frother or whisk it quickly. 16. Pour the golden milk into your favorite mugs. 17. Optionally, sprinkle a bit of nutmeg on top for a nice touch. 18. Serve warm and enjoy this comforting drink! - Always use a whisk to blend the spices into the milk. - Whisking helps mix the turmeric and other spices evenly. - When heating, keep the heat low to avoid scalding the milk. - Stir often to prevent sticking at the bottom of the pan. - If you see steam but no bubbles, you are at the right temperature. - A milk frother works wonders for a smooth, frothy finish. - If you don’t have a frother, whisk vigorously by hand. - Frothing adds air, giving the latte a creamy feel. - The more you froth, the lighter and fluffier your drink will become. - For an extra touch, froth some almond milk separately and top your latte with it. You can mix spices to make your turmeric latte tastier. Try adding a pinch of nutmeg or a dash of cardamom. These spices add warmth to the drink. You can also use fresh ginger instead of ground ginger. This will give your latte a bright, zesty kick. Just remember, fresh ginger may need more time to steep. Many people rush the heating process. Always warm your milk slowly over medium heat. If you boil it, the spices can lose flavor. Another mistake is not blending the spices well. Make sure to whisk the mixture thoroughly. This helps avoid clumps of turmeric or ginger. Lastly, avoid skipping the black pepper. It helps your body absorb turmeric better. Sweetness is personal. Start with one tablespoon of honey or maple syrup. Taste your latte and add more if you like it sweeter. For creaminess, use full-fat coconut milk for a richer feel. Almond milk is lighter but still delicious. You can also mix almond and coconut milk for the best of both worlds. {{image_2}} You can easily make this latte vegan. Just use almond milk, coconut milk, or oat milk. These milks work great in this recipe. They keep the drink creamy and delicious. If you want a nut-free option, oat milk is the best choice. It blends well with turmeric and spices. To make an iced version, start with brewed turmeric milk. Follow the same steps but let it cool. Pour over ice instead of serving warm. This drink is refreshing on hot days. You can also add some ice cream for a treat! You can mix and match flavors for fun. Try adding matcha for a green twist. This adds a fresh taste and boosts energy. You can also use cocoa for a chocolatey version. The cocoa pairs well with turmeric and spices. For a special touch, add a dash of vanilla extract. This enhances the overall flavor and aroma. To store leftover turmeric golden milk, let it cool first. Then, pour it into an airtight container. Keep it in the fridge for up to three days. This way, you can enjoy the drink again without losing its flavor. When reheating your golden milk, do it gently. Pour it into a small saucepan. Heat it over low to medium heat. Stir it often to avoid burning. Never let it boil, as this can change the taste and texture. You can also use a microwave. Heat in short bursts, stirring in between. Turmeric golden milk lasts about three days in the fridge. Check for signs of spoilage. If it smells sour or has any mold, discard it. Always trust your senses. If it looks or smells off, it’s best to throw it away. Turmeric has many health benefits. It is known for its bright yellow color and active compound called curcumin. Curcumin may help reduce inflammation. It can also support joint health. Some studies suggest it may boost your mood. Turmeric might even help with digestion. Drinking turmeric may also support your immune system. Yes, you can use any milk you like. Almond milk is great, but coconut milk adds creaminess. Oat milk is a good choice for a thicker texture. If you prefer dairy, whole or skim milk works too. Just remember, different types of milk will change the flavor a bit. To make this recipe sugar-free, skip the honey or maple syrup. You can use a sugar substitute like stevia or monk fruit instead. These options will give you sweetness without the calories. Just adjust the amount to your taste. Yes, it is safe for most people to have turmeric daily. Using it in cooking or drinks is a great way to enjoy its benefits. However, if you have health issues or take certain medications, check with a doctor first. Moderation is key, as with any food. In this blog post, we explored the ingredients and health benefits of Turmeric Golden Milk. I shared step-by-step instructions for making it frothy and delicious. We also discovered tips, tricks, and variations to enhance your drink. Proper storage and reheating advice can help you enjoy leftovers. Remember, turmeric offers many health benefits, so enjoy this drink often. Use alternative ingredients if you prefer. With these ideas, you can create the perfect golden milk to suit your taste and health needs. Enjoy your journey to wellness!
                          Turmeric Golden Milk Latte Simple and Creamy Recipe
                        • - 1 ripe mango, peeled and diced - 1 cup fresh pineapple chunks - 1 banana, sliced - 1 cup coconut water (or regular water) - ½ cup plain Greek yogurt (or dairy-free alternative) - 1 tablespoon honey or agave syrup (optional) - A handful of fresh mint leaves (for garnish) - Ice cubes (optional) The key to a delicious mango pineapple smoothie lies in its fresh ingredients. You want ripe fruits for the best flavor. The mango should feel soft when you squeeze it gently. Pineapples should smell sweet and fruity. This smoothie combines sweet mango, tangy pineapple, and creamy banana. Coconut water adds hydration, while Greek yogurt gives it a nice creaminess. You can add honey for extra sweetness if you like. Mint leaves add a refreshing touch when you serve it. Each ingredient plays a role in making this smoothie flavorful and refreshing. Trust me, using fresh ingredients will make a big difference in taste! To make this smoothie, start by gathering your main ingredients. You need a ripe mango, fresh pineapple, and a banana. 1. In a blender, combine the diced mango, pineapple chunks, and banana slices. This mix brings a burst of tropical flavor. 2. Next, add one cup of coconut water to the blender. This not only hydrates but also adds a refreshing twist. 3. For creaminess, pour in half a cup of plain Greek yogurt. If you want it sweeter, drizzle in one tablespoon of honey or agave syrup. 4. Blend on high until the mixture is smooth and creamy. If you like your smoothie chilled, toss in a few ice cubes and blend again until they are fully mixed in. 5. After blending, taste your smoothie. If it needs to be sweeter or thicker, add more honey or coconut water as needed. Once your smoothie is ready, it’s time to serve it. I recommend using tall glasses to show off the vibrant color. For a fun touch, garnish each glass with a few fresh mint leaves on top. This not only looks nice but also adds a fresh aroma. Enjoy your delicious Mango Pineapple Smoothie! For the Full Recipe, please refer back to the ingredient list and instructions. To get your smoothie just right, focus on creaminess. Use ripe fruits like mango and banana. The Greek yogurt adds a nice, smooth texture. If you want a richer taste, try full-fat yogurt. For a lighter feel, use low-fat or dairy-free yogurt. Adjust the thickness by adding more liquid. Coconut water is great for this. If your smoothie is too thick, just pour in a bit more. Blend again until it’s just how you like it. If you want a thicker smoothie, add more banana or ice cubes. Boosting flavor can take your smoothie to the next level. Try adding spices like cinnamon or ginger. These spices not only add warmth but also great health benefits. A dash of cinnamon can make the smoothie taste cozy. A pinch of ginger gives it a nice kick. You can also use flavored yogurts for extra taste. Vanilla or coconut yogurt work well. If you want sweetness, think about honey or agave syrup. These can make your smoothie more enjoyable. For a fun twist, try adding a splash of vanilla extract. It will add a lovely aroma to your drink. For a full taste experience, explore the [Full Recipe]. {{image_2}} You can change the fruit in your smoothie to keep it fresh. Adding strawberries or blueberries gives a sweet twist. These berries add a nice color and taste. You can also try using other tropical fruits like papaya or kiwi. These fruits bring new flavors and nutrients to your drink. Each fruit will change the smoothie’s taste and make it unique. If you want a dairy-free smoothie, swap the Greek yogurt for a plant-based option. Almond, coconut, or soy yogurt works well. These alternatives keep your smoothie creamy without dairy. For sweeteners, you can use maple syrup or agave syrup for a vegan choice. These options add sweetness while keeping your drink plant-based. Enjoy the fruity goodness in many ways! Don't forget to check the Full Recipe for more ideas. You may have some smoothie left after making your Mango Pineapple Smoothie. To keep it fresh, use a glass jar or a BPA-free plastic container. Seal it tightly to prevent air from spoiling the flavor. Store it in the fridge for up to 24 hours. After that, it may lose some taste and texture. If you want to enjoy the smoothie later, freezing is a great option. Pour the smoothie into ice cube trays or freezer-safe bags. Leave some space in the bags for expansion. You can freeze it for up to three months. When you’re ready to drink it, take out what you need. Thaw it in the fridge overnight or blend it straight from the freezer for a slushy treat. Enjoy your refreshing Mango Pineapple Smoothie anytime! Yes, you can make this smoothie ahead of time. If you want to save it, store it in an airtight container. Keep it in the fridge for up to one day. The smoothie may separate, so stir it well before you drink it. If you don’t have coconut water, use regular water or fruit juice instead. Fruit juice can add a nice flavor. You can also try almond milk for a creamier touch. Just remember, the taste will change a bit based on what you use. To make the smoothie thicker, add more Greek yogurt or a banana. You can also use frozen fruit instead of fresh. Frozen fruit gives you a nice, thick texture. Just blend it well, and you’ll get a creamy drink. Yes, this smoothie is great for kids! It is packed with fruits and tastes sweet. You can adjust the sweetness by adding less honey. The bright colors and fresh flavors will appeal to children, making it a fun treat. You can find the Full Recipe for the Tropical Bliss Mango Pineapple Smoothie above in this article. This will guide you through every step to create your own refreshing drink. This blog post covers a simple and tasty smoothie recipe. You learned about the key ingredients and their nutritional benefits. I provided steps to prepare and serve the smoothie perfectly. Tips for texture and flavor help you make it your own. You can explore variations to suit your tastes or dietary needs. Don’t forget storage tips to keep leftovers fresh. Enjoy your smoothie making journey. It’s all about trying new things and having fun!
                          Mango Pineapple Smoothie Refreshing and Flavorful Blend
                        • - 2 packets of frozen açaí puree - 1 ripe banana - 1 cup of fresh pineapple chunks - 1 cup of coconut milk (or any non-dairy milk) - 1 tablespoon of honey or agave syrup (optional) For a vibrant tropical taste, the main ingredients are key. Açaí puree brings rich color and flavor. It is full of antioxidants. Bananas add creaminess and natural sweetness. Fresh pineapple gives a bright, juicy touch. Coconut milk offers a smooth base. You can use any non-dairy milk you prefer. Honey or agave syrup adds sweetness if needed. - Sliced kiwi - Coconut flakes - Granola - Chia seeds - Fresh berries (e.g., strawberries, blueberries) Toppings make your smoothie bowl pop! Sliced kiwi adds a zesty kick. Coconut flakes give it a tropical crunch. Granola provides texture and flavor. Chia seeds offer extra nutrients. Fresh berries, like strawberries and blueberries, add color and taste. You can mix and match these toppings for a fun look. For the full recipe, please refer to the section above. 1. Blend the ingredients Start by adding the frozen açaí puree, ripe banana, fresh pineapple chunks, and coconut milk into a blender. If you want it sweeter, you can add honey or agave syrup. Blend this mixture on high speed until it becomes creamy and smooth. 2. Adjust consistency with coconut milk If your smoothie is too thick, just add a bit more coconut milk. Blend again until you reach the texture you want. This step is key to making your smoothie bowl enjoyable. 3. Pour into a bowl Once blended, carefully pour the smoothie mixture into a bowl. Make sure to use a large enough bowl to hold all the goodness. 4. Add toppings creatively Now comes the fun part! Arrange your toppings, such as sliced kiwi, coconut flakes, granola, chia seeds, and fresh berries, over the smoothie. Try to create a colorful pattern. I love making a circular design to highlight all the vibrant colors. - Tips for presentation Use a shallow bowl to show off your beautiful toppings. You can also sprinkle some extra coconut flakes around the edge for a nice touch. A colorful presentation makes your smoothie bowl more fun to eat. - Recommended serving utensils Serve your smoothie bowl with a regular spoon. If you want to make it more special, use a wooden spoon or a cute, colorful one. Enjoy your tropical treat right away to keep it fresh and tasty. For the full recipe, refer to the earlier sections. To make a great smoothie bowl, start with ripe fruits. Ripe fruits taste better and add natural sweetness. Look for bananas that are yellow with some brown spots. When it comes to pineapples, choose ones that smell sweet. It ensures they are juicy and fresh. Blending is key to your smoothie bowl. You want a smooth and creamy texture. If your mix is too thick, add more coconut milk. Blend again until you reach the right consistency. A good blend makes your bowl enjoyable and easy to eat. A colorful topping arrangement makes your smoothie bowl pop. Use fresh berries, sliced kiwi, and coconut flakes. Lay them out in a pattern. A circular design looks appealing and fun. To elevate your smoothie bowl's look, use bowls with interesting shapes. Tall bowls or wide, shallow ones can change the game. Garnish with a sprinkle of chia seeds for a fancy touch. This not only looks great but adds a bit of crunch too. {{image_2}} You can change the non-dairy milk for this smoothie. Almond, soy, or oat milk work well. Each milk adds a different taste. Try using seasonal fruits too. Mango, papaya, or berries add a fresh twist. You can mix and match to find your favorite blend. Want more nutrients? Add spinach or kale to your smoothie. They blend well and boost health. You won’t even taste them! For extra energy, stir in nut butter or protein powder. Both will make your smoothie more filling. They add great flavor too! You can also experiment with different combinations to find the best taste for you. To store leftovers, place your smoothie bowl in the fridge. Use a tight container to keep it fresh. Glass or BPA-free plastic works well for storage. I prefer glass because it keeps flavors better. You can freeze smoothie bowls for later. Just pour the mixture into an airtight container. Leave some space at the top, as it will expand when frozen. To defrost, place it in the fridge overnight. If you’re in a rush, you can use the microwave. Just heat it in short bursts to avoid cooking. Enjoy your tropical treat later with ease! For the recipe, check out the Full Recipe. What is açaí and what are its benefits? Açaí is a small, dark purple berry from Brazil. It is full of antioxidants, which help fight free radicals in the body. Açaí is also rich in fiber, promoting good digestion. Plus, it has healthy fats that support heart health. You can enjoy its fruity taste in many dishes. Can I make this smoothie bowl ahead of time? Yes! You can prepare the smoothie mix and store it in the fridge for up to 24 hours. Just remember to keep the toppings separate. This way, your bowl stays fresh and tasty. How can I make this recipe vegan or gluten-free? To make it vegan, use agave syrup instead of honey. For gluten-free, ensure your granola and any other toppings are gluten-free. Most fruits and coconut milk are naturally gluten-free, so you’re all set! Can I substitute açaí with other fruits? Yes, you can! If you can’t find açaí, try using frozen berries like blueberries or strawberries. These fruits will add sweetness and a burst of color to your bowl. What to do if the smoothie is too thick? If your smoothie is too thick, just add a little more coconut milk. Blend again until you reach your desired creaminess. This will make it easier to pour and enjoy. How to fix a smoothie bowl that tastes too bland? If your smoothie bowl lacks flavor, try adding a splash of vanilla extract or a pinch of salt. You can also mix in a bit of honey or agave syrup for sweetness. Adjust the toppings to add more taste and texture. This article covers how to make a delicious açaí smoothie bowl. You learned about the key ingredients, easy steps for preparation, and creative topping ideas. I shared tips to improve taste and presentation, plus fun variations to try. Don’t forget storage techniques to keep your bowl fresh. With all this information, you can enjoy a tasty and nutritious treat anytime. Get creative with your favorites and make this recipe truly yours. Enjoy every bite!
                          Tropical Acai Smoothie Bowl Energizing Healthy Treat

                        Footer

                        ↑ back to top

                        More information

                        • Drinks
                        • Appetizer
                        • Dinner
                        • Desserts
                        • About
                        • Contact
                        • Privacy Policy

                        Our Policies

                        • Privacy Policy
                        • GDPR Policy
                        • Terms Of Use
                        • Copyright Policy
                        • Cookie Policy
                        • Disclaimer

                        Copyright © 2025 cheftaling