Chef Taling

  • Recipes
    • Dinner
    • Desserts
    • Appetizer
    • Drinks
  • Privacy Policy
  • Contact
  • About
menu icon
go to homepage
  • Recipes
    • Dinner
    • Desserts
    • Appetizer
    • Drinks
  • Privacy Policy
  • Contact
  • About

search icon
Homepage link
  • Recipes
    • Dinner
    • Desserts
    • Appetizer
    • Drinks
  • Privacy Policy
  • Contact
  • About

×

Avocado Kale Caesar Salad Fresh and Flavorful Delight

Published: Aug 19, 2025 · Modified: Aug 19, 2025 by Taling · Leave a Comment

↓ Jump to Recipe

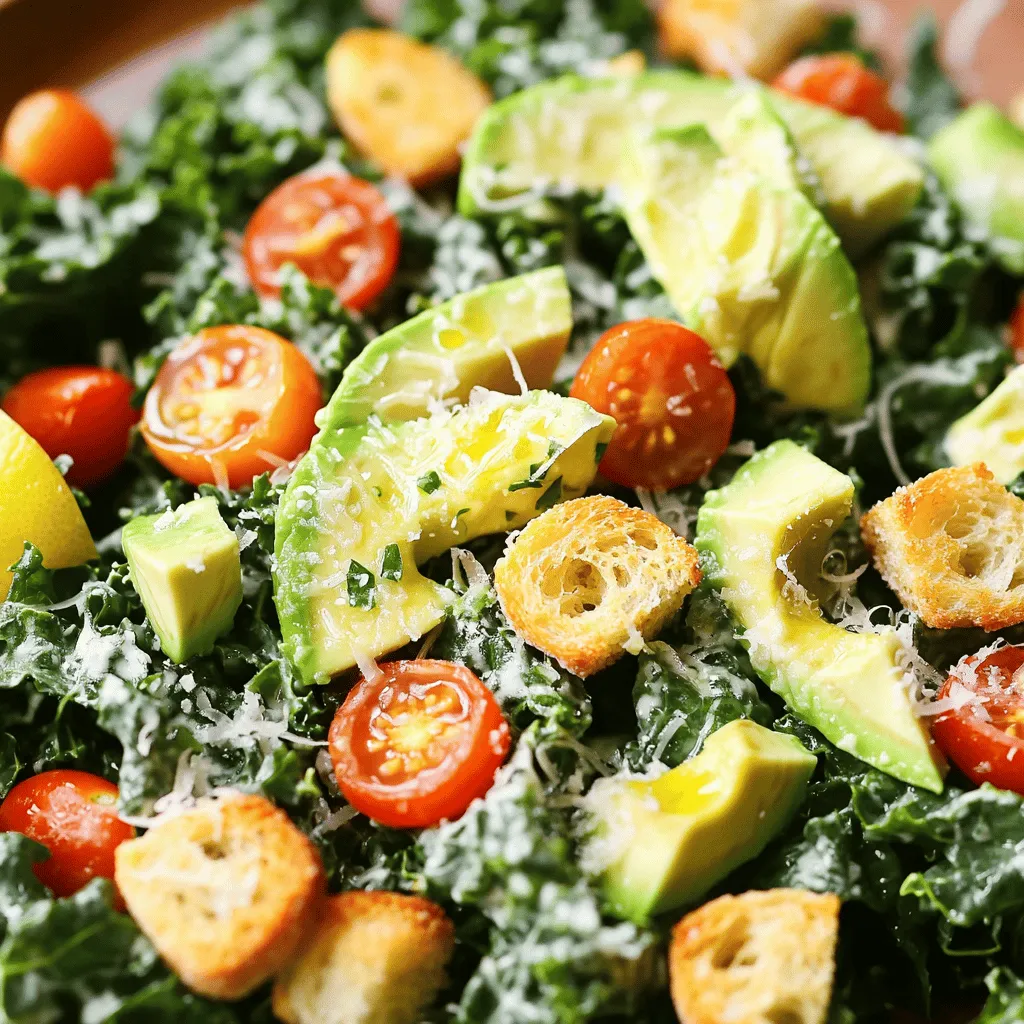
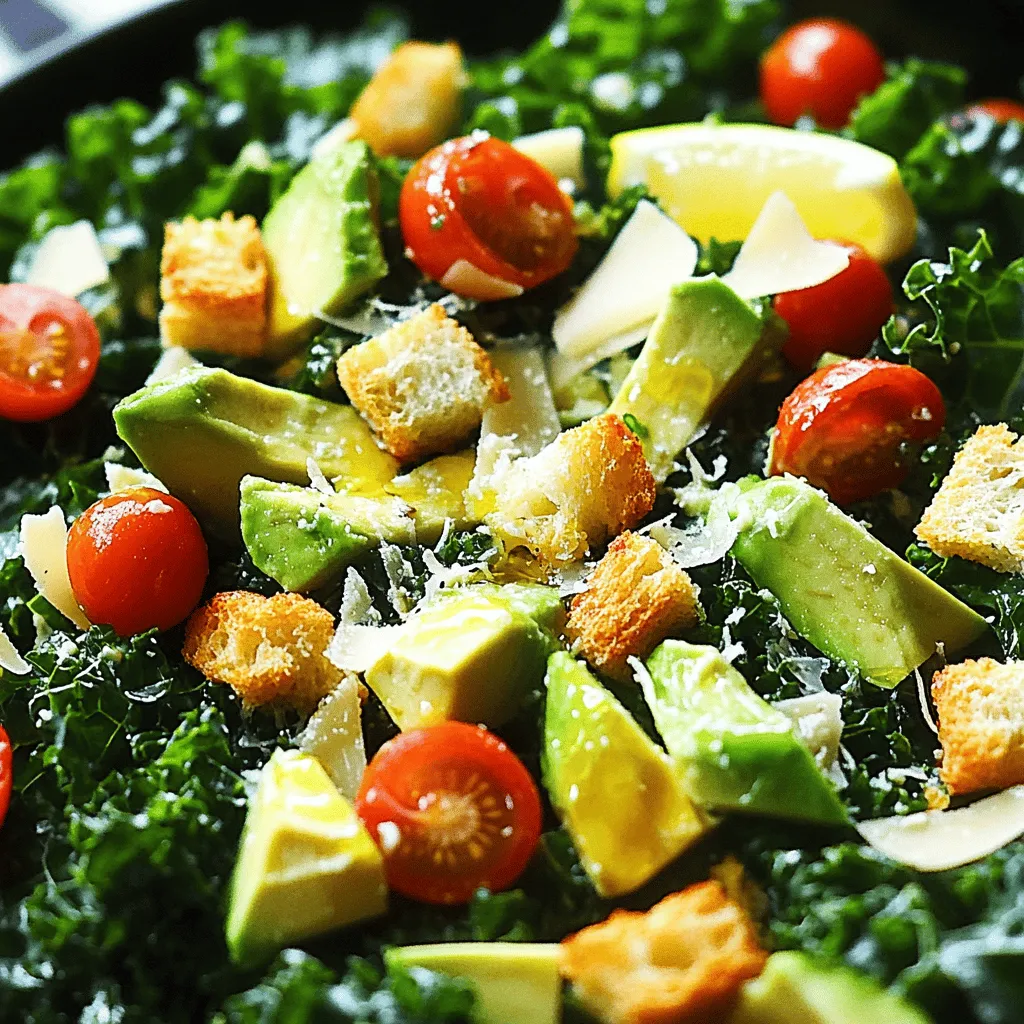
Craving a fresh and tasty salad? You’re in the right place! This Avocado Kale Caesar Salad is a healthy twist on a classic dish. Each bite bursts with flavor from ripe avocados, crunchy kale, and tangy dressing. Plus, it’s quick to make! In this post, I’ll guide you through the simple steps and share tips for perfecting this delightful dish. Let’s dive into the world of fresh ingredients and vibrant tastes!

- 4 cups curly kale, stems removed and chopped - 1 ripe avocado, diced - 1 cup cherry tomatoes, halved When I make this salad, I start with fresh ingredients. Curly kale is my go-to because it holds dressing well. I always remove the stems to get a softer bite. Next, I pick a ripe avocado. A good avocado adds creaminess. The last fresh item is the cherry tomatoes. They bring color and a sweet burst of flavor. - 1 tablespoon lemon juice - 1 tablespoon Dijon mustard - 1 tablespoon Worcestershire sauce For the dressing, I mix lemon juice, Dijon mustard, and Worcestershire sauce. The lemon juice gives it a zesty kick. The mustard adds depth, while the Worcestershire sauce enhances the flavor. I whisk these together for a smooth blend. - ½ cup croutons (store-bought or homemade) - ¼ cup freshly grated Parmesan cheese I love adding croutons for a crunchy texture. You can use store-bought or make your own. Lastly, I sprinkle Parmesan cheese on top. It adds a salty richness to the salad. Each topping makes this dish a fresh delight. To start, take your curly kale and chop it. Remove the tough stems. Place the chopped kale in a large bowl. Add a pinch of salt to the kale. This step is key. Salting helps break down the tough leaves. Using your hands, massage the kale for about 2-3 minutes. You want it to turn dark green and feel tender. This makes the kale easier to eat and brings out its flavor. Next, grab a small bowl. In it, combine the lemon juice, Dijon mustard, Worcestershire sauce, and olive oil. Whisk these ingredients together until they are well mixed. A good whisking technique gives the dressing a creamy texture. You can use a fork or a small whisk. Make sure everything blends well for the best taste. Now, pour the dressing over the massaged kale. Toss the kale to coat it completely with the dressing. Gently fold in the diced avocado and cherry tomatoes. Be careful not to smash the avocado. Finally, add the croutons and freshly grated Parmesan cheese. Give the salad one last gentle toss. Season with salt and freshly ground black pepper to taste. Serve the salad right away for the freshest flavor. To choose a ripe avocado, look for these signs: - The skin should be dark and slightly bumpy. - Gently squeeze the avocado. It should yield to pressure but not feel mushy. - Check the stem. If it comes off easily and is green underneath, the avocado is ripe. To cut and dice an avocado, follow these steps: 1. Cut the avocado in half lengthwise. 2. Twist the two halves to separate them. 3. Remove the pit carefully using a knife or spoon. 4. Use a spoon to scoop out the flesh. 5. Slice the flesh into cubes while still in the skin. 6. Gently scoop out the cubes with a spoon. Homemade croutons are simple and add great flavor. Here’s an easy recipe: - Ingredients: - 2 cups of bread, cubed - 2 tablespoons olive oil - Salt and pepper to taste - Optional: garlic powder, herbs, or cheese 1. Preheat your oven to 375°F (190°C). 2. Toss the bread cubes with olive oil, salt, and any herbs you like. 3. Spread them on a baking sheet. 4. Bake for 10-15 minutes until golden brown. For flavor variations, try adding: - Italian herbs for a classic touch. - Paprika for a smoky vibe. - Grated cheese for extra richness. Massaging kale makes it softer and tastier. Here are the best techniques: 1. Start with clean, chopped kale in a bowl. 2. Add a pinch of salt. This helps break down the fibers. 3. Use your hands to knead and squeeze the kale for 2-3 minutes. The benefits of massaging kale include: - Making it easier to chew and digest. - Enhancing its flavor. - Changing its color to a brighter green, signaling readiness. {{image_2}} To make a vegan version of this salad, you can swap the Parmesan cheese. Use nutritional yeast instead of cheese. It adds a cheesy flavor without using dairy. For Worcestershire sauce, pick a vegan brand. This sauce often has anchovies, so check the label. Want more protein? You can add grilled chicken or tofu. Both options work well with the salad flavors. If you want other protein choices, consider chickpeas or beans. These options are healthy and tasty too. Adding seasonal vegetables makes this salad even better. Try bell peppers in summer or roasted squash in fall. You can also toss in fruits like apple slices or berries. Nuts like walnuts or almonds add crunch and flavor. Adjust according to what’s fresh and available! To keep your salad fresh, store leftovers in a sealed container. Use an airtight glass or plastic container. This helps prevent browning and keeps the flavors alive. If you can, separate the dressing from the salad. This way, the kale and other veggies stay crisp. The best temperature for storing your salad is 34°F to 40°F. This range helps maintain freshness. When stored properly, the salad lasts about 1 to 2 days. After this time, the kale may wilt, and the avocado can brown. Freezing this salad isn't recommended. The texture of the kale and avocado changes when frozen. If you must freeze, keep the components separate. Freeze the kale and avocado in one bag and the dressing in another. Before serving, let them thaw in the fridge overnight. Yes, you can prep this salad ahead of time. To keep it fresh, follow these tips: - Wash and chop kale: Store it in an airtight container. - Prepare the dressing: Mix it and keep it in a jar. - Dice avocado last: Add it right before serving to prevent browning. - Store croutons separately: This keeps them crunchy. By prepping this way, you save time and enjoy fresh flavors. If you want a different green, try these: - Spinach: It’s tender and mild. - Swiss chard: It adds a nice color and taste. - Romaine lettuce: Crisp and crunchy, great for salads. Each option brings its own flavor and texture. Yes, this salad can be gluten-free. Here’s how: - Croutons: Use gluten-free bread to make your own or buy gluten-free croutons. - Dressings: Check labels for gluten-free Worcestershire sauce. These swaps keep your salad tasty and safe for gluten-free diets. This blog post explored how to make a fresh and tasty salad. We covered the best ingredients, from curly kale and ripe avocado to a zesty dressing. You learned step-by-step how to prepare, assemble, and add crunchy toppings like croutons. We also shared tips for selecting the perfect avocado and making homemade croutons. Finally, we discussed storage tips so your salad stays fresh. With these insights, you can create your own delicious salad, tailored to your taste. Enjoy your culinary journey and make this salad your own!

Ingredients

Fresh Ingredients

  1. 4 cups curly kale, stems removed and chopped
  2. 1 ripe avocado, diced
  3. 1 cup cherry tomatoes, halved

When I make this salad, I start with fresh ingredients. Curly kale is my go-to because it holds dressing well. I always remove the stems to get a softer bite. Next, I pick a ripe avocado. A good avocado adds creaminess. The last fresh item is the cherry tomatoes. They bring color and a sweet burst of flavor.

Dressing Ingredients

  1. 1 tablespoon lemon juice
  2. 1 tablespoon Dijon mustard
  3. 1 tablespoon Worcestershire sauce

For the dressing, I mix lemon juice, Dijon mustard, and Worcestershire sauce. The lemon juice gives it a zesty kick. The mustard adds depth, while the Worcestershire sauce enhances the flavor. I whisk these together for a smooth blend.

Toppings

  1. ½ cup croutons (store-bought or homemade)
  2. ¼ cup freshly grated Parmesan cheese

I love adding croutons for a crunchy texture. You can use store-bought or make your own. Lastly, I sprinkle Parmesan cheese on top. It adds a salty richness to the salad. Each topping makes this dish a fresh delight.

Step-by-Step Instructions

Preparing the Kale

To start, take your curly kale and chop it. Remove the tough stems. Place the chopped kale in a large bowl. Add a pinch of salt to the kale. This step is key. Salting helps break down the tough leaves. Using your hands, massage the kale for about 2-3 minutes. You want it to turn dark green and feel tender. This makes the kale easier to eat and brings out its flavor.

Making the Dressing

Next, grab a small bowl. In it, combine the lemon juice, Dijon mustard, Worcestershire sauce, and olive oil. Whisk these ingredients together until they are well mixed. A good whisking technique gives the dressing a creamy texture. You can use a fork or a small whisk. Make sure everything blends well for the best taste.

Assembling the Salad

Now, pour the dressing over the massaged kale. Toss the kale to coat it completely with the dressing. Gently fold in the diced avocado and cherry tomatoes. Be careful not to smash the avocado. Finally, add the croutons and freshly grated Parmesan cheese. Give the salad one last gentle toss. Season with salt and freshly ground black pepper to taste. Serve the salad right away for the freshest flavor.

Tips & Tricks

Choosing the Right Avocado

To choose a ripe avocado, look for these signs:

  1. The skin should be dark and slightly bumpy.
  2. Gently squeeze the avocado. It should yield to pressure but not feel mushy.
  3. Check the stem. If it comes off easily and is green underneath, the avocado is ripe.

To cut and dice an avocado, follow these steps:

1. Cut the avocado in half lengthwise.

2. Twist the two halves to separate them.

3. Remove the pit carefully using a knife or spoon.

4. Use a spoon to scoop out the flesh.

5. Slice the flesh into cubes while still in the skin.

6. Gently scoop out the cubes with a spoon.

Making Homemade Croutons

Homemade croutons are simple and add great flavor. Here’s an easy recipe:

  1. Ingredients:
  2. 2 cups of bread, cubed
  3. 2 tablespoons olive oil
  4. Salt and pepper to taste
  5. Optional: garlic powder, herbs, or cheese

1. Preheat your oven to 375°F (190°C).

2. Toss the bread cubes with olive oil, salt, and any herbs you like.

3. Spread them on a baking sheet.

4. Bake for 10-15 minutes until golden brown.

For flavor variations, try adding:

  1. Italian herbs for a classic touch.
  2. Paprika for a smoky vibe.
  3. Grated cheese for extra richness.

How to Massage Kale Effectively

Massaging kale makes it softer and tastier. Here are the best techniques:

1. Start with clean, chopped kale in a bowl.

2. Add a pinch of salt. This helps break down the fibers.

3. Use your hands to knead and squeeze the kale for 2-3 minutes.

The benefits of massaging kale include:

  1. Making it easier to chew and digest.
  2. Enhancing its flavor.
  3. Changing its color to a brighter green, signaling readiness.

Variations

Vegan Version

To make a vegan version of this salad, you can swap the Parmesan cheese. Use nutritional yeast instead of cheese. It adds a cheesy flavor without using dairy. For Worcestershire sauce, pick a vegan brand. This sauce often has anchovies, so check the label.

Protein Additions

Want more protein? You can add grilled chicken or tofu. Both options work well with the salad flavors. If you want other protein choices, consider chickpeas or beans. These options are healthy and tasty too.

Seasonal Variations

Adding seasonal vegetables makes this salad even better. Try bell peppers in summer or roasted squash in fall. You can also toss in fruits like apple slices or berries. Nuts like walnuts or almonds add crunch and flavor. Adjust according to what’s fresh and available!

Storage Info

How to Store Leftovers

To keep your salad fresh, store leftovers in a sealed container. Use an airtight glass or plastic container. This helps prevent browning and keeps the flavors alive. If you can, separate the dressing from the salad. This way, the kale and other veggies stay crisp.

Refrigeration Tips

The best temperature for storing your salad is 34°F to 40°F. This range helps maintain freshness. When stored properly, the salad lasts about 1 to 2 days. After this time, the kale may wilt, and the avocado can brown.

Freezing Considerations

Freezing this salad isn’t recommended. The texture of the kale and avocado changes when frozen. If you must freeze, keep the components separate. Freeze the kale and avocado in one bag and the dressing in another. Before serving, let them thaw in the fridge overnight.

FAQs

Can I prep this salad in advance?

Yes, you can prep this salad ahead of time. To keep it fresh, follow these tips:

  1. Wash and chop kale: Store it in an airtight container.
  2. Prepare the dressing: Mix it and keep it in a jar.
  3. Dice avocado last: Add it right before serving to prevent browning.
  4. Store croutons separately: This keeps them crunchy.

By prepping this way, you save time and enjoy fresh flavors.

What can I substitute for kale?

If you want a different green, try these:

  1. Spinach: It’s tender and mild.
  2. Swiss chard: It adds a nice color and taste.
  3. Romaine lettuce: Crisp and crunchy, great for salads.

Each option brings its own flavor and texture.

Is this salad gluten-free?

Yes, this salad can be gluten-free. Here’s how:

  1. Croutons: Use gluten-free bread to make your own or buy gluten-free croutons.
  2. Dressings: Check labels for gluten-free Worcestershire sauce.

These swaps keep your salad tasty and safe for gluten-free diets.

This blog post explored how to make a fresh and tasty salad. We covered the best ingredients, from curly kale and ripe avocado to a zesty dressing. You learned step-by-step how to prepare, assemble, and add crunchy toppings like croutons. We also shared tips for selecting the perfect avocado and making homemade croutons. Finally, we discussed storage tips so your salad stays fresh. With these insights, you can create your own delicious salad, tailored to your taste. Enjoy your culinary journey and make this salad your own!

- 4 cups curly kale, stems removed and chopped - 1 ripe avocado, diced - 1 cup cherry tomatoes, halved When I make this salad, I start with fresh ingredients. Curly kale is my go-to because it holds dressing well. I always remove the stems to get a softer bite. Next, I pick a ripe avocado. A good avocado adds creaminess. The last fresh item is the cherry tomatoes. They bring color and a sweet burst of flavor. - 1 tablespoon lemon juice - 1 tablespoon Dijon mustard - 1 tablespoon Worcestershire sauce For the dressing, I mix lemon juice, Dijon mustard, and Worcestershire sauce. The lemon juice gives it a zesty kick. The mustard adds depth, while the Worcestershire sauce enhances the flavor. I whisk these together for a smooth blend. - ½ cup croutons (store-bought or homemade) - ¼ cup freshly grated Parmesan cheese I love adding croutons for a crunchy texture. You can use store-bought or make your own. Lastly, I sprinkle Parmesan cheese on top. It adds a salty richness to the salad. Each topping makes this dish a fresh delight. To start, take your curly kale and chop it. Remove the tough stems. Place the chopped kale in a large bowl. Add a pinch of salt to the kale. This step is key. Salting helps break down the tough leaves. Using your hands, massage the kale for about 2-3 minutes. You want it to turn dark green and feel tender. This makes the kale easier to eat and brings out its flavor. Next, grab a small bowl. In it, combine the lemon juice, Dijon mustard, Worcestershire sauce, and olive oil. Whisk these ingredients together until they are well mixed. A good whisking technique gives the dressing a creamy texture. You can use a fork or a small whisk. Make sure everything blends well for the best taste. Now, pour the dressing over the massaged kale. Toss the kale to coat it completely with the dressing. Gently fold in the diced avocado and cherry tomatoes. Be careful not to smash the avocado. Finally, add the croutons and freshly grated Parmesan cheese. Give the salad one last gentle toss. Season with salt and freshly ground black pepper to taste. Serve the salad right away for the freshest flavor. To choose a ripe avocado, look for these signs: - The skin should be dark and slightly bumpy. - Gently squeeze the avocado. It should yield to pressure but not feel mushy. - Check the stem. If it comes off easily and is green underneath, the avocado is ripe. To cut and dice an avocado, follow these steps: 1. Cut the avocado in half lengthwise. 2. Twist the two halves to separate them. 3. Remove the pit carefully using a knife or spoon. 4. Use a spoon to scoop out the flesh. 5. Slice the flesh into cubes while still in the skin. 6. Gently scoop out the cubes with a spoon. Homemade croutons are simple and add great flavor. Here’s an easy recipe: - Ingredients: - 2 cups of bread, cubed - 2 tablespoons olive oil - Salt and pepper to taste - Optional: garlic powder, herbs, or cheese 1. Preheat your oven to 375°F (190°C). 2. Toss the bread cubes with olive oil, salt, and any herbs you like. 3. Spread them on a baking sheet. 4. Bake for 10-15 minutes until golden brown. For flavor variations, try adding: - Italian herbs for a classic touch. - Paprika for a smoky vibe. - Grated cheese for extra richness. Massaging kale makes it softer and tastier. Here are the best techniques: 1. Start with clean, chopped kale in a bowl. 2. Add a pinch of salt. This helps break down the fibers. 3. Use your hands to knead and squeeze the kale for 2-3 minutes. The benefits of massaging kale include: - Making it easier to chew and digest. - Enhancing its flavor. - Changing its color to a brighter green, signaling readiness. {{image_2}} To make a vegan version of this salad, you can swap the Parmesan cheese. Use nutritional yeast instead of cheese. It adds a cheesy flavor without using dairy. For Worcestershire sauce, pick a vegan brand. This sauce often has anchovies, so check the label. Want more protein? You can add grilled chicken or tofu. Both options work well with the salad flavors. If you want other protein choices, consider chickpeas or beans. These options are healthy and tasty too. Adding seasonal vegetables makes this salad even better. Try bell peppers in summer or roasted squash in fall. You can also toss in fruits like apple slices or berries. Nuts like walnuts or almonds add crunch and flavor. Adjust according to what’s fresh and available! To keep your salad fresh, store leftovers in a sealed container. Use an airtight glass or plastic container. This helps prevent browning and keeps the flavors alive. If you can, separate the dressing from the salad. This way, the kale and other veggies stay crisp. The best temperature for storing your salad is 34°F to 40°F. This range helps maintain freshness. When stored properly, the salad lasts about 1 to 2 days. After this time, the kale may wilt, and the avocado can brown. Freezing this salad isn't recommended. The texture of the kale and avocado changes when frozen. If you must freeze, keep the components separate. Freeze the kale and avocado in one bag and the dressing in another. Before serving, let them thaw in the fridge overnight. Yes, you can prep this salad ahead of time. To keep it fresh, follow these tips: - Wash and chop kale: Store it in an airtight container. - Prepare the dressing: Mix it and keep it in a jar. - Dice avocado last: Add it right before serving to prevent browning. - Store croutons separately: This keeps them crunchy. By prepping this way, you save time and enjoy fresh flavors. If you want a different green, try these: - Spinach: It’s tender and mild. - Swiss chard: It adds a nice color and taste. - Romaine lettuce: Crisp and crunchy, great for salads. Each option brings its own flavor and texture. Yes, this salad can be gluten-free. Here’s how: - Croutons: Use gluten-free bread to make your own or buy gluten-free croutons. - Dressings: Check labels for gluten-free Worcestershire sauce. These swaps keep your salad tasty and safe for gluten-free diets. This blog post explored how to make a fresh and tasty salad. We covered the best ingredients, from curly kale and ripe avocado to a zesty dressing. You learned step-by-step how to prepare, assemble, and add crunchy toppings like croutons. We also shared tips for selecting the perfect avocado and making homemade croutons. Finally, we discussed storage tips so your salad stays fresh. With these insights, you can create your own delicious salad, tailored to your taste. Enjoy your culinary journey and make this salad your own!

Avocado Kale Caesar Salad

Elevate your salad game with this delicious Avocado Kale Caesar Salad recipe! Packed with nutrient-rich kale, creamy avocado, and fresh cherry tomatoes, this quick 10-minute dish is perfect for any occasion. Discover how to make a flavorful dressing that ties everything together and enjoy a satisfying meal that's both healthy and tasty. Click to explore the full recipe and impress your friends with this vibrant, nutritious salad!
Print Recipe Pin Recipe

Ingredients
  

4 cups curly kale, stems removed and chopped

1 ripe avocado, diced

1 cup cherry tomatoes, halved

½ cup croutons (store-bought or homemade)

¼ cup freshly grated Parmesan cheese

1 tablespoon lemon juice

1 tablespoon Dijon mustard

1 tablespoon Worcestershire sauce (ensure it's a vegan version if needed)

¼ cup olive oil

Salt and freshly ground black pepper, to taste

Instructions
 

In a large mixing bowl, combine the chopped kale with a pinch of salt. Using your hands, massage the kale for about 2-3 minutes until it becomes tender and dark green in color.

    In a separate small bowl, whisk together the lemon juice, Dijon mustard, Worcestershire sauce, and olive oil until well combined.

      Pour the dressing over the massaged kale and toss to coat completely.

        Fold in the diced avocado and cherry tomatoes gently to avoid smashing the avocado.

          Add the croutons and Parmesan cheese, and give the salad one last gentle toss.

            Season with salt and pepper to taste and serve immediately.

              - Prep Time: 10 min | Total Time: 10 min | Servings: 2-4

                Related Recipes

                • - 2 large cucumbers - 2 green onions - Cilantro (optional) - 1 teaspoon salt - 2 tablespoons soy sauce - 1 tablespoon rice vinegar - 1 tablespoon sesame oil - 1 teaspoon honey or maple syrup - 1 tablespoon Sriracha - 1 teaspoon freshly grated ginger - 1 tablespoon sesame seeds - Prep time: 10 minutes - Total time: 40 minutes - Servings: 4 The spicy sesame cucumber salad shines with its fresh and crunchy textures. You need two large cucumbers for this recipe. Slice them thinly to keep the crunch. You can use two green onions, finely chopped, for a mild onion flavor. If you like, add cilantro for a fresh touch. For the pantry ingredients, you will need one teaspoon of salt. The salt helps to draw out moisture from the cucumbers. Use two tablespoons of soy sauce for that umami depth. A tablespoon of rice vinegar adds a nice tang. Sesame oil gives a rich, nutty flavor. You can sweeten the salad with one teaspoon of honey or maple syrup. One tablespoon of Sriracha gives it a spicy kick. Adjust this to your taste. A teaspoon of freshly grated ginger adds warmth. Finally, finish with one tablespoon of sesame seeds for crunch. This salad is quick to make. It takes only 10 minutes to prep and 40 minutes total. It serves four people, making it perfect for a small gathering. Enjoy making this fresh and vibrant dish! - Thinly slice cucumbers. - Sprinkle with salt and let sit for 15-20 minutes. Start by slicing the cucumbers. Use a sharp knife for clean cuts. Thin slices help the salad soak up the dressing well. The salt draws out moisture, making your salad crisp and fresh. - Combine soy sauce, rice vinegar, and sesame oil. - Whisk in honey or maple syrup, Sriracha, and ginger. In a bowl, mix soy sauce, rice vinegar, and sesame oil. These ingredients create a savory and tangy base. Add honey or maple syrup for sweetness. Then, stir in Sriracha for heat and freshly grated ginger for zest. This dressing brings all the flavors together. - Drain excess moisture from cucumbers. - Toss cucumbers with dressing. - Add sesame seeds and green onions. After the cucumbers sit, drain any liquid. This step keeps the salad from getting soggy. Pour the dressing over the cucumbers and toss well. Finally, add sesame seeds and chopped green onions for crunch and flavor. Let the salad rest for ten minutes. This waiting time helps the flavors mix nicely. Enjoy your fresh and spicy salad! Let the salad rest before serving. This step helps the flavors mix well. After you mix in the dressing, let it sit for ten extra minutes. This time allows the cucumbers to soak up the taste. If you like spice, adjust the Sriracha to your taste. Start with one tablespoon and add more if needed. This way, you control how spicy it gets. Adding toppings can make the salad even better. Try using nuts or seeds for extra crunch. Toasted sesame seeds work great and add flavor. Chopped peanuts or almonds can also bring a nice bite. Feel free to mix and match different toppings for variety. Garnishing with cilantro adds a fresh touch. Just sprinkle some on top before serving. It not only looks good but also adds flavor. Serve the salad chilled or at room temperature. You can pair it with grilled meats or rice dishes for a full meal. {{image_2}} You can change the flavor by using different vinegars or oils. For a tangy twist, try apple cider vinegar. It adds a nice zing. You can also swap sesame oil for olive oil. This will give the salad a lighter taste. Experiment with your favorite flavors. It’s fun to discover what you like best! Want to make your salad heartier? Add protein! Tofu works great. Cut it into small cubes and toss it in. If you prefer meat, shredded chicken is a tasty choice. Both options boost the salad's protein and make it more filling. You can make your salad more colorful and crunchy with extra veggies. Bell peppers add a sweet crunch. Chop them into bite-sized pieces and mix them in. Avocados give a creamy texture. They also add healthy fats. Slice them and gently fold them into the salad for a delicious twist. To keep your spicy sesame cucumber salad fresh, store it in an airtight container. This helps keep the flavors strong and the cucumbers crunchy. Make sure to refrigerate it right after serving. If you have leftovers, place them in the fridge within two hours. The salad tastes best when eaten within a few days. The spicy sesame cucumber salad stays fresh for about 3 to 5 days in the fridge. After this time, the cucumbers can become soggy. Always check for any off smells or changes in texture before eating. If it looks or smells strange, it’s best to throw it away. I do not recommend freezing this salad. Freezing changes the texture of the cucumbers. They can become mushy once thawed. Instead, enjoy the salad fresh for the best taste and crunch. Yes, you can make this salad ahead of time. It tastes great when it sits for a while. You can prepare it up to 24 hours in advance. Just keep it in the fridge. The flavors will blend, and the salad will be extra tasty. If you don’t have Sriracha, you can use other hot sauces. Try using chili paste or a bit of cayenne pepper. Adjust the amount to your taste. If you want less heat, use a mild sauce or just skip it altogether. Yes, the Spicy Sesame Cucumber Salad is both vegan and gluten-free. It contains no animal products and uses gluten-free soy sauce. You can enjoy it without worry about dietary restrictions. To make it spicier, add more Sriracha. You can also include red pepper flakes or chopped fresh chilies. Start with a little and taste as you go. This way, you can find the perfect heat for your liking. This blog post shared a simple way to make Spicy Sesame Cucumber Salad. We covered fresh and pantry ingredients, including the best tips for taste and storage. You can customize the salad with protein or other veggies. Remember, letting the salad sit boosts flavor. With these steps, you can create a delicious dish. Enjoy making it your own!
                  Spicy Sesame Cucumber Salad Fresh and Crunchy Delight
                • - 1 pound fresh asparagus, trimmed - 2 tablespoons olive oil - 3 cloves garlic, minced - 1/4 cup grated Parmesan cheese - 1 teaspoon lemon zest - 1/2 teaspoon salt - 1/4 teaspoon black pepper - A pinch of red pepper flakes - Additional herbs or spices The magic of Garlic Parmesan Air Fryer Asparagus starts with fresh asparagus. Make sure to choose bright green, firm stalks. Trim the ends to keep them tender. Olive oil adds rich flavor and helps crisp the asparagus in the air fryer. Use good quality oil for the best taste. Next, garlic. I love using fresh garlic in this recipe. Mince three cloves to give a great flavor punch. For seasoning, we need Parmesan cheese. Grate it yourself for the best results. Lemon zest brings a nice brightness to the dish. Use a fine grater to get just the zest, avoiding the bitter white part. Finally, we have salt and pepper. These basic seasonings enhance all the flavors. If you like some heat, add a pinch of red pepper flakes. You can also mix in other herbs to match your taste. With these simple ingredients, you can make a delightful side dish that shines at any meal. - Trimming and cleaning: Start by taking 1 pound of fresh asparagus. Hold a spear and bend it gently. It will naturally snap at the right point. Discard the tough ends. Rinse the asparagus under cold water to clean it of dirt. - Marinating the asparagus: In a large bowl, mix 2 tablespoons of olive oil, 3 cloves of minced garlic, 1 teaspoon of lemon zest, 1/2 teaspoon of salt, and 1/4 teaspoon of black pepper. Add the trimmed asparagus and toss to coat well. Let it marinate for about 5 minutes. This helps the flavors soak in. - Preheating the air fryer: Set your air fryer to 400°F (200°C) and let it preheat. This step is key for getting that perfect crisp. - Arranging asparagus in the basket: Carefully place the marinated asparagus in the air fryer basket. Arrange them in a single layer, leaving space between each spear. This way, they cook evenly and get crispy. - Adding Parmesan cheese: After 7-10 minutes of cooking, check the asparagus. They should be tender and slightly crispy. Take them out and sprinkle 1/4 cup of grated Parmesan cheese on top right away. The heat will make the cheese melt just right. - Serving suggestions: If you like a bit of heat, add a pinch of red pepper flakes. Serve the asparagus warm as a side dish or a healthy snack. It pairs well with grilled meats or a fresh salad. To avoid overcrowding the air fryer, place asparagus in a single layer. This helps them cook evenly. If you pile them up, they can become soggy instead of crispy. You can cook in batches if needed. To check for doneness, use a fork or knife. The asparagus should feel tender but not mushy. You want a slight crunch when you bite into it. For a crispier finish, cook them for a few extra minutes. For extra flavor, try adding a squeeze of fresh lemon juice. This brightens the dish and adds freshness. You can also use herbs like thyme or rosemary for a different taste. If you're out of Parmesan cheese, try using pecorino Romano. It has a nice salty flavor and melts well. Nutritional yeast is another option for a vegan twist. Pair this dish with grilled chicken or fish for a balanced meal. It also works well with rice or quinoa for a healthy side. To use leftovers, chop the asparagus and toss it into salads. You can also mix it into pasta or grain bowls for a quick meal. These ideas keep the flavors fresh and exciting. {{image_2}} You can enjoy asparagus in many ways. First, consider roasting asparagus in the oven. This method gives it a nice, rich flavor. Preheat your oven to 425°F (220°C). Toss the asparagus with olive oil, garlic, and seasoning. Spread it on a baking sheet. Roast for about 15-20 minutes, or until it is tender and slightly crispy. Another fun way is grilling asparagus. This method adds a smoky touch. Heat your grill to medium-high. Coat the asparagus with oil and seasonings. Grill for about 5-7 minutes, turning occasionally. The grill marks will add both flavor and a beautiful look. If you want a vegan twist, you can skip the cheese. Instead, use nutritional yeast for that cheesy taste. It is packed with vitamins and has a nice flavor. You can also try using cashew cheese for a creamy texture. For those on a low-carb or keto diet, keep the asparagus as your base. Use olive oil and garlic as your main flavors. You can also add bacon bits for extra flavor without adding carbs. Asparagus shines in spring, but you can use other veggies too. Try green beans or Brussels sprouts. They cook well and soak up flavors nicely. Adjust the cooking time as needed. You can also adapt the recipe for different veggies. Zucchini or bell peppers work great. Cut them into similar sizes as asparagus. Follow the same steps to cook and season them for a tasty dish. To store leftover Garlic Parmesan Air Fryer Asparagus, place it in an airtight container. Keep it in the fridge for up to 3 days. Make sure it's cool before sealing the container. If you want to freeze it, spread the cooked asparagus on a baking sheet first. Freeze it for about 1 hour, then transfer it to a freezer bag. This method helps prevent clumping. When reheating asparagus, use an air fryer or oven for the best results. Preheat your air fryer to 350°F (175°C) and heat for about 3-5 minutes. This keeps the texture crispy. You can also use a microwave, but it may make the asparagus soft. To maintain flavor, avoid reheating more than once. You can add asparagus to many dishes. Try slicing it into salads or pasta. It's great in omelets too. For meal prep, store ingredients separately. Keep the asparagus, olive oil, and spices in different containers. This way, you can easily mix and cook them when you're ready. Cooking asparagus in an air fryer takes about 7-10 minutes at 400°F. Check them halfway through to shake the basket. This helps them cook evenly. The asparagus should be tender and a bit crispy when done. You can use frozen asparagus, but fresh tastes better. If you use frozen, do not thaw them first. Just add a minute or two to the cooking time. This way, they will still get that nice texture. Garlic Parmesan Air Fryer Asparagus goes well with many dishes. Here are some ideas: - Grilled chicken or fish - Pasta with lemon or cream sauce - Quinoa or rice bowls - Steak or pork chops - A fresh salad with lemon vinaigrette This asparagus dish is a great side for both light and hearty meals. Enjoy it with your favorite proteins for a tasty dinner. In this blog post, we covered how to make Garlic Parmesan Air Fryer Asparagus. You learned about the main ingredients, cooking steps, and tips for great flavor. I shared optional variations and storage tips to help you enjoy this dish longer. Remember, experiment with different methods and seasonings to suit your taste. Incorporating asparagus into your meals can boost health and flavor. With these steps and ideas, you can create a delicious dish every time. Enjoy your cooking adventure!
                  Garlic Parmesan Air Fryer Asparagus Simple Delight
                • - 8 oz whole wheat pasta (fusilli or rotini) - 2 cups fresh spinach, rinsed and dried - 1 cup strawberries, hulled and sliced - 1/2 cup feta cheese, crumbled The main ingredients in this dish bring bright flavors and colors. Whole wheat pasta gives a nice bite. Fresh spinach adds a lush green crunch. Strawberries burst with sweetness. Feta cheese gives a tangy kick that balances the salad. - 1/4 cup walnuts, chopped - 1/4 cup red onion, finely sliced - 1/4 cup extra-virgin olive oil - 2 tablespoons balsamic vinegar Walnuts add a nice crunch and healthy fats. Red onion brings a sharp flavor. Extra-virgin olive oil makes everything rich and smooth. Balsamic vinegar adds a touch of sweetness and depth. - 1 tablespoon honey - Salt and pepper to taste Honey sweetens the dressing, while salt and pepper enhance all the flavors. This simple mix ties the salad together, making it truly special. To start, you need to cook the pasta. Use 8 oz of whole wheat pasta. I prefer fusilli or rotini for this salad. Boil water in a large pot. Add a pinch of salt to the water. Then, add the pasta and cook according to the package instructions until al dente. This should take about 7 to 9 minutes. Al dente means the pasta is firm but not hard. Once done, drain the pasta in a colander. Rinse it under cold water. This cools the pasta quickly and stops the cooking process. Now, it’s time to mix the salad. In a large bowl, combine the cooked pasta, 2 cups of fresh spinach, and 1 cup of sliced strawberries. Add 1/2 cup of crumbled feta cheese, 1/4 cup of chopped walnuts, and 1/4 cup of finely sliced red onion. These ingredients bring great flavors and textures. In a separate bowl, whisk 1/4 cup of extra-virgin olive oil, 2 tablespoons of balsamic vinegar, 1 tablespoon of honey, and some salt and pepper. Pour this dressing over the salad mixture. Toss gently to ensure everything is well coated. Let the salad sit for 10 to 15 minutes before serving. This step allows the flavors to meld together nicely. For an attractive finish, serve the salad in a large, shallow bowl. Garnish with extra strawberry slices and a few whole walnuts. You can drizzle some extra balsamic vinegar on top for more flavor. Enjoy your fresh and tasty Strawberry Spinach Pasta Salad! Letting the salad sit is key to great taste. It allows the flavors to blend well. I suggest letting it rest for at least 10-15 minutes. This will make every bite more delicious. You can also adjust the seasoning to balance the flavors. A pinch more salt or a dash of pepper can make a big difference. Always taste before serving to ensure it meets your liking. Cooking the pasta just right is very important. Follow the package instructions carefully. You want it al dente, which means firm but not hard. This gives your salad the best texture. After cooking, rinse the pasta under cold water. This stops the cooking process and helps prevent sticking. Make sure to drain it well before mixing it with other ingredients. Choosing ripe strawberries is essential for flavor. Look for berries that are bright red and firm. Avoid any that are mushy or dull. They should smell sweet and fresh. For feta cheese, opt for a creamy and crumbly variety. It adds a nice tang and richness to the salad. A good feta makes all the difference in taste and texture. {{image_2}} You can change the pasta for a gluten-free option. Try using gluten-free fusilli or rotini. This keeps the texture while making it safe for those who avoid gluten. For cheese, you can swap feta with goat cheese for a tangy taste. Mozzarella also works well for a milder flavor. Want to mix it up? Add other fruits like blueberries or peaches. They bring a new burst of sweetness. You can also use different nuts, like almonds or pecans. This adds crunch and extra flavor to your salad. You can customize the vinaigrette to suit your taste. Try adding herbs like basil or mint for a fresh kick. If you want a different flavor profile, use a creamy dressing like ranch or a yogurt-based dressing. Each option gives the salad a unique twist. To keep your Strawberry Spinach Pasta Salad fresh, store it in the fridge. Use an airtight container to seal in flavors. Make sure the lid fits snugly. This will help prevent air from drying out the salad. Always let it cool to room temperature before sealing it. In the fridge, your salad lasts about 3 to 5 days. Look for signs of spoilage like a strange smell or mushy strawberries. If the spinach appears wilted or discolored, it's best to toss it out. Always trust your senses; they rarely lie! Freezing pasta salad isn’t always ideal due to the texture changes. If you choose to freeze it, pack it tightly in a freezer-safe container. Leave some space for expansion. To thaw, place it in the fridge overnight. Serve it cold, and mix well to revive flavors. Yes, you can make this salad ahead of time. Prepare the salad and dressing separately. Store them in the fridge. When you are ready to serve, toss them together. This keeps the pasta and veggies fresh. Flavors still blend well even after sitting. This salad pairs well with grilled chicken or fish. You can also serve it with crusty bread. For a brunch, it goes nicely with an omelet. Consider a light soup for a complete meal. To make this salad vegan, skip the feta cheese. Use a plant-based cheese as a substitute. You can also add chickpeas for protein. They give a nice texture and help fill you up. Yes, you can make a low-carb version. Replace the whole wheat pasta with spiralized zucchini or cucumber. This keeps the dish fresh and crunchy. You still get the great flavors without the carbs. This blog post covers how to make a delicious Strawberry Spinach Pasta Salad. We explored key ingredients, like whole wheat pasta and fresh spinach, and seasoning options. I shared step-by-step instructions for cooking and serving. Tips and tricks ensure you get the best flavor, and we discussed variations to suit your taste. Proper storage keeps leftovers fresh. Overall, this salad is versatile and easy to prepare. Enjoy your cooking journey and savor every bite!
                  Strawberry Spinach Pasta Salad Fresh and Flavorful Dish
                • - 3 cups fresh corn kernels (about 5 ears of corn) - 1 red bell pepper, diced - 1 green bell pepper, diced - 1 small red onion, finely chopped - 1 cup cherry tomatoes, halved - 1 jalapeño, seeded and minced - 1/4 cup fresh cilantro, chopped - Juice of 2 limes - 3 tablespoons olive oil - 1 teaspoon cumin - 1 teaspoon chili powder - Salt and pepper to taste - 1 avocado, diced (for topping) The main ingredients in Fiesta Corn Salad bring a burst of flavor. Fresh corn kernels give it sweetness and crunch. The bell peppers add color and a crisp texture. Red onion gives a tasty bite, while cherry tomatoes offer juiciness. The jalapeño adds heat, and fresh cilantro brightens the dish. Lime juice and olive oil create a tangy dressing that ties everything together. Spices like cumin and chili powder enhance the flavors. Finally, avocado adds creaminess and richness on top. - Lime juice ratio - Oil type - Spice choices For the dressing, I use a balance of lime juice and olive oil. Lime juice gives a bright and zesty taste. I recommend 2 parts lime juice to 3 parts oil for the best flavor. Olive oil adds a smooth texture. For spices, cumin and chili powder add depth. You can adjust salt and pepper to match your taste. - Other vegetables - Cheese options - Protein additions You can customize Fiesta Corn Salad with optional add-ins. Other vegetables like zucchini or black beans work well. Cheese options include feta or cotija for a salty kick. For protein, try grilled chicken or black beans. These additions can make the salad more filling and flavorful. Feel free to mix and match to suit your taste! To prepare the corn, start by blanching it. Bring a large pot of salted water to a boil. Add 3 cups of fresh corn kernels. Blanch them for about 3-4 minutes. This step makes the corn tender but not mushy. After blanching, drain the corn in a colander. Rinse it under cold water to stop the cooking process. This cooling step helps keep the corn crisp and bright. Next, we need to combine the vegetables. Dice one red bell pepper and one green bell pepper into small pieces. Finely chop one small red onion. Halve one cup of cherry tomatoes. For a kick, seed and mince one jalapeño. Add all these vegetables to the bowl with corn. Toss everything gently. Make sure the colors mix well! Now, let’s make the dressing. In a small bowl, combine the juice of two limes, three tablespoons of olive oil, one teaspoon of cumin, and one teaspoon of chili powder. Add salt and pepper to taste. Whisk the mixture until it blends well. This dressing balances the flavors and brings everything together. Pour the dressing over the corn and vegetable mixture. Sprinkle 1/4 cup of fresh chopped cilantro on top. Gently toss to coat all the ingredients evenly. Be careful not to crush the vegetables. Just before serving, fold in one diced avocado. This adds creaminess to the dish. Chilling the salad enhances the flavors. After mixing, let it sit in the fridge for about 30 minutes. This time allows the ingredients to meld well. If you are short on time, you can serve it right away. However, chilling makes it taste even better. You can easily change the spice level of your Fiesta Corn Salad. If you want more heat, add more jalapeño or a pinch of cayenne pepper. For milder flavors, skip the jalapeño or use a sweet pepper instead. Feel free to substitute any ingredients based on what you have. For example, swap cherry tomatoes for diced cucumber or add black beans for extra protein. You can also use different herbs, like parsley or mint, in place of cilantro. Serve your Fiesta Corn Salad in a large bowl for a family-style meal. Or, present it on a colorful platter for a party. You can also use individual cups for each guest. This fun style adds a festive touch to your table. Garnish with extra cilantro leaves and lime wedges. This adds a pop of color and a fresh look. You can also sprinkle some queso fresco on top for a creamy finish. Fresh herbs make a big difference in flavor. Chopped cilantro adds brightness to the salad. You can also try adding fresh basil or oregano for a different taste. Letting your salad marinate for a bit enhances the flavors. Chill the salad in the fridge for about 30 minutes before serving. This helps all the ingredients blend together nicely. {{image_2}} To make a Southwest Fiesta Corn Salad, add black beans and corn to the mix. You can also throw in some diced avocado for creaminess. This version boasts a rich, hearty flavor. The beans bring protein, while the avocado adds a smooth texture. The Mexican Street Corn Salad brings a creamy twist to the classic. You make it by adding mayonnaise or sour cream. Key ingredients include crumbled cotija cheese and chili powder. This version has a rich and tangy flavor that takes you straight to the streets of Mexico. For vegetarian or vegan options, switch dairy with plant-based yogurt or mayo. Tofu or chickpeas can boost the protein. Use nutritional yeast for a cheesy flavor without dairy. These swaps make the salad just as tasty while keeping it plant-based. To keep your Fiesta Corn Salad fresh, store it in an airtight container. This helps keep out air and moisture. The salad tastes best when enjoyed within 3 days. If you notice any signs of spoilage, it’s best to discard it. You can freeze Fiesta Corn Salad, but it may change in texture. To freeze, place it in a freezer-safe container. Make sure to leave space for expansion. When ready to eat, thaw it in the fridge overnight. Reheat gently on low heat or enjoy it cold. You can make this salad up to a day in advance. Prepare all the ingredients, but do not add the avocado until just before serving. Use glass or plastic containers with lids for storage. This way, you keep everything fresh and tasty. Fiesta Corn Salad is a bright and fresh dish. It features sweet corn, colorful veggies, and zesty lime. You mix corn, bell peppers, onion, tomatoes, and jalapeño. The salad is topped with cilantro and avocado. This dish is perfect for summer barbecues or potlucks. It brings a vibrant taste to any meal. To make Fiesta Corn Salad gluten-free, choose gluten-free spices and condiments. Most fresh veggies and corn are gluten-free. Always check labels on packaged items. This ensures no hidden gluten sneaks in. You can enjoy this salad worry-free! Yes, you can use frozen corn! It’s a great time-saver. Simply thaw and drain the corn before using. Frozen corn can taste sweet and crisp. However, fresh corn gives the best flavor and texture. If you use frozen, blanch briefly for the best result. To add heat, try more jalapeño or some diced serrano peppers. You can also include hot sauce or cayenne pepper. Adjust the amount to suit your taste. Start with a little, then add more if needed. This way, you control the heat level. Yes, Fiesta Corn Salad works well for meal prep. Make it ahead and store it in the fridge. Keep the avocado separate until serving to avoid browning. Store it in an airtight container for freshness. It stays tasty for about three days. Enjoy it for lunch or dinner! This blog post covered all you need to know about Fiesta Corn Salad. We explored the main ingredients and dressings, and how to customize your salad. I shared tips on preparing and presenting your salad so it looks great. You learned the best ways to store and make it ahead of time. Enjoy making this fresh and colorful dish. You can mix and match ingredients to fit your taste. With the right prep, it’s easy and fun to enjoy!
                  Fiesta Corn Salad Fresh and Flavorful Side Dish

                Leave a Reply Cancel reply

                Your email address will not be published. Required fields are marked *

                Recipe Rating


                Hi I’m Taling

                I love sharing perfected dishes from my kitchen. I’m sure they’ll earn a spot in your heart. Let’s savor this journey together!.

                More about me

                Recent Desserts

                • - 2 cups old-fashioned rolled oats - 1 cup sliced almonds - ½ cup honey or maple syrup - ¼ cup coconut oil, melted - 1 teaspoon pure vanilla extract - ½ teaspoon cinnamon - ¼ teaspoon sea salt The main ingredients create a great base for your granola clusters. Old-fashioned rolled oats give you texture and fiber. Sliced almonds add crunch and protein. Honey or maple syrup provides natural sweetness. Coconut oil helps bind the granola and gives it a nice flavor. Vanilla extract adds a warm aroma. Cinnamon and sea salt enhance the taste, making it irresistible. - ½ cup dried fruit (e.g., cranberries or cherries) Adding dried fruit is optional but can enhance your granola. Dried cranberries or cherries bring a chewy texture. They also add a burst of flavor that contrasts nicely with the crunchy clusters. Feel free to mix in your favorite dried fruit to make it your own! - Benefits of oats and almonds - Natural sweeteners vs. processed sugars Oats are a fantastic source of fiber. They help keep you full and support heart health. Almonds provide healthy fats and protein. They are great for your skin and heart. Using honey or maple syrup makes the granola healthier than using processed sugars. Natural sweeteners offer flavor without the crash. This granola is a smart choice for breakfast or snacks! First, preheat your oven to 325°F (165°C). This helps your granola cook evenly. Next, line your baking sheet with parchment paper. This will make cleanup easy and prevent sticking. In a large mixing bowl, combine the rolled oats, sliced almonds, cinnamon, and sea salt. I like to stir these ingredients well to mix the flavors. This step is key for a tasty granola. In a separate bowl, whisk together the melted coconut oil, honey or maple syrup, and vanilla extract. This mixture brings sweetness and flavor. Make sure it is fully combined to coat the oats well. Now, pour the wet mixture over the dry ingredients. Stir gently but thoroughly to ensure even coating. Every oat should feel the love of the sweet mixture! Transfer the mixture to your prepared baking sheet. Press it down firmly with a spatula. This step is crucial for making clusters. Bake in the preheated oven for 20-25 minutes. Stir halfway through to ensure even baking. Look for a golden brown color. Once baked, allow the granola to cool completely on the baking sheet. This cooling time helps the granola harden and form clusters. After it cools, break the granola into clusters. If you like, mix in any dried fruit at this stage for extra flavor. Enjoy your crunchy and delicious snack! To get those perfect granola clusters, you must press the mixture down firmly. This step helps the granola stick together as it bakes. Use a spatula to compact the mix into an even layer on the baking sheet. This creates a solid base for your clusters. Also, bake at the right temperature, which is 325°F (165°C). This temperature ensures that the granola cooks evenly and gets that lovely golden color. You can easily change the flavor of your granola. Try adding spices like nutmeg or cardamom for a warm touch. You can also use different nuts or seeds. Swap sliced almonds for walnuts or pecans. This switch adds a unique crunch and flavor. You could even add seeds like pumpkin or sunflower for more texture. Presentation can make your granola even more appealing. Serve the clusters in mason jars or cute bowls. This adds a fun touch to your breakfast or snack. Drizzle with honey or almond butter for extra sweetness. A sprinkle of sliced almonds on top makes it look even better. Enjoy your beautiful and tasty creation! {{image_2}} If you need a nut-free option, try using seeds. Sunflower seeds or pumpkin seeds work great. They keep the crunch and add good flavor. Use them in the same amount as the sliced almonds. This way, you still get tasty granola clusters without nuts. You can mix things up! For a sweet twist, add chocolate chips to your granola. Chocolate chip vanilla almond granola clusters taste amazing. You can also try a maple pecan version. Just swap the almonds for pecans and add a splash of maple syrup. Both variations are sure to please. Get creative with seasonal flavors! In the fall, add dried cranberries or a sprinkle of pumpkin spice. This gives a warm, cozy taste. For summer, toss in some tropical fruits like dried mango or pineapple. It adds a fun, fruity vibe. Enjoy these variations to keep your granola exciting! Store your Vanilla Almond Granola Clusters in airtight containers. This keeps them fresh. Place the containers in a cool, dry spot. Avoid warm places to prevent moisture. When stored at room temperature, your granola lasts about two weeks. For longer storage, consider freezing it. Granola freezes well, and you can keep it for up to three months. Check the texture and smell of your granola. If it feels soft or chewy, it may be stale. A lack of aroma also means it’s time to toss it. Fresh granola should smell sweet and nutty. Homemade Vanilla Almond Granola Clusters last about two weeks when stored properly. Use an airtight container to keep them fresh. After two weeks, the granola may still be safe to eat but could lose its crunch. Yes, you can! Use certified gluten-free oats to make this recipe gluten-free. Many brands offer gluten-free oats, which are safe for those with gluten sensitivities. Granola clusters are great with yogurt or smoothie bowls. You can also sprinkle them on oatmeal or mix them into your favorite cereal. They add a nice crunch and flavor. To lower sugar, use less honey or maple syrup. You can also try unsweetened applesauce or mashed bananas. These options keep the flavor and texture while cutting back on sugar. Making Vanilla Almond Granola Clusters is easy and fun. You learned the main ingredients needed, like oats and almonds, and how to combine them. I shared tips for perfect clusters and fun variations to try. Storage methods keep your granola fresh longer. Homemade granola is tasty and healthier than store-bought. It’s a great snack or breakfast option. Enjoy making this recipe and customizing it to your taste!
                  Vanilla Almond Granola Clusters Crunchy and Delicious
                • - 3 ripe peaches, peeled and pitted - 1 cup fresh raspberries Fresh fruits are the stars of this sorbet. Ripe peaches give it a sweet, juicy base. They should feel soft when you gently press them. Fresh raspberries add a tangy burst of flavor. Their bright color makes the sorbet look beautiful. - ½ cup granulated sugar - 1 cup water - 2 tablespoons lemon juice We use granulated sugar to sweeten the sorbet. It mixes well with the fruit and makes a simple syrup. Water helps the sugar dissolve easily. Lemon juice adds a bit of zing. It balances the sweetness and brings out the fruit's natural flavors. - A pinch of salt Salt is a secret ingredient here. It enhances the flavors and makes the sorbet taste better. Just a small pinch will do. It helps all the sweet and tart notes shine through. First, we make a simple syrup. In a medium saucepan, combine 1 cup of water with ½ cup of granulated sugar. Heat this over medium heat. Stir until the sugar dissolves completely. This usually takes just a few minutes. Once the sugar dissolves, remove the saucepan from the heat. Let the syrup cool to room temperature. This syrup will add sweetness to our sorbet. Now, we will prepare the fruit. Take 3 ripe peaches, peel them, and remove the pits. Then, rinse 1 cup of fresh raspberries. Place the peaches and raspberries in a blender or food processor. Blend them until the mixture is smooth. You want a creamy texture without any chunks. This will create the rich base for our sorbet. Next, we combine everything. Pour the cooled simple syrup into the blender with the fruit. Add 2 tablespoons of lemon juice and a pinch of salt. Blend again until all the ingredients mix well. Taste the mixture. If it needs more sweetness, add a little sugar or extra raspberries and blend again. Now, transfer this mixture into a shallow container. Place it in the freezer. Every 30 minutes, stir the mixture to break up any ice crystals. This will take about 4 hours. When it is fully frozen and smooth, it’s ready to serve. Use a scoop to dish it up into bowls. Enjoy your peach raspberry sorbet! To make your sorbet shine, you can adjust the sweetness. Taste the mix before freezing. If it's not sweet enough, add a bit more sugar. You can also use extra raspberries for a bolder flavor. Try mixing in other fruits for fun. You can use strawberries, blackberries, or even mango. Each fruit brings its own taste to the sorbet. This way, you can create many yummy flavors! To avoid ice crystals, stir the sorbet every 30 minutes while it freezes. This helps keep it smooth and creamy. If you skip this step, the sorbet may turn icy. Use a shallow container for freezing. A wider surface area helps the sorbet freeze faster and stay smooth. Glass or metal containers work best. They help cool the mixture evenly. For a lovely presentation, serve the sorbet in chilled bowls. This keeps it cold for longer. You might want to garnish it with fresh raspberries or mint leaves. This adds color and extra flavor to your dish. Another idea is to create a layered dessert. You can serve sorbet with yogurt or fresh fruit. This not only makes it pretty but also adds more taste and texture to enjoy! {{image_2}} You can switch out fruits for fun flavors. Try using seasonal fruits like strawberries or mangoes. They add a new twist to your sorbet. You can mix peaches with blackberries, too. Each fruit brings its own sweetness and taste. Adding herbs or spices can also change the flavor. A little mint can make your sorbet refreshing. You might like a hint of ginger for a spicy kick. Experimenting with different combinations keeps things exciting. If you want to cut down on sugar, try sugar substitutes. Agave syrup or honey can work well in this recipe. Just remember to adjust the amount since they are sweeter. This way, you can enjoy a tasty treat without all the sugar. For a dairy-free option, you can leave out any cream. This sorbet is already dairy-free, making it perfect for those with allergies. You can enjoy this cool treat without any worries. To keep your peach raspberry sorbet fresh, choose the right container. I recommend using a shallow, airtight container. This helps the sorbet freeze evenly. You can also use a glass or plastic container with a tight lid. Avoid metal containers, as they can cause freezer burns. When storing your sorbet, freeze it quickly. After you finish freezing it, press a piece of plastic wrap directly onto the surface. This helps keep out air and moisture. Always ensure the lid is on tight before placing it back in the freezer. Your peach raspberry sorbet can last up to two weeks in the freezer. After that, it may lose its flavor and texture. To enjoy it at its best, try to eat it within this time frame. Watch for signs of spoilage. If you see ice crystals forming on the surface, that means it is starting to lose quality. If the sorbet has an off smell or odd color, it's best to toss it. Always trust your senses when enjoying this tasty treat! You can make sorbet by freezing the mixture manually. First, blend your fruits, sugar, and water. Once mixed, pour it into a shallow dish. Place it in the freezer. Every 30 minutes, stir it with a fork. This breaks up ice and keeps it smooth. Repeat until it’s fully frozen, usually about 4 hours. Yes, you can use frozen fruit. Just make sure to thaw it a bit before blending. This helps with blending. You might need less sugar since frozen fruit can be sweeter. Taste the mixture and adjust as needed. To soften sorbet, take it out of the freezer a few minutes before serving. Let it sit at room temperature for 5 to 10 minutes. You can also scoop it and place it in the fridge for a short time. This helps it reach the right texture. Sorbet is often seen as a healthier option than ice cream. It usually has less fat since it doesn’t contain cream. Sorbet is made mainly from fruit and sugar. However, it can still have a lot of sugar. Always check labels if you buy it. Fresh fruit sorbet is a great way to enjoy sweet flavors with fewer calories. In summary, we covered how to make delightful sorbet using fresh fruits like peaches and raspberries. You learned about necessary ingredients like sugar and lemon juice, and how to blend them into a smooth mix. We also explored tips for enhancing flavor and achieving the perfect texture. Don’t forget to try different fruits or adjustments for your diet. With proper storage, your sorbet will last. Enjoy refreshing treats with this simple method! Create your unique flavors and share them with others.
                  Peach Raspberry Sorbet Refreshing Summer Treat
                • To make these delightful bars, you need the following key ingredients: - 1 cup all-purpose flour - ¼ cup powdered sugar - ½ cup unsalted butter, softened - ¼ teaspoon salt - 2 large eggs - 1 cup granulated sugar - ¼ cup freshly squeezed lemon juice - Zest of 1 lemon - 1 cup fresh raspberries These ingredients create a tasty treat that is both sweet and tangy. The flour and butter make a nice crust, while the eggs and sugar give the filling a smooth texture. Fresh lemon juice and zest add a bright flavor, and raspberries give a burst of color and taste. You can add some optional ingredients to make your bars even better: - Extra powdered sugar for dusting This optional dusting gives a lovely finish to the bars. It adds a touch of sweetness and makes the bars look even more appealing. Having the right tools makes cooking easier. For this recipe, you will need: - 8x8 inch baking dish - Parchment paper - Mixing bowls - Whisk - Spatula Using parchment paper helps lift the bars out easily. A whisk is great for mixing the filling smoothly. These tools will help you create perfect Raspberry Lemonade Bars every time. First, you need to preheat your oven to 350°F (175°C). This step is key to getting the bars baked just right. Next, grab an 8x8 inch baking dish. Line it with parchment paper. Leave some paper hanging over the sides. This will help you lift the bars out later. In a medium bowl, mix together these four ingredients: - 1 cup all-purpose flour - ¼ cup powdered sugar - ½ cup unsalted butter, softened - ¼ teaspoon salt Stir them well until the mix forms a crumbly dough. Then, press this dough into the bottom of your lined baking dish. Make sure to spread it evenly. Bake this crust for about 15 minutes, or until it turns a light golden color. While the crust bakes, you can prepare the filling. In another bowl, whisk together: - 2 large eggs - 1 cup granulated sugar - ¼ cup freshly squeezed lemon juice - Zest of 1 lemon Mix these until they are smooth and combined. Next, gently fold in 1 cup of fresh raspberries. Be careful not to crush them too much. You want to keep some whole for a nice texture. Once the crust is ready, pour the raspberry-lemon filling over it. Return the dish to the oven and bake for an extra 20-25 minutes. The filling should be set and slightly golden on top when done. After baking, let the bars cool completely in the dish on a wire rack. When cool, use the parchment paper to lift the bars out and cut them into squares. If you like, you can dust the tops with extra powdered sugar before serving. To make a great crust, use cold butter. It keeps the crust flaky. Mix the flour, powdered sugar, and salt well. This helps the flavors blend. Press the dough firmly into the baking dish. Make sure it’s even. Bake until it’s lightly golden. This gives a perfect base for your filling. For a smooth filling, whisk the eggs well. Mix in the granulated sugar until it’s blended. Add the lemon juice and zest next. This gives a bright flavor. Gently fold in the raspberries. Be careful not to mash them. You want some berries whole for texture. This makes every bite exciting. When serving, cut the bars into neat squares. Dust them with powdered sugar for a sweet touch. Use a sharp knife for clean edges. Arrange them on a colorful plate. This makes for a pretty display. You can also add fresh raspberries on top. This adds a nice pop of color. Enjoy with a glass of lemonade for a refreshing treat! {{image_2}} You can switch up the fruit in these bars. Try using blueberries or strawberries. Each fruit gives a unique taste. I love the sweet and tart mix of peach and lemon. You can blend fruits too. For instance, mix raspberries with blackberries for a berry blast! To make these bars gluten-free, swap all-purpose flour with almond or coconut flour. These flours add flavor and texture. You may need to adjust the amounts. Almond flour is heavier, so use less. Coconut flour absorbs more moisture, so add extra liquid. Want to spice things up? Add fresh mint or basil for a herbal twist. You can also mix in a pinch of cinnamon for warmth. If you like spicy, try a dash of cayenne pepper. These small changes can make a big impact on taste! To keep your Raspberry Lemonade Bars fresh, store them in an airtight container. They will stay good at room temperature for up to two days. If you want to keep them longer, place them in the fridge. They can last about a week when chilled. Always make sure to cover them well to prevent them from drying out. You can freeze these bars for longer storage. First, cut them into squares. Wrap each piece tightly in plastic wrap. Then, place them in a freezer-safe bag or container. They will stay fresh in the freezer for up to three months. When you’re ready to enjoy them, just thaw them in the fridge overnight. If you want to warm your Raspberry Lemonade Bars, use the oven. Preheat your oven to 300°F (150°C). Place the bars on a baking sheet and heat for about 10 minutes. This will make them warm and soft without losing their flavor. Avoid using the microwave, as it can make the bars soggy. Enjoy your delicious treat! Yes, you can use frozen raspberries. They work well in this recipe. Just remember to thaw them first. Drain any extra water to keep the filling from being too runny. This way, your bars stay firm and tasty. To add more tartness, increase the lemon juice. Try adding an extra tablespoon. You can also add a bit more lemon zest. This will boost the lemon flavor and balance the sweetness of the raspberries. The best way to cut the bars is using a sharp knife. First, let the bars cool completely. Use the parchment paper to lift them out. Then, run the knife under hot water for clean cuts. Wipe the knife dry between cuts for neat squares. Raspberry Lemonade Bars last up to five days in the fridge. Store them in an airtight container. If you want to keep them longer, you can freeze them for up to three months. Just make sure to wrap them tightly before freezing. Raspberry Lemonade Bars are easy to make and delicious. We covered key ingredients, step-by-step baking, and helpful tips. You can also try different fruit or gluten-free options. Remember to store them right for the best taste. These bars are great for sharing or enjoying at home. I hope you feel inspired to create your own tasty treats. Enjoy the sweet and tangy flavors!
                  Raspberry Lemonade Bars Refreshing Summer Treat
                • - 2 cups fresh strawberries, hulled and halved - 1 cup coconut milk (or any milk of your choice) - 2 tablespoons honey or maple syrup (adjust to taste) - 1 teaspoon vanilla extract - 100g dark chocolate, chopped - 1 tablespoon coconut oil - ¼ cup crushed nuts (almonds, pistachios, or hazelnuts for topping, optional) Fresh strawberries make the base for these popsicles. You want ripe, sweet berries. They should shine and smell sweet. Coconut milk adds creaminess and pairs well with strawberries. If you prefer, use almond or oat milk instead. For sweetness, I like honey or maple syrup. You can adjust the amount based on your taste. The vanilla extract brings warmth and depth. Next, we have dark chocolate. Choose one that you love. It coats the popsicles and gives a nice contrast to the fruit. The coconut oil helps the chocolate melt smoothly. Lastly, the crushed nuts are optional but add great crunch and flavor. Almonds, pistachios, or hazelnuts work well. You can skip them if you want a simpler treat. Now that you have your ingredients, you’re ready to create a delicious dessert! Start with fresh strawberries. Remove the green tops and cut them in half. This makes them easier to blend. Place the hulled strawberries in a blender. Add one cup of coconut milk, two tablespoons of honey or maple syrup, and one teaspoon of vanilla extract. Blend these ingredients until smooth. You want a nice, creamy mixture. Next, grab your popsicle molds. Pour the strawberry mixture into the molds. Fill each one about three-quarters full. This space helps the popsicles expand as they freeze. Be careful not to overfill them, or it will be messy. Now, insert the popsicle sticks into each mold. Make sure they stand straight. Place the molds in the freezer. Let them freeze for about four to six hours. They need to be solid to remove them easily. To release them, run warm water over the outside of the molds. This trick helps loosen the popsicles. For the chocolate coating, gather 100 grams of chopped dark chocolate and one tablespoon of coconut oil. Place these in a heatproof bowl. Melt the mixture in the microwave. Do this in 20-second intervals. Stir after each interval until smooth. You want it fully melted and ready to dip. Now comes the fun part—dipping! Take each popsicle and dip it halfway into the melted chocolate. Let any excess chocolate drip off. If you like, roll the dipped part in crushed nuts for extra crunch. Then, lay the popsicles on a baking sheet lined with parchment paper. Return them to the freezer for about 10 to 15 minutes. This sets the chocolate nicely. Fresh strawberries are key for these popsicles. Look for berries that are bright red, firm, and free from blemishes. The best strawberries taste sweet and juicy. Ripe strawberries have more flavor, making your popsicles better. Choose organic strawberries if you can, as they often have a richer taste. Adjust the sweetness to fit your taste. Use honey or maple syrup to sweeten your popsicles. Start with the 2 tablespoons suggested in the recipe. If you prefer a sweeter treat, add more. Just mix well and taste. Remember, the sweetness can change the final flavor. To get a smooth, even coat of chocolate, melt dark chocolate with coconut oil. This mix helps the chocolate flow better. Heat it in short bursts in the microwave. Stir often to avoid burning. When dipping your popsicles, let the excess chocolate drip off. This keeps your popsicles neat and tasty. {{image_2}} You can switch up the chocolate for your popsicles. Instead of dark chocolate, try milk chocolate for a sweeter taste. White chocolate adds a creamy flavor, while ruby chocolate brings a unique berry-like taste. Each type can change how your popsicles taste. Experiment with them to find your favorite. Mixing fruits can make your popsicles even more fun. Try adding bananas or mango to the strawberry mix. You can also add a few drops of flavor extracts, like almond or coconut. These small changes create new tastes. Each combination can surprise your taste buds. If you're looking for healthier popsicles, there are easy swaps. Use a low-sugar sweetener like stevia instead of honey or maple syrup. For a dairy-free option, stick with coconut milk or almond milk. You can even add Greek yogurt for creaminess without much sugar. These options keep your popsicles tasty while making them better for you. To keep your chocolate dipped strawberry popsicles fresh, store them in an airtight container. This helps prevent freezer burn. If you do not have one, wrap each popsicle in plastic wrap. This adds an extra layer of protection. Make sure to label the container with the date to track freshness. You can store these popsicles in the freezer for up to two months. After that, they may lose taste and texture. To enjoy them at their best, try to eat them within this time frame. When you are ready to enjoy your popsicles, remove them from the freezer. Let them sit for about 5 minutes to soften slightly. This makes them easier to bite into. If you want them cold and firm, enjoy them right away! Yes, you can use frozen strawberries! Just remember to thaw them first. This helps in blending. Frozen strawberries may make your popsicles a bit softer. But they still taste great. You can easily make these popsicles vegan. Just swap honey for maple syrup. Use coconut milk or any plant-based milk. This keeps the popsicles creamy and delicious. To remove popsicles, run warm water over the outside of the molds. This warms the sides and helps loosen the popsicles. They should slide out easily after a few seconds. To prevent cracking, add coconut oil to the chocolate. This keeps it smooth and flexible. Make sure the popsicles are cold when you dip them in chocolate. This helps the chocolate set nicely without cracking. You now have a simple guide to make tasty strawberry popsicles. Using fresh strawberries and creamy coconut milk, you can create a fun treat. Remember to customize the sweetness and experiment with toppings like nuts. Storing them right will keep them fresh, and you can enjoy different variations too. With these steps, you'll impress family and friends with your skills. Get ready to enjoy your homemade popsicles!
                  Chocolate Dipped Strawberry Popsicles Simple Delight

                Recent Drinks

                • To make a delicious Turmeric Golden Milk Latte, gather these simple ingredients: - 2 cups almond milk (or your preferred milk) - 1 teaspoon ground turmeric - ½ teaspoon ground ginger - ¼ teaspoon cinnamon - 1 tablespoon honey or maple syrup (adjust to taste) - Pinch of black pepper - ½ teaspoon vanilla extract - Optional: a sprinkle of nutmeg for garnish - Almond Milk: This milk is low in calories and rich in vitamins. It helps with heart health. - Turmeric: This spice has curcumin, known for its anti-inflammatory properties. It may help improve brain function. - Ginger: Ginger can help with digestion and nausea. It adds a nice warmth to the drink. - Cinnamon: This spice is rich in antioxidants. It may help lower blood sugar and improve heart health. - Honey or Maple Syrup: Both sweeteners can boost energy. They also provide antioxidants. - Black Pepper: This spice enhances turmeric absorption. It makes the drink more effective. - Vanilla Extract: It adds flavor and can help reduce stress. - Nutmeg: This spice is optional, but it adds warmth and a nice aroma. - Milk Options: You can use oat milk, soy milk, or coconut milk for different flavors. - Sweeteners: If you prefer, try agave syrup or stevia as sugar-free options. - Spices: Experiment with cardamom or cloves for added flavor. - Nutmeg: You can skip it if you don't like nutmeg, or use a touch of cocoa powder instead. 1. Start by taking a small saucepan. 2. Add 2 cups of almond milk to the pan. 3. Measure and add 1 teaspoon of ground turmeric. 4. Next, add ½ teaspoon of ground ginger. 5. Sprinkle in ¼ teaspoon of cinnamon. 6. Sweeten your drink with 1 tablespoon of honey or maple syrup. 7. Don't forget a pinch of black pepper for better absorption of turmeric. 8. Lastly, add ½ teaspoon of vanilla extract. 9. Whisk all the ingredients well in the pan. 10. Place the saucepan on medium heat. 11. Gently warm the mixture while stirring often. 12. Keep an eye on it; do not let it boil. 13. After about 5-7 minutes, it should be hot enough. 14. Remove the pan from heat and let it cool slightly. 15. If you want a frothy drink, use a milk frother or whisk it quickly. 16. Pour the golden milk into your favorite mugs. 17. Optionally, sprinkle a bit of nutmeg on top for a nice touch. 18. Serve warm and enjoy this comforting drink! - Always use a whisk to blend the spices into the milk. - Whisking helps mix the turmeric and other spices evenly. - When heating, keep the heat low to avoid scalding the milk. - Stir often to prevent sticking at the bottom of the pan. - If you see steam but no bubbles, you are at the right temperature. - A milk frother works wonders for a smooth, frothy finish. - If you don’t have a frother, whisk vigorously by hand. - Frothing adds air, giving the latte a creamy feel. - The more you froth, the lighter and fluffier your drink will become. - For an extra touch, froth some almond milk separately and top your latte with it. You can mix spices to make your turmeric latte tastier. Try adding a pinch of nutmeg or a dash of cardamom. These spices add warmth to the drink. You can also use fresh ginger instead of ground ginger. This will give your latte a bright, zesty kick. Just remember, fresh ginger may need more time to steep. Many people rush the heating process. Always warm your milk slowly over medium heat. If you boil it, the spices can lose flavor. Another mistake is not blending the spices well. Make sure to whisk the mixture thoroughly. This helps avoid clumps of turmeric or ginger. Lastly, avoid skipping the black pepper. It helps your body absorb turmeric better. Sweetness is personal. Start with one tablespoon of honey or maple syrup. Taste your latte and add more if you like it sweeter. For creaminess, use full-fat coconut milk for a richer feel. Almond milk is lighter but still delicious. You can also mix almond and coconut milk for the best of both worlds. {{image_2}} You can easily make this latte vegan. Just use almond milk, coconut milk, or oat milk. These milks work great in this recipe. They keep the drink creamy and delicious. If you want a nut-free option, oat milk is the best choice. It blends well with turmeric and spices. To make an iced version, start with brewed turmeric milk. Follow the same steps but let it cool. Pour over ice instead of serving warm. This drink is refreshing on hot days. You can also add some ice cream for a treat! You can mix and match flavors for fun. Try adding matcha for a green twist. This adds a fresh taste and boosts energy. You can also use cocoa for a chocolatey version. The cocoa pairs well with turmeric and spices. For a special touch, add a dash of vanilla extract. This enhances the overall flavor and aroma. To store leftover turmeric golden milk, let it cool first. Then, pour it into an airtight container. Keep it in the fridge for up to three days. This way, you can enjoy the drink again without losing its flavor. When reheating your golden milk, do it gently. Pour it into a small saucepan. Heat it over low to medium heat. Stir it often to avoid burning. Never let it boil, as this can change the taste and texture. You can also use a microwave. Heat in short bursts, stirring in between. Turmeric golden milk lasts about three days in the fridge. Check for signs of spoilage. If it smells sour or has any mold, discard it. Always trust your senses. If it looks or smells off, it’s best to throw it away. Turmeric has many health benefits. It is known for its bright yellow color and active compound called curcumin. Curcumin may help reduce inflammation. It can also support joint health. Some studies suggest it may boost your mood. Turmeric might even help with digestion. Drinking turmeric may also support your immune system. Yes, you can use any milk you like. Almond milk is great, but coconut milk adds creaminess. Oat milk is a good choice for a thicker texture. If you prefer dairy, whole or skim milk works too. Just remember, different types of milk will change the flavor a bit. To make this recipe sugar-free, skip the honey or maple syrup. You can use a sugar substitute like stevia or monk fruit instead. These options will give you sweetness without the calories. Just adjust the amount to your taste. Yes, it is safe for most people to have turmeric daily. Using it in cooking or drinks is a great way to enjoy its benefits. However, if you have health issues or take certain medications, check with a doctor first. Moderation is key, as with any food. In this blog post, we explored the ingredients and health benefits of Turmeric Golden Milk. I shared step-by-step instructions for making it frothy and delicious. We also discovered tips, tricks, and variations to enhance your drink. Proper storage and reheating advice can help you enjoy leftovers. Remember, turmeric offers many health benefits, so enjoy this drink often. Use alternative ingredients if you prefer. With these ideas, you can create the perfect golden milk to suit your taste and health needs. Enjoy your journey to wellness!
                  Turmeric Golden Milk Latte Simple and Creamy Recipe
                • - 1 ripe mango, peeled and diced - 1 cup fresh pineapple chunks - 1 banana, sliced - 1 cup coconut water (or regular water) - ½ cup plain Greek yogurt (or dairy-free alternative) - 1 tablespoon honey or agave syrup (optional) - A handful of fresh mint leaves (for garnish) - Ice cubes (optional) The key to a delicious mango pineapple smoothie lies in its fresh ingredients. You want ripe fruits for the best flavor. The mango should feel soft when you squeeze it gently. Pineapples should smell sweet and fruity. This smoothie combines sweet mango, tangy pineapple, and creamy banana. Coconut water adds hydration, while Greek yogurt gives it a nice creaminess. You can add honey for extra sweetness if you like. Mint leaves add a refreshing touch when you serve it. Each ingredient plays a role in making this smoothie flavorful and refreshing. Trust me, using fresh ingredients will make a big difference in taste! To make this smoothie, start by gathering your main ingredients. You need a ripe mango, fresh pineapple, and a banana. 1. In a blender, combine the diced mango, pineapple chunks, and banana slices. This mix brings a burst of tropical flavor. 2. Next, add one cup of coconut water to the blender. This not only hydrates but also adds a refreshing twist. 3. For creaminess, pour in half a cup of plain Greek yogurt. If you want it sweeter, drizzle in one tablespoon of honey or agave syrup. 4. Blend on high until the mixture is smooth and creamy. If you like your smoothie chilled, toss in a few ice cubes and blend again until they are fully mixed in. 5. After blending, taste your smoothie. If it needs to be sweeter or thicker, add more honey or coconut water as needed. Once your smoothie is ready, it’s time to serve it. I recommend using tall glasses to show off the vibrant color. For a fun touch, garnish each glass with a few fresh mint leaves on top. This not only looks nice but also adds a fresh aroma. Enjoy your delicious Mango Pineapple Smoothie! For the Full Recipe, please refer back to the ingredient list and instructions. To get your smoothie just right, focus on creaminess. Use ripe fruits like mango and banana. The Greek yogurt adds a nice, smooth texture. If you want a richer taste, try full-fat yogurt. For a lighter feel, use low-fat or dairy-free yogurt. Adjust the thickness by adding more liquid. Coconut water is great for this. If your smoothie is too thick, just pour in a bit more. Blend again until it’s just how you like it. If you want a thicker smoothie, add more banana or ice cubes. Boosting flavor can take your smoothie to the next level. Try adding spices like cinnamon or ginger. These spices not only add warmth but also great health benefits. A dash of cinnamon can make the smoothie taste cozy. A pinch of ginger gives it a nice kick. You can also use flavored yogurts for extra taste. Vanilla or coconut yogurt work well. If you want sweetness, think about honey or agave syrup. These can make your smoothie more enjoyable. For a fun twist, try adding a splash of vanilla extract. It will add a lovely aroma to your drink. For a full taste experience, explore the [Full Recipe]. {{image_2}} You can change the fruit in your smoothie to keep it fresh. Adding strawberries or blueberries gives a sweet twist. These berries add a nice color and taste. You can also try using other tropical fruits like papaya or kiwi. These fruits bring new flavors and nutrients to your drink. Each fruit will change the smoothie’s taste and make it unique. If you want a dairy-free smoothie, swap the Greek yogurt for a plant-based option. Almond, coconut, or soy yogurt works well. These alternatives keep your smoothie creamy without dairy. For sweeteners, you can use maple syrup or agave syrup for a vegan choice. These options add sweetness while keeping your drink plant-based. Enjoy the fruity goodness in many ways! Don't forget to check the Full Recipe for more ideas. You may have some smoothie left after making your Mango Pineapple Smoothie. To keep it fresh, use a glass jar or a BPA-free plastic container. Seal it tightly to prevent air from spoiling the flavor. Store it in the fridge for up to 24 hours. After that, it may lose some taste and texture. If you want to enjoy the smoothie later, freezing is a great option. Pour the smoothie into ice cube trays or freezer-safe bags. Leave some space in the bags for expansion. You can freeze it for up to three months. When you’re ready to drink it, take out what you need. Thaw it in the fridge overnight or blend it straight from the freezer for a slushy treat. Enjoy your refreshing Mango Pineapple Smoothie anytime! Yes, you can make this smoothie ahead of time. If you want to save it, store it in an airtight container. Keep it in the fridge for up to one day. The smoothie may separate, so stir it well before you drink it. If you don’t have coconut water, use regular water or fruit juice instead. Fruit juice can add a nice flavor. You can also try almond milk for a creamier touch. Just remember, the taste will change a bit based on what you use. To make the smoothie thicker, add more Greek yogurt or a banana. You can also use frozen fruit instead of fresh. Frozen fruit gives you a nice, thick texture. Just blend it well, and you’ll get a creamy drink. Yes, this smoothie is great for kids! It is packed with fruits and tastes sweet. You can adjust the sweetness by adding less honey. The bright colors and fresh flavors will appeal to children, making it a fun treat. You can find the Full Recipe for the Tropical Bliss Mango Pineapple Smoothie above in this article. This will guide you through every step to create your own refreshing drink. This blog post covers a simple and tasty smoothie recipe. You learned about the key ingredients and their nutritional benefits. I provided steps to prepare and serve the smoothie perfectly. Tips for texture and flavor help you make it your own. You can explore variations to suit your tastes or dietary needs. Don’t forget storage tips to keep leftovers fresh. Enjoy your smoothie making journey. It’s all about trying new things and having fun!
                  Mango Pineapple Smoothie Refreshing and Flavorful Blend
                • - 2 packets of frozen açaí puree - 1 ripe banana - 1 cup of fresh pineapple chunks - 1 cup of coconut milk (or any non-dairy milk) - 1 tablespoon of honey or agave syrup (optional) For a vibrant tropical taste, the main ingredients are key. Açaí puree brings rich color and flavor. It is full of antioxidants. Bananas add creaminess and natural sweetness. Fresh pineapple gives a bright, juicy touch. Coconut milk offers a smooth base. You can use any non-dairy milk you prefer. Honey or agave syrup adds sweetness if needed. - Sliced kiwi - Coconut flakes - Granola - Chia seeds - Fresh berries (e.g., strawberries, blueberries) Toppings make your smoothie bowl pop! Sliced kiwi adds a zesty kick. Coconut flakes give it a tropical crunch. Granola provides texture and flavor. Chia seeds offer extra nutrients. Fresh berries, like strawberries and blueberries, add color and taste. You can mix and match these toppings for a fun look. For the full recipe, please refer to the section above. 1. Blend the ingredients Start by adding the frozen açaí puree, ripe banana, fresh pineapple chunks, and coconut milk into a blender. If you want it sweeter, you can add honey or agave syrup. Blend this mixture on high speed until it becomes creamy and smooth. 2. Adjust consistency with coconut milk If your smoothie is too thick, just add a bit more coconut milk. Blend again until you reach the texture you want. This step is key to making your smoothie bowl enjoyable. 3. Pour into a bowl Once blended, carefully pour the smoothie mixture into a bowl. Make sure to use a large enough bowl to hold all the goodness. 4. Add toppings creatively Now comes the fun part! Arrange your toppings, such as sliced kiwi, coconut flakes, granola, chia seeds, and fresh berries, over the smoothie. Try to create a colorful pattern. I love making a circular design to highlight all the vibrant colors. - Tips for presentation Use a shallow bowl to show off your beautiful toppings. You can also sprinkle some extra coconut flakes around the edge for a nice touch. A colorful presentation makes your smoothie bowl more fun to eat. - Recommended serving utensils Serve your smoothie bowl with a regular spoon. If you want to make it more special, use a wooden spoon or a cute, colorful one. Enjoy your tropical treat right away to keep it fresh and tasty. For the full recipe, refer to the earlier sections. To make a great smoothie bowl, start with ripe fruits. Ripe fruits taste better and add natural sweetness. Look for bananas that are yellow with some brown spots. When it comes to pineapples, choose ones that smell sweet. It ensures they are juicy and fresh. Blending is key to your smoothie bowl. You want a smooth and creamy texture. If your mix is too thick, add more coconut milk. Blend again until you reach the right consistency. A good blend makes your bowl enjoyable and easy to eat. A colorful topping arrangement makes your smoothie bowl pop. Use fresh berries, sliced kiwi, and coconut flakes. Lay them out in a pattern. A circular design looks appealing and fun. To elevate your smoothie bowl's look, use bowls with interesting shapes. Tall bowls or wide, shallow ones can change the game. Garnish with a sprinkle of chia seeds for a fancy touch. This not only looks great but adds a bit of crunch too. {{image_2}} You can change the non-dairy milk for this smoothie. Almond, soy, or oat milk work well. Each milk adds a different taste. Try using seasonal fruits too. Mango, papaya, or berries add a fresh twist. You can mix and match to find your favorite blend. Want more nutrients? Add spinach or kale to your smoothie. They blend well and boost health. You won’t even taste them! For extra energy, stir in nut butter or protein powder. Both will make your smoothie more filling. They add great flavor too! You can also experiment with different combinations to find the best taste for you. To store leftovers, place your smoothie bowl in the fridge. Use a tight container to keep it fresh. Glass or BPA-free plastic works well for storage. I prefer glass because it keeps flavors better. You can freeze smoothie bowls for later. Just pour the mixture into an airtight container. Leave some space at the top, as it will expand when frozen. To defrost, place it in the fridge overnight. If you’re in a rush, you can use the microwave. Just heat it in short bursts to avoid cooking. Enjoy your tropical treat later with ease! For the recipe, check out the Full Recipe. What is açaí and what are its benefits? Açaí is a small, dark purple berry from Brazil. It is full of antioxidants, which help fight free radicals in the body. Açaí is also rich in fiber, promoting good digestion. Plus, it has healthy fats that support heart health. You can enjoy its fruity taste in many dishes. Can I make this smoothie bowl ahead of time? Yes! You can prepare the smoothie mix and store it in the fridge for up to 24 hours. Just remember to keep the toppings separate. This way, your bowl stays fresh and tasty. How can I make this recipe vegan or gluten-free? To make it vegan, use agave syrup instead of honey. For gluten-free, ensure your granola and any other toppings are gluten-free. Most fruits and coconut milk are naturally gluten-free, so you’re all set! Can I substitute açaí with other fruits? Yes, you can! If you can’t find açaí, try using frozen berries like blueberries or strawberries. These fruits will add sweetness and a burst of color to your bowl. What to do if the smoothie is too thick? If your smoothie is too thick, just add a little more coconut milk. Blend again until you reach your desired creaminess. This will make it easier to pour and enjoy. How to fix a smoothie bowl that tastes too bland? If your smoothie bowl lacks flavor, try adding a splash of vanilla extract or a pinch of salt. You can also mix in a bit of honey or agave syrup for sweetness. Adjust the toppings to add more taste and texture. This article covers how to make a delicious açaí smoothie bowl. You learned about the key ingredients, easy steps for preparation, and creative topping ideas. I shared tips to improve taste and presentation, plus fun variations to try. Don’t forget storage techniques to keep your bowl fresh. With all this information, you can enjoy a tasty and nutritious treat anytime. Get creative with your favorites and make this recipe truly yours. Enjoy every bite!
                  Tropical Acai Smoothie Bowl Energizing Healthy Treat
                • - 1 cup plain yogurt - ½ cup coconut milk - 1 cup fresh blueberries (plus extra for garnish) - 2 tablespoons honey or agave syrup (adjust to taste) - ½ teaspoon vanilla extract - A pinch of cardamom powder - Ice cubes (optional) Using fresh ingredients makes a big difference in taste. Fresh blueberries burst with flavor and nutrients. They give the lassi a bright color and a sweet taste. If you can’t find fresh blueberries, frozen ones work too. They are picked at their peak and frozen quickly. This helps keep their taste and nutrients. However, fresh blueberries always add a better texture. Each ingredient in this lassi has great health benefits. - Plain yogurt: Full of protein and good for your gut health. - Coconut milk: Contains healthy fats that can boost energy. - Blueberries: Packed with antioxidants, they help fight disease. - Honey or agave syrup: Adds sweetness and has some vitamins. - Vanilla extract: Adds flavor and may reduce stress. - Cardamom powder: Can aid digestion and add a warm spice note. This Blueberry Coconut Lassi is not just tasty; it’s also good for you! Start by gathering all your ingredients. This makes the process easier and faster. You will need: - 1 cup plain yogurt - ½ cup coconut milk - 1 cup fresh blueberries (plus extra for garnish) - 2 tablespoons honey or agave syrup (adjust to taste) - ½ teaspoon vanilla extract - A pinch of cardamom powder - Ice cubes (optional) Make sure your blueberries are fresh and ripe. They add great flavor and color. If you want a sweeter lassi, adjust the honey or agave syrup to your taste. Now it’s time to blend! In a blender, combine the yogurt, coconut milk, blueberries, honey, vanilla extract, and cardamom powder. Blend on high speed until the mix is smooth and creamy. If you like a thinner drink, add more coconut milk. After blending, taste the lassi. You can add more honey if you want it sweeter. For a chilled treat, add ice cubes and blend again until frothy. Pour your lassi into tall, clear glasses. This shows off the pretty purple color. For a special touch, garnish with a few whole blueberries on top. You can also sprinkle a little cardamom powder for added flair. If you want to impress, add a slice of lime on the glass rim. This not only looks good but adds a nice contrast to the drink. Enjoy your refreshing Blueberry Coconut Lassi! For the full recipe, check the earlier section. For a thick and creamy lassi, use full-fat yogurt. This gives your drink a rich texture. If you want it thinner, add a bit more coconut milk. Blend it well until it's smooth. You can also try adding ice cubes. This makes it frothy and cold. Both honey and agave syrup are great for sweetness. Honey gives a floral taste, while agave is mild. Start with two tablespoons and taste it. If you want it sweeter, add more. Remember, you can always add more, but you can't take it out! You can make your lassi even better! Try adding a pinch of cinnamon or nutmeg for warmth. Fresh mint leaves can add a nice touch too. You might even add a splash of lime juice for a zesty kick. All these extras can make your blueberry coconut lassi unique and delicious. For the full recipe, check out the complete instructions. {{image_2}} You can easily make a vegan version of blueberry coconut lassi. Just swap the yogurt with a plant-based option. Use coconut yogurt or almond yogurt for a creamy base. These alternatives keep that rich flavor. They also add a nice texture. You still get the fresh taste from blueberries and coconut milk. This change makes the drink creamy without any dairy. Spices can enhance the flavor of your lassi. Cardamom adds a warm note. You can also try cinnamon for a sweet twist. If you want more fruit, think about adding bananas or mangoes. These fruits blend well with blueberries. They also boost the health benefits. Each adds its own flavor and richness to the drink. If you prefer different dairy options, there are many choices. Greek yogurt gives a thicker texture. It also adds a tangy taste. You can use regular yogurt instead of plain yogurt. It is a great way to change the flavor. Try using buttermilk for a unique twist. Each choice will change the texture and taste of your lassi. Each option keeps the drink creamy and delicious. For the full recipe, check out the link above. To keep your blueberry coconut lassi fresh, store it in a clean glass jar. Make sure the jar is airtight. This helps keep out air and bacteria. If you have leftovers, don’t let them sit out for long. Refrigerate the lassi within two hours of making it. Always use a spoon to scoop the lassi. Avoid using your fingers, as this can introduce germs. When stored properly, blueberry coconut lassi lasts about 2 to 3 days in the fridge. After that, the taste and texture may change. You will notice it may separate a bit. If this happens, just give it a good shake or blend it again. Always check for any off smells or changes in color before consuming. You can freeze blueberry coconut lassi for later enjoyment. Pour the lassi into ice cube trays or freezer-safe containers. Leave some space at the top, as liquids expand when frozen. To use, thaw the lassi in the fridge overnight or blend the frozen cubes into smoothies. This method keeps the flavor and nutrients intact. For the best taste, use frozen lassi within three months. For the full recipe, check out the earlier section! Yes, you can use Greek yogurt. It makes the lassi thicker and creamier. If you prefer a lighter drink, stick with plain yogurt. Greek yogurt has more protein, which is great for keeping you full. Just remember to adjust the coconut milk to balance the thickness. Absolutely! Blueberry Coconut Lassi is a fun and tasty drink for kids. It has natural sweetness from honey and blueberries. The yogurt provides healthy probiotics, good for digestion. Kids love the vibrant color and fruity flavor. You can make it as sweet as they like! You can find Blueberry Coconut Lassi at many health food stores or cafes. Some grocery stores may also carry it in the yogurt section. If you want a fresh one, try making it at home. You can easily whip up this drink with the Full Recipe I provided. Blueberry coconut lassi is a nutritious and tasty drink. You learned about key ingredients, like fresh blueberries and coconut. The blending process ensures a smooth drink. Adjust sweetness with honey or agave for your taste. You can try different fruits and spices to mix it up. Storing tips help you keep leftovers fresh. Remember, lassi is fun to make and enjoy. Experiment with variations to find your favorite way to drink it. Enjoy your delicious and healthy blueberry coconut lassi!
                  Blueberry Coconut Lassi Creamy and Refreshing Drink

                Footer

                ↑ back to top

                About

                • Home
                • Drinks
                • Appetizer
                • Dinner
                • Desserts
                • About
                • Contact
                • Privacy Policy

                Contact

                • Privacy Policy
                • GDPR Policy
                • Terms Of Use
                • Copyright Policy
                • Cookie Policy
                • Disclaimer

                Copyright © 2025 cheftaling