- Grilled Shrimp Bowl with Avocado and Corn Salsa Delight
- Italian Sandwich Sliders Flavorful and Easy Recipe
- Southern-Style Honey Butter Cornbread Poppers Delight
- Authentic New Orleans Gumbo Flavorful and Hearty Dish
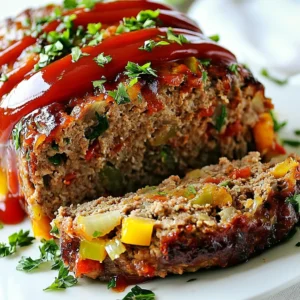
- Best Ever Classic Meatloaf Tasty Comfort Food Recipe
- Damn Good BLT Pasta Salad Flavorful and Easy Recipe
- Loaded Baked Potato with Steak Bites Flavor Boost
- Loaded Cheesy Pocket Tacos Flavorful and Fun Dish
- Creamy Marry Me Shrimp Pasta Irresistible Delight
- Award Winning Cheeseburger Soup Comforting Delight
- Korean Spicy Noodles Flavorful and Easy Recipe
- Sticky Sweet Chili Chicken Thighs Flavorful Dinner Treat
- Marry Me Shrimp Pasta Tasty and Simple Dinner Recipe
- Beer Battered Fish Crispy and Flavorful Delight
- Cheeseburger Bombs Flavorful and Fun Party Treats
- Coconut Curry Baked Cod Flavorful and Simple Dish
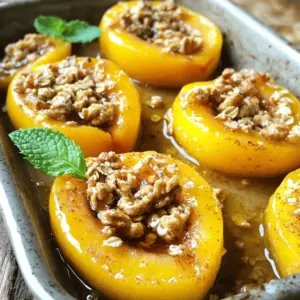
- Baked Nectarines with Honey Cinnamon Delightful Treat
- Gnocchi Mac and Cheese Creamy Comfort Food Delight
- Cozy White Bean Mushroom Stew Hearty and Warm Delight
- Birthday Cake Cupcakes with Sprinkles Delight
- Bang Bang Chicken Recipe Crispy and Flavorful Treat
- Glamorous New Year’s Eve Desserts to Impress Guests
- The Best Taco Pasta Easy and Flavorful Recipe
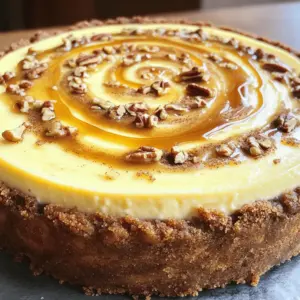
- Cinnamon Roll Honeybun Cheesecake Irresistible Delight
- Salted Caramel Apple Krispy Treats Delightful Recipe
- Homemade Big Mac Wraps Tasty and Easy to Prepare
- Chickpea Fritters with Veggies Easy Recipe for Everyone
- Chicken Cordon Bleu with Swiss Cheese Sauce Delight
- Pineapple Bake Flavorful Tropical Dessert Recipe
- Mosaic Jello Delight Easy and Colorful Treat
- Frutti di Mare Pasta Flavorful Seafood Delight
- Deep Hamburger Sausage & Pepperoni Pie Delight
- Peanut Butter Smores Sandwich Cookies Delightful Treat
- Baby Lemon Impossible Pies Delightful Mini Dessert
- Garlic Butter Beef Cheeseburger Rollups Delightful Meal
- Pineapple Upside-Down Cupcakes Delightful and Easy Treat
- Pistachio Raspberry Cake Delightful and Easy Recipe
- Banana Coffee Cake Deliciously Moist and Easy Recipe
- Lemon Chicken Pasta Delightful and Easy Dinner Recipe
- Hobo Casserole Delightful Meal for Easy Cooking
- Garlic Parmesan Cheeseburger Bombs Tasty and Easy Treat
- Old-Fashioned Applesauce Cake Simple and Tasty Recipe


. To store leftover gumbo, let it cool first. This step helps keep it fresh. After cooling, transfer the gumbo into an airtight container. A glass or plastic container works well. Make sure to leave some space at the top. This space allows for expansion if you freeze it later. Freezing gumbo is easy and keeps it tasty. For best results, pour the cooled gumbo into freezer-safe bags. Squeeze out the air before sealing them. Flatten the bags to save space in your freezer. Gumbo can last up to three months in the freezer. When you’re ready to eat it, thaw it in the fridge overnight. To heat it up, warm it slowly on the stove over low heat. Stir it often to avoid burning. This way, you keep the flavors and texture just right. You can use many types of meat in gumbo. Common choices include: - Smoked sausage - Chicken thighs - Shrimp - Duck - Crab Each meat adds its own unique flavor. Yes, you can make gumbo ahead of time. This dish often tastes better the next day. To reheat, warm it slowly on the stove. Add a little broth if it seems thick. To thicken gumbo without changing its taste, try these tips: - Cook the roux longer for a deeper flavor. - Stir in okra, which also adds texture. - Mash some of the beans or vegetables in the pot. These methods enhance the gumbo while keeping it tasty. Roux is the heart of gumbo. It adds depth and richness. The color of your roux can change the flavor. A darker roux gives a nutty taste, while a lighter one is milder. Getting the roux right is key to a great gumbo. Gumbo pairs well with various sides and drinks. Here are some ideas: - Cooked white rice - French bread or cornbread - A simple salad - Iced tea or a cold beer These options enhance the meal and make it more enjoyable. Gumbo combines rich flavors and traditions from New Orleans. We explored key ingredients, like the roux and the holy trinity of vegetables. You learned step-by-step how to prepare this dish. We also discussed tips to enhance flavor and ideas for variations. Finally, proper storage techniques ensure your gumbo stays delicious. Make gumbo your own by trying different meats and spices! It’s fun to create a dish that warms the soul. Enjoy your cooking adventures!](https://cheftaling.com/wp-content/uploads/2025/05/2fa8a103-01b8-4520-96b3-678a93f8e659-300x300.webp)
![- 8 oz rotini pasta - 4 slices of turkey bacon, cooked and crumbled - 1 cup cherry tomatoes, halved - 1 cup lettuce, shredded (romaine or iceberg) - 1/2 cup mayonnaise - 1 tablespoon Dijon mustard - 1 tablespoon apple cider vinegar - 1 teaspoon garlic powder - Salt and pepper to taste - 2 green onions, sliced - 1/4 cup shredded cheddar cheese (optional) - Large mixing bowl - Small bowl for dressing - Whisk - Pot for boiling pasta - Strainer When I make this Damn Good BLT Pasta Salad, I love to gather all my ingredients first. The rotini pasta is my base. It holds the dressing well, making every bite tasty. Then, I add cooked turkey bacon. It gives a nice crunch and smoky flavor. The cherry tomatoes add a sweet burst, while the lettuce brings freshness. For the creamy dressing, I use mayonnaise, Dijon mustard, and apple cider vinegar. This mix gives a tangy and rich flavor. A little garlic powder adds depth. Don’t forget salt and pepper to make it pop! You will need a large mixing bowl to combine everything. A small bowl for the dressing helps keep things neat. I use a whisk to blend the dressing until it's smooth. A pot and strainer are vital for cooking and draining the pasta. With these ingredients and tools, you are ready to create a delicious salad. For the full recipe, check out the detailed instructions provided. Start by boiling the rotini pasta. Follow the package instructions for the right cooking time. Typically, you want it to be al dente, so keep an eye on it. Once it's cooked, drain the pasta and rinse it under cold water. This step stops the cooking and cools it down quickly. Set it aside while you prepare the other ingredients. In a large mixing bowl, combine your cooled pasta with crumbled turkey bacon, halved cherry tomatoes, and shredded lettuce. Make sure to mix them well, but be gentle. This keeps the lettuce crisp and the tomatoes intact. Once combined, set this bowl aside while you work on the dressing. In a separate small bowl, whisk together the mayonnaise, Dijon mustard, apple cider vinegar, and garlic powder. This combination gives the dressing a nice balance of creaminess and tang. Don’t forget to season it with salt and pepper to taste. Adjust it until it's just right for your palate. Now, pour that delicious dressing over your pasta mixture. Toss everything together gently until well coated. This is where the flavors start to blend. For an extra layer of taste, fold in the sliced green onions and optional cheddar cheese. The cheese adds a nice bite and richness to the dish. Finally, chill your pasta salad in the refrigerator for at least 30 minutes. This lets the flavors meld and makes the salad even better. When you’re ready to serve, give it a good toss to redistribute the dressing. Serve it chilled, and enjoy every bite of this Damn Good BLT Pasta Salad! For the full recipe, check the details above. To make your salad truly amazing, start with high-quality mayonnaise. It gives a rich creaminess that brings everything together. For a zesty kick, consider adding a splash of lemon juice. This small touch adds a bright, tangy flavor that makes your salad shine. Want to switch things up? You can use regular bacon instead of turkey bacon. This gives a richer flavor that many people love. If you enjoy fresh tastes, try adding herbs like parsley or cilantro. They bring a vibrant touch and enhance the overall flavor. How you serve your pasta salad matters. Use a clear bowl to show off those colorful ingredients. This makes the dish look even more inviting. For a finishing touch, garnish with extra green onions or cherry tomatoes. It adds a pop of color and makes your salad look gourmet. For the full recipe, check out the [Full Recipe]. {{image_2}} If you want a meat-free twist, swap turkey bacon for sautéed mushrooms or a plant-based bacon alternative. Mushrooms add a savory, umami flavor that makes the salad just as enjoyable. You can use any type of mushroom you like, but I recommend cremini or shiitake for the best taste. Their texture works well with the pasta and other fresh ingredients. For those who love a rich, creamy texture, you can increase the mayonnaise amount. Adding extra mayo makes every bite smooth and delicious. You can also mix in some Greek yogurt for added creaminess and a tangy flavor. This little trick packs in protein and keeps the salad feeling light. Want to boost the nutrition? Toss in more veggies! Bell peppers, cucumbers, and avocados are great choices. Bell peppers add crunch and sweetness, while cucumbers bring a refreshing bite. Avocados add creaminess and healthy fats. Mix and match to find your favorite combination. Each addition makes the salad even more colorful and tasty! For the full recipe, check out the [Full Recipe]. To keep your Damn Good BLT Pasta Salad fresh, store it in an airtight container. This way, it lasts up to 3 days in the fridge. I recommend eating it within this time for the best taste and texture. Freezing this pasta salad is not a good idea. The pasta can become mushy when thawed. You want to enjoy the crunch of fresh veggies and the softness of the pasta, not a soggy mess. When you pull out leftovers, give them a little refresh. A splash of vinegar or olive oil can brighten the flavors. Just mix it in well before serving. This simple trick will make your pasta salad taste almost as good as the first time! Yes, chilling the salad enhances the flavors, making it perfect for meal prep. When you let the salad sit, the tastes blend together. This makes each bite even better. I often make this a day in advance. It saves time and gives me more chances to enjoy it later. This pasta salad pairs well with grilled meats or sandwiches. It adds a fresh, tasty side to any meal. I love serving it with grilled chicken or burgers. You can also enjoy it at picnics or barbecues. It’s a crowd-pleaser. You can easily make this recipe gluten-free. Just substitute rotini pasta with gluten-free pasta options available in stores. There are many types to choose from, like rice or corn pasta. They work well and taste great in this salad. This blog post guided you through making a tasty BLT pasta salad. We covered key ingredients, step-by-step instructions, and handy tips. You learned how to tweak the recipe, store leftovers, and even explore variations. In the end, this dish is both simple and fun. It’s great for gatherings or meal prep. Enjoy mixing flavors and colors to make it your own. Happy cooking!](https://cheftaling.com/wp-content/uploads/2025/05/3657cd51-653d-4020-bce8-bfff5510ef18-300x300.webp)

![- Store-bought or homemade taco shells - Cheese varieties: cheddar and mozzarella - Protein options: ground beef or plant-based substitute For loaded cheesy pocket tacos, you need a few key ingredients. First, choose your taco shells. You can buy them or make your own with tortilla dough. Next, select your cheese. I love using a mix of cheddar and mozzarella for the perfect melt. For protein, use cooked ground beef or a plant-based option if you prefer. - Black beans and corn - Diced tomatoes and green onions - Recommended seasoning and spices Now, let's add some veggies! Black beans and corn bring great texture and flavor. Diced tomatoes add freshness, while green onions give a nice crunch. Use taco seasoning to spice up your filling. A bit of salt and pepper also helps to bring out the flavors. - Suggestions for customizable toppings - Description of how toppings enhance the dish Toppings make these tacos even better! You can add sour cream for creaminess, guacamole for richness, or salsa for a zesty kick. Shredded lettuce adds crunch and color. Each topping can change the flavor and texture of your tacos, making them more fun and tasty. For the Full Recipe, check out the recipe section above. For store-bought taco shells, follow the package instructions. Preheat your oven as directed. If you want to make your own, prepare a simple tortilla dough. Roll the dough into pockets and set them aside. Homemade shells add a nice touch, but store-bought saves time. Heat a skillet over medium heat and add one tablespoon of olive oil. Once hot, add cooked ground beef. Sprinkle taco seasoning over the beef. Stir well and cook for 2-3 minutes until heated. You can adjust the seasoning to your taste. Next, mix in black beans, corn, diced tomatoes, and half of the green onions in a large bowl. This adds great flavor and nutrition. Season the mixture with salt and pepper. Taste it to ensure it's just right. Carefully fill each taco pocket with the meat and vegetable mix. Don’t be shy; pack them in! Next, sprinkle a generous amount of cheddar and mozzarella cheese into each pocket. This is what makes them loaded and cheesy! Place the filled tacos on a baking sheet. Bake them for about 10-12 minutes. You want the cheese to melt and the pockets to get slightly crispy. When they come out, let them cool for one minute. Add the remaining green onions and any toppings you love, like sour cream or guacamole. For the full recipe, check this [Full Recipe]. To get crispy taco pockets, use a light touch with oil. Brush a thin layer of olive oil on the outside. Bake them until golden brown. For the best cheese melt, use a mix of cheddar and mozzarella. Cheddar gives a nice sharp flavor, while mozzarella adds gooeyness. Layer the cheese on top of the filling. This way, it melts better and stays inside. Pair your loaded cheesy pocket tacos with fresh sides. A simple green salad adds crunch. You might also serve them with guacamole or salsa for extra flavor. To impress at a party, arrange the tacos on a colorful platter. Use fresh herbs or diced tomatoes for a pop of color. This makes the dish look fun and inviting. You can easily make this recipe vegetarian or vegan. Swap out the ground beef for a plant-based meat or mushrooms. Use vegan cheese to keep it dairy-free. For gluten-free options, look for taco shells made from corn. You can also make your own with gluten-free flour. This way, everyone can enjoy the meal! For the full recipe, check the main section. {{image_2}} You can change the proteins in this dish. Try shredded chicken, turkey, or tofu. If you want to skip meat, you can use beans. Pinto beans, kidney beans, or chickpeas work great. You can also add more veggies. Bell peppers, zucchini, or spinach can add color and flavor. Mix and match to find what you like best. Why not bring global flavors into your tacos? You can add spices from around the world. For example, try curry powder for an Indian twist. You can also use teriyaki sauce for a fun Asian flair. For fusion tacos, think about using kimchi or salsa verde. These ingredients will make your tacos exciting and new. Using seasonal produce makes your tacos fresher. In spring, add asparagus or radishes. Summer is great for corn and tomatoes. In fall, consider adding roasted squash or apples. Winter brings hearty veggies like kale or Brussels sprouts. You can also adapt the recipe for holidays. For Cinco de Mayo, add festive toppings like fresh cilantro and lime. For a winter gathering, use warm spices like cinnamon or nutmeg. Enjoy making these tacos year-round! To keep your loaded cheesy pocket tacos fresh, store them in the fridge. Use an airtight container to lock in flavor. Place a paper towel inside the container to absorb excess moisture. This helps keep the tacos crisp. You can store them for up to three days. When you're ready to eat your leftovers, reheating is key. I recommend using an oven to warm them up. Preheat your oven to 350°F (175°C). Place the tacos on a baking sheet. Heat for about 10 minutes. This method helps restore the crispy texture. Avoid microwaving as it can make them soggy. If you must use a microwave, cover the tacos with a paper towel to reduce moisture. To freeze unbaked tacos, assemble them first. Place the filled tacos on a baking sheet. Freeze them for about an hour until firm. Then, transfer them to a freezer-safe bag. This method saves space and keeps them fresh. When you want to bake them, remove the tacos from the freezer. Thaw them in the fridge overnight. Preheat your oven and bake as directed in the Full Recipe. Enjoy your tasty treat anytime! Loaded cheesy pocket tacos are a fun twist on traditional tacos. They use pocket taco shells filled with cheese, meat, and veggies. The melting cheese adds a rich flavor. Each bite is warm and satisfying. You can customize the filling to suit your taste. This dish appeals to both kids and adults. It’s perfect for parties, family dinners, or a quick meal. Yes, you can prep these tacos ahead of time. Cook the filling and let it cool. Store it in the fridge for up to two days. You can fill the taco shells before baking. Just cover them and keep them in the fridge. When you're ready to eat, bake them as the recipe suggests. This saves time and makes mealtime easy. Absolutely! There are many low-carb alternatives for taco shells. Lettuce wraps make a fresh and crunchy option. You can also use cauliflower tortillas for a tasty twist. Cheese crisps are another fun choice. These options keep the flavor while cutting down on carbs. They make the dish lighter and still very enjoyable. To add heat, use spicier taco seasoning. You can also mix in jalapeños or diced green chilies. For extra spice, top with hot salsa or spicy sour cream. You can even add a few dashes of hot sauce to the filling. These simple changes will bring more heat without losing the great flavor. This blog post breaks down how to make loaded cheesy pocket tacos. You learned about the ingredients needed, like taco shells and cheese, and how to cook the filling. I shared tips for making crispy tacos and ideas for tasty toppings. You can make these tacos for any occasion, even with dietary needs in mind. Now, it's time to get cooking and enjoy these delicious tacos. Remember, the best meals come from creativity and passion in the kitchen. Happy cooking!](https://cheftaling.com/wp-content/uploads/2025/05/59d08bdf-5276-4385-8052-0cdad236ff8f-300x300.webp)
![To make this soup shine, you need some key ingredients. Here’s what you will need: - 1 lb ground beef - 1 medium onion, chopped - 2 cloves garlic, minced - 3 medium potatoes, peeled and diced - 4 cups beef broth - 1 cup shredded cheddar cheese - 1 cup milk - 1 tablespoon Worcestershire sauce - 1 teaspoon Dijon mustard - 1 teaspoon smoked paprika - Salt and pepper to taste - 2 tablespoons olive oil - Fresh parsley, chopped (for garnish) These ingredients create a rich, meaty flavor. The potatoes add a comforting texture. The cheese makes it creamy and delicious. You can easily customize this soup to fit your taste. Here are some optional ingredients to consider: - Cooked bacon bits for extra crunch - Green onions for a fresh bite - Hot sauce for a spicy kick - Different cheeses like Monterey Jack or Gouda - Frozen vegetables like corn or peas Feel free to mix and match. This makes the soup a fun way to use what you have at home. What type of ground beef should I use? I recommend using 80/20 ground beef. This mix gives good flavor without being too greasy. Can I use other meats? Yes! You can use turkey or chicken for a lighter soup. Just adjust the cooking time. What if I don’t have beef broth? You can use chicken or vegetable broth. This will still give the soup depth and flavor. Is there a dairy-free option? Absolutely! Use coconut milk or almond milk for a dairy-free version. Just make sure to adjust for taste. For the complete recipe, check out the [Full Recipe]. To make this cheeseburger soup, start with a large pot. Heat the olive oil over medium heat. Add the chopped onion and minced garlic. Sauté them until the onions look clear. This step adds great flavor. Next, add the ground beef. Use a wooden spoon to break it up. Cook until it turns brown and is no longer pink, about 5-7 minutes. If there’s too much fat, drain it. Now, stir in the diced potatoes and beef broth. Add the Worcestershire sauce, Dijon mustard, smoked paprika, salt, and pepper. Bring everything to a boil. Lower the heat and let it simmer. Cover the pot and cook for 15-20 minutes. The potatoes should be tender by now. Once cooked, add the milk and shredded cheddar cheese. Stir until the cheese melts. This makes the soup creamy. Taste it and adjust the seasoning if needed. Remove the pot from heat. Let it cool for a few minutes before serving. Browning the beef well is key for rich flavor. Use a wide pot to give the beef space. Don’t overcrowd the pan. If necessary, cook in batches. Stir only a few times to let it brown. This helps to develop a nice crust. Keep the heat at medium. Too high can burn the meat. The total cooking time is about 40 minutes. This includes 10 minutes for prep and 30 minutes for cooking. If your potatoes are larger, they may need extra time. Check for doneness by piercing with a fork. If you want a thicker soup, let it simmer a bit longer. For a thinner soup, add more broth or milk. Always adjust to your taste and preference. For the full recipe, please refer to the [Full Recipe]. To make your cheeseburger soup truly shine, use fresh ingredients. Fresh herbs, like parsley, add bright notes. Smoked paprika brings a warm, smoky taste. For extra depth, try adding a splash of hot sauce. This gives your soup a mild kick without overpowering the main flavors. Don't skip the Worcestershire sauce; it adds umami richness. You can also experiment with different cheeses. A mix of cheddar and Monterey Jack creates a delightful melt. One mistake is overcooking the potatoes. You want them tender, not mushy. If you add them too early, they may break apart. Another common error is using low-quality beef. Choose ground beef with a good fat content for flavor. Avoid adding too much milk too fast. This can lead to curdling. Instead, add it slowly for a smooth finish. Finally, always taste your soup before serving. Adjust the salt and pepper as needed to enhance the flavors. For a creamy texture, start with whole milk or half-and-half. This gives a rich base without being too heavy. Stir in cheese slowly, allowing it to melt evenly. If your soup is too thick, add a bit more broth or milk to loosen it. Blending a portion of the soup can also help. Use an immersion blender for a smooth consistency. Just remember to leave some chunks for that classic cheeseburger feel. For the full recipe, check here: [Full Recipe]. {{image_2}} You can easily make a vegetarian cheeseburger soup. Start by swapping the ground beef with plant-based meat or lentils. Use vegetable broth instead of beef broth. Add extra veggies like bell peppers and corn for texture and flavor. You can also add a splash of soy sauce for depth. This version keeps all the comforting elements of the original. To make this soup gluten-free, choose gluten-free Worcestershire sauce. Use a gluten-free flour blend to thicken the soup. You can also skip the thickening step and enjoy a lighter broth. Ensure all your toppings, like cheese and bread, are gluten-free too. This way, everyone can enjoy a bowl without worries. Toppings can elevate your cheeseburger soup. Try adding crispy bacon bits or jalapeños for a spicy kick. Sour cream or Greek yogurt adds creaminess. Chopped green onions give a fresh touch. You can even add crumbled tortilla chips for crunch. Feel free to mix and match based on your taste. The Full Recipe gives you a great base to start from! Store leftover cheeseburger soup in an airtight container. Let the soup cool first. Then, transfer it to the container. Make sure to leave some space at the top. This allows the soup to expand when frozen. You can keep it in the fridge for up to three days. To reheat, pour the soup into a pot. Heat it over medium-low heat. Stir often and heat until warm. You can also use the microwave. Pour the soup into a microwave-safe bowl. Heat it in short bursts, stirring in between. This way, the soup heats evenly. To freeze cheeseburger soup, use freezer-safe containers. Divide the soup into portions for easy meals. Label each container with the date and name. This helps you keep track of what you have. Thaw the soup overnight in the fridge before reheating. This ensures it stays tasty. For the full recipe, click here. This cheeseburger soup wins awards due to its rich flavor and creamy texture. I blend classic cheeseburger tastes with hearty ingredients. The combination of beef, cheese, and spices creates a cozy dish. The smoked paprika adds a unique twist that surprises many. Each spoonful feels like a warm hug. The use of fresh potatoes gives it a nice body. When you serve it, everyone will want the recipe! Yes, you can make this soup ahead of time. In fact, it tastes even better the next day! Just follow the recipe and let it cool. Store it in an airtight container in the fridge. When you're ready to eat, simply reheat it on the stove. Stir well to ensure even heating. You may need to add a splash of milk if it thickens. To adjust this recipe for fewer servings, you can easily scale down the ingredients. For three servings, use half the amount of each ingredient. If you use one cup of beef broth, just halve it to one cup. Keep the cooking times the same, but check for doneness earlier. You can also freeze any leftovers for another meal. This soup freezes well, so don't worry about waste! For the full recipe, be sure to check out the detailed instructions. In this post, we explored the key ingredients for a tasty cheeseburger soup. I shared tips on cooking, storage, and variations to suit your needs. You can customize it for any diet and avoid common mistakes that ruin flavor. Remember, making this soup is easy and fun. By following my step-by-step guide, you can create a creamy and delicious dish. Enjoy your cooking, and don’t be afraid to experiment. A warm bowl of this soup can brighten your day. Try it today!](https://cheftaling.com/wp-content/uploads/2025/05/0bdacb09-3772-42d8-ab14-52cfc7fa34a5-300x300.webp)
![- 8 oz (225 g) soba noodles (or alternative noodles) - 2 tablespoons gochujang (Korean red chili paste) - 1 tablespoon sesame oil - 1 tablespoon soy sauce - 1 tablespoon honey or maple syrup - 1 teaspoon minced garlic - 1 teaspoon minced ginger - 1 cup julienned carrots - 1 cup thinly sliced bell peppers (red and yellow) - 1/2 cup green onions, chopped - 1 tablespoon sesame seeds for garnish - Optional: Sliced cucumbers and chili flakes Korean Spicy Noodles shine with bold flavors and simple ingredients. The base starts with soba noodles, which are quick to cook. Gochujang is key for spice and depth. It adds a rich, savory taste. Sesame oil brings a nutty aroma. It enhances the dish beautifully. You can customize your noodles by adding your favorite veggies. Carrots and bell peppers work well. They add crunch and color. The sauce combines soy sauce, honey or maple syrup, garlic, and ginger. This mix balances sweet and spicy. It coats the noodles perfectly, making every bite a delight. For garnish, sesame seeds add a nice touch. Consider adding sliced cucumbers for freshness. If you like more heat, sprinkle chili flakes on top. You can find the Full Recipe for more detailed steps. Enjoy creating this tasty dish! 1. Cook the soba noodles according to package instructions. You want them al dente. 2. Drain and rinse the noodles under cold water. This stops the cooking and keeps them firm. 3. In a small bowl, mix gochujang, sesame oil, soy sauce, honey, garlic, and ginger. Stir until smooth. This sauce adds a rich, spicy kick. 4. Heat a skillet over medium heat. Sauté the julienned carrots and bell peppers for about 4-5 minutes. They should be soft but still crisp. 5. Add the cooked noodles to the skillet with the veggies. Pour your spicy sauce over everything and toss well. Make sure all the noodles are coated. 6. Cook the noodles and veggies together for 2-3 minutes. This lets the flavors mix together perfectly. 7. Remove from heat and toss in the green onions. This adds a fresh flavor right before serving. You can find the full recipe with all the details above. Enjoy your cooking! To get the best noodle texture, cook them just until they are al dente. This means they should still have a slight bite to them. After cooking, drain the noodles right away. Rinse them under cold water. This step stops the cooking process and keeps the noodles firm. You can boost the flavor of your dish by adding extra seasonings. A splash of rice vinegar adds a nice tang. If you want more spice, try adding extra gochujang. Start with a teaspoon, then taste. Adjust until it suits your heat level. Garnish your noodles for great visual appeal. Sprinkle sesame seeds on top for a touch of elegance. You can also add sliced cucumbers for a refreshing crunch. Serve your spicy noodles with a side of steamed veggies or a light salad for a complete meal. {{image_2}} You can easily add protein to your Korean spicy noodles. Tofu, shrimp, or chicken work great. For tofu, use firm or extra-firm varieties. Cut it into cubes, then sauté until golden brown. Add it to the noodles when you mix in the sauce. For shrimp, peel and devein them. Sauté the shrimp with the veggies until they turn pink. Then, toss them with the noodles and sauce. If you prefer chicken, use boneless, skinless chicken breasts. Cut them into strips and cook them in the skillet before adding the veggies. This way, the chicken absorbs the spicy flavors well. Korean spicy noodles have many regional twists. One fun version is Jjapaguri, also known as Ram-don. This dish mixes instant noodles with a rich beef flavor. You can find it in the movie "Parasite." Other regions may use different spices or add local vegetables. For example, some may include zucchini or mushrooms. These changes add unique tastes to the dish. If you need gluten-free options, try rice noodles or gluten-free pasta. They work well and absorb the flavors nicely. You can also swap out veggies for your favorites. Broccoli, snap peas, or bok choy add great crunch and flavor. Just remember to cook them until they are tender but still crisp. Feel free to explore these variations to make the dish your own! For the complete recipe, check out the Full Recipe. To store your Korean spicy noodles, place them in an airtight container. Make sure to cool them first. This helps keep the noodles fresh. Store them in the fridge. They will stay good for about 3 to 4 days. Always check for any off smells before eating. When reheating, you want to keep the noodles nice and chewy. Use the stovetop when possible. Add a splash of water to help steam the noodles. Stir them gently until warm. If you use a microwave, cover the bowl and add a little water. Heat in short bursts to avoid drying them out. Yes, you can freeze Korean spicy noodles! This is a great way to save leftovers. First, cool them completely. Divide into portions and place them in freezer bags. Remove as much air as possible before sealing. To defrost, place in the fridge overnight or use the microwave. When ready to eat, reheat as mentioned above for the best texture. For Korean Spicy Noodles, I recommend using soba noodles. They have a nice texture and flavor. Soba noodles are made from buckwheat. This gives them a unique taste. You can also use other noodles like rice noodles or ramen. Each type will add its own twist to the dish. Yes, you can easily adjust the spice level. To make them less spicy, use less gochujang. You can also add more honey or maple syrup. This will balance the heat. Another option is to add more vegetables. These will help to dilute the spice. You can find gochujang in many grocery stores. Look in the Asian food aisle. If your local store doesn't have it, check online. Many websites sell gochujang. You can also visit an Asian market for fresh options. Customizing your Korean Spicy Noodles is fun! You can add your favorite veggies or proteins. Try adding tofu, chicken, or shrimp. For veggies, think about broccoli or zucchini. You can also change the sauce. Add more garlic or a splash of lime juice for a twist. Korean Spicy Noodles pair well with many side dishes. Kimchi is a classic choice. It adds a nice crunch and flavor. You can also serve pickled radishes or a simple salad. These sides complement the noodles well and create a balanced meal. For the complete recipe, click here: [Full Recipe]. Korean spicy noodles are simple, fun, and packed with flavor. We reviewed key ingredients and spices that make this dish pop. You learned how to cook the noodles and prepare the sauce, making it easy to customize. Remember to experiment with extra flavors and proteins for a personal touch. Storing leftovers or making it spicy is simple with these tips. Enjoy your cooking adventure with Korean spicy noodles. You’ll impress your family and friends with this tasty dish!](https://cheftaling.com/wp-content/uploads/2025/05/ccb73075-b0a8-422d-b93c-e06523fde93a-300x300.webp)

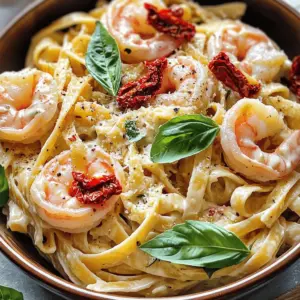
![When making Marry Me Shrimp Pasta, you need these key ingredients: - 8 oz fettuccine or linguine pasta - 1 lb large shrimp, peeled and deveined - 4 cloves garlic, minced These three form the base of the dish. The pasta provides a hearty texture. The shrimp adds protein and flavor. The garlic gives the dish its wonderful aroma. - 1 cup heavy cream - 1 cup chicken broth - 1/2 cup grated Parmesan cheese The heavy cream makes the sauce rich and creamy. Chicken broth adds depth. Parmesan cheese gives a lovely salty flavor. Together, they create a smooth sauce that clings to the pasta. - 3 tablespoons olive oil, divided - 1 teaspoon red pepper flakes - Fresh basil for garnish (optional) Olive oil adds healthy fat and flavor. Red pepper flakes give a hint of heat. Fresh basil adds color and a pop of freshness. You can leave out the red pepper if you prefer a milder dish. This list covers all you need for a tasty dinner. For the full recipe, check out the details in the full recipe section. To cook fettuccine or linguine, start by boiling a large pot of salted water. Once it bubbles, add the pasta. Follow the package instructions for timing. I prefer to check it a minute early for that perfect al dente texture. Al dente means the pasta is firm but cooked. Drain the pasta, but save half a cup of the water. This water helps adjust the sauce later. When it’s time to sauté the shrimp, heat two tablespoons of olive oil in a large skillet over medium heat. Season the shrimp with salt and pepper. Cook them for about 2-3 minutes on each side. They'll turn pink and opaque when done. This means they are ready to come out of the pan. Use the same skillet for the sauce. Add the last tablespoon of olive oil and minced garlic. Cook for about 30 seconds until it smells great. Then, add red pepper flakes and halved cherry tomatoes. Let them cook for about five minutes. You want the tomatoes to soften. Next, pour in the heavy cream and chicken broth. Stir everything together and bring it to a simmer. Add chopped spinach and let it wilt for about two minutes. Now, it’s time to combine everything. Stir in the cooked pasta and shrimp into the sauce. Toss gently to coat them evenly. If the sauce feels too thick, add a bit of the reserved pasta water. Add just a little at a time until it reaches the right smoothness. For serving, divide the pasta onto plates or in bowls. You can garnish with fresh basil if you like. It adds a nice pop of color and flavor. For a pretty touch, you can sprinkle more Parmesan cheese on top. This makes your dish look and taste amazing. For a detailed recipe, check the Full Recipe. To add romance to your meal, use a nice table setting. Light some candles and play soft music. You can also serve a simple side salad with a light vinaigrette. For extra flavor, sprinkle fresh herbs like basil or parsley on top before serving. You can mix in capers or olives for a briny kick. A squeeze of lemon juice brightens the dish and adds a fresh taste. One common mistake is overcooking the shrimp. Cook them just until they turn pink, about 2-3 minutes per side. If you cook them too long, they become rubbery. Another mistake is adding too much salt. Start with a small amount and adjust to your taste. Remember, you can always add more, but you can't take it out! For this recipe, you need a large pot for boiling pasta. A non-stick skillet works best for sautéing shrimp. A good cutting board and a sharp knife are essential for chopping garlic and tomatoes. Use a measuring cup for precise ingredient amounts. Don't forget a pasta spoon for easy serving. All these tools will help you create a perfect Marry Me Shrimp Pasta. If you want the full recipe, check out the details provided earlier. {{image_2}} You can easily swap shrimp for other proteins. Scallops add a sweet taste and cook quickly. For a heartier option, try chicken. Simply sauté it until golden brown. If you want a vegetarian dish, use mushrooms or firm tofu. These options soak up the sauce well. If you need gluten-free options, use rice noodles or gluten-free pasta. Whole grain pasta is a healthy choice, too. You can also try different shapes like penne or rotini. These shapes hold the sauce nicely, adding variety to your meal. To switch up the flavors, add fresh herbs like parsley or dill. A squeeze of lemon brightens the dish. You can also add spices like paprika or cumin for a twist. Throw in vegetables like bell peppers or peas for extra nutrition. Beans or lentils can add protein and texture, making it even more filling. For the full recipe, check out the Marry Me Shrimp Pasta section above! For storing leftover Marry Me Shrimp Pasta, use airtight containers. Glass or plastic containers work well. Make sure to let the pasta cool before sealing. Store in the fridge for up to three days. This keeps the dish fresh and tasty. To reheat, use the stovetop or microwave. For the stovetop, add a splash of chicken broth. This helps to keep the pasta moist. Stir gently over low heat until warmed through. If using a microwave, cover the dish with a damp paper towel. This helps to steam the pasta and prevent drying. Yes, you can freeze Marry Me Shrimp Pasta! Freeze in individual portions for easy meals. Use freezer-safe containers or bags. When ready to eat, thaw overnight in the fridge. Reheat on the stovetop with a little broth to restore texture. Enjoy your delicious meal anytime! Marry Me Shrimp Pasta pairs well with various side dishes. Here are my favorites: - Garlic bread - A fresh green salad - Roasted vegetables - Steamed asparagus - A light white wine, like Sauvignon Blanc These sides enhance the meal and provide a nice balance. Yes, you can prepare this dish ahead of time. Here’s how: - Cook the pasta and shrimp, then store them separately. - Make the sauce and keep it in the fridge. - To reheat, warm the sauce, add the pasta and shrimp, and heat until warm. This way, the flavors stay fresh, and you save time later. To reduce the spice in Marry Me Shrimp Pasta, follow these tips: - Cut down on red pepper flakes. - Use sweet bell peppers instead for flavor without heat. - Add more cream or cheese to balance the spice. These changes help create a milder dish for sensitive palates. The name “Marry Me Shrimp Pasta” comes from its rich flavor. Many claim that this dish is so good, it could win someone’s heart. The dish blends Italian and American styles. It highlights shrimp, pasta, and creamy sauce for a delightful meal. Yes, Marry Me Shrimp Pasta is great for meal prep. Here’s what to do: - Prepare all ingredients in bulk. - Store pasta and sauce in separate airtight containers. - This dish stays fresh for up to 3 days in the fridge. Meal prep makes it easy to enjoy this tasty dish all week! For the [Full Recipe], check back to make it your own. Marry Me Shrimp Pasta is a delightful dish that impresses with its flavor and ease. We covered key ingredients, step-by-step cooking, and various tips. Remember to avoid common pitfalls like overcooking shrimp. Feel free to explore variations, including protein or pasta swaps. Lastly, store and reheat leftovers correctly to enjoy this meal again. Enjoy cooking and sharing this recipe that brings joy to your table!](https://cheftaling.com/wp-content/uploads/2025/05/b5f11b0a-9b49-4e0f-a666-f0551b0d51fe-300x300.webp)


![For this dish, you need simple and fresh ingredients. Here’s what you’ll need: - 4 cod fillets (about 6 oz each) - 1 can (14 oz) coconut milk - 2 tablespoons red curry paste - 1 tablespoon fresh ginger, grated - 2 garlic cloves, minced - 1 tablespoon lime juice - 1 tablespoon soy sauce - 1 teaspoon brown sugar - 1 red bell pepper, sliced - 1 cup green beans, trimmed - Fresh cilantro for garnish - Salt and pepper to taste These main ingredients create a creamy curry sauce that pairs perfectly with the cod. Feel free to add extra ingredients for a twist. Here are some optional items you might try: - Chopped scallions for a fresh crunch - A dash of fish sauce for depth - Red pepper flakes for heat - Sliced mushrooms for earthiness Adding these can enhance the flavor and make the dish your own. Coconut Curry Baked Cod is not just tasty; it's healthy too! Here’s a quick look at its nutrition: - Calories: About 300 per serving - Protein: Approximately 28g from cod - Fat: Around 18g from coconut milk - Carbohydrates: Roughly 12g from vegetables - Fiber: 3g from green beans and bell pepper This dish is balanced and nutritious, making it a great choice for dinner. For the full recipe, check out the detailed instructions. Start by gathering all your ingredients. You will need: - 4 cod fillets (about 6 oz each) - 1 can (14 oz) coconut milk - 2 tablespoons red curry paste - 1 tablespoon fresh ginger, grated - 2 garlic cloves, minced - 1 tablespoon lime juice - 1 tablespoon soy sauce - 1 teaspoon brown sugar - 1 red bell pepper, sliced - 1 cup green beans, trimmed - Fresh cilantro for garnish - Salt and pepper to taste Wash the vegetables well. Grate the ginger and mince the garlic. Slice the red bell pepper. Trim the green beans so they cook evenly. This step makes your dish fresh and bright. In a mixing bowl, combine the coconut milk, red curry paste, ginger, garlic, lime juice, soy sauce, and brown sugar. Whisk these together until you have a smooth sauce. The combination gives a rich, creamy flavor. Taste the sauce. Adjust salt and pepper, if needed. This curry sauce is the heart of the dish. Preheat your oven to 375°F (190°C). Take a baking dish and place your seasoned cod fillets inside. Pour half of your coconut curry mixture over the fillets, coating them well. Next, add the sliced red bell pepper and green beans around the cod. Pour the rest of the sauce over the veggies. Cover the dish with aluminum foil. Bake for 20 minutes. This keeps the cod moist. After 20 minutes, remove the foil. Bake for another 10 minutes. The cod should look opaque and flake easily with a fork. When it's done, carefully take it out. Garnish with fresh cilantro. Serve hot, and enjoy the delicious flavors. For the complete method, check the Full Recipe. When picking cod fillets, look for fresh, firm pieces. The color should be white or pale pink. Avoid any fillets that look dull or have brown spots. If possible, buy wild-caught cod. It usually has a better taste and texture. You can also check for a clean ocean scent. This means the fish is fresh and safe to eat. To make your coconut curry taste great, use quality red curry paste. Choose one with a good balance of spices. Don't skip the fresh ginger and garlic; they add depth. Lime juice brightens the dish, so use fresh juice, not bottled. If you like it spicy, you can add more curry paste or even some chili flakes. Taste the sauce before pouring it over the cod. Adjust with a pinch of salt or a bit more sugar if needed. Coconut curry baked cod pairs well with rice or quinoa. These grains soak up the sauce nicely. You can also serve it with a fresh salad for a crunchy texture. I love adding roasted vegetables on the side for more flavor. Fresh cilantro on top gives a nice color and flavor contrast. For drinks, try a chilled white wine or coconut water for a refreshing twist. For more details, check out the Full Recipe. {{image_2}} You can change the veggies in this dish based on what you like. Try using zucchini, spinach, or broccoli. These vegetables cook well with the coconut curry sauce. You can also add sweet potatoes for a sweet twist. Just cut them small so they cook evenly. This gives a new taste while keeping the dish healthy. If cod isn’t your favorite, use other seafood. Salmon or halibut works great too. These fish have a rich flavor that pairs well with curry. You can even use shrimp or scallops. Just adjust the cooking time. Seafood cooks fast, so check it often. This way, you get a tasty meal every time. To make this dish vegetarian or vegan, swap the cod for tofu or chickpeas. Tofu soaks up the curry flavor well. You can also add more vegetables to fill the dish. Use mushrooms or eggplant for extra taste. For the sauce, ensure your curry paste is vegan. This way, you keep all the flavor while making it plant-based. Check the [Full Recipe] for more tips on cooking this dish! After enjoying your Coconut Curry Baked Cod, you may have some leftovers. Store them in an airtight container. Make sure to let the dish cool completely first. This helps keep it fresh. Place the container in the fridge. It will stay good for up to three days. To keep the flavors intact, avoid mixing the vegetables with the cod. When you are ready to eat your leftovers, reheating is simple. Preheat your oven to 350°F (175°C). Place the cod in a baking dish. Cover it with foil to keep it moist. Heat for about 15 minutes, or until warm. You can also use a microwave. Just cover the cod with a damp paper towel. Heat it for one to two minutes, checking often. If you want to save it for later, freezing is a great option. First, let the dish cool down. Then, cut the cod into portions. Wrap each portion tightly in plastic wrap or foil. Place them in a freezer-safe container. This helps prevent freezer burn. You can freeze it for up to two months. When you want to eat it, thaw it in the fridge overnight. Then, reheat as mentioned above. For best taste, consume it sooner than later. For the full recipe, please refer to the main article. Yes, you can use frozen cod. Just ensure you thaw it first. Place it in the fridge overnight or run it under cold water. Frozen cod works well. It may cook a little longer, so check for doneness. You have many tasty options! Here are some ideas: - Steamed jasmine rice - Quinoa for a nutty flavor - Fresh salad with lime dressing - Warm naan bread for dipping - Stir-fried vegetables for extra crunch These sides add great balance to your meal. To spice it up, add more red curry paste. Start with one extra teaspoon. You can also include sliced fresh chilies or red pepper flakes. For a unique twist, try adding a dash of hot sauce. Adjust to your taste, and enjoy the heat! Coconut curry baked cod is a tasty and healthy dish. You learned about key ingredients, step-by-step cooking, and smart tips. Try new veggies or alternate seafood to make it unique. Proper storage keeps your leftovers fresh and delicious. Remember, you can easily adjust spice levels or serve it with many sides. Enjoy making this dish! It’s simple and sure to please. Happy cooking!](https://cheftaling.com/wp-content/uploads/2025/05/ef4c12c0-f09f-4bc7-afa1-bcb4d3a8d24b-300x300.webp)
![- Gnocchi (store-bought or homemade) - Dairy ingredients: milk, cheddar cheese, mozzarella cheese - Seasoning essentials: garlic powder, onion powder, ground mustard, salt, pepper - Topping ingredients: breadcrumbs, fresh parsley To make Gnocchi Mac and Cheese, you need a few key ingredients. First, gnocchi is the star of this dish. You can buy it or make your own. I love the texture of homemade gnocchi, but store-bought works just fine. Next, gather your dairy ingredients. You will need whole milk, sharp cheddar cheese, and mozzarella cheese. These cheeses melt well and give the dish a creamy texture. I recommend using sharp cheddar for its bold flavor. Seasoning is essential. Use garlic powder, onion powder, and ground mustard. These spices add depth to the cheese sauce. Don't forget salt and pepper to enhance the taste. Finally, for the topping, grab some breadcrumbs and fresh parsley. The breadcrumbs add a nice crunch, while parsley brightens the dish. You can find the Full Recipe for complete details on how to combine all these ingredients into one delicious meal. To make gnocchi, start by boiling a large pot of water. Add about 1 tablespoon of salt to the water. Salting the water is key, as it enhances the flavor of the gnocchi. Once the water boils, add the gnocchi. Cook them until they float, which takes about 2-3 minutes. This means they are done. Drain the gnocchi and set them aside. Next, it’s time to make the cheese sauce. Begin by melting 2 tablespoons of butter in a large saucepan over medium heat. Once melted, stir in 2 tablespoons of all-purpose flour. This creates a roux. Cook it for about 1 minute until it bubbles slightly. Gradually add 2 cups of whole milk while whisking. This helps to eliminate lumps. Keep stirring until the sauce thickens, which takes about 5-7 minutes. Once thick, lower the heat and add in 2 cups of shredded cheddar cheese and 1 cup of shredded mozzarella cheese. Stir until the cheeses melt and the sauce becomes creamy. Don’t forget to season it with garlic powder, onion powder, ground mustard, salt, and pepper. For baking, preheat your oven to 350°F (175°C). If you like, transfer the gnocchi and cheese mixture into a greased 9x13 inch baking dish. In a small bowl, mix 1/2 cup of breadcrumbs with a drizzle of olive oil and some salt. Sprinkle this mixture evenly over the top of the gnocchi and cheese. Bake the dish for 20-25 minutes until the top is golden and crispy. For the complete recipe, check the [Full Recipe]. To make your Gnocchi Mac and Cheese creamy, choose good cheese. I love using sharp cheddar and mozzarella. They melt well and give a rich flavor. Mixing these two cheeses adds depth. You can also try Gruyère or fontina for a unique taste. These cheeses add a nutty flavor that pairs nicely with the gnocchi. Avoid clumping in your cheese sauce by whisking well. Start with a smooth roux when you mix the butter and flour. Gradually add the milk while whisking to keep it smooth. This helps prevent lumps. To get a golden breadcrumb topping, mix breadcrumbs with a little olive oil. This gives them a nice crunch. Spread them evenly on top before baking for the best result. For a lovely presentation, serve Gnocchi Mac and Cheese in individual bowls. Add a sprinkle of extra cheese or parsley on top. This makes the dish pop with color. Pair it with a light salad or crusty bread for a full meal. For drinks, a chilled white wine like Sauvignon Blanc works well. It balances the richness of the cheese. Enjoy your creamy comfort food delight! {{image_2}} You can easily swap cheese to fit your taste. For a lighter option, use reduced-fat cheese. If you want a sharper flavor, try aged cheddar. You can also mix cheeses, like Gouda or Fontina, for a rich taste. For a vegan version, choose non-dairy cheese made from nuts or soy. Use almond or oat milk in place of whole milk. This keeps the dish creamy without dairy. Want to make it heartier? Try adding proteins like crispy bacon or grilled chicken. They add great flavor and texture. You can also mix in cooked sausage for something different. Adding vegetables boosts nutrition, too. Spinach, broccoli, or peas work well. Just cook them lightly before adding to the dish. This helps keep the colors bright and flavors fresh. You can make Gnocchi Mac and Cheese on the stovetop or bake it. Stovetop is quick and easy. Just cook the gnocchi, make the sauce, and combine. Baking gives a crunchy top. After mixing everything, transfer it to a baking dish. Top with breadcrumbs and bake until golden. Another fun method is the one-pot Gnocchi Mac and Cheese. Just cook the gnocchi in the sauce. This saves time and cleanup. Follow the Full Recipe for a detailed guide on how to do this. To keep your Gnocchi Mac and Cheese fresh, store it in an airtight container. This helps to keep it safe from air and moisture. Make sure it cools to room temperature first. You can safely keep it in the fridge for up to three days. If you want to save it for longer, freezing is a great option. Divide it into smaller portions for easy thawing later. Wrap each portion tightly in plastic wrap, then place them in a freezer-safe bag. This way, it can last for about three months in the freezer without losing its flavor. When it's time to enjoy your leftovers, you have two good options: microwaving or using the oven. Microwaving is quick and easy. Place a portion in a microwave-safe dish and cover it. Heat it in short bursts, stirring in between, until it’s hot. If you prefer the oven, preheat it to 350°F (175°C). Place the Gnocchi Mac and Cheese in a baking dish, cover it with foil, and heat for about 15-20 minutes. This method helps keep the top crispy. After refrigeration, your dish may lose some creaminess. To fix this, add a splash of milk or cream when reheating. Stir well to restore that rich, creamy texture. Enjoy every bite of your tasty dish! Gnocchi Mac and Cheese lasts about 3 to 5 days in the fridge. Store it in an airtight container. This keeps the dish fresh and safe to eat. When you're ready to enjoy it again, just reheat it. Yes, you can use frozen gnocchi. Just cook them straight from the freezer. They may take a minute longer to float. Follow the package directions for the best results. Frozen gnocchi saves time and effort. For a gluten-free version, try crushed cornflakes or ground nuts. You can also use panko or crushed rice crackers. These alternatives add crunch while keeping the dish tasty. For a healthier option, sprinkle some toasted seeds or herbs on top instead. Gnocchi Mac and Cheese combines comfort and flavor. We explored key ingredients like gnocchi, cheese, and spices. I shared step-by-step instructions to prepare the dish, make the cheese sauce, and bake it perfectly. Useful tips on cheese selection and cooking techniques help ensure your dish shines. You can even try tasty variations for different diets. Lastly, I covered storage and reheating methods to keep it fresh. Enjoy crafting your Gnocchi Mac and Cheese, and remember, cooking is all about creativity and fun!](https://cheftaling.com/wp-content/uploads/2025/05/3d12762e-b2d3-4493-9766-614dc36a0cd1-300x300.webp)


![To create a stunning dessert, you need a few key ingredients. Here’s what you'll need for the Glamorous Chocolate Raspberry Tower: - 1 cup dark chocolate chips - 1 cup heavy cream - 2 tablespoons powdered sugar - 2 cups fresh raspberries - 1 teaspoon vanilla extract - 1 tablespoon lemon juice - Edible gold leaf for decoration (optional) - Mint leaves for garnish These ingredients blend to form rich flavors and textures. The dark chocolate and raspberries shine together. When selecting chocolate, go for quality. Use high-percentage dark chocolate chips. This choice gives a deep, rich flavor. Fresh raspberries should be plump and bright. They should have no soft spots. Quality ingredients make a big difference in taste. Garnishes can elevate your dessert. Consider using edible gold leaf for a touch of luxury. Fresh mint leaves add color and a fresh aroma. You can also drizzle more raspberry sauce on top. These small touches make your dessert look and taste even better. For the complete recipe, check out the Full Recipe. 1. Start by heating 1/2 cup of heavy cream in a small saucepan. Use medium heat until it just begins to simmer. 2. Remove the pan from the heat and add 1 cup of dark chocolate chips. Let them sit for 2 minutes. 3. Stir the mixture until the chocolate is smooth and melted. 4. In another bowl, whip the remaining 1/2 cup of heavy cream with 2 tablespoons of powdered sugar. Whip until soft peaks form. 5. Gently fold the whipped cream into the chocolate mixture. Ensure there are no lumps. Set this aside to chill for at least 30 minutes. 1. Combine 2 cups of fresh raspberries, 1 teaspoon of vanilla extract, and 1 tablespoon of lemon juice in a blender. 2. Blend until smooth. If you want a smooth sauce, strain this mixture using a fine mesh sieve. This removes the seeds. 1. Take a 2-inch round pastry ring and place it on a serving plate. 2. Start with a layer of chocolate mousse. Follow this with a drizzle of raspberry sauce and a few fresh raspberries. 3. Repeat these layers until the ring is filled. Finish with mousse on top. 4. Carefully remove the pastry ring. Decorate the top with more raspberry sauce, fresh raspberries, and sprinkle edible gold leaf if desired. 5. Garnish with mint leaves to add color and freshness. These steps will help you create a stunning dessert that impresses your guests. For the complete recipe, refer to [Full Recipe]. To get the best chocolate mousse, use high-quality dark chocolate. Melt it slowly to avoid burning. When you whip the cream, stop as soon as soft peaks form. This keeps the mousse light and airy. Gently fold the whipped cream into the chocolate. If you mix too hard, you lose the fluffiness. Chill the mousse for at least 30 minutes. This helps it set and enhances the texture. A beautiful dessert spread impresses guests. Use a large, white plate for contrast. The white background makes the colors pop. Layer the mousse in clear cups or jars. This shows off the stunning layers. Add fresh raspberries on top for color. A sprinkle of edible gold leaf adds a touch of class. Always use clean tools for serving. This keeps the dessert looking fresh and neat. Pair the chocolate raspberry tower with sparkling wine. The bubbles cut through the richness. You can also serve it with coffee or a rich dessert liqueur. For a fun twist, make mini versions of the tower. Serve them on a decorative tray for guests to pick up. This makes it easy to enjoy while mingling. For the full recipe, check out the Glamourous Chocolate Raspberry Tower. {{image_2}} You can change flavors easily by swapping some ingredients. Use white chocolate instead of dark chocolate for a sweeter taste. If you prefer a fruity twist, try adding orange zest to the chocolate mousse. For a nutty flavor, mix in some finely chopped hazelnuts or almonds. Instead of raspberries, you can use strawberries or blueberries. Each fruit brings a new taste and color to your dessert. Adding layers can make your dessert more exciting. Try adding a layer of crumbled cookies between the chocolate mousse layers for crunch. You can also create a layer of whipped cream on top for a fluffy finish. Consider adding a layer of lemon curd for a tart contrast. This change will enhance the overall experience and delight your guests. Decorating your dessert can make it shine. For New Year’s Eve, use edible gold leaf to add glamour. You can also sprinkle some silver edible glitter on top. Use festive shapes like stars or fireworks made from fruit or chocolate. These details can match your party theme and make your dessert a showstopper. Enjoy creating your own glamorous chocolate raspberry tower with these variations! For more details, check out the Full Recipe. After your celebration, store any leftover desserts in the fridge. Use an airtight container to keep them fresh. This way, you maintain their taste and texture. Enjoy the leftovers within three days for the best flavor. If you notice any sogginess, add a layer of parchment paper between layers before sealing. You can freeze your chocolate raspberry tower for longer storage. Wrap it tightly in plastic wrap, then place it in a freezer-safe container. This protects it from freezer burn. The dessert can last up to two months in the freezer. When ready to enjoy, thaw it overnight in the fridge. This keeps it from getting soggy. If you need to reheat a portion, do so gently. Use a microwave on low power, or warm it in an oven at a low temperature. Avoid overheating, as this can ruin the mousse's texture. Serve the dessert chilled, with fresh raspberries and a drizzle of raspberry sauce. This enhances its look and taste. For added flair, sprinkle some edible gold leaf right before serving. You can find the full recipe for this dessert in the recipe section. A dessert is 'glamorous' when it looks fancy and tastes amazing. It should have rich colors, fun textures, and unique flavors. Using high-quality ingredients helps create a luxurious feel. Presentation matters too! Add garnishes like fresh fruits, edible gold leaf, or elegant sauces. These elements make your dessert stand out and impress your guests. Yes, you can prepare the chocolate raspberry tower ahead of time. Make the chocolate mousse and raspberry sauce a day before. Store them in the fridge. Assemble the tower just before serving. This way, your dessert stays fresh and looks beautiful. It saves you time on New Year's Eve, so you can enjoy the party! You can try several other desserts for New Year's Eve. Here are a few ideas: - Mini cheesecakes with fruit toppings - Sparkling wine jello shots - Chocolate-covered strawberries - Macarons in festive colors - Tiramisu cups for a coffee twist These desserts are fun and can add a glam touch to your celebration. Each one brings unique flavors and styles to your festive table. You now have all the tools to create glamorous New Year’s Eve desserts. We covered essential ingredients, from quality chocolate to elegant garnishes. I shared step-by-step instructions for a stunning chocolate raspberry tower and gave tips to perfect the mousse and presentation. You can even vary flavors and textures for your theme. Store leftovers wisely to enjoy later. Now go and impress your guests with your delicious creations. Enjoy making memories with friends and family this New Year’s Eve!](https://cheftaling.com/wp-content/uploads/2025/05/a8aee1a1-6984-44a1-8a10-b3563d836e69-300x300.webp)
![- 8 oz. rotini pasta - 1 lb. ground beef or turkey - 1 small onion, diced - 2 cloves garlic, minced - 1 packet taco seasoning - 1 can (14 oz.) diced tomatoes with green chilies - 1 cup corn kernels (fresh or frozen) - 1 cup black beans, rinsed and drained - 1 cup shredded cheddar cheese - 1/2 cup sour cream - Fresh cilantro, chopped (for garnish) - Optional toppings: sliced jalapeños, avocado, sliced green onions Gathering these ingredients makes this dish quick and fun. You can use ground beef or turkey based on your taste. Diced tomatoes with green chilies give it a zesty kick. Corn and black beans add texture and color. For toppings, I love using cheese and sour cream. They add creaminess. Fresh cilantro makes it pop. You can also add jalapeños for heat or avocado for creaminess. This taco pasta recipe is all about flavor, so feel free to mix and match! You can find the complete recipe in the Full Recipe section. - Bring salted water to a boil. - Cook rotini according to package instructions. - Drain and set aside. - Heat olive oil in a large skillet over medium heat. - Sauté onion and garlic until soft. - Add and brown the ground beef or turkey. - Season with taco seasoning. - Stir in diced tomatoes, corn, and black beans. - Simmer to meld flavors. - Add cooked rotini to the skillet. - Mix until well coated. - Stir in cheddar cheese and sour cream. - Adjust seasoning with salt and pepper. - Garnish with fresh cilantro. - Add optional toppings before serving. This recipe is all about ease and flavor. You can find the full recipe above. Enjoy your cooking! How to cook pasta al dente? To cook pasta al dente, boil water and add salt. Once boiling, add the rotini. Check the pasta a couple of minutes before the time on the package. It should be firm but not hard. Drain it and set it aside. Tips for browning meat evenly? To brown meat evenly, use a large skillet. Heat the olive oil first. Add the ground beef or turkey in a single layer. Avoid crowding the pan. Let it cook without stirring for a few minutes, then break it apart. Best practices for seasoning? Season your meat while it cooks. Use the taco seasoning packet for the best flavor. Add salt and pepper gradually. Taste as you cook to avoid over-seasoning. Alternatives to sour cream? If you want an alternative to sour cream, try Greek yogurt. It gives a nice tang and creaminess without the fat. You can also use plain cottage cheese, blended until smooth. Adding cream cheese for richness? For an extra rich flavor, add cream cheese. Mix it in with the cheese and sour cream. It will give your taco pasta a creamy texture that everyone will love. Suggested spices for extra kick? To add some heat, try cayenne pepper or crushed red pepper flakes. A hint of smoked paprika can also boost the flavor. Start with a small amount and add more as needed. Using fresh herbs to elevate taste? Fresh herbs like cilantro or parsley can really elevate your dish. Chop them finely and mix them in just before serving. They add freshness and a pop of color. {{image_2}} For a tasty vegetarian taco pasta, swap the meat for lentils or mushrooms. Lentils add protein and fiber. Mushrooms bring a savory, earthy flavor. When using these ingredients, adjust the seasonings to fit plant-based options. You might want to add more spices for depth. A little extra cumin or chili powder can make a big difference. You can easily turn this recipe into a baked dish. After mixing in the pasta, transfer it to a baking dish. To add a crunchy topping, sprinkle breadcrumbs over the top. Bake at 350°F for about 20 minutes. This gives you a crispy layer that contrasts nicely with the creamy inside. If you prefer other proteins, try chicken or ground turkey instead of beef. Both will work well and still taste great. You can even use seafood like shrimp or fish for a fun twist. Just cook the seafood until it's done, then mix it in with the other ingredients. This adds new flavors and textures to your taco pasta. After you enjoy your taco pasta, store any leftovers right away. Place them in an airtight container. This keeps the flavors fresh and helps avoid spills. Make sure the pasta cools down first. Refrigerate it within two hours of cooking. Proper storage can keep it good for about three to four days. You can reheat your taco pasta in two ways: the microwave or the stove. For the microwave, place it in a bowl. Cover it with a damp paper towel to keep moisture. Heat it in short bursts, stirring in between. On the stove, add a splash of water in a pan. Heat gently over low heat, stirring often. This way, you avoid mushy pasta. If you want to keep your taco pasta longer, freezing is a great option. First, let it cool completely. Then, store it in a freezer-safe container or bag. Remove as much air as possible before sealing. For the best results, eat it within three months. When you're ready to eat, thaw it in the fridge overnight. Reheat it as you would with leftovers for the best taste. For the full recipe, check out [Full Recipe]. Yes, you can use other pasta shapes. You might try penne or fusilli. For gluten-free options, use brown rice pasta or chickpea pasta. These choices taste great and keep the dish healthy. Taco pasta lasts about 3 to 5 days in the fridge. Make sure to store it in a tight container. This keeps the flavors fresh and tasty. You can prepare taco pasta ahead of time. Cook the pasta and meat, then store them separately. This way, you can mix them right before serving. It helps keep everything fresh. Taco pasta is very kid-friendly. Kids love the cheesy, meaty flavor. To make it more appealing, let them add their own toppings like cheese or avocado. This makes it fun for them. Serve taco pasta with a fresh salad or garlic bread. A side of corn or nachos also works well. These sides add a nice crunch and balance to the meal. This recipe combines pasta and taco flavors for a fun dish. We covered key ingredients, cooking steps, and tips for the best results. You can also adjust it for dietary needs or storage. Enjoy making it your own with favorite toppings and variations. Now, it's time to bring friends or family together for a tasty meal they’ll love. Happy cooking!](https://cheftaling.com/wp-content/uploads/2025/05/99136476-dbbe-4ea8-b4bf-7b80400c09bc-300x300.webp)


![To make delicious chickpea fritters with veggies, gather these ingredients: - 1 can (15 oz) chickpeas, rinsed and drained - 1/2 cup grated zucchini (squeezed to remove excess moisture) - 1/2 cup grated carrots - 1/4 cup finely chopped red bell pepper - 1/4 cup finely chopped green onions - 2 cloves garlic, minced - 1/2 cup fresh cilantro, chopped - 1/2 teaspoon ground cumin - 1/2 teaspoon paprika - 1/4 teaspoon black pepper - 1/4 teaspoon salt - 1/2 cup all-purpose flour (or chickpea flour for gluten-free) - 1 large egg (or flax egg for vegan) - Oil for frying (such as olive oil or vegetable oil) These fresh ingredients bring flavor and texture. The chickpeas serve as a great base. Zucchini and carrots add moisture and crunch. The spices give a warm kick. You can adjust the spices to fit your taste. For a gluten-free option, use chickpea flour instead of all-purpose flour. You can also swap the egg for a flax egg if you prefer a vegan recipe. This recipe is flexible. You can customize it with your favorite veggies or spices. Check out the Full Recipe for more details on preparing these tasty fritters! Mixing the Chickpeas and Veggies Start by mashing the chickpeas in a large bowl. Use a fork or potato masher. Aim for a chunky texture; avoid making it too smooth. Next, add the grated zucchini, carrots, red bell pepper, and green onions. Don’t forget the minced garlic and chopped cilantro. Sprinkle in the ground cumin, paprika, black pepper, and salt. Mix everything well until combined. Making the Batter In a small bowl, whisk the egg until it's frothy. If you want a vegan option, use a flax egg. Add this egg to the chickpea mix along with the flour. Stir until a thick batter forms. If the batter seems too wet, you can add more flour. It should hold together well, so check the consistency. Cooking the Fritters Heat 2-3 tablespoons of oil in a large skillet over medium heat. Once the oil is hot, scoop about 2 tablespoons of the mixture for each fritter. Flatten them slightly in the pan. Fry each fritter for about 3-4 minutes on each side. You want them golden brown and crispy. If needed, work in batches, adding more oil as necessary. Frying Techniques To get the best results, keep an eye on the oil temperature. Too hot, and the fritters will burn. Too cool, and they will soak up oil. Aim for a steady medium heat to achieve that crispy goodness. Achieving the Perfect Color and Texture When frying, look for a golden brown color. This is key for a great texture. Once done, remove the fritters from the pan. Place them on a paper towel-lined plate to absorb any excess oil. This keeps them crisp and tasty. For serving, arrange the fritters on a platter with fresh cilantro for a pop of color. Enjoy them warm with your favorite dip or sauce. For the full recipe, check out the instructions above. Oil Temperature Management Keep your oil at the right heat. If it’s too cool, the fritters will soak up oil and turn soggy. If it’s too hot, they will burn quickly. Aim for medium heat. You can test the oil by dropping a small amount of batter in. If it sizzles and rises, you’re ready to fry! Batch Cooking Suggestions Make more fritters than you need. They freeze well! Just fry them and let them cool. Place them in a single layer on a baking sheet. Once frozen, transfer them to a bag. When you want some, just reheat them in the oven for a quick snack. Recommended Dips and Sauces Pair your fritters with tasty dips. A yogurt sauce or tahini works great. You can mix yogurt with herbs and lemon for a fresh flavor. Hummus is also a favorite. These add creaminess and balance the crispiness of the fritters. Presentation Tips Make your dish look tempting! Arrange the fritters on a large platter. Garnish with fresh cilantro or parsley. Add a colorful mix of dips around the fritters. This not only looks good but invites everyone to dig in. For the full recipe, refer to the recipe section above. {{image_2}} Gluten-Free Options You can easily make these fritters gluten-free. Simply swap regular flour for chickpea flour. This flour keeps the fritters light and adds extra chickpea flavor. You can also use almond flour or oat flour if you prefer. Both options work well and keep the texture nice. Vegan Alternatives To make the fritters vegan, replace the egg with a flax egg. Mix one tablespoon of flaxseed meal with three tablespoons of water. Let it sit for a few minutes until it thickens. This simple change keeps your fritters together without any eggs. Additional Veggies to Include Feel free to add extra veggies for more flavor. Chopped spinach, shredded cabbage, or even corn can work great. These ingredients add color and nutrition. You can also try adding some diced jalapeños for a spicy kick. Different Spices to Experiment With Spices can change the whole dish. Try adding curry powder for warmth or chili powder for heat. You can also use fresh herbs like dill or parsley for a fresh taste. Mixing in some lemon zest brightens up the fritters too. The options are endless, so have fun experimenting. For the full recipe, check out [Full Recipe]. Refrigeration Tips After cooking, let the fritters cool. Place them in an airtight container. They will stay fresh for up to four days. If you want to keep them longer, consider freezing. Freezing Guidance For freezing, cool the fritters first. Arrange them in a single layer on a baking sheet. Once frozen solid, move them to a freezer bag. This method prevents them from sticking together. They can last up to three months in the freezer. Best Methods for Maintaining Crispiness To keep the fritters crispy when reheating, use the oven. Preheat it to 375°F (190°C). Place the fritters on a baking sheet for about 10 minutes. This method keeps them golden and crunchy. Microwave vs. Oven Reheating While you can use the microwave, it may make the fritters soggy. If you choose this method, heat them for 30 seconds at a time. Check until they are warm but be careful not to overheat. For the best result, the oven is always the winner! For the full recipe, check out the [Full Recipe]. How do you make chickpea fritters crispy? To make chickpea fritters crispy, use enough oil in the pan. Heat the oil until it's hot before adding the fritters. This helps them get a nice golden color. You can also squeeze out excess moisture from the veggies. This keeps the batter from being too wet. Can I bake the fritters instead of frying? Yes, you can bake the fritters. Preheat your oven to 400°F (200°C). Place the fritters on a lined baking sheet. Brush or spray them with a little oil. Bake for about 20-25 minutes, flipping halfway through. They will be less crispy than fried, but still tasty! What can I serve with chickpea fritters? Chickpea fritters go well with many dips. Try yogurt sauce, hummus, or a spicy salsa. A fresh salad also makes a great side. You can serve them on a platter with colorful sauces for a fun touch. Caloric Content Each fritter has about 100 calories. This can change based on how much oil you use. If you bake, the calorie count may be lower. Nutritional Benefits of Ingredients Chickpeas are high in protein and fiber. They help keep you full longer. Zucchini and carrots add vitamins and minerals. Fresh herbs like cilantro provide antioxidants. These fritters are a healthy choice for a snack or meal. Enjoy the Full Recipe for a delicious dish! This blog post outlined how to make delicious chickpea fritters. We covered the key ingredients, blending chickpeas with fresh veggies, and creating the perfect batter. You learned cooking tips for frying and serving ideas with dips. We also explored variations for dietary needs, storage methods, and answers to common questions. Chickpea fritters can be a fun, tasty dish. You can customize them to suit your taste or dietary preferences. So, grab your ingredients and start cooking! Enjoy your homemade fritters!](https://cheftaling.com/wp-content/uploads/2025/05/3632a5a1-64d7-4421-9e80-54061ca83127-300x300.webp)


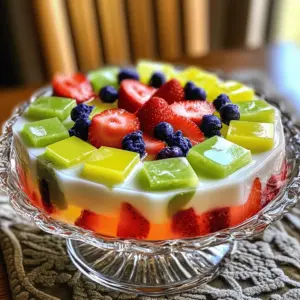
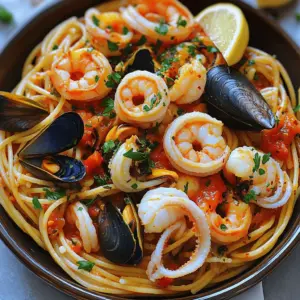


![- 1 cup granulated sugar - 1/2 cup all-purpose flour - 1/4 cup unsalted butter, melted - 2 large eggs - 1 cup whole milk - 1 teaspoon vanilla extract - Zest of 2 lemons - 1/4 cup freshly squeezed lemon juice - 1/2 teaspoon baking powder - Pinch of salt - Powdered sugar, for dusting (optional) One Baby Lemon Impossible Pie has about 100 calories. It contains around 10 grams of sugar. Each pie is rich in flavor yet light in texture. They offer a sweet treat without too many calories. When picking lemons, look for ones that feel heavy for their size. Choose organic lemons when possible. They often taste better and have no harmful chemicals. If you cannot find fresh lemons, bottled lemon juice works too, but fresh is best. Always check the dates on your dairy products. Fresh milk and eggs make a big difference in taste. Start by preheating your oven to 350°F (175°C). This helps the pies bake evenly. While the oven heats, grease a 24-cup mini muffin tin. You can use non-stick spray or butter. Make sure each cup is well-coated. This step helps the pies come out easily after baking. Next, gather your mixing bowls. In one bowl, whisk together the dry ingredients: granulated sugar, all-purpose flour, and baking powder. Make sure there are no lumps. In another bowl, mix the wet ingredients. Combine melted butter, eggs, whole milk, vanilla extract, lemon zest, lemon juice, and salt. Whisk until the mixture is smooth. Now, slowly pour this wet mix into the dry ingredients. Stir gently. You want everything to combine, but don’t overmix. This keeps the texture light. Carefully pour the batter into the mini muffin tin. Fill each cup about halfway. This gives them room to rise. Place the tin in the preheated oven. Bake for about 20 minutes. You’ll know they are done when the tops are golden. Insert a toothpick into the center of a pie. If it comes out clean, they are ready. After baking, let them cool in the tin for about 5 minutes. Then, transfer them to a wire rack to cool completely. For a sweet touch, dust them with powdered sugar before serving. You can find the full recipe to guide you through these steps. Enjoy these small, tasty treats! To make Baby Lemon Impossible Pies safe for little ones, reduce the sugar. You can cut the sugar by half. This keeps the pies sweet but not too much for babies. Use organic ingredients when possible. Organic lemons taste better and are safer for kids. Choose fresh, ripe lemons for the best flavor. Serve the Baby Lemon Impossible Pies on a colorful platter. This makes them look fun and inviting. Garnish each pie with a small mint leaf or a thin lemon slice. These simple touches brighten up the dish. You can also use colorful plates or napkins to match. Kids love bright colors! Mix the ingredients gently to avoid tough pies. Overmixing can make them dense instead of light. Pay attention to baking times. Bake for about 20 minutes, but check early. Ovens can vary, and you want them golden, not burnt. Cooling is key; let them rest in the tin for 5 minutes. This helps them firm up and makes them easier to remove. {{image_2}} You can mix up the flavors of Baby Lemon Impossible Pies easily. Try adding fresh blueberries for a fruity twist. Just fold in a cup of blueberries into the batter. For a floral note, use lavender. Add a teaspoon of dried lavender to the mix. Both options bring new life to these treats while keeping that delicious lemon base. If you need gluten-free options, swap all-purpose flour with gluten-free flour blend. This change works well for texture and taste. For dairy-free pies, replace whole milk with almond or oat milk. You can also use coconut oil instead of butter. These swaps keep the pies tasty and suitable for different diets. Want to make larger pies? Use a standard muffin tin instead of a mini one. Fill each cup about two-thirds full and bake for 25-30 minutes. If you prefer different shapes, use tart pans or even silicone molds. Adjust baking times based on the size you choose. Each method gives you a fun and unique way to enjoy Baby Lemon Impossible Pies. For the complete recipe, check out the [Full Recipe]. To keep your Baby Lemon Impossible Pies fresh, store them in an airtight container. This helps prevent them from drying out. You can place parchment paper between layers to avoid sticking. Make sure they are completely cool before sealing them up. Refrigeration is best for short-term storage. You can keep the pies in the fridge for up to five days. They will stay tasty and moist. Freezing is great for longer storage. Wrap each pie in plastic wrap, then place them in a freezer bag. This keeps them fresh for up to three months. In the fridge, these pies last about five days. When frozen, they remain good for up to three months. To enjoy them after freezing, let them thaw in the fridge overnight. Reheat them in the oven before serving for the best taste. You can also find the Full Recipe to make more whenever you need! Yes, you can make these pies without eggs. Use a mixture of ground flaxseed and water as a substitute. Combine 1 tablespoon of ground flaxseed with 2.5 tablespoons of water for each egg. Let it sit for about 5 minutes until it thickens. This will help bind your ingredients just like eggs do. If you want to replace granulated sugar, use coconut sugar or honey. Both options add a nice flavor. If using honey, reduce the liquid in the recipe slightly. For a lower-calorie option, consider a sugar substitute like stevia or erythritol. Remember to follow package instructions for the right amount. To check if your pies are done, insert a toothpick into the center of one. If it comes out clean, your pies are ready. The tops should look slightly golden. If they still look wet or gooey, bake them a few more minutes. Keep an eye on them to avoid overbaking. For the full recipe, check the details above. Enjoy making these delightful Baby Lemon Impossible Pies! In this post, we covered key ingredients, from sugar to butter, and tips for quality. I shared step-by-step baking instructions, along with helpful tips to make mini pies baby-friendly. We explored flavor variations and proper storage methods to keep your pies fresh. Remember, good choices lead to great results. Keep experimenting with flavors and methods. Enjoy creating your delicious mini pies using these insights!](https://cheftaling.com/wp-content/uploads/2025/05/b06ef402-8667-4e9a-9203-536452365553-300x300.webp)

![- 1 cup all-purpose flour - 1/2 cup brown sugar - 1/4 cup granulated sugar - 1/2 teaspoon baking powder - 1/4 teaspoon baking soda - 1/4 teaspoon salt - 1/2 cup unsalted butter, softened - 2 large eggs - 1 teaspoon vanilla extract - 1/2 cup crushed pineapple, drained - 1/2 cup maraschino cherries, halved These ingredients create a base for your cupcakes. The flour gives structure. The sugars add sweetness and moisture. Baking powder and baking soda help the cupcakes rise. Butter makes them rich and soft. Eggs bind everything together. The crushed pineapple and cherries provide the fun topping. They give a burst of flavor and color. The pineapple brings sweetness, while cherries add a pop of brightness. This combo makes every bite special. - 1/2 teaspoon ground cinnamon (optional) - Vegan or gluten-free substitutes as needed You can add ground cinnamon for extra warmth. It pairs well with the fruit. Want to make these cupcakes fit your diet? Swap standard flour for gluten-free flour. Use flax eggs for a vegan version. These changes keep the joy of pineapple upside-down cupcakes alive for everyone. For the complete recipe, check the [Full Recipe]. 1. Preheat your oven to 350°F (175°C). This step is key for even baking. 2. Line your muffin tin with cupcake liners. This helps with easy removal. 3. Combine the crushed pineapple with a pinch of ground cinnamon if you like. This adds a warm flavor. 1. In a mixing bowl, whisk together the all-purpose flour, baking powder, baking soda, and salt. This makes the dry mix ready. 2. In a large bowl, cream together softened butter, brown sugar, and granulated sugar. Mix until light and fluffy. This is where the magic begins! 3. Add the eggs one at a time, mixing well after each. Stir in the vanilla extract for that sweet aroma. 4. Gradually add the dry mix to the wet ingredients. Alternate with the crushed pineapple. Mix until just combined. Avoid over-mixing for soft cupcakes. 1. Fill each cupcake liner halfway with the batter. This gives them room to rise. 2. Top each with halved maraschino cherries and a small spoonful of leftover pineapple mixture. This creates a beautiful topping. 3. Bake for 18-20 minutes. Check with a toothpick. It should come out clean when done. These cupcakes are a fun twist on a classic dessert. Enjoy your baking adventure! For the complete recipe, check the Full Recipe section. To help your cupcakes rise perfectly, make sure your baking powder and baking soda are fresh. Old leavening agents might not work well. Mix the dry ingredients well before adding them to the wet mix. This helps spread the leavening agents evenly. Avoid common mistakes by not overmixing your batter. Stir until just combined to keep your cupcakes light. Also, don’t skip preheating the oven. This step is key for even baking. If your oven is not hot enough, the cupcakes may not rise as they should. For an attractive display, serve your cupcakes on a colorful platter. You can arrange them in a circle or a fun pattern. This way, they catch everyone’s eye at parties or gatherings. Garnishing adds more visual appeal. A slice of fresh pineapple or a cherry on top makes each cupcake pop. You can also sprinkle a little grated coconut for texture. These small touches create a stunning treat that looks as good as it tastes. Explore more creative serving ideas in the Full Recipe for a delightful twist! {{image_2}} To make vegan Pineapple Upside-Down Cupcakes, swap eggs for applesauce or flaxseed meal. Use a plant-based butter to replace regular butter. Replace regular milk with coconut milk for extra flavor. These swaps keep the cupcakes moist and tasty. For gluten-free options, use a gluten-free flour blend instead of all-purpose flour. Make sure your baking powder is gluten-free too. This will help ensure your cupcakes rise well. You can also add some almond flour for texture. You can add fun flavors to your cupcakes. Try mixing in shredded coconut for a tropical touch. A splash of rum adds a nice kick, too. Just a tablespoon will work well without overpowering. For toppings, get creative! You can use whipped cream or cream cheese frosting on top. A sprinkle of toasted coconut makes a great finish. Fresh fruit slices or a drizzle of caramel can make your cupcakes even more special. Enjoy exploring these fun twists! To keep your Pineapple Upside-Down Cupcakes fresh, store them in an airtight container. This helps maintain their moisture and flavor. If you want to keep them longer, you can freeze them. When stored in the fridge, they last for about five days. In the freezer, they can stay good for up to three months. When you're ready to enjoy leftover cupcakes, you can reheat them simply. Place them in the microwave for about 10-15 seconds. This warms them up nicely without drying them out. You may also place them in a preheated oven at 350°F (175°C) for about 5-7 minutes. Serve them warm with a scoop of vanilla ice cream or a drizzle of caramel sauce for a delightful touch. Can I use fresh pineapple instead of canned? Yes, you can use fresh pineapple. Just make sure to cut it into small pieces. Fresh pineapple adds a crisp taste to your cupcakes. Why did my cupcakes sink in the middle? Your cupcakes may sink if the batter is too wet or if you open the oven door too soon. Be sure to measure the ingredients carefully and wait until baking is almost done before checking. Can I substitute other fruits for the topping? Absolutely! You can use peaches, cherries, or even berries. The key is to keep the fruit juicy but not too wet. This helps the cupcakes stay fluffy. How do I adjust baking time for mini cupcakes? Mini cupcakes bake faster. Check them after 10 to 12 minutes. A toothpick should come out clean when they are done. What should I do if I don’t have cupcake liners? If you lack cupcake liners, grease your muffin tin with butter or oil. This should help the cupcakes release easily after baking. How to know when the cupcakes are fully baked? Insert a toothpick into the center. If it comes out clean, your cupcakes are ready. If it has wet batter, bake a few more minutes. For the full recipe, check out the details above. Enjoy your baking! Pineapple upside-down cupcakes offer a fun twist on a classic dessert. We covered key ingredients like butter, pineapple, and cherries. I shared easy steps for mixing the batter and assembling the cupcakes. You learned tips for baking success and how to store them properly. Try the variations to fit your dietary needs or to explore new flavors. With these insights, you can bake cupcakes that impress everyone. Enjoy your baking journey, and let your creativity shine!](https://cheftaling.com/wp-content/uploads/2025/05/a41c79fe-9282-44f2-98f8-6b030148f0bd-300x300.webp)
![To make the pistachio raspberry cake, gather these ingredients: - 1 cup unsalted pistachios, shelled - 1 cup all-purpose flour - 1 teaspoon baking powder - ½ teaspoon baking soda - ¼ teaspoon salt - ½ cup unsalted butter, softened - 1 cup granulated sugar - 2 large eggs - 1 teaspoon vanilla extract - ½ cup buttermilk - 1 cup fresh raspberries (plus extra for garnish) - ½ cup powdered sugar (for frosting) - 1 tablespoon lemon juice - 1 tablespoon milk (for frosting) Each ingredient plays a key role in the cake's flavor and texture. - Use 1 cup of shelled pistachios for a nutty base. - 1 cup of flour gives structure to your cake. - The 1 teaspoon of baking powder helps the cake rise perfectly. - The ½ teaspoon of baking soda balances the acidity from raspberries. - Adding ¼ teaspoon of salt enhances the overall flavor. - ½ cup of softened butter adds richness. - 1 cup of sugar sweetens the cake. - Two large eggs provide moisture and bind the ingredients. - 1 teaspoon of vanilla extract adds depth to the flavor. - ½ cup of buttermilk keeps the cake moist. - 1 cup of fresh raspberries gives a burst of tartness. - Use ½ cup of powdered sugar for frosting sweetness. - 1 tablespoon of lemon juice brightens the frosting. - 1 tablespoon of milk thins the frosting to a spreadable consistency. You can swap some ingredients for different flavors or dietary needs: - Replace unsalted butter with coconut oil for a dairy-free option. - Use almond flour instead of all-purpose flour for a gluten-free version. - If you don’t have buttermilk, mix ½ cup of milk with 1 teaspoon of vinegar. - For a nut-free cake, omit pistachios and add more flour instead. - Swap fresh raspberries with blueberries or strawberries for variety. - Use agave syrup or honey in place of granulated sugar for a natural sweetener. These substitutions allow you to customize the cake to your taste or dietary needs. For the full recipe, check the recipe section. First, you need to preheat your oven to 350°F (175°C). This helps the cake bake evenly. Next, take an 8-inch round cake pan. Grease the pan with butter or oil. Then, dust it with flour. This step prevents the cake from sticking. Set the pan aside while you make the batter. Start by using a food processor to grind the pistachios. Pulse them until they are finely ground. Be careful not to blend too much. You want a fine meal, not pistachio butter. In a medium bowl, mix the ground pistachios, all-purpose flour, baking powder, baking soda, and salt. Whisk these dry ingredients well and set them aside. In a large bowl, cream the softened butter and granulated sugar. Mix them together until they are light and fluffy. This should take about 3-4 minutes. Add the eggs, one at a time, mixing well after each. Then, add the vanilla extract and buttermilk. Stir until it is combined. Now, slowly add the dry ingredients to the wet mixture. Mix until just combined. Be careful not to overmix the batter. This keeps your cake light and airy. Finally, gently fold in the fresh raspberries with a spatula. Reserve some for decoration later. Pour the batter into your prepared cake pan. Smooth the top with a spatula. Bake the cake for 25-30 minutes. You will know it’s ready when a toothpick inserted in the center comes out clean. Once baked, let the cake cool in the pan for about 10 minutes. After that, transfer it to a wire rack to cool completely. This step is important. A cooled cake is easier to frost and decorate. Once the cake is cool, you can move on to the fun part: frosting and decorating! For the frosting, whisk together the powdered sugar, lemon juice, and milk until smooth. Spread this glaze on top of the cake. Add the reserved raspberries and crushed pistachios for a lovely finish. Enjoy your creation! For the complete method, check out the Full Recipe. Baking can be tricky. Here are some mistakes to watch out for: - Not measuring ingredients: Always use precise measurements. - Overmixing the batter: This can make the cake tough. Mix just until combined. - Skipping the oven preheat: Always preheat your oven. A cold oven can ruin your cake. - Not testing for doneness: Use a toothpick to check. If it comes out clean, it's done. A moist cake is key for taste. Here are some tips to keep it moist: - Use buttermilk: It adds moisture and richness. - Do not overbake: Follow the baking time closely. - Add fruits: Raspberries not only add flavor but also moisture. - Cover the cake: After cooling, wrap it in plastic wrap. This keeps it fresh. Decorating can be fun and easy. Try these tips for a beautiful cake: - Use a cake stand: It elevates the look of your cake. - Spread frosting evenly: Use a spatula for smooth edges. - Garnish with fresh raspberries: They add color and flavor. - Sprinkle crushed pistachios: This adds texture and looks great. These tips will help you make a stunning pistachio raspberry cake. For the complete recipe, see the [Full Recipe]. {{image_2}} If you want to make a gluten-free pistachio raspberry cake, you can use almond flour instead of all-purpose flour. Almond flour gives a nice texture and a rich flavor. You can also try a gluten-free flour blend. Just make sure it contains xanthan gum, as this helps with binding. Replace the flour in the recipe with the same amount of gluten-free flour. You can switch the raspberries for other fruit if you like. Blueberries work great in this cake. They add a nice pop of color and flavor. Cherries are another tasty option. Just chop them up and fold them into the batter. You can also use diced strawberries for a sweeter twist. Feel free to mix fruits for a fun flavor combo. Want to make your cake more unique? Try adding different flavors! A teaspoon of almond extract gives a nice nutty taste. You can also add a splash of orange juice or zest for a bright flavor. If you love chocolate, fold in some mini chocolate chips with the raspberries. This will add richness to your cake. Explore these options to make your cake truly yours. For the full recipe, check out the complete guide. To keep your pistachio raspberry cake fresh, store it in an airtight container. Wrap it in plastic wrap if you don’t have one. This helps keep the moisture in and prevents it from drying out. If you have leftover frosting, store it separately in the fridge. You can freeze your cake for longer storage. First, let it cool completely. Then, slice the cake if you like. Wrap each slice in plastic wrap and place them in a freezer bag. This way, you can enjoy a piece whenever you want. The cake can freeze well for up to three months. When stored properly, the cake lasts about four to five days at room temperature. If you keep it in the fridge, it stays fresh for up to a week. For the best taste, eat it sooner rather than later. Always check for any signs of spoilage, such as mold or an off smell. If you're unsure, it's best to toss it away. Enjoy this delightful cake with perfect freshness! For the full recipe, refer back to the complete instructions above. Yes, you can use frozen raspberries. They work well in this cake. Just remember to thaw and drain them first. This step helps keep your cake from getting too wet. Frozen berries might break apart more than fresh ones, so be gentle when folding them in. Check the cake by inserting a toothpick into the center. If it comes out clean or with a few crumbs, the cake is done. You can also look for a golden color on the top. The edges should slightly pull away from the pan. If it jiggles in the middle, it needs more time. Serve the cake warm or at room temperature. I like to add a drizzle of lemon glaze on top. Garnish with fresh raspberries and crushed pistachios for a nice look. For a sweeter touch, serve each slice with whipped cream or vanilla ice cream. You can find the full recipe to help you create this treat! This post covered the key elements of baking a delicious pistachio raspberry cake. You learned about the important ingredients and their precise measurements. The step-by-step instructions guide you from prep to bake, ensuring success. We also shared tips to avoid baking mistakes and keep your cake moist. Don't forget the exciting variations and how to store your cake for freshness. Enjoy your baking journey and celebrate your sweet creations with family and friends. Happy baking!](https://cheftaling.com/wp-content/uploads/2025/05/945a6f0f-6a9b-4034-aa15-5a74552d6394-300x300.webp)
![- 2 ripe bananas, mashed - 1/2 cup unsalted butter, softened - 1 cup granulated sugar - 2 large eggs - 1 teaspoon vanilla extract - 1 1/2 cups all-purpose flour - 1 teaspoon baking powder - 1/2 teaspoon baking soda - 1/2 teaspoon salt - 1/2 cup sour cream These main ingredients create a base for your banana coffee cake. The ripe bananas add natural sweetness and moisture. The unsalted butter gives it a rich flavor. Granulated sugar helps it rise and brown. Eggs bind everything together, while vanilla adds a lovely aroma. - 1/2 cup chopped walnuts - 1/2 cup chocolate chips - 1/2 teaspoon cinnamon (for topping) - 2 tablespoons brown sugar (for topping) These optional ingredients allow you to customize your cake. Chopped walnuts add a nice crunch. Chocolate chips give a sweet twist. Mixing cinnamon and brown sugar creates a delightful topping. You can mix and match to find your favorite version of this cake. - Approx. 250 calories per serving - 5g protein, 15g fat, 30g carbs per slice - Ripe bananas provide potassium and fiber. The cake offers a tasty way to enjoy fruit. Bananas help with digestion, while walnuts add healthy fats. This dish is perfect for breakfast or a snack. You can feel good knowing it has some health benefits. For the full recipe, check out the Banana Coffee Cake details. To start, you need to prepare your cake pan. Greasing the pan is key to a smooth release. Use unsalted butter or cooking spray. Make sure to cover the bottom and sides well. If you want, you can also line the pan with parchment paper. This adds an extra layer of safety. Just cut a circle for the bottom and strips for the sides. This way, your coffee cake comes out cleanly. Now it’s time to mix the batter. In a large bowl, cream the softened butter and granulated sugar together. Use a hand mixer for best results. You want it to be light and fluffy. Next, add the mashed bananas and eggs. Don’t forget the vanilla extract! Mix it all together until you see no lumps. The batter should look smooth and creamy. In a separate bowl, whisk your dry ingredients. Mix the all-purpose flour, baking powder, baking soda, and salt. This step is important. Whisking helps blend the ingredients evenly. Now, you will add the dry mix to the wet mix. Do this in parts, alternating with the sour cream. Start and end with the dry ingredients. This ensures your batter stays light and fluffy. Mix until just combined, then fold in the chopped walnuts gently. This method makes your banana coffee cake deliciously moist. You can find the full recipe above for all the steps you need! To ensure your banana coffee cake comes out perfect, use a toothpick to test for doneness. Insert a toothpick in the center of the cake. If it comes out clean, your cake is ready. If it has batter on it, bake a few more minutes. To keep your cake moist, store it in an airtight container. You can also wrap it in plastic wrap. This helps keep the cake from drying out. If you want to store it longer, consider freezing it. A common mistake is overmixing the batter. Mix just until the ingredients combine. Overmixing can make your cake tough instead of light. Another mistake is not measuring ingredients properly. Use measuring cups and spoons for accuracy. This helps ensure the right balance of flavors and textures. To achieve a moist cake, use ripe bananas. The riper they are, the more moisture and flavor they add. Mash them well to blend evenly into the batter. Enhancing the banana flavor is easy. You can add a splash of banana extract. This adds a natural taste that makes your cake even better. For an extra kick, mix in a bit of cinnamon. It pairs well with banana and adds warmth to the flavor. For the full recipe, you can refer to the [Full Recipe]. {{image_2}} You can easily add nuts to your banana coffee cake. Chopped walnuts are a classic choice. They give a nice crunch and earthy flavor. If you want a tropical twist, try coconut flakes or pecans. Pros of Adding Nuts: - Adds texture and flavor. - Boosts nutrition with healthy fats. Cons of Adding Nuts: - Some people may be allergic. - Nuts can make the cake denser. Want to take your cake up a notch? Try adding cocoa powder or chocolate chips. This gives a rich, sweet taste that pairs well with bananas. You can also play with spices. Add a dash of nutmeg or ginger for warmth. Each spice will change the flavor profile and make the cake even more special. If you need a gluten-free version, swap out all-purpose flour for almond or gluten-free flour. Make sure it has a good binding agent. For dairy-free, use coconut oil instead of butter. You can replace sour cream with almond milk or a dairy-free yogurt. These swaps keep the cake moist and tasty. To keep your banana coffee cake fresh on the counter, wrap it well with plastic wrap. This helps to keep moisture in. You can also use an airtight container. The cake stays good for about three days at room temperature. If you want to keep it longer, consider refrigerating it. To store it in the fridge, place the wrapped cake in a container. It can last up to a week this way. For long-term storage, freezing banana coffee cake works well. First, let the cake cool completely. Then, wrap it tightly in plastic wrap, followed by aluminum foil. This double wrapping prevents freezer burn. You can freeze it for up to three months. When you are ready to eat it, thaw the cake in the fridge overnight. For reheating, place slices in the microwave for about 15-20 seconds. This warms the cake gently without drying it out. At room temperature, banana coffee cake lasts about three days. It can stay fresh longer if stored correctly. Watch for signs of spoilage, like a sour smell or mold. If the cake feels overly dry or hard, it’s best to toss it. Keeping an eye on these factors helps ensure you enjoy your delicious treat at its best. For the full recipe, check the link provided. Yes, you can use frozen bananas. They add great flavor and moisture. Thaw the bananas first. You can do this by placing them in the fridge overnight. If you need them fast, place them in a bowl of warm water for about 30 minutes. Once thawed, drain any extra liquid. Then, mash them well before adding to your batter. Using frozen bananas works well and saves waste. Banana coffee cake pairs well with several drinks. I recommend a hot cup of coffee or tea. The warmth balances the cake's sweetness. For a refreshing option, serve it with cold milk or a fruit smoothie. You can also enjoy it with yogurt or fresh fruit on the side. These pairings enhance the flavors and make for a delightful snack. Yes, this recipe is great for baking in advance. You can bake the cake a day ahead. After baking, let it cool completely. Then, wrap it tightly in plastic wrap. Store it at room temperature for up to three days. For longer storage, freeze the cake. Just slice it before freezing for easy servings. This way, you can enjoy it anytime. For detailed instructions, check out the Banana Coffee Cake full recipe. Here you’ll find all the steps to make this delicious treat. In this blog post, we explored how to make delicious banana coffee cake. We covered essential and optional ingredients, step-by-step instructions, and helpful tips for a perfect bake. You learned about variations, storage tips, and answers to common questions. Banana coffee cake is fun to make and even better to eat. Whether you go classic or add your twist, enjoy the process. Happy baking, and savor every bite of your treat!](https://cheftaling.com/wp-content/uploads/2025/05/1c9aa05e-6201-46d1-b112-fefb80916cc7-300x300.webp)
![- 2 boneless, skinless chicken breasts, cut into bite-sized pieces - 8 oz fettuccine or your preferred pasta - 1 tablespoon olive oil - 3 cloves garlic, minced - Zest of 1 lemon - 1/4 cup freshly squeezed lemon juice - 1 cup chicken broth - 1 cup heavy cream - 1 teaspoon dried oregano - Salt and pepper to taste - 1/2 cup grated Parmesan cheese In this dish, the chicken plays a big role. I use boneless, skinless chicken breasts for easy cooking. Cut them into small pieces to ensure they cook quickly. The pasta is just as important. I love fettuccine, but you can pick any type you like. For the sauce, I mix lemon juice, zest, garlic, and chicken broth. These flavors blend well and make the dish bright and fresh. Heavy cream adds richness, while Parmesan cheese gives a nice salty kick. - Fresh herbs - Extra cheese Garnishes make the dish pop. I often use fresh parsley for color and flavor. A sprinkle of extra cheese on top adds creaminess and makes it look fancy. You can also try other herbs like basil or thyme for a twist. Check out the Full Recipe for all the steps to create this delightful meal! 1. Salting the water: Start by filling a large pot with water. Add a generous amount of salt. It should taste like the sea. This step boosts the pasta's flavor. 2. Draining and reserving pasta water: Cook the pasta according to the package instructions. Drain the pasta but save 1/2 cup of the water. This water is starchy and can help your sauce later. 1. Seasoning and cooking: Heat olive oil in a large skillet over medium heat. Add chicken pieces, then season with salt, pepper, and oregano. Cook until golden brown, about 6-7 minutes. 2. Setting chicken aside: Once cooked, remove the chicken from the skillet. Place it on a plate and let it rest while you make the sauce. 1. Sautéing garlic: Use the same skillet. Add minced garlic and sauté for about 30 seconds. This will make your kitchen smell amazing! 2. Adding liquids and zest: Pour chicken broth into the skillet. Scrape any browned bits from the bottom. Then add lemon juice and the zest. Bring it to a simmer for 3-4 minutes. 1. Mixing pasta with sauce and chicken: Lower the heat. Stir in heavy cream and mix well. Add the cooked chicken and drained pasta. Toss everything together gently. 2. Adjusting sauce consistency: If the sauce is too thick, add some reserved pasta water. Keep mixing until everything is well coated. Taste and adjust with salt and pepper if needed. Enjoy your Lemon Chicken Pasta Delight with a sprinkle of Parmesan! For the full recipe, check the earlier section. To make a great sauce, focus on thickness first. You want it creamy, not runny. Let the sauce simmer to thicken. It will help coat the pasta better. For balancing flavors, taste as you go. Add more lemon juice for zing or more cream for richness. Adjust the salt too, to enhance all the flavors. Cook chicken evenly by cutting it into small pieces. This way, it cooks faster and more evenly. Use medium heat to avoid burning the outside while the inside stays raw. To prevent dryness, don’t overcook the chicken. Aim for a golden brown color, around 6-7 minutes. Let the chicken rest after cooking to keep it juicy. Cooking pasta al dente means it’s firm to the bite. Boil it in salted water for the best taste. Always taste the pasta a minute before the package time ends. To avoid sticky pasta, add a splash of olive oil after draining. Toss it with the sauce right away to keep it from clumping. For the complete recipe, check out the [Full Recipe]. {{image_2}} When you make lemon chicken pasta, you can switch it up in fun ways. Here are some ideas to try. You can add more flavors with vegetables and proteins. - Vegetables: Toss in spinach for color and nutrition. Cherry tomatoes add sweetness and a pop of color. - Proteins: For a twist, use shrimp or tofu. Shrimp cooks quickly and adds a nice flavor. Tofu is great for a plant-based option. If you have dietary needs, there are easy swaps. - Gluten-free pasta options: Use rice noodles or gluten-free pasta. They work well and taste great. - Dairy-free alternatives: Swap heavy cream for coconut milk or almond milk. This change keeps the dish creamy without dairy. Boost the taste with herbs and spices. - Additional herbs: Fresh basil or thyme can brighten the dish. They add a lovely aroma and layer of flavor. - Spicy versions: If you love heat, add red pepper flakes. This gives the dish a spicy kick that many enjoy. Feel free to explore these variations to make lemon chicken pasta your own! For the full recipe, check out the details above. To keep your Lemon Chicken Pasta fresh, use airtight containers. Glass or plastic containers work well. Place your leftovers in the container when they are cool. You can store them in the fridge for up to three days. If they sit longer, the taste may fade. You can freeze Lemon Chicken Pasta before or after cooking. If you freeze it raw, prepare the pasta and sauce as normal. Place everything in a freezer-safe container. It will stay good for up to three months. If you freeze it after cooking, let it cool first. Reheat it gently to keep the flavors intact. To reheat, use the stovetop or microwave. If using the stovetop, add a splash of chicken broth or water. This prevents the pasta from drying out. Stir and heat until warm. Enjoy your delicious meal again! For the full recipe, check out Lemon Zest Chicken Pasta Delight. You can make Lemon Chicken Pasta ahead of time. First, cook the pasta and chicken as per the Full Recipe. Let them cool completely. Then, store them in separate airtight containers. Keep the sauce in another container. When ready to eat, reheat the sauce and combine everything. This method helps maintain the dish's taste and texture. Yes, you can use different pasta shapes. Fettuccine works great, but you can try penne, spaghetti, or even gluten-free options. Just adjust the cooking time according to the type you choose. The key is to ensure the sauce clings well to your pasta. Lemon Chicken Pasta pairs well with various sides. You can serve it with a fresh green salad. Garlic bread or crusty rolls are also great choices. If you want something lighter, steamed vegetables complement the dish nicely. Lemon Chicken Pasta can be a healthy choice. It has lean protein from chicken and carbs from pasta. You can make it even healthier by using whole wheat pasta and reducing the cream. Adding vegetables boosts the nutrition and fiber content. To adjust the Lemon Chicken Pasta recipe for more servings, simply double or triple the ingredients. Keep the same cooking method. If you increase the pasta, make sure to adjust the amount of sauce accordingly. More sauce helps keep everything flavorful and moist. This blog covered making Lemon Chicken Pasta, first with key ingredients. You learned about chicken, pasta, and sauce. We walked through cooking steps, from pasta to sauce prep. Tips helped you achieve perfect texture and flavor. Variations, like adding veggies or using different proteins, keep meals fresh. Finally, I shared storage options for leftovers. Now you can enjoy this dish any time. Happy cooking!](https://cheftaling.com/wp-content/uploads/2025/05/90103b08-669e-4d5f-a5de-2d6c53b037f2-300x300.webp)
![To make Hobo Casserole, gather these simple ingredients: - 1 lb ground beef - 1 medium onion, chopped - 2 cloves garlic, minced - 3 medium potatoes, diced - 2 cups mixed vegetables (carrots, peas, corn) - 1 can (15 oz) diced tomatoes, undrained - 1 cup beef broth - 1 tablespoon Worcestershire sauce - 1 teaspoon dried thyme - 1 teaspoon paprika - Salt and pepper to taste - 1 cup shredded cheddar cheese These ingredients blend together to create a warm and hearty dish. You can easily swap some ingredients if needed. Here are a few ideas: - Use ground turkey or chicken for a lighter dish. - Swap mixed vegetables for any fresh veggies you have. - Use vegetable broth instead of beef broth for a vegetarian option. - If you don’t have Worcestershire sauce, soy sauce works too. - Try different types of cheese like mozzarella or Monterey Jack for a new flavor. These swaps keep the dish tasty and fun! Using fresh ingredients often gives the best taste. However, frozen ingredients can save time and still taste great. Here’s how to decide: - Fresh Vegetables: They add bright flavors and crisp textures. - Frozen Vegetables: They are convenient and can be just as nutritious. They are picked at peak freshness and frozen quickly. If you have fresh potatoes and onions, use them. If not, frozen options will work just fine. Just remember to adjust cooking times slightly for frozen ingredients. Enjoy your cooking adventure with Hobo Casserole! First, gather all your ingredients. You will need ground beef, chopped onion, and minced garlic. Dice the potatoes and have your mixed veggies ready. You will also need diced tomatoes, beef broth, Worcestershire sauce, thyme, and paprika. Don’t forget the cheddar cheese for the topping. Once you have everything, you can start cooking. Start by heating a large skillet over medium heat. Add the ground beef and cook it until it turns brown. This usually takes about 6-8 minutes. Make sure to drain any extra fat after cooking. Next, add the chopped onion and minced garlic to the skillet. Cook them together until the onion looks clear, about 3-4 minutes. In a large mixing bowl, combine the diced potatoes, mixed vegetables, and the can of diced tomatoes. Pour in the beef broth and Worcestershire sauce. Add the cooked meat mix, thyme, paprika, and season with salt and pepper. Stir everything well so it mixes evenly. Now, transfer the entire mixture into a greased 9x13-inch casserole dish. Spread it out evenly. Cover the dish with aluminum foil and place it in your preheated oven at 375°F (190°C). Bake for 45 minutes. After that, take off the foil and sprinkle the shredded cheddar cheese on top. Bake it again for another 15 minutes. This step makes the cheese melt and bubble nicely. Once done, let it cool for a few minutes before serving. Enjoy this hearty dish with fresh bread if you like. For the full recipe, check out the earlier section. To make Hobo Casserole shine, use fresh ingredients. Fresh vegetables add great flavor and texture. Make sure to chop your onions and garlic finely. This helps them blend in well. For meat, choose good quality ground beef. If you prefer leaner meat, ground turkey works too. Adjust seasonings to your taste. If you love spice, add red pepper flakes. Cheese lovers can sprinkle more cheddar on top. One common mistake is not draining the beef fat. This can make your dish greasy. Also, avoid overcooking your vegetables. They should be tender but not mushy. Don't forget to cover the casserole with foil when baking. This keeps moisture in. Lastly, let it cool a bit before serving. This helps the flavors meld together. Hobo Casserole is great on its own but pairs well with many sides. A simple green salad adds freshness. Crusty bread or garlic bread makes a nice addition too. For drinks, try a light iced tea or lemonade. Want to impress? Add a sprinkle of fresh herbs on top for color and taste. You can find the full recipe above to guide you through this tasty dish! {{image_2}} You can easily make Hobo Casserole vegetarian. Replace the ground beef with a plant-based meat substitute. Lentils also work great in this dish. Use mushrooms for a hearty texture and rich flavor. Add extra veggies like bell peppers and zucchini for more color and taste. This way, you keep all the comfort of the dish while offering a fresh twist. For a gluten-free Hobo Casserole, swap the Worcestershire sauce for a gluten-free version. Ensure your beef broth is also gluten-free. You can use gluten-free breadcrumbs as a topping if you want a crispy finish. This way, everyone can enjoy the dish without worry. If you want different protein sources, consider using chicken or turkey. These lean meats provide a lighter option. You can also use beans, like black beans or chickpeas, for a protein boost in vegetarian versions. Tofu is another great choice that absorbs flavors well. It’s fun to experiment with different proteins, so feel free to mix and match! For the full recipe, check out the details above. To keep your Hobo Casserole fresh, let it cool first. Then, place it in an airtight container. This helps avoid moisture loss and keeps flavors intact. You can store it in the fridge for up to three days. If you're using a glass or ceramic dish, you can cover it with a lid or plastic wrap. When you want to enjoy leftovers, heat the casserole in the oven. Preheat it to 350°F (175°C). Cover the dish with foil to help it heat evenly. Bake for about 20-25 minutes or until it’s hot all the way through. If you want a crispy top, uncover it for the last 5 minutes. If you want to save your Hobo Casserole for later, freezing is a great option. First, let it cool completely. Then, cut it into portions for easy thawing. Wrap each piece tightly in plastic wrap, then place them in a freezer-safe bag. This helps keep freezer burn away. You can freeze it for up to three months. To reheat, thaw it in the fridge overnight, then follow the reheating instructions. Hobo casserole is a hearty dish made with meat and veggies. It usually has ground beef, potatoes, and mixed vegetables. You bake it all in one pot, making it simple and tasty. This dish is perfect for busy nights or family dinners. Yes, you can make hobo casserole in a slow cooker! Just brown the meat first. Then, combine all the ingredients in the slow cooker. Cook on low for 6 to 8 hours or high for 3 to 4 hours. This method makes it even easier! Hobo casserole lasts about 3 to 4 days in the fridge. Be sure to store it in an airtight container. When you reheat it, make sure it gets hot all the way through. Absolutely! You can use any vegetables you like. Think about bell peppers, green beans, or zucchini. Just remember to chop them small so they cook evenly. This flexibility makes the dish fun and unique! Hobo casserole has roots in American cooking. It became popular during the Great Depression. People needed cheap, filling meals. The idea was to use available ingredients, making it adaptable and easy. Today, it still serves as comfort food for many families. You can find the full recipe for this delightful dish in the [Full Recipe]. Hobo casserole is simple, tasty, and versatile. We covered all the key ingredients and discussed smart swaps. I shared tips to avoid common mistakes and outlined baking steps. You learned about vegetarian and gluten-free options, plus how to store leftovers. Now you can enjoy this dish in many ways. Get creative with your ingredients and try new pairings. Remember, cooking is fun!](https://cheftaling.com/wp-content/uploads/2025/05/0ead19a6-55f2-4eff-985e-3b96bada59a8-300x300.webp)

![- 2 cups applesauce - 1 ½ cups all-purpose flour - 1 cup granulated sugar - ½ cup packed brown sugar The main star of our cake is applesauce. It gives moisture and natural sweetness. You can use homemade or store-bought applesauce for this recipe. Just make sure it’s smooth. All-purpose flour is the backbone of the cake. It provides structure and helps create a tender crumb. Always measure your flour correctly for the best results. We use two types of sugar: granulated and brown. Granulated sugar adds sweetness, while brown sugar offers a hint of caramel flavor and moisture. The blend creates a balanced sweetness in the cake. - 1 teaspoon baking powder - 1 teaspoon baking soda - 1 teaspoon ground cinnamon - ½ teaspoon ground nutmeg - ½ teaspoon salt - 1 teaspoon vanilla extract - 3 large eggs - ½ cup vegetable oil - 1 cup chopped walnuts or pecans (optional) - ½ cup raisins (optional) Baking powder and baking soda work together to help the cake rise. They create a light and fluffy texture. Spices like cinnamon and nutmeg add warmth and depth to the flavor. They transform the cake from simple to special. We can add nuts or raisins for texture and flavor. Walnuts or pecans give a nice crunch. Raisins add sweetness and chewiness. These are optional but highly recommended. For the full recipe, check out [Full Recipe]. Preheating the Oven Set your oven to 350°F (175°C). This heat helps the cake rise well. Preparing the Baking Pan Take a 9x13-inch baking pan. Grease and flour it or use parchment paper. This step makes it easy to remove the cake later. Combining Wet Ingredients In a big bowl, mix the granulated sugar, brown sugar, and vegetable oil. Stir it well until it looks smooth. Incorporating Dry Ingredients In another bowl, whisk together the flour, baking powder, baking soda, cinnamon, nutmeg, and salt. Slowly add this dry mix to the wet ingredients. Mix gently until just combined. Avoid over-mixing to keep the cake light. Pouring Batter into the Pan Carefully pour the batter into the prepared pan. Use a spatula to smooth the top. Baking Time and Testing for Doneness Bake the cake for 30-35 minutes. To check if it’s done, insert a toothpick in the center. If it comes out clean, the cake is ready. Let it cool for about 10 minutes in the pan. Then, transfer it to a wire rack to cool completely. Now you are ready to enjoy your old-fashioned applesauce cake! For the complete recipe, check the Full Recipe section. Importance of Not Over-Mixing To get the best texture, mix gently. Over-mixing can make the cake tough. This cake needs tenderness, so stir just until combined. You want a light and fluffy feel. Choosing the Right Applesauce Use unsweetened applesauce for this recipe. It allows the sugars to shine through. The applesauce should be smooth, but some texture is okay. If you like, make your own for more flavor. Fresh applesauce adds a nice touch. Adding Spices for Extra Flavor Spices boost the cake's taste. Besides cinnamon and nutmeg, try adding ginger or allspice. A little extra spice can make the cake special. Adjust to your liking for a warm, cozy flavor. Optional Ingredients for Varied Taste You can change this cake up by adding nuts or raisins. Walnuts or pecans add crunch. Raisins provide sweetness. If you want a more fruity cake, add chopped apples or dried fruits. Each choice adds a new layer of flavor. Dusting with Powdered Sugar For a lovely finish, dust the cake with powdered sugar. It makes the cake look fancy. Use a sifter to get an even layer. This step is simple but adds charm. Pairing with Ice Cream or Whipped Cream Serve slices with a scoop of vanilla ice cream or whipped cream. Creamy toppings balance the cake's spices. This combo makes each bite delightful. Enjoy your cake warm or at room temperature. For the full recipe, check the complete guide to old-fashioned applesauce cake! {{image_2}} You can make this cake healthier by swapping out some ingredients. Here are two easy changes: - Using Whole Wheat Flour: This flour has more nutrients and fiber. It can make the cake denser. Use the same amount of whole wheat flour as all-purpose flour in the recipe. Your cake will still taste great! - Reducing Sugar Content: You can cut down the sugar by using less granulated sugar or brown sugar. Try using half a cup less. The applesauce adds natural sweetness, so your cake will still be yummy! Want to change the flavor of your cake? Here are some fun ideas: - Adding Cocoa Powder for Chocolate Flavor: Mix in a half-cup of cocoa powder. This will give the cake a rich chocolate taste. It pairs well with the applesauce! - Using Different Nuts or Dried Fruits: You can add nuts like almonds or pecans. Dried fruits like cranberries or apricots also work well. Just make sure to chop them small, so they mix in nicely. You can adjust the cake for different seasons. Here are two tasty ideas: - Incorporating Pumpkin for Fall: Add one cup of pumpkin puree to the batter. This will give the cake a warm flavor perfect for fall. It also keeps the cake moist! - Adding Lemon Zest for a Bright Flavor: Grate the zest of one lemon into the batter. This will brighten up the cake. It gives a fresh taste that balances the sweetness of the applesauce. These variations can help you make this old-fashioned applesauce cake unique. You can find the full recipe above to enjoy these twists! To keep your Old-Fashioned Applesauce Cake fresh, store it in a cool place. Here are some best practices: - Allow the cake to cool completely before storing. - Use an airtight container to keep moisture out. - Keep the cake at room temperature if you plan to eat it within a few days. If you have leftover cake, freezing is a great option. Here’s how to freeze it properly: - Wrap the cake tightly in plastic wrap or aluminum foil. - Place the wrapped cake in a freezer-safe bag or container. - To thaw, move the cake to the fridge for several hours or overnight. This method helps maintain its taste and texture. How long does applesauce cake last? - At room temperature, it stays fresh for about 3 to 5 days. - In the fridge, it lasts for up to a week. - When frozen, it can last for up to three months. Look for these signs of spoilage: - Unpleasant odor - Mold or discoloration - Unusual texture If you notice any of these, it’s best to discard the cake. Enjoy your delicious Old-Fashioned Applesauce Cake with proper storage! For the complete recipe, check out the Full Recipe. Yes, you can. Here are some egg substitutes for baking: - 1/4 cup unsweetened applesauce per egg - 1/4 cup mashed banana per egg - 1 tablespoon ground flaxseed mixed with 3 tablespoons water (let sit for 5 minutes) These options work well in most recipes. They help bind the cake while adding moisture. Absolutely! Homemade applesauce has many benefits: - You control the ingredients. - It often tastes fresher and more vibrant. - You can adjust the sweetness to your liking. Making applesauce at home is easy. Simply cook peeled and chopped apples with a bit of water until soft. Then, mash or blend them to your desired texture. This cake pairs well with many items. Here are some ideal pairings: - Whipped cream for a light touch - A scoop of vanilla ice cream for creaminess - Caramel sauce for added sweetness For drinks, try serving it with a warm cup of tea or coffee. Both complement the spices in the cake nicely. A dense applesauce cake can come from a few common mistakes: - Over-mixing the batter can create too much gluten, leading to density. - Using too much flour or not measuring accurately can alter the texture. - Baking at too low a temperature can prevent it from rising properly. To fix these issues, mix gently when combining ingredients. Measure flour correctly. Also, ensure your oven is at the right temperature before baking. This blog post covers everything you need to know about making applesauce cake. We explored primary and additional ingredients, with clear steps for preparation, mixing, and baking. You learned tips for texture and flavor, plus fun variations and storage info. Making applesauce cake is easy and rewarding. Try different spices and add-ins to make it yours. Enjoy the warm, cozy aroma as it bakes, and remember to share with friends and family for maximum delight. Happy baking!](https://cheftaling.com/wp-content/uploads/2025/05/a5babc57-7557-4b7b-838c-01953fd0b6b5-300x300.webp)