- Mediterranean Chickpea Power Bowls Flavorful Meal Prep
- Fluffy Pancake Stack Simple and Tasty Recipe
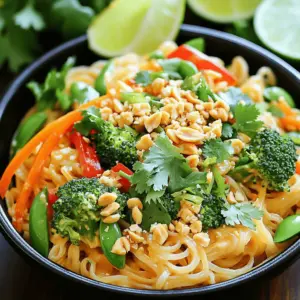
- Spicy Thai Peanut Noodles Quick and Tasty Meal
- Easy Chewy Brownies Irresistible Chocolate Delight
- Easy Chicken Tikka Masala Flavorful and Simple Dish
- No-Bake Lemon Cheesecake Easy and Refreshing Dessert
- Crispy Coconut Shrimp Delightful and Tasty Recipe
- Spicy Garlic Shrimp Skewers Easy and Flavorful Dish
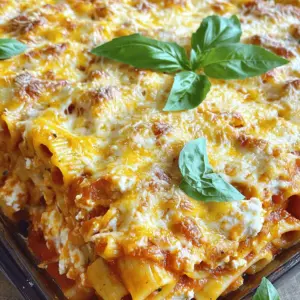
- Baked Ziti with Ricotta Flavorful and Simple Dish
- Southern Fried Catfish Crispy and Flavorful Delight
- Crispy Chickpea & Kale Wraps Fresh and Flavorful Meal
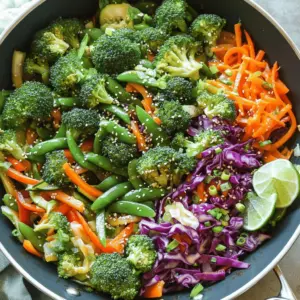
- Rainbow Veggie Stir Fry Skillet Easy Weeknight Meal
- Mango Avocado Power Salad Fresh and Healthy Delight
- Sheet Pan Citrus Glazed Salmon Fresh and Easy Recipe
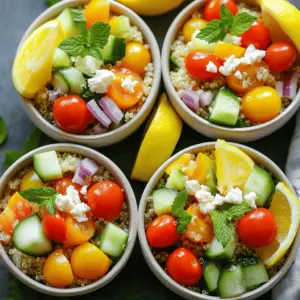
- Summer Lemon Herb Quinoa Bowls Flavorful and Fresh
- Lemon Ricotta Pasta Simple and Creamy Delight
- Zucchini Fritters Delightful and Easy to Make Recipe
- Garlic Butter Chicken Bites Savory and Simple Dish
- Crispy Baked Tofu Easy and Flavorful Plant-Based Dish
- Mango Coconut Chia Pudding Delightful and Healthy Recipe
- Roasted Vegetable Pasta Delightful and Healthy Bowl
- Easy Garlic Butter Pasta Quick Dinner Delight Recipe
- Quick and Easy One-Pot Pasta for Busy Weeknights
- Irresistible Garlic Knots You Can Make at Home Today
- Crispy Cream Cheese Wontons Tasty Party Appetizers
- Quick Cheesy Garlic Chicken Wraps for a Tasty Meal
- Garlic Butter Shrimp Skillet Quick and Tasty Meal
- Cheesy Taco Pasta Comforting and Quick Weeknight Meal
- Garlic Butter Shrimp Pasta Flavorful and Simple Recipe
- Lemon Ricotta Pancakes Fluffy and Easy Recipe
- Banana Oatmeal Cookies Healthy and Easy Recipe
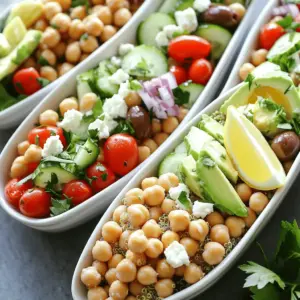
- Mediterranean Chickpea Salad Fresh and Flavorful Dish
- Creamy Spinach Artichoke Dip Flavorful and Easy Recipe
- Spicy Chickpea Tacos Flavorful and Quick Meal Idea
- Lemon Garlic Shrimp Pasta Flavorful and Simple Dish
- Garlic Herb Roasted Chicken Juicy and Flavorful Dish
- Cranberry Walnut Salad Simple and Tasty Recipe
- Mushroom Asparagus Chicken Penne Flavorful Dinner Dish
- Chocolate Chip Banana Muffins Tasty and Easy Recipe
- Vegan Mushroom Stroganoff Creamy and Flavorful Dish
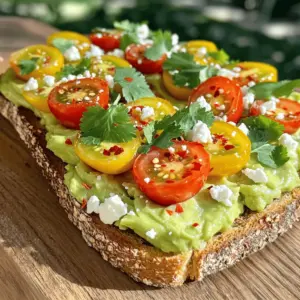
- Zesty Avocado Toast Simple and Flavorful Recipe
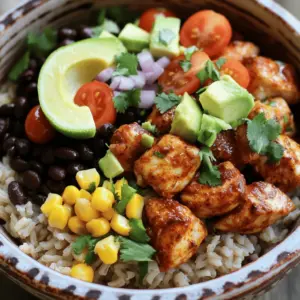
- Chipotle Chicken Bowls Flavorful Meal in Minutes


![- 1 cup (225g) unsalted butter - 2 cups (400g) granulated sugar - 4 large eggs - 1 teaspoon vanilla extract - 1 cup (130g) all-purpose flour - 1 cup (90g) unsweetened cocoa powder - 1/2 teaspoon salt - 1/2 teaspoon baking powder - 1 cup (175g) chocolate chips (semi-sweet or dark) - Optional: 1/2 cup (50g) chopped nuts (walnuts or pecans) Here are the key ingredients for making my chewy brownies. Each one plays a big role in the final taste and texture. Butter adds richness and keeps the brownies moist. Sugar gives sweetness and helps create that perfect chewy texture. The eggs work as a binder. They hold everything together and add to the moistness. Vanilla extract gives a lovely flavor that enhances the chocolate. All-purpose flour helps form the structure. Cocoa powder provides that deep chocolate taste, while salt balances sweetness. Baking powder gives a little lift while keeping the brownie dense. Chocolate chips are a must for extra gooey bites. You can also add nuts for some crunch if you like. This mix is simple yet effective. For tools, you will need a medium saucepan, whisk, and a 9x13 inch baking pan. Parchment paper helps with easy removal. Mixing bowls and a rubber spatula will make your job easier. With these ingredients, you’re on your way to baking up a delicious batch. For the full recipe, click [Full Recipe]. - Preheat your oven to 350°F (175°C). - Grease a 9x13 inch baking pan or line it with parchment paper. - In a medium saucepan, melt 1 cup of unsalted butter over low heat. - Once melted, remove from heat and stir in 2 cups of granulated sugar until mixed well. - Add 4 large eggs to the butter-sugar mix, one at a time. - Mix well after each egg. - Stir in 1 teaspoon of vanilla extract for flavor. - In a separate bowl, whisk together 1 cup of all-purpose flour, 1 cup of unsweetened cocoa powder, 1/2 teaspoon of salt, and 1/2 teaspoon of baking powder. - Gradually add the dry mix to the wet mixture. - Stir until just combined; do not overmix. - Fold in 1 cup of chocolate chips and, if you like, 1/2 cup of chopped nuts. - Pour the batter into the prepared pan and spread it evenly. - Bake in the preheated oven for 25 to 30 minutes. - Check for doneness by inserting a toothpick into the center. - If it comes out with moist crumbs, your brownies are ready! To make chewy brownies, you must avoid overmixing the batter. When you mix too much, you add air and create a cake-like texture. Mix just until the dry and wet ingredients blend together. This keeps the brownies dense and rich. Bake until just set for a fudgy center. The toothpick test helps here. Insert it into the center; if it comes out with a few moist crumbs, they are ready. These brownies taste best when served warm with a scoop of ice cream. The warm brownie melts the ice cream, creating a delightful treat. For extra flair, you can garnish with sea salt or a drizzle of chocolate sauce. These simple touches add flavor and make your dessert look fancy. If your brownies turn out dry, it may be due to baking them too long. Keep an eye on the time and check them a bit early. Adjust baking time for different ovens as heat can vary. If you notice they seem dry, you may need to reduce the baking time next time. Remember, each oven can be a bit different. For perfect chewy brownies, keep practicing and make notes of what works best. {{image_2}} You can make these brownies gluten-free. Just swap the all-purpose flour for a gluten-free flour blend. This change keeps the chewy texture while making it safe for those with gluten allergies. You can mix up the flavor in fun ways. Try adding white or milk chocolate chips for a sweet twist. You can also stir in spices like cinnamon or espresso to enhance the chocolate flavor. These small changes can make your brownies even more special. If you need to avoid nuts, that’s easy too. Simply leave them out. For added texture, add seeds or dried fruit instead. Sunflower seeds or dried cherries work great. This way, everyone can enjoy the brownies without worry. To keep your brownies fresh, place them in an airtight container. This helps prevent them from drying out. Make sure the container is sealed tightly. Store the brownies at room temperature. They will stay good for about 3 to 4 days. If you want to enjoy them longer, consider freezing them. Freezing is a great way to save brownies for later. First, cut them into squares. Wrap each piece in plastic wrap. Then, place the wrapped brownies in a freezer-safe bag. Remove as much air as you can. This keeps them tasty and fresh. When you are ready to eat them, take the brownies out of the freezer. Let them thaw at room temperature for about 30 minutes. For a firmer texture, you can also warm them in the oven for a few minutes. Enjoy your delicious Easy Chewy Brownies whenever you crave a sweet treat! For the full recipe, check out the [Full Recipe]. To check if your brownies are done, look for a few signs: - The edges will pull away from the pan slightly. - The top will look shiny and set. - Insert a toothpick in the center. If it comes out with a few moist crumbs, they are ready. Remember, underbaking is better than overbaking. You want that gooey, chewy center. Yes, you can make these brownies ahead of time. Here are some tips: - Bake the brownies and let them cool completely. - Store them in an airtight container at room temperature for up to three days. - For longer storage, wrap them well and freeze. They can last up to three months in the freezer. Just thaw them before serving. If you want to make these brownies vegan, there are great egg substitutes: - Use 1/4 cup of unsweetened applesauce for each egg. - You can also use 1/4 cup of mashed banana. - Another option is to mix 1 tablespoon of ground flaxseed with 3 tablespoons of water. Let it sit for a few minutes until it thickens. These will help keep your brownies moist and chewy. Cakey brownies often lack that chewy texture we love. Here are some common causes: - Overmixing the batter can add too much air, making them light. - Using too much flour can also lead to a dry, cakey result. - Make sure to bake until just set. Remember, a few moist crumbs on the toothpick mean they are perfect. To achieve that chewy texture, follow the [Full Recipe] closely and enjoy every bite! You have learned how to make delicious brownies step by step. We covered the ingredients, tools, and key tips to get that chewy texture. Remember, don’t overmix and bake just until set for a fudgy center. Feel free to try variations, store your leftovers properly, and troubleshoot common issues. Baking should be fun and rewarding. Enjoy serving these brownies warm with ice cream or a sprinkle of sea salt. Now go ahead and treat yourself or share with others!](https://cheftaling.com/wp-content/uploads/2025/06/59c37fc0-90b5-41fc-a0f9-e25623ac22fe-300x300.webp)
![To create my easy chicken tikka masala, you'll need a few main items. These ingredients make the dish rich and tasty: - 500g boneless chicken breast, cubed - 1 cup plain yogurt - 2 tablespoons lemon juice - 3 tablespoons vegetable oil - 1 large onion, finely chopped - 1 can (400g) crushed tomatoes - 1 cup coconut milk - Fresh cilantro leaves for garnish These ingredients are key. They work together to make a warm and inviting dish. Spices bring life to chicken tikka masala. Here are the spices you will need for the marinade: - 2 tablespoons garam masala - 1 tablespoon ground cumin - 1 tablespoon coriander powder - 1 teaspoon turmeric powder - 1 teaspoon chili powder - Salt to taste Mix these spices with yogurt and lemon juice to form a flavorful marinade. Letting the chicken sit in this mixture adds depth to the dish. While the basic recipe is delicious, you can enhance your meal with optional ingredients: - Naan bread or rice - Extra cilantro for garnish - Sliced green chilies for heat These extras elevate the dining experience. Consider adding them based on your taste. You can find the full recipe in the article for more details on preparation. To start, we need to marinate the chicken. Grab a large bowl. In it, mix the yogurt, lemon juice, garam masala, ground cumin, coriander powder, turmeric powder, chili powder, and salt. This mix makes a tasty marinade. Add the cubed chicken to the bowl. Make sure each piece gets a good coat of marinade. Cover the bowl and put it in the fridge. Let it sit for at least one hour. For best results, marinate overnight. Next, we will cook the base. Heat the vegetable oil in a large skillet over medium heat. Add the finely chopped onion once the oil is hot. Cook it until it’s golden brown, which takes about 5 to 7 minutes. Then, add the minced garlic and grated ginger. Stir these in for about 2 minutes until they smell amazing. Now, it’s time to combine our flavors. Add the marinated chicken to the skillet. Cook it for about 5 to 6 minutes, browning the chicken on all sides. After that, pour in the crushed tomatoes. Mix them well and let them cook for 5 minutes. This helps thicken the sauce. Reduce the heat to low. Add in the coconut milk and stir everything together. Let it simmer for 10 to 15 minutes. This makes the chicken tender and the sauce creamy. Taste and add salt if needed. Enjoy your delightful Chicken Tikka Masala with naan or rice! For the full recipe, check out [Full Recipe]. To make the best marinade, use plain yogurt. It makes the chicken tender and juicy. Add fresh lemon juice for a tangy taste. The spices are key too; garam masala, cumin, and turmeric give great flavor. Mix everything well and coat the chicken pieces evenly. Let the chicken sit in the marinade for at least one hour, but overnight is even better. This allows the flavors to soak in deeply. When you cook the chicken, don’t rush it. Start with a medium heat to brown it nicely. This helps lock in the juices. Stir the chicken often to ensure even cooking. Once browned, add your crushed tomatoes and coconut milk. Allow it to simmer gently. This step keeps the chicken moist and flavorful. Remember, overcooking can lead to dry chicken. Serve your Chicken Tikka Masala with warm naan or fluffy rice. Both soak up the rich sauce well. For an extra burst of flavor, sprinkle fresh cilantro on top just before serving. You can also add a side of cooling yogurt or raita to balance the spices. This dish is vibrant and packed with flavor, perfect for sharing with friends and family. For a complete guide, check the Full Recipe. {{image_2}} You can make Chicken Tikka Masala healthier with a few easy swaps. Use Greek yogurt instead of regular yogurt. This adds protein and cuts some fat. You can also try skinless chicken thighs. They are juicier and can be more flavorful. For a lighter sauce, use low-fat coconut milk. It still gives a creamy texture without extra calories. To make a vegetarian version, swap chicken for paneer or tofu. Both soak up flavors well. For a vegan option, use chickpeas or cauliflower. They add texture and taste. Replace yogurt with coconut yogurt for a rich flavor. This keeps the dish creamy while keeping it plant-based. Chicken Tikka Masala pairs well with many sides. Naan bread is a classic choice. It’s great for scooping up the sauce. You can also serve it with basmati rice. The rice soaks up the sauce nicely. Another option is a fresh cucumber salad. It adds a nice crunch and coolness to the meal. For a twist, try serving it with quinoa. It adds protein and a nutty flavor. Feel free to explore these variations to make the dish your own. Check out the Full Recipe for more details on making this delightful meal. To keep your Chicken Tikka Masala fresh, let it cool first. Place it in an airtight container. This helps prevent any strong smells or flavors from mixing. Store it in the fridge for up to 3 days. If you plan to eat it later, freezing is a great option. When you're ready to eat your leftovers, reheat them gently. You can use a microwave or a saucepan. If using a microwave, heat it in short bursts. Stir after each burst to avoid hot spots. If using a saucepan, add a splash of water or coconut milk. This keeps the dish moist and tasty. You can freeze Chicken Tikka Masala for up to 3 months. Make sure it cools completely before freezing. Use a freezer-safe container or bag to prevent freezer burn. When you’re ready to enjoy it, thaw it overnight in the fridge. Then reheat it as mentioned above. This way, you can savor the flavors anytime! For the full recipe, check out the delightful Chicken Tikka Masala. To make chicken tikka masala spicier, you can add more chili powder. Start with one extra teaspoon. You could also add fresh chopped green chilies for a burst of heat. If you enjoy heat, try using spicy garam masala. You can adjust the spice levels to fit your taste. Yes, you can use other proteins in this dish. Tofu works well if you want a vegetarian option. Shrimp or fish can also be great choices. Just remember to adjust cooking times. Fish cooks faster, while tofu may need longer to soak up flavors. Chicken tikka masala pairs well with several side dishes. Naan bread is a favorite for soaking up the sauce. Rice is another popular choice, especially basmati or jasmine rice. You can also serve it with a simple salad or raita to cool the heat. For a complete meal, try serving with roasted vegetables. This blog post covered all you need for easy chicken tikka masala. We discussed key ingredients, step-by-step cooking tips, and ways to make it your own. Remember, marinating chicken well gives the best flavor. You can also explore healthier options or vegetarian variations. Proper storage and reheating keep your dish tasty for later. With these tips, you can make a great chicken tikka masala anytime. Enjoy your cooking journey!](https://cheftaling.com/wp-content/uploads/2025/06/347832e4-5b65-46a9-84d1-feca3473ac30-300x300.webp)
![To make this no-bake lemon cheesecake, you'll need a few simple ingredients. Each one plays a key role in creating that fresh, zesty flavor. - 1 ½ cups graham cracker crumbs - ½ cup unsalted butter, melted - 2 cups cream cheese, softened - 1 cup powdered sugar - 1/3 cup fresh lemon juice - Zest of 2 lemons - 1 teaspoon vanilla extract - 1 cup heavy whipping cream - Fresh berries and mint leaves, for garnish These ingredients come together to create a creamy, light dessert. The graham cracker crumbs form a crunchy base, while the cream cheese provides that rich texture. Fresh lemon juice and zest give it a bright flavor. The heavy cream adds a fluffy touch. You can find the full recipe to get started right away! To start your delicious no-bake lemon cheesecake, mix 1 ½ cups of graham cracker crumbs with ½ cup of melted unsalted butter in a large bowl. Stir well until the crumbs are fully coated in butter. This will give your crust a rich flavor. Next, take a 9-inch springform pan and press the crumb mixture evenly into the bottom. Use your fingers or the bottom of a glass to make it compact. Once done, place the pan in the refrigerator to chill while you prepare the filling. In a large bowl, beat 2 cups of softened cream cheese until it's smooth and creamy. An electric mixer works best for this step. Slowly add 1 cup of powdered sugar, mixing until well combined. The sugar will add sweetness and help achieve a silky texture. Now, mix in 1/3 cup of fresh lemon juice, the zest of 2 lemons, and 1 teaspoon of vanilla extract. Stir until everything is well blended. This mixture is where your cheesecake gets its bright and zesty flavor. In a separate bowl, whip 1 cup of heavy cream until stiff peaks form. This step is crucial as it adds lightness to your cheesecake. Now, gently fold the whipped cream into the lemon cream cheese mixture. Use a spatula and be careful to maintain the lightness. You want to see no white streaks left in the filling. Pour the cheesecake filling over your chilled crust, smoothing the top with a spatula. Cover the cheesecake with plastic wrap and place it in the refrigerator. Chill for at least 4 hours, or even overnight for the best results. Once set, release the cheesecake from the springform pan. Enjoy your refreshing dessert! For the full recipe, check out the details above. To make a great no-bake lemon cheesecake, start with softened cream cheese. Soft cream cheese blends easily and gives a smooth texture. Leave it out for 30 minutes before mixing. This small step makes a big difference. Next, when you whip the heavy cream, don’t rush. Whip it until stiff peaks form. This adds fluffiness to your cheesecake. When you fold the whipped cream into the lemon mixture, be gentle. Use a spatula and fold carefully. This keeps the air in the whipped cream, making your cheesecake light and airy. For toppings, fresh berries work wonders. Strawberries, blueberries, or raspberries add color and flavor. You can also use mint leaves for a fresh touch. Just sprinkle them on top before serving. Pair your cheesecake with a bright beverage. A glass of lemonade or iced tea complements the lemon flavor. For dessert pairings, serve it with a light sorbet. This keeps the meal refreshing and delightful. For a complete experience, check out the Full Recipe for more details on how to create this delicious dessert. {{image_2}} You can easily change the taste of your cheesecake. Adding citrus like lime or orange gives it a fun twist. Just swap out some lemon juice for lime or orange juice. This mix creates a bright flavor that is just as refreshing. You could also try different extracts. Instead of vanilla, use almond or coconut. This simple swap can create a whole new flavor profile. If you want a lighter dessert, you can use low-fat cream cheese. This option keeps the creamy texture without all the fat. You can also create a gluten-free crust. Use almond flour or gluten-free graham crackers instead of regular ones. This way, everyone can enjoy a slice. Feel free to explore these variations in the full recipe to make it your own! To keep your no-bake lemon cheesecake fresh, store it in the fridge. Use an airtight container or cover it tightly with plastic wrap. This helps keep the cheesecake moist and prevents it from absorbing other smells. Make sure to eat your leftovers within four to five days for the best taste. If you want to serve it cool, take it out of the fridge just a few minutes before serving. You can also freeze your cheesecake if you have extra. Start by letting it set in the fridge for at least four hours. Once it’s firm, wrap it tightly in plastic wrap. Then, put it in a freezer-safe container or bag. It can last in the freezer for up to two months. When you're ready to enjoy it, take it out and let it thaw in the fridge overnight. This keeps the texture smooth and creamy. You’ll love how refreshing it tastes even after freezing! The cheesecake needs to set for at least 4 hours. For best results, let it chill overnight. This time allows the flavors to blend well. It also helps the cheesecake firm up nicely. Yes, you can make this cheesecake ahead of time. It stores well in the refrigerator. Preparing it a day in advance is a smart move. This way, you save time on the day of your event or gathering. You can substitute some ingredients if needed. Use graham cracker crumbs for a different crust. Try using different citrus juices like lime or orange for a twist. You may also use low-fat cream cheese to make it lighter. Always check the consistency to ensure great results. For the full recipe and more details, check out the [Full Recipe]. You now have all the tools to make a delicious cheesecake. We covered the ingredients, step-by-step instructions, and helpful tips. You learned how to store and even freeze your cheesecake for later enjoyment. With variations and healthier options, you can adapt this dessert to fit your taste. Remember, practice makes perfect, so don’t hesitate to experiment. Enjoy making and sharing this cheesecake with family and friends!](https://cheftaling.com/wp-content/uploads/2025/06/fdceffec-6b1d-4252-af4b-b039a3f4ebde-1-300x300.webp)
![To make crispy coconut shrimp, you need simple and fresh ingredients. Here is what you'll need: - 1 pound large shrimp, peeled and deveined - 1 cup all-purpose flour - 2 large eggs - 1 cup shredded coconut (unsweetened) - 1 cup panko breadcrumbs - 1 teaspoon paprika - 1 teaspoon garlic powder - 1 teaspoon salt - 1/2 teaspoon black pepper - 1/2 teaspoon cayenne pepper (optional, for heat) - Oil for frying (coconut oil or vegetable oil) - Lime wedges, for serving The essential ingredients are shrimp, flour, eggs, coconut, and panko. These create a tasty base for the dish. - Essential Ingredients: - Shrimp - Flour - Eggs - Coconut - Panko Optional additions like cayenne pepper add heat. You can skip it if you prefer mild flavors. You can try different seasonings to change up the flavor. Here are some ideas: - Add spices: Use chili powder or cumin for a kick. - Herbs: Try adding dried herbs, like parsley or cilantro, to the breadcrumb mix. - Coconut type: Use sweetened coconut for a different taste, but keep it balanced. Feel free to experiment! Each tweak can lead to a unique and delightful dish. For the complete recipe, check out the [Full Recipe]. Start by gathering your ingredients. You need one pound of large shrimp, peeled and deveined. Get one cup of all-purpose flour, two large eggs, and one cup of unsweetened shredded coconut. You also want one cup of panko breadcrumbs, one teaspoon of paprika, one teaspoon of garlic powder, one teaspoon of salt, and half a teaspoon of black pepper. For some heat, include half a teaspoon of cayenne pepper. Lastly, have oil ready for frying and lime wedges for serving. Set up your breading station. Put the flour in one bowl, and beat the eggs in another. In a third bowl, mix the shredded coconut, panko breadcrumbs, paprika, garlic powder, salt, black pepper, and cayenne pepper. This station helps you coat the shrimp easily. Next, heat the oil in a deep skillet or large frying pan over medium-high heat. You want about one to two inches of oil in the pan. The oil should reach around 350°F or 175°C for perfect frying. Now, take each shrimp. First, dredge it in the flour, shaking off any extra. Then, dip the floured shrimp into the beaten eggs, letting any excess drip off. Finally, coat the shrimp in the coconut and panko mixture. Press gently to make sure it sticks well. Once the oil is hot, add the shrimp in batches. Avoid overcrowding the pan. Fry each side for about two to three minutes until they turn golden brown and crispy. Use a slotted spoon to remove the shrimp, and place them on a paper towel-lined plate to drain excess oil. To ensure your shrimp are crispy, pay attention to the oil temperature. Use a thermometer to check it regularly. If the oil is too cool, the shrimp will absorb more oil and become soggy. If it's too hot, they may burn before cooking through. Press the coconut and panko mixture onto the shrimp firmly. This step helps the coating stick well during frying. Serve the shrimp right away for the best crunch. Enjoy with fresh lime wedges from the Full Recipe. When making crispy coconut shrimp, avoid these common mistakes: - Skipping the dredging step: Always coat shrimp in flour first. This helps the egg and coating stick. - Not pressing the coating: After coating in coconut and panko, press gently. This helps the coating stick better during frying. - Overcrowding the pan: Fry shrimp in small batches. Overcrowding lowers oil temperature and leads to soggy shrimp. Breading shrimp can be simple if you follow these best practices: - Set up a breading station: Have three bowls ready for flour, eggs, and the coconut mix. Keep it organized. - Use dry hands: Wet hands can make the breading process messy. Dry hands help keep the coating intact. - Coat evenly: Make sure each shrimp has an even layer of breading. This ensures they fry up nice and crispy. Temperature control is key for crispy results: - Use a thermometer: Aim for oil at 350°F (175°C). This is the sweet spot for frying. - Test the oil: Drop a small piece of bread in the oil. If it sizzles and browns in about 60 seconds, the oil is ready. - Adjust heat as needed: If shrimp cook too fast, lower the heat. If they take too long, raise it slightly. For more detailed steps and ingredients, check out the Full Recipe. {{image_2}} You can play with the coating for crispy coconut shrimp. Try using crushed cornflakes instead of panko for more crunch. You can also add spices like curry powder or cayenne to the coconut mix. For a sweet touch, mix honey or maple syrup into the egg wash. This change gives a fun twist to the classic recipe. Crispy coconut shrimp shines with fresh flavors. Serve it with a tangy mango salsa for a tropical vibe. A zesty lime dipping sauce complements the shrimp perfectly. You can also pair it with a simple green salad or coconut rice. Both options balance the dish well and make it feel complete. If you need a gluten-free version, swap all-purpose flour with rice flour. Use gluten-free panko or crushed nuts instead of traditional panko. This way, you can enjoy crispy coconut shrimp without worries. Always check labels to ensure all ingredients are gluten-free. This keeps everyone happy and healthy at your table. For the full recipe, visit [Full Recipe]. To keep your crispy coconut shrimp fresh, let them cool first. Place them in an airtight container. You can refrigerate them for up to three days. If the shrimp are warm, they can create steam and become soggy. So, cool them down before storage. For the best taste, reheat the shrimp in an oven. Preheat your oven to 350°F (175°C). Spread the shrimp on a baking sheet in a single layer. Heat for about 10-12 minutes. This method keeps them crispy. You can also use an air fryer for quick reheating. Set it to 350°F (175°C) and cook for about 5-7 minutes. If you want to freeze the shrimp, do it right after cooking. Lay them on a baking sheet first, and freeze until solid. Then, transfer them to a freezer-safe bag. They can stay frozen for up to three months. To thaw, move them to the fridge overnight. For a quick method, place them in cold water for about an hour. Once thawed, reheat them using the oven or air fryer. This keeps them crispy and tasty. For the full recipe, check out the detailed steps to make your own crispy coconut shrimp. You can make crispy coconut shrimp without frying by baking them. Start by preheating your oven to 400°F (200°C). Follow the same breading steps from the recipe. Place the shrimp on a baking sheet lined with parchment paper. Spray them lightly with cooking oil to help them crisp up. Bake for about 15-20 minutes. Turn them halfway through for even cooking. You’ll get a lighter version of this tasty dish! The best dipping sauce for coconut shrimp is a sweet and spicy sauce. A mix of sweet chili sauce and a splash of lime juice works great. You can also try a mango salsa or a creamy coconut sauce. These options add a bright flavor that complements the shrimp perfectly. Feel free to experiment with your favorite flavors! Yes, you can bake crispy coconut shrimp instead of frying! Baking is a healthy option. It still gives you a crispy texture. Follow the breading process from the recipe. Preheat your oven and arrange the shrimp on a baking sheet. Bake for 15-20 minutes until they are golden brown. This method is quick and easy! Check out the full recipe for more details. Crispy coconut shrimp is easy and fun to make. We covered the key ingredients and gave detailed steps for crispiness. You now have tips to avoid common mistakes and explore tasty variations. Remember, these shrimp can be stored, reheated, and even frozen for later. With this guide, you can enjoy delicious shrimp any time. Try different flavors and sauces to make it your own. Cooking should be exciting and enjoyable for you!](https://cheftaling.com/wp-content/uploads/2025/06/fcbb5786-ea4f-4c1d-b49a-03de7bb398dd-1-300x300.webp)
![For Spicy Garlic Shrimp Skewers, you will need: - 1 pound large shrimp, peeled and deveined - 4 cloves garlic, minced - 2 tablespoons olive oil - 1 tablespoon chili paste or sriracha (adjust to taste) - 1 teaspoon smoked paprika - 1 teaspoon lemon zest - Juice of 1 lemon - 1 teaspoon honey - Salt and pepper to taste - Fresh parsley, chopped (for garnish) - Skewers (if wooden, soak in water for 30 minutes) Each ingredient brings its own flavor to the dish. The shrimp is the star here, but garlic and chili paste add a nice kick. Olive oil helps blend everything together. If you lack some ingredients, don’t worry. You can make simple swaps: - Use shrimp of any size. Smaller shrimp cook faster, so adjust cooking time. - Swap olive oil with avocado oil or vegetable oil for a different taste. - If you don't have chili paste, use hot sauce or red pepper flakes. - Honey can be replaced with maple syrup for a vegan option. - No fresh parsley? Try cilantro or chives for a fresh garnish. These swaps keep the dish tasty and fun. Feel free to experiment! Fresh ingredients matter a lot in this recipe. They boost flavor and texture. Fresh shrimp taste sweet and tender. Fresh garlic adds a punch. Using fresh lemon gives a bright citrus flavor. The zest adds aroma. Overall, fresh ingredients make your dish stand out. For the best results, choose high-quality, fresh items. They will shine in your Spicy Garlic Shrimp Skewers. For the complete recipe, check the [Full Recipe]. Start by gathering your ingredients. For the marinade, mix garlic, olive oil, chili paste, smoked paprika, lemon zest, lemon juice, honey, salt, and pepper in a bowl. Whisk it well until it's smooth. This mix gives the shrimp a spicy and zesty flavor. Next, add the shrimp to the marinade. Make sure each shrimp is fully coated. Cover the bowl and place it in the fridge. Let the shrimp sit for at least 30 minutes. You can marinate it up to 2 hours for a bolder taste. This step makes the shrimp juicy and full of flavor. While the shrimp is marinating, preheat your grill or grill pan over medium-high heat. After marinating, thread the shrimp onto skewers. Aim for 4-5 shrimp per skewer and leave space between them. This helps them cook evenly. Once the grill is hot, place the skewers on it. Cook for 2-3 minutes on each side. The shrimp will turn pink and opaque when done. Remove the skewers from the heat and let them rest for a minute. Garnish with fresh parsley before serving. For an extra kick, serve with lemon wedges. Enjoy this easy and flavorful dish! You can find the full recipe to guide you through every step. Grilling shrimp is quick and easy. Start with a hot grill. This helps get nice grill marks. Use medium-high heat for best results. Make sure to preheat your grill for about 10 minutes. This ensures even cooking. Place the skewers directly on the grill without crowding them. Leave space for heat to circulate. Turn them only once to avoid breaking the shrimp. Marinating shrimp enhances its taste. I recommend at least 30 minutes. This lets the shrimp soak up the garlic and spices. For a stronger flavor, marinate for up to 2 hours. Just be careful not to marinate too long. Shrimp can become mushy if left too long in acidic marinades. To prevent shrimp from sticking, oil your grill grates. Use a paper towel dipped in oil to coat the grates. Another trick is to soak wooden skewers in water. This keeps them from burning on the grill. Also, make sure your shrimp are patted dry before marinating. This helps the marinade stick better. For more tips, check the Full Recipe. {{image_2}} You can change the flavor of your spicy garlic shrimp skewers easily. Try a citrus twist by using orange juice instead of lemon juice. You can also swap honey for maple syrup for a different sweet touch. For a fresh taste, mix in fresh herbs like basil or cilantro. If you want more heat, add some cayenne pepper or red pepper flakes. This way, you can find the perfect flavor for you. Adding veggies to your skewers is a great idea. Bell peppers, zucchini, and cherry tomatoes work well. Cut them into the same size as the shrimp for even cooking. You can also add fish like salmon or scallops for variety. These combinations boost flavor and give a colorful dish. You can make your meal even more exciting with different textures. You don't need a grill to cook your shrimp skewers. You can use an oven instead. Preheat the oven to 400°F (200°C). Place your skewers on a baking sheet lined with parchment paper. Bake for about 8-10 minutes or until the shrimp are pink and cooked through. If you want to use the stovetop, heat a grill pan over medium-high heat. Cook the skewers for 2-3 minutes on each side. Both methods give you delicious shrimp with a nice char. For the full recipe, check the earlier sections of this article. After you enjoy your spicy garlic shrimp skewers, store leftovers in a tight container. Place them in the fridge. They will stay fresh for up to two days. Make sure the shrimp cool down first before you seal the container. This helps prevent moisture build-up, keeping your shrimp from getting soggy. If you want to save shrimp skewers for later, freezing is a great option. Wrap each skewer in plastic wrap. Then, place them in a freezer-safe bag. Make sure to squeeze out the air. You can freeze them for up to three months. When you're ready to eat, thaw them in the fridge overnight. This keeps the shrimp juicy and flavorful. To reheat your shrimp skewers, use the oven for the best results. Preheat your oven to 350°F (175°C). Place the skewers on a baking sheet. Cover them loosely with foil to keep moisture in. Heat for about 10 minutes or until warm. You can also use a microwave, but it may make the shrimp less firm. Heat them in 30-second bursts, checking often. Enjoy your delicious spicy garlic shrimp skewers again! For the full recipe, check out the details above. For the best flavor, marinate the shrimp for at least 30 minutes. This gives the shrimp time to absorb the garlic and chili flavors. If you want a bolder taste, let it sit for up to 2 hours. Just remember, longer is not always better. Too much time can change the texture of the shrimp. Yes, you can use frozen shrimp! Just make sure to thaw them first. Place the shrimp in the fridge overnight or run them under cold water for a quick thaw. After thawing, peel and devein them if needed. This makes it easy to create your spicy garlic shrimp skewers. Several side dishes pair well with spicy garlic shrimp skewers. Here are a few ideas: - Rice: Jasmine or basmati rice complements the flavors well. - Salad: A fresh green salad adds crunch and balance. - Grilled veggies: Bell peppers and zucchini make great grilled sides. - Corn on the cob: Sweet corn adds a nice touch to your meal. Check out the Full Recipe for more details on making this dish! In this article, we explored the key ingredients for tasty shrimp skewers and the importance of using fresh items. We outlined simple steps for preparing, marinating, and cooking shrimp. I shared helpful tips for grilling and preventing sticking. We also discussed variations like different marinades and cooking methods. Finally, we looked at how to store and reheat leftovers. For the best shrimp skewers, focus on freshness and flavor. Enjoy your cooking!](https://cheftaling.com/wp-content/uploads/2025/06/518cecb3-ac87-432c-afdd-9f84008a9d6c-300x300.webp)
![To make Southern fried catfish, you need a few key ingredients. Here’s what you will need: - 4 catfish fillets (about 1 pound) - 2 cups buttermilk - 1 cup cornmeal - 1/2 cup all-purpose flour - 1 tablespoon Cajun seasoning - 1 teaspoon garlic powder - 1 teaspoon onion powder - 1/2 teaspoon cayenne pepper (adjust for spiciness) - Salt and pepper to taste - Vegetable oil for frying - Lemon wedges for serving - Fresh parsley for garnish These ingredients create a crispy and flavorful dish. The buttermilk makes the catfish tender. The cornmeal and flour give it that perfect crunch. Cajun seasoning adds a nice kick. You can adjust the cayenne pepper for more or less heat. This recipe serves four people, perfect for a family meal. For the full recipe, check the instructions later in this article. Each ingredient plays a role in making the catfish delicious and satisfying. First, take your catfish fillets and soak them in buttermilk. This step is key for flavor and tenderness. Cover the bowl and refrigerate for at least one hour. You can even leave it overnight for a richer taste. While the fish marinates, mix the dry ingredients. In a shallow dish, combine cornmeal, flour, Cajun seasoning, garlic powder, onion powder, cayenne pepper, salt, and pepper. Stir until all spices blend well. This coating gives the catfish that crispy, tasty crust. After marinating, take the fillets out of the buttermilk. Let the extra buttermilk drip off. Then, dredge each fillet in your dry mix. Press gently to ensure the coating sticks. Shake off the excess and place them on a plate. In a large skillet, pour enough vegetable oil to cover the bottom by about half an inch. Heat the oil over medium-high until it reaches 350°F. This temperature is perfect for frying. Once the oil is hot, carefully place your coated catfish in the skillet. Fry in batches to avoid crowding. Cook for about 5 to 7 minutes on each side. Look for a golden brown color. Use a slotted spoon to flip the fillets for even cooking. When the catfish is done, remove it from the skillet. Set them on a plate lined with paper towels to soak up any extra oil. This keeps them crispy and not greasy. Finally, plate your fried catfish. Add a sprinkle of fresh parsley for color and serve with lemon wedges on the side. This adds a fresh zing that complements the fish. For the full recipe, check out the details above. The key to great fried catfish is the frying technique. Use a heavy skillet or deep fryer. Heat the oil to 350°F (175°C) for the best results. This high heat gives a crispy crust. Don't overcrowd the pan. Fry in batches if needed. This helps the fish cook evenly. Marinating the catfish is very important. Soaking in buttermilk adds flavor and keeps the fish moist. Aim for at least one hour. If you have more time, overnight is even better. This step tenderizes the fish and makes it extra juicy. Seasoning is where the magic happens. Start with a mix of cornmeal and flour. Add Cajun seasoning, garlic powder, and onion powder for depth. Use cayenne pepper if you like heat. Adjust it to your taste. Be generous with salt and pepper. This creates a flavor-packed crust that shines. For the full experience, check the [Full Recipe]. {{image_2}} If you love heat, try adding more cayenne pepper to your mix. Use up to 1 teaspoon for a nice kick. You can also add hot sauce to your buttermilk soak. This will give your catfish a spicy twist that everyone will enjoy. Serve with pickles or a spicy remoulade for extra flavor. Want a lighter option? You can bake your catfish instead of frying. Preheat your oven to 425°F. After coating your fish, place it on a baking sheet lined with parchment paper. Spray with cooking oil to help it crisp up. Bake for about 20 minutes or until golden. This method keeps the fish moist while cutting down on oil. Cajun and Creole spices are both great for catfish. Cajun seasoning is usually spicier with a bold flavor. It often includes paprika, cayenne, and herbs. Creole seasoning is milder and adds a touch of sweetness. It may contain more herbs and less heat. Choose based on your taste. Mix and match both for an exciting flavor profile! For the complete recipe, check out the Full Recipe section. After you enjoy your Southern fried catfish, store any leftovers properly. Let the catfish cool at room temperature, but do not leave it out for more than two hours. Place the cooled catfish in an airtight container. This keeps the fish fresh and prevents it from getting mushy. You can also wrap the catfish tightly in aluminum foil or plastic wrap. Remember to label the container with the date. To reheat your catfish, avoid the microwave if possible. Microwaving can make the fish soggy. Instead, preheat your oven to 350°F (175°C). Place the catfish on a baking sheet. Heat it for about 10-15 minutes until it is hot and crispy. If you have an air fryer, that works great too! Heat the catfish for about 5-7 minutes at 350°F (175°C) for a crunchy result. If you want to keep your fried catfish for longer, freezing is a good option. First, let the catfish cool completely. Wrap each piece in plastic wrap, then place them in a freezer-safe bag. Squeeze out the air before sealing the bag. This helps prevent freezer burn. You can freeze the catfish for up to three months. When ready to eat, thaw in the fridge overnight before reheating. Enjoy your crispy treat later! For the full recipe, check out the Southern Fried Catfish details. For frying catfish, use vegetable oil or peanut oil. They have high smoke points. This helps the fish fry evenly and get crispy. I prefer peanut oil for its rich flavor. It adds a nice touch to the dish. Yes, you can use frozen catfish fillets. Just ensure they are fully thawed. This helps them cook evenly. Pat them dry with a paper towel before marinating. This step keeps the coating crispy and prevents sogginess. Southern Fried Catfish pairs well with several sides. Try coleslaw for a crunchy contrast. Hushpuppies are also a great choice for added texture. Other good sides include fried green tomatoes and cornbread. Each dish complements the catfish beautifully. Check if the catfish is golden brown and crispy. You can use a fork to flake the fish gently. If it flakes easily, it is done. The internal temperature should reach 145°F (63°C) for safe eating. Enjoy your perfectly fried catfish! This guide shared the key steps to make delicious Southern fried catfish. We covered ingredients, cooking tips, and tasty variations. Remember to marinate the fish for the best flavor. Whether you fry or bake, these methods ensure a great meal. Store leftovers properly to enjoy later. With these tips, you’ll master catfish cooking in no time! Enjoy every bite and impress your family and friends.](https://cheftaling.com/wp-content/uploads/2025/06/83245f8b-61af-4373-9ce6-cb1c68bff597-300x300.webp)
![- 1 can (15 oz) chickpeas, drained and rinsed - 2 cups kale, stems removed and roughly chopped - 1 tablespoon olive oil - 1 teaspoon smoked paprika - 1 teaspoon garlic powder - 1/2 teaspoon cumin - 1/2 cup hummus (store-bought or homemade) - 1 medium carrot, grated - 1/2 cucumber, thinly sliced - Fresh cilantro or parsley for garnish Crispy Chickpea & Kale Wraps are a tasty meal you can whip up fast. You can enjoy them warm or cold. The main ingredients are simple but full of flavor. Chickpeas give protein and crunch, while kale adds nutrients. Olive oil makes everything rich and smooth. For spices, I use smoked paprika, garlic powder, and cumin. These spices give a warm, savory taste. You can adjust them to suit your needs. I love to add extra seasoning if I want more flavor. The optional fillings are fun to mix in. Hummus spreads easily on the wrap. Grated carrot adds a nice crunch, and cucumber gives a fresh bite. Fresh herbs like cilantro or parsley make the dish pop with color and taste. To see the full recipe, check out the [Full Recipe]. Enjoy making these wraps! 1. First, preheat your oven to 400°F (200°C). This step is key for crispy chickpeas. 2. In a mixing bowl, take the drained chickpeas. Add olive oil, smoked paprika, garlic powder, cumin, salt, and pepper. Toss until all the chickpeas are well coated. This mix adds great flavor. 1. Spread the chickpeas in a single layer on a baking sheet. Use parchment paper for easy cleanup. 2. Bake them for 20 to 25 minutes. Make sure to shake the pan halfway through. This helps them cook evenly and get nice and crispy. 1. While the chickpeas bake, grab another bowl and add the kale. Massage it with a pinch of salt for 1 to 2 minutes. This makes the kale soft and tasty. 2. Once the chickpeas are ready, let them cool a bit. 3. Now, take a wrap and spread a good amount of hummus on it. 4. Layer the massaged kale, crispy chickpeas, grated carrot, and sliced cucumber on top of the hummus. 5. Roll the wrap tightly. Tuck in the sides as you go to keep everything inside. 6. Slice each wrap in half. You can secure them with a toothpick if you like. 7. For a pop of color, garnish with fresh cilantro or parsley. Follow these steps for a fresh and flavorful meal. You can find the full recipe in the earlier section! To get crispy chickpeas, start with dry chickpeas. Drain and rinse them well. Pat them dry with a towel. This step is key to remove excess moisture. Next, coat them with olive oil and spices. Use smoked paprika, garlic powder, and cumin for taste. Spread them out on a baking sheet. Make sure they are in a single layer. Bake at 400°F for 20-25 minutes. Shake the pan halfway through to cook evenly. The chickpeas should look golden brown when done. Want to boost the flavor? Add extra spices like cayenne for heat or herbs like thyme. You can also mix in lemon zest for brightness. For the hummus, try adding roasted garlic or tahini. This will create a creamy and rich dip. You can even use different flavors of hummus, like roasted red pepper or beet. When serving, think about color and texture. Cut the wraps in half for a nice display. Arrange them on a platter with fresh herbs. You could also add a drizzle of olive oil or balsamic glaze. This adds a touch of elegance. Use small bowls for extra hummus and veggies. This makes it fun for guests to dip and enjoy. For a pop of color, sprinkle some paprika or sesame seeds on top. {{image_2}} You can switch up ingredients for more fun. Try different legumes like black beans or lentils. They both add a nice taste and texture. You can even use white beans for a creamier wrap. Each legume gives a unique flavor that keeps things fresh. For greens, kale is great, but you can use spinach or arugula. Both are tasty and add a new crunch. If you like something mild, use romaine lettuce. It adds a crisp bite without being too strong. If you need gluten-free wraps, many brands offer them now. Look for rice paper or corn tortillas. They taste great and hold the filling well. You won't miss the gluten at all! For a vegan option, swap hummus for a bean spread. You can use a white bean spread or avocado mash. Both give the wraps creaminess and flavor without dairy. You can change the wraps based on the season. In summer, add fresh tomatoes or bell peppers for crunch. They are juicy and refreshing. In fall, add roasted sweet potatoes or squash for warmth. Dressing can also add zest. Try a lemon-tahini dressing for a bright flavor. Or a spicy sriracha sauce if you like heat. Both choices enhance the wraps and make them more exciting. For the full recipe, check out the Crispy Chickpea & Kale Wraps 🥙 section. To keep your wraps fresh, store them in the fridge. Wrap each one tightly in plastic wrap or foil. Place them in an airtight container to avoid drying out. This helps maintain flavor and texture. Reheat crispy chickpeas in the oven for the best results. Set the oven to 350°F (175°C) and spread them on a baking sheet. Heat for about 10 minutes until they are crispy again. For the wraps, it's best to reheat in a skillet. Heat over medium for a few minutes on each side. This keeps them warm and soft without making them soggy. You can freeze the wraps for later. Wrap each one in plastic wrap, then place them in a freezer bag. This prevents freezer burn. To thaw, leave them in the fridge overnight. Reheat in the oven or skillet as mentioned before. This way, you won’t lose any flavor! For the best taste, enjoy them within three months. Yes, you can prepare these wraps ahead of time. For best results, store the chickpeas and kale separately. This keeps the wraps fresh and crispy. You can make the chickpeas and massaged kale a day in advance. Keep them in airtight containers in the fridge. Assemble the wraps just before eating. This way, the wraps stay crunchy and flavorful. If you need a substitute for chickpeas, you have options. You can use black beans or white beans. Lentils also work well. These alternatives provide similar protein and texture. Make sure to season them like chickpeas for the best flavor. These wraps last about 1 to 2 days in the fridge. To keep them fresh, wrap them tightly in plastic wrap or foil. If you notice any sogginess, enjoy them sooner rather than later. For the best taste, eat them within the first day. This blog post covered tasty and healthy Crispy Chickpea & Kale Wraps. We looked at main ingredients, spices, and optional fillings that boost flavor. I shared step-by-step instructions for easy prep and baking. You learned tips for perfect chickpeas and creative serving ideas. We explored variations with swaps and seasonal add-ins. Lastly, I provided storage and reheating suggestions for leftovers. Enjoying these wraps boosts your meals while keeping it fun and simple. Try these steps today!](https://cheftaling.com/wp-content/uploads/2025/06/6142cf5f-30bb-4b10-988d-9b120ffdf4de-300x300.webp)
![- 1 ripe mango, diced - 2 avocados, diced - 1 cup cherry tomatoes, halved - 1 cup arugula or baby spinach - ½ cup red onion, thinly sliced - 1 red bell pepper, diced - ¼ cup sunflower seeds or pumpkin seeds - 2 tablespoons fresh cilantro, chopped - 2 tablespoons lime juice - 1 tablespoon olive oil - Salt and pepper to taste The main ingredients in this salad create a bright and fresh flavor. The ripe mango brings sweetness, while the creamy avocados add richness. Cherry tomatoes add a pop of color and a juicy bite. You can use arugula or baby spinach based on your taste. Both greens give a nice base for the salad. For additional crunch and flavor, I love adding red onion and red bell pepper. These ingredients not only enhance the texture but also add nutrients. Sunflower seeds or pumpkin seeds give that extra crunch, making every bite delightful. Fresh cilantro ties it all together with a burst of flavor. The dressing is simple yet effective. Lime juice and olive oil balance tanginess and smoothness. A pinch of salt and pepper elevates the taste. You can find the complete recipe under "Full Recipe." Enjoy gathering these fresh ingredients. They make this power salad a vibrant and healthy delight! - Combine diced mango and avocados in a large salad bowl. - Add cherry tomatoes, arugula (or spinach), red onion, and red bell pepper. Start by dicing the mango and avocados into bite-sized pieces. This makes them easy to mix. Next, slice the cherry tomatoes in half. If using arugula or spinach, make sure they are fresh. Thinly slice the red onion and dice the red bell pepper. All these colors will make your salad pop! - Whisk lime juice, olive oil, salt, and pepper in a small bowl. In a small bowl, add the lime juice and olive oil. Use a whisk to mix them well. Then, add salt and pepper to taste. This simple dressing brings everything together. The lime juice adds a zesty touch that complements the fruit. - Drizzle dressing over salad ingredients and toss gently. - Top with sunflower seeds (or pumpkin seeds) and chopped cilantro. Once your dressing is ready, drizzle it over the salad. Toss gently so you don’t mash the avocado or mango. Finally, sprinkle the sunflower seeds on top for crunch. Add chopped cilantro for a fresh, herbal note. For the full recipe, check out the detailed steps above. Enjoy your vibrant, healthy meal! When picking mangoes, look for ones that are slightly soft. A ripe mango has a sweet scent. Check for a bright, golden color. Avoid mangoes with dark spots or wrinkles. For avocados, choose ones that yield to gentle pressure. They should feel smooth and firm. Green avocados are not ripe yet. If you find some hard ones, leave them out for a day or two to ripen. Cherry tomatoes are great in this salad. Use fresh ones for the best taste. If fresh ones are hard to find, canned cherry tomatoes work too. Just make sure to drain them well before adding. The dressing makes your salad pop. Start with the lime juice. Adjust it until you find the right tartness for your taste. If you love a strong flavor, add more lime juice. If you prefer it milder, use less. Next, add olive oil for richness. Mix it in with the lime juice. Taste as you go. This is your chance to make it just right. Season with salt and pepper to enhance the taste. A little bit goes a long way. This salad is a star on its own, but you can make it even better. Pair it with grilled chicken for a filling meal. Shrimp also works well; it adds a nice touch. Both proteins add flavor and make your salad more nutritious. For a lighter option, enjoy it as a side dish. This fresh salad complements many main dishes. Whether you’re having fish or steak, it’s sure to impress. Don’t forget to check the full recipe for more details! {{image_2}} You can customize your salad easily. If you don’t have arugula, try kale or mixed greens instead. These greens add a nice crunch and taste. You can also swap sunflower seeds for other seeds or nuts. Almonds or walnuts work great for added texture. Want a kick? Add sliced jalapeños for a spicy twist. They bring heat and flavor. Another great option is to mix in feta cheese. This cheese adds a nice tang and creaminess to the salad. It pairs well with the sweetness of the mango and creaminess of the avocado. Boost the nutrients by adding superfoods. Options like chia seeds or hemp hearts offer extra vitamins and minerals. You can also toss in beans for more protein and fiber. Black beans or chickpeas are tasty choices. They make the salad filling and hearty. For the full recipe, check out the [Full Recipe]. To keep your Mango Avocado Power Salad fresh, store it in an airtight container. This helps prevent the salad from wilting. You can refrigerate it for up to two days. After that, the avocados may brown and the flavors could fade. If you have a busy schedule, you can prep this salad ahead of time. Chop all the veggies and fruit, then store them in a container. Keep the dressing separate until you are ready to eat. This way, the salad stays crisp and fresh. I do not recommend freezing the salad. Freezing can change the texture of the avocado and mango. However, you can freeze some ingredients, like the diced mango. Just make sure to use a freezer-safe bag. When you're ready to use it, thaw it in the fridge overnight. What is the nutritional value of Mango Avocado Power Salad? This salad is packed with nutrients. Each serving offers vitamins A and C, healthy fats, and fiber. The mango gives you a boost of vitamin C. Avocados provide heart-healthy fats, while greens add more vitamins. This blend supports your overall health. How can I make this salad vegan-friendly? The Mango Avocado Power Salad is mostly vegan. Just ensure the olive oil is pure. You can swap honey for maple syrup if you want a sweet dressing. This keeps everything vegan without losing flavor. How long does it take to prepare this salad? You can whip up this salad in just 15 minutes. The quick prep makes it perfect for busy days. You can chop, mix, and serve it fast. Can I use canned mango or avocados instead of fresh? While fresh is best, canned options work in a pinch. Make sure to drain any liquid from the canned fruit. Fresh ingredients always taste brighter and more vibrant, so use them when you can. What can I use instead of lime juice? If you don't have lime juice, try lemon juice instead. It gives a similar tang. You can also use vinegar for a different flavor twist. Can I replace sunflower seeds with nuts? Yes, you can use nuts instead of sunflower seeds. Almonds or walnuts add crunch and flavor. Just chop them up to mix in easily. In this blog post, we explored how to make a fresh and healthy Mango Avocado Power Salad. We covered the main and additional ingredients, detailed step-by-step instructions, and offered helpful tips. You can easily swap ingredients and make this salad fit your taste. In conclusion, this salad is not just tasty; it's also packed with nutrients. Enjoy it as a side or add protein for a full meal. You will love how easy this is to prepare and customize!](https://cheftaling.com/wp-content/uploads/2025/06/b1e7e576-9398-42c5-8d42-a75187fcd67c-300x300.webp)
![To make Sheet Pan Citrus Glazed Salmon, gather these main ingredients: - 4 salmon fillets - 2 oranges (juiced and zested) - 1 lemon (juiced and zested) - 2 tablespoons honey - 2 tablespoons olive oil - 2 cloves garlic, minced - 1 teaspoon fresh ginger, grated - Salt and pepper to taste - 1 cup snap peas - 1 red bell pepper, sliced The salmon fillets are the star of this dish. Their rich flavor pairs well with the bright citrus. The oranges and lemon bring freshness and balance. Honey adds a hint of sweetness. Olive oil helps with cooking and adds nice flavor. Garlic and ginger give depth. Snap peas and red bell pepper add color and crunch. For a little extra flair, try these optional garnishes: - Sesame seeds - Additional herbs or spices Using sesame seeds gives a nice crunch. You can also sprinkle fresh herbs like cilantro or parsley for color and taste. If you want more spice, add some chili flakes or black pepper. Each garnish enhances the dish, making it even more enjoyable. This simple recipe comes together quickly. You can find the full recipe linked above for more details on preparation and cooking steps. 1. Preheat the Oven: Start by preheating your oven to 400°F (200°C). This heat helps to cook the salmon evenly and keeps the veggies crisp. Line a large sheet pan with parchment paper. This makes cleanup easier later. 2. Make the Citrus Glaze: In a small bowl, whisk together the juices and zest from the oranges and lemon. Add honey, olive oil, minced garlic, grated ginger, salt, and pepper. Mix until well combined. This glaze adds a bright flavor to the salmon. 1. Arrange Salmon and Vegetables: Place the salmon fillets on one side of the sheet pan. Pour half of the citrus glaze over the salmon. On the other side, arrange the snap peas and sliced red bell pepper. Drizzle them with olive oil and sprinkle with salt and pepper. Toss them to coat well. 2. Roasting Duration and Temperature Guidelines: Place the sheet pan in the oven. Roast for 15-20 minutes. The salmon should be cooked through and flake easily with a fork. The vegetables will be tender but still crisp. This cooking method keeps everything juicy and full of flavor. 1. Application of the Glaze Before Serving: In the last 5 minutes of roasting, brush the reserved citrus glaze over the salmon. This creates a shiny, tasty finish that makes the dish look great. 2. Serving Suggestions: Once done, take the sheet pan out of the oven. Let it rest for a couple of minutes. Sprinkle sesame seeds over the salmon and vegetables for a nice crunch. Serve warm for a fresh and easy meal. For the full recipe, check out the details I provided earlier. Enjoy your delicious Sheet Pan Citrus Glazed Salmon! To get the best texture from your salmon, begin with fresh fillets. Look for salmon that is bright and moist. When cooking, place the salmon skin-side down on the sheet pan. This keeps it moist and helps it cook evenly. To check for doneness, gently poke the salmon with a fork. If it flakes easily, it's ready. The internal temperature should reach 145°F (63°C). Use an instant-read thermometer for accuracy. For more flavor, consider adding fresh herbs like dill or parsley. A pinch of red pepper flakes can add a nice kick. You can also swap honey for maple syrup for a different sweetness. If you have leftover glaze, store it in a sealed container in the fridge. It will stay fresh for about a week. Use it to drizzle over grilled chicken or veggies. This way, you maximize the flavors and minimize waste. For the complete recipe, check out the [Full Recipe]. {{image_2}} You can switch up the proteins in this dish. If you prefer, use trout or even chicken. Each will soak up the citrus glaze well. Just adjust the cooking time slightly. Fish takes less time than chicken. For veggies, snap peas and red bell peppers are great, but feel free to mix. Broccoli or asparagus work nicely too. They add color and crunch. You can use any seasonal veggies you like. To change the flavor, add fresh herbs. Basil or cilantro can brighten the dish. For spice, try red pepper flakes or cumin. Each will give a new twist. Experiment with citrus too. Lime or grapefruit juice can change the taste. Mix and match until you find your favorite combo. You might even try a blend of citrus for depth. The options are endless! For the full recipe, you can refer to the Sheet Pan Citrus Glazed Salmon. To keep your cooked salmon and vegetables fresh, store them in airtight containers. Place the salmon and veggies in separate containers if possible. This helps maintain their texture and flavor. Refrigerate them right after the meal. They should stay good for up to three days. When you’re ready to reheat, avoid the microwave if you can. Instead, use the oven for the best taste. Preheat your oven to 300°F (150°C). Place the salmon on a baking sheet and cover it with foil. Heat for about 10 minutes. This method helps keep the salmon moist and tasty. If you want to save salmon for later, freezing is a great choice. Wrap each salmon fillet tightly in plastic wrap, then place it in a freezer bag. Remove as much air as you can. This helps prevent freezer burn. You can freeze the salmon for up to three months. When you’re ready to eat, thaw the salmon in the fridge overnight. For quicker thawing, place it in cold water for about an hour. Once thawed, reheat it using the same oven method mentioned above. This way, you enjoy that delicious flavor again. For the full recipe, check out the earlier section! How to make the salmon skin crispy? To get crispy salmon skin, start with dry skin. Pat the skin with paper towels. Then, place the salmon skin-side down in a hot pan with a bit of oil. Cook it on high heat for a few minutes before baking. This helps create a nice crust. Can I use frozen salmon for this recipe? Yes, you can use frozen salmon. Just make sure to thaw it completely first. Place it in the fridge overnight or in cold water for a quicker thaw. Once thawed, follow the same steps as with fresh salmon. Health benefits of salmon and citrus Salmon is rich in omega-3 fatty acids. These help your heart and brain health. Citrus fruits add vitamin C, which boosts your immune system. Together, they create a tasty and healthy meal. How to make this recipe healthier? You can use less honey in the glaze. Try adding more veggies like broccoli or carrots. This adds fiber and nutrients without many calories. Can I grill instead of roast? Yes, grilling works well too! Preheat your grill and place the salmon on a grill pan. Cook it on medium heat. Keep an eye on it to prevent sticking and burning. What's the best side dish to serve with citrus glazed salmon? A fresh salad pairs nicely with this dish. You can also serve it with brown rice or quinoa. These sides balance the flavors and add healthy grains to your meal. This post covered how to make a tasty citrus-glazed salmon. You learned about the key ingredients, step-by-step cooking, and tips for perfect texture. Remember, experimenting with flavors makes each dish unique. Don't hesitate to try new vegetables or spices. Storing leftovers? Keep them fresh with proper techniques for refrigeration or freezing. Enjoy your meals, and have fun cooking!](https://cheftaling.com/wp-content/uploads/2025/06/25e1a520-5936-4956-adf9-fa6c55a31b2b-300x300.webp)
![For the best Lemon Ricotta Pasta, you need the following key components: - 8 oz spaghetti or fettuccine - 1 cup ricotta cheese - 1 lemon (zest and juice) - 2 tablespoons olive oil - 2 cloves garlic, minced - 1 cup baby spinach - Salt and pepper, to taste - Fresh basil leaves, for garnish - Parmesan cheese, for serving (optional) If you have dietary preferences, consider these alternatives: - Use whole wheat or gluten-free pasta for a different texture. - Swap ricotta with cottage cheese for a lighter version. - Replace olive oil with avocado oil for a nutty taste. Measuring ingredients correctly is very important in cooking. It ensures that each part of the dish shines. To measure: - Use a kitchen scale for dry ingredients. - Use liquid measuring cups for wet ingredients. - Level off dry ingredients with a straight edge for accuracy. Each serving of Lemon Ricotta Pasta has about 400 calories. Key ingredients offer great nutritional benefits: - Ricotta cheese is rich in protein and calcium. - Lemon is full of vitamin C and adds bright flavor. - Spinach is packed with iron and vitamins A and K. This dish is not only tasty but also provides essential nutrients. For the full recipe, check the [Full Recipe]. To start, bring a large pot of salted water to a boil. Add 8 oz of spaghetti or fettuccine. Cook it according to the package instructions. I like to aim for al dente, which means the pasta should be firm but cooked through. This gives the best texture. Here are some tips for perfect pasta texture: - Make sure your water is at a rolling boil before adding pasta. - Stir the pasta occasionally to prevent it from sticking. - Reserve 1 cup of pasta water before draining. This water helps in making the sauce creamy. Next, we prepare the sauce. In a mixing bowl, combine 1 cup of ricotta cheese, the zest and juice of 1 lemon, and a pinch of salt and pepper. Mixing this until smooth is important. The lemon zest adds a bright flavor, while the juice gives it a nice tang. Here’s why the lemon is key: - It brightens up the dish. - It balances the richness of the ricotta. Now it’s time to combine everything. In a large skillet, heat 2 tablespoons of olive oil over medium heat. Add 2 cloves of minced garlic and sauté for 1-2 minutes. Then, add the cooked pasta to the skillet. Next, add the ricotta mixture and a splash of the reserved pasta water. Toss it all together over low heat. This helps the sauce coat the pasta evenly. If the sauce is too thick, add more pasta water to achieve a creamy consistency. Lastly, fold in 1 cup of baby spinach. Cook for an additional 1-2 minutes until it wilts. Your Lemon Ricotta Pasta is now ready to enjoy! For the full recipe, check out the earlier section. What common issues might I face? Some common issues include the sauce being too thick or too thin. If it’s too thick, add more pasta water slowly. If it’s too thin, cook it a bit longer over low heat to thicken. Another issue could be bland flavors. Taste and adjust the seasoning with salt and fresh pepper. How can I adjust flavors to my liking? You can enhance flavors by adding more lemon zest or juice. If you want more richness, include a bit more ricotta cheese. For a kick, a pinch of red pepper flakes works well. Trust your taste buds and tweak until it feels right for you. What are some ideas for garnishing and plating? For a bright finish, top your dish with fresh basil leaves. A sprinkle of grated Parmesan adds flavor and visual appeal. You can also add a drizzle of olive oil for a nice shine. Serve the pasta in a shallow bowl for a beautiful presentation. What pairs well with Lemon Ricotta Pasta? This dish goes well with a simple green salad. A light vinaigrette complements the creamy pasta. You could enjoy it with a glass of white wine, like Pinot Grigio, to enhance the meal. Garlic bread is also a great side that many love. What kitchen tools do I need for preparation? You will need a large pot for boiling pasta and a colander to drain it. A good skillet is essential for sautéing the garlic and mixing everything together. A mixing bowl is also needed for combining the ricotta and lemon. What cookware helps achieve the best results? Use a non-stick skillet to prevent sticking and to make cleanup easy. A large pot with a heavy bottom will help cook the pasta evenly. Using a microplane for zesting the lemon gives you the best flavor. For perfect mixing, a sturdy spatula will work wonders. For the full recipe, check out the [Full Recipe]. {{image_2}} You can add many veggies to your Lemon Ricotta Pasta. Try cherry tomatoes, zucchini, or bell peppers. These veggies add color and taste. Use seasonal produce for the best flavor. In spring, add asparagus or peas. In summer, go for fresh corn or green beans. Just sauté them lightly before adding to the pasta. This keeps them crisp and bright. Adding protein makes this dish heartier. You can use chicken, shrimp, or tofu. For chicken, cook it in the skillet until golden brown. Then, slice it and mix it in. For shrimp, sauté them in the same pan until they turn pink. If you prefer tofu, cube it and pan-fry until crispy. Each protein adds its own unique flavor. To make a vegan version of Lemon Ricotta Pasta, swap the ricotta cheese. Use a dairy-free ricotta made from nuts or tofu. You can also blend soaked cashews with lemon juice for a creamy texture. For the pasta, ensure it is egg-free. This way, you keep all the flavor but make it plant-based. Enjoy the same creamy delight without dairy! You can find the full recipe to guide you through this delicious meal. After enjoying your Lemon Ricotta Pasta, store any leftovers in an airtight container. This keeps the pasta fresh. Place it in the fridge for up to three days. If you need to keep it longer, freeze it. The pasta can last up to two months in the freezer. Remember to thaw it overnight in the fridge before reheating. When it’s time to enjoy your leftovers, avoid the microwave if you can. Instead, warm the pasta in a skillet over low heat. Add a splash of water or extra olive oil. This helps keep the pasta creamy. Stir gently to mix in the sauce. If you microwave, do it in short bursts and stir often to avoid drying out the dish. To save time on busy nights, prep your ingredients ahead. Cook the pasta and let it cool. Store it in the fridge. You can mix the ricotta, lemon juice, and zest in advance too. Just combine everything when you're ready to eat. This way, you get a fresh meal in minutes. For even faster meals, chop spinach and garlic in advance. Each step makes it easier to whip up your Lemon Ricotta Pasta on a busy night. For the complete recipe, check out the [Full Recipe]. Lemon Ricotta Pasta is a simple yet tasty dish. It blends fresh ricotta cheese and zesty lemon. This dish comes from Italy and celebrates bright flavors. It is creamy, rich, and easy to make. The lemon adds a refreshing touch. This dish is perfect for a quick weeknight meal or a special gathering. You can enjoy it with friends or family. It also offers a chance to showcase fresh ingredients. Yes, you can! While spaghetti or fettuccine works best, many other options exist. Penne, linguine, or even whole wheat pasta can be great. Each type brings a different texture and flavor. For instance, penne adds a nice bite. Linguine offers a flat surface for the sauce to cling to. Remember, the shape of the pasta can change how the sauce coats it. To make Lemon Ricotta Pasta gluten-free, choose gluten-free pasta. Many brands offer rice, corn, or quinoa-based options. These alternatives cook differently, so check the package instructions. You can also use spiralized vegetables like zucchini as a pasta substitute. If you have gluten sensitivity, ensure all other ingredients are gluten-free. Always read labels, as some products may contain hidden gluten. Lemon Ricotta Pasta offers simple, fresh flavors and quick preparation. We covered ingredients, accurate measuring, nutrition, and cooking steps. Adjust flavors to fit your taste and add veggies or proteins as you like. Store leftovers wisely to enjoy later. With these tips, you can create a delicious meal that suits your needs. Dive in and enjoy your cooking journey!](https://cheftaling.com/wp-content/uploads/2025/06/e8ba6dbb-03e8-4486-b508-d030686d9199-300x300.webp)

![- Chicken: 1 lb boneless, skinless chicken breasts - Garlic: 4 cloves, minced - Butter: 4 tablespoons unsalted - Seasonings: Fresh thyme, paprika, salt, and pepper The chicken is the star of this dish. I prefer using boneless, skinless chicken breasts because they cook quickly and stay juicy. Cut the chicken into bite-sized pieces for even cooking. Garlic brings a rich flavor. I use four cloves, minced finely. This amount gives a strong yet balanced taste. Fresh herbs are key too. I love adding fresh thyme, but dried works well too. Add paprika for a nice color and slight spice. - Fresh parsley for garnish - Lemon wedges for serving Garnishing with fresh parsley adds a pop of color. It also brightens the dish. Lemon wedges serve as a zesty side. Squeeze them over the chicken for a fresh flavor boost. You can find the Full Recipe to guide you step-by-step. First, cut the chicken into bite-sized pieces. This helps them cook evenly. Next, season the chicken with salt, pepper, and paprika. These spices add flavor and warmth. Make sure every piece is coated well. This step is key for tasty bites. Now, it's time to melt the butter in a skillet over medium heat. Watch it carefully so it doesn't burn. Once the butter is melted, add minced garlic. Sauté it for about 1-2 minutes until it smells amazing. Be careful not to let it brown. Next, increase the heat to medium-high. Add the seasoned chicken pieces to the skillet in a single layer. Let them sear for about 4-5 minutes on one side. After that, flip them to cook the other side for another 4-5 minutes. You want them to be golden and fully cooked. As they cook, the chicken absorbs the garlic butter flavor. This is where the magic happens! When cooked, sprinkle fresh thyme over the chicken. Toss everything together so the chicken is well coated in that delicious garlic butter. This dish is quick and full of flavor. For the full recipe, check the main instructions. Enjoy your cooking! To make your Garlic Butter Chicken Bites shine, use fresh herbs. Fresh thyme adds a bright taste. You can also try fresh parsley for a fresh kick. Adjust seasoning based on your taste. If you like it spicy, add a pinch of cayenne pepper. If you prefer mild, skip the heat. Taste as you go to find your perfect balance. For the best results, cut your chicken into evenly sized pieces. This helps them cook at the same rate. If the pieces are too big or too small, some will cook faster than others. Also, don’t overcrowd the skillet. This causes the chicken to steam instead of sear. Cook in batches if you need to. This way, you’ll get that nice golden color on every piece. Follow these tips, and your dish will look as good as it tastes. Don't forget to check the [Full Recipe] for more details. {{image_2}} You can easily change up garlic butter chicken bites. Add veggies like bell peppers or onions. They bring color and crunch to the dish. Simply chop them into bite-sized pieces and cook them with the chicken. This will add flavor and nutrients. You can also swap chicken for shrimp or tofu. Shrimp cooks fast and adds a sweet taste. Tofu is a great choice for a plant-based meal. Make sure to season them well for the best flavor. Try new herbs to give your dish a fresh twist. Rosemary or oregano can add a nice touch. Just sprinkle them in when you add the garlic. This will boost the flavor profile. Adding a splash of white wine or lemon juice to the butter sauce is another great idea. The wine adds depth and richness. Lemon juice gives a bright, zesty kick. This balance will make your garlic butter chicken bites even more delicious. For the full recipe, check out the section above. After making Garlic Butter Chicken Bites, let them cool. Place the chicken in airtight containers. This helps keep the bites fresh. You can store them in the fridge for up to three days. Make sure you seal the containers well to prevent any bad odors. When you want to enjoy the leftovers, you have a couple of easy options. You can microwave the chicken bites for quick heating. If you want a crispier texture, reheat them in a skillet with a bit of butter. This adds flavor back to the dish. Make sure the chicken is heated through before you serve it again. Enjoy your tasty meal! Making Garlic Butter Chicken Bites takes about 25 minutes. You spend 10 minutes prepping the ingredients. The cooking process takes about 15 minutes. This quick dish is perfect for busy weeknights. Yes, you can prepare this dish ahead of time. Cook the chicken bites and let them cool. Store them in an airtight container in the fridge. They stay fresh for up to three days. When ready to eat, just reheat them. Garlic Butter Chicken Bites pair well with many side dishes. Here are some tasty options: - Steamed rice - Mixed green salad - Roasted vegetables - Mashed potatoes These sides enhance the meal and add color to your plate. You can freeze Garlic Butter Chicken Bites. First, let them cool completely. Then, place them in a freezer-safe container. They can last for up to three months in the freezer. To reheat, thaw them in the fridge overnight. Warm them in a skillet until heated through. Enjoy this dish anytime you crave a quick meal. For the full recipe, check out the details above. This blog post shared a tasty Garlic Butter Chicken Bites recipe. I covered key ingredients like chicken and garlic, plus cooking steps with tips. You'll find easy ways to enhance flavor, try variations, and store leftovers. Remember, you can adjust seasoning and add your favorite veggies. Cooking can be fun and simple. Enjoy your meal and don't be afraid to experiment! Happy cooking!](https://cheftaling.com/wp-content/uploads/2025/06/a4c73bd0-027f-48fa-af0d-1984f89a4056-300x300.webp)
![- Firm tofu (14 oz) - Cornstarch - Soy sauce - Sesame oil - Olive oil - Garlic powder - Smoked paprika - Black pepper - Salt - Fresh parsley, chopped Crispy baked tofu is a simple yet tasty dish. The main ingredient, firm tofu, is key to the texture you want. It holds its shape well when baked. Cornstarch gives the tofu a crunchy exterior, while soy sauce adds a rich flavor. Sesame oil brings a hint of nuttiness, and olive oil helps with browning. For seasoning, garlic powder adds warmth, and smoked paprika gives a nice, smoky taste. Black pepper adds a little heat, while salt enhances all the flavors. Finally, fresh parsley makes a great garnish. It adds color and freshness. This recipe is easy to follow. You can find the full recipe in the section above. Enjoy making this delightful dish! 1. Preheating the oven Start by preheating your oven to 400°F (200°C). This step is key for crispy results. 2. Draining and pressing tofu Open the tofu package and drain the liquid. Press the tofu between paper towels. This helps remove extra moisture for better crispiness. 3. Cutting tofu into cubes Slice the tofu into bite-sized cubes. Aim for uniform pieces to ensure even cooking. 1. Combining dry and wet ingredients In a large bowl, mix together cornstarch, soy sauce, sesame oil, olive oil, garlic powder, smoked paprika, black pepper, and salt. This blend gives great flavor and texture. 2. Coating the tofu evenly Gently add the cubed tofu to the bowl. Toss the tofu until each piece is well coated. This step is crucial for flavor. 1. Arranging the tofu on the baking tray Line a baking tray with parchment paper. Place the coated tofu cubes in a single layer, spaced apart. This helps them crisp up nicely. 2. Setting baking time and temperature Bake the tofu in the preheated oven for 25-30 minutes. Keep an eye on them as they cook. 3. Turning tofu for even cooking Halfway through baking, turn the tofu cubes. This helps them brown evenly and get that perfect crispy texture. Enjoy your crispy baked tofu! For those looking for the full recipe, check out the [Full Recipe]. To get the best results, start with firm tofu. Firm tofu holds its shape well and crisps nicely. Next, drying the tofu is key. After draining, press it between paper towels to soak up extra moisture. This step makes a big difference in texture. Finally, set your oven to 400°F (200°C). This hot temperature helps achieve that perfect crunch. One common mistake is not pressing enough liquid out of the tofu. If the tofu is wet, it won’t become crispy. Another mistake is overcrowding the baking tray. Make sure the tofu cubes are spaced apart. Give them room to breathe and crisp evenly. Crispy baked tofu pairs great with sauces. You can try soy sauce, teriyaki, or even a spicy sriracha mix. For sides, think about serving it with rice or a fresh salad. These sides add flavor and balance to your meal. For the full recipe, check out the Crispy Baked Tofu Delight. Enjoy experimenting! {{image_2}} You can easily change the taste of your crispy baked tofu. Adding honey or maple syrup gives it a sweet touch. This blends nicely with the savory flavors. You can also use different spices for unique flavors. Try adding cumin for warmth or chili powder for heat. Each spice adds a new twist to your dish. If you want a faster option, use an air fryer. It cooks the tofu quickly and makes it very crispy. Simply coat the tofu as you would for baking, then place it in the air fryer. Cook at 375°F for about 15-20 minutes. You can also pan-sear the tofu for a quicker method. Heat oil in a pan over medium heat. Add the coated tofu cubes and cook for about 5-7 minutes on each side. This gives you a delicious golden crust and juicy inside. For those who need gluten-free options, use tamari instead of soy sauce. This keeps all the flavors while meeting dietary needs. If you're looking for vegan options, this recipe is already vegan-friendly. Just ensure all your ingredients are plant-based. You can swap out oils too, using avocado or coconut oil for different tastes. These ideas help you make the crispy baked tofu your own. Each variation can turn a simple dish into something special. For the complete recipe, refer to the Full Recipe section. To store leftover crispy baked tofu, place it in an airtight container. Keep it in the fridge for up to five days. Make sure the tofu is cool before sealing the container. This helps keep it fresh longer. If you want to freeze crispy baked tofu, let it cool completely. Place the tofu in a freezer-safe bag or container. Remove as much air as you can to prevent freezer burn. You can freeze it for up to three months. When you’re ready to use it, thaw it in the fridge overnight. To reheat crispy baked tofu, the oven is the best method. Preheat your oven to 350°F (175°C). Place the tofu on a baking sheet and bake for about 10-15 minutes. This will help it regain its crispiness. You can also use an air fryer. Set it to 350°F (175°C) and cook for about 5-7 minutes. This method works well for keeping the tofu crispy. Crispy baked tofu lasts in the fridge for up to five days when stored properly. After that, it may start to lose its freshness. Signs of spoilage include a sour smell and a slimy texture. If you notice these signs, it’s best to throw the tofu away. Always trust your senses when checking food freshness. To get crispy tofu, start with firm or extra-firm tofu. The key is to press it well to remove moisture. After pressing, coat the cubes in cornstarch. This helps create a nice crust. Use a hot oven, about 400°F. Bake for 25-30 minutes. Flip the cubes halfway through for even crispiness. For great flavor, mix soy sauce, sesame oil, and spices. You can use soft tofu, but it won't be as crispy. Firm or extra-firm tofu holds its shape better. Soft tofu crumbles when pressed. It works in soups or smoothies, not baking. For this recipe, firm tofu is best. It gives you that nice crunch. Crispy baked tofu is great in many dishes. Serve it over rice or in a salad. You can add it to stir-fries for extra protein. Pair it with a dipping sauce like soy sauce or a spicy mayo. Garnish with fresh herbs for color and taste. Crispy baked tofu is healthier than fried tofu. Baking uses less oil, cutting down calories. Tofu is a good source of protein and iron. It also has healthy fats. Plus, it’s packed with calcium. Overall, baking keeps it nutritious while still tasty. Baking tofu at 400°F takes about 25-30 minutes. This time gives it a crispy texture. Make sure to flip the tofu halfway through cooking. This helps all sides brown evenly. Keep an eye on it to avoid burning. For the full recipe, check out the Crispy Baked Tofu Delight. Crispy baked tofu is a simple and tasty dish. We covered key ingredients like firm tofu and cornstarch, and we went through easy step-by-step instructions. I shared tips for the best crispiness and common pitfalls to avoid. You can even try delicious variations and learn how to store your leftovers. Tofu is not just healthy; it’s also very versatile. With this guide, you can make a crunchy, flavorful treat you’ll love! Enjoy your tasty, baked tofu adventure!](https://cheftaling.com/wp-content/uploads/2025/06/1f980306-9242-41a4-ae78-d4bb259935d0-300x300.webp)
![- 1 cup coconut milk (canned or carton) - 1 cup diced ripe mango (plus extra for topping) - 1/4 cup chia seeds - 2 tablespoons maple syrup (or honey) - 1 teaspoon vanilla extract - Pinch of salt Coconut milk brings a rich, creamy texture. It makes the pudding smooth and flavorful. You can use canned or carton coconut milk. Both work well. Diced ripe mango adds sweetness and a lovely color. Choose a ripe mango for the best taste. The fruit gives a tropical flair to your dish. Chia seeds are the magic ingredient. They soak up liquid and create a pudding-like texture. Plus, they pack a nutritional punch, offering fiber and healthy fats. Sweeteners, like maple syrup or honey, balance the flavors. You can adjust the amount based on your taste. This step is key to making the pudding just right. Flavorings, such as vanilla extract and a pinch of salt, boost the overall taste. Vanilla adds warmth, and salt brings out the sweetness. This combination makes each bite delightful. - Additional diced mango - Shredded coconut - Fresh mint leaves Toppings can make your pudding even more special. Extra diced mango adds freshness. It also makes the dish look pretty. Shredded coconut adds a fun texture. It gives a taste of the tropics too. Fresh mint leaves are a great garnish. They add color and a hint of coolness. Plus, they make the dish look fancy. For the full recipe, check the detailed instructions to bring this dish to life. To make this tasty mango coconut chia pudding, start by blending. - In a blender, add: - 1 cup coconut milk - 1 cup diced ripe mango - 2 tablespoons maple syrup or honey - 1 teaspoon vanilla extract - A pinch of salt Blend the mixture until it is smooth and creamy. This step helps combine all the flavors well. Next, combine the chia seeds. - In a mixing bowl, add: - 1/4 cup chia seeds Pour the mango coconut mixture over the chia seeds. Stir well to mix everything together. This ensures all seeds are coated evenly. Now, let’s chill and set the pudding. - Allow the mixture to sit for about 5 minutes. - Stir again to prevent clumping of chia seeds. This step is crucial for a smooth pudding texture. Cover the bowl and refrigerate. - Chill for at least 4 hours, or if you can, overnight. This time allows the chia seeds to swell and create that lovely pudding-like texture. Once the pudding is ready, it’s time to serve. - Use individual cups or bowls for a nice presentation. - Top with extra diced mango for added flavor. - You can also sprinkle shredded coconut for a fun texture. For an extra touch, garnish with fresh mint leaves. This makes your dessert look beautiful and fresh. Enjoy your delicious mango coconut chia pudding! For the complete recipe, refer to the [Full Recipe]. To store mango coconut chia pudding, use an airtight container. Place it in your fridge. This keeps it fresh. The pudding lasts for up to five days. Enjoy it as a snack or breakfast! If your pudding is too thick, add more coconut milk. Stir it well to mix. This helps achieve a creamier texture. For a perfect pudding, aim for a texture like soft yogurt. Taste your pudding before serving. If you want it sweeter, add more maple syrup or honey. You can also enhance the flavor by adding a splash of lime juice. This brightens the taste and adds a nice twist. For more ideas, check out the Full Recipe. {{image_2}} You can switch up the fruit in this recipe. Try using pineapple or passionfruit for a fun twist. These fruits add a bright flavor and new texture. If you want something different, mix in berries like strawberries or blueberries. They bring a sweet and tart taste that balances well with coconut. This recipe is easy to adapt for different diets. To make it vegan, simply use maple syrup as the sweetener. It works great and keeps everything plant-based. This pudding is also gluten-free. All the ingredients are naturally gluten-free, so you don’t have to worry about that. You can add spices to enhance the taste. A sprinkle of cinnamon or nutmeg can bring warmth and depth. It’s a simple way to change the flavor profile. If you like flavored coconut milk, use it instead of plain. Coconut milk with a hint of vanilla or almond can make this pudding even better. For the Full Recipe, refer back to the main article. Chia seeds are tiny but mighty. They are full of fiber, protein, and healthy fats. Just two tablespoons give you about 11 grams of fiber. This helps keep your tummy happy. Chia seeds also provide omega-3 fatty acids. These fats are good for your heart and brain. Coconut milk adds a creamy texture and tropical flavor. It is rich in medium-chain triglycerides (MCTs). These fats can boost energy and help with weight loss. Coconut milk also has vitamins C, E, and B vitamins. These nutrients support your immune system and skin health. Mango is not only sweet but also packed with vitamins. One cup of diced mango has over 100% of your daily vitamin C needs. This vitamin helps your body heal and fight off sickness. Mango also contains vitamin A, which is good for your eyes. Plus, it has plenty of antioxidants that help keep your body healthy. Each serving of Mango Coconut Chia Pudding has around 270 calories. This makes it a great snack or dessert. The pudding has about: - Fat: 15 grams - Carbohydrates: 36 grams - Protein: 4 grams This balance of nutrients helps keep you full and satisfied. You can enjoy this pudding without guilt while treating your taste buds. For the full recipe, check out the section above! Mango coconut chia pudding can last about 5 days in the fridge. Make sure to keep it in a jar or an airtight container. This helps keep it fresh and tasty. If you see any changes in smell or texture, throw it away. Yes, you can use almond milk instead of coconut milk. However, it will change the flavor. Almond milk is lighter and less creamy. If you want a rich taste, stick with coconut milk. It pairs well with mango and adds creaminess. Yes, it is necessary to refrigerate chia pudding before eating. Chia seeds need time to soak and expand. This helps create that pudding-like texture. I recommend chilling it for at least 4 hours for the best results. Absolutely! You can make mango coconut chia pudding ahead of time. It is a great option for meal prep. Just make it the night before and let it chill overnight. This makes for a quick and healthy breakfast or snack. The best way to tell if chia pudding is ready is by its thickness. It should be thick and creamy, not watery. You can stir it after chilling to check. If it is too thick, add a bit more coconut milk to loosen it. This blog post covered how to make Mango Coconut Chia Pudding. We explored the key ingredients like coconut milk, mango, and chia seeds. You learned how to prepare and chill the pudding, along with storing leftovers. We looked at fun variations and tips for flavoring too. Chia pudding is easy to make and full of nutrients. Try different fruits or flavors to make it your own. Enjoy this healthy, tasty treat!](https://cheftaling.com/wp-content/uploads/2025/06/f301df9b-e257-4088-abc1-a7380e7136ac-300x300.webp)
. To store your leftover roasted vegetable pasta, let it cool first. Place it in an airtight container. This helps keep the pasta fresh. You can store it in the refrigerator for up to three days. Make sure to label the container with the date. This way, you know when to use it. When you are ready to eat the leftovers, you can reheat the pasta. The best way is to use a skillet. Add a splash of water or olive oil to keep it moist. Heat it on low to avoid burning. Stir it often to warm it evenly. You can also use a microwave. Place it in a bowl with a lid. Add a tablespoon of water to keep it juicy. Heat in short intervals, stirring in between. Enjoy your tasty meal again! How to make Roasted Vegetable Pasta vegan? To make Roasted Vegetable Pasta vegan, simply skip the Parmesan cheese. You can replace it with a vegan cheese alternative. Nutritional yeast is a great option too. It adds a cheesy flavor without any dairy. You also want to check your pasta. Most pasta is vegan, but it’s wise to look at the label. Can I use frozen vegetables instead of fresh? Yes, you can use frozen vegetables for this dish. Just remember that frozen veggies may release more water when cooked. This can change the texture a bit. Thaw and drain them before mixing with pasta for the best results. You may need to roast them a bit longer to ensure they are tender and flavorful. What type of pasta is best for roasting vegetables? Penne or fusilli work great for this recipe. These shapes hold the sauce and roasted bits well. They also mix nicely with the vegetables. You can choose other pasta types too, like rotini or farfalle. Just make sure they cook evenly. Caloric content and serving size Each serving of Roasted Vegetable Pasta has about 400 calories. This is based on a serving size of one-fourth of the total recipe. It’s a filling meal that won’t weigh you down. Breakdown of macronutrients per serving - Carbohydrates: Around 60g - Protein: About 12g - Fat: Roughly 14g This meal provides a good balance of nutrients. You get healthy carbs from the pasta and lots of vitamins from the veggies. Roasted Vegetable Pasta is a simple and tasty dish. We covered the ingredients, cooking steps, and tips to make it great. Remember, you can switch vegetables and pasta to fit your needs. Store leftovers properly and heat them just right to keep the flavor. This dish brings joy to any meal. Dive in and enjoy your cooking journey!](https://cheftaling.com/wp-content/uploads/2025/06/973614e5-bc7a-46cd-9b35-14a543939eae-300x300.webp)
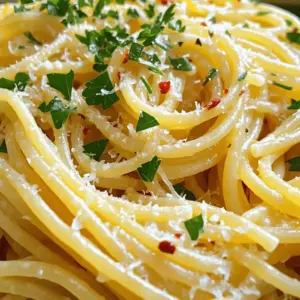
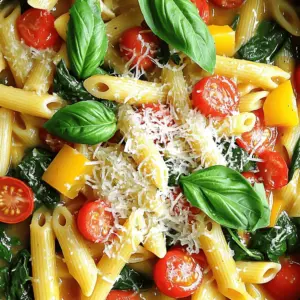


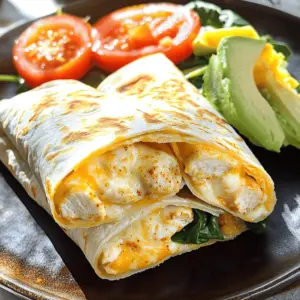
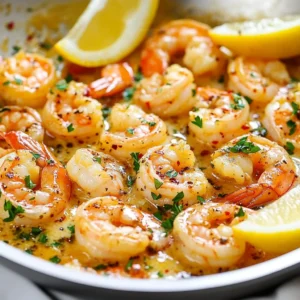
. 1. Cooking the macaroni Start by bringing a large pot of water to a boil. Add 8 oz of elbow macaroni and cook it until it is al dente. This usually takes about 7-8 minutes. Once done, drain the macaroni in a colander and set it aside. 2. Sautéing the vegetables In the same pot, heat 1 tablespoon of olive oil over medium heat. Add 1 medium diced onion. Sauté it for about 3-4 minutes until it becomes soft and clear. Next, add 2 cloves of minced garlic and cook for one more minute. This step adds great flavor to the dish. 3. Browning the meat Now, add 1 lb of ground beef or turkey to the pot. Break it up with a spoon as it cooks. Keep stirring until it is brown and no longer pink. This should take about 5-7 minutes. Make sure to drain any excess fat if needed. 4. Combining ingredients and simmering Stir in 1 packet of taco seasoning, 1 can of diced tomatoes with green chilies, and 2 cups of chicken or vegetable broth. Bring this mix to a simmer. Then, reduce the heat and add the cooked macaroni. Mix everything well so that all the flavors blend together. 5. Adding cheese Gradually add 1 cup of shredded cheddar cheese and 1 cup of shredded mozzarella cheese. Stir until the cheese melts and the mix becomes creamy. This is where the magic happens! 6. Adjusting consistency Taste your dish and add salt and pepper as needed. If the pasta seems too thick, you can add extra broth to reach your desired consistency. Let it sit for a couple of minutes off the heat to thicken up nicely. Enjoy your cheesy taco pasta! If you want a detailed recipe, check the Full Recipe for all the steps. How to make it vegetarian To make Cheesy Taco Pasta vegetarian, replace the meat with black beans or lentils. You can also use plant-based crumbles instead of ground beef or turkey. This keeps the dish hearty and satisfying. Substituting different proteins If you want to change the protein, try using ground chicken or pork. Seafood like shrimp can also work for a fun twist. Each protein gives a new flavor to the dish while keeping it simple. Ensuring a creamy texture For a creamy texture, add the cheese slowly while stirring. This helps the cheese melt evenly. If the pasta gets too thick, add a splash of broth or water. This keeps it smooth and delicious. Ways to enhance flavor To boost the flavor, add some spices like cumin or smoked paprika. You can also toss in some fresh herbs like cilantro or parsley. Squeeze a bit of lime juice on top for a fresh kick. Presentation ideas Serve Cheesy Taco Pasta in colorful bowls. Top it with extra cheese and fresh cilantro. You can add a dollop of sour cream for creaminess. This makes your dish look as good as it tastes. Complementary side dishes For sides, tortilla chips are a great choice. They add crunch and pair well with the pasta. A simple salad with lime vinaigrette also works well. It adds freshness and balances the richness of the pasta. {{image_2}} You can boost your Cheesy Taco Pasta with tasty add-ins. Try adding black beans or corn for extra fiber and flavor. Both ingredients mix well with the spices. If you like some heat, chop up jalapeños and stir them in. They add a nice kick to each bite. Not a fan of elbow macaroni? No problem! You can swap it for gluten-free pasta if you need a gluten-free option. There are many types of gluten-free pasta that taste great. You can also try other shapes, like penne or rotini. Different shapes hold sauce differently, adding more fun to your dish. The cheese options are endless! Mixing different cheeses can create more depth in flavor. Try adding pepper jack for spice or gouda for a smoky taste. If you want a dairy-free meal, use vegan cheese options. Many brands melt well, offering a creamy texture without the dairy. This way, everyone can enjoy it! For the full recipe, check the [Full Recipe]. To store leftover cheesy taco pasta, let it cool first. Then, place it in an airtight container. This keeps the dish fresh and tasty. You can store it in the fridge for up to three days. When ready to eat, just reheat it gently on the stove or in the microwave. Make sure to stir it well and add a splash of broth if needed. This helps keep it creamy. You can freeze cheesy taco pasta for up to three months. To do this, let it cool completely. Then, transfer it to a freezer-safe container. Make sure to leave some space at the top for expansion. When you want to eat it, take it out and let it thaw in the fridge overnight. To reheat, warm it in a pot over low heat. Stir it often to prevent sticking. You may need to add a bit of broth or water to get the right texture back. Preparing cheesy taco pasta in advance makes busy nights easier. You can cook it on the weekend and store it in portions. This way, you can grab a container for lunch or dinner. It’s a quick meal that kids and adults love. You can also pack it in lunchboxes. Just keep it cold until you’re ready to eat. This dish is perfect for meal prep because it tastes great reheated. To make Cheesy Taco Pasta from scratch, follow these steps: 1. First, boil water in a large pot. Cook 8 oz of elbow macaroni until al dente. Drain and set aside. 2. In the same pot, heat 1 tablespoon of olive oil over medium heat. Add 1 medium diced onion. Sauté for 3-4 minutes until it turns soft. 3. Then, add 2 minced garlic cloves. Sauté for 1 more minute until fragrant. 4. Next, add 1 lb of ground beef or turkey. Cook until it turns brown, about 5-7 minutes. 5. Stir in 1 packet of taco seasoning, 1 can of diced tomatoes with green chilies, and 2 cups of chicken broth. Bring it to a simmer. 6. Add the cooked macaroni back into the pot. Mix well so everything combines. 7. Gradually mix in 1 cup of shredded cheddar cheese and 1 cup of shredded mozzarella cheese. Stir until melted and creamy. 8. Season with salt and pepper. If it’s thick, add more broth to thin it out. 9. Finally, remove from heat. Let it sit for a couple of minutes to thicken. Yes, you can make Cheesy Taco Pasta in one pot. This method saves time and cleanup: - Start by cooking the macaroni in the same pot. Use the boiling water method. - After draining, keep the pot on the heat for the next steps. - Sauté the onions and garlic in the same pot. Then, add the meat and cook. - Follow the same instructions as before, adding all ingredients to the pot. - This method keeps the flavors together and makes it easy to serve. If you don’t have taco seasoning, you can make your own spice blend: - Combine 1 teaspoon each of chili powder, cumin, and paprika. - Add ½ teaspoon of garlic powder and onion powder. - Mix in ¼ teaspoon of salt and pepper. - You can adjust the spices based on your taste. This blend will give you a nice kick. Yes, Cheesy Taco Pasta is very kid-friendly. Here are some tips to make it appealing: - Use fun pasta shapes like shells or spirals. Kids love unique shapes. - Let them help sprinkle cheese on top. It makes them feel involved. - Serve it with a side of tortilla chips. The crunch adds a fun element. - You can also add a dollop of sour cream for extra creaminess. You’ve learned how to make Cheesy Taco Pasta, from ingredients to cooking steps. You saw ways to modify the recipe and some fun variations. Storing leftovers and meal prep tips help you enjoy this dish longer. Finally, the FAQs provide quick answers to common questions. This recipe is easy and kid-friendly, making it a hit for any home. Enjoy your tasty creation and share it with friends!](https://cheftaling.com/wp-content/uploads/2025/06/938c0f4e-f04a-4a36-87ee-5eccc2c32c9b-300x300.webp)
![- 8 oz linguine or spaghetti - 1 lb large shrimp, peeled and deveined - 4 cloves garlic, minced - 1/2 cup unsalted butter The main ingredients set the stage for this dish. First, you need your pasta. Linguine or spaghetti works well. Both types hold the sauce nicely. Next, shrimp brings a sweet and savory taste. I prefer large shrimp for better texture. Garlic adds flavor and aroma. Fresh garlic makes a big difference! Lastly, unsalted butter gives richness and smoothness to the sauce. - 1/4 cup fresh parsley, chopped - 1/2 tsp red pepper flakes (optional) - 1 lemon, juiced - Grated Parmesan cheese for serving Optional ingredients can elevate this dish. Fresh parsley adds color and a fresh taste. Red pepper flakes bring a hint of heat. Use as much as you like! A squeeze of lemon juice brightens the dish. It balances the richness of the butter. Grated Parmesan cheese as a topping adds a salty touch. It’s a simple way to enhance flavor and presentation. - Salt and pepper - Reserved pasta water Salt and pepper are key for seasoning. They bring out the best flavors in all ingredients. Always taste as you go! Reserve some pasta water before draining. This starchy water helps the sauce cling to the pasta. It adds creaminess without extra fat. This simple trick makes your dish even better! For the full recipe, check out [Full Recipe]. First, get your water boiling in a large pot. Add a good amount of salt to the water. This adds flavor to your pasta. Cook 8 oz of linguine or spaghetti according to the package instructions. You want it to be al dente, which means firm to the bite. Before draining, save 1/2 cup of that pasta water. This water has starch that helps sauce stick. Drain the pasta and set it aside. In a large skillet, melt 1/2 cup of unsalted butter over medium heat. Keep an eye on it so it doesn't burn. Once melted, add 4 cloves of minced garlic. Cook the garlic for 1-2 minutes. You want it to smell great but not brown. This step is key for rich flavor. Now, raise the heat to medium-high. Add 1 lb of large shrimp to the skillet. Season them with salt, pepper, and optional red pepper flakes. Cook the shrimp for 2-3 minutes on each side. They should turn pink and opaque. This means they are done. Next, add the cooked pasta to the skillet with the shrimp. Pour in the reserved pasta water and juice from 1 lemon. Toss everything gently to combine. Make sure the pasta gets a good coat of garlic butter. This is where the magic happens! Remove the skillet from the heat. Add 1/4 cup of chopped fresh parsley for color and flavor. Toss the dish again to mix everything well. Taste and adjust the seasoning if needed. Serve your Garlic Butter Shrimp Pasta hot, and don’t forget to sprinkle grated Parmesan cheese on top for extra yumminess. For the full recipe, check out the details above. To get shrimp just right, aim for tenderness. Fresh shrimp cook quickly. They should turn pink and opaque. If they curl tightly, you overcooked them. This makes them rubbery and less enjoyable. Cooking shrimp for 2-3 minutes per side is ideal. Keep an eye on them as they cook. You can customize the taste of your dish. Start by adjusting seasonings. Add a pinch more salt or pepper if you like. Want more heat? Toss in extra red pepper flakes. You can also explore herbs. Fresh basil or oregano can make a big difference. A sprinkle of lemon zest adds brightness too. Cooking pasta al dente creates the best texture. Follow the package instructions closely. Check the pasta a minute before it’s done. It should be firm but cooked through. Remember to save some pasta water. This starchy water helps bind the sauce. Use it to adjust the sauce’s thickness. It’s a simple tip that makes a big impact. {{image_2}} When making Garlic Butter Shrimp Pasta, you can switch up your pasta. Whole wheat pasta adds a nutty flavor and is healthier. Gluten-free pasta is great for those with dietary needs. You can also try different shapes like penne, fusilli, or even fettuccine. Each shape holds the sauce differently, making your dish unique. If shrimp isn't your favorite, you can use chicken or tofu instead. Chicken gives a nice, hearty taste, while tofu is a great plant-based option. You can also try other seafood like scallops or crab for a different twist. Just adjust the cooking time based on what you choose to ensure everything cooks perfectly. To add more depth, consider tossing in vegetables. Spinach, cherry tomatoes, or bell peppers add color and nutrition. For a creamier sauce, you can mix in heavy cream. This will make the dish richer and more filling. Experiment with seasonings, too, like fresh herbs or a splash of white wine for a new flavor layer. For the full details on creating this dish, check out the Full Recipe. To store your Garlic Butter Shrimp Pasta, let it cool first. Place it in an airtight container. This keeps the flavors fresh. You can store it in the fridge for up to three days. If you wait longer, the shrimp may lose texture and flavor. When reheating, the best method is the stove. Put the pasta in a skillet over low heat. Add a splash of water or broth to help it steam. Stir it often to keep the sauce from burning. You can also use a microwave. Heat it in short bursts, stirring in between. This helps keep the flavor strong. You can freeze the Garlic Butter Shrimp Pasta for later. Freeze it in a safe container, leaving space for expansion. It can last up to two months in the freezer. When ready to eat, thaw it in the fridge overnight. Reheat on the stove or in the microwave, adding a bit of water if needed. Enjoy your meal just like the first time! Garlic Butter Shrimp Pasta lasts about 3 to 4 days in the fridge. Store it in a tight container to keep it fresh. The shrimp and pasta can dry out if left open. Yes, you can make Garlic Butter Shrimp Pasta ahead of time. Cook the pasta and shrimp, then cool them. Store them in the fridge. When ready to serve, reheat gently. Add a splash of pasta water to revive the sauce. Great side dishes for this pasta include garlic bread, a fresh salad, or roasted vegetables. These options add color and texture to your meal. A light white wine also pairs well. Yes, you can make Garlic Butter Shrimp Pasta gluten-free. Use gluten-free pasta made from rice or corn. Many brands offer great alternatives that taste good and hold their shape. To spice up your dish, add more red pepper flakes. You can also use fresh diced chili peppers or a dash of hot sauce. Start with small amounts to find your perfect heat level. This blog post gave you the key ingredients and steps to make Garlic Butter Shrimp Pasta. I included tips on cooking shrimp and perfecting pasta texture. You can mix in different proteins or veggies for your own twist. Remember to store any leftovers properly for later. Cooking should be fun, and this dish is simple yet delicious. I hope you try it soon and enjoy every bite!](https://cheftaling.com/wp-content/uploads/2025/06/0a8d9f6e-3270-4bd6-a20c-69ba2c3a4380-300x300.webp)


![To make a great Mediterranean chickpea salad, you need some key ingredients. First, grab a can of chickpeas. These little beans pack a protein punch. Next, gather fresh vegetables like cherry tomatoes, cucumber, bell peppers, and red onion. Each adds color and crunch to the dish. Don’t forget Kalamata olives and feta cheese. These ingredients give the salad a true Mediterranean flavor. Now, let’s talk about the pantry staples. You will need olive oil and lemon juice for dressing. These two ingredients add richness and tang. For seasoning, grab dried oregano, salt, and pepper. They bring out the best flavors in your salad. If you want to elevate your salad, consider some optional garnishes. Fresh parsley adds a pop of color and freshness. You can also add extra feta or olives for a tasty topping. These small additions can make your salad even more enjoyable. For the complete list of ingredients, check the Full Recipe. Start by draining and rinsing the chickpeas. This step removes the canning liquid and excess salt. Rinse them under cold water in a strainer. Let the chickpeas sit to drain while you prepare the veggies. Next, chop your vegetables. Cut the cherry tomatoes in half. Dice the cucumber into small pieces. Finely chop the red onion. Dice the bell peppers into bite-sized chunks. Each vegetable adds its own taste and texture. In a large bowl, combine the chickpeas and chopped vegetables. Add the Kalamata olives for a salty kick and the crumbled feta cheese for creaminess. This mix is colorful and full of flavor. In a small bowl, whisk together the dressing. Use the olive oil, lemon juice, dried oregano, and a pinch of salt and pepper. Whisk until everything is well combined. This dressing brightens the salad and ties all the flavors together. Pour the dressing over the salad mixture. Gently toss everything until each piece is coated. Be careful with the feta; you want it to stay chunky for texture. Allow the salad to sit for about 10-15 minutes. This wait lets the flavors meld and become even more delicious. Before serving, garnish with freshly chopped parsley. This adds a pop of color and freshness. Enjoy your Mediterranean Chickpea Salad! For the full recipe, refer to the earlier section. To keep your Mediterranean chickpea salad fresh, start with ripe vegetables. Look for tomatoes that are bright and firm. Choose cucumbers that are crisp and shiny. Bell peppers should be colorful and without blemishes. Fresh veggies add a lot of flavor. Letting your salad sit before serving helps the flavors blend. After mixing, let it rest for about 10-15 minutes. This waiting time allows the dressing to soak into the veggies. You will notice a big difference in taste. You can enhance the flavor of your salad by experimenting with herbs. Try adding fresh basil or mint for a new twist. These herbs can change the taste profile and add freshness. Adjust the seasoning to your liking as well. Sometimes a pinch more salt or a dash of pepper is all you need. Taste as you go to get it just right. For serving, think about how you can make your salad stand out. Use vibrant bowls that match the bright colors of the salad. This makes the dish look more inviting. You can also layer the ingredients for a beautiful display. Adding a sprinkle of fresh parsley on top gives it a nice finishing touch. Remember, we eat with our eyes first! For the full recipe, check out the Mediterranean Chickpea Salad recipe provided! {{image_2}} You can add grilled chicken or shrimp to this salad for a protein boost. Both options add great flavor and keep you full longer. If you want something plant-based, quinoa is a good choice. It gives the salad a nice texture and adds protein too. For a vegan twist, try substituting feta with vegan cheese. This keeps the salad creamy and delicious without dairy. You can also add more plant-based ingredients like avocados. They add healthy fats and a rich taste to the mix. To make your salad even more Mediterranean, incorporate staples like sun-dried tomatoes or artichokes. These add a burst of flavor and a touch of authenticity. You can also try different olives, like green olives or Castelvetrano, for various taste profiles. Each type of olive brings its unique character to the dish. For the full recipe, check out the Mediterranean Chickpea Salad. To keep your Mediterranean Chickpea Salad fresh, place it in a sealed container. Glass or plastic containers with lids work best. Avoid leaving it out at room temperature for too long. Store any leftover salad in the fridge right away. This keeps the flavors bright and the veggies crisp. In the fridge, this salad lasts about three to four days. If you notice any changes in smell or color, it might be time to toss it. Signs that the salad has gone bad include a slimy texture or an off odor. Always trust your senses when deciding if food is still good. You can freeze Mediterranean Chickpea Salad, but some ingredients may change texture. To freeze, pack the salad in an airtight container. Leave some space for expansion. When you're ready to eat, thaw it in the fridge overnight. After thawing, freshen it up with a splash of lemon juice. Enjoy the full recipe [Full Recipe]. Chickpeas are packed with nutrients. They are a great source of protein. One cup of cooked chickpeas has about 15 grams of protein. They also provide fiber, which is good for digestion. Fiber helps keep you full longer. Chickpeas are low in fat, making them a healthy choice. They contain vitamins like B6 and minerals like iron and magnesium. Eating chickpeas can help lower cholesterol. They may also aid in weight management. Overall, chickpeas support heart health and keep your energy steady. Yes, you can make this salad in advance. It actually tastes better after sitting for a bit. To prep ahead, chop your veggies and store them in the fridge. You can mix the dressing separately. Just combine everything when you are ready to eat. This salad keeps well for 2-3 days in the fridge. Make sure to use an airtight container to keep it fresh. If you make it early, let it sit for 10-15 minutes after mixing. This allows the flavors to blend nicely. Mediterranean Chickpea Salad pairs well with many dishes. You can serve it with grilled chicken or fish for a filling meal. It also goes great with pita bread and hummus. Try it alongside a warm bowl of soup for a cozy dinner. For a light lunch, serve it with a simple wrap. You can even enjoy it as part of a larger mezze platter. This salad's fresh flavors complement many foods, making it a versatile dish. Check out the Full Recipe for more ideas! Mediterranean Chickpea Salad is a fresh and healthy dish. It includes chickpeas, fresh veggies, olives, and feta. You mix everything with a simple dressing. Let it chill for the best taste. You can also swap ingredients to make it your own. Try adding protein or different herbs. Remember to store leftovers properly to keep them fresh. Enjoy this salad as a tasty meal or side. It’s easy to make, full of flavor, and great for any occasion.](https://cheftaling.com/wp-content/uploads/2025/06/acd35588-d654-450e-bfe4-614e90b68d25-300x300.webp)
![To make this creamy spinach artichoke dip, gather these ingredients: - 1 cup fresh spinach, chopped - 1 cup canned artichoke hearts, drained and chopped - 1 cup cream cheese, softened - ½ cup sour cream - ½ cup mayonnaise - 1 cup shredded mozzarella cheese - ½ cup grated Parmesan cheese - 2 cloves garlic, minced - 1 teaspoon lemon juice - Salt and pepper to taste - Red pepper flakes (optional, for heat) You can swap some ingredients if needed. Here are a few ideas: - Use Greek yogurt instead of sour cream for less fat. - Substitute ricotta cheese for cream cheese for a lighter dip. - If you want a vegan option, try using cashew cream instead of cheese. - Replace mozzarella with a dairy-free cheese for a vegan dip. Using fresh ingredients can make a big difference in flavor. Fresh spinach adds a vibrant taste and texture. Canned artichokes save time and still taste great. However, the quality of canned items matters. Choose high-quality canned artichokes for the best results. Fresh garlic gives a stronger flavor than garlic powder, which can enhance the dip. Overall, fresh ingredients can elevate the dish, but canned ingredients offer convenience without sacrificing too much taste. For the full recipe, check the earlier section! Start by gathering all your ingredients. You need fresh spinach, artichoke hearts, cream cheese, sour cream, and mayonnaise. Also, have shredded mozzarella, grated Parmesan, garlic, lemon juice, salt, and pepper ready. If you want heat, grab some red pepper flakes. 1. Preheat the oven to 350°F (175°C). This step is key for even cooking. 2. In a medium bowl, mix the cream cheese, sour cream, and mayonnaise. Use a spatula for a smooth blend. 3. Add in the spinach and chopped artichoke hearts next. Then toss in the minced garlic and lemon juice. 4. Now, add half of the mozzarella and Parmesan cheese. This will make the dip cheesy and rich. 5. Season the mixture with salt and pepper. If you like, sprinkle in red pepper flakes for some spice. 6. Transfer the mix to a baking dish. Spread it out evenly. This helps it cook evenly too. 7. Top it off with the rest of the mozzarella and Parmesan cheese. This will create a lovely crust when baked. 8. Bake in the oven for 25-30 minutes. You want the cheese to be bubbly and golden brown. - Use room temperature cheese. Softened cream cheese mixes better and melts well. - Don’t skip the preheating. It ensures the dip cooks evenly and becomes bubbly. - Keep an eye on it. Ovens can vary, so check a few minutes before the time is up. - Let it cool slightly before serving. This helps the cheese set nicely for dipping. Follow these steps, and you’ll enjoy a creamy, cheesy spinach artichoke dip that everyone loves. For the full recipe details, check the [Full Recipe]. You can prepare this dip ahead of time. Mix all your ingredients and place them in a dish. Cover it well and store it in the fridge for up to two days. When you’re ready to bake, simply remove it from the fridge. Preheat your oven and bake as directed. If it’s cold, it may need a few extra minutes in the oven. This dip shines as an appetizer. Serve it warm with tortilla chips or sliced baguette. Fresh veggies, like carrots or celery, add a nice crunch. You can also use pita chips for a twist. For a fun touch, sprinkle fresh parsley or extra red pepper flakes on top. This makes it more appealing and colorful. Avoid using cold cream cheese; it won’t mix well. Always soften it first. Don't skip the salt and pepper; they enhance the flavors greatly. Watch the baking time, too. If you leave it too long, the dip may dry out. Lastly, be careful with the garlic. If you add too much, it can overpower the other flavors. For the full recipe, make sure to check the details above. {{image_2}} You can amp up the flavor of your creamy spinach artichoke dip with fun add-ins. Try adding fresh herbs like basil or dill for a bright touch. You can also mix in spices like paprika or cayenne pepper for some heat. A dash of Worcestershire sauce can add a savory depth. Get creative and find what you love! If you're looking to make this dip lighter, there are easy swaps. Use low-fat cream cheese and sour cream instead of their full-fat versions. Greek yogurt is a great substitute for sour cream, adding protein and tang. You can also use less cheese or replace it with nutritional yeast for a cheesy flavor without the fat. Dietary needs can change your dip game. For a vegan version, use cashew cream or a store-bought vegan cream cheese. Replace the mozzarella and Parmesan with vegan cheese. If you're gluten-free, serve your dip with gluten-free crackers or veggies. It's all about making this dish work for you and your guests. For the full recipe, check out the detailed instructions above! To keep your creamy spinach artichoke dip fresh, store it in an airtight container. Make sure the container is clean and dry. If you have any extra dip, cover it tightly to prevent it from drying out. It’s a good idea to let the dip cool to room temperature before sealing it. Your dip will last about 3 to 4 days in the fridge. Check for any signs of spoilage, like an off smell or mold. If it looks or smells funny, throw it out. To keep it tasty, always reheat it gently before serving again. You can freeze this dip for longer storage. Use a freezer-safe container to avoid freezer burn. The dip will stay good for up to 2 months in the freezer. When you’re ready to eat it, thaw it in the fridge overnight. To reheat, warm it in the oven or a microwave until it’s hot and creamy again. Enjoy it just like the first time you made it! For the full recipe, check out the easy steps above. Yes, you can use frozen spinach. Just make sure to thaw it first. Squeeze out any extra water. This helps keep your dip creamy and thick. Frozen spinach is a great time-saver. It also has nutrients similar to fresh spinach. There are many tasty options to serve with your dip! I love using tortilla chips. They add a nice crunch. Sliced baguette works well too. Fresh veggies like carrots and celery are healthy choices. You can even use pita chips for a fun twist. To add some heat, sprinkle in red pepper flakes. Start with a small amount and taste as you go. You can also add diced jalapeños for a fresh kick. If you want more flavor, try using spicy cheese. Make it your own with these simple tweaks! For more details, check out the Full Recipe for creamy spinach artichoke dip. We covered a lot about making a creamy spinach artichoke dip. You learned about key ingredients, cooking steps, and handy tips. Fresh vs. canned ingredients really matter for flavor. I shared flavor add-ins and gave healthier choices. You have options for storing and reheating too. Keep these ideas in mind next time you cook. Choose your ingredients wisely, avoid common mistakes, and have fun! Enjoy sharing your dip with friends and family.](https://cheftaling.com/wp-content/uploads/2025/06/9beeccb5-60e0-4f5e-b2a6-66cd35615605-300x300.webp)
![- 1 can (15 oz) chickpeas, drained and rinsed - 1 tablespoon olive oil - 1 teaspoon smoked paprika - 1 teaspoon ground cumin - 1/2 teaspoon cayenne pepper - Additional toppings Spicy chickpea tacos are simple and quick to make. You start with chickpeas. They are packed with protein and fiber. Rinse and drain the chickpeas. This step helps remove excess sodium. Then, mix them with olive oil and spices. The smoked paprika gives a rich flavor. Cumin adds warmth, while cayenne brings heat. You can adjust cayenne to match your taste. If you want a milder taco, use less. For a stronger kick, add more. - Corn vs. flour tortillas - Gluten-free alternatives Next, let's talk tortillas. You can choose corn or flour. Corn tortillas have a nice taste and are gluten-free. Flour tortillas are soft and chewy. If you need gluten-free, stick to corn. Both types work well with spicy chickpeas. Warm them before serving. This keeps them soft and tasty. - Avocado - Red cabbage - Cilantro - Lime wedges Fresh garnishes are the best part. Slice ripe avocado for creaminess. Shredded red cabbage adds crunch and color. Chopped cilantro brings freshness. Lastly, lime wedges give a zesty finish. Squeeze lime juice over the tacos for a bright flavor. These garnishes make your dish pop. For the full recipe, check out the [Full Recipe]. To start, you need to coat the chickpeas with spices. In a medium bowl, mix the drained chickpeas with olive oil, smoked paprika, ground cumin, cayenne pepper, garlic powder, salt, and pepper. Make sure all the chickpeas are evenly coated. This will give them great flavor. Next, you will cook the chickpeas. Heat a skillet over medium heat. Add the seasoned chickpeas and cook them for about 5-7 minutes. Stir them often. You want them heated through and slightly crispy. This step adds a nice texture to your tacos. Now, it’s time to warm the tortillas. You can use a skillet or microwave. If using a skillet, place it over medium heat and warm each tortilla for about 30 seconds on each side. If using the microwave, place a few tortillas on a plate and cover with a damp paper towel. Heat for 20-30 seconds. To keep your tortillas pliable, place them in a clean kitchen towel after warming. This will trap steam and keep them soft. Assembling the tacos is the fun part! Start with a warm tortilla. Add a spoonful of the spicy chickpeas in the center. Next, layer on slices of avocado and some shredded red cabbage. For a burst of flavor, top with chopped cilantro and a squeeze of fresh lime juice. If you want, add a dollop of sour cream or yogurt for creaminess. For presentation, serve the tacos on a colorful platter. Scatter lime wedges and extra cilantro around for a vibrant touch. This not only looks good but makes your meal even more inviting. For the detailed recipe, check the Full Recipe. How can you change the spice level in your tacos? Start with less cayenne pepper. You can always add more later. If you find the dish too hot, a creamy element helps. Try adding sour cream or yogurt. They cool down the heat while adding a nice taste. Want crispy chickpeas? Make sure they are dry before cooking. Drain and rinse them well. I like to use a hot skillet for the best texture. Cook them for about 5-7 minutes, stirring often. This gives them a nice crunch. What should you serve with your tacos? I love to pair them with a fresh salad. A side of rice or beans works well too. For added flavor, serve with lime wedges. They brighten up the dish. You can also add more cilantro for extra taste. {{image_2}} You can switch up the flavors in your spicy chickpea tacos easily. Try adding different spices. For a smoky taste, use chipotle powder instead of cayenne. You can also mix in some curry powder for an Indian twist. If you want more heat, add a pinch of crushed red pepper. Using other beans or proteins is another fun option. Black beans, lentils, or even quinoa work well. They add new textures and flavors. If you prefer meat, grilled chicken or shrimp can be delicious too. These tacos are great for many diets. They are naturally vegan and vegetarian. Chickpeas provide protein and fiber, making them filling and nutritious. You can also use a dairy-free yogurt as a topping if you want to keep it vegan. For gluten-free options, choose corn tortillas. They are safe for those with gluten sensitivities. Always check the labels to ensure they meet your needs. When it comes to herbs, fresh is often best. Fresh cilantro brightens up the dish. You can also use fresh parsley or mint for a twist. Dried herbs can work too, but fresh adds more flavor. Experimenting with sauces can take your tacos to the next level. Try a zesty avocado sauce or a spicy salsa. A drizzle of tahini can add a creamy touch. The key is to find what you love! For the full recipe, check out the details provided. To keep your spicy chickpea tacos fresh, store leftovers properly. Place the chickpeas in a sealed container. Store any extra tortillas and toppings separately. This way, your tacos will taste great later. Use glass or plastic containers with tight lids. These containers prevent moisture and keep everything fresh. When reheating, ensure your chickpeas stay crispy. You can use an oven or skillet for the best results. Preheat your oven to 350°F (175°C) and spread the chickpeas on a baking sheet. Heat for about 10 minutes. If using a skillet, warm over medium heat, stirring gently. This method helps maintain their crunch. For a quick taco kit, prepare your ingredients in advance. Drain and rinse the chickpeas and store them in the fridge. You can also mix your spices in a small bowl. Chop the avocado and cabbage ahead of time, too. Keep everything in separate containers. When you’re ready to eat, just assemble your tacos quickly. This makes it easy to enjoy a healthy meal any day. For the full recipe, check the recipe section above. Yes, you can make these tacos ahead of time. If you want to store them, keep taco parts separate. Store the chickpeas in a sealed container in the fridge. Wrap the tortillas in foil or plastic wrap. This keeps them fresh. You can assemble the tacos when you're ready to eat. This way, they stay crisp. You can use other legumes if you don't have chickpeas. Black beans are a great choice. They have a nice texture and flavor. You might also try kidney beans or pinto beans. These will add protein and fiber to your meal. To kick up the heat, add more cayenne pepper. You can also try hot sauce. Sriracha or a chipotle sauce works well. For more spice, toss in some diced jalapeños. Each of these will add a nice kick to your tacos. Enjoy the heat! For the full recipe, check out the details above. This post covered how to make tasty spicy chickpea tacos. We discussed key ingredients and how to cook the chickpeas. I shared tips for warming tortillas and assembling your tacos for a great presentation. We also explored variations and dietary modifications to fit your needs. Whether you prefer a mild or spicy kick, you can easily customize the flavors. Enjoy your tasty creation, and don’t be afraid to experiment!](https://cheftaling.com/wp-content/uploads/2025/06/3535c56f-eb29-4a31-8952-17bc9f512a75-300x300.webp)
. This blog post covered a delicious Lemon Garlic Shrimp Pasta recipe. We looked at its main ingredients, cooking steps, and helpful tips for the best results. I shared ways to adjust flavors and variations to meet your dietary needs. You can store leftovers or freeze the dish for later. Remember, cooking shrimp just right is key to this meal. Now, you can enjoy a tasty and simple pasta dish, perfect for any occasion. Happy cooking!](https://cheftaling.com/wp-content/uploads/2025/06/df2a2bda-5f0e-4d28-aec2-8f7280034908-300x300.webp)
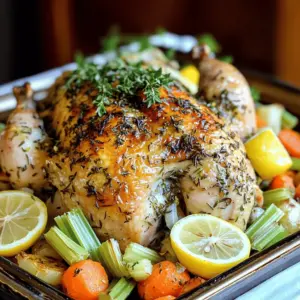
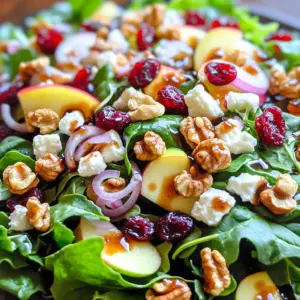
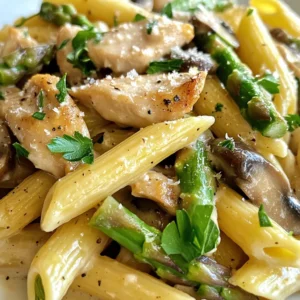
![To make these tasty muffins, you need a few key items. Here is what you will need: - 2 ripe bananas, mashed - 1/3 cup melted coconut oil (or vegetable oil) - 1/2 cup brown sugar - 1 large egg - 1 teaspoon vanilla extract - 1 teaspoon baking soda - Pinch of salt - 1 cup all-purpose flour - 1/2 cup chocolate chips These ingredients blend perfectly to create a moist and sweet treat. The bananas add natural sweetness, while the chocolate chips bring joy to each bite. You can enhance your muffins with a few optional items if you like. Here are some ideas: - 1/4 teaspoon ground cinnamon - A handful of chopped nuts (like walnuts or pecans) Adding cinnamon gives a warm flavor to your muffins. Nuts add a nice crunch and extra nutrition. If you have special dietary needs, don't worry! You can swap some ingredients. Here are some options: - For a vegan option, use flaxseed meal instead of an egg. - For gluten-free muffins, replace all-purpose flour with a gluten-free blend. - If you want to cut sugar, use a sugar substitute like stevia or applesauce. These substitutions keep the spirit of the recipe while fitting your needs. Check out the Full Recipe for all the details! Start by gathering your ingredients. You need ripe bananas, melted coconut oil, brown sugar, an egg, and vanilla. Don’t forget baking soda, salt, flour, chocolate chips, and optional cinnamon. The ripe bananas give the muffins a sweet flavor and moist texture. 1. Preheat your oven to 375°F (190°C). Line a muffin tin with paper liners or grease it lightly. 2. In a large bowl, mash the bananas until smooth. Mix in the melted coconut oil until it blends well. 3. Add the brown sugar, egg, and vanilla extract. Stir until everything is mixed together. 4. Sprinkle the baking soda and salt over the mix. Stir gently to combine. 5. Gradually add in the flour. Mix just until the flour is no longer visible. Do not over-mix! Now, it’s time to bake! 1. Fold in the chocolate chips and optional cinnamon. Do this gently to keep the batter fluffy. 2. Pour the batter evenly into the muffin tin. Fill each cup about 3/4 full. 3. Bake for 18 to 22 minutes. Check for doneness by inserting a toothpick. It should come out clean. After baking, let the muffins rest. 1. Remove the muffins from the oven. Let them cool in the tin for about 5 minutes. 2. Transfer the muffins to a wire rack to cool completely. This helps them stay fluffy. 3. Serve the muffins warm. Dust them with powdered sugar and add a small dish of butter. You can garnish with extra chocolate chips or banana slices for a nice touch. Enjoy your delicious chocolate chip banana muffins! For the full recipe, check out the [Full Recipe]. To get soft and fluffy muffins, use ripe bananas. They add great flavor and moisture. Make sure your mashed bananas are smooth. This helps mix easily with the other ingredients. Don't over-mix your batter. Stir just until the flour disappears. Over-mixing can make muffins tough. Use a light hand when folding in chocolate chips. For even chocolate chip distribution, sprinkle the chips over the batter. Gently fold them in with a spatula. This way, the chips spread out well without sinking to the bottom. You can also dust the chocolate chips with a little flour before adding them. This helps them stay suspended in the batter as it bakes. One mistake is not preheating the oven. Always preheat it to 375°F (190°C) before baking. Another mistake is filling the muffin cups too full. Fill each cup about 3/4 full to avoid overflow. Lastly, check your muffins with a toothpick. If it comes out wet, they need more time. Follow the full recipe for the best results. {{image_2}} You can easily make nut-free chocolate chip banana muffins. Just skip any nuts in your recipe. The muffins will still taste great. Use the same ingredients from the full recipe. They will be soft, moist, and packed with chocolate goodness. This way, those with nut allergies can enjoy them too. Want a vegan option? Use flaxseed meal instead of an egg. Mix one tablespoon of flaxseed with three tablespoons of water. Let it sit for five minutes. Then, add it to your banana mix. Replace the melted coconut oil with applesauce for a lighter touch. These muffins will still be rich and delicious. If you need gluten-free muffins, swap the all-purpose flour for a gluten-free blend. Make sure it contains xanthan gum for the right texture. You can also use almond flour or coconut flour. Each option gives the muffins a unique taste. Keep the rest of the recipe the same, and you will have moist, tasty muffins. To keep your chocolate chip banana muffins fresh, store them in an airtight container. Make sure they are completely cool before sealing them. You can keep them at room temperature for up to three days. If you want them to last longer, consider refrigerating them for about a week. Freezing is a great option for longer storage. Wrap each muffin tightly in plastic wrap or foil. Then, place them in a freezer-safe bag or container. This helps prevent freezer burn. You can freeze them for up to three months. When you are ready to enjoy, just thaw them at room temperature or heat them in the microwave for a quick treat. Chocolate chip banana muffins have a good shelf life. When stored properly, they can last around a week in the fridge. For reheating, use the microwave for about 10-15 seconds. This keeps them soft and warm. You can also use the oven at 350°F (175°C) for about 5-10 minutes to refresh them. Enjoy your muffins warm for the best experience! You can tell if your muffins are done by using a toothpick. Stick it into the center of a muffin. If it comes out clean, your muffins are ready. You should see no wet batter on the toothpick. If it has some batter, bake them a bit longer. Keep an eye on them after 18 minutes. Yes, you can use frozen bananas! Just thaw them first and drain any extra liquid. After that, mash them well before adding to your mix. Frozen bananas work great and add nice moisture to the muffins. They also taste just as good. You can add many tasty things to your muffins! Here are some ideas to try: - Nuts: Walnuts or pecans add crunch. - Dried fruits: Raisins or cranberries add sweetness. - Spices: A pinch of nutmeg or ginger gives a warm flavor. - Coconut: Shredded coconut adds a tropical twist. Feel free to mix and match these add-ins to find your favorite flavor! For the complete recipe, check out the Full Recipe above. In this post, we explored all you need for chocolate chip banana muffins. We covered essential and optional ingredients, plus substitutions for dietary needs. I shared step-by-step instructions, tips for the best results, and fun variations. Remember to store your muffins properly for lasting freshness. Baking can be fun and rewarding. With practice, you will make great muffins every time. Enjoy your baking journey!](https://cheftaling.com/wp-content/uploads/2025/06/e29682bb-eab6-4118-a051-073f5c4cc47e-300x300.webp)
![- 12 oz (340g) mushrooms (cremini or button), sliced - 1 medium onion, finely chopped - 3 cloves garlic, minced - 1 cup vegetable broth - 1 cup non-dairy sour cream (coconut or cashew-based) - 2 tablespoons soy sauce or tamari - 1 teaspoon Dijon mustard - 1 tablespoon nutritional yeast - 2 tablespoons olive oil - 1 teaspoon dried thyme - 1 teaspoon smoked paprika - Salt and pepper to taste - 8 oz (225g) egg-free pasta (or your favorite vegan pasta) - Best types of pasta for stroganoff include fettuccine, penne, or wide noodles. When I make Vegan Mushroom Stroganoff, I focus on fresh ingredients. The mushrooms give a rich, earthy flavor. I love using cremini or button mushrooms. They create a meaty texture without any meat. A finely chopped onion and minced garlic add depth to the dish. They sauté beautifully in olive oil. The vegetable broth adds moisture and flavor, while the non-dairy sour cream makes it creamy. Soy sauce or tamari brings umami taste. Dijon mustard adds a hint of tang. Nutritional yeast gives a cheesy note, enhancing the overall flavor. Don't forget the thyme and smoked paprika; they bring warmth and aroma. For the pasta, I recommend egg-free options. Fettuccine and penne hold the sauce well. The creamy sauce clings nicely, making every bite a delight. Check out the Full Recipe for more tips on cooking this dish. Cooking the pasta: Timing and tips Start by boiling a large pot of water. Add a pinch of salt to season. Once the water boils, add 8 oz of egg-free pasta. Cook it according to the package instructions, usually around 7-10 minutes. You want it al dente, which means it should still have a slight bite. After cooking, drain the pasta and set it aside. Sautéing the onion and garlic While the pasta cooks, heat 2 tablespoons of olive oil in a large skillet over medium heat. Add 1 medium finely chopped onion. Cook it for about 5 minutes until it becomes soft and translucent. Then, add 3 minced garlic cloves. Sauté for another minute until you smell the garlic's aroma. Adding and cooking mushrooms Next, raise the heat to medium-high. Add 12 oz of sliced mushrooms to the skillet. I prefer cremini or button mushrooms for this dish. Cook them for 7-10 minutes. You want them to turn brown and tender. Stir occasionally to keep them from sticking. Making the creamy sauce Reduce the heat back to medium. Pour in 1 cup of vegetable broth and 2 tablespoons of soy sauce. Add 1 teaspoon of Dijon mustard, 1 tablespoon of nutritional yeast, 1 teaspoon of dried thyme, and 1 teaspoon of smoked paprika. Stir it all together. Let the mix simmer for about 5 minutes. This helps the flavors to blend nicely. Mixing the sauce with pasta Here comes the fun part! Lower the heat again and gently mix in 1 cup of non-dairy sour cream. Heat it through but don't let it boil. Adjust the taste with salt and pepper. Then, add the cooked pasta into the creamy sauce. Toss everything together gently to coat the pasta well. Final touches and presentation tips Once combined, remove the skillet from the heat. Serve your Vegan Mushroom Stroganoff hot. For a nice touch, sprinkle freshly chopped parsley on top. It adds a beautiful color and fresh flavor. Enjoy your creamy, flavorful dish! For the complete recipe, check the [Full Recipe]. - Choosing the right mushrooms I love using cremini or button mushrooms. They add great flavor and texture. Their deep umami taste makes the dish rich and satisfying. You can also mix in shiitake for a unique twist. Just make sure to slice them evenly for even cooking. - Ensuring creaminess without dairy To keep it creamy, I use non-dairy sour cream. Coconut or cashew-based options work well. They give a smooth texture that mimics traditional sour cream. You can also add a splash of non-dairy milk for extra creaminess. - Sautéing tips for maximizing flavor Start by heating olive oil over medium heat. Add onions first and let them soften. This step builds a flavorful base. Once the onions are translucent, add garlic. It takes just a minute for garlic to become fragrant. Then, add mushrooms and let them brown. This step enhances their flavor. - Avoiding mushy pasta or overcooked mushrooms Cook the pasta until al dente. This keeps it firm and prevents mushiness. Drain it and set it aside while you make the sauce. For mushrooms, cook them until they are tender but not soggy. You want them to hold their shape in the stroganoff. - Alternatives for non-dairy sour cream If you can’t find non-dairy sour cream, use cashew cream. Soak cashews in water, then blend until smooth. It works as a great substitute. Silken tofu is another option; blend it for a creamy texture. - Other herbs and spices you can use Feel free to switch up the herbs. Fresh thyme or parsley adds brightness. If you want a kick, sprinkle in some chili flakes. This adds a nice depth to the dish without overpowering it. {{image_2}} You can change up this dish by adding more veggies. Spinach or peas work well. Both add color and nutrition. Try adding them right before you stir in the sour cream. You can also swap the pasta. Use gluten-free pasta if needed. Other options like rice or quinoa can work too. Spices can change the whole taste. You can try adding garlic powder or onion powder for extra depth. A dash of chili flakes gives it some heat. Mix in smoked paprika for a smoky touch. Each spice can take this dish to a new level. If you need a gluten-free option, pick gluten-free pasta. This makes the dish safe for gluten-sensitive folks. For more protein, try adding lentils or chickpeas. These options make the meal heartier and more filling. You can find many ways to adjust this recipe to fit your needs. For the full recipe, check out the details above. To keep your Vegan Mushroom Stroganoff fresh, store it in an airtight container. This helps to prevent moisture loss and keeps flavors intact. Glass containers work best, as they do not absorb smells or stains. Plastic containers are also fine, but ensure they are BPA-free. When reheating, use a stovetop to maintain texture. Heat on low and stir often to avoid burning. You can add a splash of vegetable broth or non-dairy milk to keep the sauce creamy. Microwaving is quick but can change the dish’s texture. If you choose this method, heat in short bursts, stirring in between. You can freeze Vegan Mushroom Stroganoff, but it may change texture when thawed. To freeze, let it cool completely, then transfer to a freezer-safe container. Leave some space for expansion. For thawing, place it in the fridge overnight. Reheat slowly on the stovetop, adding liquid to restore creaminess. What makes this stroganoff vegan? This stroganoff is vegan because it uses no animal products. Instead of dairy, I use non-dairy sour cream. I also choose vegetable broth for flavor. These swaps make the dish both creamy and plant-based. Can I use fresh herbs instead of dried? Yes, you can use fresh herbs! Fresh herbs add bright flavor. Use about three times the amount of fresh herbs compared to dried. For example, if the recipe calls for one teaspoon of dried thyme, use three teaspoons of fresh thyme. How do I adjust the recipe for more servings? To adjust for more servings, simply multiply each ingredient by the number of servings you need. This dish is easy to scale. Just keep an eye on cooking times. Larger batches may take a bit longer to cook. Is Vegan Mushroom Stroganoff healthy? Yes, this dish is healthy. It is low in saturated fat and high in fiber. The mushrooms provide nutrients like potassium and vitamin D. Non-dairy sour cream is lower in calories than regular sour cream. How does it compare to traditional stroganoff? Vegan Mushroom Stroganoff is lighter than traditional versions. It has less fat and fewer calories. You still get rich flavors and creamy texture without meat or dairy. Can I make this recipe ahead of time? Absolutely! You can prepare the sauce and store it in the fridge. When you’re ready to eat, heat it and add cooked pasta. This makes for a quick and easy meal. What should I serve with Vegan Mushroom Stroganoff? This dish pairs well with a simple salad or steamed vegetables. You can also serve it with crusty bread for a hearty meal. For a twist, try serving it over rice or quinoa as well. For the full recipe, check out the complete guide to making this delicious dish! Vegan Mushroom Stroganoff is easy to make and packed with tasty ingredients. You learned about the key components, the step-by-step process, and ways to customize this dish. Remember, using the right mushrooms and avoiding overcooked pasta are vital for success. You can mix in veggies, adjust spices, or even cater to dietary needs. With these tips, you can enjoy a creamy, flavorful meal. I hope this recipe inspires your next cooking adventure!](https://cheftaling.com/wp-content/uploads/2025/06/fa16820b-26a9-4d3a-be05-88dcb213776b-300x300.webp)