• Home
  • Recipe Index
    • Desserts
    • Dinner
    • Appetizer
    • Drinks
  • About
  • Contact
  • Privacy Policy
menu icon
go to homepage
  • Home
  • Recipe Index
    • Desserts
    • Dinner
    • Appetizer
    • Drinks
  • About
  • Contact
  • Privacy Policy

search icon
Homepage link
  • Home
  • Recipe Index
    • Desserts
    • Dinner
    • Appetizer
    • Drinks
  • About
  • Contact
  • Privacy Policy

×
Natalie

Natalie

Natalie is a passionate food storyteller and recipe developer at Taling’s Recipes, where she brings her love of seasonal ingredients and approachable cooking to life.

Her culinary path started in farmers’ markets, where she discovered the beauty of cooking with what’s fresh and local. Over time, she honed her skills in home kitchens and community gatherings, creating comforting meals that balance flavor with simplicity. Today, Natalie shares her recipes with a global audience, inspiring home cooks to embrace creativity, confidence, and joy in everyday meals.

  • - 2 boneless, skinless chicken breasts - 1 cup heavy cream - 1 cup chicken broth - 3 cloves garlic, minced - 2 cups fresh spinach, chopped - 1 teaspoon onion powder - 1 teaspoon paprika - 1 tablespoon olive oil - 1/2 cup Parmesan cheese, grated - Salt and pepper to taste - Fresh basil leaves for garnish I love using fresh and simple ingredients for this dish. You start with chicken. I prefer boneless and skinless breasts. They cook evenly and stay juicy. Next, you need heavy cream and chicken broth. These give the dish its creamy base. Don’t forget garlic. It adds a nice flavor. Onion powder and paprika bring in warmth and depth. You will also need fresh spinach. It wilts down beautifully in the sauce. For the finishing touch, grab some grated Parmesan cheese. It melts into the sauce and makes it rich. Finally, you can add salt and pepper to taste. Fresh basil leaves make a lovely garnish. They add color and a hint of freshness. This mix of ingredients creates a tasty, comforting meal. {{ingredient_image_1}} First, take your chicken breasts. Pat them dry with a paper towel. This step helps the seasoning stick. Now, season both sides with salt, pepper, paprika, and onion powder. Make sure to cover every inch. This adds great flavor to the chicken. Next, heat up a large skillet over medium heat. Add the olive oil and let it warm up. Place the seasoned chicken breasts in the skillet. Cook for about 6-7 minutes on each side. You want them golden brown and cooked through. Once done, remove the chicken from the skillet and set it aside. In the same skillet, add the minced garlic. Sauté it for about 1 minute. You want to smell that garlic! Now, pour in the chicken broth and bring it to a gentle simmer. Add the heavy cream and stir well. Let it simmer for about 3-4 minutes. This helps the sauce thicken a bit. Now, add the chopped spinach to the skillet. Stir it in until it wilts, which takes about 2 minutes. Then, sprinkle in the grated Parmesan cheese. Mix until it melts into the sauce. Finally, return the chicken to the skillet. Spoon some sauce over the top. Let it cook for another 2 minutes. This helps all the flavors blend. When you serve, consider garnishing with fresh basil leaves. It makes the dish look great! To cook chicken breasts well, start with even thickness. If they are thick, pound them gently. This helps them cook evenly. Season both sides with salt, pepper, paprika, and onion powder. Heat olive oil in the skillet over medium heat. Cook the chicken for 6-7 minutes on each side. Look for a golden crust and make sure they are cooked through. You can swap heavy cream for half-and-half if you want a lighter sauce. Coconut milk is a great dairy-free option. For a little zing, add lemon juice or zest. If you like a different flavor, try using feta cheese instead of Parmesan. Each choice brings a fresh twist to the recipe. When you sauté garlic, keep the heat medium-low. This prevents burning and gives a rich flavor. Cook minced garlic for just one minute until fragrant. Then add the spinach. Stir it in until it wilts, which should take about two minutes. This keeps the vibrant color and nutrients of the spinach intact. Pro Tips Perfectly Cooked Chicken: Use a meat thermometer to ensure the chicken reaches an internal temperature of 165°F (75°C) for safe consumption. Fresh Spinach: Always use fresh spinach for the best flavor and texture. If using frozen spinach, make sure to thaw and drain it well. Customize the Creaminess: Adjust the amount of heavy cream and Parmesan cheese according to your desired creaminess level for the sauce. Garnish for Presentation: Enhance the dish’s look and flavor by topping with freshly chopped basil and an extra sprinkle of Parmesan before serving. {{image_2}} You can easily change this dish by adding other veggies. Try bell peppers for sweetness or mushrooms for a rich flavor. You can also add zucchini or cherry tomatoes for a fresh touch. Just sauté them with garlic before adding the cream. This gives you a colorful and tasty meal. If you want to swap the chicken, consider shrimp or tofu. Shrimp cooks fast and adds a light flavor. Tofu gives a nice texture and soaks up the sauce well. Just adjust the cooking time based on the protein you choose. This keeps the dish exciting and caters to different diets. To make this dish dairy-free, use coconut milk instead of heavy cream. It adds a hint of sweetness. Nutritional yeast can replace Parmesan cheese for a cheesy taste. You can also use a dairy-free cream alternative. This way, everyone can enjoy this creamy spinach chicken skillet! To keep your creamy spinach chicken skillet fresh, let it cool first. Then, place it in an airtight container. This helps lock in flavors and moisture. Store it in the fridge for up to three days. If you want to enjoy it later, freezing works too. To reheat, you can use the stove or microwave. If using the stove, warm it in a pan over low heat. Stir often to prevent sticking. For the microwave, place in a bowl and cover it. Heat in short bursts, stirring in between. This keeps the meal creamy and delicious. You can freeze the creamy spinach chicken skillet. Portion it into freezer-safe containers. It can last up to three months in the freezer. When ready to eat, thaw it in the fridge overnight. Reheat as mentioned before for the best taste. Yes, you can use frozen spinach. Just thaw and drain it first. Frozen spinach is a great option. It saves time and still tastes good. Add it to the sauce after you sauté the garlic. You can serve this dish with many sides. Here are some great ideas: - Rice: White or brown rice absorbs the creamy sauce well. - Pasta: Any type of pasta pairs nicely with the chicken. - Bread: Crusty bread is perfect for soaking up the sauce. - Salad: A fresh green salad adds a nice crunch. To add spice, try these tips: - Use cayenne pepper: Add a pinch when seasoning the chicken. - Red pepper flakes: Stir some into the sauce for heat. - Hot sauce: Drizzle a bit on top before serving. These options let you control the spice level easily. In this post, I shared how to make a delicious Creamy Spinach Chicken Skillet. We covered the key ingredients, like chicken, cream, and fresh veggies. I guided you through each step from preparing the chicken to serving the dish. I also provided tips for cooking, possible variations, and best ways to store leftovers. Remember, cooking is a fun journey. Don’t hesitate to try new ingredients or flavors. Enjoy every bite!
    Creamy Spinach Chicken Skillet Savory and Simple Meal
  • To make classic buttermilk fried chicken, gather these main ingredients: - 4 chicken thighs, bone-in, skin-on - 4 chicken drumsticks, bone-in, skin-on - 2 cups buttermilk - 2 cups all-purpose flour - 1 tablespoon garlic powder - 1 tablespoon onion powder - 1 teaspoon paprika - 1 teaspoon cayenne pepper (adjust for spice level) - Salt and pepper to taste - Vegetable oil for frying These ingredients create a rich and flavorful dish. The buttermilk helps tenderize the chicken. It also adds a tangy taste. The spices give the chicken its distinctive flavor. For the homemade gravy, you will need: - 2 tablespoons butter - 2 tablespoons all-purpose flour - 1 cup chicken broth - Salt and pepper to taste This gravy adds richness to the fried chicken. The butter and flour create a roux. The chicken broth brings in a savory depth. To enhance your meal, consider these garnishes and sides: - Fresh parsley, chopped (for garnish) - Mashed potatoes - Side salad Fresh parsley adds color and a hint of freshness. Mashed potatoes make a classic pairing. A side salad can balance the meal with crispiness. Enjoy your buttermilk fried chicken with these tasty options! To start, gather your chicken thighs and drumsticks. Place them in a large bowl. Pour in 2 cups of buttermilk. Make sure each piece is well coated. Cover the bowl and refrigerate it. Let the chicken marinate for at least 4 hours. For the best flavor, overnight is ideal. This step makes the chicken tender and juicy. In another bowl, mix your dry ingredients. Combine 2 cups of all-purpose flour, 1 tablespoon of garlic powder, 1 tablespoon of onion powder, 1 teaspoon of paprika, and 1 teaspoon of cayenne pepper. Add salt and pepper to taste. Stir well to blend everything. This mixture gives the chicken its amazing flavor and crispy texture. After marinating, take the chicken from the fridge. Let the excess buttermilk drip off. Dredge each piece in the flour mixture. Press lightly to ensure a good coating. Place the coated chicken on a wire rack. Let it rest for about 15 minutes. This step helps the coating stick better during frying. In a large skillet or Dutch oven, heat about 1 inch of vegetable oil. Use medium-high heat. The oil should reach about 350°F (175°C). Be careful not to let it smoke. Gently place the breaded chicken in the hot oil. Do not overcrowd the pan. Fry in batches for about 12-15 minutes per side. The chicken should turn golden brown and reach an internal temperature of 165°F (74°C). Transfer the fried chicken to a wire rack to drain any excess oil. In a separate saucepan, melt 2 tablespoons of butter over medium heat. Once melted, stir in 2 tablespoons of flour. Cook this mixture for about 1 minute until it turns light brown. Gradually whisk in 1 cup of chicken broth. Stir constantly until the gravy thickens, which takes about 3-5 minutes. Season with salt and pepper to taste. To serve, plate the fried chicken on a rustic dish. Drizzle the homemade gravy generously over the chicken. For a nice touch, sprinkle fresh chopped parsley on top. Pair it with mashed potatoes or a side salad for a complete meal. This dish looks as good as it tastes and will impress anyone at your table. To get that perfect crispy skin, use a few tricks. First, let the chicken marinate in buttermilk overnight. This step makes the meat juicy and tender. After coating the chicken in the flour mix, let it rest on a wire rack. This helps the coating stick better. When frying, make sure the oil is hot, around 350°F. Fry in batches, giving each piece space to cook evenly. Flip the chicken only once to avoid losing the crispy coating. Choosing the right oil is key. I recommend using vegetable oil. It has a high smoke point, which means it can handle the heat without burning. Other good options include canola or peanut oil. These oils let the chicken cook well and stay crispy. Avoid using olive oil, as it has a lower smoke point. You can save time with a few simple tricks. Marinate the chicken the night before. This allows flavors to soak in and cuts down on prep time. While the chicken marinates, mix your flour and spices. When you take the chicken out of the buttermilk, coat it quickly. If you're short on time, use a store-bought spice mix. This way, you can get that great flavor without all the extra steps. {{image_2}} Want more heat? Add cayenne pepper to your marinade. You can use 1 to 2 teaspoons, based on your spice love. You can also mix in hot sauce for a zesty kick. This will give your chicken a nice, spicy flavor. After frying, serve with a cooling dip, like ranch or yogurt. Baking is a healthier option. Preheat your oven to 425°F (220°C). After coating the chicken, place it on a baking sheet lined with parchment paper. Mist the chicken lightly with oil for crispiness. Bake for 35 to 45 minutes, turning halfway. Check for an internal temperature of 165°F (74°C) to ensure it’s done. For a gluten-free version, swap all-purpose flour for gluten-free flour. Almond flour or a gluten-free baking mix works well. Ensure your buttermilk is gluten-free, too. This way, everyone can enjoy fried chicken without worry. The taste and texture will still be delightful. Store leftover fried chicken in an airtight container. Keep it in the fridge. It lasts for about 3 to 4 days. Make sure the chicken is cool before sealing. This keeps it crispy and tasty. Lay paper towels at the bottom of the container to absorb moisture. To reheat fried chicken, use the oven for best results. Preheat your oven to 375°F (190°C). Place the chicken on a wire rack above a baking sheet. This helps air circulate, keeping it crispy. Heat for about 15-20 minutes, or until hot. You can also use an air fryer. Set it to 350°F (175°C) for about 8-10 minutes. You can freeze fried chicken for later use. Let it cool completely, then wrap each piece in plastic wrap. Place the wrapped chicken in a freezer bag. It can last for up to 3 months in the freezer. For the gravy, cool it down, then pour it into an airtight container. Freeze it for up to 2 months. Remember to label everything with dates! I recommend marinating the chicken for at least 4 hours. For best taste and texture, marinate it overnight. This helps the chicken soak up the buttermilk's tangy flavor. It also makes the meat juicy and tender. Yes, you can use chicken breasts. They will cook faster than thighs and drumsticks. Just remember to adjust your cooking time. Ensure the internal temperature reaches 165°F for safety. If you don't have buttermilk, you can easily make your own. Mix 1 cup of milk with 1 tablespoon of vinegar or lemon juice. Let it sit for about 5 minutes. This gives you a similar tangy flavor and acidity. To check if the chicken is done, use a meat thermometer. The internal temperature should be at least 165°F. You can also cut into a piece. The juices should run clear, not pink. Yes, you can prepare the gravy ahead of time. Just store it in the fridge after cooking. When ready to serve, warm it on the stove. If it thickens too much, add a splash of chicken broth to loosen it up. Fried chicken is a fun dish that anyone can make at home. We covered key ingredients, from chicken to gravy and tasty sides. I shared step-by-step instructions to help you fry the best chicken ever. You learned tips for crunchiness and time-saving tricks. Plus, I offered variations for every taste and how to store leftovers right. With these methods, you can enjoy delicious meals anytime. Enjoy your cooking journey!
    Classic Buttermilk Fried Chicken with Savory Gravy
  • - 1 lb ground turkey - 2 tablespoons hot honey - 1 tablespoon olive oil - 1 red bell pepper, diced - 1 cup broccoli florets - 3 green onions, chopped - Sesame seeds for garnish - 2 cloves garlic, minced - 1 teaspoon grated ginger - 1 tablespoon soy sauce (or tamari for gluten-free) - 1 cup cooked brown rice (or quinoa) - Salt and pepper to taste This recipe starts with some key ingredients that make it shine. Ground turkey serves as the base protein, offering a lean option that cooks up quickly. Hot honey adds a sweet and spicy kick that elevates the dish. Olive oil is essential for sautéing, giving the turkey a nice, rich flavor. Next, we add colorful veggies. Diced red bell pepper brings sweetness, while broccoli florets add crunch and nutrition. Chopped green onions provide a fresh finish, and sesame seeds bring a nutty touch that enhances the overall experience. Don't forget the seasonings! Garlic and ginger create a fragrant base that wakes up your senses. Soy sauce adds umami, tying everything together. Finally, cooked brown rice or quinoa gives you a hearty base, while salt and pepper balance the flavors perfectly. This Hot Honey Ground Turkey Bowl combines these ingredients for a meal that is both easy and packed with flavor. Enjoy creating your bowl! {{ingredient_image_1}} First, heat the olive oil in a large skillet over medium heat. Add the minced garlic and grated ginger. Sauté these for about one minute until they smell great. Next, add the ground turkey to the skillet. Use a spatula to break it up. Cook for five to seven minutes. You want the turkey to brown and cook through. Now, stir in the hot honey and soy sauce. Mix well to coat the turkey evenly. This is where the magic happens. The hot honey adds sweetness and spice. Season with salt and pepper to your taste. Cook this for an additional two minutes. Let the flavors blend together nicely. In a separate pot, steam the broccoli florets for about four to five minutes. You want them to be tender but still bright green. In the last minute of cooking, add the diced red bell pepper to the turkey mixture. Cook until the bell pepper is slightly soft. This adds color and crunch to your bowl. Now, you’re ready to build your delicious Hot Honey Ground Turkey Bowl! You can adjust the hot honey amount to fit your taste. If you want more heat, add an extra tablespoon. If you prefer it milder, use less. Taste as you go to find the right balance. This lets you control the spice level for everyone at the table. For meal prep, store the turkey mixture in an airtight container. Keep the rice or quinoa separate to avoid sogginess. You can store everything in the fridge for up to four days. To reheat, use the microwave or a skillet. Add a splash of water to keep it moist. This way, your meal stays fresh and tasty. Seasoning is key to a great dish. Always taste your food as you cook. Adjust salt and pepper to enhance flavors. A bit of soy sauce adds depth, but don’t overdo it. The right balance makes all the difference. This ensures each bite is full of flavor and satisfaction. Pro Tips Use Fresh Ingredients: Fresh vegetables and quality ground turkey will enhance the flavor and nutritional value of your bowl. Adjust the Heat: If you prefer a milder dish, reduce the amount of hot honey or add a splash of lime juice for balance. Meal Prep Friendly: This recipe is great for meal prep! Cook a larger batch and store in the fridge for quick lunches throughout the week. Customize Your Bowl: Feel free to add other vegetables or toppings like avocado, corn, or a drizzle of sriracha for extra flavor! {{image_2}} You can swap ground turkey for chicken or tofu. If you choose chicken, use the same amount. Ground chicken cooks fast, just like turkey. For tofu, use extra-firm tofu. Crumble it up and cook it until golden. This adds a nice texture and flavor. Both options keep the bowl tasty and healthy. Feel free to add other veggies. Seasonal vegetables make the bowl fresh and colorful. Try adding spinach, zucchini, or carrots. These veggies cook quickly. They add crunch and nutrition. You can also use frozen vegetables if fresh ones aren’t available. Just make sure to adjust cooking time based on what you use. You can change the flavor with extra spices and sauces. Try adding chili flakes for more heat. A dash of lime juice brightens the dish too. You might like a splash of sesame oil for a nutty taste. Experiment with different sauces like sriracha or hoisin sauce. Each will give your bowl a new twist. To keep your Hot Honey Ground Turkey Bowl fresh, store leftovers in an airtight container. Place it in the fridge. It stays good for about 3 to 4 days. Make sure it cools down before sealing. This helps avoid steam buildup, which can make the food soggy. If you want to freeze your bowl, use a freezer-safe container. Let the dish cool completely first. Then, portion it out for easy meals later. You can freeze it for up to 2 months. Just remember to label the container with the date. This way, you’ll know when it needs to be eaten. When you're ready to enjoy your bowl again, there are a few good methods. For best results, you can reheat it in the microwave. Place it in a bowl and cover it loosely with a lid or a paper towel. Heat in 1-minute intervals, stirring in between. You can also use a skillet on low heat. Add a splash of water or broth to help steam it. This keeps the turkey moist and tasty! You can pair your bowl with some tasty sides. Here are a few ideas: - Steamed green beans - Roasted sweet potatoes - A fresh garden salad - Crispy wontons or rice chips These sides bring balance to your meal. They add crunch and freshness. You can mix and match based on what you like. Enjoy your meal with friends or family for a fun dinner. Yes, this recipe can be gluten-free! Just swap regular soy sauce for tamari. Tamari is made without wheat, so it’s safe for gluten-free diets. Always check labels on sauces and other ingredients. You can also serve it over quinoa instead of brown rice. Quinoa is naturally gluten-free. Make sure all your ingredients are labeled gluten-free for safety. Absolutely! You can try different sweeteners. Here are some options: - Maple syrup for a rich flavor - Agave nectar for a milder taste - Regular honey, if you don't mind the heat Each sweetener gives a unique twist to your bowl. Feel free to experiment! Adjust amounts based on your taste. This blog post walks you through a tasty hot honey ground turkey bowl. We covered the main ingredients, from ground turkey to fresh vegetables. You learned how to prepare and combine flavors while cooking. Plus, we shared tips for adjustments and meal prep. Final thoughts: This dish is versatile and easy to make. Explore different proteins, veggies, and flavors to suit your taste. Enjoy this healthy meal that’s both delicious and satisfying. Your kitchen will soon be filled with fantastic aromas!
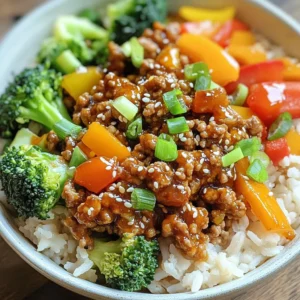
    Hot Honey Ground Turkey Bowl Flavorful and Easy Meal
  • To make creamy taco soup, you need these main ingredients: - 1 lb ground turkey or beef - 1 medium onion, diced - 2 cloves garlic, minced - 1 can (15 oz) black beans, rinsed and drained - 1 can (15 oz) corn, drained - 1 can (10 oz) diced tomatoes with green chilies - 2 cups chicken or vegetable broth - 1 packet taco seasoning - 1 cup cream cheese, softened - 1 cup shredded cheddar cheese - 1 tablespoon olive oil - Salt and pepper to taste These ingredients create a hearty and rich soup that is packed with flavor. The cream cheese and cheddar give it a creamy texture. The diced tomatoes and taco seasoning provide a zesty kick. Toppings can take your creamy taco soup to the next level. Here are some great options: - Sour cream - Avocado slices - Lime wedges - Chopped cilantro - Tortilla chips These toppings add freshness and crunch. A squeeze of lime brightens the dish, while avocado gives it a smooth finish. If you want to make this soup healthier, consider these swaps: - Use ground turkey instead of beef to lower fat. - Replace cream cheese with Greek yogurt for a lighter option. - Add more vegetables, like bell peppers or spinach. These changes can make your soup healthier while keeping it tasty. You can enjoy creamy taco soup without the guilt! {{ingredient_image_1}} 1. Start by gathering all your ingredients. This makes cooking easier. 2. Dice one medium onion and mince two cloves of garlic. 3. Rinse and drain one can of black beans and one can of corn. 4. Open one can of diced tomatoes with green chilies. 5. Measure two cups of chicken or vegetable broth. 6. Get one packet of taco seasoning and set aside. 7. Soften one cup of cream cheese at room temperature. 8. Grate one cup of cheddar cheese. 1. In a large pot, heat one tablespoon of olive oil over medium heat. 2. Add the diced onion and sauté for three to four minutes until clear. 3. Stir in the minced garlic and cook for one more minute. 4. Add one pound of ground turkey or beef. Cook until brown, breaking it apart. 5. This should take about five to seven minutes. 6. Sprinkle in the taco seasoning and mix well with the meat and onions. 7. Pour in the chicken broth, black beans, corn, and diced tomatoes. 8. Bring the mixture to a gentle simmer. 9. Lower the heat and add the softened cream cheese. Stir until it melts. 10. Mix in the shredded cheddar cheese until it melts. 11. Taste and add salt and pepper as needed. 12. Let the soup simmer on low for ten to fifteen minutes. 1. Serve the soup hot in bowls. 2. Add a dollop of sour cream to each bowl. 3. Top with slices of avocado and a sprinkle of chopped cilantro. 4. For crunch, add a few tortilla chips on top. 5. Place a lime wedge on the side for extra zest. 6. Enjoy the rich flavors and creamy texture of your soup! To boost the flavor in your creamy taco soup, consider these tips: - Use fresh herbs like cilantro or parsley. - Add lime juice for a bright taste. - Try different taco seasonings. Each has a unique kick. - Incorporate fresh jalapeños for heat. - Mix in a splash of hot sauce for extra spice. Making this soup ahead of time is easy. Just follow these steps: - Prepare the soup as usual, but don’t add cheese yet. - Cool it down before storing in the fridge. - You can keep it for up to three days. - When ready to serve, heat and add cheese. - This helps the soup taste even better as flavors blend. You can easily change this recipe for different diets: - For a vegetarian version, swap meat for lentils or mushrooms. - To make it vegan, use plant-based cream cheese. - If you're gluten-free, check the taco seasoning label. - Want low-fat? Use lean turkey and low-fat cream cheese. - Feel free to add more veggies for extra nutrition. Pro Tips Use Fresh Ingredients: Fresh vegetables and quality meat will enhance the flavor of your soup, making it more delicious. Customize Your Spice Level: Adjust the taco seasoning to your preference, adding more or less based on your taste for spice. Make It Ahead: This soup tastes even better the next day! Prepare it in advance and let the flavors meld in the fridge overnight. Add More Veggies: Feel free to toss in additional vegetables like bell peppers or zucchini for extra nutrition and flavor. {{image_2}} You can make a great vegetarian taco soup by swapping the meat. Use 1 cup of lentils or 1 can of chickpeas. These add protein and texture. For a vegan version, use vegetable broth and skip the cream cheese. Instead, try 1 cup of coconut cream for that creamy texture. You can also add more veggies like bell peppers or zucchini for extra flavor. To change the spice level, adjust the taco seasoning. If you like it mild, use half the packet. For heat, add a pinch of cayenne or some chopped jalapeños. You can also use hot salsa instead of diced tomatoes with green chilies. Remember, you can always add spice, but you can't take it out! Feel free to mix and match ingredients. Instead of black beans, use pinto or kidney beans for variety. You can also swap corn for sweet peas or diced carrots for a different taste. If you want a kick, add some diced green chiles or a splash of hot sauce. These swaps keep the soup fresh and fun each time you make it! Store leftovers in an airtight container. Let the soup cool first. Then, place it in the fridge. It will stay fresh for up to 3 days. If you want to keep it longer, think about freezing it. To reheat, pour the soup into a pot. Warm it over medium heat. Stir it often to avoid burning. You can also use a microwave. Heat it in a safe bowl for 2-3 minutes. Check the soup and stir halfway through. If you freeze the soup, use a freezer-safe container. Leave some space at the top. This space allows the soup to expand as it freezes. Label the container with the date. The soup will last up to 3 months. When you're ready to eat, thaw it in the fridge overnight before reheating. Yes, you can use a slow cooker for creamy taco soup. Start by browning the meat in a pan. Then, add all the other ingredients to the slow cooker. Mix well and cook on low for 6-8 hours or high for 3-4 hours. When done, stir in the cream cheese and cheddar cheese. This method makes the flavors blend nicely. If you need a substitute for cream cheese, try sour cream or Greek yogurt. These options will keep the soup creamy. You can also use a dairy-free cream cheese if you want a vegan option. Just make sure to mix it in well to get a smooth texture. To thicken the soup, you can use a few simple tricks. One option is to add more cream cheese or cheese. Another method is to mix in a cornstarch slurry. Just mix one tablespoon of cornstarch with two tablespoons of cold water. Stir this into the soup and cook for a few more minutes. You can also add mashed beans for a thicker texture. We explored the key ingredients for creamy taco soup, including variations and storage tips. Following the simple preparation steps can make cooking easy and fun. You can enhance flavors, adjust for dietary needs, and even try different spice levels. Whether you love it spicy or mild, this soup is flexible. You can also store leftovers without worry. Embrace your creativity in the kitchen and enjoy your delicious creation!
    Creamy Taco Soup Rich and Flavorful Meal Idea
  • To make crispy air fryer Parmesan zucchini fries, gather these items: - 2 medium zucchini, cut into fry shapes - 1 cup breadcrumbs (whole wheat works best) - ½ cup grated Parmesan cheese - 1 teaspoon garlic powder - 1 teaspoon Italian seasoning - ½ teaspoon salt - ¼ teaspoon black pepper - 2 large eggs, beaten - Olive oil spray You can change a few ingredients if needed. Instead of whole wheat breadcrumbs, use regular breadcrumbs. For a dairy-free option, swap Parmesan for nutritional yeast. If you want more flavor, add a pinch of cayenne pepper. Each serving of these zucchini fries has about: - Calories: 150 - Protein: 8g - Carbohydrates: 15g - Fiber: 2g - Fat: 7g This snack is low in carbs and high in flavor! Enjoy knowing you are eating a tasty and healthier option. {{ingredient_image_1}} First, grab two medium zucchinis. Cut them into fry shapes. Aim for even sizes to help them cook well. You want them not too thick, so they get crispy. Next, take a shallow bowl. Mix 1 cup of breadcrumbs, ½ cup of grated Parmesan cheese, 1 teaspoon of garlic powder, 1 teaspoon of Italian seasoning, ½ teaspoon of salt, and ¼ teaspoon of black pepper in it. Stir well so all the spices blend. In another bowl, beat two large eggs. Dip each zucchini fry into the eggs. Let the excess egg drip off. Now, coat each fry in the breadcrumb mix. Press gently to make sure the coating sticks well. Preheat your air fryer to 400°F (200°C) for about 5 minutes. Spray the air fryer basket lightly with olive oil. Place the coated zucchini fries in a single layer. Make sure they do not touch each other. Spray the tops of the fries with olive oil too. Air fry for 10-12 minutes. Flip them halfway through to get even crispiness. They should look golden brown when done. Take them out and serve hot. Enjoy with marinara or ranch for dipping! To make your zucchini fries extra crispy, follow these steps: - Always preheat your air fryer to 400°F (200°C). This helps the fries cook evenly. - Cut the zucchini into uniform fry shapes. This ensures they cook at the same rate. - After coating, let the fries sit for a few minutes. This helps the breading stick better. - Use whole wheat breadcrumbs for a crunchier texture. They provide a nice bite. - Spray the fries with olive oil before cooking. This helps them brown nicely. Enjoy your zucchini fries fresh out of the air fryer. Here are some great ways to serve them: - Pair them with marinara sauce for a classic dip. It adds a tasty twist. - Ranch dressing also works well for a creamy option. It complements the fries perfectly. - Garnish with extra grated Parmesan and fresh parsley. This adds color and flavor. - Serve alongside a crisp salad for a complete meal. The freshness balances the fries. You can prepare zucchini fries ahead of time. Here’s how to do it: - Coat the fries as usual, then place them on a baking sheet. Freeze them for about 30 minutes. - Once frozen, transfer the fries to a zip-top bag. This saves space in your freezer. - When ready to eat, preheat your air fryer and cook straight from frozen. Just add a few minutes to the cooking time. - To reheat leftover fries, air fry them for about 5-7 minutes at 400°F (200°C). This will help restore their crispiness. Pro Tips Choose Fresh Zucchini: Select firm, shiny zucchinis for the best texture and flavor in your fries. Experiment with Seasonings: Customize the breadcrumb mixture by adding your favorite spices or herbs for a unique twist. Do Not Overcrowd the Basket: For optimal crispiness, make sure the zucchini fries are in a single layer without overlapping. Serve Immediately: Enjoy the fries right after cooking for maximum crunchiness; they can lose their crispiness if left out too long. {{image_2}} You can change the taste of your zucchini fries with different spices. Try adding smoked paprika for a smoky flavor. Cayenne pepper gives a nice kick, while cumin adds warmth. You can also use taco seasoning for a fun twist. Just mix any seasoning into the breadcrumb mixture for a new taste. Instead of breadcrumbs, you can use crushed cornflakes or almond flour. Both options give a nice crunch. For a gluten-free choice, use gluten-free breadcrumbs. If you like a cheesy flavor, add extra Parmesan to your coating. This way, you can make your fries unique each time. You can make these zucchini fries vegan easily. Replace the eggs with a mixture of ground flaxseed and water. Use 1 tablespoon of flaxseed with 2.5 tablespoons of water for each egg. Let it sit for a few minutes to thicken. For the cheese flavor, try nutritional yeast. It adds a savory taste without using dairy. After you enjoy your air fryer Parmesan zucchini fries, store any leftovers in an airtight container. They will stay fresh in the fridge for about 3 days. Make sure to let them cool down before sealing the container. This will help keep them crispy and prevent moisture buildup. If you want to save some for later, freezing is a great option. First, let the cooked fries cool completely. Then, place them in a single layer on a baking sheet. Freeze for about 1-2 hours until firm. Afterward, transfer them to a freezer-safe bag. They can last up to 2 months in the freezer. To reheat your zucchini fries, the air fryer is your best friend. Preheat your air fryer to 350°F (175°C). Place the frozen or refrigerated fries in the basket in a single layer. Heat for about 5-7 minutes or until they are hot and crispy again. You can also use an oven if you prefer, but the air fryer keeps them crispier. Yes, you can use many other vegetables for air frying. Try carrots, sweet potatoes, or eggplant. Cut them into fry shapes, just like the zucchini. Each vegetable will have a unique taste. Adjust the cooking time as needed, since thicker veggies may take longer. Air fry the zucchini fries for about 10 to 12 minutes. Flip them halfway through to ensure even cooking. They should turn golden brown and crispy. Keep an eye on them, as air fryers can vary in heat. You want them crunchy but not burnt! Zucchini fries taste great with various dipping sauces. Marinara sauce is a classic choice. Ranch dressing also complements the cheesy flavor. Try garlic aioli or tzatziki for a twist. Feel free to get creative with your favorite dips! Zucchini fries are a tasty snack made easy. You need simple ingredients and just a few steps. We covered how to prepare, coat, and cook them in an air fryer. With tips for crispiness and serving ideas, you can enjoy them your way. You can even make vegan or unique variations. Plus, storing or reheating them is a breeze. Try these recipes and enjoy zucchini fries, a crunchy treat that's healthy and fun.
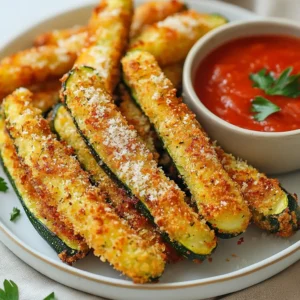
    Air Fryer Parmesan Zucchini Fries Crisp and Tasty Snack
  • - 250g spaghetti or linguine - 3 tablespoons olive oil - 3 cloves garlic, thinly sliced - 1 small red chili, finely chopped - 1 can (400g) cherry tomatoes, crushed - 2 cups baby spinach - Salt and pepper to taste - Fresh basil leaves, for garnish - Zest of 1 lemon - Grated Parmesan cheese (optional) - Protein options, like shrimp or chicken - Vegetarian alternatives, such as mushrooms or tofu - Gluten-free pasta options, like rice noodles or chickpea pasta When I gather these ingredients, I feel ready to create something special. Each item plays a big role in the dish's flavor. The spaghetti or linguine forms the base. Olive oil adds richness. Garlic and chili bring warmth and depth. Cherry tomatoes create a fresh, tangy sauce. Baby spinach adds color and nutrition. You can also customize your Midnight Pasta. Want more protein? Toss in shrimp or chicken. Keep it vegetarian with mushrooms or tofu. Looking for gluten-free? Choose a pasta made from rice or chickpeas. This flexibility makes Midnight Pasta a go-to for any meal. You can mix and match based on what you love. {{ingredient_image_1}} To boil spaghetti or linguine, start with a large pot. Fill it with water and add a good amount of salt. Bring it to a rolling boil. Then, add your pasta. Cook it according to the package instructions until it's al dente, which means firm to the bite. This usually takes about 8 to 10 minutes. After cooking, reserve about 1 cup of the pasta water before draining. This water is starchy and will help your sauce stick to the pasta later. For the sauce, grab a large skillet. Heat 3 tablespoons of olive oil over medium heat. Once hot, add 3 cloves of thinly sliced garlic and 1 small finely chopped chili. Sauté them for about 1 to 2 minutes. You want them fragrant, but be careful not to burn the garlic. Next, pour in 1 can of crushed cherry tomatoes. Let the sauce simmer for about 5 to 7 minutes. It should thicken slightly. Season with salt and pepper to taste. If it’s too thick, you can add some reserved pasta water. Once your sauce is ready, it’s time to mix it with the pasta. Add the drained spaghetti or linguine directly into the skillet. Toss everything together so the pasta is well coated in sauce. If the sauce seems too thick, add a little reserved pasta water until it reaches your preferred consistency. Now, add 2 cups of baby spinach and the zest of 1 lemon. Stir gently for another 2 to 3 minutes. Cook until the spinach just wilts but remains bright green. This keeps it fresh and tasty. To make the best Midnight Pasta, cook your pasta al dente. This means it should be firm to the bite. Al dente pasta holds up well and soaks up the sauce nicely without getting mushy. Timing is key. Start your sauce when you add the pasta to boiling water. This helps the sauce finish just as the pasta is ready. To make your dish pop, add some seasonings. A pinch of red pepper flakes can give it a nice kick. You can also try Italian seasoning or a dash of garlic powder. Fresh herbs can elevate your dish. Basil adds brightness, while dried herbs are handy if you don't have fresh. Use about one-third of the amount of dried herbs compared to fresh. Presentation matters! Twirl the pasta on the plate for a nice look. You can also layer it with sauce and spinach for a colorful effect. Don't forget garnishes! Fresh basil leaves or a sprinkle of Parmesan cheese adds a touch of elegance. Lemon zest can also brighten up the dish visually. Pro Tips Use High-Quality Olive Oil: The flavor of the olive oil can significantly enhance the dish, so opt for a good quality extra virgin olive oil for the best results. Don’t Skip the Pasta Water: The reserved pasta water is starchy and helps to bind the sauce to the pasta, giving it a creamy texture without adding extra fat. Adjust Spice Level: If you prefer a milder dish, remove the seeds from the chili before chopping, or use less chili to control the heat. Fresh Ingredients Matter: Using fresh basil and spinach will elevate the dish’s flavor profile, so avoid dried herbs if possible for this recipe. {{image_2}} You can easily make Midnight Pasta vegetarian. Here are some great ideas: - Substitutes for meat: Try using mushrooms or lentils instead of meat. They add great texture and flavor. - Ideas for adding more vegetables: Toss in zucchini, bell peppers, or carrots. They will brighten up your dish and add color. If you love heat, let’s turn up the spice! Here’s how: - Increasing heat with additional chilies: Add more red chilies or use crushed red pepper flakes. Adjust the amount to your taste. - Other spicy ingredients to incorporate: Consider adding jalapeños or a dash of hot sauce for extra kick. Make your Midnight Pasta shine with seasonal ingredients! - How to adapt the recipe with seasonal produce: In summer, add fresh tomatoes and basil. In winter, use roasted butternut squash or kale. - Making it a summer or winter dish: In summer, keep it light with fresh veggies. In winter, warm it up with hearty greens and root veggies. To keep your midnight pasta fresh, follow these tips: - Cool the pasta to room temperature before storing. - Place it in an airtight container. - Store in the fridge for up to three days. - For longer storage, freeze it in a freezer-safe container. - Make sure to label the container with the date. When you're ready to enjoy leftovers, you have a few options: - Reheat on the stovetop over low heat. - Add a splash of water or olive oil to keep it moist. - Stir gently to avoid breaking the pasta. - You can also microwave it in 30-second intervals. - Cover the dish to keep moisture in while reheating. Leftovers last well in the fridge for about three days. If frozen, you can enjoy them for up to three months. Look for these signs of spoilage: - An off smell or unusual color. - A slimy texture on the pasta. - Mold or any signs of freezer burn. If you see any of these, it's best to discard the pasta. Midnight Pasta is a simple and quick dish. It’s perfect for late-night cravings. This dish blends garlic, chili, and tomatoes for a burst of flavor. The name hints at its late-night appeal. It originated from Italy, where cooks needed a fast meal. Midnight Pasta celebrates comfort and simplicity in cooking. Yes, you can prepare some parts in advance. Cook the pasta and store it in the fridge. Keep the sauce separate to maintain freshness. You can mix them when ready to eat. Store leftovers in an airtight container for up to three days. Reheat on the stove or in a microwave. Midnight Pasta pairs well with a simple salad. A fresh green salad adds crunch and balance. Garlic bread makes a nice side, too. For drinks, try a light white wine or sparkling water. Both options complement the flavors without overpowering them. Absolutely! Midnight Pasta is great for meal prep. Cook a larger batch and divide it into containers. This makes it easy to grab a meal during the week. You can add protein like chicken or shrimp for variety. Just remember to keep the sauce separate until ready to eat. Midnight Pasta is easy and fun to make. We covered the main ingredients and steps, from boiling pasta to creating a tasty sauce. I shared tips for perfect timing and flavor enhancements. You can also customize with proteins or veggies and use fresh herbs for better taste. Store and reheat your leftovers with care to keep them fresh. Whether you enjoy it late at night or as a meal prep option, Midnight Pasta is a versatile dish. Try mixing in your favorite ingredients. Enjoy your cooking!
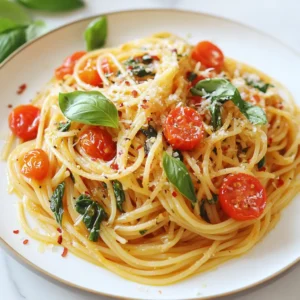
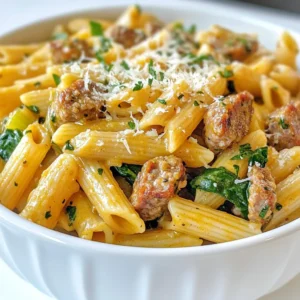
    Midnight Pasta Delight Quick and Tasty Recipe
  • To make Tuscan Chicken Soup, you will need: - 1 lb boneless, skinless chicken breasts, diced - 1 tablespoon olive oil - 1 medium onion, chopped - 2 cloves garlic, minced - 2 medium carrots, diced - 2 celery stalks, diced - 1 can (14 oz) diced tomatoes, with juices - 4 cups chicken broth - 1 can (15 oz) cannellini beans, rinsed and drained - 2 cups fresh spinach, chopped - 1 teaspoon dried oregano - 1 teaspoon dried basil - Salt and pepper to taste - ½ cup grated Parmesan cheese (for serving) - Fresh basil leaves, for garnish If you don't have everything, don't worry! You can swap some items: - Chicken breasts can be replaced with thighs for more flavor. - Use vegetable broth instead of chicken broth for a lighter soup. - Spinach can be swapped with kale or Swiss chard. - If you lack cannellini beans, use any white bean like navy beans. - Try fresh herbs if you have them, and use one tablespoon of each instead. Using fresh ingredients makes a big difference in taste. Fresh chicken and vegetables bring vibrant flavors. However, canned ingredients can save time and add convenience. For example: - Canned tomatoes add sweetness and acidity without extra work. - Canned beans are quick to use and provide protein. - Fresh spinach wilts down nicely, but you can use frozen if needed. Choose fresh when you can, but don't shy away from canned options. Both work well in this comforting soup! {{ingredient_image_1}} Start by heating one tablespoon of olive oil in a large pot over medium heat. Once the oil is hot, add one pound of diced chicken. Cook the chicken for about five to seven minutes. You want it to be browned. After cooking, remove the chicken from the pot and set it aside on a plate. In the same pot, add one chopped onion, two minced garlic cloves, two diced carrots, and two diced celery stalks. Sauté these vegetables for around five minutes. You want them to soften and smell great. Stir them often to avoid burning. Next, stir in one can of diced tomatoes with juices and four cups of chicken broth. Add the cooked chicken back into the pot. Bring this mixture to a simmer. Then, add one can of rinsed and drained cannellini beans, two cups of chopped fresh spinach, one teaspoon of dried oregano, one teaspoon of dried basil, and some salt and pepper to taste. Let it all simmer for another ten to fifteen minutes. This allows the flavors to blend into a warm, tasty soup. Don’t forget to taste it and adjust the seasonings if you want. Serve hot with grated Parmesan cheese and fresh basil leaves on top. To boost flavors in Tuscan chicken soup, start with fresh herbs. Use basil and oregano for a bright taste. Fresh garlic adds a punch, while sautéing onions creates sweetness. You can also add a splash of lemon juice for some zing. If you like heat, toss in red pepper flakes. These small tweaks can change the soup from good to great! One common mistake is overcooking the chicken. Cook it just until browned and tender. If you add spinach too early, it can lose its vibrant color. Also, don't skip tasting your soup. Adjust salt and pepper to fit your taste. Lastly, be careful with the broth. Use low-sodium broth, so you can control the saltiness. Serve your soup hot, topped with grated Parmesan cheese. This adds richness and flavor. Fresh basil leaves make a nice garnish and look pretty. Pair the soup with crusty bread for dipping. A simple side salad adds freshness and crunch. For a complete meal, enjoy it with a glass of white wine. Pro Tips Use Fresh Ingredients: Whenever possible, opt for fresh vegetables and herbs to enhance the flavor and nutritional value of your soup. Adjust the Consistency: If you prefer a thicker soup, you can blend a portion of the soup and stir it back in for a creamier texture. Make It Ahead: This soup can be made in advance and stored in the refrigerator for up to 3 days. It often tastes even better the next day! Experiment with Proteins: Feel free to substitute chicken with turkey, or even add sausage for a different flavor profile. {{image_2}} You can easily make a tasty vegetarian version of Tuscan chicken soup. Start by using vegetable broth instead of chicken broth. For protein, add chickpeas or lentils. Keep the diced tomatoes and vegetables like carrots and celery. You can also use kale or Swiss chard for a nice green touch. This soup remains hearty and full of flavor without meat. If you love heat, try adding some spice to your Tuscan chicken soup. Just include red pepper flakes or diced jalapeños when sautéing the onion and garlic. You can also add some hot Italian sausage for a kick. Adjust the amount to fit your taste. This variation warms you up and adds a new layer of flavor. Making this soup gluten-free is simple. Just check your broth and canned ingredients to ensure they are gluten-free. Ditch any pasta you might add, as traditional pasta contains gluten. Instead, consider using rice or quinoa for texture. This way, you can enjoy a comforting bowl of Tuscan chicken soup without worry. After you enjoy your Tuscan chicken soup, store any leftovers in an airtight container. Make sure the soup cools down first. Place it in the fridge, where it will stay fresh for up to three days. If you want to keep it longer, freezing is a great option. To freeze your soup, follow these steps. First, let the soup cool completely. Then, pour it into freezer-safe containers or bags. Leave some space at the top for the soup to expand. Label each container with the date. You can freeze it for up to three months. When you are ready to eat your frozen soup, thaw it in the fridge overnight. Then, reheat it on the stove over medium heat. Stir it often to warm it evenly. You can also use a microwave. Heat it in short bursts, stirring in between, until it is hot. Add fresh herbs or cheese to boost the flavor before serving. Tuscan Chicken Soup is a warm and hearty dish. It features chicken, beans, and vegetables. The broth is rich and flavorful. You get hints of oregano and basil in every bite. This soup warms me up on cold days. It’s like a hug in a bowl. Yes, you can make this soup in a slow cooker. Start by cooking the chicken and veggies on the stove. Then, transfer everything to the slow cooker. Add your broth, tomatoes, and beans. Cook on low for 6-8 hours. You will enjoy the same great flavors. To make the soup creamier, add some heavy cream or half-and-half. Stir it in just before serving. You can also blend a small portion of the soup and return it to the pot. This adds a nice, thick texture. Serve this soup with crusty bread or garlic bread. A fresh salad complements it well too. You can also pair it with a light pasta dish. Don’t forget to sprinkle extra Parmesan on top for added flavor. In this post, I covered key ingredients, step-by-step cooking, and helpful tips for Tuscan Chicken Soup. I shared tasty variations and storage info to keep your meal fresh. Remember to choose fresh ingredients for the best flavor. Avoid common mistakes to enhance your dish. This soup is versatile and easy to make. Whether you prefer vegetarian or spicy options, there’s something for everyone. Enjoy your cooking adventure with Tuscan Chicken Soup and satisfy your taste buds!
    Tuscan Chicken Soup Flavorful and Comforting Meal
  • - 1 pound boneless, skinless chicken thighs, cut into bite-sized pieces - 1 cup cornstarch - 1/2 cup all-purpose flour - 1 cup orange juice (freshly squeezed if possible) - Zest of 1 orange For this easy orange chicken, I use chicken thighs. They stay juicy and tender. Cornstarch and flour make the chicken crispy. Fresh orange juice and zest add bright flavor. - 1/4 cup honey - 2 tablespoons soy sauce - 2 tablespoons rice vinegar - 1 tablespoon sesame oil - 1 tablespoon grated fresh ginger - 2 cloves garlic, minced The sweet honey balances the sauce. Soy sauce adds umami. Rice vinegar gives a nice tang. Sesame oil brings depth. Fresh ginger and garlic add warmth. These flavors work together beautifully. - Green onions - Sesame seeds Garnishes make the dish pop. Green onions add color and crunch. Sesame seeds give a toast flavor. They enhance the dish and make it look great on the plate. {{ingredient_image_1}} To start, you need to prepare the chicken. First, in a medium bowl, mix cornstarch, flour, baking powder, salt, and black pepper. This mixture gives the chicken a crispy coating. Next, dip the chicken pieces into the beaten eggs. Make sure each piece is fully covered. After that, coat them with the cornstarch mixture. The coating will help the chicken fry up nicely. Now, heat oil in a large skillet or wok over medium-high heat. Once the oil is hot, carefully add the coated chicken pieces in batches. Fry them until they turn golden brown and crispy. This should take about 5 to 7 minutes. Once done, remove them and let them drain on paper towels. For the sauce, gather your ingredients. In another pan, combine orange juice, honey, orange zest, soy sauce, rice vinegar, sesame oil, grated ginger, and minced garlic. Stir well to mix everything together. Next, simmer this mixture over medium heat for about 5 minutes. This helps the flavors blend and the sauce to thicken slightly. The aroma will be amazing as it cooks! Now it’s time for the final touch. Take the crispy chicken and add it to the hot sauce. Toss the chicken in the sauce to coat it evenly. Cook for an additional 2 to 3 minutes. This allows the chicken to soak up the delicious flavors. When serving, plate the orange chicken in a deep dish. Garnish it with sliced green onions and a sprinkle of sesame seeds. This adds a nice touch to your meal. Enjoy the vibrant colors and flavors! To ensure crispy chicken, use cornstarch. It coats the chicken well and helps it fry up nicely. Dip each piece in beaten eggs first. Then, coat it in the cornstarch mixture. Fry the chicken in hot oil. Keep the oil at 350°F for the best results. If the oil is too hot, the chicken burns. If it's too cool, the chicken becomes soggy. Fry in small batches to keep the oil hot. If you don’t have orange juice, try using pineapple juice or lemon juice. These can add a nice twist. You can also switch proteins. Chicken breast works well, but shrimp or tofu can be great choices too. Adjust your cooking time with different proteins to ensure they are cooked through. For plating, use a deep dish. This helps show off the glazed chicken. Add a side of steamed rice for texture. Stir-fried vegetables add color and nutrition. Garnish with green onions and sesame seeds for a pop of flavor. A colorful plate makes the meal more inviting. Pro Tips Use Fresh Ingredients: Freshly squeezed orange juice and ripe ginger will elevate the flavor of your sauce significantly. Avoid bottled juice for the best taste. Double Fry for Extra Crispiness: For an even crispier chicken, fry the pieces twice. After the first fry, let them rest for a few minutes before frying again until golden brown. Balance Sweetness and Acidity: Adjust the amount of honey and soy sauce to achieve your desired balance between sweet and savory. Taste the sauce before adding the chicken. Garnish with Fresh Herbs: Adding chopped cilantro or basil as a garnish can provide an extra layer of flavor and freshness to the dish. {{image_2}} For a lighter take, try baked orange chicken. Instead of frying, coat the chicken in cornstarch and bake it. Preheat your oven to 400°F (200°C). Place the chicken on a baking sheet and bake for 20-25 minutes until golden. This keeps the crunch without the extra oil. You can also lower the sugar in the sauce. Use less honey or replace it with a sugar substitute. This makes it healthier while still keeping that sweet flavor. Want some heat? Add chili flakes or sriracha to the sauce. This gives your orange chicken a spicy kick. Start with a small amount and adjust to your taste. Another fun idea is to experiment with different sauces. Try adding teriyaki sauce or hoisin sauce. These can create a unique flavor twist while still pairing well with orange. If you're going gluten-free, swap soy sauce for tamari. This keeps the dish tasty while meeting dietary needs. You can also add regional spices. Try curry powder for an Indian twist or five-spice powder for a Chinese flair. These spices can change the dish and make it feel like a new meal. After you make your Easy Orange Chicken, store leftovers in an airtight container. This keeps the chicken fresh and flavorful. It can last in the fridge for up to three days. Make sure to cool it down before putting it in the fridge. This helps it stay crispy and tasty. If you want to save some for later, freezing is a great option. Place the chicken in a freezer-safe bag or container. Remove as much air as possible to prevent freezer burn. It can last in the freezer for up to three months. When you're ready to eat, thaw it overnight in the fridge. This keeps the chicken juicy. To reheat, I recommend using the stovetop for the best results. Heat a skillet over medium heat, add a splash of oil, and cook the chicken until it is warm and crispy. If you're in a hurry, you can use the microwave, but this may make the chicken soft. For the best flavor, always aim for the stovetop method. You can enhance the flavor of orange chicken by adding fresh herbs. Try using cilantro or basil. You can also increase the ginger and garlic for a bolder taste. Adding a splash of rice wine or a dash of chili flakes can bring more depth. Marinade the chicken with soy sauce for a few hours before cooking. This step makes the chicken tastier and juicier. Yes, you can use chicken breast instead of thighs. Chicken breast is leaner but may dry out faster. To keep it juicy, marinate the chicken longer. Cut the breast into similarly sized pieces as the thighs for even cooking. Ensure the cooking time does not exceed 5-6 minutes, as it cooks faster than thighs. To store leftover orange chicken, place it in an airtight container. Refrigerate it within two hours of cooking. It stays fresh for up to three days. Make sure to separate the sauce if you want the chicken to stay crispy. You can also freeze it for up to three months. Thaw it in the fridge overnight before reheating. To add spice to your orange chicken, mix in some red pepper flakes or sriracha. You can also add chopped jalapeños or a dash of hot sauce to the orange sauce. Adjust the amount to your taste. For a stronger kick, use spicy sesame oil instead of regular sesame oil. Enjoy the heat! This blog post covered the key ingredients and steps for making orange chicken. You learned about the main components like chicken thighs and the rich orange sauce, along with tips for crispiness and plating. I shared ways to modify recipes for health and flavor. Finally, we discussed storage and reheating methods. Now you can create a delicious orange chicken meal. Enjoy making this dish your own and share with others!
    Easy Orange Chicken Savory and Quick Meal Delight
  • - 8 ounces whole wheat macaroni - 1 pound lean flank steak, sliced thin - 1 cup cottage cheese - 1 cup shredded low-fat mozzarella cheese - 1 cup shredded provolone cheese - 1 tablespoon olive oil - 1 medium onion, diced - 1 green bell pepper, diced - 2 cloves garlic, minced - 2 cups low-sodium beef broth - 1 teaspoon smoked paprika - Salt and pepper to taste - Fresh parsley for garnish - Optional toppings like extra cheese or hot sauce For this recipe, I love using whole wheat macaroni. It adds fiber and keeps the dish hearty. Lean flank steak gives a rich flavor without too much fat. The mix of cottage cheese, mozzarella, and provolone creates a creamy, cheesy sauce that’s hard to resist! Don’t skip the sautéed onion, green bell pepper, and garlic. They add depth to the dish. The low-sodium beef broth helps bind everything together, while smoked paprika brings a hint of smokiness. For garnishing, fresh parsley adds a bright touch. You can also experiment with toppings. A sprinkle of extra cheese or a dash of hot sauce can elevate the flavor! This ingredient list sets the stage for a delicious, high-protein meal that’s sure to impress! {{ingredient_image_1}} 1. In a big pot, boil salted water. 2. Add 8 ounces of whole wheat macaroni. 3. Cook according to the package instructions, usually about 8-10 minutes. 4. Once cooked, drain and set aside. 1. Heat 1 tablespoon of olive oil in a large skillet over medium-high heat. 2. Add 1 pound of thinly sliced flank steak. 3. Season with salt, pepper, and 1 teaspoon of smoked paprika. 4. Sauté the steak until browned, about 5-7 minutes. 5. Remove the steak from the skillet and set aside. 1. In the same skillet, add 1 medium diced onion, 1 diced green bell pepper, and 2 minced garlic cloves. 2. Sauté the vegetables until soft, about 4-5 minutes. 3. Pour in 2 cups of low-sodium beef broth and bring it to a simmer. 4. Reduce the heat to low. 5. Add 1 cup of cottage cheese, half of the mozzarella cheese, and half of the provolone cheese. 6. Stir until all the cheese melts into a creamy sauce. 1. Add the drained macaroni and the sautéed steak to the skillet. 2. Mix everything well, ensuring the pasta and steak are coated in the cheese sauce. 3. Transfer the mixture to a baking dish. 1. Preheat your oven to 350°F (175°C). 2. Top the mac and cheese with the remaining mozzarella and provolone cheese. 3. Bake for 15-20 minutes, until the cheese is bubbly and slightly golden. 4. Remove from the oven and let it cool for a few minutes. 5. Garnish with fresh parsley before serving. Choosing the right cheese makes all the difference in your sauce. I love using a mix of low-fat mozzarella and provolone. They melt beautifully and add that creamy texture we crave. Cottage cheese helps boost protein, making this dish hearty. If you want to try other cheeses, consider these alternatives: - Cheddar for a sharp flavor - Gouda for a smoky touch - Cream cheese for extra creaminess To get the best flavor from your flank steak, always slice it against the grain. This makes each bite tender. Season your steak well with salt, pepper, and smoked paprika. This adds depth to the dish. For cooking methods, you can: - Sear it in a skillet for a nice crust - Grill it for a smoky taste - Broil it for a quick cook Spices can take your dish to the next level. I recommend adding: - Garlic powder for extra flavor - Cayenne pepper for a kick - Italian seasoning for a herbaceous touch You can also add other vegetables to boost nutrition. Try: - Mushrooms for umami - Spinach for color and nutrients - Zucchini for added texture With these tips, your Philly Cheesesteak Mac and Cheese will be a hit! Pro Tips Use Quality Steak: Select a high-quality flank steak for the best flavor and tenderness. Cheese Variety: Feel free to experiment with different cheeses like cheddar or gouda for a unique twist. Don't Overcook the Pasta: Cook the macaroni al dente, as it will continue to cook in the oven. Add Heat: If you enjoy spicy food, consider adding sliced jalapeños or a dash of hot sauce to the mixture. {{image_2}} You can switch up the protein in your Philly Cheesesteak Mac and Cheese. If you prefer chicken or turkey, use thinly sliced breast meat. Both options give you great flavor and keep the meal light. They also cook quickly, so you can have a tasty dish in no time. For plant-based options, try using mushrooms or tempeh. Mushrooms provide a nice umami flavor. Tempeh adds a hearty texture and is packed with protein. Both choices make this dish friendly for everyone, even those who don’t eat meat. If you need a gluten-free version, choose gluten-free pasta. Many brands offer great options that taste just as good. Just make sure to check the labels for any hidden gluten. For vegan adaptations, swap the cheeses for dairy-free alternatives. Look for brands that melt well. Use nutritional yeast to add that cheesy flavor without the dairy. You can also use vegetable broth instead of beef broth for a rich taste. To mix up the cheese, try different combinations. Cheddar or gouda can add a sharp bite. You can even use blue cheese for a bold twist. Mixing cheeses creates layers of flavor that make this dish special. Adding spices is another way to change the flavor. Try cayenne pepper for heat or Italian herbs for a fresh taste. You can also drizzle hot sauce on top for an extra kick. Don't be afraid to experiment with sauces, too. A splash of Worcestershire sauce can deepen the flavor and make every bite exciting. To store your Philly cheesesteak mac and cheese, first let it cool down. Place it in an airtight container. This keeps the dish fresh and tasty. It lasts about 3 to 5 days in the fridge. Always check for any signs of spoilage before digging in. Freezing your mac and cheese is simple. First, let it cool completely. Then, portion it into freezer-safe containers. Make sure to leave some space at the top for expansion. Cover tightly with a lid or wrap in plastic wrap. It can stay frozen for up to 3 months. When you're ready to enjoy it, thaw it in the fridge overnight. Reheat in the oven at 350°F (175°C) for about 20-30 minutes. Stir midway to heat evenly. You can prepare this dish ahead of time. Cook the pasta and steak, then mix them with the cheese sauce. Store it in an airtight container. This mac and cheese is great for meal prep! Use glass containers for easy reheating. They help keep the food fresh and are safe for the oven. You’ll always have a tasty meal ready to go! Whole wheat macaroni is my go-to choice. It packs more protein than regular pasta. You can also try lentil or chickpea pasta for even more protein. These options boost nutrition and taste great in mac and cheese. Cooking times may vary, so check package instructions. Yes, you can easily make this dish meatless. Use mushrooms or a mix of veggies instead of beef. Mushrooms give a nice, meaty texture. You can also add some plant-based protein like tofu or tempeh for a protein punch. Reheating leftovers is simple. Use the oven for the best results. Preheat it to 350°F (175°C), then place your mac and cheese in a baking dish. Cover it with foil to keep it moist. Heat for about 15-20 minutes. You can also use the microwave. Just add a splash of broth or water. Heat in 30-second intervals, stirring in between. This mac and cheese pairs well with simple sides. A fresh salad adds a nice crunch. You can also serve it with roasted vegetables for a healthy touch. If you want something heartier, garlic bread is a favorite. These sides balance the rich flavors of the mac and cheese. You now have a complete guide to making high-protein mac and cheese. We covered the essential ingredients, step-by-step cooking methods, and even tips for flavor and storage. You can customize this dish to fit your needs, whether for a hearty meal or a healthy option. Enjoy experimenting with protein alternatives and different flavors. With all this knowledge, you're ready to create your own delicious version of this comfort food. Get cooking and savor each bite!
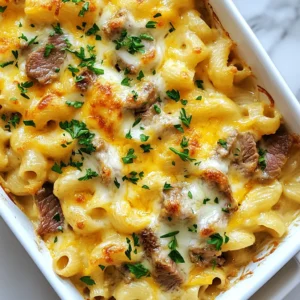
    Philly Cheesesteak Mac and Cheese High Protein Delight
  • To make the Whole30 Hawaiian Chicken Sheet Pan, you'll need these fresh and vibrant ingredients: - 4 boneless, skinless chicken thighs - 1 red bell pepper, sliced - 1 yellow bell pepper, sliced - 1 red onion, sliced - 2 cups fresh pineapple chunks - 3 tablespoons coconut aminos - 1 tablespoon olive oil - 2 cloves garlic, minced - 1 inch fresh ginger, minced - 1 teaspoon ground turmeric - 1 teaspoon red pepper flakes (optional for heat) - Salt and pepper to taste - Fresh cilantro for garnish These ingredients create a colorful and tasty dish. The chicken thighs give a rich flavor. The bell peppers add crunch. Pineapple brings a sweet twist. Together, they create a perfect balance. The coconut aminos add depth without soy. Garlic and ginger elevate the taste. Turmeric gives a warm color and health benefits. Red pepper flakes can spice it up if you like heat. Fresh cilantro brightens the dish, making it visually appealing. Each bite will take you to the islands. Enjoy gathering these ingredients for your meal! {{ingredient_image_1}} 1. Preheat your oven to 425°F (220°C). This step is key for a crispy finish. 2. Line a large baking sheet with parchment paper. This makes cleanup easy and quick. 3. In a mixing bowl, combine the coconut aminos, olive oil, minced garlic, minced ginger, ground turmeric, and red pepper flakes. Add a pinch of salt and pepper. Whisk well until mixed. 4. Add the chicken thighs to the marinade. Let them sit for at least 10 minutes. This helps the flavors soak in. 1. On the prepared baking sheet, arrange the sliced red bell pepper, yellow bell pepper, red onion, and pineapple chunks. This creates a colorful base for your dish. 2. Place the marinated chicken thighs on top of the vegetables and pineapple. Drizzle any remaining marinade over everything. This adds extra flavor. 1. Bake the sheet pan in the preheated oven for 25-30 minutes. Check for doneness. The chicken should reach an internal temperature of 165°F (75°C) and be no longer pink. 2. Once cooked, remove the pan from the oven. Let it rest for about 5 minutes. This helps the juices stay in the chicken. 3. Garnish with fresh cilantro before serving. This adds a nice touch and bright flavor. To keep the chicken juicy, marinate it for at least 10 minutes. This helps the chicken soak up the flavors. For extra moisture, consider using thighs instead of breasts. They have more fat, which adds flavor and keeps them tender. You can mix up the marinade flavor to suit your taste. Try adding lime juice for a zesty kick. Or, use a splash of pineapple juice for more sweetness. You can also swap garlic for shallots for a milder taste. Feel free to adjust the spices too. If you like heat, add more red pepper flakes. If you prefer less spice, skip them. Pair this dish with simple sides. Steamed broccoli or cauliflower rice work well. They balance the sweet flavors of the chicken and pineapple. For a fresh touch, serve a green salad on the side. It adds crunch and color. To make your dish look appealing, use a large platter. Spread the chicken and veggies evenly for a nice display. Garnish with fresh cilantro for a pop of green. This makes the dish look vibrant and fresh. Pro Tips Marinate Longer for Flavor: If time allows, marinate the chicken thighs for 30 minutes or even overnight in the refrigerator. This will enhance the flavor and tenderness of the chicken. Use Fresh Pineapple: For the best flavor, opt for fresh pineapple instead of canned. The sweetness and acidity of fresh pineapple will elevate the dish. Customize Your Veggies: Feel free to swap in your favorite vegetables such as zucchini or snap peas. This recipe is versatile, and using seasonal veggies can add variety. Check Chicken Temperature: Always use a meat thermometer to check that the chicken has reached an internal temperature of 165°F (75°C) to ensure it is safe to eat. {{image_2}} You can change the protein in this dish. Swap chicken for shrimp or pork. They both cook well and taste great with the sauce. You can also switch up the veggies and fruits. Use zucchini, broccoli, or mango instead of bell peppers and pineapple. Each swap brings its own flavor and keeps the dish fresh. Add more spices or herbs for extra flavor. Try fresh basil or cilantro for a pop of freshness. You can also use thyme or oregano for a different twist. If you like heat, add more red pepper flakes. For a milder taste, leave them out. You can also try a dash of hot sauce. Adjusting these flavors makes the meal your own. To store leftovers, let the dish cool first. Place the chicken and veggies in a container. Use airtight containers for best results. Make sure to keep it in the fridge. This meal stays fresh for up to three days. When you’re ready to eat, just reheat it on the stove or in the microwave. To freeze this meal, let it cool completely. Place the chicken and veggies in a freezer-safe bag. Squeeze out extra air before sealing. This dish can stay in the freezer for about three months. When you're ready to enjoy it again, thaw it in the fridge overnight. Reheat in the oven or microwave until hot. Yes, this recipe is Whole30 compliant. It uses fresh ingredients and avoids added sugars, dairy, and grains. The coconut aminos replace soy sauce, giving you that umami flavor without breaking the rules. Absolutely! Feel free to swap in your favorite veggies. Zucchini, carrots, or snap peas work well. Just keep the cooking time in mind, as some vegetables may need longer to cook. For thicker chicken pieces, increase the cooking time by 5 to 10 minutes. Always check the chicken's internal temperature. It should reach 165°F (75°C) to ensure it’s safe to eat. Yes, you can prepare this dish ahead of time. Marinate the chicken and chop the vegetables the night before. Store them in the fridge. When you're ready, just bake them! You now have a great recipe for sheet pan chicken with vibrant veggies and tasty fruit. From marinating the chicken to baking it, each step adds unique flavor. Remember, you can swap ingredients and customize flavors to suit your taste. Don’t forget to store leftovers properly to enjoy them later. This dish is not only healthy but fun to make, with endless options. Enjoy cooking and impress your friends with this colorful meal!
    Whole30 Hawaiian Chicken Sheet Pan Delightful Meal
  • Cooking Cheesy Chicken Broccoli Tortellini is simple and fun. Here’s what you need to gather: - 2 cups cheese tortellini (fresh or frozen) - 1 cup cooked chicken breast, shredded - 1 cup broccoli florets, blanched - 1 cup heavy cream - 1 cup shredded mozzarella cheese - 1/2 cup grated Parmesan cheese - 2 tablespoons olive oil - 2 cloves garlic, minced - 1 teaspoon onion powder - Salt and pepper to taste - Fresh parsley, chopped (for garnish) Each ingredient plays a key role in making this dish creamy and cheesy. The cheese tortellini brings a soft texture, while the chicken adds protein. Broccoli gives a nice crunch and bright color. The heavy cream and cheeses create that rich sauce we all love. Olive oil and garlic enhance the flavor, while parsley adds a fresh touch at the end. Gather these ingredients, and you'll be ready to create a delightful meal that impresses everyone! {{ingredient_image_1}} To start, fill a large pot with salted water. Bring the water to a boil over high heat. Once it boils, add 2 cups of cheese tortellini. Cook the tortellini according to the package instructions, usually around 3 to 5 minutes. You want them to be tender but still firm, or al dente. After cooking, drain the tortellini and set them aside. Next, heat 2 tablespoons of olive oil in a large skillet over medium heat. Once the oil is hot, add 2 minced garlic cloves and 1 teaspoon of onion powder. Cook these for about 1 minute. You will smell the garlic and onion as they sizzle. Now, add 1 cup of shredded cooked chicken and 1 cup of blanched broccoli florets. Stir these together and cook for another 2 to 3 minutes, until warmed through. Now it’s time to make the cheese sauce. Lower the heat on your skillet. Pour in 1 cup of heavy cream, stirring to combine. Gradually add 1 cup of shredded mozzarella cheese and 1/2 cup of grated Parmesan cheese. Mix this continuously until all the cheese melts and the sauce becomes creamy. You want a smooth texture that coats the back of a spoon. Finally, it’s time to bring everything together. Add the cooked tortellini to the skillet with the cheese sauce. Gently toss the tortellini to coat them well in the creamy sauce. Season with salt and pepper to taste. This step is crucial, as it ties all the flavors together in each bite. To avoid curdling in your cheese sauce, keep the heat low. High heat can cause the cream to separate. Stir constantly as you add the cheese. This helps it melt evenly. For a creamy consistency, use heavy cream. It gives a rich flavor and smooth texture. Blanching broccoli is key. It keeps the bright green color and crisp texture. Just boil it for two minutes, then plunge it into ice water. This stops the cooking process. Timing is also important. Add the chicken and broccoli to the pan before the cream. This warms them up and blends flavors nicely. For side dishes, a simple garden salad works well. It adds freshness and crunch. You can also serve garlic bread for a cozy touch. For garnishing, sprinkle fresh parsley on top. It adds color and a hint of flavor. Pro Tips Use Fresh Ingredients: Fresh broccoli and high-quality cheese will enhance the flavor and texture of your dish. Don’t Overcook the Tortellini: Make sure to cook the tortellini just until al dente to maintain their shape and texture in the dish. Customize Your Cheese: Feel free to mix different types of cheese for a unique flavor profile; cheddar or gouda can be delicious alternatives. Garnish for Freshness: Adding fresh parsley or even a squeeze of lemon juice right before serving can brighten up the dish. {{image_2}} You can switch up the protein in this dish. Shrimp adds a fresh taste. Tofu is a great choice for a plant-based meal. Try using different vegetables too. Spinach, peas, or even bell peppers work well. Each adds its own flavor and texture. To make this dish gluten-free, choose gluten-free tortellini. Many brands offer tasty options. For a dairy-free meal, use coconut cream instead of heavy cream. Nutritional yeast can replace cheese for a cheesy flavor without dairy. Adding spices can boost the flavor. A pinch of red pepper flakes adds heat. Fresh herbs like basil or thyme can brighten the dish. You can also use flavored tortellini, like spinach or roasted garlic, for added depth. These changes can make each meal unique and exciting. Store any leftovers in an airtight container. This helps keep the dish fresh. You can keep it in the fridge for up to three days. Always let it cool down first before sealing it up. You can freeze Cheesy Chicken Broccoli Tortellini for up to three months. Make sure to use a freezer-safe container. When you want to eat it, let it thaw in the fridge overnight. To reheat, warm it gently on the stove or in the microwave. Add a splash of cream or milk for a creamy texture. This helps the dish stay rich and tasty. Avoid reheating it too long to keep the cheese from becoming tough. To make this dish vegetarian, you can swap the chicken for plant-based proteins. Here are some tasty options: - Use firm tofu, diced and sautéed until golden. - Try chickpeas for a protein boost. - Use seitan for a meat-like texture. - Substitute with mushrooms for an earthy flavor. These swaps keep the dish rich and satisfying without meat. Yes, you can use frozen tortellini! Here are some tips: - Cook the frozen tortellini directly in boiling water. - Increase the cooking time by a few minutes. - Check the package for specific time guidelines. - Drain and add to your sauce when tender. Frozen tortellini works great and saves time in the kitchen! This dish pairs well with several sides: - A fresh garden salad adds crunch and color. - Garlic bread complements the creamy sauce perfectly. - Roasted vegetables bring extra flavor and nutrition. - A light soup can start the meal on a warm note. These options enhance your dining experience and bring variety to the table. In this blog post, we explored a simple and tasty Cheesy Chicken Broccoli Tortellini dish. We covered the needed ingredients, step-by-step cooking instructions, and helpful tips to ensure a creamy sauce. I shared variations to fit different diets and suggested how to store leftovers properly. This dish is versatile and easy to make. You can customize it to your liking. I hope you enjoy trying this recipe and experimenting with your own twists. Cooking can be fun, so get creative in the kitchen!
    Cheesy Chicken Broccoli Tortellini Creamy Delight
  • - 8 oz penne or rigatoni pasta - 2 tablespoons olive oil - 1 lb smoked sausage (Andouille or Kielbasa) - 1 onion, diced - 3 cloves garlic, minced - 1 bell pepper, diced - 1 can (14.5 oz) diced tomatoes - 1 cup heavy cream - 1 tablespoon Cajun seasoning - 1 cup spinach leaves - Salt and pepper to taste - Grated Parmesan cheese for serving - Fresh parsley for garnish Gathering your ingredients is the first step to creating this tasty dish. Start by choosing between penne or rigatoni pasta. Both types will work well in this recipe. Next, you need olive oil for cooking. This adds flavor and helps the sausage brown nicely. For the sausage, Andouille or Kielbasa will give you that rich, smoky taste. You’ll also need a diced onion and minced garlic for a base of flavor. The bell pepper adds sweetness and crunch. Don’t forget the can of diced tomatoes, which brings moisture and a nice tang. For that creamy texture, heavy cream is key. The Cajun seasoning gives the dish its signature kick. Spinach adds a pop of color and nutrition. Finally, you’ll want salt and pepper to taste, grated Parmesan cheese for that cheesy finish, and fresh parsley for a lovely garnish. With these ingredients ready, you're on your way to making a delicious meal! {{ingredient_image_1}} - Start by bringing a large pot of salted water to a boil. - Add 8 oz of penne or rigatoni pasta. - Cook according to the package instructions until the pasta is al dente. - Drain the pasta and set it aside for later. - In a large skillet, heat 2 tablespoons of olive oil over medium heat. - Once the oil is hot, add 1 lb of sliced smoked sausage, like Andouille or Kielbasa. - Cook the sausage for 5-7 minutes until it turns brown and crispy. - Next, add 1 diced onion, 1 diced bell pepper, and 3 cloves of minced garlic to the skillet. - Sauté this mix for about 3-4 minutes until the veggies soften. - Stir in 1 can of diced tomatoes with juice and 1 tablespoon of Cajun seasoning. - Let this simmer for about 3-5 minutes so the flavors meld together. To thicken your creamy sauce, let it simmer on low heat. This helps it reduce nicely. If you want it thicker, feel free to add more cream. You can also mix in a bit of cheese for extra richness. Adjust the seasoning to your taste. Start with just a pinch of salt and pepper. You can add more Cajun seasoning to kick up the heat. Taste as you go to find the perfect balance. Cooking pasta al dente means it will have a slight bite. This adds great texture to your dish. To achieve this, follow the package's timing closely. Remember, pasta will continue to cook after you drain it. Add the pasta to the sauce just before it’s fully cooked. This way, it absorbs the yummy sauce and flavors. For sides, garlic bread complements the pasta well. A fresh salad adds a nice crunch. When serving, sprinkle grated Parmesan cheese on top. This adds flavor and creaminess. Fresh parsley gives a pop of color and freshness. It makes your dish look and taste great! Pro Tips Choose Your Sausage Wisely: For the best flavor, opt for a high-quality smoked sausage like Andouille or Kielbasa. These will infuse the dish with a rich, smoky taste. Adjust the Spice Level: Cajun seasoning can vary in heat. Start with a tablespoon and taste before adding more to ensure it suits your spice preference. Use Fresh Ingredients: Fresh spinach and ripe tomatoes will elevate the dish's flavor and texture. Frozen spinach can be used, but fresh will provide a better taste. Don’t Overcook the Pasta: Aim for al dente pasta to ensure it holds its shape and texture when mixed with the sauce. The pasta will continue to cook slightly once combined with the sauce. {{image_2}} You can easily make this dish vegetarian. Just swap the sausage for a plant-based option. Look for products like vegan sausage or even mushrooms. Both add great texture and flavor. Use the same amount, one pound, to keep the balance. You’ll still get a rich, creamy sauce that makes this pasta amazing! Want more heat? Add extra Cajun seasoning or red pepper flakes. Start with a pinch, then taste. You can also add diced jalapeños for a fresh kick. If you prefer it milder, reduce the Cajun seasoning. Use just half a tablespoon. You can always add more later if needed. Feel free to mix up the veggies! You can use zucchini, asparagus, or even broccoli. They all work well in this dish. For the cream, you can use half-and-half or even coconut milk for a dairy-free option. Just keep the amount the same, one cup. These swaps keep the dish fresh and fun! To keep your Creamy Cajun Sausage Pasta fresh, follow these steps: - Let the pasta cool down to room temperature. - Place it in an airtight container. - Store it in the fridge for up to 3 days. This method helps prevent spoilage and keeps your pasta tasty. When you're ready to enjoy leftovers, reheating is key. Here are two good methods: - Stovetop: Place the pasta in a skillet. Add a splash of milk or cream to help it stay creamy. Heat on low, stirring often until warm. - Microwave: Put the pasta in a microwave-safe dish. Cover it with a damp paper towel. Heat in short bursts of 30 seconds, stirring in between, until it's hot. Both methods keep the flavor and texture nice. If you want to freeze your pasta, consider these points: - Use a freezer-safe container or bag. - Leave some space for the pasta to expand as it freezes. - It can last up to 2 months in the freezer. To serve, let it thaw in the fridge overnight. Then, reheat using the stovetop or microwave methods. This way, you can enjoy the dish later without losing taste. Creamy Cajun Sausage Pasta lasts about 3 to 4 days in the fridge. Store it in an airtight container to keep it fresh. Make sure to let it cool before sealing. This way, you prevent extra moisture inside. Always check for any off smells or changes in color before eating leftovers. Yes, you can make this recipe ahead of time. Cook the pasta and sausage mix, then store them separately. This keeps the pasta from getting mushy. When ready to eat, simply heat them together with the sauce. You can also prep the vegetables the day before. This saves time on cooking day. Yes, you can freeze Creamy Cajun Sausage Pasta. However, the cream may separate when thawed. To freeze, let the dish cool completely, then place it in a freezer-safe container. It stays good for about 2 to 3 months. When ready to eat, thaw it overnight in the fridge. Reheat slowly on the stove, stirring well to combine the sauce. This dish is a simple yet tasty meal made with pasta, sausage, and veggies. From choosing the right ingredients to cooking them well, you now have the keys to success. I showed you how to make it creamy and flavorful, and even how to store it for later. Don't hesitate to try the variations to suit your taste. Enjoy your creamy Cajun sausage pasta, and happy cooking!
    Creamy Cajun Sausage Pasta Flavorful and Easy Recipe
  • - 12 oz spaghetti or bucatini pasta - 4 tablespoons unsalted butter - 3 cloves garlic, minced - 1/2 teaspoon red pepper flakes (adjust to taste) - 1 cup heavy cream - 1 cup grated Parmesan cheese - Zest of 1 lemon - 1 tablespoon lemon juice - Salt and black pepper to taste - Fresh parsley, chopped (for garnish) - Optional: 1/4 cup crispy fried shallots for topping The ingredients in this dish create a rich flavor that feels like a warm hug. The pasta is the base, giving you that comforting feel. You can use spaghetti or bucatini; both work well. The unsalted butter and garlic add depth. You can adjust the red pepper flakes to fit your spice level. Cream makes the dish silky. Parmesan brings in a savory note, while lemon zest and juice brighten everything up. Salt and black pepper season the dish. Fresh parsley adds color and freshness. If you want a crunchy twist, add crispy fried shallots. These ingredients blend together for a meal that warms your heart and fills your belly. {{ingredient_image_1}} To start cooking the pasta, bring a large pot of salted water to a boil. This step is key for flavor. Add 12 oz of spaghetti or bucatini. Cook it according to the package instructions until it is al dente, which usually takes about 8 to 10 minutes. Once the pasta is ready, you need to reserve some water. Use a measuring cup to take out 1 cup of pasta water before draining the rest. This water has starch that helps thicken the sauce later. After reserving the water, drain the pasta and set it aside. Next, it's time to prepare the sauce. In a large skillet over medium heat, melt 4 tablespoons of unsalted butter. Be careful not to burn it. Once the butter melts, add 3 cloves of minced garlic and 1/2 teaspoon of red pepper flakes. Sauté these together for about 1 to 2 minutes. You want the garlic to be fragrant but not browned. Then, pour in 1 cup of heavy cream. Stir this to combine well. Let the mixture simmer gently for about 3 to 5 minutes. This softens the flavors and helps thicken the sauce. Now, it’s time to bring it all together. Gradually whisk in 1 cup of grated Parmesan cheese until it melts and becomes smooth. Don’t forget to add the zest of 1 lemon and 1 tablespoon of lemon juice. This gives the dish a fresh kick. Season the sauce with salt and black pepper to taste. Finally, add the cooked pasta to the skillet with the sauce. If your sauce is too thick, gradually stir in some of the reserved pasta water until it reaches your desired consistency. Toss everything well to coat the pasta evenly in the creamy sauce. Enjoy your flavorful comfort dish! - Adjusting Spice Levels Start with half a teaspoon of red pepper flakes. If you crave more heat, add more. Taste often while cooking to get your perfect spice level. Remember, you can always add more, but you can't take it out! - Choosing the Right Pasta Spaghetti and bucatini are great choices. Bucatini has a hole in the middle, making it unique. This helps sauce cling better. Use what you like best; both will taste amazing! - Avoiding Overcooked Garlic Sauté garlic until it’s fragrant, about one to two minutes. Brown garlic can taste bitter. Keep your heat on medium, and watch it closely. You want that perfect golden color! - Ensuring Creamy Consistency When you add heavy cream, stir well. Let the sauce simmer gently for three to five minutes. This thickens it nicely. If your sauce is too thick, add some reserved pasta water until it’s just right. - Garnishing with Parsley Fresh parsley adds color and a hint of freshness. Chop it finely and sprinkle it over your pasta. This simple touch makes your dish look just like a restaurant meal! - Serving Suggestions Serve your pasta in warm bowls. For extra crunch, top with crispy fried shallots. This adds a fun texture that pairs well with the creamy sauce. Enjoy your beautiful dish! Pro Tips Use Fresh Ingredients: Always choose fresh garlic and high-quality Parmesan cheese for the best flavor in your sauce. Adjust the Spice Level: Feel free to modify the amount of red pepper flakes according to your heat preference; you can start with less and add more as needed. Reserve Pasta Water: Don’t forget to reserve pasta water before draining; it’s a great way to adjust the sauce consistency without losing flavor. Garnish Creatively: Adding crispy fried shallots not only enhances the texture but also adds an extra layer of flavor to the dish. {{image_2}} You can easily add protein to your spicy copycat Carbone pasta. - Chicken or Shrimp: Grilled chicken or sautéed shrimp work well. Cook them separately and mix them in with the pasta. This adds flavor and makes the dish heartier. - Vegetarian Options: For a meat-free meal, try adding chickpeas or tofu. They soak up the sauce and give you a nice texture. Adding more flavors can elevate your dish even further. - Adding Vegetables: Spinach or mushrooms are great choices. Sauté spinach until wilted or add mushrooms for a savory taste. Toss them in right before you mix in the pasta. - Experimenting with Different Cheeses: Swap Parmesan for Pecorino Romano or add mozzarella. Each cheese brings a different taste and texture to the dish. Feel free to change up the sauce to suit your taste. - Tomato-Based Variants: You can make a tomato sauce with crushed tomatoes, garlic, and herbs. This gives a fresh twist and can balance the spice. - No-Cream Versions: If you want a lighter dish, skip the cream. Use olive oil and vegetable broth instead. This keeps the pasta flavorful while cutting down on richness. To keep your Spicy Copycat Carbone Pasta fresh, store it in the fridge. Place it in an airtight container. It will stay good for about three days. For best taste, eat it sooner rather than later. Use glass or plastic containers with tight lids. They help prevent air from getting in. This keeps your pasta creamy and flavorful. When you're ready to eat, you can quickly reheat the pasta. The microwave works well for this. Just place the pasta in a bowl and cover it. Heat for one to two minutes. Stir halfway to warm it evenly. To keep the sauce creamy, add a splash of milk or extra cream while reheating. This will help revive that rich flavor. If it looks dry, add a little reserved pasta water too. You can freeze Spicy Copycat Carbone Pasta if you have leftovers. Place it in a freezer-safe container. Make sure it’s sealed well to avoid freezer burn. It can last for up to three months in the freezer. Cool the pasta completely before freezing. This helps to keep the texture nice. Label your container with the date, so you remember when you froze it. To thaw, move the pasta to the fridge overnight. When ready to eat, reheat it using the microwave or on the stove. Add a bit of cream to help with the sauce. Stir well to mix everything before serving. Spicy Copycat Carbone Pasta is a creamy, spicy dish that warms the heart. It uses spaghetti or bucatini, butter, garlic, red pepper flakes, heavy cream, and Parmesan cheese. The result is a rich pasta that is both comforting and exciting. This recipe is inspired by a famous restaurant dish. It brings the taste of fine dining into your kitchen. Yes, you can make this recipe ahead of time. To prepare, cook the pasta and sauce as directed. Let them cool before storing. Use an airtight container for best results. You can store the pasta and sauce separately to keep the texture nice. If you need a substitute for heavy cream, you can use several options. Whole milk with butter is a good choice. You can mix 3/4 cup of milk with 1/4 cup of melted butter. For a non-dairy option, try coconut milk or cashew cream. Each option will change the flavor a bit. Adjust the seasoning to keep it tasty. This blog post covered the key ingredients, step-by-step instructions, and expert tips for making Spicy Copycat Carbone Pasta. You learned how to create a rich, creamy sauce and the importance of using the right spices. I shared variations for adding protein or vegetables and provided storage tips for leftovers. In conclusion, cooking this dish at home is fun and easy. With practice, you can impress yourself and others with a delicious meal. Enjoy exploring the flavors and making it your own!
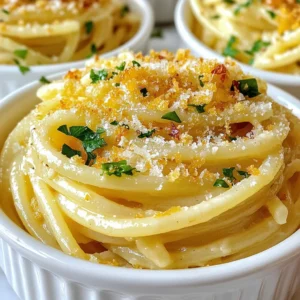
    Spicy Copycat Carbone Pasta Flavorful Comfort Dish
  • To make Cajun chicken bites, you will need simple and fresh ingredients. Here is what you need: - 1 lb chicken breast, cut into bite-sized pieces - 2 tablespoons Cajun seasoning - 1/2 cup buttermilk - 1/2 cup all-purpose flour - 1/4 cup cornmeal - 1/2 teaspoon garlic powder - 1/2 teaspoon paprika - 1/4 teaspoon cayenne pepper (optional for extra heat) - Salt and pepper to taste - Vegetable oil (for frying) - Fresh parsley, chopped (for garnish) Each ingredient plays a key role in the flavor and texture of the dish. The chicken breast offers lean protein. Cajun seasoning brings that spicy, bold flavor. Buttermilk adds creaminess and helps tenderize the chicken. The flour and cornmeal together create a crispy coating. Garlic powder and paprika add depth and warmth. Cayenne pepper gives a kick, but you can skip it if you want milder bites. Salt and pepper enhance everything. Finally, vegetable oil is perfect for frying, giving a nice crisp. Fresh parsley adds a pop of color and freshness when you serve. {{ingredient_image_1}} First, gather your chicken breast pieces. Place them in a medium bowl. Pour in the buttermilk. Make sure all the chicken is covered. Let it sit for at least 30 minutes. This step helps make the chicken juicy and soft. While the chicken marinates, grab another bowl. Mix the Cajun seasoning, flour, cornmeal, garlic powder, paprika, salt, and pepper. If you want more heat, add cayenne pepper. Stir well until everything is combined. This coating gives the chicken its flavorful crunch. Next, take a deep skillet or frying pan. Fill it with vegetable oil. Heat the oil over medium heat. Use a thermometer to check when it reaches 350°F (175°C). This is the right temperature for frying. Too hot will burn the chicken; too cool will make it soggy. Once the oil is hot, take the chicken out of the buttermilk. Let the excess buttermilk drip off. Then, dredge each piece in the flour mixture. Ensure each piece is fully coated. Carefully place them in the hot oil. Do not overcrowd the pan. Fry for about 4-5 minutes. Flip them halfway through for even cooking. Look for a golden brown color. When the chicken bites are done, use a slotted spoon to take them out. Place them on a plate lined with paper towels. This will help soak up extra oil. Finally, sprinkle fresh parsley on top for a pop of color. Your Cajun chicken bites are now ready to enjoy! Marinating the chicken is key. I use buttermilk to tenderize the meat. It makes the chicken juicy and adds flavor. Let the chicken soak for at least 30 minutes. If you have time, try marinating for a few hours. This step makes a big difference in taste. For a crispy bite, use a mix of flour and cornmeal. This combo gives great texture. Add garlic powder and paprika for extra flavor. Make sure to coat each chicken piece well. Shake off any extra flour mix before frying. This helps to keep the coating intact while cooking. When frying, always be careful. Heat the oil to about 350°F (175°C). Use a thermometer to check the temp. Never overcrowd the pan. This can lower the oil's heat and make your chicken soggy. Use tongs to place chicken in the oil gently. Keep a close eye on the cooking time. Flip the bites halfway for even cooking. Pro Tips Marinate for Maximum Flavor: Allowing the chicken to marinate in buttermilk for at least 30 minutes not only tenderizes the meat but also enhances the overall flavor of your dish. Perfect Coating Ratio: Mixing cornmeal with flour adds a delightful crunch to your chicken bites. Make sure to coat each piece evenly for the best texture. Oil Temperature Matters: Ensure your oil is at the right temperature (350°F) before frying. This helps achieve a golden brown crust while keeping the chicken juicy inside. Drain Properly: After frying, place the chicken bites on a paper towel-lined plate to absorb excess oil. This will keep them crispy and prevent them from becoming soggy. {{image_2}} Want to turn up the heat? Add more cayenne to the seasoning mix. You can also use hot sauce in the buttermilk. This will give your chicken bites a delightful kick. Remember, spice levels depend on your taste, so adjust as needed. Air frying is a great way to make these bites crispy without deep frying. After marinating, coat the chicken as usual. Preheat your air fryer to 400°F (200°C). Place the chicken in a single layer and cook for about 10-12 minutes. Flip halfway through for even cooking. They will come out crispy and delicious! You can easily make this dish gluten-free. Swap out all-purpose flour for a gluten-free blend. Cornmeal is often gluten-free, but check the label. Use gluten-free Cajun seasoning too. This way, everyone can enjoy the tasty Cajun chicken bites! After you enjoy your Cajun chicken bites, store leftovers in an airtight container. This keeps them fresh. Be sure to let them cool down first. You can store them in the fridge for up to three days. If you want to save them longer, consider freezing. To reheat, you have a few options. The best way is to use an oven. Preheat it to 350°F (175°C). Place the chicken bites on a baking sheet. Heat for about 10 minutes until they are hot. You can also use a microwave, but they may not stay crispy. Heat in 30-second intervals until warm. If you want to freeze your Cajun chicken bites, follow these steps. First, let them cool completely. Then, place them in a freezer-safe bag. Remove as much air as possible. Label the bag with the date. They can last up to three months. When you are ready to eat them, thaw in the fridge overnight before reheating. To spice up your Cajun chicken bites, add more cayenne pepper. You can also try adding hot sauce to the buttermilk marinade. If you like heat, use a spicier Cajun seasoning blend. Adjust the amount based on your heat preference. Yes, you can use chicken thighs! They are juicier and have more flavor than chicken breasts. Cut the thighs into bite-sized pieces just like you would with breasts. The cooking time will be similar as long as the pieces are roughly the same size. Cajun chicken bites go great with several dipping sauces. I recommend ranch dressing for a cool contrast. Honey mustard adds a sweet touch. For a kick, try spicy aioli or a zesty remoulade. Feel free to experiment with your favorite sauces! Yes, you can bake the chicken bites! Preheat your oven to 400°F (200°C). Place the coated chicken on a baking sheet lined with parchment paper. Bake for about 20-25 minutes, flipping halfway through. This method gives you a healthier option while still keeping the flavor. You can store leftover Cajun chicken bites in the fridge for up to three days. Keep them in an airtight container to maintain freshness. If you want to keep them longer, consider freezing them for up to three months. In this article, we covered how to make delicious Cajun chicken bites. You learned about the key ingredients, step-by-step instructions, and helpful tips. I shared variations to fit your taste and storage info for leftovers. Keep experimenting and adjusting the spices to find your perfect flavor. Cajun chicken bites are fun to make and even more fun to eat. Enjoy your cooking adventure!
    Cajun Chicken Bites Flavorful and Easy Recipe
  • - 2 cups water - 1 cup whole milk (or plant-based milk) - 2 teaspoons loose black tea or 2 tea bags - 1 tablespoon fresh ginger, grated - 4-5 green cardamom pods, crushed - 2-3 whole cloves - 1 small cinnamon stick - 1-2 teaspoons brown sugar - A pinch of smoked paprika - Optional garnish: mint leaves I love how this drink blends spices and smoky notes. Each ingredient adds depth. The water forms the base, while the milk creates creaminess. Black tea brings a rich flavor that balances well with spices. Fresh ginger adds warmth. The crushed cardamom pods give a sweet, floral note. Cloves provide a hint of warmth, and cinnamon lends earthiness. Smoked paprika is the secret to that unique, bold flavor. It gives the chai a delightful smokiness that warms you. The brown sugar adds just the right sweetness, making it cozy. Feel free to add fresh mint leaves on top for a refreshing touch. This drink is perfect on a chilly day or anytime you crave comfort. Enjoy experimenting with these ingredients! {{ingredient_image_1}} To start, grab a saucepan. In it, combine 2 cups of water, 1 tablespoon of grated ginger, 4-5 crushed green cardamom pods, 2-3 whole cloves, and 1 small cinnamon stick. This mix holds the key to bold flavor. Next, heat the saucepan over medium heat. Bring the mixture to a boil. Once it bubbles, lower the heat. Let it simmer for 5 to 7 minutes. This slow cooking helps the spices release their full flavor. After the spices have simmered, it’s time to add the tea. Use 2 teaspoons of loose black tea or 2 tea bags. Stir them in and let the mix simmer for another 2 to 3 minutes. Now, pour in 1 cup of whole milk or your choice of plant-based milk. Add 1-2 teaspoons of brown sugar for sweetness. Turn the heat back to medium. Stir gently and let it heat just below boiling. Be careful not to let it boil over. While the chai heats, it’s time for the secret ingredient. Add a pinch of smoked paprika to the mix. This spice gives a unique smoky flavor that sets this chai apart. Stir well to blend it in. Finally, remove the saucepan from heat. Use a fine mesh sieve to strain the chai into cups or a teapot. This step removes the spices and tea leaves, leaving you with a smooth drink. Enjoy your Smoky Masala Chai hot. If you like, add a few mint leaves for a nice touch! To make Smoky Masala Chai your own, adjust the spices based on your taste. If you like it spicier, add more ginger or cardamom. For a sweeter drink, increase the brown sugar. To get that smoky flavor, smoke the spices lightly before using them. You can also try using a pinch of smoked salt along with smoked paprika. This enhances the depth of flavor in your chai. Serve your chai hot in cozy mugs. This drink warms you up on chilly days. For a nice pairing, enjoy it with crunchy snacks like samosas or sweet treats like cookies. These pairings enhance the overall experience. One big mistake is over-boiling the milk. This can change the texture and make it grainy. Always heat the milk just below boiling. Another mistake is skipping the straining process. Straining removes the spices and tea leaves, giving you a smooth drink. Don't rush; take your time to enjoy every step. Pro Tips Use Fresh Spices: Freshly crushed spices release more aroma and flavor, enhancing your chai experience. Adjust Sweetness to Taste: Start with less sugar and adjust according to your preference; you can always add more! Experiment with Milk Alternatives: Different plant-based milks (like oat or almond) can change the flavor profile—try them out! Add a Smoky Twist: For an extra smoky flavor, consider using smoked tea leaves instead of regular black tea. {{image_2}} You can make Smoky Masala Chai with plant-based milk. Almond, oat, or coconut milk work well. These options create a creamy texture without dairy. Each choice adds a unique flavor. For instance, coconut milk adds a hint of sweetness. Oat milk gives a smooth finish. Choose what you like best for your chai. Feel free to customize the spices in your chai. Adding nutmeg gives a warm, sweet note. Black pepper adds a touch of heat. Star anise brings a fragrant, licorice-like flavor. Experiment with different spices to find your perfect mix. Just a little change can make a big difference in taste. Want to enjoy Smoky Masala Chai cold? Iced chai is refreshing on warm days. Start by making the hot chai as usual. After straining, let it cool to room temperature. Pour the cooled chai over ice. You can add a splash of plant-based milk for creaminess. For extra flair, garnish with mint leaves. Enjoy your chilled drink! To keep your Smoky Masala Chai fresh, use airtight containers. Glass jars or plastic containers work well. Store the chai in the fridge if you have extra. Make sure it cools down first before sealing it. This will help it stay tasty for up to three days. When reheating, use a small pot on low heat. This keeps the flavor strong and smooth. Stir gently as it warms up. Aim for about 5-10 minutes until it's hot but not boiling. Boiling can change the taste and texture, which we want to avoid. If you want to save some chai for later, freezing is a good choice. Pour the cooled chai into freezer-safe containers. Leave a little space at the top to allow for expansion. You can freeze it for up to one month. To thaw, take it out and place it in the fridge overnight. Reheat it on low heat, just like before, for the best flavor. Enjoy your chai whenever you want a cozy drink! Smoky Masala Chai is a warm drink with rich flavors. It blends spices like ginger, cardamom, and cloves. The smoky taste comes from a pinch of smoked paprika. This drink combines sweet, spicy, and comforting notes. Key Ingredients: - Water - Whole milk (or plant-based milk) - Black tea - Fresh ginger - Green cardamom pods - Whole cloves - Cinnamon stick - Brown sugar - Smoked paprika - Mint leaves (optional) The chai starts with boiling water and spices, creating a strong base. Then, you add black tea and milk, enriching the flavor. The smoked paprika adds a unique twist, making it stand out. To make this chai caffeine-free, you can swap black tea for herbal tea. Rooibos tea works well for its smooth taste. You can also use chamomile or peppermint tea. These options keep the flavor profile intact but remove caffeine. Yes, you can use store-bought chai blends. Look for blends with spices like ginger and cardamom. Adjust the amount according to your taste. You can still add smoked paprika for that smoky flavor. Pre-made blends save time while still delivering delicious chai. In this blog post, we explored how to make Smoky Masala Chai. We covered the ingredients, methods, and tips to enhance your chai experience. Remember to adjust spices to fit your taste and avoid common mistakes like over-boiling the milk. You can also try fun variations, such as plant-based options or an iced version. Enjoy experimenting and creating a comforting cup that warms the soul. Whether you share it with friends or savor it alone, your chai will surely delight!
    Smoky Masala Chai Bold and Flavorful Comfort Drink
  • To make Penne Napoli Red Sauce, you need these key ingredients: - 250g penne pasta - 2 tablespoons olive oil - 1 medium yellow onion, finely chopped - 2 cloves garlic, minced - 1 carrot, grated - 1 celery stalk, finely chopped - 400g canned crushed tomatoes - 1 tablespoon tomato paste - 1 teaspoon dried oregano - 1 teaspoon sugar - Salt and pepper to taste - Fresh basil leaves, for garnish - Grated Parmesan or vegan cheese, for serving (optional) You can add a few extras to make your dish shine: - Red pepper flakes for heat - A drizzle of balsamic vinegar for tang - Fresh parsley for a pop of color If you don’t have an ingredient, here are some great swaps: - Use whole wheat penne for a healthier option. - Swap olive oil with avocado oil if needed. - Replace yellow onion with shallots for a milder flavor. - Use dried basil instead of fresh if you’re out. - For a vegan twist, skip the cheese or use nutritional yeast. These substitutions still keep the dish tasty and satisfying. {{ingredient_image_1}} To start, you need to cook the penne. First, grab a large pot. Fill it with water and add a pinch of salt. Bring the water to a boil over high heat. Once boiling, carefully add 250g of penne pasta. Cook it according to the package instructions. Aim for al dente, which means it should be firm to the bite. This usually takes about 10-12 minutes. After cooking, drain the pasta in a colander. Remember to save a cup of the pasta water for later. Set the pasta aside. Now, let’s sauté the vegetables. Take a large skillet and heat 2 tablespoons of olive oil over medium heat. Once hot, add a finely chopped medium yellow onion. Stir it for about 2 minutes until it starts to soften. Next, add 2 minced garlic cloves, 1 grated carrot, and 1 finely chopped celery stalk. Cook these veggies together for about 5-7 minutes. You want them soft and translucent. This step builds great flavor for your sauce. For the red sauce, it’s time to add the tomatoes. Stir in 400g of canned crushed tomatoes and 1 tablespoon of tomato paste into the skillet. Mix everything well to combine. Now, add 1 teaspoon of dried oregano, 1 teaspoon of sugar, and salt and pepper to taste. Bring the sauce to a gentle simmer. Let it cook for about 15 minutes, stirring occasionally. This allows the sauce to thicken nicely. If it gets too thick, add a few tablespoons of the reserved pasta water. Finally, add the drained penne to the sauce. Toss it gently to coat the pasta well. Now, you’re ready to serve your Penne Napoli! To get the best pasta, always use a big pot. Fill it with water and add salt. This helps the pasta taste great. Cook the penne until it is al dente. This means it should still have a slight bite. Remember to reserve some pasta water. You may need it later to adjust the sauce’s thickness. To boost the sauce's flavor, start with good olive oil. Use fresh garlic and onion. Sauté these until they are soft. Add the grated carrot and celery for sweetness. The canned crushed tomatoes bring the sauce together. Don't forget the dried oregano and a pinch of sugar. This balances the acidity of the tomatoes. Taste the sauce and adjust salt and pepper as needed. Let it simmer for 15 minutes to deepen the flavors. When serving, use a big bowl or plate. Top the penne with fresh basil leaves. This adds a nice pop of color and flavor. If you like cheese, sprinkle some grated Parmesan or vegan cheese on top. For a fun twist, serve with garlic bread on the side. Enjoy your meal with family or friends! Pro Tips Perfect Pasta Cooking: Always cook your pasta in a large pot of boiling salted water to ensure even cooking and to prevent it from becoming too sticky. Rich Flavor Boost: For an extra depth of flavor, consider adding a splash of red wine to the sauce while it simmers. Fresh Herbs Matter: Use fresh basil instead of dried for a more aromatic and vibrant flavor in your dish. Cheese Secrets: If you're using Parmesan, try grating it fresh right before serving for the best flavor and texture. {{image_2}} You can make Penne Napoli vegetarian or vegan easily. Just skip the cheese. Use a plant-based cheese for a vegan twist. The sauce already has lots of flavor from the veggies and tomatoes. You will not miss the meat at all. For added richness, try adding a splash of coconut cream. It gives a nice touch without changing the taste. If you need gluten-free options, look for gluten-free penne. Many brands make it from rice, corn, or quinoa. These options taste great and work well in the sauce. Cook them just like regular penne. Always check the package for cooking times. Want to add protein? Chicken and sausage are great choices. Cook them in the skillet before adding the veggies. This way, they soak up all the flavors. For a plant-based option, use tofu. Press it to remove extra moisture, then cube it. Sauté it with the veggies for a tasty addition. Each option adds a new layer of flavor to your dish. To keep your Penne Napoli fresh, let it cool first. Then, place it in an airtight container. Store it in the fridge for up to three days. If you want to keep it longer, freezing is a great option. When you're ready to eat, take out the Penne Napoli. You can reheat it in a skillet over medium heat. Add a splash of water or olive oil to help it warm up. Stir often to keep it from sticking. You can also use a microwave. Heat it in a bowl for about 1-2 minutes, stirring halfway through. To freeze Penne Napoli, follow these steps. First, let it cool completely. Then, pack it in a freezer-safe container. You can also use freezer bags. Make sure to remove as much air as possible. It will be good for up to three months. When you want to use it, thaw it in the fridge overnight before reheating. Making Penne Napoli Red Sauce takes about 35 minutes. This includes 10 minutes for prep and 25 minutes for cooking. You can enjoy a warm meal in no time! Yes, you can use fresh tomatoes! You will need about 800g of fresh tomatoes. Peel and chop them. Cook them down until they break apart, which can take a bit longer. The flavor will be bright and fresh. I recommend grated Parmesan for a great taste. If you prefer a vegan option, use a vegan cheese that melts well. Both options add a lovely creaminess to your dish. In this post, we covered how to make a tasty Penne Napoli Red Sauce. We explored the ingredients needed, including substitutes and serving options. I shared step-by-step instructions for cooking the pasta and making the sauce. Tips for perfecting texture and flavor made the recipe even better. We also discussed variations, storage, and common questions. Remember, cooking is about fun and trying new things. Enjoy your delicious meal!
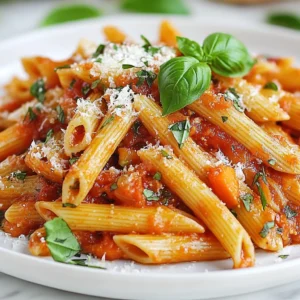
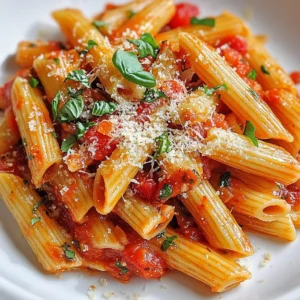
    Penne Napoli Red Sauce Flavorful and Simple Recipe
  • - 1 lb flank steak, thinly sliced against the grain - 2 tablespoons cornstarch - 2 tablespoons sesame oil - 1 red bell pepper, sliced - 1 yellow bell pepper, sliced - 2 green onions, chopped - 2 cloves garlic, minced - 1 tablespoon fresh ginger, grated Flank steak is key for this dish. It cooks quickly and stays tender. The sliced bell peppers add color and crunch. Garlic and ginger bring a warm, earthy taste that lifts the dish. - 1/4 cup soy sauce - 2 tablespoons hoisin sauce - 1 teaspoon red pepper flakes (adjust to taste) - 1 tablespoon rice vinegar - Salt and pepper to taste Soy sauce adds a rich umami flavor. Hoisin sauce offers a sweet touch. Red pepper flakes give a nice kick. Adjust these spices to suit your taste! - Skillet or wok - Mixing bowl - Knife and cutting board A good skillet or wok helps cook everything evenly. Use a mixing bowl for marinating the beef. A sharp knife and cutting board make slicing easy and safe. With these tools, you'll have a smooth cooking experience! {{ingredient_image_1}} To start, take 1 pound of flank steak and slice it thinly against the grain. This helps make the beef tender. In a mixing bowl, add the sliced beef, 2 tablespoons of cornstarch, a pinch of salt, and pepper. Toss everything well to coat the beef evenly. Let it sit for about 10 to 15 minutes. This short marinating time helps the beef absorb the flavors and gives it a nice texture. Next, heat 2 tablespoons of sesame oil in a large skillet or wok over medium-high heat. Once the oil is hot, add the marinated beef in a single layer. Sear the beef for 2 to 3 minutes without stirring. This helps form a nice crust. After that, flip the beef and cook for another 2 minutes. It should be browned but not fully cooked. Remove the beef from the skillet and set it aside. In the same skillet, add 2 minced cloves of garlic and 1 tablespoon of grated fresh ginger. Sauté them for about 30 seconds until they smell great. Then, add 1 sliced red bell pepper, 1 sliced yellow bell pepper, and 2 chopped green onions. Stir-fry these veggies for 3 to 4 minutes until they soften a bit. Now, it’s time to bring everything together. Add the beef back into the skillet with the veggies. Then, pour in 1/4 cup of soy sauce, 2 tablespoons of hoisin sauce, 1 tablespoon of rice vinegar, and 1 teaspoon of red pepper flakes. Stir everything well and cook for another 2 to 3 minutes. This allows the beef to finish cooking and the sauce to heat up and thicken. Taste and adjust the seasoning if needed, adding more salt or pepper. Serve the dish hot over cooked rice or noodles, and enjoy! How can you adjust the spiciness levels? You can control heat by changing the amount of red pepper flakes. Start with less if you prefer mild. Add a pinch more if you like it spicy. Taste as you go. This way, you find the right balance for your taste buds. What about additional seasoning options? Try adding a splash of lime juice for brightness. You can also use a dash of sesame seeds for crunch. Fresh herbs like cilantro can add a fresh note. Experiment with what you have on hand! What are the best practices for stir-frying? First, ensure your skillet or wok is very hot. This helps to sear the meat quickly. Cook in batches if needed to avoid steaming. Keep the beef in a single layer for better browning. How can you avoid overcooking the beef? Remove the beef from heat while slightly undercooked. It will continue to cook in the skillet with the sauce. This keeps it tender and juicy. Always check for doneness by cutting a piece. What are some suggestions for garnishing? Top your dish with chopped green onions or sesame seeds. You can also add slices of fresh chili for color. A sprinkle of fresh herbs makes the dish pop visually. What are good serving suggestions? Serve Minute Firecracker Beef over fluffy rice or noodles. Both options soak up the sauce well. You can also add a side of steamed veggies for balance. This makes for a complete and satisfying meal. Pro Tips Slice Against the Grain: Ensure you slice the flank steak against the grain for tender pieces that are easier to chew. Marinate for Flavor: Allow the beef to marinate for a minimum of 15 minutes to enhance its flavor and tenderness. Adjust Spice Level: Control the heat by adjusting the amount of red pepper flakes based on your preference for spice. Serve with Fresh Garnish: Garnish with additional green onions or sesame seeds for a burst of freshness and crunch. {{image_2}} You can switch beef for chicken or tofu. Chicken cooks quickly and stays juicy. Use the same amount, about 1 pound. Cook chicken for about 5-7 minutes. Tofu needs a little longer to get crispy, around 8-10 minutes. Make sure to press the tofu to remove extra water before cooking. If you want a vegetarian dish, use mushrooms instead of beef. Portobello or shiitake mushrooms offer great flavor. You can also add other veggies like zucchini or snap peas. This gives your meal more color and taste. Cook the mushrooms for about 5 minutes until soft. Feel free to change the sauces to fit your taste. You can try teriyaki sauce for a sweeter flavor. Adding lime juice can make it tangier. Mix in some chili garlic sauce for extra heat. Experimenting with different sauces makes this dish fun and unique! To keep your Minute Firecracker Beef fresh, store it in the fridge. Use airtight containers to avoid spills and keep flavors intact. Let the beef cool to room temperature before sealing. This helps prevent moisture buildup. You can freeze Minute Firecracker Beef for later use. Place the cooled dish in a freezer-safe container. Make sure to leave space for expansion. For best taste, consume within three months. To thaw, move it to the fridge overnight. When ready to eat, reheat in a skillet over low heat until hot. Stir often to heat evenly. Minute Firecracker Beef lasts about three to four days in the fridge. Always check for signs of spoilage. If it smells off or has a strange color, discard it. Eating spoiled food can make you sick, so it's better to be safe. Minute Firecracker Beef can be quite spicy. The heat comes from the red pepper flakes. If you want less heat, adjust the amount you use. Start with half a teaspoon. You can always add more later. You can also remove the red pepper flakes altogether. This way, you can enjoy the dish without the spice. Yes, you can prepare Minute Firecracker Beef ahead of time. Marinate the beef and chop the veggies in advance. Store them in separate containers in the fridge. When you are ready to eat, just stir-fry everything together. The dish will taste fresh and delicious. Reheating is easy too. Just warm it in a skillet for a few minutes until hot. Minute Firecracker Beef pairs well with several side dishes: - Cooked white or brown rice - Stir-fried noodles - Steamed broccoli or green beans - A fresh salad with a light dressing For a complete meal, add a simple soup. Hot and sour soup or egg drop soup works great. Enjoy your tasty, colorful plate! To make Minute Firecracker Beef, you need fresh ingredients and simple tools. Marinate the beef well for flavor. Sear it for that perfect crust. Stir-fry the veggies and mix everything together for a quick meal. Remember, you can swap proteins or tweak the sauce to fit your taste. In the end, this dish is fun to make and enjoy. It suits any skill level in the kitchen. With practice, it can become a family favorite!
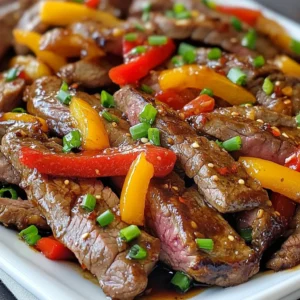
    Minute Firecracker Beef Flavorful Stir-Fry Recipe
  • To make Taco Pizza, you need a few key ingredients. Here’s what you must have: - 1 pre-made pizza crust (store-bought or homemade) - 1 cup refried beans - 1 cup shredded cheddar cheese - 1 cup shredded mozzarella cheese - 1 cup cooked taco meat (ground beef or turkey seasoned with taco seasoning) - 1 medium tomato, diced - 1/2 cup black olives, sliced - 1/2 cup shredded lettuce - 1/4 cup diced red onion - 1/4 cup fresh cilantro, chopped - 1/2 cup sour cream (for drizzle) Feel free to make your Taco Pizza your own! Here are some optional ingredients you can add: - 1 tablespoon taco seasoning (for extra flavor) - Sliced jalapeños for heat - Corn for sweetness - Avocado slices for creaminess - Other favorite toppings like bell peppers or green onions To create your Taco Pizza, you’ll need a few handy tools: - Baking sheet or pizza stone - Rolling pin (if using homemade crust) - Mixing bowl for preparing toppings - Pizza cutter for easy slicing - Measuring cups for accurate portions With these ingredients and tools, you’re all set to create a delicious Taco Pizza that everyone will love! {{ingredient_image_1}} Start by preheating your oven to 425°F (220°C). This step is key for a crispy crust. Next, take your pre-made pizza crust. If it’s store-bought, simply roll it out on a baking sheet or a pizza stone. Make sure to leave a half-inch border around the edges. This will help hold all the tasty toppings. Now it’s time for the fun part! Spread 1 cup of refried beans evenly over the crust. This will act as a tasty base. Next, sprinkle 1 cup of shredded cheddar cheese. After that, add 1 cup of shredded mozzarella cheese on top. Next, layer on 1 cup of cooked taco meat. This can be ground beef or turkey seasoned with taco seasoning. After the meat, add diced tomatoes and 1/2 cup of sliced black olives. These will give your pizza a fresh touch. Place your pizza in the preheated oven. Bake it for 12-15 minutes. You want the cheese to be bubbly and melted, and the crust should look golden brown. Once it’s done, take it out of the oven. Let it cool for a couple of minutes. Finally, top your pizza with shredded lettuce, diced red onion, and fresh cilantro. Drizzle sour cream on top or serve it on the side for dipping. Enjoy your delicious Taco Pizza! To bake taco pizza just right, follow these steps. Preheat your oven to 425°F (220°C). This heat helps the crust get nice and crispy. Roll out or place your pizza crust on a baking sheet. Make sure it’s even. Spread refried beans across the crust, leaving a small edge. This adds great flavor. Layer on the cheddar and mozzarella cheese generously. Place cooked taco meat on top of the cheese. Bake for 12 to 15 minutes. Watch closely! The cheese should be bubbly and the crust golden. Let it cool for a few minutes before slicing. This helps the toppings stay put when you cut it. When serving taco pizza, think outside the box. Cut it into wedges for easy sharing. A sprinkle of extra cilantro adds a fresh look. Add a few olives on each slice for color. Lime wedges on the side give a tasty, zesty kick. Pair your pizza with a simple salad. A fresh green salad or a corn salad works well. You can also serve it with salsa or guacamole for extra flavor. Each bite will be a fiesta! To boost flavor, season your taco pizza wisely. Use taco seasoning in your meat. This adds a great kick! If you want more spice, add jalapeños or hot sauce. Try mixing different cheeses too. Pepper jack cheese brings a nice heat. You can also add spices like cumin or paprika to the beans. Don’t forget toppings! Fresh cilantro and diced red onion enhance each bite. Remember, the right seasonings make your taco pizza truly delicious! Pro Tips Pre-Bake the Crust: For a crispier crust, consider pre-baking the pizza crust for 5 minutes before adding the toppings. This helps prevent a soggy base. Customize Your Toppings: Feel free to mix and match your favorite taco toppings such as jalapeños, corn, or avocado to personalize your pizza. Use Fresh Ingredients: Using fresh veggies like tomatoes and lettuce will enhance the flavor and texture of your pizza. Always opt for the freshest produce available. Serve with a Side: Pair your Taco Pizza Delight with a fresh green salad or tortilla chips and salsa for a complete meal experience. {{image_2}} You can easily make a vegetarian taco pizza. Start with the same base. Use refried beans as your sauce. Instead of taco meat, pile on veggies like bell peppers, zucchini, and corn. Add a generous amount of cheese. I recommend using both cheddar and mozzarella for that perfect melt. Top it off with fresh tomatoes, olives, and lettuce after baking. This veggie twist tastes fresh and is hearty too. If you like heat, spice up your taco pizza! Use spicy taco seasoning on your meat. You can also add jalapeños or banana peppers for a kick. A drizzle of hot sauce before serving gives it an extra zing. Try using pepper jack cheese to add a creamy, spicy layer. For an even bolder flavor, mix in some sriracha with your sour cream for dipping. This spicy version will wake up your taste buds! For a gluten-free taco pizza, choose a gluten-free crust. Many stores offer pre-made options. You can also make your own with almond flour or cauliflower. The rest of the toppings stay the same. Use refried beans, cheese, and your favorite veggies or meats. Just be sure all ingredients are gluten-free. After baking, add your fresh toppings like lettuce and cilantro. This way, everyone can enjoy taco pizza without worry. To keep your leftover taco pizza fresh, first let it cool down. Once cool, slice the pizza into pieces. Place the slices in an airtight container. You can also wrap each slice in plastic wrap. Store it in the fridge for up to three days. This way, the flavors stay intact, and the crust remains tasty. When you're ready to enjoy your leftovers, preheat your oven to 350°F (175°C). Place the slices on a baking sheet. Heat for about 10-15 minutes. This makes the crust crispy again and warms the toppings. You can also use a microwave, but it may make the crust soft. If you choose the microwave, heat for 30 seconds at a time until warm. To freeze your taco pizza, first cool it completely. Slice the pizza as you would for storage. Wrap each slice tightly in plastic wrap. Then, place them in a freezer-safe bag. Squeeze out any air before sealing. You can freeze the pizza for up to two months. When you're ready to eat, thaw it in the fridge overnight and reheat as mentioned above. You can use many toppings for Taco Pizza. Here are some ideas: - Jalapeños for heat - Avocado slices for creaminess - Corn for sweetness - Fresh salsa for extra flavor - Chopped green onions for crunch Feel free to mix and match toppings. This lets you create your own flavor. Yes, you can use other meats. Ground turkey or chicken works well. You can also try beef, pork, or even plant-based meat. Season your meat to boost flavor. Just make sure it's cooked before adding it to your pizza. This step keeps the toppings nice and warm. To make a low-carb Taco Pizza, you can swap out the crust. Use a cauliflower crust or a fathead dough. You can also skip the beans and cheese. Instead, load up on meats and veggies. Use lettuce as a base and pile on your taco toppings. This keeps the fun flavors while cutting carbs. Taco pizza is simple and fun to make. You can customize it with your favorite toppings and spices. Follow the steps to prep, bake, and enjoy your delicious creation. Remember, you can make it vegetarian or spicy. Storing leftovers is easy, and reheating keeps it tasty. With these tips and tricks, you’ll impress everyone with your skills. Get ready to share and enjoy this tasty dish!
    Taco Pizza Delight Simple and Tasty Recipe
  • - 8 ounces penne pasta - 2 cups cooked chicken, shredded - 1 package (8 oz) cream cheese, softened - 1 cup ranch dressing - 1 cup sharp cheddar cheese, shredded - 1 cup chicken broth For Crack Chicken Penne, you need a few key ingredients. First, penne pasta is the heart of this dish. It holds the creamy sauce well. Next, use cooked chicken, shredded for easy mixing. Cream cheese adds richness and creaminess. Ranch dressing gives a tangy flavor. Sharp cheddar cheese melts beautifully and enhances taste. Lastly, chicken broth ties everything together, making it saucy and smooth. - ½ teaspoon garlic powder - ½ teaspoon onion powder - ½ teaspoon black pepper - ¼ cup sliced green onions (for garnish) - ¼ cup crispy bacon bits (optional for garnish, omit for a pure crack flavor) Seasoning is essential for great taste. Garlic powder and onion powder boost flavor without overpowering. Black pepper adds a touch of heat. For garnish, sliced green onions bring freshness. If you want extra crunch, sprinkle bacon bits on top. They add a savory touch that many love. {{ingredient_image_1}} First, fill a large pot with water and add salt. Bring this water to a boil. Once boiling, add 8 ounces of penne pasta. Cook the pasta according to the package directions until it is al dente. This usually takes about 8-10 minutes. After it cooks, drain the pasta in a colander. Set the pasta aside while you make the sauce. Grab a large skillet and place it on medium heat. Add 2 cups of shredded cooked chicken to the skillet. Next, add 1 package of softened cream cheese and 1 cup of ranch dressing. Pour in 1 cup of chicken broth. Then, sprinkle ½ teaspoon of garlic powder, ½ teaspoon of onion powder, and ½ teaspoon of black pepper into the mix. Stir everything well. As the cream cheese melts, it will blend with the other ingredients, creating a rich sauce. Let this mixture simmer for 5-7 minutes. Stir gently until hot and well combined. Now, it’s time to mix in the penne. Add the drained pasta to the skillet. Toss the pasta in the creamy chicken mixture until it is fully coated. Next, fold in 1 cup of shredded sharp cheddar cheese. Stir until the cheese melts and the pasta becomes extra creamy. Once done, take it off the heat and let it sit for a minute before serving. To ensure a smooth sauce, always start with softened cream cheese. This helps it blend easily. Cook the sauce on medium heat. Stir gently while it heats. If the sauce is too thick, add more chicken broth. This keeps it creamy. Aim for a cooking time of 5 to 7 minutes. This allows the flavors to meld well. Be careful not to overcook the mixture. You want it hot, but not boiling. For ideal presentation, serve Crack Chicken Penne in a large bowl. You can also use individual plates. Top with sliced green onions and extra cheddar cheese. This makes the dish look vibrant and fresh. Recommended side dishes include a light salad or garlic bread. The salad adds crunch and freshness. Garlic bread offers a nice, buttery touch that pairs well. If you need alternatives for cream cheese, try Greek yogurt. It gives a similar creaminess with less fat. Another option is cottage cheese, blended until smooth. For dairy-free options, use non-dairy cream cheese. Almond or cashew-based options work well. You can also use coconut milk for a different flavor. This helps keep the dish creamy without dairy. Pro Tips Use Rotisserie Chicken: For a quicker prep time, use store-bought rotisserie chicken. It’s flavorful and saves you the hassle of cooking and shredding the chicken yourself. Customize Your Cheese: Feel free to experiment with different types of cheese like mozzarella or pepper jack for a unique flavor twist in your Crack Chicken Penne. Make It Ahead: This dish can be made ahead of time and stored in the fridge. Just reheat it on the stove over low heat, adding a splash of chicken broth if needed to loosen the sauce. Add Veggies: Boost the nutritional value by adding vegetables like spinach or bell peppers. Just sauté them in the skillet before adding the chicken mixture for extra flavor and texture. {{image_2}} To add a kick, you can include hot sauce or diced jalapeños. This gives your dish a bold flavor. You will taste the heat in every bite. The creamy sauce balances the spice, making it tasty and exciting. Adjust the amount of hot sauce based on your heat preference. For a veggie boost, mix in fresh spinach or bell peppers. This makes your dish healthier and adds vibrant colors. You may need to cook the veggies for a few extra minutes. Start by adding them to the skillet before the chicken mixture. This way, they soften up nicely while keeping their crunch. If you're watching carbs, try using zucchini noodles instead of pasta. Spiralize the zucchini into noodle shapes for a fun twist. Cook them briefly to keep their texture. You may want to reduce the amount of chicken broth, as zucchini releases water. This keeps your dish flavorful and creamy without being watery. To keep your Crack Chicken Penne fresh, place it in the fridge. Store leftovers in airtight containers. This prevents drying out and keeps flavors intact. Use shallow containers to cool the dish faster. Make sure to refrigerate within two hours of cooking. This keeps bacteria at bay. When reheating, aim to keep the creamy texture intact. The best way to reheat is on the stove. Heat over low to medium heat, stirring often. This helps warm your dish evenly. You can also use the microwave, but do so in short bursts. Stir between intervals to avoid hot spots. Yes, you can freeze Crack Chicken Penne! To freeze, use airtight containers or freezer bags. Remove as much air as possible. For best results, freeze it within two days of cooking. When ready to eat, thaw in the fridge overnight. Reheat gently to restore its creamy goodness. Crack Chicken is a creamy, flavorful dish made with shredded chicken. It gained fame on social media and is loved for its ease and taste. The name comes from its addictive flavor, making it hard to stop eating. This dish combines ranch dressing, cream cheese, and cheese to create a rich sauce. It’s perfect for busy weeknights, family dinners, or potlucks. Yes, you can prepare Crack Chicken Penne in advance. To do this, cook the penne and make the sauce ahead of time. Store them separately in the fridge. When you are ready to eat, simply reheat the sauce and combine it with the pasta. This method keeps everything fresh and tasty. Absolutely! Crack Chicken Penne is great for meal prep. Divide the dish into portions and store in airtight containers. This makes it easy to grab a meal when you're busy. It keeps well in the fridge for about 3 to 4 days. You can reheat it in the microwave or on the stove. Yes, you can scale the recipe for larger or smaller servings. Just multiply or divide the ingredients based on how many people you are serving. If you want to serve two, use half the ingredients. For eight servings, double everything. This makes it easy to fit any gathering or meal plan. In this blog post, we explored how to make Crack Chicken Penne. We covered the main ingredients, step-by-step cooking instructions, and helpful tips for perfecting your dish. You learned ways to add a twist or adapt the recipe for different diets. Enjoy experimenting with flavors and serving this comfort dish. It’s perfect for family meals or meal prep. With the right storage and reheating methods, your leftovers will taste just as good. Dive into this tasty dish, and make it your own!
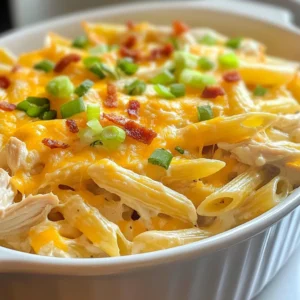
    Crack Chicken Penne Creamy Comfort Dish Delight
  • Here’s what you need to make Fiery Chicken Ramen with Garlic Sauce: - 2 boneless, skinless chicken thighs - 4 cups chicken broth - 2 packs of ramen noodles (discard seasoning packets) - 3 tablespoons sesame oil - 4 cloves garlic, minced - 1 tablespoon fresh ginger, grated - 1 red chili pepper, sliced (adjust based on spice preference) - 2 tablespoons soy sauce - 1 tablespoon chili paste (like sambal oelek) - 2 green onions, chopped - 1 cup baby spinach - 1 soft-boiled egg (optional) - Sesame seeds for garnish Each ingredient plays a key role in the dish. The chicken thighs add protein and flavor. Chicken broth serves as the base, bringing warmth. Ramen noodles provide that comforting texture. I use sesame oil for a rich, nutty taste. Garlic and ginger give a fragrant kick. The red chili pepper and chili paste add heat, but you can adjust these to your liking. Green onions offer a fresh crunch, while baby spinach adds color and nutrients. If you want to elevate your ramen, a soft-boiled egg on top is great! Finally, sesame seeds add a nice finish. Gather these ingredients, and you’re ready to start cooking. {{ingredient_image_1}} Seasoning the chicken thighs Start by seasoning the chicken thighs. Use salt and pepper for taste. This step boosts the flavor of the chicken. Cooking the chicken In a large pot, heat 1 tablespoon of sesame oil over medium heat. Add the chicken thighs to the pot. Cook them for about 5-7 minutes on each side. Look for a nice golden brown color. This shows they are cooked through. Resting and slicing the chicken After cooking, remove the chicken from the pot. Let it rest for a few minutes. This keeps the chicken juicy. Once rested, slice the chicken into thin strips. Sautéing garlic, ginger, and chili pepper In the same pot, add the rest of the sesame oil. Then, toss in the minced garlic, grated ginger, and sliced red chili pepper. Sauté these for about 2 minutes. This step fills your kitchen with a great smell. Adding chicken broth and simmering Next, pour in the chicken broth. Bring it to a gentle simmer. Add soy sauce and chili paste, stirring well. Let this simmer for about 5 minutes. This helps the flavors blend together. Adding ramen noodles and cooking time Now, add the ramen noodles to the broth. Cook them according to the package instructions. This usually takes about 3-4 minutes. You want the noodles to be al dente. Incorporating chicken and spinach Once the noodles are cooked, add the sliced chicken back into the pot. Also, throw in the baby spinach. Stir everything until the spinach wilts. This should take about 1-2 minutes. Now, your Fiery Chicken Ramen is ready for serving! To make your fiery chicken ramen shine, adjust the spice levels. Use less red chili pepper if you prefer milder heat. If you like it hot, add more chili paste. Balancing broth flavors is key. Taste the broth and add soy sauce gradually. This way, you can find the perfect salty touch without overpowering the other flavors. For soft-boiled eggs, start with cold water. Place the eggs in the water, then bring it to a boil. Boil for 6-7 minutes for a runny yolk. After boiling, place the eggs in ice water to stop the cooking. Peel them gently to keep the shape intact. When sautéing garlic and ginger, use medium heat. This allows their flavors to bloom without burning. Stir them quickly for about two minutes until fragrant. This step adds depth to your ramen. You can get creative with garnishing. Try adding sliced radishes or cilantro for a fresh touch. Sesame seeds add crunch and a nutty flavor. Presentation matters! Serve the ramen in deep bowls. Arrange the chicken and spinach neatly. Place the soft-boiled egg on top and sprinkle with green onions. A beautiful dish makes every bite more enjoyable. Pro Tips Adjust the Spice Level: If you prefer a milder dish, reduce the amount of red chili pepper and chili paste. You can also add more broth to dilute the heat. Perfect Soft-Boiled Egg: For the perfect soft-boiled egg, boil it for exactly 6-7 minutes, then plunge it into ice water to stop the cooking process before peeling. Flavor Boosters: Try adding a splash of rice vinegar or lime juice for an extra layer of flavor that complements the spiciness of the ramen. Make it a Meal Prep: This ramen can be made ahead of time! Just store the broth and noodles separately to prevent sogginess, and combine when ready to eat. {{image_2}} You can switch up the protein in this recipe. Try tofu for a tasty veggie option. Beef works well too, adding a rich flavor. If you need gluten-free noodles, look for rice noodles or gluten-free ramen. These swaps keep the dish fun and exciting. Want to boost the flavor? Add mushrooms or bok choy for extra crunch and nutrients. You can also try different spice blends. A dash of five-spice powder or some chili flakes can give your ramen a new twist. Mix and match to find your favorite! Ramen pairs well with side dishes. Serve it with a simple salad or some spring rolls. Both options balance the meal nicely. For drinks, try a light beer or a refreshing iced tea. These choices enhance your ramen experience. Enjoy experimenting! To keep your fiery chicken ramen fresh, store it right. First, let the ramen cool to room temperature. Then, place it in an airtight container. This helps to lock in flavors and moisture. I suggest using glass or BPA-free plastic containers. They are great for storing food and easy to clean. When it's time to enjoy your leftovers, you can reheat them in a few ways. The best method is to use the stove. Put your ramen in a pot over low heat. Add a splash of chicken broth or water to avoid dryness. Stir gently until it heats through. You can also use a microwave, but be careful! Heat it in short bursts and stir often to keep the flavor and texture intact. Can you freeze chicken ramen? Yes, you can! But remember, the noodles may get mushy. For best results, freeze the broth and chicken separately from the noodles. Use freezer-safe bags or containers. When you want to eat it, thaw the broth overnight in the fridge. Then, reheat it on the stove and add fresh noodles. This keeps your meal tasty and enjoyable! To tone down the heat, start by using less red chili pepper. You can also skip the chili paste or use a milder version. Adding more chicken broth can soften the spice as well. Lastly, some sugar can balance the heat. If you need a substitute, use vegetable broth or mushroom broth. Both give a rich flavor. Water can work in a pinch, but add extra spices for taste. If you want more depth, use a mix of water and soy sauce. Fiery chicken ramen stays good in the fridge for about 3 days. Make sure to store it in an airtight container. It is best to keep the noodles separate from the broth to avoid sogginess. Yes, you can! Use tofu or tempeh instead of chicken. Substitute chicken broth with vegetable broth. For extra flavor, add more garlic and ginger. Spinach and other veggies can also boost the dish. Serve the ramen hot in deep bowls. Top it with sliced green onions and sesame seeds. If you add a soft-boiled egg, cut it in half for a nice look. This adds creaminess and makes the dish special. This article shared how to create a tasty chicken ramen. You learned about key ingredients and step-by-step cooking. We covered tips for flavor and perfect garnishes to impress. Variations offer you options for different tastes and diets. Plus, we discussed storage and reheating for leftovers. Enjoy making this dish, knowing you can personalize it. With practice, you will master a delicious bowl of chicken ramen. Dive in and make it your own!
    Fiery Chicken Ramen with Garlic Sauce Recipe Delight
  • - 12 frozen vegetable potstickers - 1 can (400ml) coconut milk - 4 cups vegetable broth The heart of this soup lies in these key ingredients. The frozen vegetable potstickers are easy to find. They add texture and flavor to the dish. Coconut milk gives the soup a rich, creamy taste. It brings a hint of sweetness as well. The vegetable broth is vital for depth. It forms a tasty base for the entire soup. - 1 tablespoon red curry paste - 1 tablespoon ginger, minced - 2 cloves garlic, minced To elevate the flavor, we need some bold enhancers. Red curry paste adds a warm kick. It gives the soup a lovely Thai essence. Ginger and garlic bring freshness and warmth. Their aroma fills your kitchen and excites the senses. These ingredients blend well, creating a rich flavor profile. - 1 red bell pepper, thinly sliced - 1 cup snap peas, trimmed - 1/4 cup fresh cilantro, chopped - 2 green onions, sliced for garnish For a pop of color and crunch, we add fresh veggies. Red bell pepper adds sweetness and crunch. Snap peas offer a bright, crisp bite. Fresh cilantro and green onions are perfect for garnishing. They add brightness and a fresh finish. These garnishes make the dish look and taste vibrant! {{ingredient_image_1}} 1. Start by heating a tablespoon of oil in a large pot over medium heat. 2. Add minced ginger and garlic. Sauté for about 1 minute until fragrant. This step brings out the lovely flavors. 3. Next, stir in the red curry paste. Cook it for another minute. This adds depth and a spicy kick to our soup. 1. Pour in the vegetable broth and coconut milk. Bring this mixture to a gentle simmer. The coconut milk makes it creamy and rich. 2. Add the frozen potstickers to the soup. Let them cook for about 5-7 minutes, or until they are heated through. Stir gently to prevent sticking. 1. Add in the sliced red bell pepper and snap peas. Simmer for another 3-5 minutes until the veggies are crisp-tender. They add color and crunch to the dish. 2. Stir in the soy sauce and lime juice. Season with salt, pepper, and chili flakes if you want extra heat. This boosts the flavor. 3. Remove the pot from heat. Stir in freshly chopped cilantro right before serving. It adds a fresh touch to each bowl. To make this soup pop, you can adjust the heat. Add chili flakes for a spicy kick. Start with a small pinch, then taste. You can always add more if you like it hot. Fresh ingredients also matter. Use fresh ginger and garlic for the best flavor. They make a big difference in taste. Make sure your potstickers are fully cooked. They should heat through in about 5-7 minutes. You want them soft and warm. For the right soup consistency, don’t rush it. Let the soup simmer gently so all the flavors blend. If it’s too thick, add a bit more vegetable broth to loosen it up. For a great presentation, serve the soup in deep bowls. Top with sliced green onions and a sprinkle of cilantro. This adds color and freshness. Also, add lime wedges on the side. They give a bright, zesty flavor that wakes up the dish. Pro Tips Use Fresh Ingredients: For the best flavor, opt for fresh vegetables over frozen ones. Fresh snap peas and bell peppers will enhance the soup's taste and texture. Adjust the Spice Level: If you prefer a milder soup, reduce the amount of red curry paste. Conversely, add more chili flakes for an extra kick! Garnish Wisely: Enhance presentation and flavor by garnishing with additional cilantro and green onions just before serving. A squeeze of lime juice adds a refreshing touch. Perfect Potstickers: Ensure even cooking by stirring the potstickers gently as they heat up in the soup. This prevents them from sticking to the bottom of the pot. {{image_2}} You can easily make this soup heartier by adding proteins. Tofu is an excellent choice. It absorbs the soup's flavor well. Just cut it into small cubes and add it with the potstickers. If you prefer meat, chicken works nicely too. Cook it before adding the potstickers. You can use shredded rotisserie chicken for a quick option. For those looking for alternative proteins, consider shrimp or edamame. Both add a fun twist and different textures to the soup. To make this soup completely plant-based, swap the broth. Use a vegetable broth made without animal products. This keeps the dish vegan-friendly. You can also add more plant-based ingredients. Try using mushrooms for a meaty texture. Add them when you cook the ginger and garlic for extra flavor. When choosing broth, look for low-sodium options. This helps control salt levels in your meal. You can get creative by swapping out vegetables. Instead of snap peas, try diced zucchini or broccoli. Both add nice color and crunch. Red bell pepper can be replaced with carrots for a sweet kick. Add them in the last few minutes of cooking. This keeps them crisp. Think about using seasonal veggies too. In summer, fresh corn or green beans are great. In fall, add diced pumpkin or butternut squash for warmth and flavor. Store leftovers in an airtight container. Let the soup cool to room temperature first. Keep it in the fridge for up to three days. When reheating, warm it gently on the stove. You want to keep the potstickers intact and tender. Stir frequently and check the temperature. Yes, you can freeze the soup. However, it’s best to freeze it without the potstickers. The texture changes when frozen. Use a freezer-safe container and leave some space for expansion. To thaw, move it to the fridge overnight. Reheat on the stove and add fresh potstickers before serving. You can keep the soup in the fridge for three days. If frozen, it lasts up to three months. Look for signs like off smells or discoloration. If it looks or smells strange, it’s time to discard it. Always trust your senses when it comes to food safety. Making this soup takes about 30 minutes. You spend 10 minutes prepping the ingredients. Cooking the soup takes around 20 minutes. This quick time makes it a great choice for busy days. Yes, you can use fresh potstickers. However, they will cook faster than frozen ones. If you use fresh potstickers, reduce the cooking time by about 2-3 minutes. Make sure they are heated all the way through before serving. This soup pairs well with several side dishes. You can serve it with a simple salad or some spring rolls. For drinks, try a light white wine or iced tea. These options will balance the soup’s rich flavors. This blog covered key ingredients, step-by-step cooking, and tips for making Thai Potsticker Coconut Soup. You learned how to create a flavorful base, enhance flavors, and add fresh vegetables for perfect garnishing. Remember, you can adjust ingredients to suit your taste and dietary needs. Whether you choose to add proteins or swap veggies, this soup remains versatile. Enjoy making this dish, and share it with family and friends for a delightful meal!
    Thai Potsticker Coconut Soup Flavorful and Comforting Dish
  • - 1 medium spaghetti squash - 2 tablespoons olive oil - 2 boneless, skinless chicken breasts - Salt and pepper to taste - 2 cloves garlic, minced - 1 cup cherry tomatoes, halved - 1 cup spinach, fresh - ½ cup sun-dried tomatoes, chopped - 1 teaspoon dried oregano - 1 teaspoon dried basil - ½ cup grated Parmesan cheese (or dairy-free alternative) - Fresh basil, for garnish To make Tuscan Chicken Spaghetti Squash, gather these main ingredients. The spaghetti squash will be your base, providing a light but hearty feel. The chicken adds protein and flavor. Fresh garlic, spinach, and tomatoes create bright, tasty notes in the dish. Olive oil helps everything come together beautifully. - Artichoke hearts - Red bell pepper - Zucchini - Feta cheese These optional ingredients can give your dish a different twist. Artichoke hearts add a tangy taste. Red bell pepper and zucchini provide extra crunch and color. If you love cheese, try adding feta for a creamy touch. - Crushed red pepper flakes - Italian seasoning - Lemon zest Adding some crushed red pepper flakes can spice things up. Italian seasoning blends well with the Tuscan flavors. A hint of lemon zest brightens the dish and adds freshness. These seasonings make the meal even more delightful. {{ingredient_image_1}} Start by preheating your oven to 400°F (200°C). Cut the spaghetti squash in half lengthwise. Make sure to scoop out the seeds. Drizzle the cut sides with 1 tablespoon of olive oil. Sprinkle some salt and pepper on top. Place the squash cut-side down on a baking sheet. Roast it for 30-35 minutes. Check if the flesh is tender and can be shredded with a fork. While the squash roasts, season the chicken breasts with salt, pepper, and 1 teaspoon of olive oil. Heat a skillet over medium-high heat. Add the chicken and cook for about 6-7 minutes on each side. Ensure it is cooked through. Remove the chicken from the skillet and let it rest. Once cooled, slice the chicken into bite-sized pieces. In the same skillet, add 2 minced garlic cloves. Sauté for about 30 seconds. You want it fragrant but not burnt. Next, add 1 cup of halved cherry tomatoes, 1 cup of fresh spinach, and ½ cup of chopped sun-dried tomatoes. Cook this mixture while stirring occasionally. It should take about 3-4 minutes until the spinach wilts and the tomatoes soften. Stir in 1 teaspoon of dried oregano and 1 teaspoon of dried basil. Add the cooked chicken pieces and mix everything well. Once the spaghetti squash is done cooking, use a fork to shred the flesh into spaghetti-like strands. Transfer these strands into the skillet with the chicken and veggies. Toss everything together well, ensuring the squash is coated. Finally, sprinkle ½ cup of grated Parmesan cheese over the mixture. Let it melt slightly from the heat. Serve hot, garnished with fresh basil leaves for a burst of flavor. Cutting spaghetti squash can be tricky. Always use a sharp knife for clean cuts. Place the squash on a sturdy cutting board. Hold it steady with one hand. Cut it in half lengthwise. If it feels tough, microwave it whole for a few minutes. This softens the skin. After cutting, scoop out the seeds with a spoon. This method keeps your fingers safe and makes cooking easier. For the best chicken, I suggest pan-searing. Season the chicken breasts with salt, pepper, and olive oil. Heat your skillet to medium-high before adding the chicken. Cook it for about 6-7 minutes on each side. You want it golden brown and cooked through. Let the chicken rest after cooking. This keeps it juicy and tender. You can also grill or bake the chicken if you prefer. Both methods work well! To get fluffy spaghetti squash, roast it properly. First, preheat your oven to 400°F (200°C). Cut the squash and place it cut-side down on a baking sheet. Roast for 30-35 minutes. The flesh should be tender when you poke it with a fork. After roasting, let it cool for a few minutes. Use a fork to shred the flesh into strands. This method creates the perfect texture for your dish. Pro Tips Choose the Right Squash: Look for a spaghetti squash that feels heavy for its size and has a smooth, firm skin. This ensures better texture and flavor. Rest Your Chicken: After cooking, let the chicken rest for a few minutes before slicing. This helps retain the juices, making the meat more tender. Customize Your Veggies: Feel free to add or substitute any vegetables you have on hand, such as zucchini or bell peppers, to enhance the dish further. Make it Ahead: This dish can be made ahead of time and stored in the fridge. Reheat gently to enjoy a quick, nutritious meal later. {{image_2}} To make a vegetarian version, skip the chicken. You can add hearty beans like cannellini or chickpeas. These beans boost protein and fiber. Use the same spices and veggies. For cheese, choose a dairy-free option if needed. This keeps the dish rich and filling. This recipe is naturally gluten-free since it uses spaghetti squash. Always check labels on any packaged ingredients. If using cheese, ensure it's gluten-free. You can swap in gluten-free pasta or grains too. Quinoa or brown rice pairs nicely with the sauce. You can easily add more veggies to the dish. Try bell peppers, zucchini, or mushrooms. Just sauté them along with garlic and tomatoes. This adds color and nutrients. Get creative with seasonal vegetables for extra flavor. You can never go wrong with more greens! To store Tuscan Chicken Spaghetti Squash, let it cool first. Place it in an airtight container. You can keep it in the fridge for up to four days. Make sure to separate the chicken and squash to keep flavors fresh. When you are ready to eat, reheat the dish gently. Use the microwave on low power for even heating. Stir the pasta strands to warm them through. You can add a splash of water or olive oil to keep it moist. You can freeze this dish if you have extra. Pack it in a freezer-safe container. It can last up to three months in the freezer. To thaw, move it to the fridge overnight. Reheat it properly before serving for the best taste. Yes, you can use other squashes. Zucchini or butternut squash work well. Each squash gives a unique taste. Zucchini provides a mild flavor, while butternut adds sweetness. Adjust the cooking time based on the squash you choose. Check for tenderness by poking the skin. If it gives easily, it's ready. You can also shred the flesh with a fork. If it pulls apart into strands, it's cooked. This should take about 30-35 minutes in the oven. Pair it with a salad for freshness. A simple green salad works best. You can also add garlic bread for crunch. For a heartier meal, serve it with roasted vegetables or a side of pasta. Enjoy your flavorful dish! You learned how to make a tasty Tuscan Chicken with spaghetti squash. I shared main and optional ingredients, seasonings, and detailed cooking steps. You got tips for cutting squash and cooking chicken safely. We also explored fun variations, storage, and answers to common questions. Now, you can enjoy a healthy meal while impressing friends and family. Cooking can be fun and easy with the right guidance. Give this recipe a try and make it your own. Enjoy your cooking adventure!
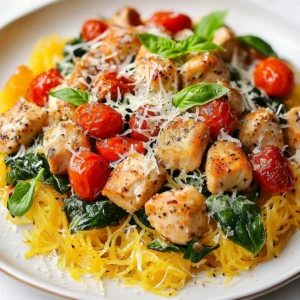
    Tuscan Chicken Spaghetti Squash Hearty and Flavorful Dish
  • - 1 lb flank steak, thinly sliced - 2 tablespoons soy sauce - 2 tablespoons gochujang (Korean chili paste) - 1 tablespoon sesame oil - 2 tablespoons brown sugar - 2 cloves garlic, minced - 1 tablespoon grated ginger - 2 cups cooked white rice - 1 cup steamed broccoli florets - 1 cup shredded carrots - 2 green onions, sliced - Sesame seeds for garnish For these Korean BBQ steak rice bowls, flank steak is the star. Its tenderness makes it perfect for marinating. The marinade combines soy sauce, gochujang, sesame oil, brown sugar, garlic, and ginger. Each ingredient adds a unique taste that makes the steak burst with flavor. Cooking the rice is simple. You want nice, fluffy white rice as the base. This will soak up all the tasty sauce from the steak. Fresh vegetables, like steamed broccoli and shredded carrots, bring color and crunch to the dish. Finally, green onions and sesame seeds make for a lovely garnish. They add freshness and a nutty touch to every bite. {{ingredient_image_1}} To start, gather your marinade ingredients. You will need: - 2 tablespoons soy sauce - 2 tablespoons gochujang - 1 tablespoon sesame oil - 2 tablespoons brown sugar - 2 cloves garlic, minced - 1 tablespoon grated ginger In a large bowl, mix all these ingredients together. Stir them well until the brown sugar dissolves. This blend creates a sweet and spicy flavor that makes your steak shine. Next, take 1 pound of flank steak, thinly sliced. Add the steak to the marinade and make sure every piece gets coated. Cover the bowl and let it chill in the fridge for at least 30 minutes. If you have time, letting it marinate for up to 2 hours boosts the flavor even more. Now it's time to cook the steak. Heat a large skillet or grill pan over medium-high heat. Make sure it gets hot enough to cook the steak quickly. Once the pan is ready, add the marinated steak in a single layer. Cook for about 3-4 minutes on one side. Flip the steak and cook for another 3-4 minutes until it’s brown and cooked through. After cooking, remove the steak from heat. Let it rest for a few minutes. This helps keep the meat juicy. Then, slice it into thin strips for easy serving. Now, let’s put it all together. Start with 2 cups of cooked white rice as the base in each bowl. Next, layer the sliced steak on top of the rice. Add 1 cup of steamed broccoli florets and 1 cup of shredded carrots on the side. To finish, sprinkle sliced green onions and sesame seeds on top for garnish. Your Korean BBQ Steak Rice Bowls are ready to enjoy! Adjust the toppings as you like for a fun twist. To make the best marinade, you should let the steak sit in it for at least 30 minutes. For more flavor, you can marinate it for up to 2 hours. This helps the flavors soak in deep. If you like it sweet, add more brown sugar. For spice, add a bit more gochujang. Taste the marinade before using it. Adjust until you find your perfect balance. To keep the steak tender, do not overcook it. Aim for a cooking time of about 3-4 minutes on each side. Use high heat to get a nice brown crust. Both a grill and a skillet work well. Using a grill gives a smoky flavor, while a skillet allows better control. Choose the method that suits your kitchen style. For a stunning rice bowl, start with a scoop of white rice. Place the steak on top, then add broccoli and carrots. To make it pop, garnish with sliced green onions and sesame seeds. This adds color and texture. A well-presented dish makes every bite special. Enjoy your creation! Pro Tips Marinate for Maximum Flavor: Allow the flank steak to marinate for at least 1 hour for deeper flavor absorption. If time allows, marinate overnight for even better results. Use High Heat: Cooking the steak over high heat helps to achieve a nice sear while keeping the meat tender and juicy. Make sure your skillet or grill pan is hot before adding the steak. Rest the Meat: After cooking, let the steak rest for a few minutes. This allows the juices to redistribute, resulting in a more tender bite. Customize Your Veggies: Feel free to add or substitute other vegetables like bell peppers, snap peas, or bok choy to your rice bowls for added color and nutrition. {{image_2}} You can change the protein in your Korean BBQ steak rice bowls. If you prefer chicken, use boneless, skinless chicken thighs. Marinate them just like the steak. Cook the chicken for about 5-6 minutes until it's done. For a plant-based option, try tofu. Use firm tofu, press it to remove water, and cut it into cubes. Marinate and cook it for about 3-4 minutes until golden. These swaps keep the flavors but change the dish's feel. Feel free to mix and match your veggies. While broccoli and carrots are great, you can add snap peas or bell peppers. Spinach or bok choy also works well. These veggies add color and crunch. You can even throw in some corn or zucchini for extra texture. Use what you have on hand to make your bowls unique. Pair your rice bowls with tasty side dishes. Kimchi adds a spicy kick and is a classic choice. You can also serve pickled vegetables for a tangy contrast. A light salad with sesame dressing can refresh the meal. For a hearty touch, serve miso soup on the side. These sides round out the meal, making it more enjoyable and filling. To keep your Korean BBQ steak rice bowls fresh, store them in airtight containers. Refrigerate them within two hours of cooking. This way, you avoid bacteria growth. The bowls can stay good in the fridge for up to three days. Make sure to separate the rice from the steak and veggies if you can. This helps each part stay fresh. When you want to enjoy your leftovers, reheat them gently. You can use the microwave or a skillet. If using a microwave, cover the bowl with a lid or wrap to keep moisture in. Heat for one to two minutes, stirring halfway through. If using a skillet, add a splash of water to keep the rice moist. Heat over low heat until warmed through. This method keeps the flavors and textures intact. If you want to save your rice bowls for later, freezing is a great option. Let the bowls cool completely before freezing. Use freezer-safe containers or bags. You can freeze the rice bowls for up to three months. When ready to eat, simply thaw them in the fridge overnight. Reheat as mentioned above, and enjoy a quick, tasty meal! Gochujang is a thick, red chili paste. It has a sweet, spicy, and savory flavor. You can find gochujang in most grocery stores. Look in the Asian foods aisle. If you can't find it there, try an Asian market or buy it online. Yes, you can make this recipe gluten-free! Use gluten-free soy sauce instead of regular soy sauce. Always check labels to ensure all ingredients are gluten-free. This way, you can enjoy the same great taste without any gluten. To make the marinade, mix these ingredients: - 2 tablespoons soy sauce - 2 tablespoons gochujang - 1 tablespoon sesame oil - 2 tablespoons brown sugar - 2 cloves garlic, minced - 1 tablespoon grated ginger Stir all together until smooth. This marinade adds rich flavor to your steak. Let the steak soak in the mix for at least 30 minutes. For better taste, marinate it for up to 2 hours. Yes, you can prepare parts of this dish in advance. You can marinate the steak the night before. Cooked rice can also be made ahead of time. Store it in the fridge. Assemble the bowls just before serving. This way, your meal stays fresh and tasty! You learned how to make delicious rice bowls with flank steak and vibrant veggies. We covered every step, from mixing the marinade to cooking the steak just right. You also discovered tips for flavor, cooking methods, and how to store leftovers well. With a few swaps, you can tailor this dish to your taste. Remember, good food comes down to quality ingredients and love. Try this recipe and enjoy sharing it with friends and family!
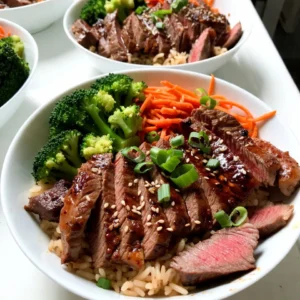
    Korean BBQ Steak Rice Bowls Delightful Flavor Fusion
  • - 8 oz rice noodles - 1/2 cup creamy peanut butter - 3 tablespoons soy sauce - 2 tablespoons sesame oil - 2 tablespoons honey or maple syrup - 1 tablespoon rice vinegar - 1 tablespoon Sriracha - Fresh cilantro for garnish - Lime wedges for serving - 1 cup red bell pepper, julienned - 1 cup cucumber, julienned - 1 cup carrots, shredded - 1/2 cup green onions, chopped Gathering the right ingredients is key to making this spicy peanut noodle salad. The main ingredients, like rice noodles and creamy peanut butter, create a tasty base. The soy sauce adds umami, while sesame oil gives a nice depth. Honey or maple syrup brings a hint of sweetness. Next, we have our flavor enhancers. Rice vinegar adds a tangy note, and Sriracha gives that spicy kick. Fresh cilantro not only looks good but also adds brightness. Lime wedges are perfect for squeezing over the top, adding zest. Don’t forget the vegetables! Red bell pepper, cucumber, carrots, and green onions bring color and crunch. These veggies not only make the salad look inviting, but they also add texture and freshness. Each bite is a burst of flavor and color, making this dish a delightful treat. {{ingredient_image_1}} To start, you need to prepare the rice noodles. Follow the package instructions carefully. Once they are cooked, drain them well. Rinse the noodles under cold water to stop the cooking process. This keeps the noodles from getting mushy. Set them aside while you make the dressing. Next, let’s create the dressing. In a medium bowl, whisk together the following: - 1/2 cup creamy peanut butter - 3 tablespoons soy sauce - 2 tablespoons sesame oil - 2 tablespoons honey or maple syrup - 1 tablespoon rice vinegar - 1 tablespoon Sriracha (you can adjust this to control the heat) Whisk until smooth and well combined. This dressing gives the salad its rich, spicy flavor. Now, it’s time to mix everything together. In a large mixing bowl, combine the cooked noodles with the following fresh veggies: - 1 cup red bell pepper, julienned - 1 cup cucumber, julienned - 1 cup carrots, shredded - 1/2 cup green onions, chopped Pour the peanut dressing over the noodles and veggies. Toss gently to combine, making sure everything is evenly coated. Transfer your colorful salad to a platter or individual bowls. For the final touch, garnish with: - 1/4 cup roasted peanuts, chopped - Fresh cilantro for garnish Serve with lime wedges on the side. The lime adds a nice zesty kick that brightens the dish. Enjoy your tasty, fresh Spicy Peanut Noodle Salad! - Always cook the rice noodles according to the package. - Watch the clock! Overcooked noodles turn mushy. - After cooking, drain and rinse the noodles well. - Rinsing stops the cooking and keeps them from sticking. - Want it spicier? Add more Sriracha! - If you prefer less sweetness, try using maple syrup instead of honey. - This swap makes the dish vegan-friendly. - Use bright, colorful veggies for a great look. - Chill the salad before serving for a refreshing taste. - Garnish with chopped peanuts and cilantro for added flair. - Lime wedges add a zesty touch that brightens the dish. Pro Tips Use Fresh Ingredients: Fresh vegetables like bell peppers, cucumbers, and carrots not only enhance the flavor but also add a satisfying crunch to your salad. Customize the Heat: Adjust the amount of Sriracha in the dressing according to your spice tolerance. You can start with less and add more to taste. Peanut Butter Consistency: For a smoother dressing, consider warming the peanut butter slightly in the microwave before mixing. This will help it blend more easily. Make it Ahead: This salad can be made a few hours in advance. Just keep the dressing separate until you're ready to serve to prevent the noodles from becoming soggy. {{image_2}} You can add protein to your Spicy Peanut Noodle Salad in many ways. Grilled chicken adds a savory touch. Shrimp gives a nice seafood flavor. Tofu is a great choice for plant-based eaters. It soaks up flavors well and keeps the dish light. If you want a vegetarian option, try adding chickpeas or edamame. Both are rich in protein and add a nice texture. If you want to change up the noodles, try spiralized vegetables. Zucchini or carrots work great for a fresh twist. Whole grain noodles are also a good choice. They add fiber and a nutty taste. For gluten-free options, use rice noodles or gluten-free pasta. This way, everyone can enjoy the salad without worry. To enhance the flavor, consider adding nuts or seeds. Chopped peanuts are great for crunch, but sunflower seeds are tasty too. You can also mix in fresh herbs. Mint or basil can brighten up the salad. They add a fresh taste and pair well with the peanut dressing. Feel free to get creative and make it your own! Store leftovers in an airtight container. This keeps them fresh. Enjoy your salad within 2-3 days for the best taste. You can freeze this salad, but it may change texture. I suggest storing the dressing separately. This way, you keep the noodles and veggies fresh. You can serve the salad cold. If you prefer it warm, let it sit at room temperature for a bit. If you store it for longer, refresh the salad by adding a splash of lime juice or extra dressing. This brings back the flavors and keeps it tasty! Yes, you can make this salad ahead. I suggest cooking the noodles and chopping the veggies the day before. Store each in separate containers. Make the dressing and keep it in the fridge. Mix everything on the day you plan to serve it. This keeps the salad fresh and crunchy. If you need a substitute for peanut butter, try almond butter or sunflower seed butter. These options work well and provide a nice flavor. They are great for those with nut allergies or who prefer a different taste. You can also use tahini for a unique twist. To make the salad less spicy, reduce the Sriracha in the dressing. You can also add more peanut butter to balance the heat. If you want more flavor without spice, try adding a little sugar or extra honey. This will make the salad tasty without the burn. This salad goes well with grilled chicken or shrimp. You can also serve it with spring rolls for a fun meal. For a vegetarian option, add some crispy tofu. The salad is light and fresh, making it a perfect side for heavier dishes. This peanut noodle salad is packed with flavor and easy to make. You can customize it with your favorite veggies and proteins. Remember to rinse noodles well and adjust the dressing to your taste. Enjoy it fresh or store it for later. This recipe is great for meal prep and sharing. With its vibrant colors and tastes, it's sure to please everyone. Whether it’s a meal or a side, it is simple and delicious. Don't hesitate to try variations and enhance your experience!
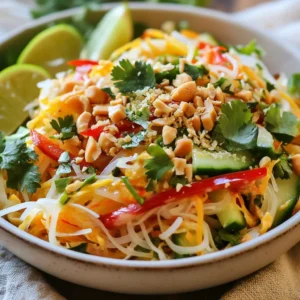
    Spicy Peanut Noodle Salad Tasty and Fresh Delight
  • - 8 ounces of pasta (such as fusilli or penne) - 1 tablespoon olive oil - 1 onion, diced - 2 carrots, diced - 2 celery stalks, diced - 2 cups cooked chicken, shredded - 1 cup frozen peas - 4 cups chicken broth - 1 cup heavy cream - 1 teaspoon dried thyme - 1 teaspoon garlic powder - Salt and pepper to taste - 1/4 cup all-purpose flour (for thickening) - Fresh parsley for garnish You can swap pasta types. Use rotini or farfalle if you prefer. If you don’t have olive oil, try butter or canola oil. Instead of chicken, use turkey or tofu for a different taste. If you want a lighter version, use low-fat milk instead of heavy cream. Frozen mixed veggies could replace peas and carrots. This dish serves four and offers a balanced meal. Each serving contains about 450 calories. It provides protein from chicken and carbs from pasta. The cream adds some fat, while veggies give fiber and vitamins. Adjust quantities for your needs. {{ingredient_image_1}} First, grab a large pot and fill it with water. Add a generous pinch of salt. Bring the water to a rolling boil. Once boiling, add 8 ounces of pasta, like fusilli or penne. Cook the pasta according to the package instructions until it's al dente. This usually takes about 8-10 minutes. Once done, drain the pasta and set it aside. Next, take a large pot and heat 1 tablespoon of olive oil over medium heat. Add the diced onion, carrots, and celery. Sauté these for about 5-7 minutes. You want them to soften and become fragrant. This step adds great flavor to your dish. Now it's time to add the shredded chicken and frozen peas to the pot. Stir them in and cook for another 2-3 minutes. Then, sprinkle 1/4 cup of all-purpose flour over the chicken and veggies. Stir well to coat everything. Cook for a minute to lightly toast the flour. Slowly pour in 4 cups of chicken broth while stirring continuously. This helps avoid lumps. After the sauce thickens, it’s time to add the heavy cream. Pour in 1 cup of cream, then add 1 teaspoon of dried thyme and 1 teaspoon of garlic powder. Season with salt and pepper to taste. Bring this mixture to a gentle simmer, stirring frequently for about 5-10 minutes. Once the sauce is thick, add the cooked pasta back into the pot. Gently mix everything until the pasta is well coated with the creamy sauce. Spoon the Chicken Pot Pie Pasta into bowls. For a beautiful touch, garnish each serving with fresh parsley. This adds color and flavor. Enjoy your comforting meal with a side salad or some crusty bread to soak up the sauce. To cook pasta just right, start with a big pot. Fill it with water and add salt. This helps flavor the pasta. Bring the water to a full boil before adding the pasta. Stir it often to keep it from sticking. Cook it until it is al dente. This means it should be firm but not hard. Drain the pasta, but save a little water for later. This starchy water can help your sauce stick better. A thick sauce makes your Chicken Pot Pie Pasta rich and creamy. To thicken your sauce, use flour. When you sauté your veggies and chicken, sprinkle the flour over the mix. Stir it in to coat everything well. This cooks the flour a bit, which makes it taste better. Slowly add the chicken broth while stirring. This helps avoid lumps. Let it simmer a bit to thicken up. If it’s still too thin, add a bit more flour mixed with water. To make your dish pop, use herbs and spices wisely. Dried thyme adds a nice earthy taste. Garlic powder gives a great boost to the flavor. You can also try adding fresh herbs like parsley at the end for brightness. If you want more kick, consider adding a pinch of red pepper flakes. Taste your sauce as you cook. Adjust the salt and pepper to make sure it’s just right. This will make every bite delightful. Pro Tips Cook Pasta Al Dente: Make sure to cook the pasta until it is al dente, as it will continue to cook when mixed with the sauce, ensuring it doesn't become mushy. Use Rotisserie Chicken: For a quicker option, use store-bought rotisserie chicken. It saves time and adds a delicious flavor to your dish. Customize Your Vegetables: Feel free to add or substitute vegetables based on your preference, such as mushrooms, bell peppers, or even spinach for added nutrition and flavor. Garnish for Freshness: Always garnish with fresh parsley or other herbs before serving to add a pop of color and enhance the flavors of the dish. {{image_2}} You can easily make a vegetarian version of Chicken Pot Pie Pasta. Swap the chicken for mushrooms or chickpeas. Both add nice texture and flavor. Use vegetable broth instead of chicken broth. Add tofu or tempeh for more protein. This version still gives you that comforting taste. For a gluten-free meal, use gluten-free pasta. Many brands offer great options that taste good. Instead of all-purpose flour, use cornstarch or almond flour for thickening. These substitutes work well without losing flavor. Check the labels to ensure everything is gluten-free. Feel free to add more veggies to your dish. Broccoli, bell peppers, or zucchini can boost nutrition. Just chop them small and sauté them with the onions, carrots, and celery. This adds color and crunch. You can customize it to your liking and make it even more delicious. To keep your Chicken Pot Pie Pasta fresh, first let it cool. Then, transfer it to an airtight container. Make sure to seal it tightly. Store the leftovers in the fridge for up to three days. This way, you can enjoy it again later! When you're ready to eat your leftovers, reheating is simple. You can use a microwave or a stove. If using a microwave, place the pasta in a bowl and cover it. Heat for 1-2 minutes, stirring halfway. On the stove, warm it in a pot over low heat. Add a splash of chicken broth if it looks dry. Stir often until hot. If you want to save it for later, freezing works well too. First, let it cool completely. Then, use a freezer-safe container or bag. Remove as much air as possible to avoid freezer burn. Label it with the date. You can freeze it for up to three months. To eat, thaw it in the fridge overnight, then reheat as mentioned above. Yes, you can use rotisserie chicken. It saves time and adds great flavor. Just shred the chicken and add it to the pot. This makes your cooking faster. Plus, it still tastes amazing in the pasta dish. To add spice, try using crushed red pepper flakes. Start with a pinch and taste. You can always add more. Another option is to use spicy seasoning blends. They can give your dish a nice kick. You can use many pasta types for this dish. Fusilli and penne are great, but try shells or bowties too. Each shape holds the sauce well. This keeps every bite full of flavor. This blog post covered how to make Chicken Pot Pie Pasta. We explored the key ingredients, including substitutions and their nutrition. I shared step-by-step cooking instructions, tips for perfect pasta, and ways to enhance flavor. We also looked at variations, storage tips, and answered common questions. Remember, cooking should be fun and flexible. Feel free to experiment with ingredients and make it your own! Enjoy your meal and the journey of cooking.
    Savory Chicken Pot Pie Pasta Simple and Comforting Meal
  • - 12 oz (340 g) pasta (penne or fusilli works well) - 2 tablespoons olive oil - 1 medium onion, diced - 4 cloves garlic, minced - 1 (28 oz) can crushed tomatoes - 3 cups vegetable broth - 1 cup heavy cream or coconut milk - 1 teaspoon dried oregano - 1 teaspoon sugar - Salt and pepper to taste - 1 cup fresh basil leaves, torn - Grated Parmesan cheese (optional for serving) This recipe shines with its simple yet flavorful ingredients. You can choose between penne or fusilli pasta. Both types work well and soak up the sauce nicely. The fresh onion and garlic add depth and aroma, giving the dish a comforting base. The crushed tomatoes bring a rich, tangy flavor. I love using vegetable broth for a lighter touch, but feel free to use chicken broth if you prefer. The cream is what makes this dish creamy and dreamy. You can choose heavy cream for richness or coconut milk for a dairy-free twist. Don’t forget the dried oregano for that lovely herbal note. A dash of sugar balances the tomatoes' acidity, while fresh basil adds brightness just before serving. If you like cheese, sprinkle some grated Parmesan on top for an extra umami kick. Gather these ingredients, and you're ready to create a delicious meal in just one pot! {{ingredient_image_1}} 1. Sautéing the onion and garlic Start by heating the olive oil in a large pot over medium heat. Add the diced onion. Cook it for about 4-5 minutes. You want it to turn soft and clear. Next, add the minced garlic. Stir it for about a minute. You will smell a great aroma. Be sure to stir often to avoid burning. 2. Combining liquids and spices Now, pour in the crushed tomatoes and vegetable broth. Add the dried oregano and sugar. Give everything a good stir to mix well. This base will be rich and tasty. Bring the mixture to a gentle simmer. 3. Cooking the pasta and incorporating cream Add the uncooked pasta to the pot. Make sure the pasta is fully submerged in the liquid. Cover the pot and cook for 10-12 minutes. Stir occasionally. You want the pasta to be al dente and soak up the flavors. Once it is cooked, reduce the heat to low. Pour in the heavy cream or coconut milk. Stir until everything is mixed well. Heat it for another 2-3 minutes. Finally, season with salt and pepper. Fold in the fresh basil leaves and serve hot. - Ensuring perfect pasta texture: Cook pasta until it is al dente, which means firm but not hard. Stir it occasionally to keep it from sticking together. The pasta will continue to cook in the sauce, so don’t overdo it! - Adjusting seasoning to taste: Start with a light hand on salt and pepper. You can always add more later. Taste the sauce before serving. Each tomato brand may vary in flavor, so adjust as needed. - Preventing sticking or burning: Keep the heat at medium to avoid burning the garlic and onion. Stir often, especially when adding the pasta. Cover the pot while cooking, but lift the lid to stir every few minutes. - Garnishing options: Serve your pasta with a sprinkle of grated Parmesan cheese on top. It adds a nice salty flavor and makes the dish look fancy. Fresh basil leaves also add a lovely touch and bright color. - Pairing with complementary dishes: This creamy tomato basil pasta goes well with a fresh salad or garlic bread. You can also serve it with roasted vegetables or a light protein, like grilled chicken or shrimp, for a complete meal. Pro Tips Use Fresh Basil: Fresh basil adds a vibrant flavor to the dish, enhancing the overall taste. Add it at the end to retain its fresh aroma. Adjust Creaminess: For a lighter version, substitute heavy cream with coconut milk or use a combination of both to balance flavors. Perfect Pasta Cooking: Stir the pasta occasionally while it cooks to prevent it from sticking together and ensure even cooking. Custom Seasoning: Feel free to customize the seasoning with red pepper flakes for a spicy kick or add your favorite herbs for extra depth. {{image_2}} You can change the protein in this dish to fit your tastes. Try diced chicken for a heartier meal. Shrimp adds a nice twist and cooks fast. If you want a plant-based option, use tofu. Just cube it and sauté until golden. You can also mix in different veggies. Spinach or kale adds color and nutrients. Bell peppers give sweetness, while mushrooms add a nice earthy flavor. Feel free to get creative with what you have on hand! If you want to go vegan or dairy-free, swap heavy cream for coconut milk. Coconut milk gives a rich flavor without dairy. You can leave out the cheese or use a vegan alternative. For gluten-free options, choose gluten-free pasta. Many brands now offer tasty gluten-free penne or fusilli. Just make sure to follow the cooking time on the package, as it may vary from regular pasta. To keep your creamy tomato basil pasta fresh, use an airtight container. Glass or BPA-free plastic containers work best. Make sure it cools down before sealing. You can store it in the fridge for up to three days. If you want to keep it longer, freezing is a good option. Place the pasta in a freezer-safe container. Leave some space at the top, as the pasta will expand when frozen. It will last in the freezer for about three months. When you’re ready to enjoy the leftovers, reheating is easy. For the best results, use a stove. Put the pasta in a pot and add a splash of water or broth. Heat it over low to medium heat. Stir it often to keep it from sticking. You can also microwave it, but be cautious. Place the pasta in a microwave-safe bowl. Add a bit of water and cover it, leaving a vent for steam. Heat it in short bursts, stirring in between. This helps keep the texture and flavor nice. Yes, you can use many types of pasta. Penne and fusilli work great. You can also try rotini or farfalle. Just make sure the pasta cooks well in the sauce. Adjust the cooking time if needed. This pasta dish lasts about 3 to 4 days in the fridge. Store it in an airtight container. Make sure it cools down before you put it away. This keeps it fresh and tasty for your next meal. Yes, you can prepare this dish ahead of time. Cook it and let it cool. Then, store it in the fridge. When you are ready, just reheat it on the stove. Add a little water or broth to keep it creamy. This blog post guides you in making a delicious pasta dish. We covered the main ingredients, from pasta to fresh herbs. You learned step-by-step how to cook it right. I shared essential tips for the best results, plus ideas for serving and ingredient swaps. Remember, you can tweak this dish to fit your tastes. You can store leftovers for later enjoyment. Have fun cooking and exploring different flavors! Enjoy your meal!
    One Pot Creamy Tomato Basil Pasta Delight Recipe
  • - 2 large flatbreads or naan - 1 cup cooked chicken, shredded - 1/2 cup buffalo sauce (adjust to taste) - 1 cup mozzarella cheese, shredded - 1/2 cup blue cheese, crumbled (optional) - 1/4 cup green onions, sliced - 1 tablespoon olive oil - Salt and pepper to taste - Fresh cilantro for garnish (optional) Creating Buffalo chicken flatbread is simple and fun. You need just a few key ingredients. First, choose your base. Flatbreads or naan work great. They provide a nice texture. Next, use cooked chicken. Shredded chicken is easy to mix with the sauce. I prefer using rotisserie chicken for speed. Buffalo sauce is key to this dish. It gives the flatbread its signature kick. Adjust the amount based on your taste. Add more for extra heat! Mozzarella cheese adds creaminess. It melts beautifully and ties the dish together. Blue cheese is optional but adds a nice tang. If you like bold flavors, use it! Green onions give a fresh crunch. Slice them thinly for easy topping. You will need olive oil to brush on the flatbreads. This helps them get crispy in the oven. Always season your dish with salt and pepper to enhance the flavors. Finally, you can garnish with fresh cilantro. It adds a pop of color and flavor. With these ingredients, you are ready to create a delicious Buffalo chicken flatbread! {{ingredient_image_1}} - Preheat your oven: Start by setting your oven to 450°F (230°C). This high heat helps the flatbread turn crispy and the cheese melt perfectly. - Combine chicken and buffalo sauce: In a mixing bowl, add 1 cup of shredded chicken. Pour in 1/2 cup of buffalo sauce. Mix well until the chicken is fully coated. You can add salt and pepper to taste. This step packs a punch of flavor. - Prepare the flatbreads: Take your 2 large flatbreads or naan. Lightly brush 1 tablespoon of olive oil on each flatbread. This helps them crisp up nicely while baking. Place the flatbreads on a baking sheet, ready for the next steps. - Distribute chicken mixture on flatbreads: Evenly spoon the buffalo chicken mixture over each flatbread. Make sure to cover them well so every bite has flavor. - Add cheese toppings: Sprinkle 1 cup of shredded mozzarella cheese over the chicken. If you love blue cheese, add 1/2 cup of crumbled blue cheese on top. This adds a rich and tangy flavor. - Bake and cool: Place the baking sheet in the oven. Bake for about 10 to 12 minutes. Keep an eye on it; you want the cheese bubbly and golden brown. Once done, take it out and let it cool for a few minutes before serving. - Garnish with green onions and cilantro: After cooling, scatter 1/4 cup of sliced green onions on top. If you like, add fresh cilantro for a fresh touch. - How to slice and serve: Slice the flatbread into squares or wedges. Serve it warm, and enjoy the delicious blend of flavors! To achieve the perfect crispy flatbread, start by preheating your oven to 450°F (230°C). This high heat helps the flatbread get nice and crunchy. Brush olive oil on the flatbread before adding toppings. This adds flavor and helps it crisp up. Bake until the cheese is bubbly and golden brown. If you want to adjust spice levels with buffalo sauce, start small. Add just half a cup and mix it with the chicken. Taste the mixture before adding more sauce. You can always add more sauce later, but you can't take it out once it's in. Using rotisserie chicken can save you time. It’s already cooked and just needs shredding. This step cuts down your prep time a lot. You can also use pre-made sauces and flatbreads. This makes your cooking even quicker and easier, while still tasty. For pairings, serve buffalo chicken flatbread with celery sticks or carrot sticks. They add crunch and freshness. You can also dip them in ranch or blue cheese dressing for extra flavor. As for beverages, iced tea or a light lager beer pairs well. These drinks balance the heat of the buffalo sauce. Enjoy your meal! Pro Tips Use Homemade Buffalo Sauce: For a more personalized touch, try making your own buffalo sauce. This allows you to control the heat level and flavor profile to suit your taste. Experiment with Cheeses: While mozzarella is classic, feel free to mix in other cheeses like cheddar or pepper jack for added flavor and a kick of spice! Preheat the Baking Sheet: By placing your baking sheet in the oven while it preheats, you can create a crispier flatbread crust when you add the toppings. Garnish Just Before Serving: For the freshest taste, add green onions and cilantro right before serving. This keeps the herbs vibrant and enhances the dish's presentation. {{image_2}} You can change up your buffalo chicken flatbread with different toppings. - Additional cheese options: Try using pepper jack for a spicy kick or cheddar for a sharp flavor. Mixing cheeses can create a richer taste. - Veggie add-ins: Add sliced bell peppers, mushrooms, or spinach for extra nutrients and color. These veggies pair nicely with the spicy chicken. If you're looking to lighten your meal, there are easy swaps. - Low-calorie substitutes: Use low-fat cheese or Greek yogurt instead of blue cheese. You can also replace the buffalo sauce with a low-calorie version. - Gluten-free options: Use gluten-free flatbreads or cauliflower crust for a tasty alternative. This option fits well for those with gluten intolerance. The type of flatbread can change your dish's taste and texture. - Whole wheat or pita bread: Whole wheat flatbreads add fiber and a nutty flavor. Pita bread offers a softer base and is easy to find. - Homemade vs. store-bought: Making flatbread at home allows for customization. However, store-bought options are great for quick meals. Just pick the one that fits your time and taste! To keep your buffalo chicken flatbread fresh, store it in an airtight container. This helps maintain moisture and flavor. You can also wrap it tightly in plastic wrap. Keep it in the fridge for best results. When you want to reheat, preheat your oven to 350°F (175°C). Place the flatbread on a baking sheet and heat for about 5-10 minutes. This keeps it crispy. Avoid using the microwave, as it can make the flatbread soggy. Yes, you can freeze buffalo chicken flatbread! First, let it cool completely. Then, wrap each piece in plastic wrap and place them in a freezer bag. Remove as much air as possible. This prevents freezer burn. To thaw, move it to the fridge overnight. Then, reheat in the oven as mentioned before. In the fridge, buffalo chicken flatbread lasts about 3-4 days. Make sure to check for any signs of spoilage. If the flatbread feels slimy or has an off smell, it’s time to toss it. Always trust your senses. Keeping an eye on freshness helps you enjoy your flatbreads at their best! What is buffalo chicken flatbread? Buffalo chicken flatbread is a tasty dish made with flatbread topped with spicy chicken. It usually features a mix of buffalo sauce, cheese, and other toppings. This dish combines bold flavors with a crunchy base. Can I make it ahead of time? Yes, you can prepare buffalo chicken flatbread ahead of time. Just cook the chicken and mix it with buffalo sauce. Store this mixture in the fridge. When ready to serve, assemble the flatbreads and bake them. What's the best buffalo sauce to use? The best buffalo sauce depends on your taste. I recommend a medium heat sauce for a good balance. Brands like Frank's RedHot or Texas Pete are popular choices. Feel free to try different sauces to find your favorite. Where can I find buffalo chicken flatbread? You can find buffalo chicken flatbread at many casual dining spots and pizza places. Check local restaurants or pizzerias that serve innovative dishes. Some may even offer it as a special. Popular restaurants offering this dish Chain restaurants like Buffalo Wild Wings and Domino's often serve buffalo chicken flatbread. Many local pubs and eateries may also have their unique take on this dish. Always ask for recommendations from friends or use food apps to find nearby options. Can I make it vegetarian? Yes, you can make a vegetarian version of buffalo chicken flatbread. Replace the chicken with roasted cauliflower or chickpeas for a hearty option. Use the same buffalo sauce for that spicy kick. What pairings go well with buffalo chicken flatbread? Buffalo chicken flatbread pairs well with fresh veggies, like carrot sticks and celery. You can also serve it with a cooling dip, like ranch or blue cheese dressing. For drinks, try a light beer or a refreshing soda. Buffalo chicken flatbread is simple and fun to make. We covered what you need, from the chicken to the cheese. I gave clear steps for preparing and baking your dish. Tips on cooking and serving help you maximize flavor. Variations let you get creative, and storage info ensures you keep your leftovers fresh. Try this dish for a tasty meal, perfect for any time. Enjoy your cooking!
    Buffalo Chicken Flatbread Flavorful and Easy Recipe
  • - 1 lb chicken breast, thinly sliced - 2 tablespoons cornstarch - Salt and pepper to taste - 1 cup broccoli florets - 1 bell pepper, sliced (red or green) - 1 carrot, julienned - 4 green onions, chopped - 1/4 cup soy sauce - 2 tablespoons brown sugar - 1 tablespoon sesame oil - 3 cloves garlic, minced - 1 inch ginger, grated To make Mongolian chicken stir fry, you need fresh ingredients. For the chicken, thinly slice one pound of chicken breast. This helps it cook quickly. For the marinade, mix the chicken with cornstarch, salt, and pepper. Let it sit for about 15 minutes to soak up the flavors. Next, gather your vegetables. You will need one cup of broccoli florets, one sliced bell pepper, and one julienned carrot. These add color and crunch. Chop four green onions for a fresh taste. For the sauce, mix together soy sauce, brown sugar, sesame oil, minced garlic, and grated ginger. This sauce gives the dish its rich flavor. Use it to coat the chicken and veggies. Now you have all your ingredients ready for a quick and tasty meal! {{ingredient_image_1}} First, get a bowl ready. Mix the sliced chicken with cornstarch. Add a pinch of salt and pepper. Stir well to coat the chicken. Set it aside to marinate for 15 minutes. This helps the chicken stay tender. Next, heat vegetable oil in a large skillet. Use medium-high heat for the best results. Add the marinated chicken to the skillet. Stir-fry it for about 4 to 5 minutes. Cook until the chicken is golden and fully cooked. Once done, remove it from the skillet and set it aside. In the same skillet, add the broccoli, bell pepper, and carrot. Stir-fry these vegetables for about 3 minutes. You want them to be tender but still crisp. Then, add the minced garlic and grated ginger. Stir for one more minute until they smell great. Now, return the cooked chicken to the skillet with the veggies. Pour in the soy sauce, brown sugar, and sesame oil. Stir everything well so that the sauce coats all the ingredients. Let it simmer for another 2 to 3 minutes. This allows the flavors to blend together. Finally, toss in the chopped green onions and mix for one last minute. This adds a fresh touch to your dish. Serve it hot, and if you like, sprinkle some sesame seeds on top for garnish. Enjoy your delicious Mongolian Chicken Stir Fry! Choose chicken breast for this dish. It cooks fast and stays tender. For the best results, thinly slice the chicken. Thin slices cook evenly and soak up the flavors well. This step is key for a tasty stir-fry. Cook the vegetables just right for a crisp-tender texture. Stir-fry broccoli, bell peppers, and carrots for about three minutes. This keeps them bright and colorful. If you overcook, they may lose their crunch and color. Watch closely as they cook. You can adjust the sauce to your taste. If you like it sweeter, add more brown sugar. For a saltier flavor, increase the soy sauce. If you have dietary needs, try low-sodium soy sauce or a sugar substitute. This way, you can still enjoy the dish without worry. Pro Tips Marinade for Flavor: Allow the chicken to marinate for at least 15 minutes. This enhances the flavor and tenderness of the meat. High Heat for Stir-Frying: Ensure your skillet or wok is hot before adding ingredients. This helps achieve that perfect sear and keeps vegetables crisp. Prep All Ingredients: Have all your vegetables chopped and sauces ready before you start cooking. Stir-frying happens quickly, and being prepared will help you manage the timing. Customize Your Veggies: Feel free to swap in your favorite vegetables, such as snap peas or mushrooms. Stir-fry is versatile and can accommodate various ingredients! {{image_2}} You can switch chicken for beef or tofu. Beef gives a rich taste. Tofu is perfect for a meat-free meal. If you use beef, cut it thin like the chicken. Cook it for about 4-5 minutes until brown. Tofu needs about 3-4 minutes to warm up. Remember, adjust cooking times based on what you choose. Adding more veggies boosts the nutrition! Try snap peas, mushrooms, or bell peppers. They add color and crunch. When you stir-fry, cook harder veggies like carrots first. They take longer to soften. Cook them for about 3 minutes. Then, toss in softer veggies like broccoli for 2 minutes. This keeps everything fresh and bright. Want heat? Add chili sauce! Start with a teaspoon and taste. You can always add more if you want it spicier. Just remember to lower the brown sugar a bit. This way, the sauce stays balanced. A little heat can take your dish to the next level! To store your Mongolian Chicken Stir Fry in the fridge, let it cool first. Use an airtight container to keep it fresh. This way, it won’t absorb any smells from the fridge. Your leftovers will stay good for about 3 to 4 days. Just make sure to reheat it well before eating. If you want to freeze Mongolian Chicken Stir Fry, let it cool completely. Then, place it in a freezer-safe bag or container. Squeeze out any extra air to prevent freezer burn. It can last in the freezer for about 3 months. When ready to eat, thaw it in the fridge overnight. To reheat, warm it in a skillet over medium heat until hot. You can also use a microwave, stirring every minute until it’s heated through. Enjoy your tasty meal anytime! Yes, you can use frozen chicken. First, thaw the chicken in the fridge for safety. This may take several hours or overnight. You can also use the microwave. Set it to the defrost setting and check often. Once thawed, slice it thinly to cook evenly. Then proceed with the marinating steps as usual. Mongolian chicken stir fry pairs well with many sides. Here are some great options: - Steamed rice - Fried rice - Noodles - Asian-style salad - Spring rolls These sides add flavor and texture to your meal. Yes, this recipe is perfect for meal prep. Here are some tips for preparing in advance: - Cook the chicken and vegetables. - Store them separately in airtight containers. - Make sure to cool them before sealing to prevent moisture. For best storage practices: - Keep in the fridge for up to 3 days. - Reheat in the microwave or on the stovetop. - You can also freeze the stir fry for up to 2 months. Just thaw in the fridge before reheating. This blog post covers a tasty Mongolian Chicken Stir Fry. We went through the ingredients, step-by-step instructions, and helpful tips. I shared storage info and answered common questions. Experiment with proteins and veggies for your own twist. You can easily adjust the sauce to fit your taste. This dish is simple to make and perfect for any night. Enjoy your cooking and the delicious meals you create!
    Mongolian Chicken Stir Fry Quick and Tasty Recipe
  • - 1 lb ground beef - 1 tablespoon sesame oil - 2 cloves garlic, minced - 1 tablespoon fresh ginger, minced - 1 red bell pepper, thinly sliced - 1 cup snap peas, trimmed - 2 green onions, chopped - 2 tablespoons soy sauce (low sodium) - 1 tablespoon sriracha (adjust to taste) - 1 tablespoon hoisin sauce - 1 teaspoon rice vinegar - Salt and pepper to taste - 3 cups cooked rice (white or brown) The main ingredient here is ground beef. It gives the stir fry a rich flavor and hearty texture. I love using high-quality beef for the best taste. The fresh vegetables add color and crunch. They make the dish bright and healthy. Bell pepper and snap peas work well together and cook quickly. The sauces bring everything together. Soy sauce gives a nice umami kick. Sriracha adds heat, so adjust it to your liking. Hoisin sauce adds sweetness, and rice vinegar gives a hint of tang. These flavors balance perfectly in the dish. - Sesame seeds - Fresh cilantro - Lime slices Toppings can elevate your stir fry. Sesame seeds add a nice crunch and nutty flavor. Fresh cilantro gives a pop of freshness. Lime slices add a zesty finish. These toppings not only make the dish tasty but also pretty on the plate. {{ingredient_image_1}} Start by measuring and chopping all your veggies. You need: - 1 red bell pepper, thinly sliced - 1 cup snap peas, trimmed - 2 green onions, chopped Next, mince 2 cloves of garlic and 1 tablespoon of fresh ginger. This adds a nice kick to your stir fry. Make sure they are fine so they mix well. Heat 1 tablespoon of sesame oil in a large skillet or wok over medium-high heat. Once it's hot, add the minced garlic and ginger. Sauté them for about 30 seconds until they smell great. Now, add 1 pound of ground beef. Break it apart with a spatula. Cook it for about 5 to 7 minutes until it is brown and fully cooked. Season with salt and pepper to taste. Add the chopped red bell pepper and snap peas to the skillet. Cook for another 3 to 4 minutes. You want your veggies to be tender but still crisp. In a small bowl, mix together: - 2 tablespoons soy sauce - 1 tablespoon sriracha (you can adjust this for more or less heat) - 1 tablespoon hoisin sauce - 1 teaspoon rice vinegar Pour this sauce over the beef and veggies. Stir everything to coat it well. Let the stir fry cook for an additional 2 to 3 minutes. This helps all the flavors meld together nicely. Now you're ready to serve your spicy ground beef stir fry over 3 cups of cooked rice. Enjoy! To start, sriracha is key for heat. You can adjust the sriracha to fit your taste. If you want it spicier, add more sriracha to the mix. If you prefer less heat, use a little less. You can also try other spicy ingredients. Chili flakes, fresh jalapeños, or a dash of hot sauce can work well too. Each option brings its own flavor and heat. Using a wok is best for stir fry. The high sides keep the food contained and allow for easy tossing. A skillet works too but may not give the same results. With both, high heat is crucial. It helps to sear the beef and cook the veggies fast. This keeps them crisp and bright. Cooking too slowly may make the dish mushy. Serve the stir fry in deep bowls. This showcases the bright colors of the veggies. For visual appeal, add a sprinkle of sesame seeds. A slice of lime on the side adds a fresh touch. You can also include a few cilantro leaves on top. These small details make the dish look gourmet and inviting. Pro Tips Use Fresh Ingredients: Fresh garlic and ginger add a vibrant flavor that enhances the overall dish. Always prefer fresh over pre-minced or jarred options. Adjust the Spice Level: The sriracha can be adjusted based on your heat preference. Start with a smaller amount and add more to taste as you cook. Don’t Overcook the Vegetables: Keep the snap peas and bell peppers crisp by cooking them just until tender. This preserves their color and nutrients. Rice Variations: Try using cauliflower rice for a low-carb option or flavored rice, like jasmine or coconut rice, to elevate the dish. {{image_2}} You can switch the beef for ground turkey or chicken. These meats are lighter but still tasty. If you want a meatless meal, try using plant-based ground meat. Tofu is also a great option. Just press it to remove water and crumble it before cooking. Feel free to use seasonal or frozen vegetables. They both work well. Carrots, broccoli, or zucchini add great flavor and crunch. You can also try water chestnuts for extra crunch. They add a nice texture to the dish. Want to amp up the taste? Add some nuts or seeds. Cashews or peanuts bring a nice crunch. You can also try different sauces. Instead of hoisin, use teriyaki or chili garlic sauce. Each sauce gives a new twist to the stir fry. To store your spicy ground beef stir fry, use airtight containers. Glass or plastic containers work well. Make sure to let the stir fry cool down before sealing. Refrigerate the leftovers within two hours of cooking. They will stay fresh for three to four days. If you want to keep them longer, freezing is a great option. Portion out the stir fry into freezer-safe bags or containers. Be sure to remove as much air as possible before sealing. You can freeze it for up to three months. Label the bags with the date to keep track of freshness. When reheating, you want to keep the stir fry's texture nice. The stovetop is best for this. Heat a bit of oil in a pan over medium heat. Add the stir fry and cook for about five minutes, stirring often. This method helps keep the veggies crisp. If you're short on time, the microwave works too. Place the stir fry in a microwave-safe dish and cover it. Heat on high for one to two minutes, stirring halfway through. This method is quick but may make the veggies a bit softer. Always check that the food is hot throughout before serving. Yes, you can. Meal prep helps save time. Cook the stir fry, then let it cool. Store it in airtight containers. It keeps well in the fridge for up to three days. You can also freeze it for longer storage. When ready to eat, just reheat in a skillet or microwave. To make it milder, use less sriracha. Start with just a teaspoon. You can also leave out the sriracha and add a bit of honey for sweetness. Another option is to add more vegetables. This adds flavor without heat. Stir fry goes great with rice. You can use white or brown rice. Another option is to serve it with noodles. A fresh salad or steamed veggies also makes a nice side. Try adding a light dipping sauce for extra flavor. You learned how to make a tasty spicy ground beef stir fry. We covered the main ingredients and optional toppings that enhance flavor. I shared step-by-step cooking instructions and tips for perfecting heat levels. You can even try variations with different proteins or veggies. Remember, storage and reheating are key for enjoying leftovers. Get creative and adjust this dish to fit your taste. Enjoy making this simple meal for friends or family. It’s quick, tasty, and adaptable—perfect for any night!
    Spicy Ground Beef Stir Fry Bowls Flavorful and Easy
  • - 4 boneless, skinless chicken breasts - 8 oz cream cheese, softened - 1 cup chicken broth - 1 tablespoon olive oil The main ingredients in this dish are simple yet powerful. Boneless, skinless chicken breasts form the base. They cook quickly and absorb flavors well. Cream cheese adds a rich, creamy texture that makes this dish special. Chicken broth gives depth and moisture to the sauce. Olive oil helps to brown the chicken and adds a nice flavor. - 1 teaspoon garlic powder - 1 teaspoon onion powder - 1 teaspoon dried thyme - 1 teaspoon dried basil - Salt and pepper to taste Seasoning is key to boosting flavor. Garlic powder brings warmth, while onion powder adds sweetness. Dried thyme and basil offer herbal notes that brighten the dish. Salt and pepper are essential to enhance all these flavors. Adjust them to your taste for the perfect balance. - Fresh parsley, chopped (for garnish) - Serving suggestions (rice or pasta) Garnishing with fresh parsley adds color and freshness. It makes the dish look inviting. You can serve this creamy chicken on rice or pasta. Both options soak up the sauce well, making each bite delicious. Enjoy your meal with a side salad for a complete dinner. {{ingredient_image_1}} First, heat 1 tablespoon of olive oil in a large skillet over medium heat. While the oil warms, season 4 boneless, skinless chicken breasts with salt and pepper. Once the oil is hot, place the chicken in the skillet. Cook each side for about 5 to 7 minutes. You want the chicken to turn golden brown and be cooked through. After cooking, remove the chicken and let it rest on a plate. This helps keep it juicy. Next, in the same skillet, add 1 cup of chicken broth. Bring it to a gentle simmer. Scrape the bottom of the skillet to lift any browned bits. These bits add great flavor! Now, reduce the heat to low and add 8 oz of softened cream cheese. Stir this mixture until the cream cheese melts and blends with the broth, forming a smooth sauce. Add 1 teaspoon of garlic powder, 1 teaspoon of onion powder, 1 teaspoon of dried thyme, and 1 teaspoon of dried basil. Mix these herbs in well for a burst of flavor. Now it's time to return the chicken to the skillet. Place the chicken breasts back in the creamy sauce. Spoon some of the sauce over the top. Let everything simmer together for about 3 to 4 minutes. This allows the chicken to soak up all the tasty flavors. Taste your sauce and adjust the seasoning with more salt or pepper if needed. Serve this dish over rice or pasta for a filling meal. Don't forget to garnish with fresh parsley for a nice touch! To cook chicken breasts just right, aim for 5-7 minutes on each side. Use medium heat for even cooking. After that time, check for doneness. The chicken should reach an internal temperature of 165°F. If you don't have a thermometer, cut into the thickest part. The meat should be white and juices should run clear. Want to boost flavor? Try adding a splash of lemon juice or a pinch of red pepper flakes. These small changes can bring a new twist. Fresh herbs like thyme and basil add great taste. If you use dried herbs, remember they are stronger. Use one-third of the amount compared to fresh herbs. For serving, place the creamy herb chicken on a bed of rice or pasta. This adds color and texture to your plate. Drizzle extra sauce over the chicken for a nice touch. Finally, sprinkle fresh parsley on top for a burst of green. It makes the dish look appetizing and fresh. Pro Tips Use a Meat Thermometer: Ensure that the chicken reaches an internal temperature of 165°F for safe consumption and optimal juiciness. Customize Your Herbs: Feel free to experiment with other herbs like oregano or rosemary to give your sauce a unique flavor twist. Make It a Meal: Serve the creamy chicken over sautéed vegetables or a fresh salad to create a complete and nutritious dish. Leftover Magic: This dish reheats beautifully, making it perfect for meal prep. Store in an airtight container in the fridge for up to 3 days. {{image_2}} You can swap chicken for turkey or pork. Both options taste great and cook similarly. Turkey gives a lighter flavor, while pork adds a richer taste. If you want a vegetarian dish, try using tofu or chickpeas. Tofu absorbs flavors well, making it a wonderful substitute. Chickpeas add a nice texture and protein boost. Want to mix it up? Consider adding spinach or other veggies to your dish. Spinach adds color and nutrition. You can also create a creamy white wine sauce for a different twist. Just add a splash of white wine after simmering the broth. This change will elevate your meal with a bit of sophistication. For a spicy kick, sprinkle in red pepper flakes while cooking. This small addition makes the dish exciting and bold. If you prefer a zesty flavor, squeeze some lemon juice into the sauce. This brightens the dish and makes it refreshing. Experimenting with these variations keeps your weeknight meals fun and delicious. After you enjoy your Cream Cheese Chicken Skillet, store leftovers properly. Let the dish cool first. Then, place the chicken and sauce in an airtight container. Refrigerate it within two hours for best results. Your leftovers will stay fresh for about three to four days. You can also freeze leftovers. Use a freezer-safe container or bag. Squeeze out as much air as possible. This helps to prevent freezer burn. When stored correctly, your dish will last up to three months in the freezer. To enjoy your Cream Cheese Chicken Skillet again, reheating is key. The best method is to use the stovetop. Place the chicken in a skillet over low heat. Add a splash of chicken broth to keep the sauce creamy. Stir gently while it heats, about 5 to 7 minutes. You can also use the microwave. Place the chicken in a microwave-safe dish. Cover it with a damp paper towel. Heat for 2 to 3 minutes, checking halfway through. Be careful not to overcook, as this can dry it out. Enjoy your meal just like the first time! Yes, you can use low-fat cream cheese. It will change the taste and texture. Low-fat cream cheese may not be as creamy. The sauce can be thinner and less rich. If you want a lighter option, this is a good choice. Just know that the dish may taste different. You can use vegetable broth if you want a veggie option. Beef broth also works well for a richer flavor. Water can be a last choice, but it lacks taste. Using broth adds depth to the creamy sauce. Choose what fits your meal best. The chicken should reach an internal temperature of 165°F. A meat thermometer helps ensure safety. Look for clear juices when you cut into it. The meat should not be pink inside. These signs show your chicken is done and safe to eat. This post covered a creamy chicken dish, highlighting key ingredients like chicken, cream cheese, and herbs. I shared step-by-step instructions for preparing the meal, tips for cooking, and storage advice. You can also explore variations to make it your own. By using these simple steps, you’ll create a delicious dish that impresses. Enjoy experimenting with flavors and serving green sides for balance. Happy cooking!
    Cream Cheese Chicken Skillet Flavorful Weeknight Meal
  • - 200g chorizo, diced - 1 small onion, finely chopped - 1 bell pepper (red or green), diced - 2 cloves garlic, minced - 1 cup shredded cheese (cheddar or Monterey Jack) The main stars of our chorizo quesadillas are chorizo and cheese. Chorizo adds a spicy kick. You’ll want to use good quality chorizo for great flavor. Onions and bell peppers bring sweetness and crunch. Fresh garlic enhances the taste. A mixture of cheddar or Monterey Jack cheese melts perfectly for a gooey texture. - 4 large flour tortillas - 2 tablespoons olive oil For the base, I prefer large flour tortillas. They hold the filling well and crisp up nicely. Olive oil helps the quesadillas brown and adds a slight richness. Be sure to use enough oil to coat your skillet. - Fresh cilantro, chopped (for garnish) - Sour cream or guacamole (for serving) Garnishes elevate the dish. Fresh cilantro adds brightness. Sour cream or guacamole gives a creamy touch. These sides balance the spice of the chorizo, making each bite delightful. - Brown the Chorizo Heat a skillet over medium heat. Add 1 tablespoon of olive oil. Once hot, add the diced chorizo. Cook it for about 5-7 minutes. Stir often until the chorizo is brown and crispy. - Add Onion and Bell Pepper Now, add the finely chopped onion and diced bell pepper. Cook for another 4-5 minutes. The veggies should soften but still have some crunch. - Assemble the Tortilla Layers On a new skillet, heat the remaining tablespoon of olive oil over medium-low heat. Place one tortilla in the skillet. Sprinkle half of the shredded cheese on top. Next, add half of the chorizo mixture. Then, top it with more cheese. Carefully place a second tortilla on top. - Cook Until Golden Brown Cook for 3-4 minutes until the bottom is golden brown. The cheese will start to melt. Flip the quesadilla using a large spatula and cook for another 2-3 minutes. Both sides should be golden brown and crispy. - Cut and Serve Remove the quesadilla from the skillet. Let it sit for a minute. Then, cut it into wedges. Repeat this for the rest of your quesadillas. - Recommended Garnishes Serve hot, garnished with fresh cilantro. Add sour cream or guacamole on the side. Enjoy your flavorful dish! To get a crispy quesadilla, use medium-low heat. This allows the tortillas to brown without burning. Use enough olive oil to coat the pan lightly. Flip the quesadilla carefully to keep it intact. After cooking, let it rest for a minute. This helps the cheese set and keeps the filling from spilling out. For gooey cheese, shred it yourself. Pre-shredded cheese often has anti-caking agents. Mix different cheeses to enhance flavor. Cheddar and Monterey Jack work well together. Layer cheese on both sides of the filling. This creates a cheesy barrier that holds everything together. Do not overload your tortillas. Too much filling makes them hard to flip. Stick to a moderate amount of chorizo and veggies. This ensures even cooking and keeps the quesadilla crispy. Avoid high heat when cooking. It can burn the tortillas while leaving the filling cold. Medium-low heat allows for even cooking. This way, your quesadillas turn out golden and hot throughout. Feel free to adjust the spices in your mix. Add more smoked paprika for a deeper flavor. For heat, toss in some chili powder or jalapeños. Start small and taste as you go. This way, you can find your perfect spice level. Fresh ingredients boost flavor and texture. Consider adding diced tomatoes or corn. Fresh herbs like cilantro add a nice touch. You can also serve with fresh salsa to enhance the taste. {{image_2}} Using Different Meats You can change up the chorizo for other meats. Try ground beef or chicken for a milder taste. Both will still give you a tasty quesadilla. Just cook the meat until it's done before adding veggies. Vegetarian Options If you want a veggie quesadilla, skip the meat. Use black beans or mushrooms instead. They add great flavor and texture. You can also add some spinach for added nutrition. Adding Spices Want to kick up the flavor? Add spices like cayenne or cumin. Just a pinch can make a big difference. Experiment to find what you like best. You can also use chili powder for more heat. Salsas and Sauces Salsas can add fun flavors. Try pico de gallo for freshness. Or go for a smoky salsa for depth. You can also drizzle some hot sauce on top for a spicy finish. Pairing with Mexican Rice Serve your quesadillas with Mexican rice. The rice complements the flavors well. It adds a nice balance to your meal. You can even mix in some corn or peas in the rice. Creating a Quesadilla Platter Make a platter for sharing. Use different quesadillas with various fillings. Include dips like sour cream and guacamole. This way, everyone can taste a bit of everything. To keep your chorizo quesadillas fresh, store them in the fridge. Wrap each quesadilla in plastic wrap or foil. Place them in an airtight container. This helps keep them from drying out. Your leftovers will stay good for about three days in the fridge. If you want to save them for longer, freezing is a great option. Wrap each quesadilla in plastic wrap tightly. Then, place them in a freezer-safe bag. Squeeze out as much air as possible. Frozen quesadillas can last up to three months. When it comes to reheating, I prefer the oven over the microwave. The oven helps keep the quesadillas crispy. Preheat your oven to 350°F (175°C). Place the quesadillas on a baking sheet. Bake for about 10-15 minutes until they are hot. If you use a microwave, the quesadilla may become soggy. To prevent this, place a paper towel under the quesadilla. Heat it in short bursts of 30 seconds. Check often to avoid overheating. How long do quesadillas last? If stored properly, they can last about three days in the fridge. In the freezer, they can last up to three months. Watch for signs of spoilage. If you see mold or a strange smell, throw them away. Additionally, if the texture seems off or they feel slimy, it’s best to discard them. Enjoy your chorizo quesadillas while they are fresh! I love using cheddar or Monterey Jack cheese for quesadillas. These cheeses melt well and add great flavor. You can also try a mix of both for more depth. Just make sure to shred the cheese yourself. Pre-shredded cheese has added ingredients that can affect the melt. Yes, you can use corn tortillas. They add a nice crunch and a more authentic taste. However, corn tortillas can break easily. To avoid this, warm them up before filling. This helps them stay soft and flexible. To spice up your chorizo quesadillas, add jalapeños or hot sauce. You can mix in some diced green chiles too. Another option is to add more smoked paprika or cayenne pepper to the mixture. Always taste as you go! Chorizo quesadillas can be part of a balanced diet. However, chorizo is high in fat and sodium. To make them healthier, use less chorizo and add more veggies like bell peppers and onions. You can also choose whole grain tortillas for extra fiber. To make a great chorizo quesadilla, gather your main ingredients like chorizo, onion, and cheese. Follow the steps to cook your filling and assemble your quesadilla. Use tips to avoid common mistakes and enhance flavor. Explore variations for different tastes. Store and reheat leftovers properly for later enjoyment. With these simple steps, you can create a delicious meal that impresses everyone. Enjoy your cooking adventure and feel proud of your tasty results!
    Chorizo Quesadillas Simple and Flavorful Meal
  • For this creamy pesto sauce pasta, you need: - 12 oz pasta (fettuccine or penne work well) - 1 cup fresh basil leaves - 1/4 cup pine nuts - 1/2 cup grated Parmesan cheese - 2 cloves garlic, minced - 1/2 cup heavy cream - 1/4 cup extra-virgin olive oil - Salt and pepper to taste These ingredients create a rich and tasty dish. The fresh basil adds a bright flavor. The pine nuts give a nice crunch. Parmesan cheese provides a salty touch. Heavy cream makes the sauce smooth. These ingredients blend perfectly to create a dish you will love. To make your pasta even better, you can add: - Cherry tomatoes, halved - Toasted pine nuts These garnishes add color and texture. The cherry tomatoes bring sweetness. The toasted pine nuts add extra crunch. They make your dish look and taste amazing. You will need a few kitchen tools to make this dish: - A large pot for boiling pasta - A food processor for making the pesto - A skillet for mixing the pasta and sauce - A measuring cup for accurate portions Having the right tools makes cooking easier. These items help you create a perfect creamy pesto sauce pasta. {{ingredient_image_1}} Start by bringing a large pot of salted water to a boil. The salt helps add flavor. Once boiling, add 12 oz of your favorite pasta, like fettuccine or penne. Cook it according to the package instructions until it is al dente. This usually takes about 8-10 minutes. After it's done, drain the pasta in a colander. Don’t forget to save about 1 cup of the pasta water. This will help later when mixing the sauce. Now, let’s make the creamy pesto sauce. Grab your food processor and add 1 cup of fresh basil leaves, 1/4 cup of pine nuts, 1/2 cup of grated Parmesan cheese, and 2 cloves of minced garlic. Pulse them together until they are finely chopped. Next, while the processor runs, slowly drizzle in 1/4 cup of extra-virgin olive oil. This helps blend everything smoothly. After that, add 1/2 cup of heavy cream and pulse again until mixed. If your sauce is too thick, add some reserved pasta water until it’s just right. In a large skillet over medium heat, add the cooked pasta. Pour the creamy pesto sauce over the pasta. Toss them together well to coat every piece. If it looks dry, add more of the reserved pasta water to make it creamy. Season with salt and pepper to taste. For a special touch, you can top your dish with halved cherry tomatoes and toasted pine nuts for added taste and crunch. Enjoy your meal! For creamy pesto sauce pasta, I recommend fettuccine or penne. These shapes hold sauce well. Fettuccine has a flat surface, so it grabs the sauce tightly. Penne has ridges, which catch the creamy goodness. You can also use rotini or farfalle if you prefer. Just remember to cook it until al dente for the best texture. To create a smooth pesto sauce, use a food processor. First, blend fresh basil leaves, pine nuts, Parmesan cheese, and minced garlic. Pulse until finely chopped. This step breaks down the ingredients. Then, with the processor running, slowly drizzle in the olive oil. This creates a creamy base. Finally, add the heavy cream and pulse until combined. If the sauce is too thick, add some reserved pasta water. This helps loosen it up. Seasoning is key for a tasty dish. Start with salt and pepper. Add them gradually. Taste as you go to get it just right. Freshly cracked black pepper adds a nice kick. You can also try a squeeze of lemon juice for brightness. If you like it spicy, add a pinch of red pepper flakes. Adjust the flavors to match your taste. Pro Tips Use Fresh Basil: Fresh basil is key for the best flavor in your pesto. Avoid dried basil for this recipe, as it won't provide the same vibrant taste. Toast Pine Nuts: Lightly toasting the pine nuts before adding them to the pesto enhances their flavor and adds a delicious nuttiness to the sauce. Adjust Creaminess: If your sauce is too thick, gradually add reserved pasta water until you reach your desired consistency. This will help keep the sauce silky and light. Garnish with Fresh Ingredients: Fresh cherry tomatoes and toasted pine nuts not only add visual appeal but also provide a delightful contrast in texture and flavor to the creamy pasta. {{image_2}} You can make this dish vegetarian by skipping the Parmesan cheese. Use nutritional yeast instead. This gives you a cheesy taste without dairy. For a vegan twist, swap heavy cream with coconut cream or cashew cream. You still get that rich texture with a fresh flavor. Add more veggies like spinach or zucchini for a colorful plate. To make your meal heartier, add protein. Grilled chicken or shrimp works great. Cook the chicken in slices or the shrimp until pink. Mix them in right before serving. This adds a nice touch and makes it more filling. You can also use tofu for a plant-based option. Don't hesitate to swap ingredients for fun flavors. Try sun-dried tomatoes instead of fresh ones for a tangy taste. You can also add arugula for a peppery kick. Experiment with different nuts like walnuts or almonds for your pesto. Each change can offer a new twist to your creamy pesto sauce pasta. Enjoy creating your own version! To keep your creamy pesto sauce pasta fresh, store it in an airtight container. Make sure to let it cool down first. Then, place it in the fridge. It stays good for about 3 to 5 days. If you want to keep it longer, consider freezing it. Just remember to leave some space in the container for expansion. When you’re ready to eat your leftovers, reheat the pasta gently. You can use a microwave or a skillet. If using the microwave, heat it in short bursts. Stir it every minute to avoid hot spots. If you use a skillet, add a splash of water or cream to keep it moist. Heat on low and stir until warm. This way, your pasta stays creamy and tasty. To freeze creamy pesto sauce pasta, portion it into small containers. Ensure they are freezer-safe. Label them with the date. It can last up to 2 months in the freezer. When ready to eat, thaw it in the fridge overnight. You can reheat it as mentioned before. Add a bit of cream or pasta water if it seems dry after freezing. Yes, you can use store-bought pesto. It saves time and works well. Just choose a brand with fresh ingredients for the best taste. If you're in a hurry, this option is great! Fettuccine and penne are perfect for creamy sauces. Their shapes hold the sauce well. You can also try other pasta like farfalle or rigatoni. They add a fun twist to your dish. To make this dish gluten-free, use gluten-free pasta. Many brands offer tasty options made from rice or chickpeas. Just cook them according to package instructions. The creamy pesto sauce stays delicious with any pasta. Yes, you can make creamy pesto sauce in advance. Store it in an airtight container in the fridge for up to three days. Just stir it well before using. If it thickens, add a bit of pasta water to loosen it. In this blog post, I covered how to make creamy pesto sauce pasta. You learned about key ingredients, optional garnishes, and tools needed. I shared step-by-step instructions on cooking, making sauce, and combining everything. Tips included choosing pasta and seasoning well. Variations like vegetarian options and adding protein help personalize your dish. Lastly, I discussed storage and reheating for best taste. Enjoy your cooking journey and make this dish your own!
    Creamy Pesto Sauce Pasta Easy and Flavorful Dish
  • For a delicious Creamy Tuscan Salmon, you will need: - 4 salmon fillets (about 6 oz each) - 2 tablespoons olive oil - Salt and pepper, to taste - 3 cloves garlic, minced - 1 cup cherry tomatoes, halved - 1 cup fresh spinach, chopped - 1 cup heavy cream - ½ cup grated Parmesan cheese - 1 teaspoon Italian seasoning - 1 tablespoon lemon juice - Fresh basil leaves, for garnish These main ingredients create a rich and tasty dish. The salmon gives a lovely flavor, while the cream and cheese add smoothness. To enhance the flavor, consider these optional ingredients: - A splash of white wine for depth - Red pepper flakes for heat For garnishing, fresh basil adds a pop of color and flavor. You can also use lemon slices to brighten the dish. Enjoy the process of selecting your ingredients! {{ingredient_image_1}} 1. Cook the Salmon Heat 2 tablespoons of olive oil in a large skillet over medium heat. Season 4 salmon fillets with salt and pepper on both sides. When the skillet is hot, add the salmon, skin-side down. Cook for about 4-5 minutes until golden brown. Flip the fillets and cook for 3-4 more minutes. The salmon should be cooked through. Remove it from the skillet and set it aside. 2. Make the Creamy Sauce In the same skillet, add 3 cloves of minced garlic. Sauté for about 30 seconds until it smells great. Then, add 1 cup of halved cherry tomatoes. Cook them for 2-3 minutes until they start to soften. Next, add 1 cup of chopped fresh spinach. Stir it in until it wilts down. 3. Combine Ingredients Pour in 1 cup of heavy cream. Then, add ½ cup of grated Parmesan cheese and 1 teaspoon of Italian seasoning. Stir everything together until the cheese melts and the sauce becomes creamy. Add 1 tablespoon of lemon juice and mix well. Return the salmon fillets to the skillet, allowing them to heat in the sauce for another 2 minutes. Taste and adjust with salt and pepper if needed. 4. Serve Serve the creamy Tuscan salmon on a warm plate. Spoon extra sauce on top and garnish with fresh basil leaves. It pairs great with garlic bread or over pasta for a full meal. Enjoy this delightful dish! To make a creamy sauce, start with heavy cream. This gives your dish richness. Stir in the Parmesan cheese slowly. This helps it melt well and blend smoothly. - Use fresh garlic for the best flavor. It adds depth. - Add the cherry tomatoes before the spinach. This way, they soften nicely. - Stir the sauce often to keep it creamy and prevent sticking. Adjust flavors by tasting as you cook. If you like it tangy, add more lemon juice. For more flavor, sprinkle in extra Italian seasoning. Cooking salmon perfectly is key. Cook it skin-side down first. This gives a nice crisp. The total cooking time is about 8-9 minutes. Look for a light pink color inside. This means it's done. Remember, you can always reheat the salmon in the sauce for a few minutes. This keeps it moist and warm. Enjoy your creamy Tuscan salmon with these easy tips! Pro Tips Fresh Ingredients: Using fresh spinach and ripe cherry tomatoes enhances the flavor and texture of the dish significantly. Don’t Overcook the Salmon: For perfectly cooked salmon, aim for a slightly pink center; it will continue to cook in the residual heat of the sauce. Customize the Cream Sauce: Feel free to add other ingredients like sun-dried tomatoes or artichokes for an extra flavor boost. Perfect Pairings: This dish goes wonderfully with a crisp white wine like Pinot Grigio or a light salad for a refreshing balance. {{image_2}} You can switch up ingredients in Creamy Tuscan Salmon to match your taste or diet. Here are some ideas: - Alternative proteins or vegetables: Swap salmon for chicken, shrimp, or tofu. Each gives a unique taste. You can also add veggies like zucchini, bell peppers, or asparagus for a fresh twist. - Dairy-free or lower-fat options: For a lighter dish, use coconut milk instead of heavy cream. You can also try nutritional yeast instead of Parmesan for a dairy-free option. - Regional variations of Tuscan flavors: Try adding sun-dried tomatoes or olives for a different Italian flair. Fresh herbs like oregano or thyme can also enhance the taste and bring in regional notes. Feel free to mix and match to create the perfect dish for you! To keep your creamy Tuscan salmon fresh, follow these steps: - Refrigeration: Place leftover salmon in an airtight container. This helps keep out air and moisture. Store it in the fridge for up to three days. - Freezing: If you want to save it longer, you can freeze the salmon. Wrap each piece tightly in plastic wrap. Then place it in a freezer bag. It will stay good for up to two months. - Reheating tips: When ready to eat, thaw the salmon overnight in the fridge. Then, gently reheat it in a skillet over low heat. Add a splash of cream to keep it moist. This way, it stays creamy and delicious. By following these steps, you can enjoy your creamy Tuscan salmon even after the first meal! Yes, you can use frozen salmon. Just thaw it first. Make sure to pat it dry. This helps the seasoning stick better. Cooking time may vary slightly. Check the salmon for doneness to ensure it's fully cooked. Creamy Tuscan Salmon pairs well with many sides. You can serve it with garlic bread. It goes great over al dente pasta too. A fresh salad adds a nice crunch. Roasted vegetables also make a good choice. Choose sides that balance the creamy sauce. Check the salmon's color and texture. It should be opaque and flake easily with a fork. The internal temperature should reach 145°F. If the salmon is still translucent, it needs more time. Always ensure it's cooked through for safe eating. This post covered making Creamy Tuscan Salmon. We shared key ingredients, detailed steps, and helpful tips. You learned best practices for a creamy sauce and how to store leftovers. We also explored variations and answered common questions. Enjoy cooking this dish! It brings a taste of Italy to your table. Don't hesitate to adjust flavors to your liking. Now, go make it your own!
    Creamy Tuscan Salmon Flavorful Dish to Savor
  • - Puff pastry: Use 1 package of puff pastry, which includes 2 sheets. Thaw the pastry in the fridge for a few hours before using. You can also set it out for 30 minutes at room temperature. - Brie cheese: You need 8 ounces of brie cheese. Cut it into small squares. The creamy texture of brie pairs well with the sweet cranberry. - Cranberry sauce: Get 1 cup of cranberry sauce. You can use fresh sauce or store-bought. Fresh sauce offers bright flavors while store-bought adds convenience. - Fresh rosemary: Use 1 tablespoon of fresh rosemary, finely chopped. This herb adds a lovely aroma. Season with salt and pepper to taste for a balanced flavor. - Optional: For a crunch, add chopped pecans or walnuts on top. They bring a nutty flavor that enhances the bites. These ingredients make the perfect base for your fifteen-minute cranberry brie bites. Each component blends well, creating a tasty and festive appetizer. {{ingredient_image_1}} 1. Start by preheating your oven to 400°F (200°C). This ensures the bites bake evenly. 2. Next, roll out your puff pastry sheets on a lightly floured surface. Make them about ¼ inch thick. This thickness helps them puff nicely. 3. Use a sharp knife to cut each sheet into 3-inch squares. You will get about 12 squares from each sheet, making 24 total. 1. Place a small square of brie cheese in the center of each pastry square. The brie will melt and become creamy. 2. Spoon about a teaspoon of cranberry sauce on top of the brie. This adds sweetness and flavor. 3. For extra taste, sprinkle a pinch of fresh rosemary, salt, and pepper over each bite. If you like, add chopped nuts on top for crunch. 1. Fold the corners of each pastry square toward the center. Pinch them to seal the bites. This keeps the filling inside. 2. Brush the tops of the sealed pastries with beaten egg. This gives them a lovely golden color. 3. Bake in your preheated oven for about 15 minutes. Check for a puffed, golden brown finish. If they look good, they are ready! To make great cranberry brie bites, pay attention to temperature and timing. I suggest preheating the oven to 400°F (200°C). This heat helps the pastry puff up nicely. Bake them for about 15 minutes. Keep an eye on them. You want them golden brown and puffed. To avoid soggy pastry, roll out the puff pastry thinly. About ¼ inch thick works well. Make sure you seal the edges tightly. This keeps the filling inside. If the filling leaks out, the pastry can get wet. For garnishing, fresh herbs really shine. I love using rosemary since it pairs well with brie. Just a pinch on top adds flavor and color. You can also try thyme or chives for a different taste. If you want to add a crunch, sprinkle chopped pecans or walnuts on top. They add great texture and a nutty flavor. For presentation, arrange the bites on a festive platter. Add sprigs of rosemary around them. This makes the dish look extra special. You can serve them warm for the best flavor. Enjoy every bite! Pro Tips Chill the Pastry: Keep the puff pastry cold before baking for a flakier texture. Experiment with Cheese: Try using different cheeses like goat cheese or cheddar for a unique flavor. Make Ahead: You can assemble the bites a few hours in advance and bake them just before serving. Garnish Creatively: Add a drizzle of balsamic glaze or a sprinkle of pomegranate seeds for extra flair. {{image_2}} You can switch up the cheese to fit your taste. Cream cheese gives a smooth texture. Goat cheese adds a tangy kick. Use sharp cheddar for a bold flavor. For toppings, think beyond nuts. Try diced apples for crunch. Chopped figs or dates add sweetness. A drizzle of honey gives a nice touch. If you need gluten-free options, look for gluten-free puff pastry. Many stores sell it now. You can make your own with almond flour too. For a vegan twist, swap the brie for a nut-based cheese. Use a plant-based egg wash or skip it altogether. Replace the cranberry sauce with a fruit chutney. This keeps the flavor bright and fresh. After enjoying your cranberry brie bites, store any leftovers in the fridge. Place them in an airtight container. This keeps them fresh and prevents drying out. Make sure to eat them within three days for the best taste. If you want to save bites for later, freezing is a good option. Lay them on a baking sheet first, so they freeze individually. Once frozen, transfer them to a freezer-safe bag. They can last for up to three months in the freezer. When you’re ready to eat them, reheat them directly from the freezer. Preheat your oven to 375°F (190°C). Bake them for about 15-20 minutes, until warm and crispy. Cranberry brie bites are best enjoyed fresh, but they can last in the fridge for up to three days. Keep an eye on them. If they smell sour or look dry, it's time to toss them. Watch for signs of spoilage like mold or a change in color. Eating spoiled food can be harmful, so always check before enjoying your leftovers. To reheat leftover Cranberry Brie Bites, I recommend using the oven. Preheat your oven to 350°F (175°C). Place the bites on a baking sheet lined with parchment paper. Heat them for about 10 to 15 minutes. This method helps keep the pastry crisp. You can also use a microwave, but the pastry may get soggy. If you choose the microwave, heat for about 30 seconds. Check if they are warm enough before serving. Yes, you can make these bites ahead of time! Prepare the bites up to the baking step. After sealing them, place them on a baking sheet. Cover and chill in the fridge for up to 24 hours. When you're ready to eat, just bake them as directed. If you want to freeze them, wrap each bite tightly. They can last in the freezer for about a month. Bake them straight from the freezer, adding a few extra minutes to the cooking time. Cranberry Brie Bites pair well with many dishes. You can serve them with a fresh salad for a light meal. A simple arugula salad with lemon dressing works great. For beverages, try a sparkling wine or light red wine like Pinot Noir. These drinks enhance the flavors of the bites. You can also serve them with a cheese platter or charcuterie board for a fun spread. Adding some fresh fruit, like grapes or apple slices, adds a nice touch. Cranberry Brie bites are easy to make and delicious for any occasion. We covered the key ingredients, from puff pastry to fresh herbs. The step-by-step guide ensures perfect bites every time, while helpful tips keep them crispy. You can also explore fun variations, dietary options, and smart storage methods. In the end, with these simple steps and ideas, you can impress your friends and family. Enjoy your cooking and get creative with flavors. Happy baking!
    Fifteen Minute Cranberry Brie Bites Tasty Appetizer
  • - 8 oz cream cheese, softened - 1 cup heavy whipping cream - 1/2 cup powdered sugar The cream cheese gives this mousse its rich and creamy base. Use full-fat cream cheese for the best taste. The heavy whipping cream adds a light and airy texture. It makes the mousse fluffy and delightful. The powdered sugar sweetens the mixture without adding graininess. - Zest of 1 lemon - 1/4 cup fresh lemon juice - 1 teaspoon vanilla extract Lemon zest and juice brighten the flavor. They bring a fresh, tangy taste that balances the sweetness. The vanilla extract adds warmth and depth to the dessert. Together, these ingredients create a zesty and refreshing experience. - 1 teaspoon unflavored gelatin (for sturdiness) - 2 tablespoons water (if using gelatin) - Fresh berries and mint leaves for garnish Gelatin is great if you want a firmer mousse. It helps the mousse hold its shape better. Fresh berries and mint leaves make lovely garnishes. They add a pop of color and a hint of freshness. These options allow you to customize your dessert. {{ingredient_image_1}} To start, sprinkle the gelatin over 2 tablespoons of cold water. Let this sit for about 5 minutes. This step helps the gelatin bloom. After it blooms, gently heat it in the microwave for about 10 to 15 seconds. You want it to dissolve completely. Set the gelatin aside for later. In a large mixing bowl, beat 8 ounces of softened cream cheese with an electric mixer. Keep mixing until it is smooth and creamy. Next, add 1/2 cup of powdered sugar, the zest of one lemon, 1/4 cup of fresh lemon juice, and 1 teaspoon of vanilla extract. Mix until everything blends well and is smooth. In another bowl, pour in 1 cup of heavy whipping cream. Whip it until soft peaks form. Be careful here; you do not want to overwhip. Overwhipping can make the cream grainy. Once you achieve soft peaks, gently fold this whipped cream into the cheesecake mixture. If you used gelatin, add it now and mix until smooth. Now, divide the mousse into serving glasses or cups. Make sure to cover them. Place them in the refrigerator for at least 2 hours. This cooling time allows the mousse to set properly. Before serving, you can garnish with fresh berries and mint leaves for a lovely touch. To get the best texture for your mousse, avoid overwhipping the cream. When you whip the cream, stop when you see soft peaks. This keeps the mousse light and fluffy. If you whip it too long, it can become grainy. Folding is key. When you mix the whipped cream into the cream cheese, use a gentle motion. Start at the bottom and lift the mixture over itself. This helps keep air in the mousse, making it airy and soft. If you want a zestier taste, add more lemon juice or zest. This will brighten the flavor and make each bite pop. You can also use different sweeteners. Try honey or maple syrup instead of powdered sugar for a unique twist. Serve the mousse in clear glasses to show off that beautiful texture. You can layer it with fresh berries for a fun look. For garnish, add mint leaves on top. This adds a splash of color and freshness to your dessert. Pro Tips Use Fresh Ingredients: Always opt for fresh lemon juice and zest to enhance the flavor of your mousse. Whip Cream Carefully: Avoid overwhipping the heavy cream; it should have soft peaks for a light and airy mousse. Chill for Best Texture: Letting the mousse chill for at least 2 hours will improve its texture and flavor. Optional Gelatin: Use gelatin if you prefer a sturdier mousse that holds its shape better when served. {{image_2}} To make a no-bake version, skip the gelatin. This will still yield a fluffy mousse. Simply whip the cream and fold it into the cream cheese mix. This method saves time and still tastes great. If you want a firmer texture, chill it longer. You can also place it in the freezer for about 30 minutes before serving. You can add fruits like strawberries or raspberries for a fresh taste. Just chop them up and fold them in gently. If you want something richer, try a chocolate lemon mousse. Melt some dark chocolate and mix it into the cream cheese base. This gives a nice twist to the classic flavor. For gluten-free options, all the ingredients are naturally gluten-free. Just check your labels to be sure. If you want a vegan option, use vegan cream cheese and coconut cream instead of heavy cream. This keeps the mousse creamy and delicious while meeting dietary needs. To keep your lemon cheesecake mousse fresh, refrigerate it right away. Place the mousse in an airtight container. If you do not have one, cover it tightly with plastic wrap. This keeps out air and prevents the mousse from absorbing other smells in the fridge. The mousse lasts about three days in the fridge. After that, the texture may change, and it may not taste as fresh. You should check for signs of spoilage. If you see any off smells or a watery layer on top, it’s time to toss it. You can freeze mousse, but the texture may change. If you want to freeze it, do so in an airtight container. To thaw, place it in the fridge overnight. This helps keep the texture smooth. Avoid thawing it in the microwave, as this can ruin the mousse. Yes, you can use low-fat cream cheese. However, the mousse may not be as rich or creamy. Low-fat cream cheese can alter the texture, making it less smooth. It might not whip up as well as full-fat cream cheese. The taste will still be good but less decadent. Let the mousse chill for at least 2 hours. This time allows the flavors to meld together. It helps create a nice, creamy texture. If you can wait longer, it can set even better. Just keep it covered in the fridge. If you want a vegan option, use agar-agar. This seaweed extract works well as a thickener. You can also use cornstarch or chia seeds. Mix them with a bit of water to achieve a similar texture. Follow the package instructions for best results. Yes, you can make this mousse a day ahead. Just store it in the fridge in covered containers. This will help the flavors develop more. When ready to serve, add your berries and mint for a fresh touch. This blog covers how to make a delicious lemon cheesecake mousse. You learned about key ingredients, from creamy bases to flavor boosters. Following simple steps, you can create the perfect texture and stunning presentation. Don’t forget to explore variations and storage tips to keep your mousse fresh. Embrace your creativity and enjoy making this treat. Each bite will remind you of sunny days. Now, go ahead and impress your friends and family with your new skills!
    Lemon Cheesecake Mousse Delightful and Easy Recipe
  • - 20 store-bought or homemade potstickers (vegetable or meat-filled) - 4 cups chicken or vegetable broth - 1 tablespoon sesame oil - 2 garlic cloves, minced - 1-inch piece of ginger, grated - 2 scallions, chopped (white and green parts separated) - 1 cup napa cabbage, thinly sliced - 1 cup baby spinach - 1 tablespoon soy sauce (or tamari for gluten-free) - 1 teaspoon rice vinegar - Fresh cilantro leaves for garnish - Crushed red pepper flakes (optional, for heat) - Salt and pepper to taste You can add extra toppings or ingredients to make your soup unique. Here are a few ideas: - Mushrooms for a rich flavor - Carrots for sweetness and color - Bok choy for extra greens - Tofu for protein and texture If you have dietary needs, you can swap some ingredients: - Use vegetable broth instead of chicken broth for a vegan option. - Tamari works as a great gluten-free alternative to soy sauce. - Use any leafy greens you have on hand, like kale or Swiss chard. These simple swaps keep the soup tasty while meeting your needs. {{ingredient_image_1}} Start by gathering your ingredients. You will need: - 20 potstickers (vegetable or meat-filled) - 4 cups chicken or vegetable broth - 1 tablespoon sesame oil - 2 garlic cloves, minced - 1-inch piece of ginger, grated - 2 scallions, chopped (white and green parts separated) - 1 cup napa cabbage, thinly sliced - 1 cup baby spinach - 1 tablespoon soy sauce (or tamari) - 1 teaspoon rice vinegar - Fresh cilantro leaves for garnish - Crushed red pepper flakes (optional) - Salt and pepper to taste Chop the scallions, mince the garlic, and grate the ginger. Slice the napa cabbage and measure out the spinach. Heat the sesame oil in a large pot over medium heat. Add the minced garlic and grated ginger. Sauté for one minute until fragrant. Next, add the white parts of the scallions and cook for another minute. Pour in the chicken or vegetable broth. Bring it to a gentle simmer. Add the sliced napa cabbage and let it simmer for about five minutes. The cabbage should soften a bit. Now stir in the baby spinach, soy sauce, and rice vinegar. Cook for an additional two to three minutes. Carefully add the potstickers to the soup. Cook them according to the package instructions, usually five to seven minutes. They should heat through and float to the top. Season the soup with salt and pepper to taste. If you like heat, add crushed red pepper flakes. Remove the pot from the heat and garnish your soup with the green parts of the scallions and fresh cilantro leaves. To make the best potstickers, choose high-quality ones. If you want more flavor, try adding herbs or spices to the broth. You can also add more vegetables for extra nutrition. When serving, arrange the potstickers artfully in deep bowls. This makes the dish more appealing. A sprinkle of cilantro and scallions adds color and freshness. Enjoy your delicious potsticker dumpling soup! Start with a clean kitchen. Gather all your ingredients before you cook. This makes cooking smooth. Use measuring cups and spoons for accuracy. Always taste your broth before adding salt. It's easier to add than to fix! Use fresh ginger and garlic for the best taste. They add depth to your soup. Add a splash of soy sauce for umami flavor. Garnish with cilantro and scallions for color. Serve the soup in deep bowls for a nice look. Try adding a squeeze of lime for freshness. Don’t rush the cooking times. Let the broth simmer to build flavor. Avoid overcrowding the pot with potstickers. They need space to cook evenly. Don’t forget to check the potstickers for doneness. They should float when fully cooked. Lastly, always taste before serving. Adjust salt and spice as needed. Pro Tips Fresh Broth: For the best flavor, use homemade chicken or vegetable broth if possible. It will greatly enhance the overall taste of the soup. Potsticker Choice: Choose high-quality potstickers for the best results. If making your own, ensure they are well-sealed to avoid any filling leakage during cooking. Vegetable Variations: Feel free to add other vegetables like bok choy, mushrooms, or carrots for added texture and nutrition. Serving Suggestions: Serve with a side of soy sauce or chili oil for dipping potstickers, enhancing the meal experience. {{image_2}} You can make a great vegetarian or vegan version of this soup. Use vegetable potstickers instead of meat-filled ones. For the broth, choose vegetable broth. You can add mushrooms for a hearty touch. They bring umami flavor that pairs well with the soup. Also, consider adding tofu for extra protein. For a gluten-free soup, use tamari instead of soy sauce. Tamari gives the same great flavor without gluten. You can also check your potstickers for gluten-free options. Many brands offer gluten-free dumplings. This way, you can enjoy the soup without worry. If you want more protein, add cooked chicken or shrimp. These pair nicely with the broth and potstickers. For extra veggies, try adding carrots or bell peppers. They add color and crunch to the dish. You can also toss in some snap peas or broccoli. These additions make the soup more filling. To store leftover potsticker dumpling soup, let it cool first. Transfer the soup into an airtight container. Make sure to keep the potstickers in the soup to stay soft. You can store it in the fridge for up to three days. If you want to keep it longer, consider freezing it. Reheat soup on the stove over low heat. Stir gently to avoid breaking the potstickers. Add a splash of broth or water if it seems too thick. If using a microwave, heat it in short bursts. Stir in between to ensure even heating. This keeps the flavors bright and fresh. To freeze potsticker dumpling soup, first cool it completely. Pour it into freezer-safe bags or containers. Remove as much air as possible to prevent freezer burn. Label the bags with the date. It can stay good for up to three months. When ready to enjoy, thaw it in the fridge overnight before reheating. You can use store-bought or homemade potstickers. I often choose vegetable or meat-filled ones. Both options add great flavor. Look for potstickers that are well-made with fresh ingredients. If you have time, making your own can be fun. It lets you control the filling and flavors. Yes, you can make this soup in advance. It tastes great when reheated. Just cook the potstickers separately. Add them to the soup right before serving. This keeps them from getting soggy. Store the soup in a sealed container in the fridge. It will last for about 3 days. To adjust the spice level, add crushed red pepper flakes. Start with a small amount. You can always add more if you want more heat. If you prefer a milder soup, skip the red pepper. You can also use less soy sauce, as it can add saltiness. This article covered Potsticker Dumpling Soup from start to finish. You learned about key ingredients and fun options to customize your soup. I shared easy steps for prep and cooking, plus tips for beginners. We explored flavorful variations and storage methods. In conclusion, this soup is versatile and simple to make. Enjoy trying out different ingredients and flavors to create your unique bowl! Always remember, cooking should be fun and delicious!
    Potsticker Dumpling Soup Flavorful and Satisfying Meal
  • To make a great Spicy Pasta Arrabbiata, gather these main ingredients: - 400g penne pasta - 4 tablespoons olive oil - 4 cloves garlic, thinly sliced - 1-2 red chili peppers, finely chopped - 1 can (400g) crushed tomatoes - 1 teaspoon sugar - Salt and pepper to taste - 1/4 cup fresh basil leaves, torn These ingredients come together to create a rich and flavorful dish. The key is in the balance of heat from the chili and the sweetness from the sugar. You can enhance your dish with optional ingredients. Consider adding: - 1/4 cup grated Parmesan cheese (for serving) - A pinch of red pepper flakes (for extra heat) - Fresh herbs like parsley or oregano (for more aroma) These additions can give your pasta a unique twist. Cheese adds creaminess, while more herbs boost the flavor. If you have dietary needs, don’t worry! Here are some substitutions: - Use gluten-free penne pasta if you need a gluten-free option. - Swap olive oil with avocado oil for a different flavor. - For a vegan version, skip the Parmesan cheese or use a vegan alternative. - If you can’t find fresh basil, use dried basil, but reduce the amount. These swaps keep your dish tasty while meeting your needs. Don't hesitate to experiment and make it your own! {{ingredient_image_1}} Start with a big pot. Fill it with water and add salt. Bring the water to a boil. Add 400 grams of penne pasta. Stir it well. Cook the pasta until it is al dente, which means it should be firm yet tender. This usually takes about 10 to 12 minutes. Be sure to check the package for exact times. Once ready, save one cup of the pasta water. Drain the pasta and set it aside. Grab a large skillet and place it on medium heat. Pour in 4 tablespoons of olive oil. Let the oil heat up but don’t let it smoke. Add 4 thinly sliced cloves of garlic. Sauté them for about 1 to 2 minutes. You want them fragrant but not burnt. Next, add 1 to 2 finely chopped red chili peppers. You can adjust this based on how spicy you like your dish. Cook these for about another minute. The aroma will be amazing! Now it’s time for the tomatoes. Pour in one can of crushed tomatoes, about 400 grams. Stir it well with the garlic and chili mix. Add 1 teaspoon of sugar to balance the flavors. Now, sprinkle in salt and pepper to taste. Let the sauce simmer for 10 to 15 minutes. Stir it occasionally. You want it to thicken slightly. After that, it’s almost ready! Toss in the cooked penne pasta and mix it all together. If it seems too thick, add some reserved pasta water a little at a time. Finish by stirring in 1/4 cup of torn fresh basil leaves. Enjoy your spicy pasta arrabbiata hot, and if you like, sprinkle some grated Parmesan cheese on top! To change the heat in your dish, control the chili peppers. You can use one or two red chili peppers based on your taste. If you want it mild, use just one pepper. For more heat, add two or even three! Just remember to remove the seeds for less spice. You can also try different pepper types, like jalapeños or serranos. Each brings its own flavor and heat. Another option? Use red pepper flakes. Sprinkle them in while cooking for a nice kick. Always taste as you go. This helps you find the perfect spice level. Spicy Pasta Arrabbiata is great on its own, but you can make it even better. Serve it with a fresh side salad. A simple mix of greens, tomatoes, and a light dressing works well. You can also add garlic bread for extra crunch and flavor. If you want to impress, top the pasta with grated Parmesan cheese. It adds a creamy, salty touch that blends perfectly with the spice. For a bright finish, sprinkle fresh basil on top. It adds color and flavor that pops. To get the best flavor, use good-quality ingredients. Fresh garlic and ripe tomatoes make a big difference. When cooking garlic, be careful not to burn it. Sauté it until it’s just golden. This brings out its sweet flavor without bitterness. Let the sauce simmer for a while. This thickens it and deepens the taste. Stir occasionally to keep it from sticking. If the sauce is too thick, add some reserved pasta water. This helps create a silky texture. Lastly, always taste your sauce before serving. Adjust salt and pepper as needed for the best flavor. Pro Tips Adjust the Spice Level: Experiment with the number of chili peppers based on your heat tolerance. Start with one and add more if you prefer it spicier. Reserve Pasta Water: Always save some pasta water before draining. It helps to adjust the sauce consistency and adds flavor. Fresh Herbs Matter: Use fresh basil for a vibrant flavor. Dried herbs won’t give the same aromatic freshness to the dish. Parmesan Optional: While Parmesan adds a delightful richness, feel free to omit it for a vegan version or substitute with nutritional yeast. {{image_2}} You can easily make a vegetarian version of spicy pasta arrabbiata. Simply skip meat and focus on fresh ingredients. Use extra veggies like bell peppers, zucchini, or spinach. They add flavor and color. Mushrooms also work well; they bring a nice texture. You can sauté them with garlic for a rich taste. This version keeps the dish light and healthy while still giving that spicy kick. If you want to add protein, chicken and shrimp are great choices. For chicken, cook bite-sized pieces in the skillet before adding garlic. This step adds depth to the sauce. Shrimp cooks quickly, so add it after the tomatoes. They will turn pink and plump. For a plant-based option, tofu is perfect. Use firm tofu, cut into cubes, and sauté it until golden. It absorbs flavors well and adds a satisfying bite. If you need a gluten-free option, many pastas fit the bill. Rice pasta and quinoa pasta are popular choices. They mimic the texture of regular pasta. Check the cooking time, as it may differ. You can also use zucchini noodles, known as "zoodles." They provide a fresh, low-carb alternative. Simply spiralize zucchini and sauté it lightly before adding the sauce. This way, you still get that spicy flavor without gluten. To store leftover spicy pasta arrabbiata, let it cool first. Place the pasta in an airtight container. Make sure to seal it well to keep out air. You can store it in the fridge for up to three days. If you want to keep it longer, consider freezing it. When you are ready to eat the leftover pasta, reheat it gently. You can use a skillet over medium heat. Add a splash of water or olive oil to keep it moist. Stir often to heat it evenly. If you use a microwave, cover it to keep moisture in. Heat in short bursts, stirring between, until warm. Freezing spicy pasta arrabbiata is a great option for easy meals later. Place the cooled pasta in a freezer-safe container. Use a portioned size for easy meals. Label the container with the date. You can freeze it for up to three months. To thaw, move it to the fridge overnight before reheating. "Arrabbiata" means "angry" in Italian. This name fits the dish well. The heat from the chili peppers gives it a fiery kick. The sauce reflects a bold character, making it a favorite for spice lovers. You get a rich flavor with every bite, and the name suits its spicy nature perfectly. Yes, you can use fresh tomatoes. Just chop about 4-5 medium tomatoes. Make sure to peel them for a smoother sauce. Cook them down just like the canned version. You may need to add a bit more salt for flavor. Fresh tomatoes can give a brighter taste. They also add a nice texture to the dish. Spicy Pasta Arrabbiata lasts about 3-5 days in the fridge. Store it in an airtight container to keep it fresh. When you reheat it, be sure to add a splash of water. This helps revive the sauce and keeps it moist. Enjoy your leftovers as a quick and tasty meal! This blog post covered how to make Spicy Pasta Arrabbiata from start to finish. We looked at key ingredients, cooking steps, and ways to spice it to your taste. You also learned how to tweak the recipe for diet needs and offer extras like protein. Finally, I shared storage tips to keep your leftovers fresh. Spicy Pasta Arrabbiata is simple but full of flavor. With these tips, you can make it your own!
    Spicy Pasta Arrabbiata Rich and Flavorful Delight
  • To make a tasty Banana Cream Cheesecake, gather these simple ingredients: - 2 cups graham cracker crumbs - 1/2 cup unsalted butter, melted - 1/4 cup granulated sugar - 16 oz cream cheese, softened - 3/4 cup powdered sugar - 1 teaspoon vanilla extract - 2 ripe bananas, mashed - 1 cup heavy whipping cream - 1/4 cup banana puree - 1 tablespoon lemon juice - Sliced bananas and whipped cream for topping Each ingredient plays a key role in the flavor and texture of this dessert. The graham cracker crumbs form a crunchy base that balances the creaminess of the filling. Unsalted butter helps bind the crust together, while granulated sugar sweetens it just right. Cream cheese brings a rich and smooth texture to the filling. Powdered sugar adds sweetness, and vanilla extract enhances the flavor. Ripe bananas provide natural sweetness and a lovely banana taste. The heavy whipping cream gives the cheesecake its fluffy texture, while banana puree deepens the banana flavor. Lemon juice brightens the overall taste and helps keep the bananas fresh. For the finishing touch, sliced bananas and whipped cream add a beautiful presentation. This dessert is not just easy to make; it’s also a delight to share with friends and family. {{ingredient_image_1}} To start, gather your ingredients for the crust. You need graham cracker crumbs, melted butter, and sugar. In a medium bowl, mix together the crumbs, butter, and sugar until it looks like wet sand. Press this mixture firmly into the bottom of a 9-inch springform pan. Make sure it is even and compact. Now, bake it at 350°F (175°C) for 10 minutes. Let it cool completely. This crust will hold your cheesecake perfectly. Next, let’s make the filling. In a large mixing bowl, beat the softened cream cheese with an electric mixer. Mix until it’s smooth and creamy. Then, add the powdered sugar and vanilla extract. Blend until it's all mixed. Now, fold in the mashed bananas and banana puree. This adds a rich banana flavor. In another bowl, whip the heavy cream until soft peaks form. Gently fold this whipped cream into your banana cream cheese mixture. Be careful not to deflate the cream. Finally, drizzle in the lemon juice to brighten the flavor. Now for the fun part! Pour your banana cream filling into the cooled graham cracker crust. Use a spatula to smooth the top. Cover the cheesecake with plastic wrap and refrigerate it for at least 4 hours. This will help it set and become firm. Just before serving, top it with sliced bananas and dollops of whipped cream. You can also sprinkle some graham cracker crumbs for extra crunch. Enjoy your delicious banana cream cheesecake! To make the crust great, mix graham cracker crumbs, melted butter, and sugar well. Press this mix firmly into your pan. Bake it at 350°F for 10 minutes. Let it cool completely. A firm crust helps hold the filling. To keep bananas from turning brown, use ripe ones. Add lemon juice to the filling. The acid in the lemon slows browning. If you have extra bananas, store them in the fridge. This helps them stay fresh for longer. When serving your cheesecake, slice it with a sharp knife. Top each slice with fresh banana slices and whipped cream. For a fun touch, sprinkle some graham cracker crumbs on top. This adds texture and looks nice. Enjoy your delicious treat! Pro Tips Use Ripe Bananas: Make sure your bananas are fully ripe for the best flavor and sweetness in your cheesecake. Chill Thoroughly: Allow the cheesecake to chill for at least 4 hours or overnight for a firmer texture and enhanced flavor. Whip Cream to Soft Peaks: Be careful not to over-whip the cream; soft peaks will give your cheesecake a light and airy texture. Prevent Browning: Adding lemon juice not only enhances flavor but also helps prevent the bananas from browning in the filling. {{image_2}} You can make this dessert even better by adding chocolate. Just melt some chocolate and mix it into the filling. Dark chocolate adds a rich taste, while milk chocolate gives it a sweeter flavor. You can also sprinkle chocolate shavings on top for a nice look. A little chocolate will enhance the banana taste and make each bite even more exciting. If you need a gluten-free cheesecake, it’s easy to adjust the crust. Swap the graham cracker crumbs for gluten-free cookie crumbs. You can find these at most grocery stores. Make sure to check the labels. The rest of the recipe stays the same. You will still enjoy a creamy and delicious cheesecake without the gluten. Don’t feel stuck with just bananas and whipped cream. You can get creative with toppings. Try using crushed nuts for crunch or add berries for a fruity twist. A drizzle of caramel or chocolate sauce can also make it special. Each topping adds a new layer of flavor and makes your cheesecake fun to customize. To keep your banana cream cheesecake fresh, always store it in the fridge. Use an airtight container to shield it from odors. If you have leftovers, cover the cheesecake tightly with plastic wrap. This helps keep moisture in and keeps it delicious. Aim to eat it within three days for the best taste. You can freeze banana cream cheesecake if you want to save some for later. First, let the cheesecake cool completely in the fridge. Then, slice it into individual pieces. Wrap each slice in plastic wrap, and then place them in a freezer-safe bag. You can store it for up to two months. When you want to enjoy a slice, take it out and let it thaw in the fridge overnight. The shelf life of your banana cream cheesecake depends on how you store it. In the fridge, it lasts about three days. If frozen, it can stay good for two months. When serving, let the cheesecake sit at room temperature for about 15 minutes. This will help bring out the flavors. For the best experience, top with fresh bananas and whipped cream just before serving. Yes, you can use fresh whipped cream. It will give a lighter texture. Just whip the cream until soft peaks form. Gently fold it into the filling. This keeps the cheesecake light and fluffy. To make banana puree, blend a ripe banana with a bit of water. Use just enough water to help it blend smoothly. Aim for a smooth texture without lumps. This puree adds great flavor to your cheesecake. You can use crushed cookies or oats. If you want a gluten-free option, try almond flour or gluten-free cookies. Just make sure to adjust the amounts to match the texture you need. Yes, you can make this cheesecake a day ahead. Just keep it in the fridge. It tastes even better when it sits overnight. This gives the flavors time to blend and deepen. This blog post covered everything you need for a great banana cream cheesecake. We looked at the simple ingredients and easy step-by-step instructions. You also learned some helpful tips for the best results and fun variations to try. Remember, storing your cheesecake well keeps it fresh longer. With these ideas, you can tackle this tasty treat and impress your friends and family. Enjoy your baking adventure and savor every bite!
    Banana Cream Cheesecake Deliciously Simple Dessert
  • For a vibrant and tasty salad, gather these key ingredients: - 4 cups mixed greens (spinach, kale, arugula) - 1 cup cherry tomatoes, halved - 1 cup diced cucumbers - 1 cup pomegranate seeds - 1 cup crumbled feta cheese - 1/2 cup walnuts, toasted - 1/4 red onion, thinly sliced - 1 avocado, sliced These ingredients bring color and flavor to your dish. The mixed greens form a healthy base. Cherry tomatoes and cucumbers add freshness. Pomegranate seeds give a sweet crunch. Feta cheese adds creaminess, while walnuts offer a nice bite. Sliced red onion gives a zesty kick, and avocado makes it rich. You can boost your salad with these optional items: - Fresh herbs (like parsley or mint) - Grated carrot - Sliced bell peppers - Cooked quinoa or farro Adding fresh herbs brightens the taste. Grated carrot adds sweetness and color. Sliced bell peppers give more crunch. Cooked grains like quinoa or farro add heartiness and fiber. You can make this salad fit your diet. Here are some easy swaps: - Use goat cheese instead of feta for a tangy taste. - Swap walnuts for almonds or pecans for different textures. - Choose a vegan dressing if you want to avoid honey. These substitutions keep the flavors while fitting different diets. Enjoy experimenting with your salad to make it just right for you! {{ingredient_image_1}} To start, gather all your ingredients. You will need: - 4 cups mixed greens (spinach, kale, arugula) - 1 cup cherry tomatoes, halved - 1 cup diced cucumbers - 1 cup pomegranate seeds - 1 cup crumbled feta cheese - 1/2 cup walnuts, toasted - 1/4 red onion, thinly sliced - 1 avocado, sliced Wash the mixed greens well. Pat them dry with a paper towel. Cut the cherry tomatoes and cucumbers into small pieces. If you have pomegranate seeds, make sure they are ready. Toast the walnuts on low heat in a pan until they are golden. Slice the red onion and avocado thinly. In a large salad bowl, add the mixed greens first. Next, toss in the halved cherry tomatoes and diced cucumbers. Gently fold in the pomegranate seeds and crumbled feta cheese. Sprinkle the toasted walnuts over the top. Finally, add the thinly sliced red onion and arrange the avocado slices nicely on top. For the dressing, you only need a few simple ingredients. In a small bowl, combine: - 3 tablespoons olive oil - 2 tablespoons balsamic vinegar - 1 tablespoon honey - Salt and pepper to taste Whisk these ingredients together until they blend well. This dressing will add a nice balance of sweet and tangy flavors to your salad. Drizzle the dressing over the salad just before serving. Toss everything lightly to mix. Enjoy your colorful and festive salad! To keep your salad fresh, use cold ingredients. Wash the greens well and dry them. You can use a salad spinner for this. Store any leftover greens in a sealed bag with a paper towel. This helps absorb moisture. Cut vegetables just before serving. This keeps them crisp and bright. For a festive touch, layer the salad in a clear bowl. This shows off the bright colors. Add pomegranate seeds on top for a pop of red. You can also sprinkle the feta cheese for a snowy effect. Use avocado slices to create a flower shape. This adds charm and beauty to the plate. Many people forget to taste the dressing. Always check for balance. If it’s too tart, add more honey. If it’s too sweet, add a dash of vinegar. Also, remember to toss the salad gently. This helps keep the ingredients intact and looking lovely. Finally, serve the salad right away. Freshness is key to enjoy all the flavors. Pro Tips Fresh Greens Matter: Always use the freshest greens possible for a crisp and vibrant salad. Look for bright colors and avoid any wilting leaves. Toast Your Nuts: Toasting walnuts enhances their flavor and adds a delightful crunch. Simply place them in a dry skillet over medium heat, stirring until golden brown. Perfect Avocado: To ensure your avocado is ripe, gently press on the skin. It should yield slightly. If it’s too soft, it may be overripe. Dress Just Before Serving: To keep your salad crisp, add the dressing right before serving. This prevents the greens from becoming soggy. {{image_2}} You can add seasonal fruits to make your salad pop! Try diced apples or pears. They add sweetness and crunch. Fresh orange slices also bring a nice zest. You can even use dried fruits like cranberries for a chewy texture. These fruits not only enhance flavor but also add color to your dish. If you want to switch up the dressing, you have great options. A lemon vinaigrette can add a bright taste. For a creamy touch, mix yogurt with lemon juice. A spicy honey mustard dressing adds a nice kick. These dressings can change the flavor and keep your salad exciting. You can swap nuts and cheese for different flavors. If you are not a fan of walnuts, try pecans or almonds. They provide a lovely crunch. For cheese, goat cheese works well too. It adds a creamy texture and tangy taste. These simple swaps can make your salad unique every time. To store leftover salad, first remove the dressing. The dressing can make greens soggy. Place the dry salad in a bowl or container. Cover it tightly with a lid or plastic wrap. Keep it in the fridge. Enjoy it within two days for best taste and freshness. I recommend using glass or plastic containers with airtight lids. These containers help keep the salad fresh. If you have a salad spinner, use it for storage. It can help remove moisture and keep greens crisp. You can also use resealable bags for smaller portions. Avoid storing salad with the dressing mixed in. This can ruin its texture quickly. Do not store in a warm place; it needs to stay cold. Don’t use containers that aren’t airtight. They let air in, which can spoil your salad fast. Yes, you can make this salad in advance. However, I recommend storing the dressing separately. Mix the salad items without the avocado and dressing. This keeps the greens fresh and crisp. When you are ready to serve, add the avocado and drizzle the dressing over the salad. Toss it gently for the best taste. If you want a substitute for feta cheese, try goat cheese or ricotta. Both options have a creamy texture. You can also use vegan cheese if you prefer a dairy-free option. Another choice is to skip the cheese altogether and add extra nuts for a crunchy texture. This salad is not vegan due to the feta cheese and honey. To make it vegan, replace the feta with a vegan cheese option. You can use agave syrup instead of honey for the dressing. This way, you keep the flavors while making it suitable for a vegan diet. This article covered how to make a festive Christmas salad. We explored main and optional ingredients, plus dietary substitutions. I shared step-by-step instructions for preparation and mixing. Tips for freshness and presentation help your salad shine. We also discussed variations, storage information, and answered common questions. In conclusion, you can create a tasty salad that fits everyone’s needs. Enjoy making this dish and impress your guests this holiday season.
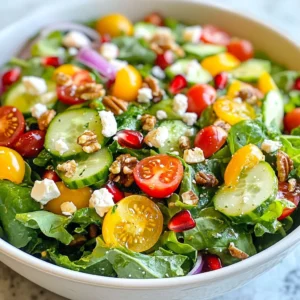
    Festive Christmas Salad Delightful and Healthy Recipe
  • - 1 can (15 oz) chickpeas, drained and rinsed - 1 block (14 oz) firm tofu, pressed and cubed - 2 cups broccoli florets - 2 cups cauliflower florets - 1 red bell pepper, chopped - 1 yellow bell pepper, chopped - 1 small red onion, sliced - 4 cloves garlic, minced The heart of this dish lies in its main ingredients. Chickpeas offer protein and fiber. Firm tofu adds creaminess and more protein. You can use fresh broccoli and cauliflower for crunch and color. The bell peppers give a sweet touch, while the red onion adds depth. Garlic brings bold flavor, making each bite delightful. - 3 tablespoons olive oil - 1 teaspoon smoked paprika - 1 teaspoon ground cumin - 1 teaspoon garlic powder - 1 teaspoon onion powder - Salt and pepper to taste Seasonings boost flavor in this veggie bake. Olive oil helps everything roast evenly. Smoked paprika adds a nice smoky taste. Ground cumin gives warmth. Garlic and onion powders enhance the base flavors. Salt and pepper balance everything out, ensuring each bite is savory. - Fresh parsley, chopped (for garnish) - Tahini sauce Garnishes elevate your dish. Fresh parsley brings a pop of color and freshness. Drizzling tahini sauce adds creaminess. It also gives a nutty flavor, enhancing your bake's taste. These choices let you personalize your dish, making it even more special. {{ingredient_image_1}} First, preheat your oven to 400°F (200°C). This hot temperature helps the veggies get nice and crispy. Next, grab a large baking sheet and line it with parchment paper. This prevents sticking and makes cleanup easy. In a big bowl, combine the chickpeas, cubed tofu, broccoli, cauliflower, bell peppers, red onion, and minced garlic. This mix gives you a colorful plate. Drizzle the olive oil over everything. Then, sprinkle in the smoked paprika, ground cumin, garlic powder, onion powder, salt, and pepper. Toss it all together until every piece is well coated. Spread the mixed veggies and tofu evenly on the baking sheet. Make sure they are in a single layer for even cooking. Bake in your preheated oven for 25-30 minutes. Stir halfway through to help everything cook evenly. You want the veggies tender and the tofu golden brown. Enjoy the delicious smells while it cooks! To ensure even cooking, spread the veggies and tofu in a single layer on the pan. Stir halfway through baking. This helps everything cook well and get that nice golden color. To check for doneness, look for tender veggies and golden tofu. You can poke a piece with a fork to see if it’s soft enough. Adding lemon juice brightens the dish. Just squeeze some fresh juice over the bake before serving. For sauces, try tahini or a drizzle of balsamic glaze. Both add a nice touch and extra flavor. You can prepare ingredients ahead of time. Chop veggies and press tofu the night before. Store them in the fridge until you are ready to bake. For storage, keep leftovers in an airtight container in the fridge. They stay fresh for about three days. Reheat in the oven or microwave until warm. Pro Tips Prep Your Tofu: Press your tofu for at least 30 minutes to remove excess moisture, which helps it absorb flavors and achieve a crispier texture when baking. Customize Your Veggies: Feel free to swap in seasonal vegetables or your favorites, such as zucchini or asparagus, to keep the dish fresh and exciting. Season Generously: Don’t be shy with the spices! Adjust the seasoning to your taste, adding more paprika or cumin if you prefer a bolder flavor. Storage and Reheating: This dish keeps well in the fridge for up to 4 days. Reheat in the oven for a few minutes to restore its crispiness. {{image_2}} You can change the veggies based on the season. Use green beans in spring, zucchini in summer, or sweet potatoes in fall. These options keep the dish fresh and fun. You can also choose veggies based on allergies. If someone can't eat broccoli, try carrots or snap peas. Always keep it colorful and tasty. If you want to swap chickpeas or tofu, tempeh is a great choice. It has a nutty flavor and adds a nice chew. You can also use lentils for a different texture. These swaps make the dish perfect for vegetarians or vegans. Adding different proteins keeps the meal balanced and filling. Love a little heat? Add jalapeños for a spicy kick. You can slice them and mix them with the veggies. If you prefer, sprinkle chili powder or cayenne on top. This will give your bake a warm flavor. Just be careful not to add too much spice if you're cooking for kids! To keep your High Protein Sheet Pan Veggie Bake fresh, store leftovers in the fridge. Use airtight containers to avoid moisture loss. This helps maintain flavor and texture. If you plan to eat leftovers within three days, this method works best. If you want to save some for later, freeze portions safely. Let the veggie bake cool completely before placing it in freezer bags. Remove as much air as you can. This helps prevent freezer burn. To enjoy later, thaw the bake overnight in the fridge. Heat it in the oven or microwave until warm. Refrigerated leftovers last about three to four days. Check for signs of spoilage, such as a sour smell or strange color. If you spot these, it's best to toss the leftovers. They might not be safe to eat. Yes, you can make this recipe gluten-free. The main ingredients are naturally gluten-free. Chickpeas and tofu do not have gluten. Just ensure you use gluten-free seasonings and oils. Always check labels for any hidden gluten sources. This way, you can enjoy the dish without worry. When you make more food, cooking time may change. If you double the recipe, keep an eye on it while baking. You might need to add 5 to 10 extra minutes. Check if the veggies are tender and if the tofu is golden. Stir halfway to help everything cook evenly. You can pair this veggie bake with many sides. Here are some suggestions: - Quinoa or brown rice for a full meal - A fresh green salad for added crunch - Whole grain bread for a hearty touch For extra protein, consider these ideas: - Grilled chicken or shrimp for meat lovers - A dollop of hummus for a creamy boost - A sprinkle of nuts or seeds for crunch and protein In this post, we explored a tasty and healthy High Protein Sheet Pan Veggie Bake. We covered ingredients like chickpeas, firm tofu, and fresh veggies. You learned how to mix them, bake to perfection, and enhance flavors. I shared smart tips for meal prep and storage to keep your dish fresh. You can also adapt this recipe to fit your tastes or dietary needs. This dish is simple, fun, and packed with nutrition. Enjoy making it and share your results!
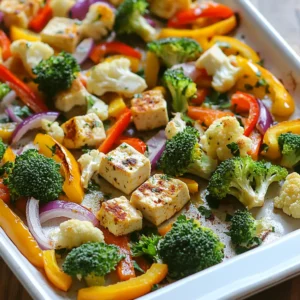
    High Protein Sheet Pan Veggie Bake Flavorful Delight
  • - 1 lb ground turkey - 1 cup long-grain rice - 2 cups chicken broth - 1 cup shredded cheddar cheese - 1 small onion, finely chopped - 2 cloves garlic, minced - 1 bell pepper, diced (any color) - 1 cup frozen mixed vegetables (peas, corn, carrots) - 1 teaspoon paprika - 1 teaspoon cumin - 2 tablespoons olive oil - Salt and pepper to taste The main ingredients for Cheesy Turkey Rice Skillet are simple and easy to find. Ground turkey gives this dish a healthy protein base. Long-grain rice adds a nice texture. Chicken broth brings flavor and moisture to the skillet. Next, we have the additional ingredients. Shredded cheddar cheese melts beautifully and adds creaminess. Chopped onion and minced garlic give a great aroma. Diced bell pepper adds crunch and color. Frozen mixed vegetables make it easy to add nutrition and color. Finally, the seasoning and oils are key. Paprika adds warmth, while cumin gives depth. Olive oil helps cook the veggies and turkey. Salt and pepper are essential to enhance all the flavors. With these ingredients, you set the stage for a warm, cheesy delight that comes together easily in one pan. {{ingredient_image_1}} 1. Start by chopping the onion and bell pepper. I like to cut them small for even cooking. 2. Mince the garlic cloves. This adds a great flavor to the dish. 3. Measure the rice carefully. Use one cup of long-grain rice. 4. Measure two cups of chicken broth. This will help cook the rice. 5. Gather all your spices. You will need paprika, cumin, salt, and pepper. 1. Heat two tablespoons of olive oil in a large skillet over medium heat. 2. Add the chopped onion and bell pepper. Sauté for about 3-4 minutes until soft. 3. Stir in the minced garlic for one more minute. The smell will be amazing! 4. Add the ground turkey to the skillet. Season with paprika, cumin, salt, and pepper. 5. Cook the turkey until it is browned and fully cooked, which takes about 5-7 minutes. 6. Mix in the rice and let it combine with the turkey and veggies for 1-2 minutes. 7. Pour in the chicken broth and bring it to a boil. 8. Reduce the heat to low and cover. Let it simmer for 15 minutes until the rice absorbs the liquid. 1. After 15 minutes, stir in the frozen mixed vegetables. Let them heat through for another 5 minutes. 2. Remove the skillet from heat. Stir in the shredded cheddar cheese until it melts and becomes creamy. 3. Taste for seasoning. Adjust with more salt or pepper if needed. 4. Serve hot, garnished with fresh parsley for color. Enjoy your cheesy turkey rice skillet! Adjusting spices can make a big difference. Start with the basic amounts, then taste. If you want more heat, add a pinch of cayenne. If you prefer a smoky flavor, add more paprika. Always trust your taste buds. Choosing the right cheese is key. Cheddar melts well and adds a rich flavor. You can also mix in mozzarella for stretchiness or a bit of pepper jack for heat. Try different blends to find your favorite combo. Sautéing vegetables properly sets the stage for great flavor. Heat olive oil over medium heat. Add onion and bell pepper first. Cook for about 3-4 minutes until they soften. This helps build a strong flavor base for your dish. To ensure rice is perfectly cooked, follow the broth-to-rice ratio. Use 2 cups of chicken broth for 1 cup of rice. Bring it to a boil, then reduce heat and cover the skillet. Let it simmer for 15 minutes. This allows the rice to absorb all that tasty broth. For presentation, serve the cheesy turkey rice skillet in a large dish. Garnish with freshly chopped parsley. This adds a bright color and freshness. You can also sprinkle some extra cheese on top for a cheesy finish. Pair it with a simple green salad or garlic bread. A crisp salad balances the creaminess of the dish. Garlic bread provides a nice crunch and flavor. This makes your meal feel complete and satisfying. Pro Tips Use Lean Turkey: Opt for lean ground turkey to keep the dish healthier without compromising on flavor. Customize Vegetables: Feel free to use any vegetables you have on hand, such as spinach or broccoli, to add more nutrients and flavor. Cheese Variations: Experiment with different types of cheese like Monterey Jack or pepper jack for a unique twist on the classic flavor. Make Ahead: This dish can be made ahead of time and reheated easily, making it perfect for meal prep or busy weeknights. {{image_2}} You can swap turkey for other proteins. Ground chicken or beef works well here. You can also use shredded rotisserie chicken for a quick fix. Each protein gives a new flavor. Using different rice adds variety too. Try brown rice for more nutty taste. Quinoa can be a great gluten-free option. Just adjust cooking times to match the rice you choose. Adding herbs and spices can elevate the dish. Fresh basil or oregano brings a burst of flavor. You can also sprinkle red pepper flakes for some heat. Introducing additional vegetables makes it more colorful. Spinach or kale add nutrition and taste. You can also toss in zucchini or mushrooms for texture. To make it gluten-free, ensure your broth is gluten-free. Use rice that is also certified gluten-free. This way, everyone can enjoy your meal. For vegetarian alternatives, skip the turkey. Use extra beans or lentils instead. These options keep the dish hearty and satisfying. Store your leftover Cheesy Turkey Rice Skillet in an airtight container. This keeps it fresh and tasty. The dish lasts about 3 to 4 days in the fridge. Be sure to cool it down to room temperature before sealing it up. This helps prevent moisture build-up inside the container. You can freeze the Cheesy Turkey Rice Skillet for later meals. Divide it into single servings in freezer-safe containers. It stays good for about 2 to 3 months in the freezer. When you're ready to eat, move a portion to the fridge overnight to thaw. For reheating, warm it in a skillet over low heat. You may add a splash of chicken broth to keep it moist. Watch for signs of spoilage. If the dish has an off smell or strange color, throw it away. Always check for mold before eating leftovers. To extend freshness, eat your leftovers within a few days. Proper storage is key to enjoying your meal later. Can I use brown rice instead of white rice? Yes, you can use brown rice. However, it takes longer to cook. You will need to increase the broth. Cook for about 20-25 minutes instead of 15 minutes. What can I serve with Cheesy Turkey Rice Skillet? This dish goes well with a simple salad or crusty bread. You can also pair it with steamed veggies for more nutrients. How can I tell if the turkey is fully cooked? The turkey should be brown and no longer pink inside. You can also use a meat thermometer. It should read 165°F (75°C) for safe eating. What if I don't have chicken broth? If you lack chicken broth, use water instead. You can add extra spices or a bouillon cube for added flavor. Can I substitute ground turkey with ground beef? Yes, you can swap ground turkey for ground beef. This change will add a richer flavor. Just be mindful of the fat content. What cheese works best aside from cheddar? Mozzarella or pepper jack cheese can work well too. They melt nicely and add a creamy texture. In this article, we explored a delicious Cheesy Turkey Rice Skillet recipe, highlighting key ingredients like ground turkey, rice, and cheese. I shared easy step-by-step cooking instructions and valuable tips to enhance your dish. We also discussed storage and cooking variations to suit your taste. Cooking should be fun and easy. Feel free to adjust the recipe to make it your own. Enjoy creating this meal that brings comfort and flavor to your table!
    Cheesy Turkey Rice Skillet Delicious One-Pan Meal
  • - 1 pound potato gnocchi - 8 ounces chorizo sausage, casings removed - 1 cup heavy cream - 1 cup fresh spinach, roughly chopped - ½ cup grated Parmesan cheese - 2 cloves garlic, minced - 1 teaspoon smoked paprika - 1 tablespoon olive oil - Salt and pepper to taste - Fresh parsley, chopped (for garnish) When making creamy chorizo gnocchi, you need quality ingredients. Start with 1 pound of potato gnocchi. This gives a soft and fluffy texture. Next, use 8 ounces of chorizo sausage, which adds a spicy kick. Be sure to remove the casings for easy cooking. You’ll need 1 cup of heavy cream to create that rich, creamy sauce. The cream blends well with the gnocchi and chorizo. For freshness, include 1 cup of roughly chopped spinach. It not only brightens the dish but adds nutrients too. Add ½ cup of grated Parmesan cheese for a cheesy flavor. You can also sprinkle more on top for serving. Minced garlic and 1 teaspoon of smoked paprika boost the taste. They pair well with the chorizo. Use 1 tablespoon of olive oil for cooking the sausage. Finally, season with salt and pepper to taste. Fresh parsley, chopped, makes a lovely garnish. It adds color and freshness to your dish. Enjoy cooking with these simple yet flavorful ingredients! First, you need to boil a large pot of salted water. Once boiling, add 1 pound of potato gnocchi. Cook them until they float, which takes about 2-3 minutes. This floating means they are ready. After that, drain the gnocchi and set them aside for later. Next, grab a large skillet and heat 1 tablespoon of olive oil over medium heat. Add 8 ounces of chorizo sausage, breaking it up with a wooden spoon. Cook it until it is browned, about 4-5 minutes. This step gives the dish great flavor. To add more taste, add 2 cloves of minced garlic and 1 teaspoon of smoked paprika. Cook for another minute until you can smell the garlic. Now, lower the heat. Stir in 1 cup of heavy cream and 1 cup of roughly chopped fresh spinach. Let this mixture simmer gently for about 3-4 minutes until it thickens. This creamy sauce will coat the gnocchi perfectly. Finally, mix in the cooked gnocchi and ½ cup of grated Parmesan cheese. Stir well until everything is combined. Don't forget to season with salt and pepper to taste. Let it sit for a couple of minutes to thicken a bit more before serving. To ensure your gnocchi cooks just right, follow these steps: - Boil salted water: Start with a large pot of boiling salted water. - Watch for floating: Cook the gnocchi until they float to the top. This means they are done. - Avoid mushiness: Do not overcook the gnocchi. This keeps the texture firm and enjoyable. To boost the taste of your creamy chorizo gnocchi, consider these ideas: - Spices: Add a pinch of cayenne for heat or Italian herbs for freshness. - Quality ingredients: Always use good-quality chorizo and fresh spinach. The better the ingredients, the more flavor you get. Presentation is key to a great meal. Here are some tips: - Plating: Serve the creamy gnocchi in shallow bowls. This makes it look inviting. - Garnishing: Top with fresh parsley and extra Parmesan. A drizzle of olive oil adds a nice touch. {{image_2}} You can easily switch out chorizo in this recipe. Try Italian sausage for a milder flavor. It adds a nice taste, too. For a vegetarian option, mushrooms work great. They soak up all the creamy sauce. Tofu is another good choice. It adds protein and makes the dish hearty. If you want a lighter sauce, swap heavy cream for half-and-half or whole milk. This change lowers the fat, but still keeps it creamy. You can also add different cheeses. Goat cheese adds a tangy flavor. Cream cheese can make it extra rich. Just mix in what you like best. Adding seasonal vegetables can boost the dish. Think about zucchini or bell peppers. They add color and nutrition. If you don’t have spinach, try kale or arugula. Both give a nice crunch and flavor. Just chop them and toss them in with the sauce. To keep your creamy chorizo gnocchi fresh, store leftovers in the fridge. Place the gnocchi in an airtight container. Make sure to cool it first to avoid steam build-up. Use glass or plastic containers that seal well. When you want to enjoy your leftovers, reheat gently. The best method is to use a skillet over low heat. Add a splash of cream or water to restore the sauce's creaminess. Stir often to avoid sticking. This will help keep the texture nice. You can freeze creamy chorizo gnocchi, but it's best to do so before adding the cream. To freeze, place cooked gnocchi and chorizo in a freezer-safe bag. Squeeze out the air and seal tightly. When you want to eat it, thaw in the fridge overnight. Reheat and then add the cream for the best flavor and texture. To cook gnocchi, use these simple steps: - Boil a large pot of salted water. - Add the gnocchi to the water and wait. - When they float, they are done. - Drain them well and set aside. You can also sauté gnocchi for extra flavor. Heat a skillet with olive oil. Add cooked gnocchi and cook until golden brown. This adds a nice crisp texture. Yes, you can make creamy chorizo gnocchi ahead. Cook the gnocchi and chorizo as usual. Store them in a sealed container in the fridge. Reheat gently on the stove. You may need to add a splash of cream to keep it creamy. Pair creamy chorizo gnocchi with a fresh salad. A simple green salad works well. Consider a light vinaigrette to balance the dish. For wine, a light red like Pinot Noir is a great match. It complements the chorizo's spice and the gnocchi's creaminess. This blog post guided you through making creamy chorizo gnocchi. We covered ingredients, step-by-step cooking, and tips for perfect results. You learned variations to suit different tastes and how to store leftovers. Remember, quality ingredients and proper techniques matter. Enjoy crafting this dish for friends and family. Your kitchen adventure with gnocchi can be delicious and fun!
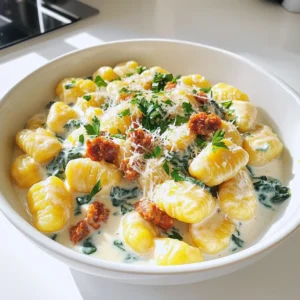
    Creamy Chorizo Gnocchi Flavorful and Simple Recipe

Posts pagination

← Newer 1 … 6 7 8 9 Older →

Footer

↑ back to top

More information

  • Drinks
  • Appetizer
  • Dinner
  • Desserts
  • About
  • Contact
  • Privacy Policy

Our Policies

  • Privacy Policy
  • GDPR Policy
  • Terms Of Use
  • Copyright Policy
  • Cookie Policy
  • Disclaimer

Copyright © 2025 cheftaling