• Home
  • Recipe Index
    • Desserts
    • Dinner
    • Appetizer
    • Drinks
  • About
  • Contact
  • Privacy Policy
menu icon
go to homepage
  • Home
  • Recipe Index
    • Desserts
    • Dinner
    • Appetizer
    • Drinks
  • About
  • Contact
  • Privacy Policy

search icon
Homepage link
  • Home
  • Recipe Index
    • Desserts
    • Dinner
    • Appetizer
    • Drinks
  • About
  • Contact
  • Privacy Policy

×
Natalie

Natalie

Natalie is a passionate food storyteller and recipe developer at Taling’s Recipes, where she brings her love of seasonal ingredients and approachable cooking to life.

Her culinary path started in farmers’ markets, where she discovered the beauty of cooking with what’s fresh and local. Over time, she honed her skills in home kitchens and community gatherings, creating comforting meals that balance flavor with simplicity. Today, Natalie shares her recipes with a global audience, inspiring home cooks to embrace creativity, confidence, and joy in everyday meals.

  • To make these fun brownies, you need a few simple items. Here’s what you’ll need: - 1 box brownie mix (plus ingredients called for on the box) - 1 cup green frosting (store-bought or homemade) - 1 cup mini chocolate chips - 1 package of pretzel sticks (for tree trunks) You can make your brownies extra special with some fun decorations. Here are some ideas: - 1 cup assorted edible decorations (like sprinkles, candy stars, and edible glitter) - Fresh mint leaves or edible flowers (for garnish, optional) You’ll need some essential tools to make your Christmas Tree Brownies. Gather these items before you start: - Baking pan - Parchment paper - Spatula - Knife - Toothpick (for testing doneness) With these ingredients and tools, you're ready to create a festive treat! {{ingredient_image_1}} Start by preheating your oven. Follow the instructions on your brownie mix box. Grease a baking pan and line it with parchment paper. This helps the brownies come out easily. In a large bowl, mix the brownie mix with eggs, oil, and water as directed. Stir until smooth and combined. Pour the batter into the pan, making sure to spread it evenly. Next, place the pan in the oven. Bake the brownies for the time listed on the box. To check if they are done, insert a toothpick. If it comes out with a few moist crumbs, they are ready. Once baked, let the brownies cool in the pan. This usually takes about 30 minutes. Cooling is important to get clean cuts. Once cooled, carefully remove the brownies from the pan. If needed, trim the edges for neatness. Use a sharp knife to cut the brownies into triangle shapes. These will look like Christmas trees. Now, grab your green frosting. Spread a thick layer on each triangle. Use a spatula to make it nice and smooth. It is time to make these brownies festive! Sprinkle mini chocolate chips on top of the frosting. These will look like ornaments on your tree. Next, use your assorted edible decorations. Add sprinkles, candy stars, or edible glitter to each brownie. Lastly, take a pretzel stick and insert it at the bottom of each tree. This will act as the trunk. You can add mint leaves or edible flowers for a pretty garnish if you like. Enjoy your delicious Christmas Tree Brownies! To get the best texture in your brownies, follow these steps. First, check your oven temperature with a thermometer. An oven that is too hot can dry out your brownies. Always mix the ingredients just until combined. This keeps them soft and fudgy. When baking, use a toothpick to test for doneness. Pull them out when a few moist crumbs cling to the toothpick. Let them cool completely before cutting. This helps them hold their shape well. For frosting, use a spatula to spread green frosting smoothly. You can also pipe the frosting for a fun look. Try to make swirls or peaks like tree branches. When adding mini chocolate chips, do this right after frosting. This way, they stick better. Use colorful sprinkles, candy stars, or edible glitter to make your trees shine. Let your creativity flow! When serving your brownie trees, arrange them on a festive platter. A cake stand can add height and drama. To create a snowy effect, sprinkle powdered sugar on top. You can also use coconut flakes to mimic fresh snow. For a nice touch, add fresh mint leaves or edible flowers next to each brownie. This makes your dessert look even more special. Pro Tips Use Quality Ingredients: Opt for high-quality brownie mix and frosting for the best flavor and texture. Cool Completely: Ensure brownies are completely cooled before cutting; this helps maintain their shape. Creative Decorations: Get creative with edible decorations; consider using candy canes or chocolate stars for a festive touch. Perfect Shape: For perfect tree shapes, use a template or cookie cutter to guide your brownie cutting. {{image_2}} You can make these brownies gluten-free by using a gluten-free brownie mix. Just check the box for the right ingredients. For a vegan version, use a vegan brownie mix. Replace eggs with applesauce or flaxseed meal mixed with water. These swaps keep the brownies moist and delicious. While green frosting shines for Christmas, you can have fun with colors. Try red or white frosting for a different look. You can mix food coloring into white frosting to create any shade you like. This adds a personal touch to your treats. Get creative with your decorations! Use candy canes for a winter theme. Add edible glitter for sparkle. You can also use colored sprinkles or mini marshmallows to create a snowy effect. For a nature theme, add small chocolate acorns or fresh berries. The ideas are endless, and you can make each brownie unique! After enjoying your Christmas tree brownies, store any leftovers properly. Place them in an airtight container. This keeps them soft and moist. Line the bottom of the container with parchment paper for extra protection. If you have cut brownies, place a piece of wax paper between layers. This prevents them from sticking together. If you want to save your brownies for later, freezing is easy. First, let the brownies cool completely. Then, wrap each brownie in plastic wrap. After wrapping, place them in a freezer bag or container. This keeps them fresh for up to three months. To enjoy, just take them out and let them thaw at room temperature. To keep your decorations looking great, store brownies carefully. If you have added mint leaves or edible flowers, remove them before storing. These can wilt quickly. Keep the decorations in a separate container. Add them back on just before serving. This keeps everything fresh and lovely, perfect for your holiday table. Yes, you can use a homemade brownie recipe. Just make sure it is thick enough to hold the tree shape. Follow your favorite recipe, then cool and cut the brownies into triangles. Spread frosting and decorate as you would with a mix. Homemade brownies add a personal touch. If you don't have pretzel sticks, you can use chocolate-covered or regular cookies. You could also try candy canes for a fun twist. Just make sure the alternative fits well and stands up. The goal is to create a sturdy base that looks festive. Christmas Tree Brownies will stay fresh for about 3 to 4 days. Store them in an airtight container at room temperature. If you want them to last longer, keep them in the fridge for up to a week. Just remember that decorations may not hold up well for too long. Yes, you can make these brownies a day or two ahead of time. Just bake and cool them, then store in an airtight container. Frost and decorate them closer to serving time. This way, the frosting and decorations stay fresh and look great. You learned how to make fun Christmas Tree Brownies. We've covered the key ingredients, tools, and step-by-step instructions. You also explored tips for texture, different variations, and storage methods. These brownies are a great treat for any holiday gathering. Try out your own decorations and flavors to make them unique. Enjoy baking and sharing these festive delights!
    Christmas Tree Brownies Delicious Holiday Treat
  • - 4 boneless, skinless chicken breasts - 1/2 cup fresh basil pesto - 1 cup cherry tomatoes, halved - 1 cup mozzarella cheese, shredded - 2 tablespoons olive oil - 1 teaspoon garlic powder - 1 teaspoon onion powder - Salt and pepper to taste - Fresh basil leaves for garnish (optional) - Lemon wedges for serving (optional) Gathering the right ingredients is key to this dish. You want fresh basil pesto for that rich flavor. The cherry tomatoes add a nice burst of sweetness. Mozzarella cheese melts beautifully, adding creaminess to the chicken. When it comes to seasoning, olive oil helps keep the chicken moist. Garlic and onion powder give depth to the flavor. Don’t forget salt and pepper—they enhance all the tastes. If you want, fresh basil leaves can brighten up your plate. Lemon wedges can add a zesty kick when you serve the meal. Make sure to measure everything before you start cooking. This makes the process smooth and fun. You can also prep some extra ingredients, like veggies, if you want to mix things up. {{ingredient_image_1}} - Preheat the oven to 400°F (200°C). - Pat dry the chicken breasts and place them in a baking dish. First, you need to preheat your oven. Set it to 400°F (200°C). This step helps cook the chicken evenly. While the oven heats, take your chicken breasts. Use paper towels to pat them dry. This helps the seasonings stick better. Then, lay the chicken in a baking dish. Ensure they fit nicely without crowding. - Drizzle with olive oil. - Sprinkle garlic powder, onion powder, salt, and pepper. Next, drizzle olive oil over the chicken. This adds flavor and helps keep the meat moist. Now, sprinkle garlic powder and onion powder on both sides. Don’t forget to add salt and pepper. These spices boost the taste. Rub the seasonings in gently to coat the chicken well. - Spread basil pesto on chicken breasts. - Scatter halved cherry tomatoes around chicken. - Top with shredded mozzarella cheese. Now it’s time for the star ingredient: pesto! Spread the basil pesto generously on each chicken breast. Make sure they are well coated for maximum flavor. Next, take your halved cherry tomatoes and scatter them around the chicken. They add a bright taste and pop of color. Finally, sprinkle shredded mozzarella cheese on top. This will melt into gooey goodness while baking. - Bake for 20-25 minutes until cooked through. - Optional: Broil for 2-3 minutes for crispy cheese. - Let rest, garnish, and serve. Put the baking dish in the preheated oven. Bake for 20-25 minutes. Check that the chicken reaches 165°F (75°C) inside. If you want crispy cheese, switch to broil for 2-3 minutes at the end. Watch it closely to stop burning. When done, take it out and let it rest for a few minutes. Garnish with fresh basil leaves if you like. Serve with lemon wedges for a zesty touch. To get juicy chicken, start by patting the chicken dry with paper towels. Removing moisture helps the chicken brown better. The right internal temperature is key. Cook the chicken until it reaches 165°F (75°C). This ensures it stays moist and safe to eat. You can use different types of pesto to change the flavor. Try sun-dried tomato, arugula, or spinach pestos. To enhance the flavor, add spices like red pepper flakes or fresh herbs like thyme or oregano. These simple changes can make your dish unique and exciting. Different cheeses can add a new twist to your dish. You can swap mozzarella for provolone, gouda, or even feta. For the best melt, shred the cheese finely. This helps it melt evenly and create a lovely, gooey topping. Pro Tips Brine for Juiciness: Consider brining your chicken breasts for 30 minutes before cooking. This will help them retain moisture and enhance flavor. Use Fresh Ingredients: Opt for fresh basil pesto and ripe cherry tomatoes to elevate the flavors of your dish. Fresh ingredients make a significant difference in taste. Check for Doneness: Always use a meat thermometer to ensure your chicken is cooked through. The internal temperature should reach 165°F (75°C) for safe consumption. Experiment with Cheeses: Feel free to mix different cheeses like parmesan or gouda with the mozzarella for a unique flavor profile and added creaminess. {{image_2}} You can boost this dish by adding vegetables. Bell peppers and zucchini work great. Chop them into bite-sized pieces. Add them to the baking dish with the chicken. This will give more color and flavor. If you add extra veggies, adjust your cooking time. Bake for an extra 5-10 minutes to ensure everything cooks well. You can switch the chicken for other meats. Turkey or pork can be tasty choices. For turkey, use similar cooking times as chicken. For pork, ensure you check the internal temperature. Pork should reach at least 145°F (63°C). This way, you keep the meat juicy and safe to eat. To make this dish keto-friendly, swap out some ingredients. Use a low-carb pesto instead of regular. You can also skip cheese or use a low-carb cheese option. Pair it with a side salad for a great meal. Roasted broccoli or cauliflower also fits well. These sides keep your meal low in carbs and full of flavor. To store leftovers, let the chicken cool first. Place it in an airtight container. This helps keep it fresh and safe. You can store it in the fridge for up to three days. After that, it may lose flavor and texture. You can freeze cooked chicken portions if you want to save some for later. Cut the chicken into pieces and place them in freezer bags. Remove as much air as you can before sealing. This helps avoid freezer burn. When you’re ready to eat, thaw the chicken in the fridge overnight. Reheat baked chicken in the oven for the best results. Set the oven to 350°F (175°C). Place the chicken in a baking dish and cover it with foil. This keeps moisture in and prevents drying out. You can also use a microwave, but it may make the chicken less juicy. If you use the microwave, heat it in short bursts and check often. Bake chicken breasts at 400°F for 20-25 minutes. This time works well for even cooking. Always check for doneness. Chicken should reach an internal temperature of 165°F. Thin breasts may cook faster, while thicker ones may take longer. Use a meat thermometer for best results. Yes, you can use store-bought pesto. It saves time and adds great flavor. Look for brands with fresh ingredients. Check the label for added preservatives. Homemade pesto is great too, but store-bought can be just as tasty. Use what works best for you. Pesto baked chicken pairs well with many sides. Here are a few ideas: - Garlic bread - Steamed broccoli - Roasted vegetables - Quinoa salad - Mashed potatoes Choose sides that balance the rich flavors of the chicken. Chicken is fully cooked when it reaches 165°F internally. A meat thermometer is the best tool for this. Look for clear juices when you cut into it. The meat should not be pink. These signs show that your chicken is safe to eat. This recipe details how to bake chicken with pesto, tomatoes, and cheese. You learned the key ingredients and steps for tasty results. Remember to adjust cooking times for added veggies or different meats. Proper storage and reheating will keep leftovers fresh. With these tips in mind, you can create variations that suit your taste. Enjoy experimenting with flavors and make this dish your own!
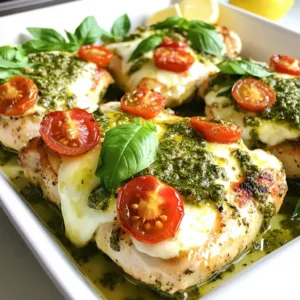
    Juicy 30-Minute Pesto Baked Chicken Breast Recipe
  • To make these tasty gyros, you need: - 500g boneless, skinless chicken thighs - 2 tablespoons olive oil - 1 tablespoon lemon juice - 2 teaspoons dried oregano - 1 teaspoon garlic powder - 1 teaspoon paprika - Salt and pepper to taste - 4 pita breads - 1 cup lettuce, shredded - 1 large tomato, diced - 1 small cucumber, diced These ingredients blend well to create a juicy and flavorful chicken. The chicken thighs stay moist and tender, while the spices add a nice kick. For the creamy feta tzatziki, gather: - 1 cup Greek yogurt - 1/2 cup feta cheese, crumbled - 1 small cucumber, grated and drained - 1 garlic clove, minced - 1 tablespoon olive oil - 1 tablespoon lemon juice - 1 tablespoon fresh dill, chopped - Salt and pepper to taste This sauce is cool and refreshing. The feta makes it rich, while the cucumber adds crunch. You can customize your gyros with these add-ins: - Sliced red onion for a bit of bite - Fresh parsley for extra color - Hot sauce for a spicy kick These options can enhance your gyros and make them uniquely yours. Feel free to mix and match based on your taste! {{ingredient_image_1}} First, get a bowl. Add 2 tablespoons of olive oil and 1 tablespoon of lemon juice. Next, mix in 2 teaspoons of dried oregano, 1 teaspoon of garlic powder, and 1 teaspoon of paprika. Add salt and pepper to taste. Now, take 500g of boneless, skinless chicken thighs. Coat the chicken well in the marinade. Cover the bowl and place it in the refrigerator. Let it sit for at least 30 minutes. For the best flavor, marinate for up to 2 hours. Grab another mixing bowl. Combine 1 cup of Greek yogurt and 1/2 cup of crumbled feta cheese. Add 1 small cucumber, grated and drained, and 1 minced garlic clove. Mix in 1 tablespoon of olive oil and 1 tablespoon of lemon juice. Then, add 1 tablespoon of fresh dill, salt, and pepper to taste. Stir everything together. Refrigerate the tzatziki for at least 20 minutes. This helps the flavors blend nicely. Preheat your grill or skillet over medium-high heat. Take the marinated chicken out of the fridge. Cook the chicken for 6-7 minutes on each side. You want it to be golden brown and fully cooked, reaching an internal temp of 75°C (165°F). Once done, remove the chicken and let it rest for a few minutes. After that, slice it into strips. Now, lightly toast the pita breads on the grill or in a skillet for 1-2 minutes until they are warm. Now, it’s time to assemble your gyros! Take a warm pita bread and lay it flat. Start layering with the sliced chicken. Add shredded lettuce, diced tomatoes, and diced cucumber. Finally, drizzle the feta tzatziki over the top. Feel free to add more if you love tzatziki! Roll the pita around the filling tightly. Serve the gyros right away. I recommend having extra tzatziki on the side for dipping. You can also pair these gyros with a fresh salad or some crispy fries for a complete meal. Enjoy your homemade Mediterranean chicken gyros! To get the best flavor in your gyros, marinate your chicken well. Use a mix of olive oil, lemon juice, oregano, garlic powder, and paprika. Let the chicken sit in the marinade for 30 minutes or longer. The longer it sits, the more flavor it absorbs. Also, always use fresh ingredients for the tzatziki. Fresh dill and quality Greek yogurt make a big difference. When cooking the chicken, preheat your grill or skillet well. This helps create a nice sear. Cook the chicken for about 6-7 minutes on each side. Use a meat thermometer to check the internal temp; it should reach 75°C (165°F). After cooking, let the chicken rest for a few minutes. This keeps it juicy when you slice it. Store any leftover chicken and tzatziki in airtight containers. They can last in the fridge for about 3 days. To reheat the chicken, use a skillet over low heat. This helps keep it moist. For tzatziki, just give it a good stir before serving. You can enjoy the leftovers in wraps, salads, or even on their own! Pro Tips Marinating Time: The longer you marinate the chicken, the more flavorful it will be. Aim for at least 2 hours, but overnight is even better! Tzatziki Tip: For a thicker tzatziki, make sure to drain the grated cucumber well. This prevents the sauce from becoming watery. Cooking Method: Grilling the chicken adds a smoky flavor that enhances the dish. If using a skillet, a touch of smoked paprika can mimic that grilled taste. Serving Suggestion: Serve the gyros with additional toppings like olives or roasted red peppers for an extra Mediterranean flair! {{image_2}} If you want a meat-free option, try grilled vegetables. You can use eggplant, zucchini, or bell peppers. Marinate them like the chicken. Cook them on the grill until soft and smoky. You will get a tasty, healthy gyro. You can also use falafel. These chickpea balls bring a nice crunch. They pair well with the creamy feta tzatziki. While feta tzatziki is a favorite, you can switch things up. Try a classic tzatziki with no feta. Just use Greek yogurt, cucumber, garlic, olive oil, and dill. For a spicy kick, add some chili flakes. If you enjoy herbs, mix in fresh mint or parsley. Each version adds a unique twist to your gyros. Make your gyros special with fun toppings. Add sliced red onions for a sharp bite. You can include olives for a briny touch. A sprinkle of feta cheese adds more flavor. Try adding pickled vegetables for extra tang. You can also use hummus underneath the chicken. It gives a rich, creamy layer. Don’t be afraid to mix and match! Once you finish your gyros, store leftovers in airtight containers. Place the chicken in one container and the feta tzatziki in another. This keeps flavors fresh. The chicken stays good in the fridge for up to three days. Tzatziki lasts around four days. Always check for any changes in smell or texture before eating. For pita breads, keep them in a cool, dry place. You can wrap them in foil or place them in a resealable bag. This keeps them soft. Avoid storing pita in the fridge, as it may dry out. They can last about a week this way. If you want them to last longer, freeze them. You can freeze both chicken and tzatziki. For chicken, slice it before freezing. This helps it thaw faster. Use freezer bags to prevent freezer burn. Tzatziki can also freeze well. Just make sure to leave some space in the container for expansion. Both will keep for about three months. When ready to eat, thaw in the fridge overnight. Reheat chicken gently to keep it moist. You can use chicken breast if you prefer. Chicken breast is leaner and cooks faster. Slice it thin for even cooking. You can also try pork, lamb, or even tofu for a vegetarian option. Each choice will change the flavor and texture a bit. Yes, you can! Feta Tzatziki tastes better when it sits. Make it a day before serving. Just store it in the fridge in an airtight container. This way, the flavors blend well. You can use a skillet or oven. Heat a non-stick skillet on medium-high heat. Cook the marinated chicken for about 6-7 minutes on each side. You can also roast the chicken in the oven at 200°C (400°F) for 20-25 minutes. Both methods give great results. Some great sides include Greek salad, roasted vegetables, or crispy fries. You can also serve some olives or hummus. These sides pair well with the flavors of the gyros and tzatziki. In this post, we explored how to create delicious Mediterranean gyros. We covered essential ingredients like marinated chicken, creamy feta tzatziki, and tasty optional add-ins. You learned step-by-step cooking instructions and handy tips for great flavor. Variations include vegetarian options and customizable toppings. Finally, we discussed how to store leftovers properly. Enjoy trying these recipes at home. You can make gyros your way, and they will impress your friends!
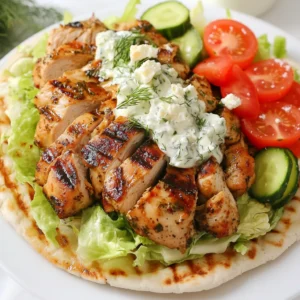
    Mediterranean Chicken Gyros with Feta Tzatziki Delight
  • - 1 lb ground chicken - 1 cup cooked quinoa - 1 cup bell peppers (red and yellow), diced - 1 small zucchini, diced - ½ cup corn kernels (fresh or frozen) Ground chicken is lean and cooks quickly. It absorbs flavors well, making it ideal for this dish. Cooked quinoa adds a nutty taste and provides fiber. Fresh vegetables like bell peppers, zucchini, and corn add crunch and color. These ingredients make the bowl healthy and satisfying. - 2 tablespoons soy sauce (or tamari for gluten-free) - 1 tablespoon sesame oil - 1 tablespoon fresh ginger, grated - 2 cloves garlic, minced - Salt and pepper to taste Soy sauce gives a salty, umami flavor. Tamari is a great gluten-free choice. Sesame oil adds richness and a nutty aroma. Fresh ginger and garlic bring warmth and depth. Salt and pepper enhance all the flavors. These seasonings make the meal pop. - 2 green onions, chopped - Fresh cilantro, for garnish - Lime wedges, for serving Chopped green onions add a fresh crunch. Fresh cilantro gives a burst of color and flavor. Lime wedges add brightness to each bite. These garnishes elevate the dish, making it look and taste amazing. Enjoy your meal with these finishing touches! {{ingredient_image_1}} To start, I heat 1 tablespoon of sesame oil in a large skillet over medium heat. Then, I add 2 cloves of minced garlic and 1 tablespoon of grated ginger. I sauté these for 1-2 minutes until they smell amazing. The garlic and ginger make the dish taste great and give it a nice aroma. Next, I add 1 pound of ground chicken to the skillet. Using a spatula, I break it up and cook it. I keep stirring until the chicken turns brown and is fully cooked, which takes about 5-7 minutes. I season it with salt and pepper to bring out the flavor. After the chicken is cooked, I stir in 1 cup of diced bell peppers, 1 small diced zucchini, and ½ cup of corn. I let these cook for 4-5 minutes. This step helps the vegetables soften just a bit. Then, I pour 2 tablespoons of soy sauce over the mixture and stir well. I let it cook for another 1-2 minutes to mix the flavors. Now it’s time to assemble the bowls! I place a serving of 1 cup of cooked quinoa at the bottom of each bowl. Then, I top it with the savory ground chicken mixture. Lastly, I garnish with chopped green onions and fresh cilantro. I also serve lime wedges on the side for an extra burst of flavor. This final touch adds brightness to the dish and makes it look beautiful. - Ensuring even cooking: Cook ground chicken over medium heat. This helps it brown nicely. Stir often to break it up. This way, you avoid any raw spots. - Tips for seasoning: Season early. Add salt and pepper to the chicken as it cooks. This helps the flavors blend well. For a kick, try adding some chili flakes or a dash of soy sauce while it cooks. - Storing cooked ingredients: Let the chicken mixture cool before storing. Use airtight containers. It keeps well in the fridge for up to three days. For longer storage, you can freeze it. - Reheating tips: Reheat on the stove for the best taste. Add a splash of water or broth to keep it moist. You can also use the microwave. Heat in short bursts to avoid overcooking. - Ideal pairing options: Serve your ground chicken over quinoa for a healthy base. You can also use brown rice or cauliflower rice for variety. Add fresh lime wedges for a zesty finish. Top with extra veggies or avocado for a colorful bowl. Pro Tips Use Fresh Ingredients: Opt for fresh bell peppers and zucchini to enhance the flavor and texture of your dish. Customize Your Veggies: Feel free to swap in any vegetables you have on hand, like spinach or carrots, for added variety. Perfectly Cooked Quinoa: Rinse quinoa before cooking to remove bitterness and ensure a fluffy texture. Enhance with Spices: Consider adding spices like paprika or chili flakes for an extra depth of flavor. {{image_2}} You can make your ground chicken bowls exciting by adding different vegetables. Try carrots, snap peas, or broccoli for a crunch. Each veggie adds a new taste and color. You can also switch up the sauces. Instead of soy sauce, use teriyaki for a sweet twist. A drizzle of spicy mayo adds heat and flavor. If you want variety, use turkey or beef instead of chicken. Both meats cook well and blend nicely with the veggies. For a vegetarian option, try tofu or tempeh. Press the tofu to remove excess water for better texture. Crumble or cube it, then follow the same steps as for chicken. While quinoa is great, you can use brown rice for a heartier bowl. Cauliflower rice is a low-carb choice if you want to lighten it up. Both options work well and soak up the flavors. To keep your ground chicken bowls fresh, use airtight containers. Let the food cool before sealing. Place the leftovers in the fridge. They stay safe for up to three days. When you’re ready to eat, just reheat the portion you want. You can freeze the ground chicken bowls too. Divide the meal into individual portions. Use freezer-safe containers or bags. Make sure to label them with the date. For best results, eat within three months. To thaw, move the container from the freezer to the fridge the night before. This method helps keep the food safe and tasty. If you need it faster, you can use the microwave. Just make sure to heat it until it’s hot all the way through. In the fridge, ground chicken bowls last about three days. If you freeze them, they can last up to three months. Always check for any signs of spoilage before eating, like a strange smell or color. Yes, you can make Ground Chicken Bowls ahead of time. This is great for meal prep. Cook the chicken and veggies as planned. Let them cool before storing. Place them in airtight containers. You can keep them in the fridge for up to four days. When you are ready to eat, just reheat the mixture. Serve it over fresh quinoa. This saves time on busy nights. If you want to swap quinoa, try brown rice. It has a nutty taste and works well. You can also use cauliflower rice for a low-carb option. It cooks quickly and adds great texture. Another option is farro, a chewy grain that adds depth. Each substitute brings a different flavor. Choose what you like best. Yes, this recipe can be gluten-free. Just use tamari instead of soy sauce. Tamari is a gluten-free soy sauce that tastes great. Always check labels to ensure no gluten in other ingredients. This way, you can enjoy the dish without worry. Gluten-free options let everyone join in on the fun! Ground chicken bowls are tasty and easy to make. You start with ground chicken, quinoa, and fresh veggies. Season them with soy sauce, sesame oil, ginger, and garlic. Then, serve with green onions, cilantro, and lime. Use my cooking tips for great results. You can switch up flavors and ingredients, making these bowls your own. Store leftovers properly to enjoy later. Now, get cooking and have fun exploring different combinations! Your perfect ground chicken bowl awaits.
    Ground Chicken Bowls Easy Meal for Any Night
  • - 4 boneless, skinless chicken breasts - 1/2 cup all-purpose flour - 1 teaspoon salt - 1/2 teaspoon black pepper - 1 teaspoon garlic powder These main ingredients form the base of your chicken piccata. The chicken is the star, while the flour helps create a nice crust. The salt, pepper, and garlic powder add great flavor to the chicken. - 1/2 cup chicken broth - 1/4 cup fresh lemon juice - 1 teaspoon lemon zest - 2 tablespoons capers - 2 cloves garlic, minced The flavor enhancers are where the magic happens. Chicken broth keeps everything moist. Fresh lemon juice and zest brighten the dish with a tangy kick. Capers add a salty, briny touch, while minced garlic boosts the flavor even more. - 2 tablespoons fresh parsley - 1 tablespoon olive oil - 1 teaspoon dried oregano Garnishes make your dish look and taste better. Fresh parsley adds color and freshness. Olive oil gives a nice richness, while dried oregano contributes more herbal notes. These garnishes are not required but can elevate your meal. {{ingredient_image_1}} 1. Combine flour and spices in a shallow dish. Use a bowl to mix 1/2 cup of flour, 1 teaspoon of salt, 1/2 teaspoon of black pepper, and 1 teaspoon of garlic powder. This blend gives the chicken a nice taste. 2. Dredge chicken breasts in flour mixture. Take each chicken breast and coat it well in the flour mix. Shake off any extra flour. This step helps create a nice crust when cooked. 1. Sear chicken in skillet (optional). Heat 1 tablespoon of olive oil in a skillet over medium heat. Add the chicken breasts and cook for 2-3 minutes on each side. This step adds extra flavor, but you can skip it if you're short on time. 2. Place in crockpot with lemon mixture. After searing, place the chicken in the crockpot. In a bowl, mix 1/2 cup chicken broth, 1/4 cup fresh lemon juice, 1 teaspoon lemon zest, 2 cloves of minced garlic, 1 teaspoon dried oregano, and 2 tablespoons of capers. Pour this mixture over the chicken in the crockpot. 1. Set crockpot to low or high. Cook the chicken on low for 4-6 hours or on high for 2-3 hours. This slow cooking allows the flavors to blend well. 2. Check for tenderness before serving. Use a fork to check if the chicken pulls apart easily. If it does, it’s ready! Sprinkle 2 tablespoons of fresh parsley on top for a pop of color and taste. - Use fresh ingredients for best flavor. Fresh lemon juice and parsley make a big difference. - Adjust lemon juice for personal taste. If you like it tart, add more lemon. If you prefer it milder, use less. - Searing chicken adds extra flavor and a nice texture. It creates a golden crust. - However, you can skip this step. The chicken will still taste great in the crockpot. - Serve the chicken piccata over pasta or rice. This makes a nice base for the sauce. - Garnish with lemon slices and fresh parsley. This adds color and makes the dish look inviting. Pro Tips Perfectly Tender Chicken: To ensure your chicken remains juicy and tender, avoid overcooking. Use a meat thermometer to check for an internal temperature of 165°F (75°C). Add More Flavor: For an extra burst of flavor, marinate the chicken in the lemon juice and spices for at least an hour before cooking. This will enhance the taste even further. Make it Creamy: If you prefer a creamier sauce, stir in a splash of heavy cream or a dollop of sour cream to the sauce just before serving. Store Leftovers Properly: Leftover chicken piccata can be stored in an airtight container in the fridge for up to 3 days. Reheat gently on the stovetop to maintain quality. {{image_2}} If you want to change up the chicken piccata, you can use other proteins. Turkey breasts or pork chops work great. They can give a different taste but still stay tender. You can also switch out the herbs. Try basil or thyme instead of oregano. Each herb brings a unique flavor. Experimenting can lead to fun results! For those who need gluten-free options, use gluten-free flour. It works just as well for dredging your chicken. Make sure to check the labels for safe choices. If you're watching your salt intake, use low-sodium chicken broth. This keeps the dish flavorful without the extra salt. You can also skip the capers or rinse them to reduce saltiness. Adding Mediterranean elements can elevate your dish. Try sun-dried tomatoes or olives for a twist. They add depth and richness. For an Asian twist, incorporate soy sauce and ginger. This gives a new flavor profile that is both savory and exciting. You can also use sesame oil instead of olive oil for a different taste. To store leftovers, place chicken piccata in an airtight container. This keeps the dish fresh and flavorful. You can also cover the dish tightly with plastic wrap. Leftovers last in the fridge for up to three days. Freezing chicken piccata is simple. First, let it cool completely. Then, place it in a freezer-safe bag. Squeeze out as much air as possible before sealing. It can last up to three months in the freezer. To reheat, thaw it overnight in the fridge. Then, warm it gently in a skillet over low heat until hot. For make-ahead meals, you can prepare the chicken and sauce the day before. Store them separately in the fridge. This makes dinner quick and easy. Pair chicken piccata with sides like pasta or steamed veggies for a balanced meal. Rice is also a great option, soaking up the tasty sauce. Yes, you can cook chicken piccata on high heat. The cooking time will change. If you cook on high, it takes about 2-3 hours. Cooking on low takes about 4-6 hours. Cooking on high may make the chicken a bit less tender. The flavors still come out well, but low heat helps keep it moist and juicy. Pairing sides can enhance your meal. Here are some great options: - Pasta: Serve with spaghetti or fettuccine. - Rice: White or brown rice works well. - Vegetables: Steamed broccoli or green beans add color and crunch. - Salad: A fresh green salad balances the meal. To check if the chicken is done, look for a few signs: - The chicken should be white, not pink. - Juices should run clear, not red. - Use a meat thermometer. The internal temp should reach 165°F (75°C). This tool helps ensure your chicken is safe to eat. Yes, you can make this recipe ahead of time. Here are some tips: - Storage: Store leftovers in an airtight container in the fridge. - Reheating: Heat in the microwave or on the stove. Add a splash of water or broth to keep it moist. - Enjoy within 3-4 days for the best flavor. This blog post covered the key ingredients and steps for making chicken piccata. We explored helpful tips to enhance flavor and presentation. You also learned about variations and storage methods for leftovers. In summary, use fresh ingredients for the best results. Enjoy experimenting with flavors and sides to make this dish your own. Happy cooking!
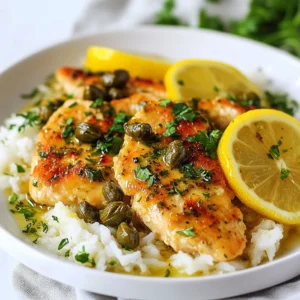
    Crockpot Chicken Piccata Flavorful and Easy Dish
  • - 1 pound ground turkey - 3 medium-sized potatoes, diced (about 2 cups) - 1 medium onion, chopped - 2 cloves garlic, minced - 1 bell pepper (any color), chopped - 1 cup cherry tomatoes, halved The main ingredients create a hearty base. Ground turkey is lean, making it a great protein choice. Potatoes add a filling texture, while onions and bell peppers enhance the flavor. Garlic gives a nice kick, and cherry tomatoes add sweetness. - 1 teaspoon smoked paprika - 1 teaspoon dried Italian herbs - ½ teaspoon cayenne pepper (optional for heat) - Salt and pepper to taste - 1 tablespoon olive oil Seasonings are key for flavor. Smoked paprika gives a rich taste. Italian herbs add warmth and depth. Cayenne pepper adds heat but is optional. Olive oil helps cook the veggies and turkey. - Fresh parsley, chopped Garnishing with fresh parsley brightens the dish. It adds color and a fresh taste. A simple touch can elevate your meal. {{ingredient_image_1}} - Heat 1 tablespoon of olive oil in a large skillet over medium heat. - Add 1 medium onion and 1 chopped bell pepper. Sauté for about 3-4 minutes until soft. - Stir in 2 minced garlic cloves and 1 pound of ground turkey. Cook for 5-7 minutes. - Break the turkey apart with a spatula until it turns brown and is fully cooked. - Sprinkle in 1 teaspoon of smoked paprika, 1 teaspoon of dried Italian herbs, and ½ teaspoon of cayenne pepper if you like heat. - Season with salt and pepper to taste, then stir well to mix. - Add 3 medium-sized diced potatoes to the skillet. Stir to mix with the turkey and veggies. - Reduce heat to medium-low and cover the skillet. Let it cook for about 15-20 minutes. - Stir occasionally until the potatoes are tender. This step is key for great texture. - Fold in 1 cup of halved cherry tomatoes. Cook for another 5 minutes until they soften and burst. - Taste the dish and adjust the seasoning if needed. - Once everything is cooked through, remove it from the heat. - Garnish with fresh chopped parsley before serving. This adds a fresh touch! - Ensuring turkey is fully cooked: Cook ground turkey to an internal temperature of 165°F. This keeps it safe and tasty. Use a meat thermometer for accuracy. - Perfect potato texture: Cut potatoes into even pieces. This ensures they cook evenly. Stir them occasionally. This helps them become tender and golden. - Recommended spice adjustments: Add more smoked paprika for a deeper flavor. If you like heat, increase cayenne pepper. A little goes a long way! - Substituting ingredients for variety: Swap ground turkey with chicken or beef. Use sweet potatoes instead of regular ones for a sweeter taste. You can also try different veggies like zucchini or carrots. - Plating ideas for presentation: Serve directly from the skillet for a cozy look. For a fancier touch, plate each serving separately. Add a dollop of sour cream or yogurt on top for creaminess. - Pairing ideas with sides or salads: Pair this dish with a crisp green salad. A side of roasted veggies works well too. You can also serve it with some crusty bread to soak up the flavors. Pro Tips Use Fresh Ingredients: Opt for fresh vegetables and herbs to enhance the flavor of your dish. Adjust the Heat: Feel free to modify the amount of cayenne pepper to suit your spice preference. Layer Flavors: Consider adding a splash of lemon juice or vinegar at the end for a zesty finish. Meal Prep Friendly: This skillet dish can be made ahead of time and reheated for a quick meal throughout the week. {{image_2}} You can switch the ground turkey with different proteins. Chicken or beef works well. If you want a vegetarian option, try lentils or chickpeas. You can also change the vegetables. Zucchini or carrots add nice flavor and texture. Spice things up with different flavor profiles. For a Mexican twist, use cumin and chili powder. For a Mediterranean vibe, try oregano and lemon zest. You can also make this dish gluten-free by choosing gluten-free ingredients. If you want low-carb, swap potatoes for cauliflower. This dish can be made in different ways. You can bake it in the oven. Preheat to 400°F (200°C) and bake for about 30-35 minutes. This lets the flavors blend nicely. If you have more time, use a slow cooker. Cook on low for 6-8 hours for a tender meal. To store leftovers, let the dish cool down first. Then, transfer it to an airtight container. You can keep it in the fridge for up to four days. When you want to reheat, warm it in a skillet over low heat. Stir often to heat evenly. You can also use a microwave, but use a microwave-safe dish. Heat it in short bursts, stirring in between, until it's hot. If you want to save it for later, freezing is a great option. Allow the meal to cool completely. Next, place it in a freezer-safe container or a heavy-duty freezer bag. Make sure to remove as much air as you can. This meal will last in the freezer for about three months. When ready to eat, thaw it in the fridge overnight. Then, reheat it in a skillet or microwave until hot. In the fridge, this meal lasts about four days. If you notice any off smell or strange color, it's best to throw it away. Always trust your senses. If it looks or smells bad, do not eat it. You can make this dish healthier by using lean ground turkey. You can also add more vegetables. Consider adding spinach, kale, or carrots for extra nutrients. Use less oil or try cooking with a non-stick skillet to cut back on fat. Swap regular potatoes for sweet potatoes for more fiber and vitamins. Yes, you can make this meal in advance. Cook it fully, then let it cool. Store it in an airtight container in the fridge for up to three days. When you're ready to eat, just reheat it on the stove or in the microwave. This makes it easy for busy days. Feel free to get creative with seasonings! Try adding cumin or chili powder for a kick. You can also use herbs like thyme or rosemary for a different flavor. If you love heat, add more cayenne pepper or red pepper flakes. Experiment to find your favorite mix! Absolutely! This recipe is great for meal prep. You can portion it into containers for easy lunches or dinners. It reheats well, so you can enjoy it throughout the week. Just remember to store it in the fridge for the best taste. Yes, you can use sweet potatoes instead of regular potatoes. Sweet potatoes add a nice sweetness and extra nutrients. Just chop them into small pieces, similar to regular potatoes. The cooking time may be a little less, so keep an eye on them. This dish combines ground turkey, colorful vegetables, and tasty seasonings for great flavor. We explored simple steps to prepare, cook, and garnish your meal. Tips and tricks enhance cooking success and presentation. You can switch ingredients for variety or try different cooking methods. Remember to follow storage guidelines for the best taste later. I hope this helps you create a meal that everyone will enjoy. Happy cooking!
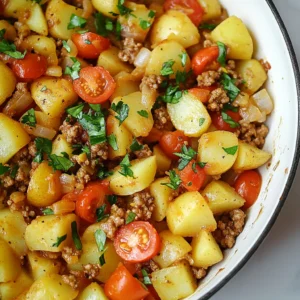
    Ground Turkey and Potato One Pan Meal Delight
  • To make this tasty French chicken casserole, gather these simple ingredients: - 4 chicken thighs, skinless and boneless - 1 tablespoon olive oil - 1 medium onion, diced - 3 cloves garlic, minced - 2 cups cremini mushrooms, sliced - 2 carrots, sliced - 1 zucchini, diced - 1 cup chicken broth - 1 cup heavy cream - 1 teaspoon dried thyme - 1 teaspoon dried rosemary - Salt and pepper to taste - 1 cup grated Gruyère cheese - 1 cup fresh spinach You can swap some ingredients for variety. Try these options: - Use chicken breast instead of thighs for leaner meat. - Substitute vegetable broth for chicken broth for a vegetarian option. - Swap heavy cream with coconut cream for a dairy-free dish. - Any cheese can work, like mozzarella or cheddar, if Gruyère is hard to find. Choosing fresh ingredients makes the dish tastier. Here are some tips: - Select chicken that feels firm and has no bad smell. - Look for onions that are dry and firm, with no sprouts. - For mushrooms, choose ones that are plump and smooth. - Pick carrots and zucchini that are bright in color and firm to the touch. - Fresh spinach should be vibrant green with no yellow spots. {{ingredient_image_1}} To start, gather your ingredients. You will need: - 4 chicken thighs, skinless and boneless - 1 tablespoon olive oil - 1 medium onion, diced - 3 cloves garlic, minced - 2 cups cremini mushrooms, sliced - 2 carrots, sliced - 1 zucchini, diced - 1 cup chicken broth - 1 cup heavy cream - 1 teaspoon dried thyme - 1 teaspoon dried rosemary - Salt and pepper to taste - 1 cup grated Gruyère cheese - 1 cup fresh spinach First, preheat your oven to 375°F (190°C). This step is key to ensure even baking. Next, heat the olive oil in a large skillet over medium heat. Add the diced onion and cook until it is soft, about 5 minutes. Then, stir in the minced garlic and cook for one more minute. This brings out the flavor. Now, add the chicken thighs to the skillet. Brown them on all sides for about 5 to 7 minutes. Once they are cooked, remove them from the skillet and set them aside. In the same skillet, add the sliced mushrooms, carrots, and zucchini. Sauté these vegetables for about 5 to 7 minutes until they are tender. After the vegetables are tender, pour in the chicken broth and heavy cream. This mixture adds richness and flavor. Next, add the dried thyme, rosemary, salt, and pepper. Stir everything well to combine. Now, it's time to assemble the casserole. In a large dish, layer the sautéed vegetables and the chicken thighs evenly. Then, top with fresh spinach. Finally, sprinkle the grated Gruyère cheese over the entire dish. The cheese will melt beautifully. Cover the dish with aluminum foil to keep moisture in. Place it in your preheated oven and bake for 30 minutes. This helps the flavors meld together. After 30 minutes, carefully remove the foil. Bake for an additional 15 minutes. You want the cheese to be golden and bubbly at this point. Once done, take the casserole out of the oven and let it cool for a few minutes before serving. This dish pairs well with crusty bread and fresh parsley on top for a lovely finish. Enjoy your cozy meal! To make your French chicken casserole shine, herbs play a key role. I love using dried thyme and rosemary. They add warmth and depth. Fresh herbs can also work wonders. If you have fresh thyme or rosemary, use them! Just chop them finely. Adding seasoning is simple. Use salt and pepper to taste. Start with a little, then adjust. This way, you get the flavor just right. A splash of lemon juice can brighten the dish too. It adds a fresh twist that pairs well with cream. One common mistake is overcooking the chicken. This can make it tough. Cook the chicken just until it’s browned, and let the oven do the rest. Another mistake is not sautéing the vegetables enough. If they are not tender before baking, they can remain crunchy. Aim for softness to get the best texture. Lastly, don’t skip the cheese! Gruyère gives a creamy, nutty taste. It melts beautifully, creating a golden crust. Serving your casserole can be fun and easy. Dish it straight from the casserole dish. This keeps it warm and inviting. Pair it with a fresh salad. A simple green salad with a light vinaigrette adds crunch and balance. Don’t forget crusty bread! It’s perfect for soaking up the creamy sauce. You can even toast it for extra flavor. Enjoying this meal together makes for a cozy family dinner, perfect for any night! Pro Tips Use Fresh Herbs: Fresh herbs like thyme and rosemary can enhance the flavor profile of your casserole significantly. If you have access to fresh versions, consider using them instead of dried for a more aromatic dish. Customize the Veggies: Feel free to swap out the vegetables based on what’s in season or what you have on hand. Bell peppers, asparagus, or even broccoli would work beautifully in this dish. Make-Ahead Option: This casserole can be assembled a day in advance. Just cover and refrigerate it before baking. Adjust cooking time if baking from cold. Cheese Variations: While Gruyère adds a lovely nutty flavor, you can experiment with other cheeses like mozzarella or cheddar for a different taste and texture. {{image_2}} To make a vegetarian version, swap the chicken with hearty veggies. Consider using: - 1 cup of chickpeas - 1 cup of lentils - 1 cup of firm tofu These options add protein and flavor. You can keep the same base with onions, garlic, and mushrooms for depth. Just replace chicken broth with vegetable broth for a full veggie experience. For a dairy-free dish, use coconut milk instead of heavy cream. This gives a nice creaminess while keeping it light. Use nutritional yeast to add a cheesy flavor without the dairy. You can also use dairy-free cheese for the topping or skip it altogether. Feel free to play with flavors by swapping some ingredients. Try: - Switching zucchini for bell peppers for a sweeter taste. - Using different mushrooms like shiitake for a richer flavor. - Adding fresh herbs like parsley or basil for brightness. These swaps can change the dish and surprise your family with new tastes. Don’t hesitate to experiment and find what you love! To keep your French Chicken Casserole fresh, let it cool first. Use an airtight container to store it. Make sure to cover it tightly. This helps keep moisture in and air out. You can store leftovers in the fridge for up to three days. When you are ready to enjoy your leftovers, heat them gently. Preheat your oven to 350°F (175°C). Place the casserole in a baking dish and cover it with foil. Bake for about 20 to 25 minutes until warm. This keeps the dish moist and the cheese melty. You can also use the microwave. Just heat in short bursts, stirring in between. You can freeze French Chicken Casserole for later. Make sure it is completely cool first. Use a freezer-safe container or wrap it in plastic wrap and foil. This helps prevent freezer burn. You can freeze it for up to three months. When ready to eat, thaw it in the fridge overnight. Then reheat as mentioned above for best taste. To keep chicken tender, start with skinless, boneless thighs. These cuts have more fat. This fat helps them stay moist while cooking. Brown the chicken in olive oil. This step locks in juices. After that, simmer it in broth and cream. This method adds flavor and keeps it juicy. Yes, you can use other cheeses. Gruyère is rich and melts well. But, you can swap it for Swiss or mozzarella. Both will give good flavor and texture. Cheddar also works if you want a sharper taste. Just remember to adjust the amount to match the new cheese. Store leftovers in an airtight container. They can last in the fridge for up to three days. For longer storage, freeze them in a freezer-safe container. You can keep it frozen for up to three months. When ready to eat, thaw and reheat in the oven for the best taste. French Chicken Casserole is simple and delicious. We covered the best ingredients, cooking tips, and ways to adapt it. Remember to pick fresh ingredients for the best flavor. I shared storage tips and answered common questions to help you succeed. Try different flavors and variations to keep things fun. This dish can be a hit at your table, ensuring everyone enjoys mealtime together. Enjoy cooking and sharing your creation with family and friends!
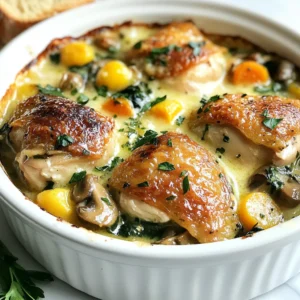
    French Chicken Casserole Comforting Dinner Delight
  • - 1 pound raw shrimp, peeled and deveined - 1 pound smoked sausage, sliced (chicken or turkey for a healthier option) - 2 tablespoons olive oil - 1 red bell pepper, diced - 1 green bell pepper, diced - 1 small onion, chopped - 3 cloves garlic, minced - 1 teaspoon smoked paprika - 1 teaspoon dried oregano - Salt and pepper to taste - 2 cups fresh spinach - Fresh parsley, chopped (for garnish) I love using raw shrimp in this dish. They cook fast and absorb flavors well. Smoked sausage adds a rich taste and hearty texture. You can pick chicken or turkey sausage for a lighter meal. Fresh veggies bring color and crunch. I use bell peppers for sweetness and onion for depth. Garlic adds a punch of flavor. The spices, like smoked paprika and oregano, bring warmth and earthiness. - Variations for sausage - Additional spices or herbs You can switch up the sausage. Try andouille for heat or kielbasa for a different taste. Adding spices like cayenne or herbs like thyme can change the flavor profile. Feel free to get creative! - Skillet - Cooking utensils You need a large skillet for this recipe. It helps cook the sausage and shrimp evenly. Basic cooking utensils, like a spatula and knife, make prep easy. These tools ensure you can whip up this dish with no fuss. {{ingredient_image_1}} Start by heating two tablespoons of olive oil in your skillet over medium heat. Add the sliced smoked sausage. Cook it for about 5-7 minutes. Stir it often to get that nice brown color. This browning technique adds rich flavor. Ensure you cook it evenly, so every piece gets nice and crispy. Once your sausage is brown, it’s time to add flavor. Toss in the chopped onion and minced garlic. Sauté these for 2-3 minutes until the onion turns soft and clear. This timing is key. It helps the garlic and onion release their sweet, rich flavors into the dish. Now it’s time to add the shrimp. Stir in the peeled and deveined shrimp. Cook them until they turn pink and opaque, which takes about 3-4 minutes. Don’t forget to mix in the fresh spinach at the end. Cook it for just 1-2 minutes until it wilts. This adds freshness and color to your meal. Cooking shrimp is quick. You want them pink and opaque. This usually takes about 3-4 minutes. Keep an eye on them. If you cook them too long, they become rubbery. To avoid overcooking, remove them from heat right when they change color. This keeps them tender and juicy. Choosing the right sausage is key. For a healthier option, go for chicken or turkey sausage. They have less fat and still pack in flavor. Each sausage type has its own taste. For a smoky flavor, stick with smoked sausage. If you want something spicy, try a chorizo. Experiment with different sausages to find your favorite. Balancing flavors is important. You want to highlight the shrimp and sausage without overpowering them. Start with salt and pepper. Then add smoked paprika and oregano for depth. Fresh herbs like parsley can brighten up the dish. Add them at the end for a fresh taste. Don’t be afraid to taste as you go. Adjust the seasoning to your liking. Pro Tips Use Fresh Ingredients: Fresh shrimp and vegetables will enhance the flavor and texture of your dish. Look for shrimp that smells like the ocean and vegetables that are bright and crisp. Adjust Spice Levels: Feel free to add more spices or heat to suit your personal taste. A pinch of cayenne pepper can give this dish an extra kick! Meal Prep Friendly: This dish holds up well in the fridge, making it a great option for meal prep. Store in an airtight container and reheat for a quick meal. Garnish for Freshness: Always garnish with fresh herbs like parsley or cilantro just before serving. This adds a burst of flavor and a pop of color to your dish. {{image_2}} Want to make this dish even better? You can swap some ingredients to fit your taste. For a low-carb option, try using zucchini noodles instead of pasta. This swap keeps your meal light and healthy. You can also choose cauliflower rice for the same effect. If you want a different protein, use turkey sausage or chicken sausage. Both options add great flavor without too many carbs. Planning ahead helps save time. You can make this Keto Shrimp Sausage Skillet in advance. Cook it fully, then let it cool. Store it in an airtight container. It stays fresh for up to three days in the fridge. When you're ready to eat, just heat it up. For serving, you can pair it with a fresh salad or avocado slices. These sides add crunch and healthy fats. Want to change the flavor? You can easily add some heat. Try adding a pinch of cayenne pepper or a dash of hot sauce. This gives the dish a nice kick. If you prefer sweetness, add a bit of honey or a sweet chili sauce. For spices, consider using garlic powder, onion powder, or Italian seasoning. Each brings its own twist to the dish. Experiment to find what you love! To keep your Keto Shrimp Sausage Skillet fresh, place leftovers in an airtight container. Glass containers work best, but any plastic container will do. Make sure to cool the dish to room temperature before sealing. Refrigerate the leftovers within two hours of cooking. This way, they stay safe to eat. You can store them in the fridge for up to three days. If you want to save your dish for later, freezing is a great option. Start by letting the skillet cool completely. Once cool, portion it into freezer-safe bags or containers. Remove as much air as possible before sealing. Label each bag with the date. You can freeze the dish for up to three months for the best taste. When you are ready to eat, thaw it in the fridge overnight. This slow method helps keep the shrimp tender and tasty. When reheating your meal, use a skillet for the best results. Heat it over medium heat and add a splash of water or broth to keep it moist. Stir the mixture often to help it heat evenly. If you use a microwave, place the food in a microwave-safe dish and cover it with a damp paper towel. This step helps prevent sogginess. Heat in short bursts, checking often, until it is hot all the way through. Avoid overcooking to keep the shrimp juicy and delicious. To add heat, consider using red pepper flakes. You can also add a diced jalapeño. Both options bring a nice kick. If you want more flavor, try a spicy sausage. This can change the dish's profile while keeping it low-carb. Yes, you can use frozen shrimp. Just remember to thaw them first. You can do this by placing them in cold water for about 10-15 minutes. Make sure to pat them dry before cooking. This keeps the skillet from getting watery. This skillet pairs well with a simple salad. A mixed green salad with lemon dressing works great. You can also serve it over cauliflower rice for added texture. Another option is to enjoy it with zucchini noodles for extra veggies. This blog post covered how to craft a delicious Keto Shrimp Sausage Skillet. We discussed key ingredients, helpful tools, and step-by-step cooking methods. I shared tips to perfect shrimp and options to customize flavors. Remember, you can always swap ingredients or adjust seasonings to suit your taste. With proper storage and reheating techniques, your dish will stay fresh. Enjoy making this meal as much as I do!
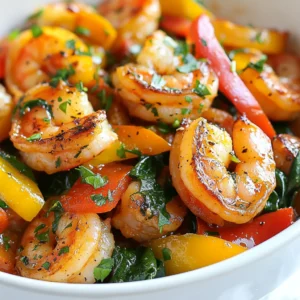
    Keto Shrimp Sausage Skillet Quick and Flavorful Meal
  • - 1 can (15 oz) chickpeas, drained and rinsed - 1 large avocado, diced - 1 cup cherry tomatoes, halved - 1 cucumber, diced - 1 small red onion, finely chopped - 1 cup feta cheese, crumbled - 2 tablespoons olive oil - 2 tablespoons lemon juice - Salt and pepper to taste - 1/4 cup fresh parsley, chopped - Lemon wedges for serving To make this Chickpea Feta Avocado Salad, start with the main ingredients. Chickpeas bring protein and fiber. Avocado adds creaminess and healthy fats. Cherry tomatoes lend sweetness, while cucumber adds crunch. The red onion provides a slight bite, and feta cheese gives it a salty tang. For the dressing, combine olive oil and lemon juice. This mix brightens the salad. Add salt and pepper to taste. This simple dressing ties all the flavors together without overpowering them. Finally, consider garnishing with parsley for color and lemon wedges for a zesty kick. These touches make the salad look fresh and inviting. Enjoy making this easy, nutritious dish! {{ingredient_image_1}} - In a large mixing bowl, combine the chickpeas, diced avocado, halved cherry tomatoes, diced cucumber, and finely chopped onion. - Next, add the crumbled feta cheese and fresh parsley to the mixture. This salad is colorful and full of flavor. The chickpeas add protein, while the avocado gives it creaminess. When you mix it all together, you create a base that is both filling and refreshing. - In a small bowl, whisk together the olive oil, lemon juice, salt, and pepper. The dressing is simple yet bright. The olive oil adds richness, and the lemon juice brings a nice zing. This balance ties the flavors together perfectly. - Drizzle the dressing over the salad ingredients and toss gently. - Taste the salad and adjust the seasoning with more salt, pepper, or lemon juice as needed. After tossing, the salad should look vibrant and appetizing. If you like a bit more salt or acidity, don’t hesitate to tweak it. This ensures you enjoy every bite! - Serve the salad right away for the best taste. - You can chill it for 30 minutes if you prefer. - Garnish with extra parsley and feta for a fresh look. - Store leftovers in an airtight container in the fridge. - Keep the salad for up to two days to maintain freshness. - Avoid adding dressing to the entire salad to keep it crisp. - You can prepare the chopped veggies in advance. - Keep each ingredient separate until you are ready to serve. - Toss everything together just before eating for the best flavor. Pro Tips Perfect Avocado Selection: Choose avocados that are slightly soft to the touch but not overly mushy for the best texture in your salad. Chickpea Variations: For added flavor, try using roasted chickpeas instead of canned ones for a crunchy texture. Freshness Matters: Use fresh lemon juice instead of bottled for a brighter flavor profile in your dressing. Make Ahead: If preparing in advance, keep the avocado separate until serving to prevent browning and maintain freshness. {{image_2}} You can switch out chickpeas for other beans. Try black beans or kidney beans for a new taste. If you want a different cheese flavor, use goat cheese or mozzarella. Each swap adds its unique twist to your salad. Want to make it heartier? Add grilled chicken or shrimp for protein. You can also toss in more veggies like bell peppers or radishes for extra crunch. Adding nuts or seeds can give a nice texture too. Spice up your salad with herbs like basil or cilantro. A sprinkle of cumin can add warmth. You can also try different vinaigrettes, like balsamic or honey mustard. These small changes can take your salad to the next level. This salad packs about 250 calories per serving. Chickpeas are rich in protein and fiber. They help keep you full longer. Avocado provides healthy fats and vitamins. It is great for heart health. Feta cheese adds flavor and calcium. Together, these ingredients make a balanced meal. This salad is gluten-free and vegetarian. These traits make it a safe choice for many diets. However, chickpeas and feta can cause allergies. Always check for allergies before serving. If someone is allergic to dairy, you may want to replace feta with a plant-based option. A good portion size is about one cup. This works for most adults. If you serve kids, a half-cup is often enough. For larger groups, adjust by multiplying the recipe. Make sure to prepare extra if you have big eaters. Chickpea Feta Avocado Salad lasts about 3 days in the fridge. Store it in an airtight container. The avocado may brown over time, so eat it sooner if you can. To keep it fresh, you can add the avocado just before serving. This way, your salad remains bright and tasty. Yes, you can make this salad vegan! For a great substitute, use plant-based feta cheese. It provides a similar taste and texture. You can also try crumbled tofu or a nut-based cheese. These options keep the salad creamy and flavorful without dairy. This salad pairs well with many dishes. Try serving it with grilled chicken or shrimp for protein. You might also enjoy it with pita bread or on a bed of greens. For a light meal, serve it alongside soup or a veggie platter. This way, you create a full and satisfying meal. This blog post shared a simple and tasty recipe for Chickpea Feta Avocado Salad. You learned about the main ingredients, how to prepare them, and tips for serving and storing. We also explored variations to customize the salad to your taste. In closing, this salad is not only delicious but also nutritious. Enjoy making it and sharing it with others. Your healthy meal choice can bring joy to you and your friends.
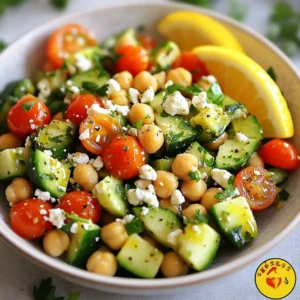
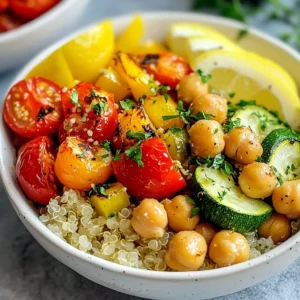
    Chickpea Feta Avocado Salad Fresh and Nutritious Meal
  • Making Cranberry Brie Puff Pastry Bites is easy with just a few key ingredients. Here they are: - Puff pastry - Brie cheese - Cranberry sauce - Fresh rosemary - Egg wash ingredients - Seasoning components 1. Puff pastry: You need one sheet, thawed. This will be the base for our tasty bites. 2. Brie cheese: Use 8 oz of brie, cut into small wedges. Brie adds a creamy, rich taste. 3. Cranberry sauce: One cup works well. You can use homemade or store-bought. The sweet and tart flavor of cranberry pairs perfectly with brie. 4. Fresh rosemary: One tablespoon, finely chopped. This herb adds a fresh, fragrant touch to each bite. 5. Egg wash ingredients: You’ll need one beaten egg. This will help give our bites a nice golden color when baked. 6. Seasoning components: A little sea salt and freshly cracked black pepper will enhance the flavors. Just a pinch of each will do! Gather these ingredients, and you’ll be ready to create a delicious treat that everyone will love! {{ingredient_image_1}} 1. Preheat your oven and prepare the baking sheet. Set your oven to 400°F (200°C). Line a baking sheet with parchment paper. This helps the bites not stick. 2. Roll out the puff pastry and cut squares. On a lightly floured surface, roll out the thawed puff pastry. Make sure it is smooth. Cut the pastry into 3-inch by 3-inch squares. 3. Assemble the bites with brie and cranberry sauce. Take a square of puff pastry and place it on the baking sheet. In the center, add a wedge of brie cheese. Spoon a small dollop of cranberry sauce over the brie. Add a sprinkle of fresh rosemary for flavor. 4. Seal and brush the pastry bites. Fold the corners of the pastry square over the filling. Pinch the seams to seal tightly. This keeps the filling inside. Brush the tops with the beaten egg for a golden finish. Sprinkle a tiny pinch of sea salt and a crack of black pepper on top. Now, you are ready to bake these tasty treats! To make the best cranberry brie puff pastry bites, focus on a few key areas. How to achieve a golden crust For that perfect golden color, use an egg wash. Beat one egg and brush it on the top before baking. The egg wash helps the pastry brown nicely. Bake at 400°F (200°C) for 15-20 minutes. Keep an eye on them. You want them puffed and golden. Best practices for sealing the pastry Sealing the pastry is key for juicy bites. After adding brie and cranberry sauce, fold the corners over tightly. Pinch the seams well to keep filling inside. If you find it hard to seal, moisten the edges with a bit of water. This helps the pastry stick together better. Using fresh versus store-bought cranberry sauce Both fresh and store-bought cranberry sauce work well. Fresh sauce adds a homemade touch. You can make it by simmering cranberries with sugar and a splash of water. Store-bought sauce is quick and easy. It still tastes great! Choose what fits your time and mood. Pro Tips Use Cold Puff Pastry: Keeping the puff pastry cold helps it to puff up beautifully in the oven, resulting in a flaky and airy texture. Experiment with Fillings: Feel free to get creative with the fillings! Swap out cranberry sauce for fig jam or add nuts for extra crunch. Seal Properly: Make sure to pinch the seams of the pastry tightly to prevent the filling from leaking out during baking. Serve Fresh: These bites are best served warm right out of the oven, so plan to bake them just before serving for optimal taste. {{image_2}} You can make cranberry brie puff pastry bites even more fun with a few twists. Here are some ideas you can try: - Adding nuts or seeds for crunch: Chopped walnuts or pepitas can add a nice crunch. Just sprinkle them on top of the brie and cranberry sauce before sealing the pastry. This extra bite makes each puff pastry feel special. - Incorporating different cheeses or herbs: While brie is a classic, you can swap it out for goat cheese or gouda. You can also mix in herbs like thyme or basil for a fresh taste. Just remember to keep the flavor balance right. - Making a sweet variation with chocolate or fruit: For a dessert version, you can add a few chocolate chips or a slice of fresh pear. Top it with a dash of cinnamon for warmth. This sweet twist can surprise your guests and make these bites perfect for dessert. These variations keep your cranberry brie puff pastry bites exciting and unique. Feel free to experiment and find your favorite flavor combinations! To keep your Cranberry Brie Puff Pastry Bites fresh, follow these steps: - Refrigeration: Place leftovers in an airtight container. They can last in the fridge for 2-3 days. - Freezing: To freeze, wrap each bite in plastic wrap, then put them in a freezer bag. They can stay frozen for up to a month. When you're ready to enjoy them again, reheating is key: - Reheating Tips: For the best taste, reheat in the oven at 350°F (175°C) for about 10-15 minutes. This keeps the pastry crispy. You can also use an air fryer for 5-7 minutes at the same temperature. These bites taste best fresh. If stored properly, they can hold their flavor well. In the fridge, expect them to stay good for a few days. Freezing helps preserve them longer, but the texture may change slightly. Enjoy them while they’re fresh for the best experience! Yes, you can use frozen puff pastry. Just make sure to thaw it first. Leave it in the fridge overnight or on the counter for about 30 minutes. This way, it rolls out easily. To make homemade cranberry sauce, you need just three ingredients: fresh cranberries, sugar, and water. In a pot, combine 1 cup of cranberries, 1 cup of sugar, and 1 cup of water. Cook on medium heat until the cranberries burst and the sauce thickens. It takes about 10-15 minutes. Cool it down before using. These bites pair well with a variety of sides. You can serve them with a fresh salad, like arugula or spinach. A cheese board with different cheeses and nuts also complements them nicely. For a sweet touch, offer some fresh fruit or a fruit dip. Yes, you can make these bites ahead of time. Assemble them, but do not bake them. Cover and store them in the fridge for up to a day. When ready to serve, just bake them straight from the fridge. Add a few extra minutes to the baking time for the best results. You now know how to make delicious Cranberry Brie Puff Pastry Bites. We covered all the key ingredients, from puff pastry to fresh rosemary. The step-by-step guide made sure you didn’t miss a thing. With tips to perfect your bites and creative variations, there's room for your own flair. Remember to store any leftovers correctly to keep them fresh. Enjoy making this tasty treat and impress your family and friends with your skills!
    Cranberry Brie Puff Pastry Bites Easy and Tasty Treat
  • To make these tasty brownies, you need: - 1 cup unsweetened cocoa powder - 1 cup all-purpose flour - 1 ½ cups sugar - ½ teaspoon baking powder - ½ teaspoon baking soda - ½ teaspoon salt - 1 cup unsalted butter, melted - 4 large eggs - 1 teaspoon vanilla extract These ingredients form the base of your brownies. The cocoa powder gives a rich chocolate flavor while the butter adds moisture. For the pumpkin cream cheese swirl, gather: - 1 cup pumpkin puree - 1 teaspoon ground cinnamon - ½ teaspoon ground nutmeg - 1 cup cream cheese, softened - ¼ cup powdered sugar - 1 egg yolk Pumpkin puree adds a warm, earthy taste. The spices bring out the fall flavor. Cream cheese adds creaminess and a slight tang, balancing the sweetness. You can make your brownies even better with: - A dusting of powdered sugar - Whipped cream - A sprinkle of cinnamon - Chopped nuts or chocolate chips These toppings can enhance the look and taste. They also give you a chance to add your personal touch! {{ingredient_image_1}} To start, preheat your oven to 350°F (175°C). Grease a 9x13 inch baking pan or line it with parchment paper. This step helps your brownies come out cleanly. In a large bowl, sift together the cocoa powder, flour, sugar, baking powder, baking soda, and salt. This mix should be even and fluffy. In another bowl, whisk together the melted butter, eggs, and vanilla extract. Once mixed, pour this into the dry ingredients. Stir until just combined; don’t over-mix. Now it’s time to create the pumpkin mixture. In a small bowl, combine the pumpkin puree, ground cinnamon, and ground nutmeg. Mix until smooth. This will add a warm flavor to your brownies. The spices make the pumpkin shine. Set this bowl aside for later. Next, let’s make the cream cheese swirl. In a separate bowl, beat the softened cream cheese with powdered sugar and egg yolk until creamy. This mix should be smooth and well combined. Now, you’re ready to layer your brownies. Spread half of the brownie batter evenly in the prepared pan. Drop spoonfuls of the pumpkin mixture and cream cheese mixture over the brownie layer. Use a knife or skewer to gently swirl them together to create a marbled effect. Pour the rest of the brownie batter on top and repeat with more spoonfuls of both pumpkin and cream cheese mixes. Swirl again to create a beautiful pattern. Finally, bake in the preheated oven for 30-35 minutes. Use a toothpick to check; it should come out with a few moist crumbs. Let the brownies cool for at least 15 minutes before slicing and serving. Enjoy your delicious treat! To achieve the perfect swirl in your brownies, start with the right tools. Use a knife or a skewer for swirling. After layering your pumpkin and cream cheese mixtures, drag it lightly through the brownie batter. Do this gently to avoid mixing too much. You want a marbled look, not a uniform blend. Aim for smooth, flowing lines. This adds beauty to your brownies. Baking time is key for these brownies. Set your timer for 30 to 35 minutes. To check if they are done, use a toothpick. Insert it into the center of the brownies. If it comes out with a few moist crumbs, they are ready. If the toothpick is wet, bake for a few more minutes. Keep an eye on them to avoid overbaking. Brownies are best when they stay soft and fudgy. Using high-quality ingredients makes a big difference. Start with fresh pumpkin puree. This brings natural sweetness and moisture. Choose good cocoa powder for rich flavor. Unsalted butter gives control over saltiness. Use full-fat cream cheese for a creamy swirl. Quality ingredients result in better taste and texture. Trust me, your taste buds will thank you! Pro Tips Use Room Temperature Ingredients: Ensure your cream cheese and eggs are at room temperature for a smoother batter and better incorporation. Don't Overmix the Batter: Mix the brownie batter just until combined to maintain a fudgy texture. Overmixing can result in cake-like brownies. Swirling Techniques: Use a knife or skewer to create beautiful swirls, but avoid overdoing it to keep defined layers of pumpkin and cream cheese. Cooling is Key: Allow the brownies to cool completely in the pan before cutting to ensure clean edges and prevent them from falling apart. {{image_2}} You can easily make gluten-free brownies. Swap all-purpose flour with a gluten-free blend. Look for a blend that works well in baking. This option keeps the taste rich and moist. You won’t miss the gluten at all! To make these brownies vegan, use flax eggs instead of regular eggs. Mix 1 tablespoon of ground flaxseed with 2.5 tablespoons of water for each egg. Replace butter with coconut oil or vegan butter. Use a dairy-free cream cheese for the swirl. These changes keep the brownies tasty and plant-based. You can add fun flavors to your brownies. Try adding chocolate chips for extra richness. Chopped nuts also add crunch and flavor. A pinch of sea salt can boost the sweet taste. You might even add a dash of ginger or cloves for warmth. Mix these in before baking for a unique twist! To keep your pumpkin cream cheese swirl brownies fresh, store them in an airtight container. This helps prevent them from drying out. It’s best to keep them at room temperature for up to three days. If you want to extend their life, move them to the fridge. They can last there for about a week. Just let them sit at room temperature for a bit before serving. Freezing these brownies is easy and a great way to save some for later. First, let the brownies cool completely. Then, cut them into squares. Wrap each square tightly in plastic wrap. Place the wrapped brownies in a freezer-safe bag or container. They can last up to three months in the freezer. When you’re ready to enjoy, just thaw them in the fridge overnight. To reheat leftover brownies, you have a few options. If you want a soft brownie, use the microwave. Heat them for about 10-15 seconds. For a crispier edge, try the oven. Preheat your oven to 350°F (175°C) and warm the brownies for about 5-10 minutes. Enjoy them warm for the best taste! Yes, you can use fresh pumpkin. First, you need to cook the pumpkin. Cut it in half, remove the seeds, and roast it until soft. Then, scoop out the flesh and mash it until smooth. This gives you a fresh pumpkin puree. Just make sure to measure the same amount as the recipe calls for. Fresh pumpkin can add a nice flavor! The best way to check brownies is with a toothpick. Insert it into the center. If it comes out with a few moist crumbs, they are done. If it comes out clean, they may be overbaked. Keep an eye on them at the 30-minute mark to avoid drying out. You want them soft and fudgy! If you need a substitute for cream cheese, try using Greek yogurt or mascarpone. Both options offer a creamy texture. You can also use ricotta cheese, but it may change the flavor slightly. For a vegan option, use silken tofu blended until smooth. Each substitute will provide a different taste, so choose based on your preference! You’ve learned how to make delicious pumpkin cream cheese swirl brownies. We covered the main ingredients, step-by-step instructions, and handy tips. You now have variations and storage info to keep your brownies fresh. Remember, quality ingredients make a big difference in taste. Have fun experimenting with flavors and don’t hesitate to try new toppings. With these steps, you can bake something wonderful and enjoy every bite. Enjoy your baking journey!
    Pumpkin Cream Cheese Swirl Brownies Irresistible Treat
  • - 4 boneless, skinless chicken breasts - 2 tablespoons olive oil - Salt and pepper, to taste - 1 teaspoon Italian seasoning - 3 cloves garlic, minced - 1 cup cherry tomatoes, halved - 1 cup fresh spinach - 1 cup heavy cream - ½ cup grated Parmesan cheese - 1 tablespoon lemon juice - Fresh basil leaves, for garnish - Cooked pasta or rice, for serving This recipe serves four people. Each person gets one chicken breast, a good amount of sauce, and a side of pasta or rice. If you have big eaters, consider adding more chicken or pasta. You can easily double the ingredients for a bigger crowd, too. If you don’t have chicken breasts, you can use thighs. They give a nice flavor and stay juicy. For the cream, you can swap it with half-and-half for a lighter dish. You can also use nutritional yeast instead of Parmesan for a dairy-free option. Lastly, if you don’t have cherry tomatoes, regular tomatoes work well too, just chop them. {{ingredient_image_1}} To start, gather all your ingredients. You will need: - 4 boneless, skinless chicken breasts - 2 tablespoons olive oil - Salt and pepper, to taste - 1 teaspoon Italian seasoning - 3 cloves garlic, minced - 1 cup cherry tomatoes, halved - 1 cup fresh spinach - 1 cup heavy cream - ½ cup grated Parmesan cheese - 1 tablespoon lemon juice - Fresh basil leaves, for garnish - Cooked pasta or rice, for serving Next, measure the olive oil and spices. This will help keep the cooking smooth. Heat the olive oil in a large pot over medium-high heat. Add the seasoned chicken breasts. Sear each side for 5-7 minutes. You want them golden brown and cooked through. Once ready, take the chicken out and place it on a plate. In the same pot, add the minced garlic. Sauté for about 30 seconds until it smells good. Then, toss in the halved cherry tomatoes. Cook these for 2-3 minutes until they soften. Add the fresh spinach next and cook until it wilts, about 1-2 minutes. Now, lower the heat to medium. Mix in the heavy cream and bring it to a gentle simmer. Stir in the grated Parmesan cheese and lemon juice. Let it thicken for 3-5 minutes. Return the chicken to the pot, coating it in the creamy sauce. Simmer for another 5 minutes to blend the flavors. Cooking times can vary. If your chicken breasts are thicker, add a few extra minutes when searing. Always check that chicken reaches an internal temperature of 165°F. Adjust the simmer time as needed, ensuring the sauce thickens to your liking. If the sauce is too thick, add a splash of water or more cream. This will help get the right consistency. To get the best flavor, start with good chicken. Use fresh, high-quality chicken breasts. Season them well with salt, pepper, and Italian seasoning. This simple step adds depth to the dish. Don’t rush the searing process; let the chicken brown nicely. This gives your dish a rich taste. When cooking garlic, watch it closely. It can burn quickly and taste bitter. Add it just before the tomatoes for a great aroma. For a rich and creamy sauce, use heavy cream. This makes the sauce thick and smooth. Stir in the Parmesan cheese slowly. This helps it melt evenly into the sauce. Adding lemon juice brightens the flavor, so don’t skip it. Taste the sauce as you go. This way, you can adjust the seasoning. If the sauce is too thick, add a splash of chicken broth to loosen it. One common mistake is overcooking the chicken. Cook it just until it is no longer pink inside. This keeps it tender and juicy. Another mistake is adding too much garlic at once. It can overpower the dish if cooked too long. Make sure to use fresh spinach. Wilted or old spinach will not taste good in your dish. Lastly, don’t forget to garnish with fresh basil. It adds a nice touch and extra flavor. Pro Tips Use Fresh Ingredients: Fresh spinach and ripe cherry tomatoes will enhance the flavor of your dish significantly. Always opt for the freshest produce you can find. Perfectly Cooked Chicken: Ensure your chicken is cooked to an internal temperature of 165°F (75°C) for safety and tenderness, avoiding overcooking to retain juiciness. Adjust Creaminess: If you prefer a lighter sauce, substitute half of the heavy cream with chicken broth or use a combination of cream and Greek yogurt for a tangy twist. Garnish with Fresh Herbs: Adding fresh basil or parsley just before serving brightens the dish and adds a burst of flavor, making it visually appealing as well. {{image_2}} You can make this dish even better by adding vegetables. Try bell peppers, zucchini, or mushrooms. These veggies add color and extra nutrients. You can also use frozen peas or broccoli for quick options. Just cook them with the cherry tomatoes. This makes the meal more filling and balanced. If you want to change the protein, you have options. You can use turkey or shrimp instead of chicken. Just make sure to adjust the cooking time. Shrimp cooks fast, so only sauté it for 3-4 minutes. For turkey, use cutlets to keep the cooking time similar to chicken. This keeps your meal easy and tasty. To boost the flavor, try adding new herbs. Fresh thyme or oregano can really brighten the dish. You can also mix in some sun-dried tomatoes for a tangy kick. If you like heat, add red pepper flakes. These small changes can give your creamy sauce a new twist. Enjoy experimenting! To keep your One Pot Creamy Tuscan Chicken fresh, let it cool first. Place it in an airtight container. Store it in the fridge for up to three days. This way, you can enjoy it later without losing flavor. When reheating, use a skillet over low heat. Add a splash of water or cream to keep it moist. Stir gently until heated through. You can also microwave it in short intervals, about one minute at a time, stirring in between. To freeze, place cooled chicken in a freezer-safe bag. Make sure to remove as much air as possible. It will keep well for up to three months. When ready to eat, thaw in the fridge overnight before reheating. This keeps the taste and texture intact. One Pot Creamy Tuscan Chicken can last in the fridge for about 3 to 4 days. Make sure to store it in an airtight container. This helps keep the flavors fresh. If you see any odd colors or smells, it’s best to toss it out. Always trust your senses when it comes to food safety. Yes, you can make this dish ahead of time. Cook it as directed and let it cool. Then, place it in the fridge. When you’re ready to serve, just reheat it on the stove or in the microwave. The flavors will meld even more overnight. However, the chicken may lose some of its initial crispness. You can serve this creamy chicken over cooked pasta or rice. Both options soak up the sauce well. You can also add a side of garlic bread for a nice crunch. A simple green salad pairs well too and adds freshness. Try to keep it light to balance the richness of the dish. In this post, I covered the ingredients, step-by-step instructions, and tips for a delicious meal. I shared how to ensure great flavor and avoid common mistakes. You can add your favorite veggies or proteins for fun variations. I also included storage tips for leftovers and answered common questions. Cooking can be simple and enjoyable. With the right ingredients and methods, anyone can create tasty meals. Enjoy trying this recipe yourself!
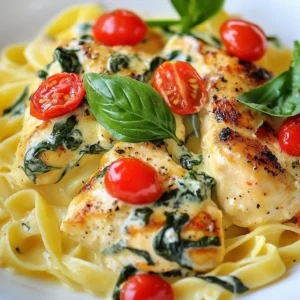
    One Pot Creamy Tuscan Chicken Easy and Tasty Meal
  • To make a great Buffalo Chicken Power Bowl, you'll need these key items: - 2 cups cooked quinoa - 1 pound boneless, skinless chicken breasts - 1/2 cup buffalo sauce (store-bought or homemade) - 1 tablespoon olive oil - 1 teaspoon garlic powder - 1 teaspoon onion powder - Salt and pepper to taste - 1 cup cherry tomatoes, halved - 1 cup cooked corn (fresh or frozen) - 1 avocado, sliced - 1 cup shredded romaine lettuce - 1/2 cup feta cheese, crumbled - Fresh cilantro or parsley for garnish These ingredients give the bowl its tasty flavor and healthy boost. Starting with quinoa keeps the base nutritious and filling. Chicken adds protein, while buffalo sauce brings a spicy kick. Fresh veggies like tomatoes and avocado add color and texture. Lastly, feta cheese and herbs give it a nice finish. You can make your Buffalo Chicken Power Bowls even better with these tasty additions: - Sliced jalapeños for heat - Greek yogurt or sour cream for creaminess - Chopped green onions for a fresh crunch - Extra buffalo sauce for spice lovers Feel free to mix and match toppings. They can change the dish's flavor and vibe. If you have dietary needs, here are some swaps you can try: - Use brown rice or cauliflower rice instead of quinoa for a different grain. - Swap out chicken for tofu, chickpeas, or tempeh for a plant-based option. - Use a dairy-free cheese instead of feta for a vegan bowl. - Choose low-sodium buffalo sauce if you want to cut back on salt. These options help everyone enjoy Buffalo Chicken Power Bowls. You can keep the flavors while making it fit your needs. {{ingredient_image_1}} Start by gathering all your ingredients. You need: - 2 cups cooked quinoa - 1 pound boneless, skinless chicken breasts - 1/2 cup buffalo sauce - 1 tablespoon olive oil - 1 teaspoon garlic powder - 1 teaspoon onion powder - Salt and pepper - 1 cup cherry tomatoes, halved - 1 cup cooked corn - 1 avocado, sliced - 1 cup shredded romaine lettuce - 1/2 cup feta cheese, crumbled - Fresh cilantro or parsley Next, preheat your oven to 400°F (200°C). This step helps cook the chicken evenly. While the oven heats, mix olive oil, buffalo sauce, garlic powder, onion powder, salt, and pepper in a bowl. Coat the chicken breasts with this marinade. Let it sit for 10 minutes to soak up the flavors. After marinating, place the chicken on a baking sheet. Bake it for 20 to 25 minutes. The chicken is done when it reaches 165°F (75°C). This step is crucial for food safety. Once cooked, let the chicken rest for 5 minutes. This makes it easier to shred. Use two forks to pull the chicken apart into bite-sized pieces. Now it’s time to build your power bowl! Start with a base of fluffy quinoa. Top it with the shredded buffalo chicken. Then, add halved cherry tomatoes, cooked corn, sliced avocado, and shredded romaine lettuce. Each layer brings a burst of flavor and texture. Finally, sprinkle crumbled feta cheese on top. For a finishing touch, garnish with fresh cilantro or parsley. If you like extra heat, drizzle a bit more buffalo sauce over the top. Enjoy your tasty Buffalo Chicken Power Bowl! To make your chicken burst with flavor, marinate it right. Mix olive oil, buffalo sauce, garlic powder, onion powder, salt, and pepper. Let it sit for at least 10 minutes. This helps the spices soak in. Bake your chicken at 400°F (200°C) for 20-25 minutes. This high heat locks in juices. Use a meat thermometer to check that it hits 165°F (75°C). Let the chicken rest before shredding. This keeps it moist and tender. Cooking quinoa is simple. Rinse it under cold water first to remove bitterness. Use a 2:1 water-to-quinoa ratio. For every cup of quinoa, add two cups of water. Bring it to a boil, then lower the heat. Cover and simmer for 15 minutes. After it’s done, fluff it with a fork. This makes it light and fluffy. If you want extra flavor, cook it in chicken broth instead of water. For the best power bowl, start with a base of quinoa. Layer on shredded buffalo chicken, then add cherry tomatoes, corn, and avocado. Finish with romaine lettuce and feta cheese. Garnish with fresh cilantro or parsley. If you like it spicy, drizzle extra buffalo sauce on top. This adds a kick and makes each bite exciting. Enjoy it fresh or make it a meal prep favorite! Pro Tips Marinating Time: Allow the chicken to marinate for at least 30 minutes if possible. This enhances the flavor and tenderness of the meat. Cooking Quinoa: Rinse quinoa under cold water before cooking to remove its natural coating, which can make it taste bitter. Chicken Shredding: For easier shredding, let the chicken rest for a few minutes after baking. This helps retain moisture. Serving Suggestions: Customize your power bowl with additional toppings like black beans, corn salsa, or your favorite hot sauce for extra flavor. {{image_2}} If you want a meatless meal, try using roasted chickpeas or grilled tofu. Both options add great protein and flavor. You can also use tempeh marinated in buffalo sauce. For a vegan twist, skip the feta cheese or use a dairy-free version. A mix of colorful veggies can make this bowl just as tasty. You don’t need to stick to chicken. Try shredded pork or beef for a different flavor. Grilled shrimp or salmon can also work well. For a plant-based option, use lentils or quinoa for protein. Each choice gives a unique taste while keeping the dish hearty and satisfying. Toppings can make your power bowl shine. Add sliced radishes for crunch and color. A dollop of Greek yogurt or sour cream adds creaminess. You could also sprinkle some chopped green onions for a fresh kick. Experiment with different toppings to find your favorite mix and match! To store your Buffalo Chicken Power Bowls, start by letting them cool. Use airtight containers to keep them fresh. I recommend keeping the chicken and quinoa separate from the veggies. This way, the veggies stay crisp. You can store everything in the fridge for up to three days. If you want to keep them longer, freeze the chicken and quinoa. They last about three months in the freezer. When you’re ready to eat your leftovers, reheat them with care. Use the microwave or a skillet. If using the microwave, cover the bowl with a damp paper towel. This helps keep the moisture in. Heat in short bursts. Stir in between to ensure even heating. If using a skillet, add a splash of water. Cover the pan to steam the food. This keeps the chicken juicy and the quinoa fluffy. Meal prep makes weeknight dinners easy. Cook a batch of quinoa and chicken on the weekend. Store them in separate containers. You can mix and match toppings each night. Try different veggies, like bell peppers or cucumbers. You can also switch up the sauces. A ranch dressing offers a cool twist. This way, you enjoy variety without extra work during the week. Yes, you can prepare these bowls ahead of time. Cook the chicken and quinoa first. Store each part in separate containers. This keeps them fresh. You can mix them together before serving. Just warm the chicken and quinoa in the microwave. Add the fresh toppings like avocado and lettuce just before eating. This way, they stay crisp and tasty. Making buffalo sauce at home is easy. You need just a few ingredients. Start with 1/2 cup of hot sauce. I like to use Frank's RedHot. Then, melt 1/4 cup of unsalted butter in a pan. Mix in the hot sauce and add 1 tablespoon of vinegar for tang. Stir it well and let it simmer for a few minutes. This sauce is perfect for your chicken! You have many tasty options for sides. Here are some ideas: - Celery sticks with ranch dressing for crunch. - Carrot sticks for a sweet touch. - Roasted broccoli for a healthy bite. - Sweet potato fries for a fun twist. These sides balance the heat of the buffalo chicken and add more flavor to your meal. Buffalo Chicken Power Bowls combine bold flavors and healthy ingredients. We covered essential items and fun toppings. You can also find the best ways to cook chicken and quinoa. Remember, these bowls fit various diets too. Meal prep ideas make your week easier. Try new flavors with unique toppings to change things up. Enjoy your tasty and nourishing meal any day!
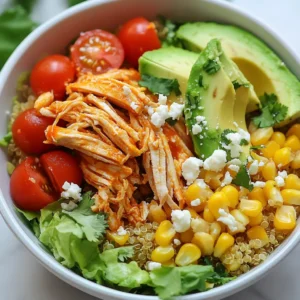
    Buffalo Chicken Power Bowls Tasty Meal for Any Night
  • To make this tasty Parmesan Ditalini Soup with Sausage, you'll need a few simple ingredients. Here’s the complete list: - 1 tablespoon olive oil - 1 medium onion, diced - 2 garlic cloves, minced - 1 carrot, diced - 1 celery stalk, diced - 1 pound Italian sausage (mild or spicy, your choice) - 6 cups chicken broth (low sodium) - 1 can (14.5 oz) diced tomatoes - 1 cup ditalini pasta - 2 cups kale, chopped - 1 teaspoon dried oregano - 1 teaspoon thyme - Salt and pepper to taste - 1/2 cup grated Parmesan cheese - Fresh parsley for garnish You can also add crusty bread to enjoy with your soup. This meal is warm and filling, making it perfect for any day. The cheese and sausage add great flavors and make it a real comfort dish. Enjoy cooking! {{ingredient_image_1}} 1. Sautéing vegetables: Start by heating 1 tablespoon of olive oil in a large soup pot over medium heat. Add 1 medium diced onion and cook it for about 5 minutes until soft. Next, stir in 2 minced garlic cloves, 1 diced carrot, and 1 diced celery stalk. Cook for another 3 to 4 minutes until everything smells good. 2. Cooking sausage: Now it’s time to add 1 pound of Italian sausage. You can choose mild or spicy, depending on your taste. Break the sausage apart with a spoon. Cook it for about 5 to 7 minutes until it is browned and fully cooked. 3. Adding broth and tomatoes: Pour in 6 cups of low-sodium chicken broth. Then, add 1 can of diced tomatoes with their juice. Bring this mixture to a boil. 4. Cooking ditalini pasta: When it starts boiling, add 1 cup of ditalini pasta. Cook it according to the package instructions, which usually takes about 8 to 10 minutes until the pasta is al dente. 1. Adding kale, herbs, and seasoning: After the pasta is ready, stir in 2 cups of chopped kale along with 1 teaspoon of dried oregano, 1 teaspoon of thyme, and some salt and pepper to taste. Cook for an extra 2 to 3 minutes until the kale wilts. 2. Incorporating Parmesan cheese: Remove the pot from heat and add 1/2 cup of grated Parmesan cheese. Stir well until the cheese melts and mixes into the soup. 3. Recommended preparation techniques: Taste your soup and adjust the seasoning if needed. For serving, ladle the soup into bowls and sprinkle with more Parmesan cheese and chopped fresh parsley. It pairs well with crusty bread for a complete meal. Enjoy this comforting dish! Sautéing your vegetables is key. Start with the onion and cook it until soft. This step builds a strong base for flavor. Then, add garlic, carrot, and celery. Cook these for a few minutes to release their scents. Timing matters when adding ingredients. Add the Italian sausage after the veggies. Cook it until it's brown and fully done. Then, pour in the chicken broth and diced tomatoes. This adds depth to your soup. Adjust your seasoning as you go. After adding the kale, taste your soup. If it needs salt or pepper, add a little at a time. This ensures balanced flavors throughout. Presentation makes a difference. Serve the soup in warm bowls. Top each bowl with extra Parmesan cheese and fresh parsley. This adds color and flavor. Pair your soup with crusty bread. A side salad works well, too. Both options complement the hearty soup nicely. Enjoy the warmth and comfort of this dish! Pro Tips Choose Your Sausage Wisely: Depending on your spice preference, opt for mild or spicy Italian sausage to tailor the flavor profile of your soup. Add Fresh Herbs: For an extra layer of flavor, consider adding fresh herbs like basil or thyme right before serving instead of dried ones. Perfect Pasta Cooking: To prevent the ditalini from becoming mushy, slightly undercook it in the soup and let it finish cooking off the heat. Garnish for Flavor: Don’t skip the fresh parsley and extra Parmesan on top; they add a vibrant touch and enhance the overall taste. {{image_2}} You can easily change the protein in this soup. If you want a lighter option, use turkey sausage. For a vegan twist, try plant-based sausage. Both options keep the dish tasty and satisfying. You can also switch up the pasta. Ditalini gives a nice bite, but other small pasta works too. Try elbow macaroni or orzo. If you want to add more greens, swap out kale for spinach or Swiss chard. They will add color and nutrition. Adding spices can boost the soup's flavor. Try a pinch of red pepper flakes for heat. A little smoked paprika adds depth. Fresh herbs like basil or thyme can bring brightness. Add these when you stir in the kale. You can also mix in other vegetables. Zucchini or bell peppers add sweetness and texture. Just chop them small and add them when you cook the onions. This keeps everything cooked evenly. After enjoying your Parmesan ditalini soup, store any leftovers in proper containers. Use airtight containers to keep the soup fresh. If you have a lot left, you can use freezer-safe bags or containers. Store the soup in the fridge for up to three days. If you want to keep it longer, freeze it. In the freezer, it can last up to three months. Just remember to label the containers with the date. When it's time to eat your leftovers, you can reheat the soup in a few ways. The best method is on the stove. Pour the soup into a pot and heat it over medium heat. Stir it often to keep it from sticking. You can also use the microwave. Place the soup in a microwave-safe bowl, cover it loosely, and heat in short bursts. Stir it between intervals to heat evenly. To keep the soup's texture and flavor, avoid boiling it. Reheat gently and add a splash of broth if it looks too thick. Enjoy your comforting soup just like the first time! Can I make this soup in advance? Yes, you can make this soup ahead of time. It tastes even better the next day. Just store it in the fridge. Reheat before serving, and it will be warm and tasty. What can I use instead of ditalini pasta? If you don't have ditalini, use small shells or elbow macaroni. These shapes work well and hold the soup's flavors nicely. How to adjust the spice level? To change the spice level, choose mild or spicy sausage. You can also add red pepper flakes for heat. Start small, then taste and add more if needed. Caloric breakdown per serving Each serving of this soup has about 350 calories. This number may change based on the sausage and cheese used. Health benefits of key ingredients - Kale: Rich in vitamins A, C, and K. Great for your immune system. - Italian sausage: Provides protein and iron, which are important for energy. - Parmesan cheese: Adds flavor and calcium, which is good for bones. This soup gives you a hearty meal packed with nutrients. This blog post covers a delicious soup recipe, from ingredients to storage tips. You learned how to sauté veggies, cook sausage, and enhance flavors. I shared good practices for serving and gave ideas for variations. Remember, you can adjust the recipe to fit your needs. This soup is more than a meal; it's a way to enjoy cooking. With these tips, you'll create something tasty and satisfying. Dive in and enjoy your culinary adventure!
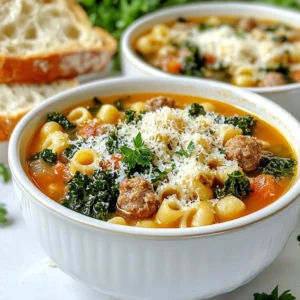
    Parmesan Ditalini Soup with Sausage Comfort Dish
  • - 1 pound beef sirloin, thinly sliced Beef sirloin is my go-to choice for this dish. It cooks fast and stays tender. Thin slices help the meat cook evenly and soak in flavor. - 2 cups broccoli florets Broccoli adds crunch and color. Choose bright green florets for the best taste. They cook quickly, making them perfect for stir-frying. - 3 cloves garlic, minced - 1-inch piece of ginger, grated Garlic and ginger bring strong flavors. Mince the garlic fine to release its oils. Grate the ginger for a fresh kick in every bite. - 3 tablespoons soy sauce - 1 tablespoon hoisin sauce - 1 tablespoon sesame oil These sauces create a rich flavor base. Soy sauce adds saltiness. Hoisin brings sweetness, while sesame oil adds a nutty aroma. - 2 teaspoons cornstarch - 1 cup beef broth Cornstarch helps thicken the sauce. Beef broth adds depth. Mix them in the right order for a smooth sauce. - 2 tablespoons vegetable oil - Cooked jasmine rice (for serving) - Toasted sesame seeds (for garnish) - Green onions, chopped (for garnish) Vegetable oil is best for high heat. Jasmine rice serves as a perfect base. Toasted sesame seeds and green onions add a nice finish. {{ingredient_image_1}} To start, take your thinly sliced beef sirloin. Place it in a bowl. Add 1 tablespoon of soy sauce and 1 teaspoon of cornstarch. Mix well. Let it marinate for about 15 minutes. This step helps the beef soak up flavor and become tender. While the beef marinates, let's make the sauce. In a separate bowl, combine the remaining soy sauce, hoisin sauce, sesame oil, and beef broth. Mix these ingredients well and set the sauce aside. This blend gives your dish a rich taste. Now, heat 1 tablespoon of vegetable oil in a large skillet or wok over medium-high heat. Once hot, add your marinated beef. Stir-fry for 2-3 minutes until it turns brown. Remove the beef and set it aside. In the same skillet, add another tablespoon of vegetable oil. Toss in 3 cloves of minced garlic and 1 inch of grated ginger. Sauté for about 30 seconds until you smell their wonderful aroma. Next, add 2 cups of broccoli florets to the skillet. Stir-fry for 2-3 minutes. The broccoli should turn bright green and be slightly tender. Return the cooked beef to the skillet. Pour the sauce mixture over the beef and broccoli. Stir well to combine everything. Let it cook for an additional 2-3 minutes. The sauce should thicken slightly. If you want it thicker, mix a bit more cornstarch with water. Add this to the skillet and stir until it blends. Finally, remove the stir-fry from the heat. Serve it over cooked jasmine rice. Garnish with toasted sesame seeds and chopped green onions. Enjoy your flavorful Minute Beef & Broccoli! To make the best stir-fry, use high heat. This helps cook food fast. Quick cooking keeps the beef juicy and the broccoli bright. Heat your skillet until it’s hot before adding oil. The oil should shimmer but not smoke. This method seals in flavor and gives you that great texture. To get tender beef, slice it thin. Cut against the grain; this breaks down the tough fibers. Marinate the beef for 15 minutes with soy sauce and cornstarch. This step not only adds flavor but also helps it stay soft during cooking. You can add extra flavor with a few simple touches. Consider adding red pepper flakes for heat or using oyster sauce for depth. Fresh herbs like cilantro or basil can brighten the dish. Garnishing with toasted sesame seeds and green onions adds a nice crunch and color. Pro Tips Slice the Beef Thinly: Thin slices of beef cook quickly and evenly, allowing for a tender texture in your stir-fry. Don’t Overcook the Broccoli: Keep the broccoli slightly crunchy for a vibrant color and better nutrients. Aim for a bright green color. Use High Heat: Stir-frying at high heat helps to sear the beef and vegetables quickly, locking in flavors and creating a delicious caramelization. Customize the Sauce: Feel free to add extra spices or sauces, like chili paste for heat or oyster sauce for a deeper flavor, to suit your taste. {{image_2}} You can switch the beef for other proteins. Chicken works great in this dish. Use thin slices of chicken breast. Cook it the same way as the beef. Shrimp is another tasty option. Just add it in the last few minutes of cooking. Tofu is perfect for a plant-based meal. Press the tofu to remove water, then cube it. Stir-fry the tofu until golden and add it to the dish. Broccoli is a star in this meal, but you can add more veggies. Bell peppers bring color and crunch. Slice them thin and toss them in when you add the broccoli. Snap peas are also a good choice. They add a nice sweetness. Other options include carrots, mushrooms, or bok choy. Feel free to mix and match. This helps you use what you have at home. The sauce can change to fit your taste. If you like it sweeter, add more hoisin sauce. For saltiness, you can use low-sodium soy sauce. You might want to try adding chili sauce for heat. This gives a nice kick to the dish. You can also use teriyaki sauce for a different flavor. Just remember to balance the tastes. Adjust each sauce to your liking for the best results. To store your leftovers, place them in an airtight container. This keeps the moisture in and prevents the beef from drying out. Make sure to cool the dish to room temperature before sealing it. Store it in the fridge for up to three days. Label the container with the date, so you know when to use it. Freezing Minute Beef & Broccoli is simple. Use freezer-safe bags or containers. Remove as much air as possible before sealing. This helps prevent freezer burn. You can freeze the dish for up to three months. When you're ready to eat, thaw it in the fridge overnight for the best results. To reheat, use the stovetop for the best texture. Add a splash of water or broth to the skillet. This helps steam the dish and keeps it moist. Heat over medium until warmed through. You can also use a microwave, but the stovetop method keeps the broccoli crisp and the beef tender. Minute Beef & Broccoli takes about 30 minutes to make. The prep time is about 15 minutes. You will spend another 15 minutes cooking. This dish cooks fast, which makes it perfect for busy nights. Yes, you can make Minute Beef & Broccoli in advance. It stores well in the fridge for up to three days. To prep, cook the dish fully and let it cool. Then, place it in an airtight container. You can also freeze it for up to three months. Just thaw it in the fridge before reheating. You can serve Minute Beef & Broccoli with cooked jasmine rice. This rice is light and fluffy, which makes a great base. Other good sides include steamed dumplings or a fresh salad. You can also add some spring rolls for a crunchy texture. Minute Beef & Broccoli is not gluten-free due to soy sauce and hoisin sauce. These sauces often contain gluten. If you need a gluten-free dish, look for tamari sauce. This soy sauce alternative works well and tastes great. Always check labels to ensure that sauces are gluten-free. In this post, we explored making a delicious Minute Beef & Broccoli. We covered essential ingredients like sirloin, fresh veggies, and key sauces and seasonings. You learned step-by-step instructions to stir-fry perfectly. Tips and tricks helped you achieve tender beef and enhance flavors. We also discussed variations and proper storage to maximize your meal's lifespan. Now, you have all the skills to create this dish with ease and confidence. Enjoy your cooking!
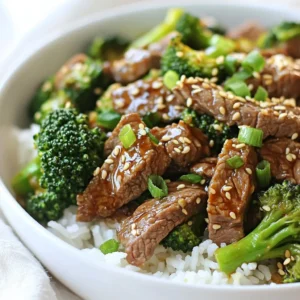
    Minute Beef & Broccoli Simple and Flavorful Dish
  • - 12 oz (340g) pasta (penne or fusilli work great) - 2 large red bell peppers - 1 tablespoon olive oil - 3 cloves garlic, minced - 1 cup heavy cream - ½ cup grated Parmesan cheese - 1 teaspoon Italian seasoning - Salt and pepper to taste - Fresh basil, chopped (for garnish) For pasta, I recommend Barilla or De Cecco. They offer great quality. Use California-grown red bell peppers for freshness. Look for Bertolli or Pompeian olive oil for your cooking needs. For cheese, I prefer Kraft or BelGioioso Parmesan. They melt beautifully in this dish. If you can’t find heavy cream, use half-and-half or coconut cream for a dairy-free option. For cheese, nutritional yeast works well for a vegan substitute. If you want a little spice, add crushed red pepper flakes to the sauce. You can also swap out the Italian seasoning for dried basil or oregano if you prefer. {{ingredient_image_1}} To start, you need to roast the red peppers. First, preheat your oven to 425°F (220°C). Cut the two large red bell peppers in half. Remove the seeds and place them cut side down on a baking sheet. Drizzle the peppers with olive oil. Roast them for 25-30 minutes. Look for charred and blistered skins. After roasting, let the peppers cool a bit. Once cool, peel off the charred skin and chop them into strips. Next, it’s time to cook the pasta. In a large pot, bring salted water to a boil. Add 12 oz of penne or fusilli pasta. Cook the pasta according to the package instructions until it is al dente. This usually takes about 8-10 minutes. When the pasta is done, reserve ½ cup of the pasta water. Then, drain the pasta and set it aside for later. Now, let’s make the sauce. In a large skillet, heat one tablespoon of olive oil over medium heat. Add three minced garlic cloves and sauté them for about one minute. You want the garlic to be fragrant but not burnt. Add the roasted red peppers to the skillet and cook for another two minutes. This helps the flavors blend. Then, transfer the garlic and peppers into a blender. Add one cup of heavy cream, ½ cup of grated Parmesan cheese, one teaspoon of Italian seasoning, and a pinch of salt and pepper. Blend everything until it is smooth and creamy. Finally, it’s time to combine the pasta and sauce. Pour the blended sauce back into the skillet. Warm it over low heat. If the sauce is too thick, add a little of the reserved pasta water until it reaches your desired consistency. Then, add the cooked pasta into the skillet. Toss everything together until the pasta is evenly coated in the creamy sauce. Now you're ready to plate the creamy roasted red pepper pasta! Enjoy your meal! Roasting the red peppers is key to this dish. I recommend using fresh, ripe red bell peppers. Their sweetness shines when roasted. Preheat your oven to 425°F (220°C) for best results. Cut the peppers in half and remove the seeds. Place them cut side down on a baking sheet. Drizzle with olive oil. Roast for 25-30 minutes. Look for charred and blistered skins. After roasting, let them cool slightly. This makes peeling easier. Once cool, the skins come off quickly. Chop the roasted peppers into strips for the sauce. A creamy sauce is what makes this dish stand out. After blending the roasted peppers, heavy cream, and cheese, check the thickness. If it's too thick, add some reserved pasta water. Start with a little water and blend again. This helps create a smooth, silky sauce. You want it to coat the pasta perfectly. A good sauce should cling to the noodles without being runny. Adjust the consistency to your liking. To boost the flavor, I suggest using fresh garlic. Sautéing the garlic in a bit of olive oil gives a nice aroma. The Italian seasoning adds depth. You can adjust it based on your taste. Want more flavor? Consider adding some crushed red pepper flakes for a kick. Fresh basil adds a bright note when you garnish the dish. Don't forget to sprinkle extra Parmesan on top for richness. All these tips will elevate your creamy roasted red pepper pasta! Pro Tips Use Fresh Ingredients: Fresh red bell peppers will provide a sweeter flavor and vibrant color to your sauce compared to canned or frozen options. Adjust Creaminess: If you prefer a lighter sauce, you can substitute half of the heavy cream with vegetable broth or use a lower-fat cream alternative. Add a Kick: For a spicy twist, consider adding a pinch of red pepper flakes or a dash of hot sauce to the sauce blend. Make It Vegan: To create a vegan version, swap heavy cream for coconut cream and use nutritional yeast instead of Parmesan cheese for a cheesy flavor. {{image_2}} You can add protein to creamy roasted red pepper pasta easily. Chicken, shrimp, or sausage work well. For chicken, grill or sauté it until cooked through. For shrimp, just cook until they turn pink. If you use sausage, cook it until brown. Mix the cooked protein into the pasta and sauce for a hearty meal. If you prefer a vegetarian option, skip the meat but add extra veggies. Spinach, zucchini, or mushrooms can enhance the dish. For a vegan version, use plant-based cream and cheese. Replace Parmesan with nutritional yeast for a cheesy flavor. This way, you keep the dish creamy and delicious without any animal products. To add heat, include red pepper flakes or diced jalapeños. You can also use spicy sausage in place of regular sausage. For a milder kick, add a dash of smoked paprika. Adjust the spice level to match your taste. This way, you can customize the flavor to your liking! To keep your creamy roasted red pepper pasta fresh, store it in an airtight container. Make sure to cool the pasta to room temperature before sealing it up. This helps prevent moisture build-up, which can make your pasta soggy. Leftovers can last in the fridge for up to three days. Label the container with the date to track freshness. When you're ready to enjoy your leftovers, reheat them gently. You can use the microwave or the stovetop. If using the microwave, place the pasta in a bowl and add a splash of water. Cover the bowl to keep moisture in. Heat in short bursts, stirring in between, until warm. For stovetop reheating, use a skillet over medium heat. Add a bit of olive oil or cream to keep the sauce creamy. Stir often to heat evenly without burning. If you want to store your creamy roasted red pepper pasta for longer, freezing is a great option. Place the cooled pasta in a freezer-safe container. Be sure to leave some space for expansion. Seal tightly and label with the date. It can last up to two months in the freezer. To thaw, move it to the fridge overnight or use the microwave. Reheat as mentioned, adding a little cream or pasta water to revive the sauce's smoothness. Creamy roasted red pepper pasta can last for about 3 to 4 days in the fridge. Make sure to store it in an airtight container. This keeps the pasta fresh and safe to eat. Always check for any signs of spoilage before you enjoy your leftovers. Yes, you can make the sauce ahead of time. Simply prepare the roasted red pepper sauce and store it in the fridge. It will stay good for about 3 days. When you are ready to eat, just heat it up, add the cooked pasta, and enjoy. This saves you time on busy days and makes meal prep easy. Some great sides to serve with creamy roasted red pepper pasta include: - Garlic bread for a crunchy, buttery contrast. - A fresh green salad to add a crisp, light element. - Roasted vegetables for extra flavor and nutrition. - Grilled chicken or shrimp for added protein. These sides complement the creamy sauce and enhance your meal experience. This blog outlined the tasty journey of making creamy roasted red pepper pasta. We covered the key ingredients and brands to use, plus fun substitutions. You learned step-by-step instructions, from roasting peppers to blending the sauce. I shared tips for perfecting the dish and ideas for tasty variations. Remember, careful storage helps keep leftovers fresh. With these insights, you can create a delicious meal any time. Enjoy cooking and sharing your new favorite pasta dish!
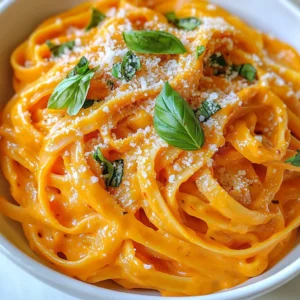
    Creamy Roasted Red Pepper Pasta Quick and Simple Meal
  • - 2 cups pumpkin puree (fresh or canned) - 2 cups all-purpose flour, plus extra for dusting - 1 large egg - 1 teaspoon salt - 1/4 teaspoon nutmeg - Freshly cracked black pepper to taste - 4 tablespoons unsalted butter - 10-12 fresh sage leaves - Grated Parmesan cheese for serving (optional) If you don’t have pumpkin puree, you can use butternut squash. It gives a similar taste. For a gluten-free option, swap out all-purpose flour with a gluten-free blend. You might need to adjust the amount a bit. Instead of sage, you can use thyme or rosemary for a different flavor. If you want a dairy-free version, skip the Parmesan cheese or use a plant-based alternative. This dish can serve four people, and each serving is rich in nutrients. Here’s a rough breakdown per serving: - Calories: 350 - Protein: 10g - Carbohydrates: 50g - Fat: 15g - Fiber: 3g - Sugar: 2g This meal provides a good balance of carbs and protein, plus healthy fats from the butter. It’s comforting and filling, perfect for fall! {{ingredient_image_1}} First, gather your ingredients. You need pumpkin puree, flour, an egg, salt, nutmeg, and black pepper. In a large bowl, mix the pumpkin puree, flour, egg, salt, nutmeg, and black pepper together. Stir until a soft dough forms. Be careful not to over-knead it. This dough should feel smooth and slightly sticky. Next, lightly flour a clean surface. Turn the dough out onto it. Divide the dough into four equal pieces. Take one piece and roll it into a long rope, about 1/2 inch thick. Cut the rope into 1-inch pieces. You can shape the gnocchi by rolling each piece over the back of a fork. This gives them ridges, which help hold the sauce later. Now it’s time to cook! Bring a large pot of salted water to a gentle boil. Add the gnocchi in small batches. Cook them until they float to the top, which takes about 2-3 minutes. This means they are ready! Use a slotted spoon to remove them and place them on a plate. In a large skillet, melt unsalted butter over medium heat. Once melted, add fresh sage leaves. Sauté for 2-3 minutes until the butter turns golden brown and the sage becomes crispy. Then, add your cooked gnocchi to the skillet. Gently toss them in the sage butter for a minute. When done, serve them right away. You can add grated Parmesan cheese if you like. Enjoy your meal! To get the best texture for your gnocchi, use fresh pumpkin puree. If using canned, drain it well to avoid excess moisture. Mix your dough gently, just until it forms. Over-kneading makes the gnocchi tough. Aim for a soft, slightly sticky dough. If it feels too wet, add a bit more flour, but not too much. The dough should hold together but still be soft. For this recipe, you’ll need a few simple tools: - Large mixing bowl - Clean work surface - Rolling pin - Fork (for making ridges) - Large pot for boiling - Slotted spoon for removing gnocchi - Large skillet for the sage butter These tools help keep the process smooth and fun. Pumpkin sage gnocchi pairs well with many dishes. Try it with a simple green salad for a light meal. A side of roasted vegetables adds great flavor. For a heartier option, serve it with grilled chicken or sautéed shrimp. You can also drizzle extra sage butter over pasta or risotto for a rich taste. Enjoy experimenting with flavors! Pro Tips Use Fresh Pumpkin: For the best flavor, use fresh pumpkin puree made from roasted pumpkin instead of canned. It adds a richer, more natural taste to your gnocchi. Don’t Over-Knead: When mixing the dough, be careful not to over-knead it, as this can lead to tough gnocchi. Mix just until combined for a lighter texture. Cooking in Batches: Cook the gnocchi in batches to avoid overcrowding the pot. This ensures they cook evenly and float to the top properly. Perfect Sage Butter: Let the butter brown slightly before adding the sage leaves, which will enhance the flavor. Watch closely to prevent burning. {{image_2}} You can make a vegan version of pumpkin sage gnocchi. Replace the egg with a mix of 1 tablespoon of ground flaxseed and 3 tablespoons of water. Let it sit for a few minutes. This helps bind the dough without eggs. The rest of the recipe stays the same. You’ll still get that lovely pumpkin flavor. For a gluten-free option, swap all-purpose flour with a gluten-free flour blend. Look for one that works well in baking. You might need to adjust the amount slightly. Start with 2 cups and add more if the dough is too sticky. This way, everyone can enjoy this tasty dish. You can add more flavors to your gnocchi. Try mixing in some garlic powder or onion powder into the dough for extra taste. For a spicy kick, add red pepper flakes. After cooking, toss the gnocchi with lemon zest. It adds a bright note that pairs well with sage. Fresh herbs like thyme or parsley can also boost the dish's flavor profile. To keep your leftover gnocchi fresh, place them in an airtight container. You can store them in the fridge for up to three days. Make sure they cool down first to avoid steam build-up. If you want to keep them longer, freezing is a better option. To freeze gnocchi, first spread them out on a baking sheet. Make sure they are not touching. Place the sheet in the freezer for about an hour. This helps them freeze individually. Once frozen, transfer the gnocchi to a freezer bag. They can last for up to three months in the freezer. To reheat the gnocchi, you have a few options. You can boil them in salted water until they float again. This takes about two to three minutes. Alternatively, you can sauté them in a skillet with a little butter. This gives them a nice crisp texture. If you frozen them, do not thaw first; just add them directly to the boiling water or skillet. Enjoy your warm, delicious gnocchi! Yes, you can use other types of squash. Butternut squash works well. You can also try acorn squash. Each type gives a unique taste. The texture may change slightly, but it will still be tasty. Homemade gnocchi lasts about three days in the fridge. Store them in an airtight container. Make sure they are cool before sealing. If you want to keep them longer, freezing is a great option. Serve the gnocchi warm, drizzled with sage butter. Add crispy sage leaves on top for crunch. A sprinkle of grated Parmesan cheese adds a nice touch. You can also pair it with a simple salad or roasted veggies for balance. This article covered everything you need for making pumpkin sage gnocchi. We explored the ingredients, found useful substitutions, and looked at the nutrition. I shared step-by-step instructions on prepping, shaping, and cooking the gnocchi for success. You learned tips for better texture and the best tools to use. We discussed tasty variations, storage tips, and answered common questions. Remember, with a few simple steps, you can make this dish shine. Enjoy your cooking journey and unleash your creativity with every bite!
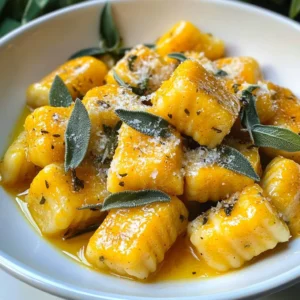
    Pumpkin Sage Gnocchi Flavorful Fall Comfort Dish
  • - 2 cups cooked chicken, shredded - 1 cup frozen mixed vegetables (peas, carrots, corn) - 1 cup cream of chicken soup - 1 cup chicken broth The base of this casserole is the cooked chicken. You can use rotisserie chicken for ease. The frozen mixed vegetables add color and nutrients. Cream of chicken soup brings creaminess and flavor, while chicken broth adds depth. - 1 teaspoon garlic powder - 1 teaspoon onion powder - 1 teaspoon dried thyme - Salt and pepper to taste - 1 teaspoon olive oil These seasonings boost the taste of your casserole. Garlic powder adds a nice kick. Onion powder gives it a sweet flavor. Thyme adds an earthy touch. Use salt and pepper to adjust to your liking. Olive oil helps to sauté the chicken and veggies. - 1 package (8 oz) refrigerated crescent roll dough - Fresh parsley, chopped (for garnish) The crescent roll dough is the star of the crust. It becomes flaky and golden when baked. Fresh parsley adds a splash of color and freshness to the dish. {{ingredient_image_1}} First, preheat your oven to 375°F (190°C). This step warms your oven so the casserole bakes evenly. Next, heat 1 teaspoon of olive oil in a large skillet over medium heat. This oil adds flavor and helps cook the chicken and veggies. In the skillet, add 2 cups of shredded cooked chicken and 1 cup of frozen mixed vegetables. Stir them well. Pour in 1 cup of cream of chicken soup and 1 cup of chicken broth. Mix everything together. Now, add 1 teaspoon of garlic powder, 1 teaspoon of onion powder, and 1 teaspoon of dried thyme. Season with salt and pepper to taste. Let this mixture simmer for about 5 minutes until it's hot. Pour the chicken and vegetable mixture into a greased 9x13 inch casserole dish. Spread it evenly across the bottom. Next, unroll the package of refrigerated crescent roll dough on a lightly floured surface. Use a rolling pin to gently roll each triangle into rectangles. Lay these rectangles over the chicken mixture, covering it completely. Place the casserole in your preheated oven. Bake for 25-30 minutes. Look for the crescent dough to be golden brown and puffed up. Once it’s done, remove it from the oven and let it cool for about 5 minutes before serving. This cooling time helps the filling set. Enjoy your delicious Chicken Pot Pie Casserole! To ensure a flaky crust, start with cold dough. This helps the dough rise better. When you roll out the crescent dough, do it gently. Avoid stretching it too much. This keeps the layers light and fluffy. To avoid a soggy bottom, make sure your filling is not too wet. Use only one cup of chicken broth. If your mixture looks too runny, simmer it longer. This helps the extra liquid cook off. Always let the casserole cool for a few minutes before serving. This allows it to set. One common mistake is overfilling the casserole. Stick to the amounts listed in the recipe. If you add too much filling, the dough may not cook right. Another mistake is not seasoning properly. Taste your filling before you pour it into the dish. Adjust the salt, pepper, or herbs as needed. Good seasoning makes all the difference in flavor. For ideal side dishes, consider serving a fresh salad. A simple green salad pairs well. You could also offer bread rolls. They soak up the extra sauce nicely. Pairing with salads or bread adds balance to your meal. The salad adds crunch, while the bread offers warmth. Both enhance the cozy feel of your chicken pot pie casserole. Pro Tips Use Rotisserie Chicken: For a quicker preparation, consider using store-bought rotisserie chicken instead of cooking your own. This saves time and adds wonderful flavor. Customize Your Vegetables: Feel free to mix and match the vegetables according to your preference. Broccoli, green beans, or bell peppers can add a different taste and texture. Make It Ahead: You can prepare the chicken and vegetable mixture a day in advance. Just assemble the casserole before baking to save time on busy nights. Check for Doneness: Baking times may vary based on your oven. Keep an eye on the crescent dough; it should be golden brown and puffed up for the best texture. {{image_2}} You can change the veggies in your chicken pot pie casserole. Try using: - Broccoli - Green beans - Bell peppers These options add color and taste. You can also switch proteins. Instead of chicken, use: - Turkey - Cooked ham - Tofu for a vegetarian twist If you need a gluten-free option, look for gluten-free crescent roll dough. Many brands offer this choice. For a healthier soup, swap the cream of chicken with: - Low-fat cream of mushroom - A homemade creamy soup These changes keep the dish tasty while fitting your needs. Boost the flavor with extra spices or herbs. Some great choices include: - Paprika - Rosemary - Basil You can also mix in cheese. Adding shredded cheddar or mozzarella gives a nice, creamy touch. Consider topping with breadcrumbs for crunch. These changes make your casserole even more delicious! You can store chicken pot pie casserole in the fridge for about three to four days. Make sure to let it cool first. Place it in an airtight container to keep it fresh. If you leave it uncovered, it may dry out. Label your container with the date. This helps you know how long it’s been stored. To freeze the casserole, let it cool completely. Then, wrap it tightly in plastic wrap or foil. You can also use a freezer-safe container. This will prevent freezer burn. It’s best to eat frozen portions within three months. To reheat, thaw it in the fridge overnight. Then, bake it at 350°F (175°C) until it’s hot all the way through. You can also microwave individual servings for a quick meal. For a meal, I suggest serving one to two cups per person. This can depend on how hungry everyone is. If you have a large gathering, you can easily double the recipe. Use a bigger dish to fit all the filling and dough. This way, everyone can enjoy a delicious serving. Yes, rotisserie chicken works well. It saves time and adds great flavor. Just shred the chicken and mix it with the other ingredients. This swap makes the cooking process quicker and easier. Baking the casserole takes about 25 to 30 minutes. You want the crescent roll dough to be golden brown and puffed. Keep an eye on it during the last few minutes. This ensures it comes out just right. Yes, you can prepare it ahead of time. Assemble the casserole and cover it. Store it in the fridge for up to 24 hours. When ready to bake, just pop it in the oven. You may need to add a few extra minutes to the baking time. The best way to reheat leftovers is to use the oven. Preheat it to 350°F (175°C). Place the casserole in an oven-safe dish and cover it. Heat for about 15 to 20 minutes. This keeps the crust nice and crisp. Absolutely! For a vegetarian option, swap the chicken for a mix of beans or extra veggies. You can use mushrooms or tofu for added protein. Replace the cream of chicken soup with a plant-based version. This keeps the dish tasty and filling. This chicken pot pie casserole combines simple ingredients for a comforting dish. You learned about the main components, seasonings, and crust choices. I shared tips to make the perfect casserole, common mistakes to avoid, and great serving ideas. Try ingredient swaps or dietary adjustments for variety. Store leftovers properly to enjoy them later. Making this dish is straightforward and rewarding. With these tips, you can create a meal that satisfies everyone at the table. Enjoy your cooking journey!
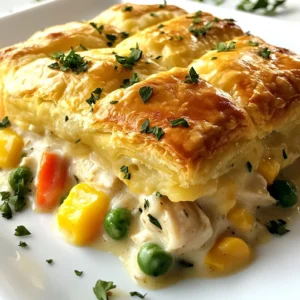
    Chicken Pot Pie Casserole Flavorful and Easy Meal
  • To make classic butter chicken, you'll need a few key items. Here’s the list: - 500g boneless chicken thighs, cubed - 1 cup plain yogurt - 2 tablespoons lemon juice - 1 tablespoon ginger-garlic paste - 2 teaspoons ground cumin - 2 teaspoons ground coriander - 1 teaspoon garam masala - 1 teaspoon turmeric powder - 1 teaspoon chili powder (adjust to taste) - Salt, to taste - 3 tablespoons unsalted butter - 1 medium onion, finely chopped - 1 cup tomato puree - 1 cup heavy cream - Fresh cilantro leaves, for garnish Each ingredient plays a part in creating the rich, creamy flavor. The chicken thighs add juiciness. Yogurt tenderizes the meat and adds tang. Lemon juice brightens the dish. The spices give it warmth and depth. Butter adds richness, while cream makes it smooth. Using fresh cilantro as a garnish adds a pop of color and freshness. Make sure you gather everything before starting. This way, you can focus on cooking and enjoy the process! {{ingredient_image_1}} First, mix the marinade. In a bowl, combine: - 1 cup plain yogurt - 2 tablespoons lemon juice - 1 tablespoon ginger-garlic paste - 2 teaspoons ground cumin - 2 teaspoons ground coriander - 1 teaspoon garam masala - 1 teaspoon turmeric powder - 1 teaspoon chili powder (adjust to taste) - Salt, to taste Stir these well until they blend. Now, add 500g of cubed boneless chicken thighs. Make sure each piece is coated. Cover the bowl and refrigerate for at least 1 hour. For best taste, let it marinate overnight. Next, heat a large skillet over medium heat. Melt 3 tablespoons of unsalted butter. Once melted, add 1 finely chopped medium onion. Sauté the onions until they are golden brown, about 5-7 minutes. Once golden, add the marinated chicken and the marinade to the skillet. Cook the chicken until it turns brown on all sides, which takes around 10 minutes. Now, pour in 1 cup of tomato puree. Bring it to a simmer. Cook for another 10 minutes until the sauce thickens a bit. Then, stir in 1 cup of heavy cream. Let it simmer for an extra 5 minutes. This helps all the flavors mix well. Adjust the salt if needed. Finally, remove the skillet from the heat. Garnish with fresh cilantro leaves for a pop of color. Serve your Butter Chicken in a large bowl. I recommend pairing it with naan or steamed basmati rice. For a special touch, drizzle a bit of cream on top. Enjoy this tasty comfort food! To get the best flavor, marinate the chicken. I suggest marinating for at least one hour. For richer taste, let it sit overnight. The longer you marinate, the better the spices soak in. Adjust the spices to control the heat. Start with one teaspoon of chili powder. If you like it spicy, add more. Always taste before serving to find your perfect balance. Use a heavy skillet for the best results. A non-stick or cast-iron skillet works great. These pans hold heat evenly, which helps cook the chicken well. When sautéing onions, cook them on medium heat. Stir often to prevent burning. Golden brown onions add a sweet taste to your dish. This step makes a big difference in flavor. Garnishing is easy and fun! Add fresh cilantro on top right before serving. A drizzle of cream adds a nice touch, too. Serve the Butter Chicken in a big bowl or on individual plates. Pair it with naan or basmati rice. This not only looks nice but makes the meal feel special. Pro Tips Marinate for Maximum Flavor: Allow the chicken to marinate overnight for the best flavor infusion. The longer it sits, the more tender and flavorful it becomes. Use Ghee for Authentic Taste: For a richer flavor, substitute the unsalted butter with ghee, which is a traditional cooking fat used in Indian cuisine. Adjust Spice Level: Control the heat of the dish by adjusting the chili powder according to your preference. Start with less and increase gradually. Serve with Accompaniments: Enhance your meal by serving Butter Chicken with naan, steamed basmati rice, or a side of cucumber raita for a refreshing contrast. {{image_2}} Punjabi Butter Chicken Punjabi butter chicken is rich and creamy. It often uses more spices than other styles. This version features a smoky flavor. You can achieve this by cooking the chicken in a tandoor or oven. The marinated chicken gets grilled first, adding depth to the dish. The sauce remains buttery and delicious, making it a favorite. Addition of different vegetables You can add vegetables to your butter chicken for more color and nutrition. Peas, bell peppers, and spinach work great. Just sauté the veggies before adding the chicken. This gives a fresh twist to the classic dish while keeping it hearty. Gluten-free options Butter chicken is naturally gluten-free. Just ensure you use gluten-free naan or rice. This way, you can enjoy the dish without worry. Always check labels on sauces and spices to be safe. Plant-based alternatives If you're looking for a plant-based version, replace chicken with tofu or chickpeas. Use coconut cream instead of heavy cream for a rich taste. The spices will still shine through, making it a wonderful meal. Cream-free versions You can make a cream-free butter chicken. Use cashew cream or almond milk for a lighter sauce. This keeps the dish creamy without using dairy. Blend soaked cashews with water for a smooth texture. Variations with different types of tomatoes Switching up tomato puree can change the flavor. Use fresh tomatoes for a brighter taste. Alternatively, try fire-roasted tomatoes for a smoky touch. Each option brings a new layer to your butter chicken. To store leftover butter chicken safely, let it cool first. Place it in an airtight container. This keeps moisture in and odors out. Store it in the fridge for up to three days. If you want to eat it later, make sure to reheat it well. For the best freezing results, use a freezer-safe container. You can also use heavy-duty freezer bags. Squeeze out as much air as you can before sealing. Butter chicken can be frozen for up to three months. When you want to eat it, thaw it overnight in the fridge. Reheat it on the stove over low heat for the best texture. Stored butter chicken lasts about three days in the fridge and three months in the freezer. Watch for signs of spoilage. If you see mold or a sour smell, toss it out. Always trust your senses when it comes to food safety. Butter chicken is a rich and creamy dish from India. It uses marinated chicken cooked in a spiced tomato sauce. This dish is known for its smooth texture and deep flavors. It started in Delhi, India, in the 1950s. It became popular for its comfort food qualities. People enjoy it in homes and restaurants alike. Yes, you can make butter chicken ahead of time. It tastes even better the next day! To prep, follow these steps: - Marinate the chicken at least one hour before cooking. - Cook the dish fully, then cool it down. - Store it in an airtight container in the fridge. It will stay fresh for about three days. When ready to eat, just reheat it on the stove. To make butter chicken less spicy, reduce the chili powder. Start with half a teaspoon, then taste. If you want it milder, you can skip the chili powder. You can also add more cream to cool down the heat. This will help balance the spice without losing flavor. Butter chicken pairs well with several side dishes. Here are some popular options: - Naan bread: Soft and perfect for scooping up sauce. - Steamed basmati rice: The fluffy grains soak up the sauce well. - Cucumber salad: A fresh side that adds crunch and cools the palate. - Roasted vegetables: Adds color and nutrients to your meal. These sides enhance the butter chicken experience. Enjoy experimenting with your favorites! This blog post covered how to make Butter Chicken. You learned about the key ingredients and simple steps to cook it. We also shared tips for authentic flavor and presentations to impress. You now know how to store leftovers and some tasty variations to try. Butter Chicken is a versatile dish that’s great for meals at home or entertaining guests. Try these ideas and enjoy each bite of this rich and flavorful meal!
    Classic Butter Chicken Flavorful Comfort Food Recipe
  • For my Vegan Lentil Shepherd's Pie, I use 1 cup of green or brown lentils. Rinse them well before cooking. Lentils are packed with protein and fiber. They offer a hearty base for this dish. Cook them in boiling water for about 25 minutes until tender. The mix of vegetables adds great flavor and texture. I use: - 1 medium onion, diced - 2 medium carrots, diced - 2 celery stalks, diced - 3 cloves garlic, minced Sauté these vegetables in olive oil until they soften. This step brings out the natural sweetness in the onion and carrots. I love using herbs to enhance flavor. For this recipe, I add: - 1 teaspoon dried thyme - 1 teaspoon dried rosemary - 2 tablespoons tomato paste - 2 cups vegetable broth - Salt and pepper to taste These seasonings create depth in the lentil mix. Tomato paste gives it a rich taste, while vegetable broth adds moisture. The topping is what makes this pie special. I use: - 4 large potatoes, peeled and quartered - 1/4 cup almond milk (or any plant-based milk) - 2 tablespoons vegan butter Boil the potatoes until fork-tender, then mash them with almond milk and vegan butter. This gives a creamy texture that contrasts nicely with the lentils. Each ingredient plays an important role in making this dish hearty and flavorful. {{ingredient_image_1}} First, take a large pot and fill it with water. Add one cup of rinsed green or brown lentils. Bring the water to a boil and cook the lentils for about 25 minutes. You want them tender but not mushy. Once done, drain the lentils and set them aside. This step gives the pie its hearty base. In a large skillet, pour two tablespoons of olive oil. Turn the heat to medium and let it warm up. Dice one medium onion, two medium carrots, and two celery stalks. Add these to the hot oil. Sauté them for about 5 to 7 minutes until they soften. Next, stir in three minced garlic cloves, one teaspoon of dried thyme, and one teaspoon of dried rosemary. Cook for another minute until the aroma fills the kitchen. Now, add the cooked lentils to the skillet with the sautéed veggies. Mix in two tablespoons of tomato paste and two cups of vegetable broth. Bring this mixture to a gentle simmer. Let it cook for about 10 minutes, stirring occasionally. Afterward, add one cup of frozen peas. Season with salt and pepper to taste, then remove from heat. This mixture is the heart of your shepherd's pie. While the lentils simmer, take four large peeled potatoes and quarter them. In a separate pot, boil these potatoes for about 15 to 20 minutes, until they are fork-tender. Drain the potatoes and return them to the pot. Add 1/4 cup of almond milk and two tablespoons of vegan butter. Mash until smooth and creamy. This topping will create a delicious layer for your pie. Preheat your oven to 400°F (200°C). Grab a large baking dish and spread the lentil mixture evenly across the bottom. Next, take the creamy mashed potatoes and spread them on top. Use a spatula to smooth them out. This creates a beautiful layer of comfort. Place the assembled pie in your preheated oven. Bake for about 20 to 25 minutes. You want the mashed potatoes to turn slightly golden and crispy on top. Once done, take it out and let it cool for a few minutes. Spoon out portions and enjoy your hearty vegan shepherd's pie! To make great mashed potatoes, choose the right potatoes. I like using Yukon Gold or Russet. They mash well and give a creamy texture. Boil the potatoes until fork-tender, about 15-20 minutes. After draining, return them to the pot. This helps evaporate extra water. Add 1/4 cup of almond milk and 2 tablespoons of vegan butter. Mash until smooth. Taste and adjust salt if needed. For a bit of flavor, try adding garlic powder or nutritional yeast. Seasoning can elevate your dish. I recommend using dried thyme and rosemary for classic flavors. You can add more herbs like oregano or basil if you like. For a kick, sprinkle in some smoked paprika or chili powder. Use fresh herbs if you have them. Fresh parsley or chives can brighten up the dish. Remember to taste as you go. Adjust salt and pepper to your preference. Vegan Lentil Shepherd’s Pie is perfect for meal prep. You can make it ahead and store it in portions. Prepare the lentil filling and mashed potatoes as usual. Then layer them in a baking dish. Cover it well and refrigerate for up to 3 days. When ready to eat, just pop it in the oven at 400°F (200°C) for about 25-30 minutes. If frozen, thaw it overnight in the fridge before baking. This makes meals easy and tasty throughout the week! Pro Tips Choose the Right Lentils: Green or brown lentils work best for this recipe as they hold their shape and texture during cooking, making the filling hearty and satisfying. Enhance Flavor: For a deeper flavor profile, consider adding a splash of soy sauce or liquid smoke to the lentil mixture before baking. Perfect Mashed Potatoes: For extra creamy mashed potatoes, ensure your potatoes are well-drained after boiling and use warm almond milk and vegan butter when mashing. Make it Ahead: This shepherd's pie can be assembled a day in advance. Just cover it tightly and store it in the fridge until you’re ready to bake. {{image_2}} You can change up the veggies in this shepherd’s pie. Try using mushrooms, bell peppers, or zucchini. They add great flavor and texture. If you want to sneak in some greens, add spinach or kale. They cook down nicely and boost nutrition. Just make sure to chop them small so they blend well with lentils. If you need a gluten-free dish, this recipe is easy to adapt. Use gluten-free vegetable broth. Also, make sure your tomato paste is gluten-free. Most brands are, but it’s good to check. You can enjoy all the flavors without worry. While mashed potatoes are classic, you can switch things up. Try mashed sweet potatoes for a sweeter taste. Cauliflower mash is another great option for a lighter topping. You could even use a crust made from oats or ground nuts. Each option gives a new twist to the dish. To reheat your Vegan Lentil Shepherd’s Pie, place it in a microwave-safe dish. Heat it in the microwave for 2-3 minutes. Stir halfway through for even heating. You can also reheat it in the oven. Preheat the oven to 350°F (175°C). Cover the dish with foil and warm it for about 15-20 minutes. This keeps the pie from drying out. You can freeze Vegan Lentil Shepherd’s Pie for later meals. Let it cool completely before freezing. Transfer the pie to an airtight container or wrap it tightly in plastic wrap. It can stay fresh in the freezer for up to 3 months. To enjoy later, thaw it in the fridge overnight before reheating. Store leftover Vegan Lentil Shepherd’s Pie in the refrigerator. Place it in a sealed container. It will stay good for about 3-5 days. Always check for any signs of spoilage before eating. Enjoy this hearty meal again and again! Yes, you can use other lentils. Red lentils cook faster but turn mushy. Green or brown lentils hold their shape well and give a hearty texture. Both work great in this dish. You might need to adjust cooking time based on the type you choose. Absolutely! This Vegan Lentil Shepherd’s Pie is perfect for meal prep. It stores well in the fridge and reheats nicely. You can make a big batch, then portion it out for easy meals during the week. Yes, you can make this dish ahead of time. Prepare it, then let it cool. Cover it well and store it in the fridge. Bake it when you are ready to eat. This way, the flavors deepen, making it even tastier. If you need a substitute, use any plant-based milk. Soy milk, oat milk, or coconut milk work well. Each will add a different flavor, so choose what you like best. The key is to keep it creamy for the mashed potatoes. This dish pairs well with a simple salad or steamed veggies. You can serve it with crusty bread for a filling meal. If you want, add a tangy sauce on the side. Enjoy the flavors together for a complete experience! In this blog post, we explored how to make a delicious Vegan Lentil Shepherd's Pie. We covered key ingredients like lentils, veggies, and seasonings. I shared step-by-step instructions, from prepping lentils to baking the pie. You learned useful tips for perfect mashed potatoes and variations to fit your diet. Finally, we discussed storage and reheating. This dish is flexible and fun. Try it out and make it your own! Enjoy a hearty meal that's both tasty and healthy.
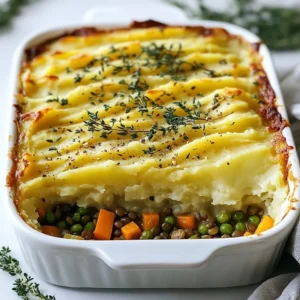
    Vegan Lentil Shepherd’s Pie Hearty and Flavorful Meal
  • - 2 cups rotini pasta - 2 cups cooked chicken breast, shredded - 1 cup romaine lettuce, chopped - 1/2 cup cherry tomatoes, halved - 1/2 cup Caesar dressing - 1/4 cup grated Parmesan cheese - 1/4 cup croutons - 1 tablespoon lemon juice The main ingredients create a tasty base for the Chicken Caesar Pasta Salad. The rotini pasta provides a fun twist. It holds the dressing well, making each bite burst with flavor. The cooked chicken breast adds protein and a savory taste. Shredded chicken works best, as it mixes easily with pasta. Romaine lettuce adds a nice crunch and freshness. Meanwhile, halved cherry tomatoes give a pop of color and sweetness. Caesar dressing is key. It brings all the flavors together. Grated Parmesan cheese adds a rich taste, while croutons add a delightful crunch. A squeeze of lemon juice brightens the salad and enhances the flavors. - Fresh parsley - Other protein options You can add fresh parsley for color and a hint of flavor. It makes the dish look pretty too. If you want more protein, try using shrimp or turkey. These options can change the taste and feel of the salad. - Salt - Pepper Finally, don’t forget salt and pepper. These basic seasonings can make a big difference. Just a sprinkle can enhance the taste. Keep in mind that the dressing and cheese may add some saltiness, so taste before seasoning. {{ingredient_image_1}} - Boil the rotini pasta: Start by boiling a large pot of salted water. Add the rotini pasta and cook it until it is al dente. This usually takes about 8 to 10 minutes. Stir the pasta occasionally to prevent sticking. - Cooling the pasta: Once cooked, drain the pasta in a colander. Rinse it under cold water to stop the cooking process. This helps keep the pasta from getting mushy in your salad. Let it sit while you prepare the other ingredients. - Shredding cooked chicken breast: If you don’t have any cooked chicken prepared, you can roast or boil your chicken breast. After cooking, let it cool for a few minutes. Then use two forks to shred the chicken into bite-sized pieces. Set it aside for later. - Combining dressing and lemon juice: In a large mixing bowl, pour in the Caesar dressing. Add the tablespoon of lemon juice. Whisk them together until they blend well. This brings a fresh taste to your salad. - Tossing ingredients together: Add the cooled rotini pasta to the bowl with the dressing. Next, include the shredded chicken, chopped romaine lettuce, halved cherry tomatoes, and grated Parmesan cheese. Gently toss everything together. You want it evenly coated. - Final seasoning: After mixing, taste the salad. Add salt and pepper if needed. Remember, the dressing and cheese can add saltiness, so adjust carefully. Each step is simple and brings you closer to a tasty Chicken Caesar Pasta Salad. Enjoy the fun of making this easy recipe! To make the best Chicken Caesar Pasta Salad, cook the pasta al dente. This means the pasta should be firm, not too soft. Overcooked pasta can become mushy in the salad. After cooking, rinse the pasta under cold water to stop cooking and cool it down. Chill the salad before serving. This helps the flavors blend. Place it in the fridge for at least 30 minutes. The cold salad is refreshing, especially on warm days. Garnish with fresh parsley for color and taste. Just sprinkle it on top before serving. It adds a nice touch and bright flavor. Choose the right serving dish. A large platter works well for gatherings. Individual bowls are great for smaller meals. Both options make serving easy. Customize the dressing amounts to suit your taste. Some like it creamy, while others prefer less. Start with half a cup of Caesar dressing and adjust from there. For crunchy croutons, add them just before serving. If they sit too long, they can become soggy. Keep them separate until you are ready to eat. Pro Tips Cook Pasta Al Dente: Ensure the rotini pasta is cooked al dente for the best texture. This prevents the pasta from becoming mushy when mixed with the dressing. Use Fresh Ingredients: Fresh romaine lettuce and ripe cherry tomatoes enhance the flavor and texture of the salad. Opt for high-quality Caesar dressing for a richer taste. Chill Before Serving: For optimal flavor, chill the pasta salad in the fridge for at least 30 minutes before serving. This allows the flavors to meld beautifully. Customize Your Salad: Feel free to add other ingredients like bacon bits, olives, or avocado for additional flavor and texture variations. {{image_2}} You can change the pasta shape in this salad. Try penne, fusilli, or even farfalle. Each shape offers a fun twist. You can also switch up the protein. Use turkey, shrimp, or even grilled veggies. These options keep the salad fresh and exciting. Make your own Caesar dressing for a special touch. You’ll need garlic, anchovies, egg yolk, lemon juice, and Parmesan cheese. Blend these for a creamy mix. If you want a lighter option, use Greek yogurt instead of mayonnaise. This keeps the flavor while cutting calories. Add more veggies for crunch and color. Try bell peppers, cucumbers, or even avocado. They all add a lovely taste. You can also switch the cheese. Instead of Parmesan, use feta or goat cheese for a unique flavor twist. These changes add depth to your Chicken Caesar Pasta Salad. To keep your Chicken Caesar Pasta Salad fresh, store it in the fridge. Use airtight containers to prevent spills and keep the salad crisp. Glass containers work well, as do plastic ones. Make sure to cool the salad completely before sealing the container. This helps it stay fresh longer. You can enjoy this salad cold or warm. If you prefer it warm, the stovetop is best. Heat it gently in a skillet over low heat. Stir often to avoid burning. The microwave is also an option. Heat in short bursts, stirring in between. Be careful not to overheat, or the salad may get soggy. In the fridge, your Chicken Caesar Pasta Salad lasts about three to four days. After that, the quality starts to decline. Always check for any off smells or changes in texture before eating leftovers. For best taste, enjoy it within the first couple of days. Yes, you can use rotisserie chicken. It saves time and adds flavor. Rotisserie chicken is already cooked, so you can shred it quickly. This chicken is juicy and tender, making your salad taste great. Plus, it gives you more time to relax and enjoy your meal. Yes, this salad works well for meal prep. You can make it ahead and store it in the fridge. Here are some tips for meal prep: - Prep ingredients separately: Store pasta, chicken, and veggies apart from the dressing. - Mix before eating: Combine all ingredients just before you eat. This keeps the salad fresh. - Use airtight containers: This helps keep everything crisp and tasty. Absolutely! You can choose gluten-free pasta. Many brands offer tasty options made from rice or chickpeas. Check the labels to find the best choice for you. This way, you can enjoy the salad without gluten. This blog post covered how to make a delicious rotini Caesar salad. We discussed key ingredients like pasta, chicken, lettuce, and dressing. I shared step-by-step instructions to help you mix everything perfectly. We explored tips for enhancing flavor and variations to keep it fresh. Don't forget about storage tips to keep leftovers tasty. Now you have the tools to create your own salad. Enjoy experimenting with flavors and ingredients that fit your taste. Happy cooking!
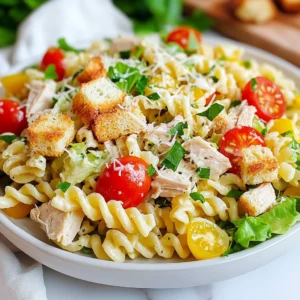
    Chicken Caesar Pasta Salad Delightful and Easy Recipe
  • - Chickpeas and Vegetables - 1 can (15 oz) chickpeas, drained and rinsed - 2 cups mixed bell peppers (red, yellow, green), diced - 1 medium zucchini, chopped - 1 cup cherry tomatoes, halved - 1 red onion, cut into wedges - Seasonings - 2 tablespoons olive oil - 1 teaspoon garlic powder - 1 teaspoon smoked paprika - 1/2 teaspoon cumin - Salt and pepper to taste - Base and Garnish - 2 cups cooked quinoa or brown rice - Fresh parsley for garnish - Lemon wedges for serving Using these ingredients gives the bowls a great taste and vibrant colors. The chickpeas bring protein, while the veggies add crunch and flavor. You can mix and match veggies based on your favorites. The seasonings make every bite tasty and exciting. I love using quinoa or brown rice as the base. They make the meal hearty and filling. Fresh parsley on top adds a nice touch, and lemon wedges give a zesty kick. You can feel good knowing that every bite is healthy and delicious! {{ingredient_image_1}} Preheating the Oven First, set your oven to 425°F (220°C). This heat helps the veggies get tender and golden. Veggie and Chickpea Mixing In a big bowl, mix these items: - 1 can (15 oz) chickpeas, drained and rinsed - 2 cups mixed bell peppers, diced - 1 medium zucchini, chopped - 1 cup cherry tomatoes, halved - 1 red onion, cut into wedges Next, drizzle on 2 tablespoons of olive oil. Then, add 1 teaspoon garlic powder, 1 teaspoon smoked paprika, and 1/2 teaspoon cumin. Don't forget to add salt and pepper to taste. Toss everything well until all the veggies and chickpeas get coated. Baking Instructions Spread the mix evenly on a large baking sheet lined with parchment paper. This keeps them from sticking. Roast for about 25-30 minutes. Stirring Tips Halfway through roasting, take the sheet out and stir the veggies. This step ensures even cooking and nice caramelization. Bowl Construction Once the veggies and chickpeas are done, let them cool for a few minutes. In each bowl, start with a base of 2 cups cooked quinoa or brown rice. Then, add a generous scoop of the roasted mix. Garnishing To finish, sprinkle fresh parsley on top. Add lemon wedges on the side. A squeeze of lemon gives a bright flavor that enhances the dish. Ensuring Crispiness To make your vegetables crispy, use a hot oven. Preheat it to 425°F (220°C). Spread the veggies in a single layer on your baking sheet. This helps them brown evenly. Stir halfway through roasting. This keeps them from sticking and helps them cook well. Flavor Enhancements Add more flavor by using fresh herbs. Basil or thyme work great. You can also mix in a splash of balsamic vinegar before serving. This adds a nice tang. Try different spices like cayenne pepper for heat or oregano for depth. Bowl Styling Ideas Use colorful bowls to show off your dish. A bright bowl makes the food pop. Layer the ingredients for a nice look. Start with a base of quinoa or rice. Then, add the roasted veggies and chickpeas on top. Finally, sprinkle fresh parsley for a touch of green. Serving Suggestions Serve with lemon wedges for a fresh burst of flavor. A drizzle of olive oil just before serving adds richness. You can also serve with a side salad or some crusty bread to make it a full meal. Pro Tips Roasting Veggies: For a more intense flavor, try marinating the chickpeas and vegetables in the olive oil and spices for at least 30 minutes before roasting. Quinoa Cooking: To enhance the flavor of your quinoa or brown rice, cook it in vegetable broth instead of water for added depth. Colorful Presentation: Arrange the roasted veggies and chickpeas in a rainbow pattern on top of your base for a visually stunning dish. Make it a Meal Prep: This dish stores well in the fridge, making it perfect for meal prep. Just reheat and enjoy throughout the week! {{image_2}} Different Vegetables You can mix and match many vegetables in this dish. Try using carrots, broccoli, or sweet potatoes. Each vegetable brings its own taste and texture. For a twist, add some spinach or kale after roasting. This adds color and nutrients. Alternative Bases If quinoa or brown rice is not your style, swap them for farro or couscous. Both options work well and add different flavors. You can even use a bed of greens like arugula or spinach for a lighter meal. This change gives a fresh crunch to your bowl. Vegan Options This recipe is already vegan as it contains no animal products. To boost protein, add more chickpeas or toss in some black beans. You can also top it with avocado or tahini for creaminess and flavor. Gluten-Free Adjustments If you need a gluten-free meal, stick with quinoa or rice. Both are naturally gluten-free and work great as a base. Always check the labels of any packaged ingredients to be safe. This way, you can enjoy your meal without worry. To keep your roasted vegetable chickpea bowls fresh, follow these steps: - Refrigeration Guidelines: Place leftovers in an airtight container. Store them in the fridge for up to 4 days. Make sure to cool the dish before sealing the container. This prevents moisture buildup. - Freezing Instructions: If you want to keep leftovers longer, freeze them. Use a freezer-safe bag or container. Squeeze out air to avoid freezer burn. They can last up to 3 months in the freezer. When you're ready to eat, thaw in the fridge overnight. To enjoy your roasted vegetable chickpea bowls again, reheating is key: - Best Methods for Reheating: The oven is best for even heating. Preheat it to 350°F (175°C). Place your bowl on a baking sheet and cover it with foil. Heat for 15-20 minutes. You can also use a microwave. Place your bowl in a microwave-safe dish. Heat in short bursts, stirring in between. - Ensuring Quality After Storage: To keep the flavors fresh, add a splash of lemon juice before serving. This brightens the dish. Check the texture as well; if it seems dry, drizzle a bit of olive oil. Enjoy the deliciousness! Yes, you can use frozen vegetables. They save time and add convenience. Just make sure to thaw them first. Pat them dry to avoid excess moisture. This helps ensure your veggies roast well and get that nice caramelized look. To boost protein in your Roasted Vegetable Chickpea Bowls, add extra chickpeas. You can also mix in some cooked lentils or tofu. Another great option is to top the bowls with a dollop of Greek yogurt or a sprinkle of feta cheese. These additions not only add protein but also enhance the dish's flavor. Roasted Vegetable Chickpea Bowls are very versatile. You can serve them warm or chilled. They pair well with a squeeze of fresh lemon for brightness. Try adding a drizzle of tahini or your favorite dressing for extra flavor. For a side, consider serving a light salad or some pita bread to complete the meal. This blog post shared how to create delicious roasted vegetable chickpea bowls. We covered the key ingredients, step-by-step instructions, and handy tips for cooking and presentation. You learned about ingredient swaps and dietary modifications, ensuring everyone can enjoy this dish. Lastly, we discussed the best ways to store and reheat leftovers for quality meals later. Keep these ideas in mind to impress your family and friends with tasty, healthy bowls!
    Roasted Vegetable Chickpea Bowls Flavorful and Nutritious
  • For these tasty power bowls, you need: - 1 lb ground chicken - 1 cup quinoa - 2 cups chicken broth (or water) - 1 cup cherry tomatoes, halved - 1 large avocado, diced - 1 cup black beans, drained and rinsed - 1 bell pepper, diced (red or yellow) - 1 teaspoon cumin - 1 teaspoon smoked paprika - 1 tablespoon olive oil - Salt and pepper to taste Each ingredient adds flavor and nutrition. Ground chicken is lean and packed with protein. Quinoa is a healthy grain rich in fiber. Cherry tomatoes give a sweet burst, while avocado adds creaminess. Black beans are full of nutrients, and bell peppers add crunch. You can make your bowls even better with these toppings: - Fresh cilantro for garnish - Lime wedges for serving Cilantro brightens the dish with fresh flavor. Lime juice adds a zesty kick that enhances all the flavors. This meal is not only delicious but also nutritious. Ground chicken provides protein, which helps build muscle. Quinoa offers complex carbs for energy and fiber for digestion. Avocado gives healthy fats that keep you full. Black beans add more protein and fiber, making this bowl a well-rounded meal. With colorful veggies, you get vitamins and minerals to boost your health. This bowl is a smart choice for a quick, healthy meal. {{ingredient_image_1}} Start by rinsing the quinoa. Place it in a fine mesh strainer and run cold water over it. This step cleans the quinoa and removes any bitter taste. Next, take a medium saucepan and add the rinsed quinoa and chicken broth or water. Bring this mixture to a boil over high heat. Once boiling, reduce the heat to low. Cover the saucepan and let it simmer for 15 to 20 minutes. In this time, the quinoa will absorb the liquid and become fluffy. After cooking, take it off the heat and let it sit covered for 5 more minutes. Finally, use a fork to fluff the quinoa before serving. While the quinoa cooks, grab a large skillet and heat olive oil over medium heat. Once the oil is hot, add the ground chicken. Cook it for about 5 to 7 minutes. As it cooks, break it apart with a spatula. You want to cook it until it turns white and no longer pink. After that, season the chicken with cumin, smoked paprika, salt, and pepper. Stir well to mix the spices into the meat. Let it cook for another 2 to 3 minutes to deepen the flavor of the chicken. Now comes the fun part: assembling your power bowl! Start with a scoop of fluffy quinoa as the base. On top of the quinoa, add the cooked ground chicken. Next, layer on halved cherry tomatoes, diced avocado, black beans, and diced bell pepper. This mix adds color and crunch. For the finishing touch, sprinkle fresh cilantro over the top. Serve lime wedges on the side so you can squeeze fresh juice onto your bowl. This adds a zesty kick to each bite! To cook quinoa, rinse it well under cold water. This removes any bitter taste. In a medium pot, mix one cup of quinoa with two cups of chicken broth or water. Bring it to a boil, then lower the heat and cover it. Let it simmer for 15 to 20 minutes. The quinoa will be fluffy when done. After cooking, let it sit for five minutes. Finally, fluff it with a fork for the best texture. To make ground chicken tastier, use simple spices. I love adding cumin and smoked paprika. These spices bring warmth and depth to the dish. Cook the chicken until it turns golden brown. This adds a nice flavor too. Don’t forget to season with salt and pepper. You can also add minced garlic or onion for extra taste. A colorful bowl makes your meal more fun. Start with a base of quinoa. Then, add layers of cooked ground chicken, black beans, and fresh veggies. Cherry tomatoes and diced avocado add bright colors. Use deep plates to showcase the vibrant ingredients. Finally, add a sprinkle of fresh cilantro and lime wedges on the side. This not only looks pretty but also adds fresh flavors! Pro Tips Store Leftovers Properly: Keep any leftover power bowl components in separate airtight containers in the fridge to maintain freshness and prevent sogginess. Customize Your Veggies: Feel free to swap out any vegetables based on your preference or what you have on hand. Zucchini or corn can be great additions! Meal Prep for the Week: Prepare a larger batch of quinoa and chicken to assemble quick power bowls throughout the week for easy lunches or dinners. Add a Kick: For those who enjoy a little heat, consider adding diced jalapeños or a splash of hot sauce to your bowl for an extra kick! {{image_2}} If you want a meat-free option, try using lentils or chickpeas. Both options add protein and fiber. You can also swap ground chicken for crumbled tofu or tempeh. These choices will keep your power bowl filling and tasty. Many proteins work well in power bowls. Ground turkey is a great alternative. It has a similar texture and taste. For a twist, try shrimp or diced chicken breast. You can even use canned tuna for a quick meal. Each option brings unique flavors and keeps your bowls interesting. Spices can change the whole taste of your power bowl. For a kick, add chili powder or cayenne pepper. If you like herbs, try adding oregano or basil. Dressings can also enhance flavors. A simple lime vinaigrette or a spicy yogurt sauce will elevate your meal. Mix and match to find your favorite flavor combos! To keep your Ground Chicken Power Bowls fresh, store the leftovers in airtight containers. This helps prevent moisture loss and keeps flavors intact. Always let the bowls cool to room temperature before sealing. This step stops condensation, which can make the food soggy. Try to eat the leftovers within three days for the best taste. If you want to prepare your bowls in advance, freezing is a great option. First, make sure the bowls are completely cool. Then, divide the ingredients into portions. Use freezer-safe bags or containers to store them. For the best results, avoid freezing the avocado and fresh toppings. They do not freeze well and can become mushy. When it’s time to eat, you can reheat your bowls in a few ways. The microwave is quick and easy. Just cover the bowl with a microwave-safe lid, heat for one to two minutes. Stir halfway through to heat evenly. If you prefer, you can also use a skillet over low heat. This method keeps the texture nice and warm. Just add a splash of water to help steam the ingredients. Enjoy your flavorful meal again! Yes, you can make this recipe ahead of time. Cook the quinoa and ground chicken. Store them in separate containers in the fridge. They stay fresh for up to four days. You can prep the veggies, too. Just cut the tomatoes, avocado, and bell pepper. Keep them in airtight containers. Assemble your bowls when you're ready to eat. If you want a substitute for quinoa, try brown rice or farro. Both grains provide a nice texture and flavor. You can also use cauliflower rice for a low-carb option. Just sauté it lightly before adding to your bowl. Choose what you like best! Yes, there are low-carb options for this recipe. Instead of quinoa, you can use cauliflower rice. It adds a great base without extra carbs. You can skip the black beans, too, as they add carbs. Use more veggies instead, like spinach or zucchini. Store assembled power bowls in the fridge for about two days. Cover them tightly to keep them fresh. If you add avocado, it may brown quickly. Consider adding it fresh before serving. Enjoy your tasty bowls! Ground chicken power bowls are easy and healthy. You learned about key ingredients, cooking steps, and tips for success. I shared ways to customize your bowls and store leftovers. Each section shows how fun and simple it is to make these dishes. Enjoy making your power bowls your way. Use this guide to explore flavors, textures, and nutrition. Cooking should be enjoyable!
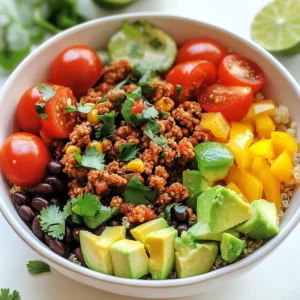
    Ground Chicken Power Bowls Flavorful and Nutritious Meal
  • - 2 cups cooked chicken breast, shredded - 1 ripe avocado, mashed - 1/2 cup Greek yogurt - 1/4 cup red onion, finely chopped - 1/4 cup celery, diced - 1 tablespoon lime juice - 1 teaspoon garlic powder - Salt and pepper to taste - 4 large whole wheat tortillas - Mixed greens (spinach, arugula, etc.) for filling These ingredients are simple yet packed with flavor. The shredded chicken serves as the main protein source. It adds heartiness to the wrap. Avocado provides creaminess and healthy fats. Greek yogurt is a great substitute for mayonnaise. It keeps the salad light while boosting protein. - Sliced cucumber for crunch - Cherry tomatoes for freshness These add-ins are great for extra texture. Cucumber gives a nice crunch, while cherry tomatoes add a burst of juice. You can mix and match based on what you like. Feel free to experiment with herbs too. Fresh cilantro or parsley can bring fresh notes to the wraps. This recipe yields four servings. Each serving has about: - Calories: 350 - Protein: 30g - Carbohydrates: 30g - Fat: 15g These wraps are high in protein thanks to the chicken and Greek yogurt. They are also filling with the fiber from the whole wheat tortillas and mixed greens. This meal is perfect for lunch or dinner, keeping you satisfied without weighing you down. To start, take a large bowl. Add one ripe avocado and mash it until creamy. Next, mix in half a cup of Greek yogurt. This adds protein and makes the mixture smooth. Then, add in two cups of shredded cooked chicken. Make sure it is evenly mixed. Next, toss in a quarter cup of finely chopped red onion and a quarter cup of diced celery. These add great crunch and flavor. Now, squeeze in one tablespoon of fresh lime juice. This adds a nice tang. Add one teaspoon of garlic powder, along with salt and pepper to taste. Mix everything gently until well combined. Be careful not to mash the avocado too much; you want some chunks for texture. Grab four large whole wheat tortillas. Lay each tortilla flat on a clean surface. Place a handful of mixed greens in the center. Spinach or arugula works well. Next, spoon an even amount of the avocado chicken salad mixture on top of the greens in each tortilla. If you want extra crunch, add slices of cucumber or cherry tomatoes. Now it’s time to fold! Fold the sides of the tortillas in, then roll tightly from the bottom up. This keeps all the filling inside. Once your wraps are rolled, slice each one in half diagonally. This makes for easy eating. Arrange the wraps on a platter for a nice presentation. For an extra touch, serve with additional mixed greens and a wedge of lime. This not only looks great but also offers a fresh burst of flavor. Enjoy your healthy, high-protein avocado chicken salad wraps! Pick a ripe avocado for the best flavor. Look for one that feels slightly soft when you press it gently. If it's hard, it needs more time to ripen. If it's too soft, it may be overripe. You can also check the color; a darker hue often means ripeness. The skin should be smooth, not wrinkled or blemished. To keep your wraps fresh, wrap them tightly in plastic wrap or foil. This helps prevent them from drying out. Store them in the fridge, where they will last for about two days. If you use ingredients like avocado, eat them sooner. The avocado can brown quickly. You can also store the filling and wraps separately for longer freshness. These wraps are great for meal prep. Make a big batch of the avocado chicken salad mixture and store it in an airtight container. You can prepare the wraps daily for fresh meals. Pack your wraps with a side of cut veggies or fruit for a balanced meal. Use small containers for dips or dressings to keep things neat. {{image_2}} To make this dish dairy-free, swap Greek yogurt with silken tofu. Blend it until smooth to get a creamy texture. You can also use avocado as your main base. This keeps the wrap rich and tasty. For a vegan option, replace chicken with chickpeas or lentils. These add protein and fiber, making your meal filling. Looking to boost protein? Consider adding black beans or quinoa. Both options are easy to mix in. They add texture and flavor, enhancing your wrap. You could also sprinkle hemp seeds on top. These tiny seeds pack a punch of protein and healthy fats. If you want to change the wrap itself, try lettuce leaves for a low-carb option. Romaine or butter lettuce works well. For a gluten-free choice, use corn tortillas. They’re soft and tasty while staying gluten-free. You can even try nori sheets for a sushi-style wrap. This adds a unique flavor to your meal. To make your meal even better, serve your wraps with tasty sides. Here are some great options: - Fresh fruit salad: Mix berries, melon, and pineapple for a sweet contrast. - Veggie sticks: Carrots, cucumbers, and bell peppers add crunch and color. - Chips: Whole grain tortilla chips or pita chips bring a fun crunch. - Soup: A light tomato or cucumber soup pairs well for a cozy touch. Making your meal look good is easy! Here are some tips: - Use a large platter: Lay the wraps side by side for a colorful display. - Add greens: Place mixed greens around the wraps for a fresh look. - Garnish with lime: Add lime wedges for a pop of color and flavor. - Slice neatly: Cut each wrap in half to show off the filling. These wraps are perfect for many occasions. Here are a few ideas: - Picnics: They are easy to pack and eat outdoors. - Lunch boxes: Great for kids and adults alike for a healthy lunch. - Casual gatherings: Serve them at parties for a fun, shareable meal. - Meal prep: Make them ahead for quick lunches during a busy week. To make these wraps gluten-free, simply swap the whole wheat tortillas for gluten-free tortillas. Look for brands that use almond flour or brown rice flour. You can also use lettuce leaves for a low-carb option. This change keeps the dish tasty while making it safe for those with gluten sensitivities. Yes, you can use canned chicken instead of cooked chicken breast. Canned chicken is quick and easy. Just drain the can and shred the chicken with a fork before mixing it into the salad. This saves time and still gives you a delicious wrap. Leftovers of these wraps can last up to three days in the fridge. Store them in an airtight container to keep them fresh. If you notice the greens wilting, eat them sooner rather than later for the best taste and texture. This blog shared how to make tasty high-protein avocado chicken salad wraps. You learned about key ingredients, useful tips, and fun variations. Each section helps you create an easy, healthy meal. Remember, you can adjust the recipe to fit your taste or diet. Try adding your favorite sides or switching up the protein. With these tips, you can enjoy delicious wraps anytime. Now, grab your ingredients, and start cooking! Enjoy every bite!
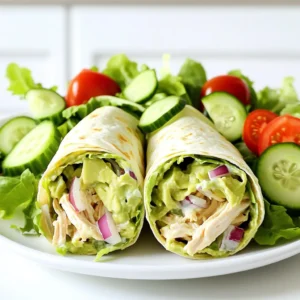
    High-Protein Avocado Chicken Salad Wraps Delight
  • - Firm tofu and its preparation You need one block (14 oz) of firm tofu. Start by pressing it. This helps remove extra water. After that, cut the tofu into 1-inch cubes. Pat the cubes dry with paper towels. This helps them get crispy when you cook them. - Marinade components For the marinade, mix these ingredients: - 1/4 cup soy sauce (or tamari for gluten-free) - 2 tablespoons maple syrup - 1 tablespoon rice vinegar - 1 tablespoon sesame oil Whisk these together in a bowl. This creates a sweet and savory flavor that soaks into the tofu. - Cooking oil and vegetables Use 2 tablespoons of vegetable oil for frying the tofu. For the veggies, gather: - 1 cup broccoli florets - 1 red bell pepper, sliced - 1 carrot, julienned You can also add 1/4 cup of chopped green onions and 1 tablespoon of sesame seeds for garnish. These add color and extra crunch to your bowl. {{ingredient_image_1}} Start by pressing the tofu. Place the block on a cutting board. Use a heavy object to press it for about 30 minutes. This step removes excess water, making the tofu firm. Once pressed, cut the tofu into 1-inch cubes. Pat the cubes dry with paper towels. Drying helps the tofu absorb the marinade better. Now, let’s make the marinade. In a small bowl, whisk together the soy sauce, maple syrup, rice vinegar, and sesame oil. Next, place the tofu cubes in a mixing bowl. Pour half the marinade over the tofu. Toss gently to coat each cube. Let the tofu marinate for at least 30 minutes. Flip the cubes halfway through for even flavor. After marinating, it’s time to coat the tofu. Sprinkle cornstarch over the marinated cubes. Gently toss to ensure even coverage. The cornstarch helps achieve that perfect crispy texture. Heat vegetable oil in a non-stick skillet over medium-high heat. Add the coated tofu cubes. Cook for about 7-10 minutes. Turn the tofu to get golden-brown color on all sides. Once crispy, remove the tofu and set it aside. For the veggies, I suggest using broccoli, red bell pepper, and carrots. Cut the broccoli into small florets, slice the bell pepper, and julienne the carrot. In the same skillet, add the vegetables. Sauté them for about 5-7 minutes. You want them tender but still bright in color. Pour the reserved marinade over the sautéed vegetables. Stir well to coat. Cook for another minute to heat everything through. Now it’s time to assemble your bowl. Start with a base of cooked jasmine rice. Next, add a layer of crispy tofu. Then, top it with the sautéed vegetables. For a nice touch, drizzle extra marinade over the top. This adds more flavor and moisture. Garnish your bowl with chopped green onions and sesame seeds. This adds a nice crunch and extra flavor. Enjoy your colorful and tasty meal! To get the best crispy tofu, pressing is key. Start by wrapping the tofu in a clean kitchen towel. Place a heavy object on top, like a cast-iron skillet. Let it sit for at least 30 minutes. This removes excess water and helps the tofu absorb flavor. If you want to try other cooking methods, baking or air-frying are great options. For baking, preheat your oven to 400°F (200°C). Spread the coated tofu on a baking sheet and bake for 25-30 minutes. Flip halfway through for even crispiness. For air-frying, set your air fryer to 375°F (190°C) and cook for about 15-20 minutes, shaking the basket halfway through. Toppings can make your tofu bowl shine. Try adding chopped green onions, sesame seeds, or crushed peanuts for added crunch. You can also drizzle extra teriyaki sauce on top for a flavor boost. To make your dish more exciting, play with spices. A hint of garlic powder or chili flakes can add depth. Don't shy away from using fresh herbs like cilantro or basil. They bring freshness that complements the teriyaki sauce well. Pro Tips Press Tofu Thoroughly: Ensure you press the tofu for at least 30 minutes to remove excess moisture, which helps achieve a crispier texture when frying. Customize the Marinade: Feel free to add garlic or ginger to the marinade for an extra layer of flavor. Fresh herbs like cilantro can also be a wonderful addition. Use High Heat for Frying: Cooking the tofu over medium-high heat allows it to develop a golden-brown crust. Make sure not to overcrowd the pan for best results. Serve Fresh: This dish is best enjoyed fresh. If preparing ahead of time, store components separately and assemble just before serving to retain texture. {{image_2}} For a vegan twist, you can swap tofu for chickpeas or tempeh. Both options provide protein and flavor. If you need a gluten-free version, use tamari instead of soy sauce. This small change keeps the dish free of gluten. You can use any vegetables you like. Try adding snap peas, bok choy, or zucchini for more color and crunch. For rice alternatives, consider quinoa or cauliflower rice. Quinoa adds protein, while cauliflower rice is low in carbs. Both options work well with the teriyaki sauce. Enjoy experimenting with flavors to make the bowl your own! To keep your crispy teriyaki tofu bowl fresh, you need to store it well. Place the leftovers in an airtight container. Make sure to let it cool to room temperature first. This helps prevent moisture buildup, which can make the tofu soggy. Store the container in the fridge. It will stay good for about 3 to 4 days. When you're ready to eat, you want to reheat it right. Use a skillet over medium heat. Add a little vegetable oil to the pan. This helps the tofu regain its crispiness. Heat for about 5 to 7 minutes. Stir gently to avoid breaking the tofu. You can also use an air fryer for a quick reheat. Set it to 375°F and cook for about 5 minutes. This keeps everything crunchy and delicious. If you want to save your crispy tofu bowl for later, freezing is an option. First, make sure the bowl is fully cooled. Then, separate the tofu from the rice and vegetables. This helps keep them fresh. Place the tofu in a freezer-safe bag or container. Seal it tightly, removing as much air as possible. You can freeze the rice and vegetables in separate bags too. They will last for about 2 to 3 months in the freezer. To thaw, take the tofu out a day before you plan to eat it. Place it in the fridge overnight. For quicker thawing, use the microwave's defrost setting. When it’s time to reheat, use a skillet or air fryer again. Just remember to let everything heat through properly. Reheating in the oven can also work well. Preheat to 350°F and bake for about 10 minutes. This keeps your meal tasty and satisfying. If you want to swap out tofu, several great options exist. You can use tempeh, which has a firmer texture and nutty taste. Chickpeas or lentils also work well, providing protein and fiber. For a different flavor, try seitan. It has a chewy texture that mimics meat. Yes, you can easily make this dish gluten-free. Use tamari instead of soy sauce. It has a similar taste but is made without wheat. Always check labels to ensure no hidden gluten is present. Most other ingredients in this recipe are already gluten-free. If you want a kick, add red pepper flakes or sriracha to the marinade. You can also mix in some fresh chili or hot sauce when sautéing the veggies. Adjust the amount to fit your taste. Enjoy the heat! This blog post covered how to make a delicious crispy tofu bowl. You learned about the right ingredients, step-by-step cooking, and tips for perfecting flavors. Remember, pressing tofu and using the right cooking techniques are key. Don't hesitate to get creative with different veggies or sauces. You can make this dish your own, no matter your diet. With these methods, enjoy tasty meals while keeping it healthy. Now, it's time for you to try this crispy tofu bowl yourself. Happy cooking!
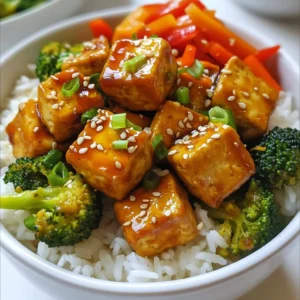
    Crispy Teriyaki Tofu Bowl Flavorful Plant-Based Meal
  • To make crispy air fryer sweet potato fries, you need the following ingredients: - 2 large sweet potatoes - 2 tablespoons olive oil - 1 teaspoon paprika - 1 teaspoon garlic powder - ½ teaspoon salt - ¼ teaspoon black pepper - ¼ teaspoon cayenne pepper (optional for heat) - Fresh parsley, chopped (for garnish) These ingredients work together to create a tasty and healthy snack. Sweet potatoes give a natural sweetness, while the spices add flavor. Olive oil is key for crispiness. You can adjust the cayenne pepper for more or less heat. Fresh parsley adds a nice touch when serving. {{ingredient_image_1}} First, peel the sweet potatoes. Then, cut them into fries. Aim for a thickness of about 1/4 inch. Uniform sizing is key. It helps them cook evenly. If some fries are thick and others are thin, they won’t cook at the same rate. This step is very important for great results. Soaking the fries in cold water helps enhance crispiness. This process removes excess starch. Aim to soak them for about 30 minutes. If you skip this step, the fries may turn out soggy. Soaking makes a big difference in texture. In a bowl, mix olive oil, paprika, garlic powder, salt, black pepper, and cayenne pepper if you like heat. Toss the dried sweet potato fries in this mix. Make sure the fries are well coated. Then, dry them thoroughly with a kitchen towel. Removing moisture is crucial for crispiness. Preheat your air fryer to 400°F (200°C) for about 5 minutes. This step helps the fries cook evenly. Place the seasoned fries in a single layer in the air fryer basket. If you have too many, cook in batches. Set the timer for 15 to 20 minutes. Halfway through, shake the basket to ensure even cooking. This technique keeps the fries from sticking together. After cooking, check if the fries are golden brown and crispy. If they aren't as crispy as you want, adjust the cooking time. Each air fryer is different. You may need to experiment a bit to get your perfect fry. Once cooked, remove the fries and sprinkle them with fresh parsley. It adds a nice touch! Serve them hot for the best taste. Pair them with your favorite dips like ranch or ketchup. Enjoy your tasty treat! To make your sweet potato fries extra crispy, adjust the soaking time. Soaking for 30 minutes is good, but try 45 minutes for a crunchier bite. Make sure to dry them well after soaking. Moisture can make them soggy. For cooking method variations, try air frying at 425°F for a few minutes more. This higher heat can help you get that perfect crunch. Spice it up with different seasonings! Try adding cumin or chili powder for a warm flavor. You can also mix in brown sugar for a sweet twist. For heat, toss in more cayenne or some hot sauce. Experimenting with seasonings keeps your fries exciting and new. If your fries turn out soggy, check two things. First, ensure you dried them well after soaking. Second, try cooking them longer or at a higher temperature. If you face uneven cooking, make sure they are in a single layer in the basket. Shake the basket halfway through cooking. This ensures each fry gets even heat and crispiness. Pro Tips Cut Uniformly: Ensure all fries are cut to the same thickness for even cooking. Soak for Crispiness: Soaking the fries in cold water removes excess starch, making them crispier. Don’t Overcrowd: Air fry in batches to allow proper circulation for maximum crispiness. Adjust Seasoning: Feel free to customize the spices to suit your taste preferences. {{image_2}} You can spice up your sweet potato fries in fun ways. A cinnamon and sugar twist adds a sweet touch. Just mix 1 tablespoon of sugar and 1 teaspoon of cinnamon. Toss this mix on your fries after cooking. It turns them into a sweet treat! You can also try herb-infused versions. Rosemary and thyme work well. Just add 1 teaspoon of dried herbs to your seasoning mix before air frying. This gives your fries a fresh flavor boost. If you want to cut down on oil, use less than the recipe calls for. You can reduce the olive oil to 1 tablespoon without losing taste. This keeps your fries light and still crispy. For a different method, try oven-baking. Preheat your oven to 425°F (220°C). Spread the fries on a baking sheet in a single layer. Bake for about 25-30 minutes, flipping halfway. This method still gives you great flavor. Adding protein is easy! Try topping your fries with cooked chicken or black beans. This makes the dish heartier and more filling. You can also serve your fries with veggies. Roasted bell peppers or a fresh salad pair well. This not only adds color but also boosts nutrition. Enjoy the flavors and textures together! To keep your fries fresh, use an airtight container. This helps lock in moisture and flavor. Place the fries in the fridge after they cool. They can last for up to three days. If you want them crisp later, store them separately from any dips. The air fryer is best for reheating. Set it to 350°F. Cook the fries for about 5 to 8 minutes. Shake the basket halfway through to ensure even heating. If you don't have an air fryer, the oven works too. Preheat it to 375°F, and bake for 10 to 15 minutes. You can also use a microwave but note that fries may turn soft. If you choose this method, heat in short intervals. If you want to freeze fries, start by cooking them first. Let them cool completely before freezing. Spread them on a baking sheet in a single layer. Freeze for about an hour, then transfer them to a freezer bag. They can stay frozen for up to three months. When ready to cook, do not thaw. Just air fry straight from the freezer. Adjust cooking time to ensure they cook through and get crispy. You should cook sweet potato fries for 15 to 20 minutes. This time may change based on your air fryer and how crispy you want them. Always shake the basket halfway through to ensure even cooking. Yes, you can use frozen sweet potato fries. Cook them at 400°F for about 10 to 15 minutes. They will not be as crispy as fresh fries but still taste great. Sweet potato fries go well with several dips. Here are a few popular options: - Ketchup - Honey mustard - Ranch dressing - Spicy mayo - Chipotle sauce Yes, sweet potato fries are often healthier than regular fries. They have more vitamins and fiber. They also contain antioxidants which help your body fight free radicals. You can skip soaking, but your fries may be less crispy. Soaking helps remove starch, making them crunchier. If you do not soak, dry the fries well before cooking for better results. Sweet potato fries are fun to make and tasty to eat. We learned how to prepped the fries, soaked them for crispiness, and seasoned them for flavor. The air frying techniques help achieve that perfect crunch. Explore different spices and storage tips to enjoy these fries anytime. Follow these steps, and you’ll impress friends and family with your cooking skills. These fries are healthy, delicious, and easy to make at home. Enjoy your crispy treats!
    Air Fryer Sweet Potato Fries Crispy and Flavorful Treat
  • - 1 lb boneless, skinless chicken thighs, sliced into thin strips - 2 tablespoons vegetable oil - 1 red bell pepper, sliced - 1 cup sugar snap peas, trimmed - 2 cloves garlic, minced - 1 tablespoon fresh ginger, minced The main ingredients set the stage for a tasty stir-fry. Chicken thighs give great flavor and juiciness. Red bell pepper adds color and sweetness. Sugar snap peas bring a nice crunch. Garlic and ginger create a fragrant base that enhances the whole dish. - ¼ cup creamy peanut butter - 3 tablespoons soy sauce (low sodium) - 2 tablespoons honey or maple syrup - 2 tablespoons rice vinegar - 1 tablespoon sesame oil - 1 teaspoon chili paste (adjust for heat preference) Seasonings are key to this dish. Peanut butter gives a creamy texture and rich flavor. Soy sauce adds saltiness, while honey or maple syrup adds a hint of sweetness. Rice vinegar brightens the mix, and sesame oil adds depth. Chili paste introduces heat; adjust it to your taste. - ¼ cup roasted peanuts, chopped - Fresh cilantro, for garnish - Lime wedges, for serving Garnishes make the meal pop. Chopped roasted peanuts add crunch. Fresh cilantro brings a burst of freshness. Lime wedges give a zesty kick when squeezed over the dish. These touches elevate the stir-fry, making it visually appealing and flavorful. {{ingredient_image_1}} Start by slicing 1 pound of boneless, skinless chicken thighs into thin strips. Thin strips cook faster and stay tender. Heat 2 tablespoons of vegetable oil in a large skillet or wok over medium-high heat. Once hot, add the chicken. Stir-fry the chicken for about 5-7 minutes. You want it to be cooked through and lightly browned. When done, remove the chicken from the skillet and set it aside. This step ensures the chicken stays juicy. In the same skillet, add the sliced red bell pepper and sugar snap peas. You need about 1 cup of sugar snap peas and one red bell pepper. Stir-fry these for about 3-4 minutes. The goal is to keep them tender yet crisp. Then, add 2 minced garlic cloves and 1 tablespoon of minced fresh ginger. Stir these constantly for about 30 seconds until they smell great. This brings out the flavors in the dish. In a separate bowl, whisk together ¼ cup of creamy peanut butter, 3 tablespoons of low-sodium soy sauce, 2 tablespoons of honey or maple syrup, 2 tablespoons of rice vinegar, 1 tablespoon of sesame oil, and 1 teaspoon of chili paste. Mix until the sauce is smooth and well combined. This sauce adds richness and a touch of sweetness to your stir-fry. Return the cooked chicken to the skillet with the veggies. Pour the peanut sauce over the top. Stir well to coat everything evenly. Cook for another 2-3 minutes to heat everything through. Finally, remove it from the heat and stir in ¼ cup of chopped roasted peanuts. This adds a nice crunch. Serve the stir-fry hot, garnished with fresh cilantro and lime wedges on the side for zest. Enjoy your delicious meal! To get the best flavor in your Thai peanut chicken stir-fry, focus on fresh ingredients. Use ripe bell peppers and crisp snap peas. Fresh garlic and ginger boost the taste. Always use creamy peanut butter for a rich sauce. A great sauce mix makes all the difference. Whisk together the peanut butter, soy sauce, honey, rice vinegar, and sesame oil. This combo adds depth and sweetness. Use a large skillet or wok for even cooking. Heat the oil over medium-high heat before adding chicken. Stir-fry the chicken until it turns golden brown. This step seals in flavors and keeps the meat juicy. Cook the veggies until they are tender but still crisp. This adds texture to your dish. Stir constantly when adding garlic and ginger. This keeps them from burning and losing flavor. Spice levels can change your dish a lot. Start with one teaspoon of chili paste for mild heat. Taste the sauce before adding more heat. If you like it spicy, add more chili paste. You can also add fresh chili slices while cooking. For a milder dish, skip the chili paste or use less. Always remember, you can add spice but can’t take it out! Pro Tips Use High Heat: Cooking on high heat helps to sear the chicken quickly, keeping it tender and juicy while adding a nice color. Prep Ingredients Ahead: Having all your ingredients prepped and ready to go will make the stir-fry process smoother and quicker. Customize the Veggies: Feel free to swap in your favorite vegetables like broccoli, carrots, or bok choy for a personal touch. Adjust the Spice: Modify the amount of chili paste according to your heat preference, or add fresh chili slices for extra kick. {{image_2}} You can easily make this dish vegetarian or vegan. Just swap the chicken for tofu. Firm tofu works best. Press it to remove extra water, then cut it into cubes. Stir-fry the tofu until golden. Use the same tasty peanut sauce. This keeps the rich flavor while making it plant-based. If you want, add some extra veggies like carrots or mushrooms. Besides chicken, shrimp is another great choice. Use peeled, deveined shrimp for a quick cook. Add them to the skillet after the garlic and ginger. Cook just until they turn pink. You can also try other proteins like pork or beef. Just slice them thinly and follow the same steps for cooking. Each protein brings its own twist to the dish. Feel free to mix up the veggies. Broccoli, carrots, and snow peas work well. Bell peppers add a nice crunch and sweetness. You can also add bok choy or zucchini for variety. Just remember to keep the cooking time short. You want the veggies to stay bright and crisp. This keeps your dish colorful and fun! After you finish your meal, let the Thai Peanut Chicken Stir-Fry cool down. Then, place any leftovers in an airtight container. Make sure to seal it well to keep out air. Store the container in the fridge. Your stir-fry will stay fresh for up to three days. To reheat, you can use the microwave or the stove. If you use the microwave, put the stir-fry in a safe dish. Heat it on high for one to two minutes. Stir halfway through to warm it evenly. If using the stove, add a little oil to a pan. Heat over medium, then add the stir-fry. Cook for about 3-5 minutes, stirring often until hot. You can also freeze your Thai Peanut Chicken Stir-Fry. Use a freezer-safe bag or container. Try to remove as much air as you can. This helps prevent freezer burn. Label the bag with the date. Your stir-fry can last up to three months in the freezer. To enjoy, thaw it overnight in the fridge. Then, reheat using the methods above. If you need a peanut butter substitute, try almond butter or sunflower seed butter. Both options work well in this recipe. They have similar textures and flavors. Almond butter gives a nutty taste. Sunflower seed butter is nut-free and safe for allergies. You can also use tahini for a rich, creamy sauce. To make this dish gluten-free, use gluten-free soy sauce. Look for tamari, which is a great option. It has a similar taste to regular soy sauce. Make sure to check all other ingredients for gluten. Stick to fresh veggies and meats to stay safe. Yes, this stir-fry pairs perfectly with rice or noodles. You can serve it over jasmine rice for a classic touch. For a fun twist, try it with rice noodles or whole wheat noodles. Both choices soak up the sauce well and add more texture. Cooked chicken lasts about 3 to 4 days in the fridge. Store it in an airtight container to keep it fresh. If you want to keep it longer, consider freezing it. Just remember to label it with the date you cooked it. This blog post covers all you need for a Thai Peanut Chicken Stir-Fry. You learned about the key ingredients, the steps for cooking, and tips for the best flavor. We also explored tasty variations and proper storage methods. I hope these tips inspire you to make a delicious meal. Now, you have everything to create a dish that impresses. Enjoy cooking and sharing this flavorful stir-fry!
    Thai Peanut Chicken Stir-Fry Flavorful Meal Idea
  • To make eggnog scones with nutmeg glaze, gather these ingredients: - 2 cups all-purpose flour - 1/3 cup granulated sugar - 1 tablespoon baking powder - 1/2 teaspoon salt - 1/2 teaspoon ground nutmeg - 1/2 teaspoon ground cinnamon - 1/2 cup unsalted butter, cold and cubed - 3/4 cup eggnog (store-bought or homemade) - 1 large egg - 1 teaspoon vanilla extract - 1 cup powdered sugar - 1-2 tablespoons milk (for glaze) - Extra nutmeg for garnish Now, let’s break down these ingredients. Quantity and Type of Flour I use 2 cups of all-purpose flour. This gives the scones a nice base. Sugar, Baking Powder, and Seasoning You need 1/3 cup of granulated sugar. This adds sweetness. The baking powder helps the scones rise. Use 1 tablespoon for a good lift. The salt, at 1/2 teaspoon, balances the flavors. Ground nutmeg and cinnamon at 1/2 teaspoon each add warmth and spice. Butter and Eggnog Requirements Cold butter is key. Use 1/2 cup of unsalted butter, cubed. It helps the scones become flaky. For the eggnog, 3/4 cup is perfect. You can use store-bought or homemade. Egg and Vanilla Details One large egg binds the dough. For flavor, add 1 teaspoon of vanilla extract. Ingredients for the Nutmeg Glaze To make the nutmeg glaze, mix 1 cup of powdered sugar with 1-2 tablespoons of milk. Adjust the milk for a smooth glaze. Top with extra nutmeg for a festive touch. With these ingredients ready, you’re set to bake some delightful eggnog scones! {{ingredient_image_1}} First, preheat your oven to 400°F (200°C). This step is key for even baking. While the oven heats, prepare your baking sheet. Line it with parchment paper to prevent sticking. This makes cleanup easy, too. In a large bowl, whisk together the following dry ingredients: - 2 cups all-purpose flour - 1/3 cup granulated sugar - 1 tablespoon baking powder - 1/2 teaspoon salt - 1/2 teaspoon ground nutmeg - 1/2 teaspoon ground cinnamon Mix until everything is well combined. This blend gives the scones their flavor. Next, add 1/2 cup of cold, cubed butter to the dry mix. Use a pastry cutter or your fingers to work the butter into the flour. Do this until the mix looks like coarse crumbs. You want small bits of butter throughout for flaky scones. In a separate bowl, whisk together: - 3/4 cup eggnog - 1 large egg - 1 teaspoon vanilla extract Blend these until smooth. The eggnog adds moisture and flavor to the scones. Pour the wet mix into the dry mix. Gently stir until just combined. Be careful not to overwork the dough; that can make the scones tough. Turn the dough onto a floured surface. Knead it a couple of times until it holds together. Flatten it into a rectangle about 1 inch thick. Now it’s time to cut the scones. Use a sharp knife or a biscuit cutter to cut triangles or circles. Place them on the prepared baking sheet, leaving space between them. Bake for 15-18 minutes, or until the tops are lightly golden. You’ll know they’re done when they look and smell amazing! - Avoiding overmixing: Mix the dough just until it comes together. Overmixing makes scones tough. This is key for a light and fluffy texture. - The importance of cold ingredients: Use cold butter and eggnog. Cold ingredients help create steam, which makes the scones rise. - Tips for achieving the right consistency: Combine powdered sugar with milk gradually. Aim for a smooth, pourable glaze. It should not be too thin or too thick. - Flavor adjustments for the glaze: Feel free to add a pinch of cinnamon or extra nutmeg. This can enhance the flavor and make it more festive. - Best accompaniments for eggnog scones: Serve these warm with butter or whipped cream. A cup of coffee or tea pairs perfectly too. - Presentation ideas for festive gatherings: Arrange scones on a pretty plate. Add sprigs of mint or cranberries for color and cheer. Pro Tips Use Cold Butter: Ensure your butter is very cold to achieve a flaky texture in your scones. Don’t Overmix: Mix the dough just until combined to keep the scones tender and light. Adjust Eggnog Flavor: For a stronger eggnog flavor, add a splash of rum or bourbon to the dough. Glaze While Warm: Drizzle the glaze over the scones while they are still warm for better adherence and flavor absorption. {{image_2}} You can play with flavors in these scones. Adding dried fruits like raisins or cranberries gives a nice chew. Nuts, like pecans or walnuts, add crunch and richness. Both options elevate the taste and texture. For spices, consider using ginger or allspice. These spices add warmth and depth. You can mix and match to find your favorite blend. Just remember to keep the nutmeg, as it defines the recipe. If you need gluten-free scones, swap the all-purpose flour with a gluten-free blend. This works well in most baked goods. Just ensure the blend has a binding agent in it. For vegan scones, replace the egg with a flax egg. Mix one tablespoon of ground flaxseed with three tablespoons of water. Let it sit until it thickens. Use a plant-based butter and your favorite non-dairy eggnog. This keeps the flavors intact while catering to dietary needs. These scones shine during the holidays. You can add peppermint extract for a festive twist. White chocolate chips also make a delightful addition. They create a sweet contrast to the nutmeg. Consider adding orange or lemon zest for a fresh, bright flavor. These citrus notes add a lovely summer touch. Each variation brings its own magic to the scone experience. Let your eggnog scones cool on a wire rack. This keeps them from getting soggy. I usually let them cool for about 10 minutes. This way, they stay fluffy and delicious. If you skip this step, steam builds up and makes them soft. For best results, store the cooled scones in an airtight container. They stay fresh for about 2 to 3 days at room temperature. If you want to keep them longer, you can freeze them. Just wrap each scone tightly in plastic wrap. Then, place them in a freezer bag. They last for up to three months in the freezer. To reheat your scones, you can use a microwave or an oven. If using the microwave, heat for about 10 to 15 seconds. This keeps them moist but can make them a bit soft. For a crispier texture, place them in a 350°F (175°C) oven for about 5 to 7 minutes. This way, you enjoy them fresh out of the oven every time! Yes, you can make these scones ahead of time. Prepare the dough, then wrap it tightly in plastic wrap. You can freeze it for up to a month. When you’re ready to bake, let it thaw in the fridge overnight. Cut and bake as usual. This way, you can enjoy fresh scones without the fuss on busy mornings. To get that perfect flaky texture, keep your butter cold. Cut it into small cubes before adding it to the flour. Work the butter fast into the flour until it looks like coarse crumbs. Do not overmix the dough when adding wet ingredients. The less you handle it, the flakier your scones will be. Lastly, use cold eggnog to help keep everything chilled. Yes, you can substitute eggnog if needed. Use plain milk or cream mixed with a bit of nutmeg and cinnamon for flavor. You can also try using almond milk or oat milk if you want a dairy-free option. Just be sure to add some spice to mimic the eggnog taste. You’ve learned about the key ingredients for eggnog scones and how to mix them. I shared tips to ensure a great texture and delicious nutmeg glaze. We explored fun variations and how to store your scones properly. These scones are perfect for holiday gatherings and a treat year-round. Enjoy the delightful flavors and make them your own! Remember, baking is about experimenting, so feel free to try new twists. Happy baking!
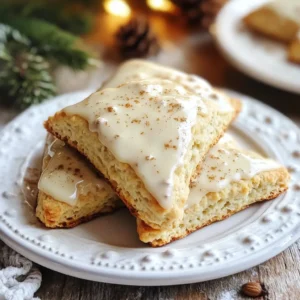
    Eggnog Scones with Nutmeg Glaze Delightful Recipe
  • - 2 cups orzo pasta - 1 lb boneless, skinless chicken breast, diced - 1 cup spinach, chopped - 1 cup cherry tomatoes, halved - 1 cup cooked chickpeas (canned or boiled) - 4 cups chicken broth - 2 tablespoons olive oil - 1 teaspoon garlic powder - 1 teaspoon paprika - ½ teaspoon black pepper - ¼ teaspoon red pepper flakes (optional) - Salt to taste - Fresh parsley, chopped (for garnish) High Protein Chicken Orzo is a delightful dish packed with flavor and nutrition. You need simple, fresh ingredients to make it shine. Here’s a breakdown of what you will use: - Orzo Pasta: This small pasta cooks quickly and absorbs flavors well. - Chicken Breast: Lean protein that keeps the dish filling and healthy. - Spinach: Adds great color and nutrients; it cooks down nicely. - Cherry Tomatoes: They bring sweetness and juiciness to the dish. - Chickpeas: A fantastic source of protein and fiber that adds texture. - Chicken Broth: It gives the dish a robust, savory base. - Olive Oil: This adds richness and helps cook the chicken perfectly. - Seasonings: Garlic powder, paprika, black pepper, and salt enhance the taste. - Garnish: Fresh parsley makes it look appealing and fresh. These ingredients come together to create a warm, comforting meal. Each one plays a role in the flavor and nutrition of the dish. {{ingredient_image_1}} - Sautéing the Chicken Start by heating olive oil in a large pot over medium heat. Add the diced chicken breast. Season it with garlic powder, paprika, black pepper, and salt. Cook the chicken for about 5 to 7 minutes until it turns golden brown and is fully cooked. This step adds flavor and ensures the chicken is juicy. - Toasting the Orzo Next, add the orzo pasta to the pot. Stir it well with the chicken. Toast the orzo for about 2 minutes. This helps it absorb more flavors later on. Keep stirring to avoid burning. - Simmering the Ingredients Now, pour in the chicken broth. Bring this mixture to a boil. Once it boils, reduce the heat to low and cover the pot. Let it simmer for about 10 minutes. The orzo will soak up most of the liquid and become tender. - Combining with Vegetables After simmering, add the cherry tomatoes, chopped spinach, and cooked chickpeas to the pot. Stir everything well. Cook for another 2 to 3 minutes. This step adds color and nutrients to your dish as the spinach wilts. - Final Adjustments Taste your dish and add more salt or spices if needed. Remove the pot from heat and let it sit for a few minutes. This resting time helps the flavors blend better. Serve it hot, garnished with fresh parsley and a sprinkle of red pepper flakes for extra flair. Enjoy your delicious High Protein Chicken Orzo! - Perfecting the Sautéed Chicken: Start with a hot pan. Add olive oil first. When the oil shimmers, add the diced chicken. Season it with garlic powder, paprika, black pepper, and salt. Cook for 5-7 minutes until golden brown. This step ensures juicy and flavorful chicken. - Ensuring Proper Orzo Texture: Toast the orzo in the pan for about 2 minutes before adding broth. This gives the pasta a nutty flavor. Make sure to stir often. When you add the broth, let it come to a boil. Lower the heat and cover the pot. Simmer until most liquid is absorbed, about 10 minutes. - Flavor Enhancements: You can add red pepper flakes for a kick. Fresh herbs like basil or thyme also work well. Squeeze a little lemon juice before serving. It brightens up all the flavors. - Ideas for Serving: Use bowl plates for a warm, inviting look. Serve the orzo hot, straight from the pot. This keeps everything cozy and fresh. - Garnishing Suggestions: Top your dish with fresh chopped parsley. This adds a pop of color. For extra spice, sprinkle some red pepper flakes on top. It makes the dish look appealing and adds flavor. Pro Tips Perfect Pasta Texture: For al dente orzo, make sure to monitor the cooking time closely. Orzo should be firm to the bite, providing a nice texture in the dish. Seasoning the Chicken: Don’t skimp on seasoning the chicken before cooking. This foundational step infuses flavor into the entire dish, making it more delicious. Add Garlic Freshly: For an extra punch of flavor, consider adding freshly minced garlic when you sauté the chicken instead of garlic powder. Customizable Vegetables: Feel free to swap in your favorite vegetables or whatever you have on hand. Zucchini, bell peppers, or peas can be great additions! {{image_2}} Alternative Proteins You can swap chicken for other proteins. Try turkey or tofu for a lighter meal. Shrimp also works well if you like seafood. For a vegetarian option, use lentils or tempeh. Each choice brings its own unique taste and texture. Vegetable Swaps Feel free to change the vegetables. Use kale or Swiss chard instead of spinach. Zucchini or bell peppers add color and crunch. Carrots or peas can also boost nutrition. Get creative with what you have on hand! Adding Quinoa Quinoa is a great way to add more protein. Cook it separately, then mix it in with the orzo. Quinoa adds a nutty flavor and a nice bite. It also packs a healthy punch with fiber and vitamins. Incorporating Nuts and Seeds Nuts and seeds add extra protein and crunch. Consider adding slivered almonds or sunflower seeds. They give a delightful texture and flavor. Sprinkle them on top just before serving for a tasty finish. - Refrigeration Tips: Store any leftovers in an airtight container. Let the dish cool down first. Place it in the fridge within two hours. It will stay fresh for up to four days. - Freezing Guidance: You can freeze leftovers too! Use a freezer-safe container. The dish can last for up to three months in the freezer. To avoid freezer burn, remove as much air as possible. - Best Ways to Reheat: The best way to reheat High Protein Chicken Orzo is on the stove. Add a splash of chicken broth or water to help it warm evenly. Heat on low, stirring often. If you prefer the microwave, use a microwave-safe bowl. Heat in short intervals, stirring in between. This keeps it moist and tasty. How high is the protein content in High Protein Chicken Orzo? High Protein Chicken Orzo packs a lot of protein. You get about 40 grams per serving. The chicken and chickpeas boost this amount. Can I make this recipe in advance? Yes, you can make this dish ahead of time. Store it in the fridge for up to three days. Just reheat it when ready to eat. Can I use whole grain orzo instead? Absolutely! Whole grain orzo is a great choice. It adds fiber and keeps the dish healthy. The cooking time may be a bit longer, so check the package. What sides pair well with High Protein Chicken Orzo? This orzo dish goes well with a fresh salad. You can also serve it with roasted veggies. Try some crusty bread to soak up the flavors. How do I adjust the recipe for more servings? To make more servings, simply double or triple the ingredients. Keep the same cooking steps. Just make sure your pot is big enough! This blog post covered a tasty recipe featuring orzo, chicken, and veggies. We walked through ingredients, steps, and tips to enhance your dish. You now know about storage, reheating, and even variations for your needs. Cooking doesn’t have to be hard. With these steps, you can enjoy a healthy meal that you can share or adapt. I hope you feel confident to try making this dish today. Happy cooking!
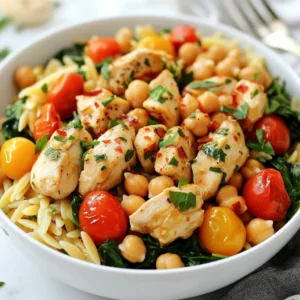
    High Protein Chicken Orzo Flavorful and Nutritious Dish
  • - 4 boneless, skinless chicken breasts - 1 cup grated Parmesan cheese - 1 cup panko breadcrumbs - 1 teaspoon garlic powder - 1 teaspoon onion powder - 1 teaspoon dried oregano - 1 teaspoon paprika - 1/2 teaspoon salt - 1/2 teaspoon black pepper - 2 large eggs - 1 tablespoon Dijon mustard - 1/4 cup flour for dredging - Olive oil spray - Fresh parsley for garnish (optional) Each ingredient brings flavor and texture to the chicken. Use fresh Parmesan for the best taste. Panko breadcrumbs give a nice crunch. Garlic powder and onion powder add depth to the flavor. Dried oregano and paprika enhance the dish with herbs and warmth. Use good quality eggs for a richer coating. When you coat the chicken, make sure to shake off the excess flour. This helps the egg mixture stick better. Also, spray the tops with olive oil. This will help the chicken turn golden and crispy in the oven. If you're looking for gluten-free options, swap panko with gluten-free breadcrumbs. You can use almond flour or crushed nuts for a different flavor. For dairy-free needs, try a dairy-free cheese substitute. Just ensure it melts well. If you want a lighter dish, you can use skin-on chicken breasts. This will add some fat and flavor. However, it may not be as light as the skinless version. Always check labels for any allergens. {{ingredient_image_1}} To start, gather all your ingredients. You need four chicken breasts, Parmesan cheese, and panko breadcrumbs. Also, have garlic powder, onion powder, oregano, paprika, salt, and pepper ready. You'll use eggs and Dijon mustard for coating. Finally, get some flour for dredging. 1. Preheat the oven to 400°F (200°C). This helps the chicken cook evenly and get crispy. 2. Line a baking sheet with parchment paper. This prevents sticking and makes cleanup easy. 3. Mix your dry ingredients. In a shallow dish, combine the grated Parmesan, panko, garlic powder, onion powder, oregano, paprika, salt, and pepper. Stir well to blend all flavors. 4. Whisk the eggs. In another dish, mix the eggs with Dijon mustard. This will help the breadcrumbs stick to the chicken. 5. Prepare the flour. Place flour in a third shallow dish for dredging the chicken. 6. Dredge the chicken. Take a chicken breast and coat it in flour. Shake off any extra flour. 7. Dip in egg. Now, dip the floured chicken into the egg mixture. Make sure it is fully coated. 8. Coat with breadcrumbs. Press the chicken into the Parmesan breadcrumb mixture, ensuring it is evenly covered on both sides. 9. Arrange on the baking sheet. Place the coated chicken on the prepared baking sheet. Spray the tops lightly with olive oil to help them brown. 10. Bake the chicken. Cook in the oven for 25-30 minutes. Look for a golden crust and ensure the chicken is cooked through. 11. Let it rest. Once done, take the chicken out and let it rest for a few minutes before slicing. - Use panko breadcrumbs for extra crunch. They are lighter and crispier than regular bread crumbs. - Lightly spray the tops of the chicken with olive oil. This helps achieve that golden, crispy crust. - Bake on a parchment-lined sheet. It helps with easy cleanup and promotes even cooking. - Avoid overcrowding the baking sheet. Give each piece space to cook properly and get crispy all around. Following these steps and tips will help you create melt-in-your-mouth Parmesan crusted chicken. Enjoy your cooking! To keep your chicken juicy, start with even-sized breasts. This helps them cook evenly. Use a meat mallet to pound the chicken slightly. This makes the meat tender and cooks faster. Always preheat your oven to the right temperature. A hot oven gives a nice crust. Marinate your chicken for extra flavor. A simple mix of olive oil, lemon juice, and garlic works well. After coating, let the chicken sit for a few minutes before baking. This helps the crust stick better. Don’t forget to spray olive oil on top. This adds more flavor and helps crisp the crust. Serve this chicken with a fresh salad. A lemon vinaigrette pairs perfectly. You can also add roasted veggies for color and taste. Mashed potatoes or rice work great as sides too. For an extra pop, serve with lemon wedges. The acidity brightens the dish and enhances the flavors. Pro Tips Perfectly Flattened Chicken: For even cooking, gently pound the chicken breasts to an even thickness before dredging. This helps them cook uniformly and stay juicy. Breadcrumb Coating: For an extra crunch, consider adding some crushed nuts, like almonds or walnuts, to the breadcrumb mixture. It adds a delightful texture and flavor. Resting Time: Allow the chicken to rest for a few minutes after baking. This lets the juices redistribute, ensuring each bite is tender and moist. Flavor Boost: For enhanced flavor, marinate the chicken in a mixture of olive oil, lemon juice, and herbs for an hour before coating. This infuses the meat with extra taste. {{image_2}} You can add more flavor to your chicken with herbs and spices. Try mixing in fresh basil or thyme for a garden taste. You could also use Italian seasoning for a classic twist. A pinch of red pepper flakes adds a nice kick. Experiment with these options to find your perfect blend. Instead of panko, you can use crushed cornflakes or regular breadcrumbs. For a nutty flavor, try almond flour or crushed walnuts. These options give you a different texture and taste. You can also add grated cheese to the coating mix for extra richness. You can cook this chicken in several ways. The air fryer gives a crispy texture with less oil. Cook it at 400°F for about 15-20 minutes. For pan-frying, heat oil in a skillet over medium heat. Cook each side for about 5-7 minutes until golden brown. Both methods keep the chicken juicy and delicious. Store your leftover chicken in an airtight container. This keeps the chicken fresh. Place it in the fridge for up to three days. Make sure the chicken is completely cool before sealing it. This helps avoid moisture buildup. To reheat, use the oven for best results. Preheat your oven to 350°F (175°C). Place the chicken on a baking sheet. Cover it loosely with foil to keep it moist. Heat for about 10-15 minutes or until warm. You can also use a microwave, but it may make the crust soggy. Freezing is a great option for longer storage. Wrap each chicken piece tightly in plastic wrap. Then place it in a freezer-safe bag. This helps prevent freezer burn. You can freeze the chicken for up to three months. To thaw, move it to the fridge overnight before reheating. To keep chicken moist, brining helps a lot. Soak your chicken in salty water for a few hours before cooking. This adds flavor and moisture. Another tip is to cook at a lower temperature. If you bake at 400°F, watch the time closely. Don't overcook; aim for juicy, tender meat. Let it rest after cooking. This step lets juices settle back into the meat. Yes, you can make this recipe gluten-free. Use gluten-free panko breadcrumbs instead of regular ones. For dredging, replace the flour with gluten-free flour or cornstarch. Both options work well and create a nice crust. Just ensure all other ingredients are gluten-free as well. This way, everyone can enjoy the meal. To check if chicken is cooked, use a meat thermometer. Insert it into the thickest part of the chicken. The safe temperature is 165°F. If you don't have a thermometer, cut into the chicken. The juices should run clear, not pink. Cooking time varies, so keep an eye on it to avoid overcooking. Parmesan crusted chicken goes well with many sides. Here are some tasty options: - Roasted vegetables: Carrots, broccoli, and bell peppers add color and nutrients. - Mashed potatoes: Creamy and comforting, they balance the chicken’s crunch. - Caesar salad: Crisp romaine and tangy dressing complement the flavors well. - Rice pilaf: A light, fluffy side that soaks up juices nicely. These pairings enhance your meal and create a colorful plate. We covered key ingredients, how to cook, and tips for delicious Parmesan-crusted chicken. Remember to explore variations and substitutions to suit your needs. Proper storage and reheating keep leftovers tasty. With these steps, you will enjoy juicy, crispy chicken every time. Use this guide to impress your family and friends with your cooking skills. Enjoy every bite and happy cooking!
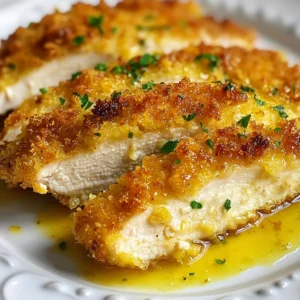
    Melt-In-Your-Mouth Parmesan Crusted Chicken Delight
  • To make a tasty Chicken Caesar Pasta Salad, you need these key ingredients: - 2 cups rotini pasta - 1 cup cooked chicken breast, diced - 1 cup romaine lettuce, chopped - ½ cup cherry tomatoes, halved - ¼ cup grated Parmesan cheese - 2 tablespoons Caesar dressing - 2 tablespoons Greek yogurt - 1 tablespoon lemon juice - Salt and black pepper, to taste - ¼ cup croutons (for garnish) These ingredients blend well to create a fresh and creamy salad. You can add more flavor and texture with these optional ingredients: - Sliced olives for a briny touch - Avocado for extra creaminess - Cooked bacon bits for a smoky crunch - Red onion slices for a bit of bite - Fresh herbs like basil or parsley for brightness Feel free to mix and match based on your taste. If you don't have some ingredients, here are easy swaps: - Use penne pasta instead of rotini. - Swap grilled chicken for rotisserie chicken. - Replace romaine with spinach or kale. - Use any cheese if you lack Parmesan, like feta or mozzarella. - You can substitute Caesar dressing with ranch or Italian dressing. These swaps will still keep your salad delicious and satisfying. {{ingredient_image_1}} First, cook 2 cups of rotini pasta. Follow the package instructions. Aim for al dente, so it stays firm. Once cooked, drain the pasta and rinse it under cold water. This step cools it down quickly. It also helps prevent sticking. Set the pasta aside while you prepare the other ingredients. Next, gather your chicken and veggies. Use 1 cup of cooked chicken breast and dice it into bite-sized pieces. In a large bowl, add the chicken, 1 cup of chopped romaine lettuce, and ½ cup of halved cherry tomatoes. This mix adds color and crunch to your salad. Now, let’s make the dressing. In a small bowl, whisk together 2 tablespoons of Caesar dressing, 2 tablespoons of Greek yogurt, and 1 tablespoon of lemon juice. Add salt and black pepper to taste. Whisk until smooth. This dressing gives the salad a creamy and tangy flavor. Add the cooled pasta to the large bowl with the chicken and veggies. Pour the dressing over the top. Gently toss everything together until well mixed. You want each piece to be coated in dressing. Then, sprinkle in ¼ cup of grated Parmesan cheese and toss lightly again. This adds a nice cheesy flavor. When ready to serve, taste the salad. Adjust the seasoning if needed. For a crunchy finish, top it with ¼ cup of croutons. Serve the salad in a large bowl or on individual plates. You can garnish with extra Parmesan cheese and a few whole cherry tomatoes for a nice look. Enjoy your delicious Chicken Caesar Pasta Salad! To get a creamy texture, use both Caesar dressing and Greek yogurt. The yogurt adds a nice tang. Mix them well in a bowl before adding to the salad. This helps blend the flavors together. If you want it creamier, add more yogurt. Just be careful not to overdo it! When tossing your salad, be gentle. You want to mix the pasta and veggies without crushing them. Start by adding the dressing to the pasta first. Then, add the veggies and chicken. Use two large spoons or forks to lift and fold the ingredients. This keeps everything intact and helps coat every piece. If you want to make this salad lighter, swap out some dressing for more yogurt. For a vegan version, use tofu instead of chicken and plant-based dressing. You can also add more veggies like bell peppers or cucumbers for crunch. Adjust the cheese or leave it out for a dairy-free option. Pro Tips Cook Pasta Al Dente: To ensure the pasta retains its shape and texture, cook it until al dente. This means it should be firm to the bite but not hard. Chill Ingredients: For a refreshing taste, chill your chicken and vegetables before mixing. This will enhance the overall flavor of the pasta salad. Dress Just Before Serving: To avoid sogginess, add the dressing to the salad just before serving. This keeps the ingredients crisp and fresh. Customize Your Greens: Feel free to mix in other greens like spinach or kale for added nutrition and flavor. This adds variety to your salad! {{image_2}} To make a vegetarian version, skip the chicken. Instead, use chickpeas or tofu for protein. Both options are filling and tasty. You can also add more veggies like bell peppers or cucumbers. These add color and crunch to your salad. Don't forget to keep the Caesar dressing, as it adds great flavor. If you need a gluten-free option, switch out the rotini pasta. Use gluten-free pasta made from rice or corn. These pastas work well and taste great. You can also use spiralized zucchini for a fresh twist. Just make sure any dressing you use is gluten-free too. To give this salad extra flavor, try adding some fresh herbs. Chopped basil or parsley works well with the dish. You can also toss in some olives or capers for a briny taste. For a bit of heat, add red pepper flakes. This will spice things up without overpowering the dish. To keep your Chicken Caesar Pasta Salad fresh, place it in an airtight container. Make sure to cover it well. You can store it in the fridge for later meals. This helps to keep the flavors intact and the pasta from getting mushy. Try to consume it within three days for the best taste. Reheating pasta salad can be tricky. I suggest eating it cold for the best flavor. If you prefer it warm, heat it gently in a pan. Add a bit of olive oil or extra dressing to keep it moist. Avoid using the microwave, as it can make the pasta soggy. Chicken Caesar Pasta Salad can last in the fridge for three to four days. If you notice any off smells or changes in texture, it’s best to toss it out. For longer storage, consider freezing the salad without the dressing. It can last in the freezer for up to two months, but the texture may change when thawed. Yes, you can make Chicken Caesar Pasta Salad ahead of time. This dish tastes great cold. I suggest making it a few hours before serving. Just keep it in the fridge. The flavors mix well when it sits. Absolutely! You can add any veggies you like. Bell peppers, cucumbers, or spinach work well too. Just chop them up small. Mix them in at the same time as the other veggies. This makes the salad even more colorful and tasty. If you want a change, try ranch or Italian dressing. Both add a nice flavor. You can also use a yogurt-based dressing for a lighter option. Just make sure it matches the taste you want. To make a lighter version, use less dressing. You can replace some dressing with extra Greek yogurt. This keeps it creamy but cuts down on calories. You can also use whole wheat pasta for more fiber. This blog post covered the essentials for making a Chicken Caesar Pasta Salad. We outlined the main ingredients, with options for substitutions and enhancements. You learned step-by-step instructions for cooking each part, and tips to achieve the perfect creamy texture. We also explored variations, storage, and answered common FAQs. Embrace your creativity in the kitchen. Experiment with flavors, make it your own, and enjoy every bite.
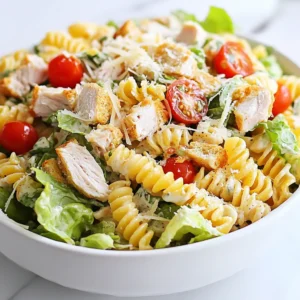
    Savory Chicken Caesar Pasta Salad Easy and Quick Recipe
  • For Spicy Nashville Hot Buttermilk Fried Chicken, you need these main ingredients: - 4 pieces of chicken (legs and thighs preferred) - 2 cups buttermilk - 1 tablespoon hot sauce (preferably cayenne-based) - 2 cups all-purpose flour - 1 tablespoon paprika - 1 tablespoon garlic powder - 1 tablespoon onion powder - 1 teaspoon cayenne pepper (adjust for heat preference) - 1 teaspoon salt - 1 teaspoon black pepper - Oil for frying (vegetable or peanut oil) - 2 tablespoons cayenne pepper (for the spicy coating) - 1 tablespoon brown sugar - Pickles, for serving The spice mix adds flavor and heat. Here’s what you need: - 1 tablespoon paprika - 1 tablespoon garlic powder - 1 tablespoon onion powder - 1 teaspoon cayenne pepper - 1 teaspoon salt - 1 teaspoon black pepper - 2 tablespoons cayenne pepper (for the coating) - 1 tablespoon brown sugar Mix these spices well to create a bold and flavorful blend. To make this dish, gather the following equipment: - Large mixing bowl for marinating - Deep frying pan or Dutch oven - Deep-fry thermometer for oil temperature - Wire racks or paper towels for draining - Mixing bowls for the dredging mixture and spice mix Having the right tools makes cooking easier and more fun! Start by making the marinade. In a large bowl, whisk together 2 cups of buttermilk and 1 tablespoon of hot sauce. I prefer cayenne-based hot sauce for the best flavor. Next, take your 4 pieces of chicken and fully submerge them in the buttermilk mixture. Make sure each piece is well coated. Cover the bowl and place it in the fridge. Let the chicken marinate for at least 4 hours, but overnight is even better. This step makes the chicken tender and flavorful. While the chicken marinates, prepare the dredging mixture. In a separate bowl, combine 2 cups of all-purpose flour, 1 tablespoon of paprika, 1 tablespoon of garlic powder, and 1 tablespoon of onion powder. Add 1 teaspoon of cayenne pepper, 1 teaspoon of salt, and 1 teaspoon of black pepper. Mix all the ingredients well. This seasoned flour will give your chicken a nice, crispy crust. Now it's time to fry the chicken! First, heat oil in a deep frying pan or Dutch oven. Pour enough oil to cover the chicken pieces halfway, about 2-3 inches deep. Heat the oil to 350°F (175°C). To test the temperature, use a deep-fry thermometer. Once the oil is hot, take the marinated chicken out of the buttermilk. Let any excess buttermilk drip off. Dredge each piece in the seasoned flour, pressing the flour onto the chicken for a good coating. Shake off any extra flour. Carefully place the coated chicken pieces in the hot oil. Fry them for about 12-15 minutes. Turn them occasionally until they are golden brown and reach an internal temperature of 165°F (74°C). Avoid overcrowding the pan; fry in batches if needed. After frying, remove the chicken and let it drain on wire racks or paper towels. This process keeps the chicken crispy. To get that perfect crispy coating, start by letting the chicken soak in buttermilk. This step not only adds flavor but also makes the chicken tender. After marinating, shake off excess buttermilk. When you dredge the chicken in the flour mixture, press it down firmly. This helps the flour stick better and creates a crunchier bite. Fry in small batches to avoid steaming. This ensures each piece gets that golden color. The best oil for frying is vegetable or peanut oil. These oils have high smoke points, making them great for frying. They help achieve that crispy texture without burning. Always choose oils that are neutral in flavor. This lets the chicken's spice shine through. Avoid using olive oil as it burns easily and alters the taste. For frying chicken, the ideal cooking temperature is 350°F (175°C). Use a deep-fry thermometer to check the heat. If the oil is too hot, the outside cooks fast while the inside stays raw. If it's too cool, the chicken absorbs too much oil and becomes greasy. Keep a steady temperature throughout the frying process. This way, you'll get a perfectly cooked, crispy chicken every time. {{image_2}} You can switch up the marinating flavors. Try using different hot sauces. Sriracha or chipotle can add a unique twist. For a tangy touch, add lemon juice to the buttermilk. You can also mix in honey for a sweet kick. Explore spices like cumin or smoked paprika for more depth. These changes can make your Nashville chicken special every time. If frying isn’t your style, try baking the chicken. Preheat your oven to 400°F (200°C). Marinate the chicken as usual. Then coat it with the flour mix. Place the chicken on a baking sheet lined with parchment. Spray it lightly with cooking oil. Bake for about 30 to 35 minutes until crispy and cooked through. This method cuts down on oil but keeps that delicious flavor. Serve your Nashville hot chicken with classic sides. Coleslaw offers a cool crunch. Cornbread adds a nice, sweet touch. You can also pair it with pickles for a tangy bite. As for drinks, sweet tea complements the heat perfectly. Lemonade is another great choice. It balances the spice and refreshes your palate. Enjoy your meal with these delicious pairings! After enjoying your spicy Nashville hot buttermilk fried chicken, store leftovers right away. Place the chicken in an airtight container. Layer parchment paper between pieces to avoid sticking. Refrigerate within two hours of cooking. This will keep the chicken fresh for 3 to 4 days. Make sure to seal it tightly to lock in moisture. To reheat the chicken, avoid the microwave if you can. It tends to make the coating soggy. Instead, preheat your oven to 350°F (175°C). Place the chicken on a wire rack over a baking sheet. This allows hot air to circulate around the chicken. Heat for about 15 to 20 minutes until it's warm and crispy again. You can also use an air fryer for a quicker option. If you can’t finish all the chicken, freezing is a great choice. Let the chicken cool completely before freezing. Wrap each piece tightly in plastic wrap, then place in a freezer bag. This helps avoid freezer burn. You can store it in the freezer for up to 3 months. To enjoy later, thaw in the fridge overnight before reheating. Nashville hot chicken gets its spice from cayenne pepper. The heat comes from using a lot of it in the coating and the marinade. This pepper delivers a bold flavor that hits your taste buds. Some recipes add a hot sauce with cayenne for extra kick. A mix of spices like paprika, garlic, and onion enhances the overall flavor. The balance of spice and sweetness makes it unique. Marinating the chicken is key for flavor and tenderness. I recommend at least 4 hours. For the best results, marinate overnight. The buttermilk and hot sauce soak into the chicken. This process helps break down proteins, making the meat juicy and tasty. Plus, it allows time for the spices to infuse deeply. Yes, you can use other meats for Nashville hot recipes. While chicken is traditional, you can try turkey or even pork. Just make sure the cooking times are adjusted for different meats. Each type will absorb the spicy flavors well. The key is to keep the buttermilk marinade and spice coating. Nashville hot chicken brings bold flavors and fun to your table. We covered essential ingredients, marinades, and perfect frying techniques. You learned tips for a crispy coating and how to store leftovers. Try variations like oven-baked chicken, or pair it with great sides. Remember, marinating time and spice levels matter for that signature heat. Now, take what you've learned and make your perfect Nashville hot chicken. Enjoy the cooking adventure!
    Spicy Nashville Hot Buttermilk Fried Chicken Delight
  • To make Parmesan Garlic Beef Bowtie Pasta, gather the following items: - 8 oz (225g) bowtie pasta - 1 lb (450g) ground beef - 1 tablespoon olive oil - 4 cloves garlic, minced - 1 small onion, finely chopped - 1 teaspoon dried oregano - 1 teaspoon red pepper flakes (optional) - 1 cup beef broth - 1 cup heavy cream - 1 cup grated Parmesan cheese - Salt and pepper to taste - Fresh parsley, chopped (for garnish) You can easily adapt this recipe based on your needs. If you want a lighter option, use ground turkey instead of beef. For a vegetarian meal, swap the beef for mushrooms or lentils. If you prefer dairy-free, try using coconut cream or a nut milk alternative in place of heavy cream. Gluten-free pasta works great, too, so don't hesitate to make that switch! You will need a few basic tools to make this dish: - A large pot for boiling pasta - A large skillet for cooking the beef and sauce - A wooden spatula for mixing - A measuring cup for liquids - A knife and cutting board for chopping ingredients - A colander for draining the pasta These tools will help you create a delicious and satisfying meal with ease! {{ingredient_image_1}} Start by filling a large pot with water. Bring the water to a boil. Add a pinch of salt to the water. Once boiling, add the bowtie pasta. Cook according to the package instructions. Aim for al dente, which means firm to the bite. After cooking, drain the pasta and set it aside. In a large skillet, heat one tablespoon of olive oil over medium heat. Once hot, add the finely chopped onion. Sauté the onion for about three minutes. You want it to be soft and translucent. Next, add the minced garlic to the skillet. Cook the garlic for one to two minutes until it smells great. Be careful not to burn it! Now, stir in one pound of ground beef. Break the meat apart with a spatula. Cook until it's browned and no longer pink, which takes about five to seven minutes. Season the mixture with one teaspoon of dried oregano, salt, and pepper. If you like some heat, add one teaspoon of red pepper flakes. Mix everything well. Pour in one cup of beef broth and bring it to a simmer. Let it cook for five minutes to reduce a bit. Then, stir in one cup of heavy cream. Bring it back to a gentle simmer for another three to four minutes. This helps the sauce thicken. Gradually mix in three-quarters of a cup of grated Parmesan cheese. Stir until it melts and becomes creamy. Now, add the cooked bowtie pasta to the skillet. Toss everything together until the pasta is well coated in the sauce. Serve right away, topping each plate with the remaining Parmesan cheese and a sprinkle of fresh chopped parsley. To cook perfect bowtie pasta, start with a large pot. Fill it with water and add a pinch of salt. Boil the water before adding the pasta. Stir the pasta a few times while it cooks. Follow the package instructions for timing and check for doneness. You want it al dente, or firm to the bite. Drain the pasta but reserve some pasta water. This water can help adjust the sauce later. For a rich, creamy sauce, use heavy cream. After cooking the beef and garlic, add the beef broth first. Let it simmer to reduce. This step builds flavor. Once reduced, stir in the heavy cream slowly. Keep the heat low to prevent curdling. Adding cheese gradually helps it melt smoothly. You want the sauce to be velvety, not grainy. If it seems too thick, splash in some reserved pasta water. To take flavors up a notch, fresh herbs work wonders. Try adding basil or thyme for a fresh twist. You can also play with spices. Red pepper flakes bring a nice heat, but adjust to your taste. For a deeper flavor, consider a splash of Worcestershire sauce. Don't forget salt and pepper to enhance all the flavors. A sprinkle of fresh parsley at the end adds color and freshness. Pro Tips Tip Title: Cook Pasta in Salted Water: Always add a generous amount of salt to the boiling water before cooking pasta. This enhances the pasta's flavor and prevents it from tasting bland. Tip Title: Don't Overcook the Beef: Ensure the ground beef is browned but not overcooked. This keeps it tender and juicy, contributing to the overall richness of the dish. Tip Title: Use Fresh Garlic: For the best flavor, use fresh minced garlic instead of garlic powder. Fresh garlic adds a robust aroma and taste that elevates the dish. Tip Title: Reserve Pasta Water: Before draining your pasta, reserve a cup of the cooking water. This starchy water can be added to the sauce to adjust the consistency and help it cling to the pasta. {{image_2}} You can easily make a vegetarian version of this dish. Swap the ground beef for plant-based ground meat. Brands like Beyond Meat or Impossible Burger work well here. Use the same amount, about 1 pound. For extra flavor, add mushrooms or lentils. They bring a nice texture and taste to the meal. Don’t forget to use vegetable broth instead of beef broth. This keeps the dish rich and flavorful without meat. If you need a gluten-free option, try gluten-free bowtie pasta. Many brands offer this now. Look for ones made from rice or chickpeas. They taste great and hold their shape well. Cook them just like regular pasta. Check the package for cooking times. This way, you can enjoy the same delicious meal without gluten. You can also switch the protein in this dish. Chicken works well if you prefer poultry. Use about 1 pound of ground chicken, and follow the same cooking steps. For a spicy twist, try Italian sausage. Remove the casing and cook it in the skillet. The sausage adds a great kick and pairs nicely with the garlic and Parmesan. You can even mix and match proteins for a unique flavor every time! After enjoying your Parmesan Garlic Beef Bowtie Pasta, let any leftovers cool. Once cooled, place them in an airtight container. This helps keep the flavors fresh. Store them in the fridge. They will stay good for up to three days. Make sure to label the container with the date. This way, you can track how long they have been stored. When you are ready to enjoy your leftovers, take them out of the fridge. You can reheat your pasta on the stove or in the microwave. If using the stove, add a splash of beef broth or cream to keep it creamy. Heat it over medium-low heat until warm. If using a microwave, place the pasta in a microwave-safe dish. Cover it with a lid or microwave-safe wrap. Heat in short bursts, stirring in between, until hot. If you want to save your pasta for a later date, freezing is an option. Portion the pasta into freezer-safe containers. Make sure to leave some space at the top of the container. This allows for expansion as the pasta freezes. Label each container with the date. You can freeze the dish for up to three months. When you're ready to eat, thaw it in the fridge overnight, then reheat as mentioned above. Yes, you can make this dish ahead of time. Cook the pasta and sauce separately. Store them in the fridge. When you are ready to serve, combine them in a pan. Heat gently until warm. This keeps the pasta from getting soggy. Absolutely! You can use different pasta shapes. Penne, fusilli, or even spaghetti work well. Just make sure to adjust the cooking time based on the type of pasta you choose. If you need a lighter option, use half-and-half. Coconut milk is a great dairy-free choice. For a thicker texture, blend silken tofu with a little milk. Each substitute will give a unique taste. The spiciness depends on how much you use. One teaspoon adds a mild kick. If you want more heat, add more flakes. Start small and taste as you go. This way, you can find the right balance for your dish. This blog post covered everything you need for a tasty dish. We listed key ingredients and tools. I shared simple steps to cook the pasta and prepare the beef. You learned tips for a creamy sauce and flavor boosts. Don't forget the variations for dietary needs. Storing and reheating the meal was also detailed. Dive in and make this meal your own! Enjoy cooking and sharing it with others. Your kitchen adventure starts now.
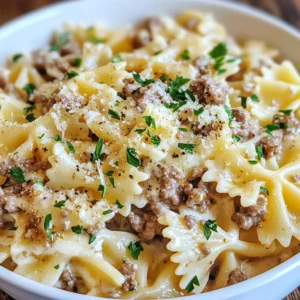
    Parmesan Garlic Beef Bowtie Pasta Flavorful Delight
  • To make a delicious high protein white chicken chili, gather these key items: - 1 lb boneless, skinless chicken breasts - 1 tablespoon olive oil - 1 medium onion, diced - 2 cloves garlic, minced - 2 cans (15 oz each) white beans, drained and rinsed - 1 can (4 oz) diced green chiles - 2 cups low-sodium chicken broth - 1 teaspoon ground cumin - 1 teaspoon chili powder - 1/2 teaspoon smoked paprika - 1/2 teaspoon dried oregano - Salt and pepper to taste - 1 cup corn kernels (fresh or frozen) - 1/2 cup Greek yogurt - 1 cup shredded cheddar cheese (optional) - Fresh cilantro and lime wedges for garnish These ingredients work together to create a hearty and filling meal. The chicken provides protein, while beans add fiber. The spices bring warmth and flavor. You can elevate your chili with these tasty toppings: - Shredded cheddar cheese - Fresh cilantro - Lime wedges These garnishes add color and enhance the dish’s flavor. The cheese brings creaminess, while lime adds a fresh zing. This high protein white chicken chili is not only tasty but also good for you. Each serving offers: - Calories: Approximately 400 - Protein: About 35 grams - Carbohydrates: Around 40 grams - Fat: Roughly 10 grams This meal packs a punch of protein, making it perfect for a post-workout meal or a filling lunch. The combination of chicken, beans, and Greek yogurt boosts its nutritional value. Enjoy your bowl of goodness, knowing it fuels your body! {{ingredient_image_1}} Start by gathering all your ingredients. You will need: - 1 lb boneless, skinless chicken breasts - 1 tablespoon olive oil - 1 medium onion, diced - 2 cloves garlic, minced - 2 cans (15 oz each) white beans, drained and rinsed - 1 can (4 oz) diced green chiles - 2 cups low-sodium chicken broth - 1 teaspoon ground cumin - 1 teaspoon chili powder - 1/2 teaspoon smoked paprika - 1/2 teaspoon dried oregano - Salt and pepper to taste - 1 cup corn kernels - 1/2 cup Greek yogurt - 1 cup shredded cheddar cheese (optional) - Fresh cilantro and lime wedges for garnish First, heat the olive oil in a large pot over medium heat. Next, add the diced onion. Cook until the onion turns soft, about five minutes. Stir in the minced garlic and cook for another one to two minutes. This step adds a lot of flavor. While the onion and garlic cook, season the chicken breasts. Use salt, pepper, cumin, chili powder, smoked paprika, and oregano. Once seasoned, add the chicken to the pot. Pour in the chicken broth and bring the mixture to a simmer. Cover the pot and cook for 20-25 minutes. The chicken needs to be fully cooked. After cooking, remove the chicken from the pot. Use two forks to shred the chicken into pieces. Return the shredded chicken back to the pot. Now, stir in the white beans, diced green chiles, and corn. Cook for another ten minutes. This lets all the flavors mix together. Finally, reduce the heat and stir in the Greek yogurt. This makes the chili creamy and adds protein. Adjust the seasonings to your taste. Shredding chicken can be easy. Use two forks to pull the chicken apart. A helpful tip is to let the chicken cool slightly before shredding. This can make it easier to handle. If you want smaller pieces, shred it a bit more. You want the chicken to blend well with the other ingredients. To boost flavor in your chili, always start with fresh ingredients. Use high-quality chicken and spices. Sauté the onions and garlic until soft. This brings out their natural sweetness. Add the spices early, letting them bloom in the oil. This step makes the chili more aromatic. Don't skip the Greek yogurt; it adds creaminess and protein. Always taste your chili as it cooks. Adjust salt and spices to fit your taste. You can easily make this chili your own. Want more veggies? Toss in bell peppers or zucchini. If you like heat, add jalapeños or hot sauce. For a smoky flavor, try adding chipotle peppers. You can also swap white beans for black beans or lentils. If you’re on a low-carb diet, skip the beans and add more chicken. Love a thicker chili? Blend part of it and stir it back in. For best results, use a large pot or Dutch oven. It holds heat well and allows for even cooking. A good knife makes chopping veggies quick and easy. Use a sturdy cutting board to keep your workspace safe. For shredding chicken, two forks work great. You might also want a ladle for serving. Lastly, keep measuring spoons handy to ensure accurate spice amounts. This keeps your chili flavorful and well-balanced. Pro Tips Use Rotisserie Chicken: For an even quicker meal, substitute cooked rotisserie chicken for the raw chicken breasts. Just add it in at the end to heat through. Adjust the Spice Level: If you prefer a milder chili, reduce the amount of chili powder and green chiles. For more heat, add diced jalapeños or a dash of cayenne pepper. Make it Ahead: This chili tastes even better the next day! Make a batch in advance and store it in the fridge for up to 3 days or freeze for up to a month. Garnish Creatively: Experiment with toppings like avocado slices, crushed tortilla chips, or a drizzle of hot sauce to add extra flavor and texture. {{image_2}} You can easily make this chili vegetarian or vegan. Replace the chicken with extra beans or lentils. Use vegetable broth instead of chicken broth for a rich flavor. Swap Greek yogurt with a plant-based yogurt for creaminess without dairy. This way, you keep the protein high while making it plant-friendly. If you like heat, add more diced green chiles or some jalapeños. For a milder chili, just use fewer spices. You can also add a pinch of cayenne pepper for a gentle kick. Taste as you go, and adjust to your liking. This way, everyone can enjoy their own spice level. This chili is naturally gluten-free, but always check labels. Some canned goods may contain gluten. Use certified gluten-free broth and beans. If you want to thicken the chili, use cornstarch mixed with water. This keeps your meal safe and delicious for gluten-sensitive diners. To store leftover high protein white chicken chili, let it cool first. Once cool, transfer it to an airtight container. Keep it in the fridge for up to four days. Make sure to label the container with the date. This helps you know when it is best to eat. You can freeze this chili for longer storage. Use freezer-safe containers or heavy-duty freezer bags. Make sure to leave some space at the top for expansion. It will stay fresh for up to three months in the freezer. When you’re ready to eat, just thaw it in the fridge overnight. Reheat the chili on the stove for the best flavor. Pour it into a pot and heat over medium heat. Stir often and add a splash of broth if it seems too thick. You can also use the microwave. Place it in a microwave-safe bowl, cover it loosely, and heat in short bursts, stirring in between. Always check that it is hot throughout before serving. To spice up your chili, add more chili powder or diced jalapeños. You can also try adding hot sauce or cayenne pepper. Taste as you go, and find the heat you like best. For a fun twist, roast your peppers before adding them for a smoky flavor. Yes, you can use canned chicken. It saves time and works well in this chili. Drain and rinse the canned chicken before adding it. Mix it in during the last few minutes of cooking. This keeps it tender and helps it soak up the flavors. High-protein meals help you feel full longer. They support muscle growth and repair. Protein also helps maintain healthy skin and hair. Eating protein can boost your metabolism, too. This chili packs a punch with lean chicken and Greek yogurt, making it a smart choice. Your chili will last about 3 to 4 days in the fridge. Store it in an airtight container to keep it fresh. If you want it to last longer, consider freezing it. Just remember to let it cool before putting it in the freezer. This blog post covered how to make a tasty high-protein white chicken chili. You learned about essential ingredients, cooking steps, and smart tips for great flavor. I shared ways to customize your dish and keep leftovers fresh. Remember, making this chili can be easy and fun. Enjoy it your way, whether spicy or mild. Keep exploring different flavors and make it a dish you'll love. Your kitchen journey starts here!
    High Protein White Chicken Chili Quick and Filling Meal
  • - 4 boneless, skinless chicken thighs - 1 cup jasmine rice - 1 medium onion, chopped - 3 cloves garlic, minced - 1 can (10.5 oz) cream of mushroom soup - 1 cup chicken broth - 1 cup whole milk - 1 cup frozen mixed vegetables (peas, carrots, corn) - ½ cup shredded cheddar cheese (optional for topping) - 1 teaspoon dried thyme - 1 teaspoon paprika - Salt and pepper to taste - Fresh parsley for garnish When making Creamy Smothered Chicken and Rice Casserole, you need to gather all your ingredients first. The main stars are the chicken, rice, onion, and garlic. These simple items create a flavorful base. You can use chicken thighs for their tenderness. Jasmine rice adds a lovely aroma and texture. Chopped onion and minced garlic make the dish fragrant and tasty. Next, you’ll need some creamy elements. The cream of mushroom soup brings richness. Chicken broth adds depth, while whole milk makes it dreamy and smooth. Don’t forget about the frozen mixed veggies! They brighten the dish and add color. If you love cheese, sprinkle some cheddar on top for extra flavor. For seasoning, dried thyme and paprika work wonders. They bring warmth and a slight kick. Finally, salt and pepper to taste help balance everything. Finish with fresh parsley for a touch of brightness. Now you have all the ingredients ready! This mix is sure to create a comforting and delicious casserole. - Preheat your oven to 375°F (190°C). - In a large ovenproof skillet, heat two tablespoons of olive oil over medium heat. - Add one chopped onion and sauté for about three to four minutes. The onion should soften. - Stir in three minced garlic cloves and cook for one more minute. You want it fragrant. - Season four chicken thighs with salt, pepper, one teaspoon of dried thyme, and one teaspoon of paprika. - Place the thighs in the skillet and sear for about four to five minutes on each side. They should turn golden brown. - Once done, remove the chicken and set it aside. - In the same skillet, combine one cup of jasmine rice, one can of cream of mushroom soup, one cup of chicken broth, and one cup of whole milk. - Stir the mixture until everything is well blended. - Add one cup of frozen mixed vegetables, which can include peas, carrots, and corn. - Place the seared chicken thighs on top of the rice mixture. - Cover the skillet with a lid or aluminum foil. - Transfer it to the preheated oven and bake for 30 minutes. - After 30 minutes, remove the cover and sprinkle on half a cup of shredded cheddar cheese, if you like. - Bake for another 10 minutes, or until the cheese melts and bubbles. - Once out of the oven, let it sit for five minutes before serving. Garnish with fresh parsley for a nice touch. - Use whole milk for richer flavor. - Opt for homemade cream of mushroom soup if possible. To make your casserole creamy, whole milk is key. It adds richness and depth. If you can, try making your own cream of mushroom soup. It tastes better and adds freshness. You can find simple recipes online. - Ensure even browning of chicken by not overcrowding the skillet. - Let the casserole rest for a few minutes for easier serving. When searing chicken, space is important. Don’t crowd the skillet. This helps the chicken brown well. Browning adds flavor to your dish. After baking, let the casserole sit for five minutes. This makes serving easier and helps flavors meld. - Serve directly from the skillet or plate in shallow bowls. - Garnish with extra parsley for added color. You can serve this dish right from the skillet for a cozy feel. If you prefer, use shallow bowls to dish it out. A sprinkle of fresh parsley adds a nice touch. It brightens the dish and makes it look great. Enjoy your meal! {{image_2}} You can easily change the meat in this dish. Substitute chicken with turkey or pork thighs for a new taste. If you want a leaner option, use boneless chicken breasts. Both options keep the dish moist and flavorful. Rice is a key part of this casserole. For a healthier option, try brown rice. It adds more fiber and nutrients. If you’re looking for a low-carb version, quinoa or cauliflower rice works great. Both options give a nice texture while cutting down on carbs. You can customize your casserole with a mix of vegetables. Seasonal veggies like bell peppers or zucchini add fresh flavors. Using fresh vegetables instead of frozen makes a big difference in taste. They bring out the dish's natural sweetness and crunch. You can store your creamy smothered chicken and rice casserole in the fridge. Place it in an airtight container. It stays fresh for up to 3 days. Make sure it cools down first. This step helps avoid moisture buildup and keeps it tasty. Freezing is a great option if you want to save some for later. I recommend freezing in individual portions. This makes reheating easy. For the best flavor, try to eat it within 2 to 3 months. Remember, the longer it sits, the less yummy it becomes. When you want to enjoy your casserole again, reheat it in the oven. Set it to 350°F and heat until hot throughout. If it seems a bit dry, add a splash of milk. This keeps the casserole creamy and delicious. Yes, you can make this casserole ahead of time. Just assemble it and place it in the fridge. When you're ready to eat, bake it straight from the refrigerator. This is perfect for busy nights. Yes, there is a vegetarian version. You can replace the chicken with beans or tofu. Use vegetable broth instead of chicken broth. This way, you keep the creamy texture and flavor without meat. I love to pair this casserole with a fresh green salad. Roasted vegetables also work well for a complete meal. These sides add color and nutrition to your plate. This blog post covered making a delicious Creamy Smothered Chicken and Rice Casserole. We discussed the main and additional ingredients, including chicken, rice, and veggies. I provided step-by-step instructions for preparing, assembling, and baking the dish. You also learned tips for achieving a creamy texture and various options for meat and rice. Finally, we explored storage and reheating methods. Enjoy this comforting meal with your loved ones. It's easy, tasty, and sure to please everyone at the table.
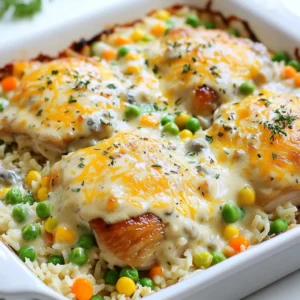
    Creamy Smothered Chicken and Rice Casserole Delight
  • To make a delicious macaroni salad like the ones served in restaurants, you'll need these key ingredients: - 2 cups elbow macaroni - 1 cup mayonnaise - 2 tablespoons Dijon mustard - 1 tablespoon apple cider vinegar - 1 cup celery, diced - 1 cup red bell pepper, diced - 1/2 cup red onion, finely chopped - 1/2 cup sweet pickle relish - 2 hard-boiled eggs, chopped - 1 teaspoon garlic powder - 1 teaspoon onion powder - Salt and pepper to taste - Fresh parsley for garnish These ingredients combine to create a creamy and flavorful dish that everyone will enjoy. You can elevate your macaroni salad with these optional ingredients: - Chopped fresh herbs like dill or parsley - A splash of lemon juice for brightness - Chopped pickles for extra crunch - Diced green onions for a mild onion flavor - A pinch of cayenne pepper for some heat These add-ins let you customize the salad to fit your taste. To make this macaroni salad, gather these tools: - Large pot for boiling macaroni - Mixing bowl for the dressing - Colander for draining pasta - Whisk for mixing the dressing - Large serving bowl for the finished salad - Plastic wrap for chilling Having the right tools makes the cooking process smooth and fun. {{ingredient_image_1}} To start, fill a large pot with salted water. Bring it to a boil over high heat. Add 2 cups of elbow macaroni. Cook it according to the package instructions until it is al dente. This usually takes about 7 to 10 minutes. Once done, drain the macaroni and rinse it under cold water. This cools it down and stops the cooking process. In a mixing bowl, combine 1 cup of mayonnaise, 2 tablespoons of Dijon mustard, and 1 tablespoon of apple cider vinegar. Add 1 teaspoon of garlic powder and 1 teaspoon of onion powder. Sprinkle in some salt and pepper to taste. Whisk everything together until it is smooth and creamy. This dressing is key to your salad’s flavor. In a large bowl, add the cooled macaroni. Now, mix in 1 cup of diced celery, 1 cup of diced red bell pepper, and 1/2 cup of finely chopped red onion. Don’t forget 1/2 cup of sweet pickle relish for a tangy kick. Gently toss these ingredients together. This step helps to evenly spread the flavors throughout your salad. Pour the dressing over the macaroni and vegetable mixture. Carefully fold in 2 chopped hard-boiled eggs. Be gentle to keep the eggs intact. Now, cover the bowl with plastic wrap. Chill it in the refrigerator for at least 1 hour. This allows the flavors to meld together. When ready to serve, taste the salad. Adjust the seasoning if needed. Garnish with fresh parsley for a nice finish. Enjoy your creamy macaroni salad! To achieve the best texture in your macaroni salad, focus on cooking the pasta just right. Cook the elbow macaroni until it is al dente, which means firm to the bite. After draining, rinse it under cold water. This step cools the pasta and halts the cooking process. It also helps prevent clumping. A well-cooked macaroni gives a lovely bite and holds the dressing better. Balancing flavors is key. You want a mix of salt, sweet, and tangy. Start with the basics: salt and pepper. Then taste your salad after adding the dressing. If it feels flat, add a bit more salt. For sweetness, the pickle relish helps, but you can add a pinch of sugar if needed. For tang, a splash more apple cider vinegar can brighten the dish. Adjust these elements until it sings. Make your macaroni salad shine on the table. Use a large, colorful bowl for serving. Sprinkle extra chopped parsley on top for a fresh touch. You can also add lemon wedges on the side. The lemon gives a zesty pop when served. Consider garnishing with slices of hard-boiled eggs for a beautiful finish. A well-presented dish makes it even more appealing. Pro Tips Chill for Flavor: Allow the macaroni salad to chill for at least an hour. This helps all the flavors meld together for a tastier dish. Add Texture: For extra crunch, consider adding some diced pickles or even chopped nuts to the salad. Customize Ingredients: Feel free to mix in other vegetables such as peas or corn, or even proteins like diced chicken or tuna for added nutrition. Leftovers Tip: Store any leftovers in an airtight container in the fridge. The salad can last up to 3 days, but the texture may change slightly. {{image_2}} You can boost your macaroni salad with protein. Adding chicken, tuna, or ham makes it heartier. Simply shred cooked chicken breast or flake canned tuna. Dice ham into small pieces for a savory touch. Mix it in with the macaroni and veggies. This keeps the salad filling and satisfying. For a vegetarian option, consider using chickpeas or tofu. They add protein and texture. If you want a vegan salad, replace mayonnaise with vegan mayo or avocado. This keeps the creaminess without eggs or dairy. Both options make the salad friendly for all diets. Get creative with your add-ins! Fresh herbs like dill or parsley brighten the flavor. Nuts like walnuts or almonds add a nice crunch. For a twist, try adding fruits like diced apples or grapes. They add sweetness and balance the salad's creaminess. Mix and match to find your favorite combo! To keep your macaroni salad fresh, store it in an airtight container. This helps keep moisture in and air out. Before sealing, let it cool to room temperature. If you have leftovers, try to finish them within a few days. Macaroni salad lasts about 3 to 5 days in the fridge. After that, it may lose flavor and texture. Always check for any signs of spoilage before eating. If it looks or smells off, it's best to toss it out. While freezing is possible, it can change the texture. If you want to freeze it, store it in a freezer-safe container. Leave some space for expansion. When you’re ready to eat, thaw it in the fridge overnight. Be aware that some ingredients might not freeze well, like the eggs and veggies. Add fresh ingredients after thawing for better taste. Restaurant-style macaroni salad is creamy and packed with flavor. It often features elbow macaroni, mayonnaise, and crunchy veggies. This salad is a staple at many delis and diners. It’s perfect for picnics or barbecues. The mix of textures and tastes makes it stand out. You get soft pasta, crisp celery, and sweet pickles all in one bite. Yes, you can make macaroni salad ahead of time. In fact, it often tastes better after chilling. Make it a day before your event for best results. Just cover it tightly and store it in the fridge. This waiting time allows the flavors to blend well. Just remember to stir it before serving for freshness. You can make it creamy by using yogurt or sour cream. Both add a nice tang while keeping it smooth. You can also use avocado for a rich flavor. Blend avocados until smooth and mix them in. Another option is to use silken tofu for a vegan touch. This keeps your salad creamy and healthy. Macaroni salad pairs well with many side dishes. Grilled meats like chicken or burgers are great choices. Fresh fruit salads add sweetness and color. You can also serve it with crispy chips for crunch. Add a simple green salad for extra veggies. Each side complements the rich flavors of the macaroni salad. To create a tasty macaroni salad, you need simple ingredients and tools. We explored key steps like cooking the pasta, making the dressing, and mixing it all together. Remember, adjusting flavors and adding protein can make your dish unique. Always chill it before serving for the best taste. Store leftovers properly to enjoy them later. Now, with these insights, you can whip up a macaroni salad everyone will love. Happy cooking!
    Macaroni Salad Restaurant Style Quick and Tasty Recipe
  • - 4 boneless, skinless chicken breasts - 1 large red bell pepper, sliced - 1 large yellow bell pepper, sliced - 1 large green bell pepper, sliced - 1 medium onion, sliced - 3 cloves garlic, minced - 1 tablespoon Cajun seasoning - 1 teaspoon dried oregano The main ingredients are the heart of this dish. The chicken breasts give the meal its protein. The bell peppers add color, crunch, and a sweet flavor. Onion and garlic bring depth and aroma. Cajun seasoning adds that kick of spice, while oregano ties it all together. - 2 tablespoons olive oil - 1 can (14 oz) diced tomatoes, drained - Salt and pepper to taste These extra ingredients help create a rich sauce. Olive oil ensures the chicken cooks well without sticking. Diced tomatoes add moisture and tang. Salt and pepper enhance every bite. Together, they create a deliciously balanced dish. - Fresh parsley for garnish Garnishing with fresh parsley makes the dish pop. It adds a bright color and fresh taste. Plus, it makes the meal look fancy, perfect for impressing guests. {{ingredient_image_1}} To start, I pound the chicken breasts with a meat mallet. This helps them cook evenly. I make sure both sides get a good coating of Cajun spice. The spice adds that bold flavor we love. Next, I heat a large skillet over medium-high heat. I add two tablespoons of olive oil and let it shimmer. Then, I place the chicken in the skillet. I cook it for about 5-6 minutes on each side. The chicken should turn golden brown and reach an internal temperature of 165°F. After removing the chicken, I add sliced bell peppers and onion to the same skillet. I sauté them for about 5-7 minutes until they soften and caramelize. Then, I stir in minced garlic and drained diced tomatoes. This mix cooks for another 2-3 minutes, filling the air with a nice aroma. Now, it’s time to bring everything together. I return the chicken to the skillet, nestling it among the vegetables. I sprinkle some dried oregano over the top and season with salt and pepper. I let it simmer for about 5 minutes. This step helps all the flavors meld together, creating a delicious dish. - To ensure your chicken is safe to eat, check the internal temperature. It should reach 165°F (75°C). Use a meat thermometer for the best results. - Taste your dish as you go. Adjust the Cajun seasoning, salt, and pepper to suit your preference. Everyone’s taste is different! - Serve this dish over rice, pasta, or crusty bread. These options soak up the sauce well. - Ideal side dishes include a light salad or steamed vegetables. They add a fresh touch to your meal. - For an eye-catching display, sprinkle fresh parsley on top of your dish. It adds a pop of color. - Use a large platter to serve. Arrange the chicken and vegetables nicely for a beautiful presentation. Pro Tips Even Cooking: Pounding the chicken breasts to an even thickness ensures they cook uniformly, preventing dry edges and undercooked centers. Heat Your Oil: Make sure your olive oil is hot before adding the chicken. A hot pan helps to achieve a nice sear and locks in moisture. Veggie Variety: Feel free to mix in other colorful vegetables like zucchini or mushrooms for added nutrition and flavor. Rest Before Serving: Let the chicken rest for a few minutes after cooking. This allows the juices to redistribute, resulting in a juicier bite. {{image_2}} You can swap out chicken for other meats. Shrimp works great and cooks fast. Pork also adds a nice twist. For a vegetarian option, try tofu or tempeh. Both soak up flavors well and keep the dish hearty. Want more heat? Adjust your Cajun seasoning to your liking. Start with a little and add more if needed. You can also toss in jalapeños for a spicy kick. Hot sauce is another fun way to add some zing. Just sprinkle a few drops to keep it balanced. If you want a different taste, try oven-baking. It gives the chicken a nice, juicy texture. Just place everything in a baking dish and roast until done. You can also grill the chicken. Grilling adds a smoky flavor that pairs well with the peppers. Both methods keep the meal exciting and full of flavor. After you cook Cajun Chicken with Bell Peppers, let it cool first. Then, store leftovers in an airtight container. This keeps the chicken fresh and safe. You can keep it in the fridge for up to four days. When storing chicken, make sure to separate it from the vegetables if possible. This helps keep everything crisp. If you want to save some for later, freezing is a great option. Cut the chicken into pieces and place them in a freezer-safe bag. Add the bell peppers and onions too. Try to remove as much air as you can. Label the bag with the date. You can freeze it for up to three months. When you're ready to eat, thaw the chicken overnight in the fridge. Reheat it in a skillet over medium heat. This will warm it up evenly. Cajun Chicken with Bell Peppers can last in the fridge for about four days. If frozen, it stays good for about three months. Always check for signs of spoilage before eating. If it smells bad or looks off, toss it out. Keeping track of the storage time helps you enjoy your meals safely. Yes, you can make this dish ahead of time. Cook the chicken and veggies as the recipe says. Once cooked, let it cool. Store the dish in an airtight container in the fridge. It stays fresh for up to three days. When ready to eat, simply reheat it in a skillet or microwave. The flavors will blend even more, making it taste great! This dish pairs well with many sides. Here are some ideas: - Cooked rice or quinoa for a filling base. - Garlic bread to soak up all the tasty sauce. - A fresh green salad to add crunch and lightness. - Corn on the cob brings a sweet touch. - A fruity drink, like sweet tea or lemonade, complements the spice nicely. Absolutely! You can add or swap vegetables based on what you like. Try these options: - Zucchini for a soft texture. - Mushrooms for a meaty bite. - Spinach or kale for extra greens. - Carrots for sweetness and color. Feel free to mix and match to make the dish your own! We explored the key ingredients for Cajun Chicken with Bell Peppers, detailing main items, extras, and garnishes. I provided step-by-step instructions for preparing and cooking the dish, including tips for serving and storing. Remember, you can switch meats or spice levels to suit your taste. Whether you enjoy this dish fresh or as leftovers, it’s easy to make and fun to personalize. Embrace your creativity, and enjoy every bite.
    Cajun Chicken with Bell Peppers Flavorful Skillet Dish
  • To make a delicious creamy spinach artichoke dip, you need: - 1 cup frozen spinach, thawed and drained - 1 can (14 oz) artichoke hearts, drained and chopped - 1 cup cream cheese, softened - 1/2 cup sour cream - 1/2 cup mayonnaise - 1 cup shredded mozzarella cheese - 1/2 cup grated Parmesan cheese - 2 cloves garlic, minced - 1 teaspoon onion powder - 1/2 teaspoon black pepper - 1/4 teaspoon salt - 1/4 teaspoon crushed red pepper flakes (optional) - Fresh parsley for garnish (optional) You can swap some ingredients if you want. Here are a few ideas: - Use fresh spinach instead of frozen for a brighter flavor. - Greek yogurt can replace sour cream for a tangy twist. - Swap mayonnaise with extra cream cheese for a richer taste. - If you want a different cheese, try cheddar or pepper jack. - Use fresh garlic instead of minced for a more intense flavor. When picking fresh ingredients, look for these tips: - Choose spinach that is vibrant green with no yellow leaves. - Select artichoke hearts that are firm and without dark spots. - For cheese, go for blocks over pre-shredded, as they melt better. - Fresh garlic should feel firm and not sprout. - Use a fresh parsley bunch that looks bright and crisp. These choices elevate your dip and make it even tastier. {{ingredient_image_1}} Start by gathering your ingredients. This recipe takes about 10 minutes to prep. Preheat your oven to 350°F (175°C). Grab a large mixing bowl. Add 1 cup of softened cream cheese, 1/2 cup of sour cream, and 1/2 cup of mayonnaise. Mix them well until the blend is smooth and creamy. This step is key for a great texture. Next, you need to mix in the main flavors. Add 1 cup of thawed and drained frozen spinach and 1 can (14 oz) of artichoke hearts that are drained and chopped. Stir these in well, ensuring they are evenly mixed. After combining the spinach and artichokes, it's time to add the rest. Toss in 1 cup of shredded mozzarella cheese and 1/2 cup of grated Parmesan cheese. Then, add 2 cloves of minced garlic, 1 teaspoon of onion powder, 1/2 teaspoon of black pepper, and 1/4 teaspoon of salt. If you like a little heat, add 1/4 teaspoon of crushed red pepper flakes. Mix everything until it is thoroughly combined. Now, take your mixture and transfer it into a baking dish. An 8x8 inch dish works best. Spread the mixture evenly in the dish. Now it’s time to bake! Place it in your preheated oven for 25 to 30 minutes. It’s done when the top is golden and bubbly. After baking, remove the dish from the oven. Let it cool for a few minutes. This cooling time helps the dip set a bit. If you like, you can garnish with fresh parsley for a pop of color. It makes the dip look even more inviting. Now, your creamy spinach artichoke dip is ready to enjoy! Serve it warm with tortilla chips, sliced baguette, or fresh veggie sticks. This dip is perfect for gatherings or a cozy night in! To make your dip super creamy, use softened cream cheese. Mix it well with sour cream and mayonnaise. This combo makes a great base. You want it smooth and thick. If your dip feels too thick, add a splash of milk. That helps lighten it up. Always stir in the spinach and artichokes after mixing the base. This keeps everything creamy and blends well. Seasoning can bring your dip to life. Use minced garlic for a punch of flavor. Onion powder adds a nice depth, too. Don’t forget the black pepper and salt; they balance the taste. If you want a kick, add crushed red pepper flakes. Just a little can spice things up. Taste as you mix, and adjust the seasonings to your liking. Serve your dip warm for the best taste. Use a nice baking dish to show it off. I like to sprinkle fresh parsley on top for color. It makes the dip look fresh and inviting. Pair it with tortilla chips or sliced baguette. Fresh veggie sticks add a nice crunch. Arrange them around the dish for a fun platter. Enjoy the flavors and the presentation! Pro Tips Thawing Spinach: Make sure to completely thaw and drain the frozen spinach to avoid excess moisture in your dip. Cheese Variations: Feel free to mix different cheeses like cheddar or cream cheese for varied flavor profiles. Serving Suggestions: Pair the dip with a variety of dippers such as pita chips, crackers, or veggie sticks for a fun presentation. Make Ahead: You can prepare the dip a day in advance and store it in the refrigerator. Just bake it before serving! {{image_2}} You can switch up the cheese in your dip. Try using feta for a tangy twist. Goat cheese adds creaminess and flavor too. You can also mix in some cheddar for a sharp bite. Each type of cheese gives the dip a unique taste. Experiment and find what you love best! Want to add some heat? Mix in jalapeños or diced green chilies. You can also increase the crushed red pepper flakes. For a smoky flavor, try adding chipotle peppers in adobo sauce. Each spicy option makes the dip exciting and full of flavor. Adjust the spice level based on your taste! You can make this dip lighter without losing flavor. Use Greek yogurt instead of sour cream and mayonnaise. You can also swap out cream cheese for a low-fat version. Choose part-skim mozzarella to cut calories. These choices make the dip healthier but still creamy and delicious. Enjoy every bite without the guilt! After enjoying your creamy spinach artichoke dip, store leftovers in an airtight container. Keep it in the fridge for up to three days. Make sure it cools down a bit before sealing. This will help keep the dip fresh and tasty. To reheat, simply scoop the dip into an oven-safe dish. Preheat the oven to 350°F (175°C). Heat for about 15-20 minutes until warm. You can also use a microwave. Heat it in short bursts of 30 seconds, stirring in between. This keeps the dip creamy and avoids drying it out. If you want to save some for later, freezing is a great option. Place the dip in a freezer-safe container. Leave some space at the top for expansion. Freeze it for up to two months. To thaw, move it to the fridge overnight before reheating. This ensures the dip stays flavorful and delicious. Yes, you can use fresh spinach. Just wash, chop, and cook it first. You will need about 6 cups of fresh spinach to match the 1 cup of frozen spinach. Cook it down until it wilts. Then, drain any extra water. This keeps the dip creamy and not watery. The dip lasts about 3 to 5 days in the fridge. Be sure to store it in a tight container. If you notice any change in smell or color, it's best to toss it. To enjoy the dip at its best, eat it within the first few days. Yes, you can prep this dip ahead of time. Mix all the ingredients and store the dip in the fridge. Bake it right before serving. This way, you save time and can enjoy the creamy goodness fresh out of the oven. This post covered how to make a great spinach artichoke dip. We went over the ingredients, steps, and some handy tips. You learned ways to swap items and make it lighter. We also talked about how to store leftovers and answered common questions. Use this guide to create your own delicious dip. Experiment with flavors and enjoy every bite!
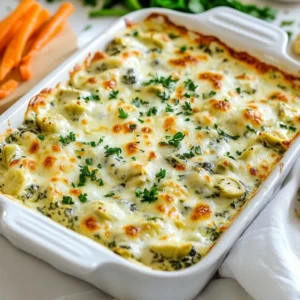
    Creamy Spinach Artichoke Dip Flavorful and Easy Recipe
  • - 1 lb (450g) ground beef - 3 tablespoons honey - 3 tablespoons soy sauce (or tamari for gluten-free) - 4 cloves garlic, minced - 1 tablespoon fresh ginger, minced - 1 teaspoon sesame oil - 1/2 teaspoon crushed red pepper flakes (adjust to taste) The main star of this dish is the ground beef. It cooks fast and soaks up flavor. Honey and soy sauce bring a sweet and salty taste. The garlic and ginger add depth. Red pepper flakes give a hint of heat. Just adjust them to your liking. - 1 cup bell peppers, diced (mix of colors for vibrancy) - 1/2 cup green onions, sliced - Sesame seeds for garnish Colorful bell peppers make this dish pop. They add crunch and sweetness. Green onions bring a fresh taste. Sesame seeds add a nice touch for garnish. They give that extra crunch and flavor. - Cooked rice - Noodles options Serve this dish over cooked rice or noodles. Both options complement the flavors well. Rice soaks up the sauce, while noodles add chewiness. Try both to see which one you like best! {{ingredient_image_1}} 1. Start by heating sesame oil in a large skillet over medium heat. Wait until it shimmers. This means it is hot enough to cook. 2. Add minced garlic and ginger to the skillet. Sauté for about 30 seconds. You want to smell that wonderful aroma. 1. Increase the heat to medium-high. Add the ground beef to the skillet. Break it apart with a spatula. Cook it until browned, about 5-7 minutes. 2. If there is excess grease, drain it. This keeps the dish from being too oily. 1. Once the beef is browned, stir in honey and soy sauce. Also, add crushed red pepper flakes for some heat. Mix well to coat the beef evenly. 2. Now, add diced bell peppers to the skillet. Cook for an additional 3-4 minutes. You want them tender but still crisp. 3. Remove from heat and stir in sliced green onions. Taste and adjust seasoning if you need to. 4. Serve the honey garlic ground beef over cooked rice or noodles. Garnish with sesame seeds for an extra crunch. To get the best taste from your honey garlic ground beef, adjust the spice levels. If you like heat, add more crushed red pepper flakes. If you prefer mild, reduce the amount. The key is to taste as you go. Balancing sweetness and saltiness is also important. The honey adds sweetness, while soy sauce brings saltiness. Make sure both flavors shine through. You can even try adding a pinch of salt or a dash of vinegar for extra depth. Browning ground beef properly is vital for flavor. Heat your skillet well before adding the beef. This helps to create a nice brown crust. Use a spatula to break apart the beef as it cooks. Drain any excess grease to keep your dish from becoming too oily. When adding bell peppers, cook them just enough to stay crunchy. This adds texture to your meal and makes it more enjoyable. If you want to switch things up, there are easy swaps. For honey, you can use maple syrup or agave nectar. Both offer sweetness without changing the flavor much. For soy sauce, tamari works well if you need it gluten-free. You can also use coconut aminos for a different taste. If ground beef isn't your thing, try turkey or chicken. Each option will give you a unique taste while keeping the dish delicious. Pro Tips Use Fresh Ingredients: Fresh garlic and ginger elevate the flavor of the dish significantly. Always opt for fresh over pre-minced for the best results. Adjust Spice Level: The crushed red pepper flakes can be adjusted to your personal preference. Start with a small amount and add more if you like it spicier. Mix Colors: Use a variety of bell pepper colors not just for visual appeal but also to add different flavor notes to your dish. Garnish for Texture: Don't skip the sesame seeds! They add a delightful crunch and nutty flavor that enhances the overall dish. {{image_2}} You can make a tasty bowl with honey garlic ground beef. Start with quinoa or cauliflower rice as your base. Quinoa gives a nutty flavor, while cauliflower rice is light and low-carb. Both options work well with the sweet and savory beef. Just add your beef mix over the top and enjoy! Want a fresh twist? Try honey garlic lettuce wraps! Use large lettuce leaves as your wrap. This option is low-carb and perfect for a light meal. Add the honey garlic ground beef right into the leaf, fold it up, and take a bite. It’s fun and easy to eat! Make your dish even better by adding more veggies. You can toss in carrots, snap peas, or broccoli. These colorful veggies not only add flavor but also boost nutrition. Just chop them small and add them in while cooking the beef. They will cook quickly and stay crisp! You can store honey garlic ground beef in the fridge for up to three days. Make sure to place it in an airtight container. This keeps the dish safe from bacteria and helps keep it fresh. To freeze honey garlic ground beef, let it cool completely first. Then, divide it into smaller portions. Use freezer-safe bags or containers to store it. Press out air to prevent freezer burn. It can last up to three months in the freezer. Label the bags with the date for easy tracking. Reheat honey garlic ground beef on the stove for best results. Use low heat to warm it gently. Add a splash of water or broth to keep it moist. Stir often to ensure even heating. You can also use the microwave. Heat in short bursts, stirring in between. This method helps keep the flavor intact and avoids overcooking. You can enjoy honey garlic ground beef with several tasty sides. Here are some great options: - Steamed rice: White or brown rice pairs well and absorbs the sauce. - Noodles: Try egg noodles or rice noodles for a fun twist. - Stir-fried veggies: Add broccoli or snap peas for color and crunch. - Salad: A fresh green salad adds a nice balance to the meal. - Egg rolls: These crispy treats make a fun side dish. Yes, you can easily make this dish gluten-free. Here are some tips: - Soy sauce: Use tamari instead of regular soy sauce. Tamari is gluten-free. - Check honey: Make sure your honey does not contain added ingredients. - Optional thickener: If you want a thicker sauce, use cornstarch mixed with water. You can control the heat level to match your taste. Here’s how: - Red pepper flakes: Start with less than half a teaspoon. Taste and add more if needed. - Fresh peppers: Use mild bell peppers for less heat or add jalapeños for more spice. - Serve with a side: Offer sour cream or yogurt to cool down the heat if needed. This dish combines tasty ground beef with sweet honey and soy sauce. You can enjoy it with vibrant bell peppers and fresh herbs. I provided easy steps for cooking and tips for the best flavor. You can even swap ingredients to fit your needs. Whether you serve it over rice or in lettuce wraps, this dish is versatile. Remember to store any leftovers properly for future meals. Now, you have all you need to make a delicious honey garlic ground beef meal!
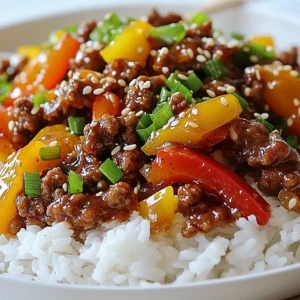
    Honey Garlic Ground Beef Flavorful Dinner Recipe
  • - Pasta options and types You can use 8 oz of pasta, like fettuccine or penne. Choose your favorite shape! - Chicken breast details Use 1 lb of diced chicken breast. It cooks fast and tastes great in this dish. - Description of ricotta cheese and substitutes I love using 1 cup of ricotta cheese for its creamy texture. If you need a substitute, try cottage cheese. It offers a similar taste. - Additional ingredients like cherry tomatoes and spinach Use 1 cup of halved cherry tomatoes for sweetness. Add 2 cups of fresh spinach to bring in some color and nutrients. {{ingredient_image_1}} Start with a big pot of water. Add a good amount of salt; this helps flavor the pasta. Bring the water to a rolling boil. Add your pasta and cook it according to the package. For al dente, you want to check it around 8-10 minutes. It should be firm but not hard. When done, save 1/2 cup of pasta water before draining. Heat olive oil in a large skillet over medium heat. When it’s hot, add the diced chicken. Spread it out to help it brown. Season with salt, pepper, and Italian seasoning. Cook for 6-8 minutes until it turns golden brown. Make sure it cooks all the way through. Once the chicken is done, add minced garlic. Sauté it for about 1 minute until you smell its aroma. Next, add the halved cherry tomatoes. Look for tomatoes that are bright and slightly soft. Cook them for 3-4 minutes until they start to soften. Now, stir in the fresh spinach. You want to cook it just until it wilts down. This usually takes about 2 minutes. Keep stirring to mix it well with the chicken and tomatoes. Lower the heat, then add the ricotta cheese to the skillet. Mix it well with the chicken and veggies. To get a nice creamy texture, slowly add some reserved pasta water. Do this one spoonful at a time until you reach your perfect consistency. Finally, add the drained pasta to the skillet. Toss everything together until it’s evenly mixed. Taste your dish and adjust the seasoning if needed. If you want more flavor, add a bit more salt or pepper. To keep chicken moist, choose fresh, high-quality meat. Cut into even pieces for uniform cooking. Season with salt and pepper before cooking. Cook on medium heat for about 6-8 minutes until golden brown. Use a meat thermometer to check for doneness; it should reach 165°F. Let the chicken rest for a few minutes after cooking. This step helps the juices stay inside. To prevent pasta from sticking, use a large pot with plenty of water. Add salt to the water before boiling; it enhances flavor. Stir the pasta during the first minute of cooking. This keeps it from clumping together. Cook until al dente, following the package instructions. Reserve some pasta water to help create a creamy sauce later. To boost flavor, try adding fresh herbs like thyme or parsley. A pinch of red pepper flakes adds heat. For a richer taste, consider a splash of lemon juice or zest. You can also mix in different spices like smoked paprika or oregano. Experiment with these options to find your favorite flavor combo. Pro Tips Choose the Right Pasta: Opt for pasta shapes that can hold sauce well, like fettuccine or penne, to enhance the creamy texture of the dish. Perfectly Cooked Chicken: Make sure to cut the chicken into uniform pieces for even cooking, and avoid overcrowding the skillet to achieve a nice sear. Adjust Creaminess: Use the reserved pasta water gradually to control the creaminess of the sauce; start with a little and add more until you reach your desired consistency. Fresh Ingredients Matter: Always use fresh spinach and ripe cherry tomatoes for the best flavor and texture; they can greatly elevate the dish. {{image_2}} You can easily make this dish vegetarian. Instead of chicken, you can use chickpeas or tofu. Both options add protein and texture. Just sauté them the same way as chicken. You can also add some mushrooms for a meaty feel. They pair well with ricotta and add umami flavor. Adding vegetables boosts nutrition and flavor. Try seasonal veggies like zucchini, bell peppers, or asparagus. Chop them small and sauté them with garlic. You can also mix in peas or broccoli for a pop of color and crunch. These veggies will cook quickly and blend well. Change the flavor by mixing in different seasonings. For a spicy kick, add red pepper flakes. You can also use fresh herbs like thyme or oregano. If you want an Italian twist, add a bit of lemon zest. For a creamy Alfredo style, mix in some grated Parmesan or nutmeg. Adjust these flavors to fit your taste. Store your creamy ricotta chicken pasta in airtight containers. Glass or plastic containers work well. Make sure to let the pasta cool before sealing. This helps avoid moisture buildup. Label the containers with the date. This way, you’ll know how fresh they are. To freeze the pasta, let it cool completely. Divide it into portions. Place each portion in freezer bags or containers. Squeeze out extra air to prevent freezer burn. Write the date on the bags. You can freeze it for up to three months. Reheat pasta gently to keep it creamy. Use a skillet for stovetop reheating. Add a splash of water or broth to help. Heat over low to medium heat, stirring often. You can also use a microwave. Place the pasta in a bowl, cover, and heat in short bursts. Stir between intervals for even heating. Yes, you can! If you don’t have ricotta, try cottage cheese or cream cheese. Both can give a similar creamy texture. Mix in a bit of lemon juice for brightness. No problem! You can swap chicken breast for turkey or tofu. Shrimp or cooked sausage also work well. Just adjust the cooking time based on what you choose. To make this creamy pasta gluten-free, use gluten-free pasta. Brands like brown rice or chickpea pasta are great options. They cook similarly and taste delicious! Yes, you can prepare this dish ahead! Cook the pasta and chicken, then mix with the sauce. Store in the fridge for up to two days. Just reheat gently on the stove. Garnish this dish with fresh herbs like parsley or chives. You can also sprinkle extra cheese or add toasted pine nuts for crunch. Lemon zest adds a nice touch too! In this blog post, I covered the key steps to make creamy ricotta chicken pasta. We explored pasta types, chicken details, and ricotta options, along with cherry tomatoes and spinach. I detailed cooking, sautéing, and mixing methods to achieve a tasty dish. Remember, you can customize flavors and substitute ingredients as needed. Cooking is all about creativity and joy. Try different variations to keep it fun. Enjoy your next meal!
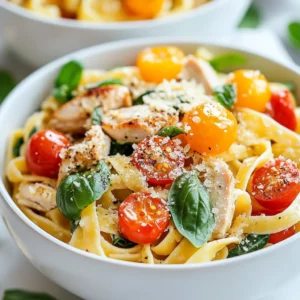
    Quick and Delicious Creamy Ricotta Chicken Pasta Recipe
  • To make this creamy lemon Parmesan chicken, gather these key ingredients: - 2 boneless, skinless chicken breasts - Salt and pepper, to taste - 1 tablespoon olive oil - 1 tablespoon butter - 3 cloves garlic, minced - 1 cup heavy cream - 1/2 cup grated Parmesan cheese - Zest of 1 lemon - Juice of 1 lemon - 1 teaspoon dried Italian herbs (oregano, thyme, basil) - Fresh parsley, chopped (for garnish) You can make this dish your own by adding: - Fresh spinach or kale for added greens - Cherry tomatoes for a pop of color and sweetness - A dash of red pepper flakes for a little heat - Lemon slices for a beautiful garnish If you need to swap out ingredients, try these options: - Use chicken thighs instead of chicken breasts for juiciness - Replace heavy cream with half-and-half or coconut cream for a lighter sauce - Parmesan cheese can be switched with Pecorino Romano for a sharper flavor - Use fresh herbs like basil or thyme instead of dried for a fresher taste These ingredients will help you create a delicious and creamy lemon Parmesan chicken. Each choice lets you personalize the dish to fit your taste. {{ingredient_image_1}} Start by seasoning your chicken breasts. Use salt and pepper on both sides. This step adds flavor. In a large skillet, heat olive oil and butter on medium-high. Wait until it gets hot. Add the chicken breasts and sear them for about 5-7 minutes. Look for a golden brown color. Once cooked, remove the chicken from the skillet and set it aside. In the same skillet, add minced garlic. Sauté it for about 30 seconds. This makes the kitchen smell great. Next, pour in the heavy cream. Use a wooden spoon to scrape the browned bits from the bottom. These bits add flavor to your sauce. Stir in grated Parmesan cheese. Keep stirring until it melts and the sauce thickens. Then add lemon zest, lemon juice, and dried Italian herbs. Mix everything well. Now, return the cooked chicken to the skillet. Coat the chicken with the creamy sauce. Let it simmer for about 2-3 minutes. This helps the chicken absorb all the flavors. Finally, taste the sauce and adjust seasoning if needed. Garnish with fresh chopped parsley before serving. To cook chicken breasts just right, start with even thickness. If your chicken is thick, pound it gently to make it uniform. This helps it cook evenly. Season both sides with salt and pepper right before cooking. Heat olive oil and butter in your skillet. Once hot, place the chicken in the pan. Cook for 5-7 minutes on each side. Look for a golden brown color and check if juices run clear. Once done, set the chicken aside to rest. This keeps it juicy. For a dreamy sauce, control the heat. After cooking the chicken, lower the heat slightly. Add minced garlic and sauté briefly, just until fragrant. Pour in heavy cream and stir to mix well. Scrape the bottom of the pan to lift those tasty bits. Next, add grated Parmesan cheese. Stir until it melts into the sauce. To thicken the sauce, let it simmer for a few minutes. If it seems too thick, add a splash of chicken broth or more cream to adjust. To boost flavor, consider adding fresh herbs like thyme or basil. They bring a bright taste. You might also add a pinch of red pepper flakes for a kick. Serve your chicken with sides like steamed veggies or pasta to soak up the sauce. For extra zing, a fresh salad pairs nicely too. Don't forget to garnish with chopped parsley for a pop of color and fresh taste! Pro Tips Perfectly Cooked Chicken: Use a meat thermometer to ensure the chicken reaches an internal temperature of 165°F (74°C) for safe consumption and optimal juiciness. Enhance the Sauce: For an extra burst of flavor, add a splash of white wine or chicken broth to the sauce after sautéing the garlic, allowing it to reduce before adding the cream. Fresh Herbs Matter: Substitute dried Italian herbs with fresh ones if available, as they provide a brighter, more vibrant flavor to the dish. Serving Suggestions: Serve this creamy lemon parmesan chicken over a bed of pasta or alongside steamed vegetables for a complete meal. {{image_2}} You can boost the nutrition in this dish by adding vegetables. Try adding spinach or broccoli. Both add color and taste. You could also include bell peppers for a crunchy bite. Just sauté the veggies in the same skillet before adding the cream. This makes your meal healthier and more colorful. If you want to change things up, consider using shrimp or tofu. Shrimp cooks quickly and adds a nice flavor. Just sauté them until they turn pink. For tofu, use firm tofu and cut it into cubes. Cook it until it’s golden brown before adding the creamy sauce. Both options keep the dish tasty and filling. You can easily switch the flavors by adding herbs or spices. Try fresh basil for a sweet touch. A sprinkle of red pepper flakes can give it heat. You can also add lemon thyme for a zesty twist. Experimenting with flavors can make this dish new each time you cook it. To store leftovers, let the chicken cool. Place it in an airtight container. Keep it in the fridge. It will last for about 3 days. Make sure to keep the sauce with the chicken. This helps maintain flavor and moisture. When you are ready to eat, reheat the chicken gently. Use a skillet over low heat. Add a splash of cream if needed. Stir the chicken in the sauce to keep it moist. This should take about 5-7 minutes. You can also use a microwave. Heat it in short bursts. Check often to avoid overcooking. If you want to freeze the dish, do it before reheating. Place the chicken and sauce in a freezer bag. Squeeze out excess air to prevent freezer burn. It can last for up to 3 months in the freezer. When ready to eat, thaw it overnight in the fridge. Reheat as mentioned above for the best taste. Yes, you can use low-fat cream. It will change the texture. The sauce may be less rich, but it will still taste good. If you want to keep the creaminess, consider adding a little extra cheese. This will help maintain a nice flavor. The chicken is done when it reaches 165°F. You can use a meat thermometer for this. If you cut into the chicken, the juice should run clear, not pink. Cook it until it's golden brown. This shows it has a nice sear. You can serve this dish with pasta, rice, or a fresh salad. Garlic bread pairs well too. Steamed vegetables like broccoli or green beans add nutrition. These sides help balance the rich flavors of the chicken. To make more servings, simply double the ingredients. If you use four chicken breasts, you may need to cook in batches. Ensure the sauce is enough to coat all the chicken. You can also use a bigger skillet or pot to fit everything. This blog post detailed how to make a tasty Creamy Lemon Parmesan Chicken. We discussed the ingredients you need and how to prepare the dish. I shared tips on cooking chicken and making a great sauce. You now know how to customize the recipe and store leftovers. In the end, this dish offers great flavor and flexibility. Try it for your next meal, and enjoy!
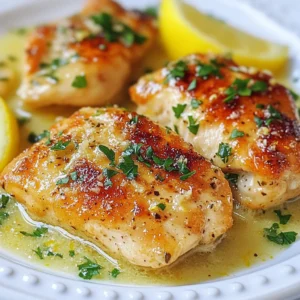
    Creamy Lemon Parmesan Chicken Delightful and Simple Dish
  • - 2 lbs boneless, skinless chicken breasts - 1 cup buffalo sauce (mild or hot based on preference) - 1/2 cup chicken broth - 1 tablespoon garlic powder - 1 tablespoon onion powder - 1 teaspoon smoked paprika - 1 teaspoon salt - 1/2 teaspoon black pepper - 1/4 cup ranch dressing (for serving) - Green onions, chopped (for garnish) - Celery sticks (for serving) When it comes to making slow cooker buffalo chicken, the right ingredients matter. You need fresh, boneless chicken breasts for the best texture. The buffalo sauce is key for flavor. Choose a sauce that matches your heat level. I often use mild for a family-friendly dish or hot for a spicy kick. While chicken broth adds depth, you can use low-sodium broth if you watch your salt. Garlic powder and onion powder bring great taste without extra work. Smoked paprika gives a nice, warm flavor. Don’t skip the salt and black pepper; they balance the dish. Ranch dressing is perfect for serving. It cools the heat from the buffalo sauce. Chopped green onions add a fresh touch. Finally, celery sticks are classic. They give crunch and a refreshing bite. - You can use chicken thighs instead of breasts for a richer flavor. - If you want to make your own buffalo sauce, mix hot sauce with melted butter. - For a lighter meal, swap in vegetable broth for chicken broth. These swaps can change your dish while keeping it tasty. You can always play around with these ingredients to suit your taste! {{ingredient_image_1}} - Preparing the Chicken: Start by placing 2 lbs of boneless, skinless chicken breasts in the bottom of your slow cooker. Make sure they lay flat and do not overlap. This helps them cook evenly. - Mixing the Sauce: In a separate bowl, combine 1 cup of buffalo sauce, 1/2 cup of chicken broth, 1 tablespoon of garlic powder, 1 tablespoon of onion powder, 1 teaspoon of smoked paprika, 1 teaspoon of salt, and 1/2 teaspoon of black pepper. Stir until everything is well mixed. - Covering and Cooking Times: Pour the sauce mixture over the chicken in the slow cooker. Make sure the chicken is fully coated. Cover the slow cooker with its lid. Set it to cook on low for 6-8 hours or high for 3-4 hours. - Checking for Doneness: After the cooking time is up, check if the chicken is tender. You can do this by using a fork to see if it shreds easily. If it does, it’s ready to go! - How to Properly Shred Chicken: Once the chicken is cooked, use two forks to shred it right in the slow cooker. Mix the shredded chicken with the sauce to soak up all the flavors. - Serving Suggestions and Garnishing Tips: Serve the shredded chicken hot. Drizzle 1/4 cup of ranch dressing over the top. Garnish with chopped green onions for color and flavor. Pair it with celery sticks for a classic touch. Enjoy your meal! To keep your chicken juicy, always add enough liquid. The chicken broth is key. If you cook on low for 6-8 hours, the chicken stays moist. Cooking on high for 3-4 hours is faster, but may dry it out. Choose low for the best results. You can boost flavor with extra spices. Try adding cayenne pepper for heat. Smoked paprika adds a nice depth. If you have time, marinate the chicken overnight. This helps the flavors soak in better. Use your favorite buffalo sauce for a unique twist. Buffalo chicken pairs well with celery sticks and ranch dressing. Serve it on a platter for a fun touch. You can also make sliders with buns for easy eating. Top with chopped green onions for color. Don’t forget to have extra ranch on the side! Pro Tips Choose Your Sauce Wisely: The level of spiciness can be easily adjusted by selecting a mild or hot buffalo sauce. Test a small amount before pouring it over the chicken to ensure it matches your taste preference. Maximize Flavor: For deeper flavor, consider marinating the chicken in the buffalo sauce and spices for a few hours or overnight before slow cooking. This allows the chicken to absorb more of the sauce's flavors. Shred with Ease: Make shredding the chicken easier by using a hand mixer on low speed. This technique quickly breaks down the chicken without much effort. Serving Suggestions: Pair the chicken with a variety of sides such as coleslaw, or carrot sticks, in addition to celery. This adds crunch and balances the dish's heat. {{image_2}} To spice up your buffalo chicken, you can use different hot sauces. Each sauce adds a unique flavor and heat level. Try using a blend of hot sauces for a more complex taste. You can also add jalapeños for an extra kick. Slice fresh jalapeños and toss them in the slow cooker. They will add both heat and crunch. If you want a lighter meal, try low-fat versions of the buffalo sauce. You can also use skinless chicken thighs for more flavor without extra fat. For vegetarian or vegan options, use jackfruit or cauliflower. These can mimic the texture of chicken well. Toss them in the same sauce for a delicious meal. Buffalo chicken is great in many forms. You can make sandwiches with crusty bread or soft rolls. Use your shredded chicken as a filling. For a twist, try buffalo chicken wraps or tacos. Use lettuce leaves or tortillas to hold the chicken. Add veggies and drizzle ranch dressing on top for more flavor. To keep your buffalo chicken fresh, store it in a tight container. Glass or plastic containers with lids work well. Let the chicken cool down before sealing it. This helps prevent steam from building up inside. You can keep it in the fridge for up to four days. If you want to enjoy it later, make sure it cools completely before refrigerating. You can freeze buffalo chicken for later meals. Place it in a freezer-safe bag or container. Remove as much air as possible before sealing. This helps prevent freezer burn. It will stay good in the freezer for up to three months. When you’re ready to eat it, thaw it overnight in the fridge. For reheating, microwave it or warm it on the stove with a bit of broth. This keeps it moist and tasty. Buffalo chicken lasts about four days in the refrigerator. If frozen, it can last for three months. Always check for any off smells or changes in color. If you notice anything unusual, it’s best to throw it away. Keeping track of the date you cooked it helps ensure safety. To make Slow Cooker Buffalo Chicken, start by preparing the chicken. Place 2 lbs of boneless, skinless chicken breasts in the slow cooker. Next, mix your sauce in a bowl. Combine 1 cup of buffalo sauce, 1/2 cup of chicken broth, and spices: 1 tablespoon garlic powder, 1 tablespoon onion powder, 1 teaspoon smoked paprika, 1 teaspoon salt, and 1/2 teaspoon black pepper. Pour this sauce over the chicken, making sure to coat it well. Cover the slow cooker and cook on low for 6-8 hours or high for 3-4 hours. The chicken will become tender and easy to shred. Once done, shred the chicken with two forks right in the cooker. This mixes it with the sauce. Serve it hot with ranch dressing and chopped green onions on top. Yes, you can use frozen chicken in the slow cooker. However, it’s best to use smaller pieces, like chicken breasts. This helps them cook evenly. When cooking with frozen chicken, add around 1-2 hours to the cooking time. Make sure the chicken reaches a safe temperature of 165°F. To be safe, check the chicken’s doneness with a food thermometer. Buffalo Chicken pairs well with several sides. Here are some great options: - Celery sticks - Carrot sticks - Coleslaw - Cornbread - Rice or quinoa - French fries or chips These sides will balance the spicy flavor and create a complete meal. To adjust the spice level of your Buffalo Chicken, here are some tips: - For a milder dish, use a mild buffalo sauce. - Add more chicken broth to dilute the heat. - Mix in a bit of cream cheese or sour cream for a creamy texture. - For more heat, add extra buffalo sauce or a dash of cayenne pepper. Experiment until you find your perfect spice level! In this blog post, we explored the steps to make delicious buffalo chicken. We covered key ingredients, cooking tips, and serving ideas. You can customize with alternatives and variations based on your taste. From spicy twists to healthier options, there’s something for everyone. Storing your leftovers properly maximizes flavor and freshness. Use this guide to create a meal that is simple and satisfying. Enjoy your buffalo chicken adventure!
    Savory Slow Cooker Buffalo Chicken Easy Recipe Guide

Posts pagination

← Newer 1 … 4 5 6 7 8 9 Older →

Footer

↑ back to top

More information

  • Drinks
  • Appetizer
  • Dinner
  • Desserts
  • About
  • Contact
  • Privacy Policy

Our Policies

  • Privacy Policy
  • GDPR Policy
  • Terms Of Use
  • Copyright Policy
  • Cookie Policy
  • Disclaimer

Copyright © 2025 cheftaling