Skip to content
DisclaimerTerms Of UseGDPR PolicyCookie Policy

Chef Taling

  • Home
  • Drinks
  • Appetizer
  • Dinner
  • Desserts
  • About
  • Contact
  • Privacy Policy
DisclaimerTerms Of UseGDPR PolicyCookie Policy

Taling

Chef Taling is the creator and culinary voice behind Taling’s Recipes, an online hub where she turns her lifelong love of food into step-by-step dishes home cooks can trust.Her journey began in her grandmother’s kitchen, soaking up the aromas of spices and the joy of shared meals an experience that sparked a passion for exploring global flavors and recreating them for friends, family, and now a worldwide audience.
For this delicious Strawberry Spinach Salad, you need: - 4 cups fresh baby spinach, washed and dried - 2 cups fresh strawberries, hulled and sliced - 1/2 cup feta cheese, crumbled - 1/4 cup red onion, thinly sliced - 1/2 cup pecans, toasted - 1 tablespoon sesame seeds Each ingredient brings a unique flavor and texture. The baby spinach adds a fresh and crisp base. The strawberries add sweetness and a pop of color. Feta cheese brings creaminess and saltiness. Red onion gives a slight bite. Toasted pecans add crunch and depth. Lastly, sesame seeds provide a lovely finish. Now, let’s focus on the dressing. For a great poppyseed dressing, gather these ingredients: - 1/4 cup olive oil - 3 tablespoons apple cider vinegar - 2 tablespoons honey - 1 tablespoon poppy seeds - Salt and pepper to taste This dressing ties the salad together. The olive oil adds richness. Apple cider vinegar gives it a tangy twist. Honey balances the flavors with sweetness. Poppy seeds add a delightful crunch and visual appeal. Seasoning with salt and pepper enhances every bite. You can find the full recipe with detailed instructions to help you make this fresh, tasty salad. To start, wash your baby spinach well. Rinse it under cool water. Shake off the extra water and dry it using a salad spinner or kitchen towel. Clean spinach helps keep the salad fresh and tasty. Next, prepare the strawberries. Use a small knife to hull the strawberries. This means removing the green tops and the white core. Then, slice the strawberries into thin pieces. Fresh, ripe strawberries add great flavor to your salad. Now, it’s time to layer your ingredients in a large bowl. First, add the fresh baby spinach. Next, scatter the sliced strawberries on top. Then, sprinkle crumbled feta cheese and thinly sliced red onion over everything. Finally, add the toasted pecans. Each layer brings its own taste and crunch. In a small bowl, whisk together the dressing. Combine olive oil, apple cider vinegar, honey, poppy seeds, salt, and pepper. Mix until all ingredients blend well. This dressing adds a sweet and tangy flavor to the salad. Drizzle the dressing over the salad. Use just enough to coat the spinach and strawberries without drowning them. Next, gently toss everything together. Make sure the spinach and strawberries are well covered in dressing. For the final touch, sprinkle sesame seeds on top. This adds flavor and makes the salad look beautiful. Serve the salad right away or chill it for a few minutes to let the flavors blend. Enjoy your Strawberry Spinach Salad with Poppyseed Dressing Delight! For the full recipe, check the detailed instructions above. Choosing ripe strawberries is key to a great salad. Look for berries that are bright red, firm, and shiny. They should smell sweet and fragrant. Avoid any that are dull or have green spots. Storing spinach properly keeps it fresh and crispy. First, wash it gently. Then, dry it well using a salad spinner. Store it in a sealed bag or container lined with a paper towel. This helps absorb moisture and keeps it crisp for days. If you want to switch things up, try different nuts. Almonds or walnuts add a nice crunch. Each nut has a unique taste, so feel free to experiment. Cheese can also change the flavor. Feta is great, but goat cheese or blue cheese can add a different twist. Each type of cheese brings its own special taste to the salad. Adjusting the sweetness and tanginess of the dressing is easy. If you like it sweeter, add more honey. For more tang, increase the vinegar. Taste as you mix to find your perfect balance. Making the dressing ahead of time is smart. You can store it in the fridge for up to a week. Just whisk it again before serving. This tip saves time and lets the flavors blend beautifully. For the full recipe, check out the Strawberry Spinach Delight section. {{image_2}} You can change the greens in this salad. Try using arugula or mixed greens instead of spinach. These greens add a peppery taste and a fun twist. You might also want to add extra fruits. Blueberries, raspberries, or sliced peaches work well. They add color and sweetness to your salad. If you need gluten-free options, this salad is great! All the ingredients are naturally gluten-free. Just double-check any packaged items like the dressing. For vegan-friendly alternatives, skip the feta cheese. You can use avocado instead. This keeps the dish creamy and rich without dairy. This salad shines with fresh, seasonal fruits. In spring and summer, stick with strawberries. In fall or winter, consider apples or pears. They bring a nice crunch and flavor. You can also add nuts like walnuts or almonds for extra texture. This makes your salad enjoyable all year round. To keep your Strawberry Spinach Salad fresh, store it properly. First, separate the salad and dressing. This keeps the greens crisp. Place the salad in an airtight container. Use a paper towel to absorb moisture. This will help prevent wilting. When it comes to the dressing, store it in a sealed jar. Shake it before use, as the ingredients can separate. You can keep it in the fridge for up to a week. Preparing ingredients ahead of time makes meal prep easy. Wash and dry the spinach and store it in a container. Slice the strawberries and keep them in a separate container. This way, they stay fresh and ready to go. Assembling the salad is quick. Just mix the spinach, strawberries, feta, red onion, and pecans in a bowl. Add the dressing right before serving to keep everything crunchy. For the full recipe, check out the details above. How to prevent strawberries from browning? To keep strawberries fresh and bright, use lemon juice. Just a little squeeze helps. Coat the sliced strawberries in lemon juice right after cutting. This slows down the browning. Can I make the salad ahead of time? You can prepare some parts ahead. Wash and dry the spinach. Slice the strawberries and store them in the fridge. Just mix everything right before serving, to keep it fresh. Is poppyseed dressing healthy? Poppyseed dressing can be a healthy choice. It uses olive oil, which is good for the heart. The honey adds natural sweetness. Just watch the amount if you are counting calories. What are some side dishes to serve with this salad? This salad pairs well with grilled chicken or fish. You can also serve it alongside crusty bread. A light soup is a nice addition too. Try these options to create a complete meal. For the full recipe, check out Strawberry Spinach Delight. You now understand how to create a fresh, tasty salad with simple steps. We covered fresh ingredients, poppyseed dressing, and easy preparation tips. With variations and storage info, you can enjoy this salad anytime. Remember, using ripe strawberries and proper storage keeps it fresh. Don't hesitate to try new flavors. This salad is flexible for your taste. Enjoy making it for your friends and family!

Strawberry Spinach Salad with Poppyseed Dressing Delight

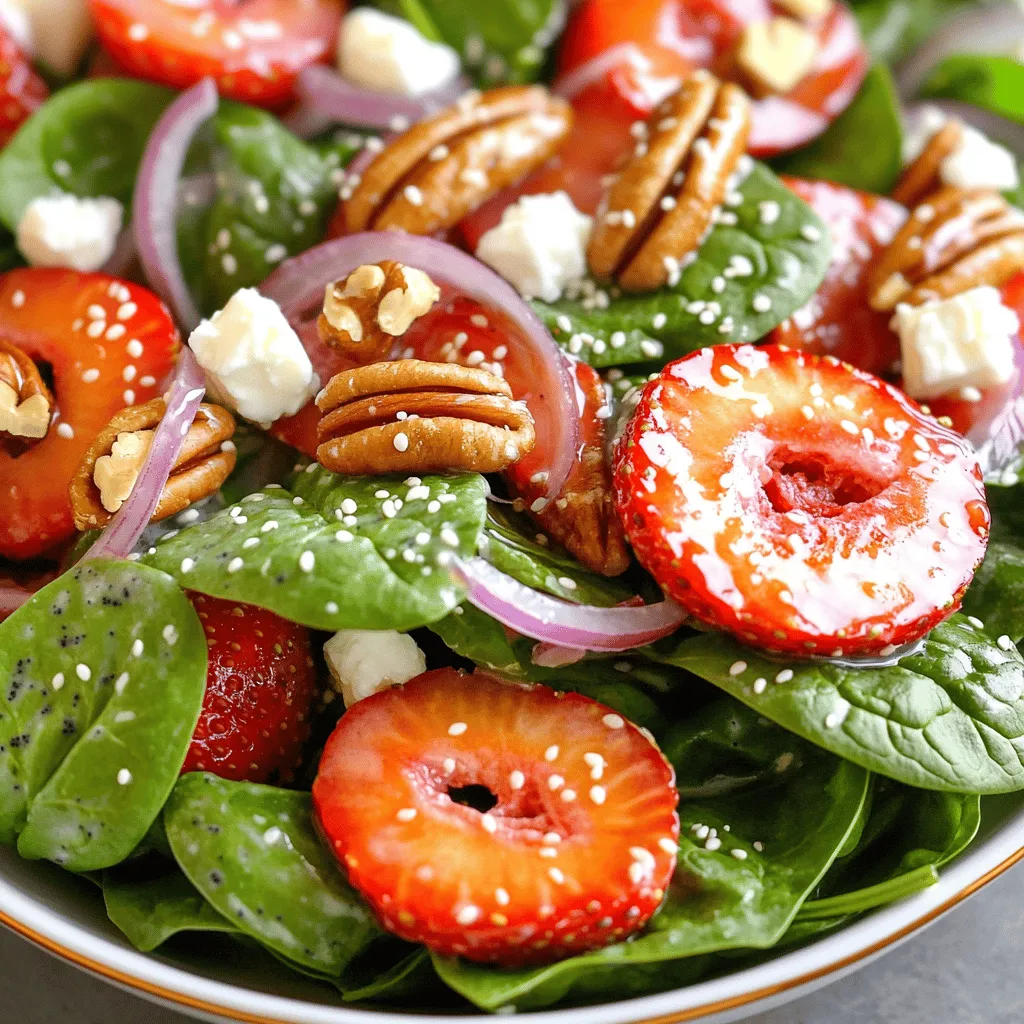
Looking for a refreshing salad that bursts with flavor? You’ve found it! My Strawberry Spinach Salad with Poppyseed Dressing combines

Gather these ingredients for a tasty meal: - 4 tilapia fillets - 1 cup panko breadcrumbs - 1/2 cup grated Parmesan cheese - 1 teaspoon garlic powder - 1 teaspoon onion powder - 1 teaspoon dried parsley - 1/2 teaspoon salt - 1/2 teaspoon black pepper - 2 large eggs - 1 tablespoon Dijon mustard - 1 tablespoon lemon juice - Cooking spray or olive oil for frying You might want to switch things up. Here are some options: - Instead of Parmesan cheese, try Pecorino Romano or nutritional yeast for a vegan twist. - For gluten-free diets, use gluten-free breadcrumbs or crushed cornflakes. - Replace eggs with flaxseed meal mixed with water for a plant-based option. Fresh ingredients make a big difference! They boost flavor and improve texture. For tilapia, look for firm fillets with a mild smell. The flesh should be moist and not discolored. Check your local fish market or grocery store. If possible, buy from a source that values sustainability. This helps our oceans and gives you the best fish! First, preheat your oven to 400°F (200°C). This heat will help make the crust crispy. Next, line a baking sheet with parchment paper. This keeps the fish from sticking and makes cleanup easy. In a shallow dish, mix the dry ingredients for the crust. Combine 1 cup of panko breadcrumbs with 1/2 cup of grated Parmesan cheese, 1 teaspoon of garlic powder, 1 teaspoon of onion powder, 1 teaspoon of dried parsley, 1/2 teaspoon of salt, and 1/2 teaspoon of black pepper. Stir well to blend all flavors. Now, let’s coat the tilapia. In a bowl, whisk 2 large eggs, 1 tablespoon of Dijon mustard, and 1 tablespoon of lemon juice. Dip each tilapia fillet into the egg mixture first. Let any extra egg drip off. Next, coat the fillet in the breadcrumb mixture. Press down gently to help it stick. This step is key for a crunchy crust. Repeat this for each fillet until they are all coated. Once coated, place the fillets on your prepared baking sheet. Lightly spray the tops with cooking spray or drizzle them with olive oil for extra crispiness. Now it's time to bake. Put the baking sheet in your preheated oven. Bake for 15 to 20 minutes. The fish should be cooked through, and the crust will turn a lovely golden brown. To check if your tilapia is done, look for an opaque look and easily flake it with a fork. To get that perfect crunch, use panko breadcrumbs. They give a light, airy texture. Mix your breadcrumbs with grated Parmesan cheese and spices like garlic powder. This adds flavor and crunch. When it comes to cooking spray versus olive oil, I prefer cooking spray. It coats evenly and helps the crust crisp up well. If you use olive oil, drizzle it lightly. Too much oil can make the crust soggy. Cooking time can change based on your oven and the thickness of the fish. Check your tilapia at 15 minutes. If it isn’t golden brown, give it a few more minutes. Keep an eye on it to avoid overcooking. To know if your tilapia is done, look for a flaky texture. Use a fork to test it gently. The fish should be opaque and easily flake apart. For side dishes, try steamed broccoli or a fresh salad. These pair well with tilapia and add color to your plate. You can also serve it with roasted potatoes for a heartier meal. For a nice finish, add a sprinkle of fresh parsley on top. Lemon wedges on the side give a pop of color and flavor. For an extra touch, consider plating the tilapia on a bright-colored dish. It makes the meal look fancy and inviting. For the full recipe, check the details earlier in this article. Enjoy making this meal! {{image_2}} To make your crispy Parmesan crust even better, you can add spices or herbs to the mix. Consider using paprika for a smoky touch or cayenne pepper for some heat. Fresh herbs like thyme or basil can brighten the dish, too. If you want a citrus zing, try adding lemon zest to the breadcrumb mix. The zest gives the crust a fresh and vibrant flavor. You can cook tilapia in different ways besides baking. Pan-frying gives it a nice golden crust. Just heat some oil in a skillet and cook the fillets for about three to four minutes on each side. Grilling is another great option. It adds a lovely smoky flavor. When grilling, keep the heat medium to avoid burning. Adjust the cooking time to about five minutes per side, depending on the thickness of your fillets. Crispy Parmesan crusted tilapia is great as a sandwich. Use your favorite bread and add some fresh greens and sauce. It can also be served over a salad, adding a hearty protein boost. If you love pasta, try serving the tilapia on top of a bed of spaghetti. Drizzle with olive oil and a squeeze of lemon for a complete meal. For the full recipe, check out the Crispy Parmesan Crusted Tilapia recipe. After enjoying your crispy Parmesan crusted tilapia, store any leftovers in the fridge. Place the fish in an airtight container. This helps keep it fresh for up to two days. Use a shallow dish to prevent the crust from breaking. Always let the fish cool down before sealing it. To keep that crispy texture, use the oven or air fryer for reheating. Preheat your oven to 350°F (175°C). Place the tilapia on a baking sheet. Heat for about 10 minutes. This method revives the crunch. Avoid using the microwave, as it can make the crust soggy. If you must use it, cover the fish with a paper towel to reduce moisture. You can freeze cooked tilapia for long-term storage. First, let it cool completely. Wrap each piece tightly in plastic wrap, then place it in a freezer-safe bag. Remove as much air as possible. This helps prevent freezer burn. Store it for up to three months. When ready to eat, thaw in the fridge overnight before reheating. This keeps the fish moist and tasty. To stop tilapia from sticking, use parchment paper on your baking sheet. This simple trick makes cleanup easy and helps the fish cook evenly. You can also spray the paper lightly with cooking spray. This adds a thin layer of oil that prevents sticking. A little oil on the tilapia itself can help too. Just drizzle or spray a bit before baking. To check if tilapia is done, look for a few signs. First, the fish should be opaque and white all the way through. You can also use a fork to flake the fish gently. If it flakes easily, it's ready. The internal temperature should reach 145°F (63°C). A good rule is to cook it until the crust is golden and crispy. Yes, you can use other fish if you want a change. Some great options include cod, haddock, or even salmon. Each fish has a unique taste, but they will all work well with the crispy Parmesan crust. Just adjust the cooking time based on the thickness of the fish you choose. For thicker fillets, you may need to bake a bit longer. Check the doneness as mentioned above. For the full recipe, refer to the Crispy Parmesan Crusted Tilapia. This recipe for baked tilapia combines fresh ingredients and simple steps. You learned about all the key ingredients, their roles, and possible swaps. I shared tips on achieving the perfect crust and the best cooking methods. Remember, using fresh ingredients makes a big difference in taste. Whether you enjoy baked tilapia on its own or in a sandwich, this dish is sure to please. Experiment with flavors and methods, and enjoy the process of making this easy meal!

Crispy Parmesan Crusted Tilapia Flavorful Easy Recipe

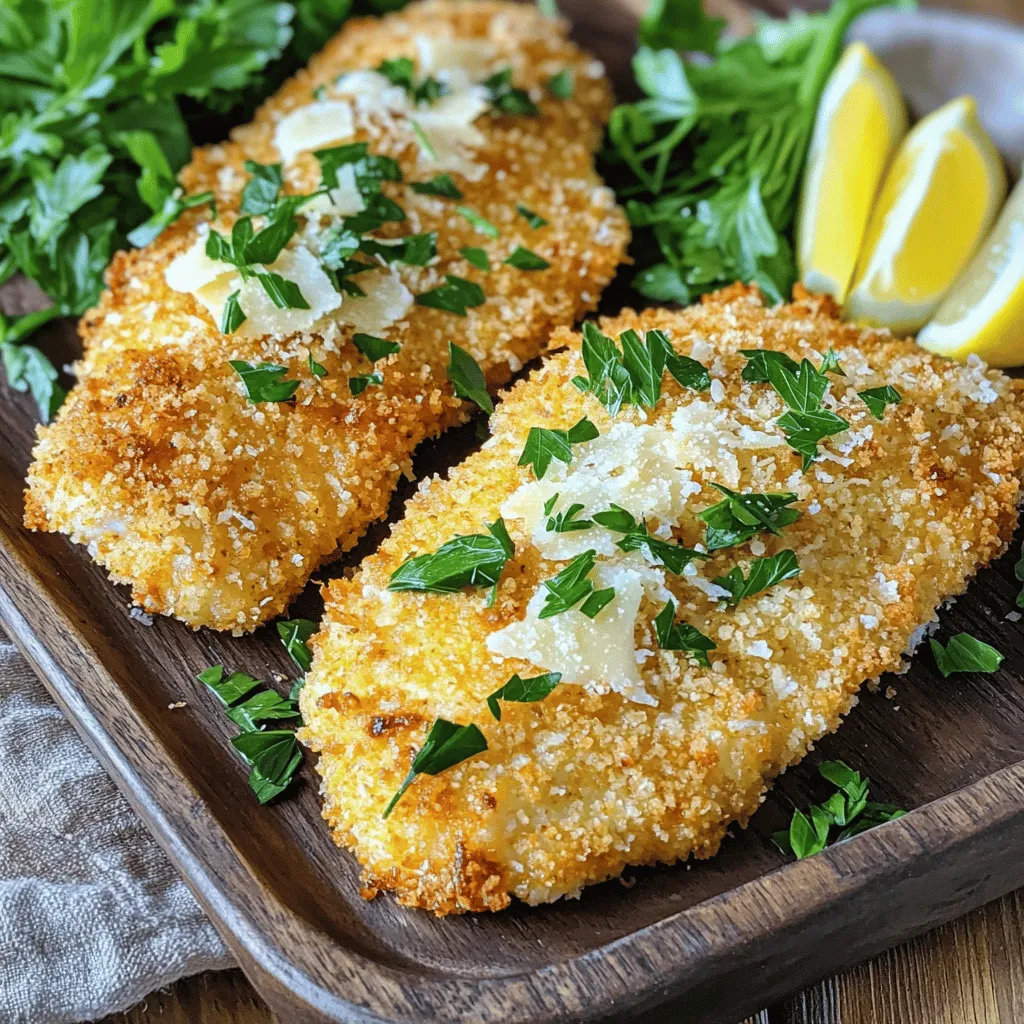
Are you ready to impress your family with a delicious meal? This Crispy Parmesan Crusted Tilapia recipe is both simple

This salad bursts with fresh flavors. Here are the key ingredients: - 4 cups seedless watermelon, cubed - 1 cup feta cheese, crumbled - 1/2 red onion, thinly sliced - 1/4 cup fresh mint leaves, chopped - 1/4 cup fresh basil leaves, chopped - 2 tablespoons olive oil - 2 tablespoons balsamic glaze - Salt and pepper to taste Each ingredient adds its own special taste. The sweet watermelon pairs well with salty feta. The red onion gives a nice crunch, while the herbs add freshness. You can boost the flavor even more with some optional extras. Try adding: - Sliced cucumbers for a crisp texture - Cherry tomatoes for a pop of color - Avocado for creaminess These extras can make your salad even more exciting. Mix and match based on what you love. Choosing the right watermelon is key. Here’s how to pick a ripe one: - Look for a uniform shape. Avoid ones with bumps. - Check for a yellow spot. This shows where it rested in the sun. - Tap the watermelon. A deep sound means it’s ripe. These tips help you select the best watermelon for your salad. A ripe watermelon makes all the difference in taste. For the full recipe, check out the link. To start, grab your seedless watermelon. Cut it into 1-inch cubes. Next, take half a red onion and slice it thinly. In a large mixing bowl, combine the cubed watermelon and sliced onion. This mix will create a sweet and savory base for your salad. Now, let’s bring in the feta cheese. Use one cup of crumbled feta and add it to the bowl. Gently toss the ingredients together. You want the feta to mix in without breaking it apart. Then, sprinkle in a quarter cup each of fresh mint and basil. These herbs add a burst of freshness. In a small bowl, whisk together two tablespoons of olive oil and two tablespoons of balsamic glaze. This will be your dressing. Drizzle it over the salad mix. Toss gently again until everything is coated. Season with salt and pepper to taste. Let the salad sit for about 10 minutes. This helps the flavors meld together. For the full recipe, refer to the earlier section. When tossing salad, it is key to be gentle. Start by adding the watermelon and onion to a large bowl. Then, sprinkle the crumbled feta on top. Use a large spoon or spatula to lift the salad. This way, you mix without smashing the feta. If you press too hard, the cheese will break apart. Aim for a light hand and slow movements. You can make this salad ahead of time, but keep a few things in mind. Prepare the watermelon and onion first. Mix them and store in the fridge. Wait to add the feta, herbs, and dressing until just before serving. Adding these last helps keep the flavors fresh. If you combine everything too soon, the salad can become soggy. Using the right tools can make salad prep simple. Here are a few must-haves: - A sharp knife for cutting watermelon - A large mixing bowl for tossing - Measuring cups for accuracy - A whisk for mixing the dressing - A spatula for gentle tossing These tools help you work quickly and keep your ingredients intact. For the full recipe, check out the details provided earlier. {{image_2}} You can make the Summer Watermelon Feta Salad even better by adding other fruits. Try using ripe strawberries or juicy peaches. They bring sweetness and a nice texture. You can also add cucumber for crunch. Just chop them up and mix them in with the watermelon. This will give your salad a fruity twist that everyone will love. While the olive oil and balsamic glaze work well, you can switch things up. A simple lemon vinaigrette adds a fresh zing. Mix lemon juice, olive oil, and a pinch of salt for a bright flavor. You can also try a honey-lime dressing for sweetness. Just whisk honey and lime juice with olive oil. This way, you can create a new taste each time you make your salad. Herbs can change the whole feel of your salad. If you want a different taste, try using cilantro or dill. They add a fresh and unique flavor that pairs well with the watermelon. You can also skip the mint and basil altogether. Use arugula for a spicy kick. Each herb adds its own charm, so feel free to mix and match! For the full recipe, check out the section above. To keep your Summer Watermelon Feta Salad fresh, store it in an airtight container. This helps prevent air from making the salad soggy. If you have any separate dressing, keep it in a small jar. Mix it in just before serving. If you don’t have a container, use plastic wrap. Cover the bowl tightly. You can keep the salad in the fridge for up to three days. However, the longer it sits, the more the watermelon releases water. This can make the salad less crunchy. If you notice excess liquid, simply drain it before serving. Freezing this salad is not recommended. Watermelon has a high water content. When frozen, it turns mushy once thawed. This affects the texture of your salad. If you want to save just the feta or herbs, those can be frozen. However, the rest is best enjoyed fresh. For the full recipe, check earlier in the article. Yes, you can use other cheeses. Crumbled goat cheese adds a tangy twist. Mozzarella offers a creamy texture. For a sharper taste, try blue cheese. Just remember, each cheese brings its own flavor. Choose one that you enjoy! This salad pairs well with grilled chicken or shrimp. You can also serve it with flatbreads or pita. A light soup works nicely too. If you want a full meal, add some quinoa or couscous. These sides make your meal balanced and tasty. Yes, the salad is vegan-friendly without feta. You can replace feta with avocado for creaminess. Adding nuts or seeds gives a nice crunch. The herbs and dressing still make it fresh and flavorful. Enjoy it as a light and healthy dish! This blog post covered how to make a tasty Summer Watermelon Feta Salad. I shared key ingredients and how to choose ripe watermelon. You learned step-by-step instructions for preparing the salad. I also offered tips for tossing it well and ways to enjoy it later. In the end, this salad is fresh and versatile. Try different fruits and dressings to make it yours. Enjoy creating your version of this summer delight!

Summer Watermelon Feta Salad Fresh and Flavorful Treat

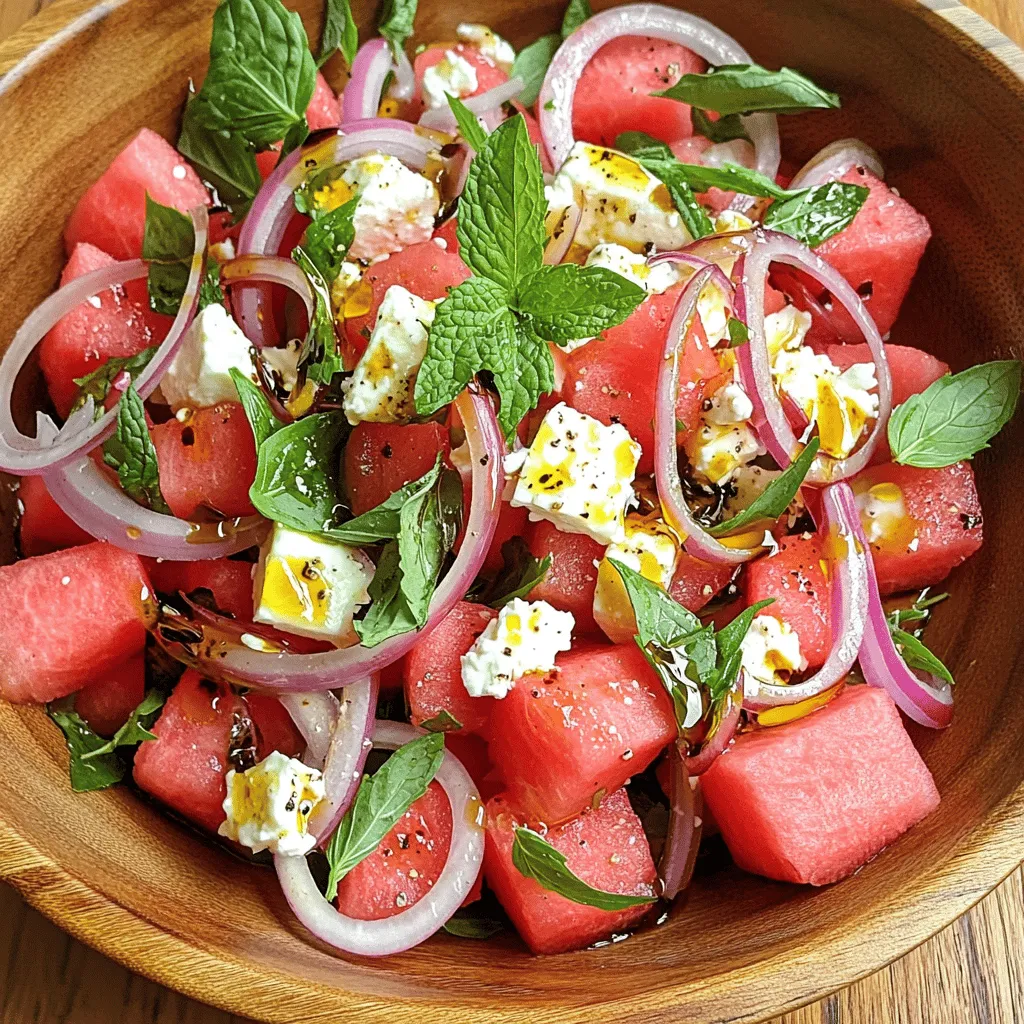
Summer is here, and there’s nothing quite like a refreshing salad to beat the heat. My Summer Watermelon Feta Salad

- 1 pound pizza dough (store-bought or homemade) - 1/3 cup unsalted butter, melted - 4 cloves garlic, minced - 1 tablespoon fresh parsley, chopped - 1 teaspoon garlic powder - 1/2 teaspoon salt - 1/4 teaspoon black pepper - Grated Parmesan cheese for topping (optional) Buttery garlic knots start with simple ingredients. You can use pizza dough from the store or make your own at home. The dough is the base of this recipe. It gives your knots their soft and chewy texture. Next, we need unsalted butter. This adds richness. It melts into the knots, making them taste divine. Garlic is key here, too. We’ll use minced garlic and garlic powder for a flavor that bursts in your mouth. Fresh parsley brings a nice touch of color and a slight freshness. Salt and black pepper round out the flavors. They help make everything taste balanced. If you want to elevate your knots, consider adding grated Parmesan cheese on top. This adds a salty kick and extra depth. These ingredients come together to create a dish that is not just tasty but also fun to make. You will love how quickly you can whip these up for any occasion. For the full recipe, check out the details above. 1. Preheat your oven and prepare the baking sheet. Start by setting your oven to 375°F (190°C). While that warms up, grab a baking sheet and line it with parchment paper. This keeps the knots from sticking and makes cleanup easy. 2. Cut the pizza dough into equal pieces. Take your pizza dough, either store-bought or homemade, and place it on a floured surface. Use a knife or a dough cutter to slice the dough into 12 equal pieces. This ensures all knots bake evenly. 3. Shape each piece into a long rope and knot it. Roll each piece into a long rope, about 8 inches long. Once you have your rope, twist it into a knot. To do this, fold the ends back through the middle. Place each knot on the prepared baking sheet, giving them some space. 1. Mix melted butter and seasonings in a bowl. In a small bowl, combine 1/3 cup of melted unsalted butter, 4 minced garlic cloves, 1 tablespoon of chopped fresh parsley, 1 teaspoon of garlic powder, 1/2 teaspoon of salt, and 1/4 teaspoon of black pepper. Stir well until everything blends together. 2. Brush the garlic butter mixture over the knots. Take a pastry brush and generously coat each knot with the garlic butter mixture. Save some for brushing after baking to keep that buttery flavor strong. 1. Bake until golden brown and cooked through. Place the baking sheet in the preheated oven. Bake for 15 to 20 minutes, or until the knots turn a lovely golden brown. 2. Apply remaining garlic butter after baking. Once the knots are done, pull them from the oven. Immediately brush the remaining garlic butter over the hot knots. This adds more flavor and keeps them moist. Enjoy these buttery garlic knots warm, and don’t forget to check out the Full Recipe for more details! To get the best texture for your buttery garlic knots, start with room-temperature dough. Cold dough does not stretch well. Knead it lightly before cutting to help it rise. This step makes the knots soft and fluffy. For even cooking, place the knots about an inch apart on the baking sheet. This distance allows heat to circulate around each knot. Rotate the baking sheet halfway through baking. This ensures every knot bakes evenly and gets that perfect golden color. You can add herbs and spices to boost flavor. Fresh thyme or rosemary pairs nicely with garlic. Just mix these herbs into the garlic butter for a tasty twist. If you want a spicy kick, consider adding red pepper flakes to the mix. Cheese options can add richness to the knots. Grated Parmesan is a classic choice. You can sprinkle it on top right after baking. For a creamier option, try adding mozzarella into the knot before baking. This creates a gooey surprise in every bite. For the full recipe, check out the [Full Recipe]. {{image_2}} You can make your garlic knots even tastier by using fresh herbs. Try adding basil, thyme, or rosemary to the garlic butter mix. Each herb brings its own flavor and aroma, making the knots unique. You can also use Italian seasoning blends. They often contain a mix of dried herbs like oregano, thyme, and basil. These blends add depth to your knots and enhance their savory profile. For cheese lovers, cheese-stuffed knots are a must-try. Simply add mozzarella or cheddar cheese into the dough before knotting. As they bake, the cheese melts and creates a gooey center that is delightful. You can serve these knots with marinara sauce for dipping. This pairing adds a fun twist and complements the garlic flavor. Enjoying these twists with friends or family makes them even better. Check out the Full Recipe for detailed instructions and tips! To keep your buttery garlic knots fresh, follow these simple steps: - Cool them: Let the knots cool to room temperature before storing. - Use an airtight container: Place the knots in an airtight container. This helps keep them soft and prevents them from drying out. - Refrigerate or freeze: If you plan to eat them soon, store them in the fridge. For longer storage, freeze them. Just make sure to separate layers with parchment paper. Reheating your garlic knots can bring back their yummy taste. Here’s how to do it best: - Oven: Preheat your oven to 350°F (175°C). Place the knots on a baking sheet. Bake for about 10 minutes. This keeps them crisp on the outside. - Microwave: For a faster option, use the microwave. Place a damp paper towel over the knots and heat for 15-20 seconds. This helps retain moisture but may make them softer. - Tips for texture: If you want to keep the knots crunchy, always prefer the oven. The microwave is quick but can make them a bit chewy. For the full recipe, check out the detailed steps and ingredients listed earlier. Can I use a different type of dough? Yes, you can use other dough types. Try biscuit dough or bread dough. Each type gives a unique flavor and texture. Experiment to find your favorite. How can I make these gluten-free? To make gluten-free garlic knots, use gluten-free pizza dough. Many stores sell ready-made options. You can also make your own using gluten-free flour blends. What can I serve with buttery garlic knots? Buttery garlic knots pair well with marinara sauce, fresh salads, or soups. They also make a great side for pasta dishes. What to do if knots don’t rise properly? If your knots don’t rise, check the yeast. It may be old or inactive. Warm temperatures help dough rise. Try placing it in a warm spot to encourage rising. How to fix an overly greasy appearance? If your knots look too greasy, reduce the butter next time. Brush them lightly with the garlic butter mixture. Let them drain on paper towels after baking to absorb extra grease. Buttery garlic knots are simple and delicious. We covered the key ingredients and easy steps to make them. I shared tips on perfecting the texture and enhancing the flavor with herbs and cheese. Plus, I explained how to store and reheat leftovers. Whether you want to try variations or troubleshoot issues, you now have the knowledge to make these tasty knots. Enjoy making them for any meal or snack!

Buttery Garlic Knots Irresistible and Easy Recipe

Do you crave the warm, cheesy goodness of garlic knots? You’re in the right place! In this post, I’ll show

To create this dish, gather these key items: - 1 medium head of cauliflower, cut into florets - 1 cup all-purpose flour - 1 teaspoon garlic powder - 1 teaspoon ginger powder - 1 teaspoon baking powder - 1 cup cold water - 1 cup cornstarch - Vegetable oil (for frying) These ingredients work together to achieve that perfect crispy texture. The cauliflower serves as the star, while the flour and cornstarch provide crunch. Now, let's talk about the sauce. You will need: - 2 tablespoons soy sauce - 2 tablespoons hoisin sauce - 1 tablespoon rice vinegar - 2 tablespoons sugar - 1 tablespoon sesame oil - 2 cloves garlic, minced - 1 teaspoon ginger, minced - 1-2 tablespoons sambal oelek (or more to taste) - 1 tablespoon sesame seeds This sauce brings a sweet and spicy flavor, making your cauliflower shine. If you want to mix things up, consider these swaps: - Use almond flour instead of all-purpose flour for a nutty flavor. - Try tamari or coconut aminos if you need gluten-free options. - If you want less heat, skip the sambal oelek or use less. These substitutions can help you customize the dish to your taste. For the complete cooking instructions, check out the Full Recipe. Start by cutting your cauliflower into florets. Make them bite-sized for easy eating. In a big bowl, mix the flour, garlic powder, ginger powder, baking powder, and cold water. This mix becomes your batter. Stir until it's smooth but thick. It should coat the cauliflower well. Next, dip each floret into the batter. Make sure it's fully covered. After that, sprinkle cornstarch on each floret. This adds a nice crunch. In a deep skillet or pot, heat about 2 inches of vegetable oil. Aim for a temperature of 375°F (190°C). Carefully place the battered florets into the hot oil in small batches. Fry them until they turn golden brown, which takes about 4-5 minutes. Use a slotted spoon to take them out and let them drain on paper towels. For the sauce, grab a small saucepan and heat it over medium heat. Combine soy sauce, hoisin sauce, rice vinegar, sugar, sesame oil, minced garlic, minced ginger, and sambal oelek. Stir often until the sauce thickens a bit, around 3-4 minutes. Once thickened, toss the fried cauliflower in a big mixing bowl with the sauce. Mix gently until the florets are well-coated. For the full recipe, refer to the earlier section. To make your Crispy General Tso’s Cauliflower super crunchy, follow a few key steps. First, coat each floret well with batter. This helps hold onto the cornstarch. Next, sprinkle cornstarch on top after dipping. This adds an extra layer of crunch. Also, make sure your oil is hot enough. Aim for 375°F (190°C) before frying. If the oil is too cool, the cauliflower will soak up oil and become soggy. One common mistake is not drying the cauliflower. Moisture will prevent crispiness. Pat the florets dry before coating them. Another mistake is overcrowding the pan. Frying too many at once lowers the oil temperature. Fry in small batches for the best results. Lastly, be careful not to burn the sauce. Keep it on low heat and stir often. To adjust the spice level in your sauce, simply change the amount of sambal oelek. Start with 1 tablespoon for mild heat. If you like it spicier, add more until you reach your desired level. You can also add fresh chili slices for heat. Remember, tasting as you go is key. Make the dish your own and enjoy the flavors! {{image_2}} You can easily make this dish vegan. Just replace the soy sauce with a gluten-free variety if needed. For the batter, use chickpea flour instead of all-purpose flour. This keeps the crispiness while adding protein. To make this recipe gluten-free, swap the all-purpose flour for a gluten-free blend. Use cornstarch as your main coating. Most soy sauces are gluten-free, but check the label to be sure. Feel free to get creative with the sauce. You can try using teriyaki sauce or sweet and sour sauce for different flavors. If you love heat, add sriracha or chili paste for a spicy kick. Check out the Full Recipe for more sauce ideas! To keep your Crispy General Tso's Cauliflower fresh, let it cool first. Place it in an airtight container. Store it in the fridge for up to three days. This way, it stays crispy and tasty. If you want to enjoy it later, make sure to check for any signs of spoilage. When you are ready to eat your leftovers, avoid the microwave. It can make the cauliflower soggy. Instead, preheat your oven to 350°F (175°C). Spread the cauliflower on a baking sheet. Heat for about 10-15 minutes until hot and crispy again. You can also use an air fryer for a quicker option. You can freeze this dish but it might lose some crispiness. First, let the cauliflower cool completely. Then, place it in a freezer-safe bag. Remove as much air as possible before sealing. It can last up to three months in the freezer. When you want to eat it, thaw it overnight in the fridge before reheating. Enjoy your crispy treat later! For the full recipe, check out the document. Yes, you can make this dish ahead of time. You can prepare the batter and coat the cauliflower florets. Keep them in the fridge until you are ready to fry. This way, they stay fresh and crispy. Fry them just before serving for the best texture. You can use many vegetables for this recipe. Broccoli, zucchini, or bell peppers work well. Cut them into similar sizes for even cooking. Each vegetable will give a unique flavor. It’s fun to experiment and find your favorite! To make a healthier version, you can bake instead of fry. Preheat your oven to 425°F (220°C). Coat the florets with the batter, then place them on a baking sheet lined with parchment paper. Bake for 20-25 minutes, flipping halfway through. This way, you reduce oil and calories while keeping the crunch. You can also use whole wheat flour instead of all-purpose flour for extra fiber. Check the Full Recipe for more details on ingredients and steps! Crispy General Tso's cauliflower makes a tasty dish. We covered main ingredients and suggested substitutes. I shared steps for preparation and cooking that help achieve crispiness. Tips included avoiding common mistakes and adjusting spice levels for your taste. You can explore vegan and gluten-free options to fit your needs. Remember to store and reheat leftovers properly for the best flavor. With this guide, you're ready to enjoy a delicious meal. Happy cooking!

Crispy General Tso’s Cauliflower Easy and Delicious Dish

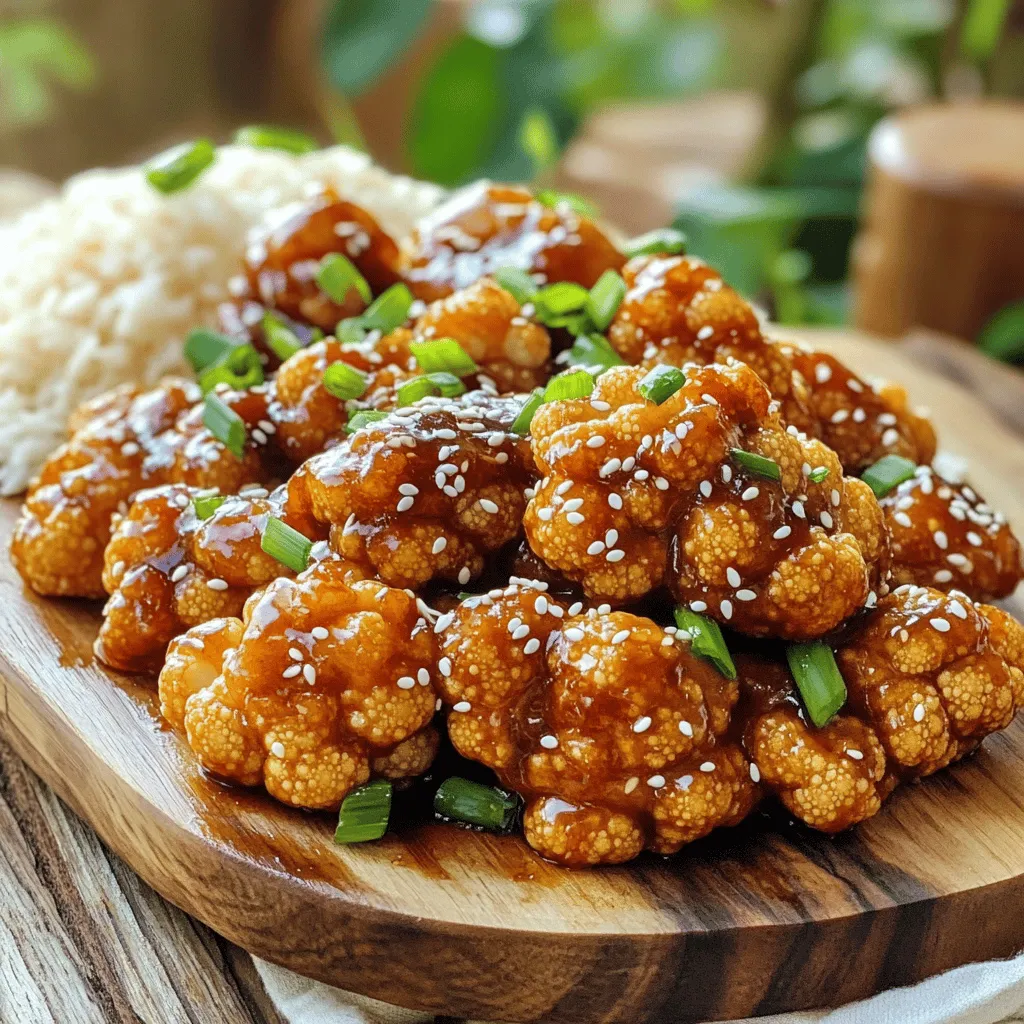
If you love crispy, flavorful dishes, I’ve got a treat for you! My Crispy General Tso’s Cauliflower is easy to

To make pumpkin spice cheesecake bars, we need the following items: - 1 ½ cups graham cracker crumbs - ½ cup unsalted butter, melted - 2 tablespoons brown sugar - 1 teaspoon cinnamon - 1 (8 oz) package cream cheese, softened - ½ cup granulated sugar - 1 cup pumpkin puree - 2 large eggs - 2 teaspoons vanilla extract - 1 teaspoon pumpkin pie spice - ¼ teaspoon salt - Whipped cream (for serving, optional) - Chopped pecans or walnuts (for garnish, optional) The crust has a crunchy and sweet base. It uses graham cracker crumbs, butter, brown sugar, and cinnamon. Press the crust firmly into the pan for the best texture. For the filling, cream cheese brings a rich creaminess. The pumpkin puree adds flavor and moisture. Sugar sweetens the mix, while eggs help set the cheesecake. I love to serve these bars with whipped cream. A dollop adds a light and creamy touch. Chopped pecans or walnuts give a nice crunch. If you have fresh autumn spices, sprinkle them on top for extra flavor. You can find the full recipe for these pumpkin spice cheesecake bars in the link provided. Enjoy making this delicious treat! 1. Preheat the oven and prepare the baking pan Start by preheating your oven to 350°F (175°C). This step is key for even baking. Next, grab an 8-inch square baking pan. Line it with parchment paper, leaving some paper over the edges. This makes it easy to lift the bars out later. 2. Make the graham cracker crust In a mixing bowl, combine 1 ½ cups of graham cracker crumbs with ½ cup of melted unsalted butter, 2 tablespoons of brown sugar, and 1 teaspoon of cinnamon. Mix these together until the mixture looks crumbly. Press this mixture firmly into the bottom of your prepared pan. It should form an even layer. Bake this in the oven for 10 minutes, then take it out and let it cool. 3. Combine cream cheese and sugars In a large bowl, beat 1 (8 oz) package of softened cream cheese with ½ cup of granulated sugar. Mix for about 2-3 minutes until it’s smooth and creamy. You want it to be fluffy, so take your time with this step. 4. Incorporate pumpkin and spices Add 1 cup of pumpkin puree, 2 large eggs, 2 teaspoons of vanilla extract, 1 teaspoon of pumpkin pie spice, and ¼ teaspoon of salt to the cream cheese mixture. Beat everything together until it is well mixed and smooth. This is where the magic happens, as the flavors blend beautifully. 5. Pour filling over crust and bake Once your crust has cooled, pour the pumpkin cheesecake filling over it. Spread it out evenly with a spatula. Place it back in the oven and bake for 30-35 minutes. The edges should look set, while the center will be slightly jiggly. 6. Cooling process and chilling tips After baking, let the bars cool at room temperature for about 10 minutes. Then, move them to the fridge to chill for at least 2 hours. Chilling is important for the texture, so don’t skip this step! Once fully chilled, lift the bars out using the parchment paper. Cut them into squares and enjoy. You can serve them with whipped cream and a sprinkle of chopped pecans or walnuts for added flair. For the full recipe, refer to the complete instructions and ingredient list provided. To get the best texture in your pumpkin spice cheesecake bars, start with room temperature ingredients. When cream cheese and eggs are at room temperature, they mix better. This helps create a smooth filling with no lumps. It also bakes evenly, which is key for great texture. Baking times can vary based on your oven. Keep an eye on the bars in the last few minutes. If your oven runs hot, check them a bit earlier. They are done when the edges look set but the center has a slight jiggle. This ensures a creamy texture. Serve these bars with a dollop of whipped cream. It adds lightness and a nice contrast to the rich cheesecake. You can also sprinkle chopped pecans or walnuts on top. They add a nice crunch and flavor. For gatherings, get creative! Cut the bars into fun shapes using cookie cutters. You can also serve them on a platter with seasonal fruits like apples or pears. This gives your dessert a colorful touch and makes it even more inviting. {{image_2}} You can swap pumpkin puree for other flavors. Try using sweet potato or butternut squash. Both give a nice twist while keeping the creamy texture. For a chocolate twist, mix in cocoa powder. You can also use flavored cream cheese, like cinnamon or maple, for a fun twist. If you want a vegan version, use plant-based cream cheese. You can replace eggs with flaxseed meal or silken tofu. For a gluten-free option, use gluten-free graham crackers for the crust. These changes keep the spirit of the bars while catering to different diets. Adding spices can give your bars a unique flavor. Try nutmeg, ginger, or even cardamom to spice things up. Top your bars with caramel sauce, chocolate drizzle, or a sprinkle of toasted coconut. Each topping adds a new layer of flavor. Seasonal fruits also work great. Chopped apples or pears can enhance the taste. You could also add fresh cranberries for a tart kick. These additions make your pumpkin spice cheesecake bars even more delightful. To keep your pumpkin spice cheesecake bars fresh, store them in the fridge. Use an airtight container to prevent them from drying out. You can also cover them tightly with plastic wrap. If you want to freeze them, cut the bars first. Place them in a single layer in a freezer bag. Make sure to remove as much air as possible. They can last in the freezer for up to three months. In the refrigerator, these bars last about five days. After that, they may lose flavor and texture. If you notice any off smells, mold, or a change in color, discard them. Always check for these signs to ensure you enjoy them at their best. Can I make this recipe ahead of time? Yes, you can make these bars a day or two in advance. Just store them in the fridge. This allows the flavors to blend, making them even tastier. Remember to cover them well to avoid drying out. What’s the best way to cut cheesecake bars? To cut cheesecake bars cleanly, use a sharp knife. Dip the knife in hot water and wipe it dry before each cut. This helps prevent sticking and gives you nice, even squares. Why did my cheesecake bars crack? Cracks often happen when the filling bakes too long or at too high a temperature. Make sure to bake at 350°F and check around 30 minutes. The center should jiggle slightly when done. How can I fix a soggy crust? A soggy crust can be a bummer. To avoid this, bake the crust for 10 minutes before adding the filling. If you already have a soggy crust, try baking it a bit longer to firm it up. You learned how to make delicious pumpkin spice cheesecake bars. We covered the ingredients, step-by-step instructions, tips for texture, and serving ideas. You can customize flavors and store them properly for later. Remember, following these easy steps and FAQs ensures tasty bars every time. Enjoy sharing this treat with friends and family. Make your baking fun and rewarding!

Pumpkin Spice Cheesecake Bars Irresistibly Delicious Treat

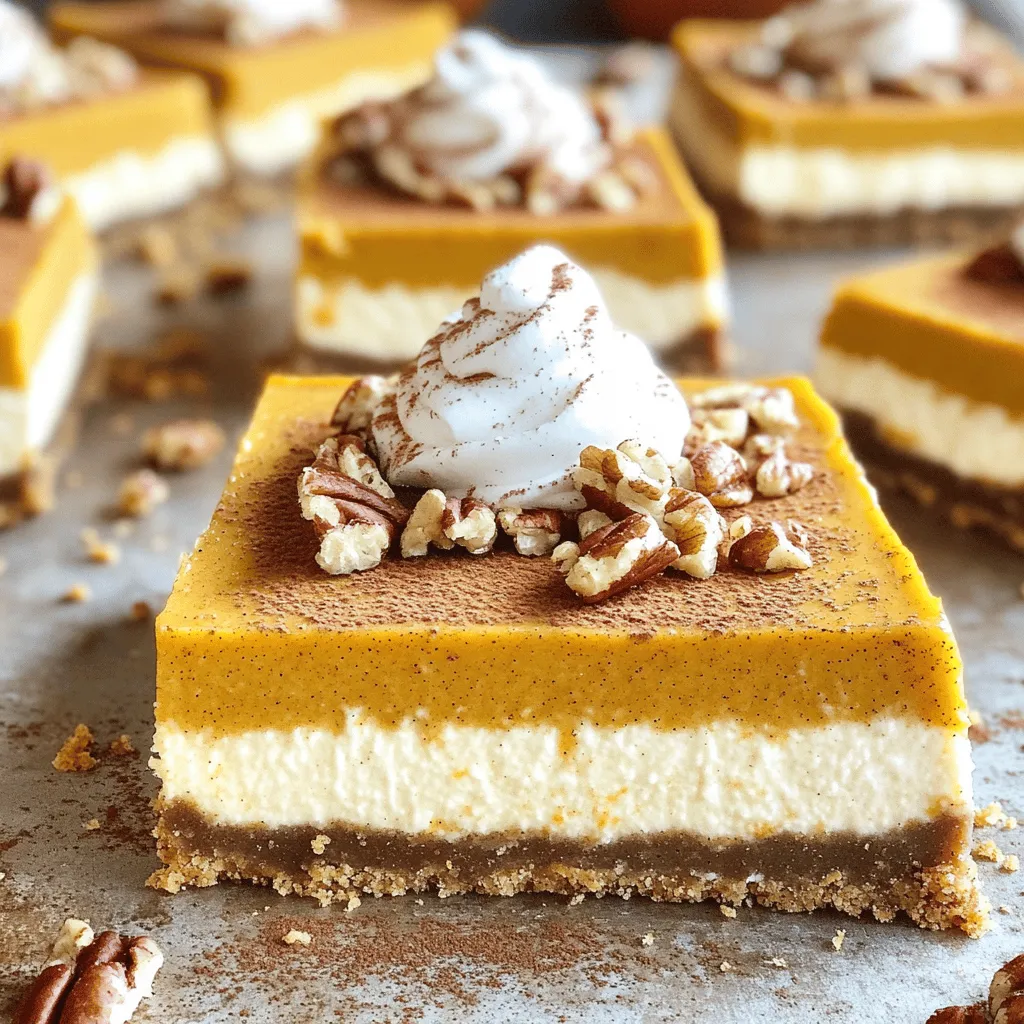
If you love fall flavors, you need to try these Pumpkin Spice Cheesecake Bars. They blend creamy cheesecake with rich

- 1 cup glutinous rice - 1 ½ cups coconut milk - ½ cup granulated sugar - ¼ teaspoon salt - 1 ripe mango, peeled and sliced - 1 tablespoon sesame seeds (optional) - Fresh mint leaves for garnish (optional) Glutinous rice is key to this dish. It gives the pudding its unique sticky texture. This type of rice absorbs flavors well and becomes soft when cooked. You can find it in Asian grocery stores or online. When selecting mangoes, look for ones that are slightly soft to the touch. This means they are ripe and sweet. A ripe mango has a fragrant aroma, indicating its sweetness. Avoid mangoes with dark spots or blemishes. For coconut milk, you can use canned or fresh options. Canned coconut milk is easy to find and convenient. Make sure to choose one with no added preservatives. If you prefer fresh coconut, blend the flesh with water and strain for a homemade version. For the full recipe, follow the steps outlined in the cooking guide. Enjoy making this delightful treat! To start, rinse the glutinous rice. Place it in a bowl and cover it with cold water. Swirl the rice until the water turns cloudy. Drain and repeat until the water runs clear. This step removes excess starch. Next, soak the rice. You need to soak it for at least 4 hours, or overnight for best results. This helps the rice absorb water and become sticky when cooked. Now, it's time to cook the rice. Drain the soaked rice and place it in a steamer lined with cheesecloth. Make sure the rice is spread out evenly. Steam it over boiling water for 30 to 40 minutes. You know the rice is done when it is fully cooked and sticky. While the rice cooks, make the coconut sauce. In a saucepan, mix coconut milk, sugar, and salt. Heat it over medium heat. Stir until the sugar dissolves. Be careful not to let it boil. To get the right consistency, keep an eye on the sauce. It should be smooth and creamy, without lumps. Once the rice is cooked, transfer it to a large bowl. Pour about 1 cup of the coconut milk mixture over the rice. Stir well to combine. Let it sit for 15 to 20 minutes. This helps the rice soak in the flavors. For serving, scoop the sticky rice pudding onto a plate. Drizzle more coconut milk sauce on top. Add fresh mango slices, arranged beautifully. If you want extra crunch, sprinkle sesame seeds over the dish. You can also use fresh mint leaves for a nice touch. For the full recipe, check out the complete instructions above. To make the best mango sticky rice pudding, you need the right texture. Achieving a sticky consistency is key. Start by rinsing the glutinous rice well. This removes excess starch. Soak the rice for at least four hours. Soaking overnight is even better. It helps the rice absorb water and cook evenly. Avoid overcooking the rice. Steam it for 30 to 40 minutes. Check it for doneness. The rice should be soft but still hold its shape. If you cook it too long, it can turn mushy. You want that perfect, chewy bite. Add a twist to your mango sticky rice pudding. You can enhance the flavor with spices. A hint of vanilla or a pinch of salt can elevate the taste. Consider adding a dash of cinnamon for warmth. It pairs well with the coconut milk. For garnishing, fresh mint leaves add a pop of color. You can also sprinkle sesame seeds on top. They add a nice crunch. Combine these elements to make your dish shine. Watch out for these common mistakes. First, don’t over-soak your rice. Soaking for too long can make it too soft. Aim for four to eight hours. Second, use glutinous rice only. Regular rice won’t give you that signature sticky texture. Look for glutinous rice in Asian grocery stores. This small step makes a big difference in your pudding's final outcome. {{image_2}} You can switch mango for other fruits in this dish. Pineapple adds a bright twist. Strawberries give a sweet and tangy flavor. You can also use bananas for creaminess. Seasonal fruits like peaches or berries work well, too. These fruits can change the taste and color of your pudding. If you want a vegan option, use maple syrup or agave for sweetness. These keep the flavor without using granulated sugar. You can also find coconut milk that is labeled vegan. For gluten-free versions, stick to glutinous rice, as it is naturally gluten-free. This way, everyone can enjoy this treat! Serving styles can make your dessert even more fun. Use a glass cup to show off the layers. You can also use small bowls to create individual servings. Molds help create fun shapes, like hearts or stars. This adds a playful touch to your meal. Try these ideas for a delightful treat! For more about this dish, check out the Full Recipe. To keep your mango sticky rice pudding fresh, follow these tips: - Place leftovers in an airtight container. - Store in the fridge for up to three days. - If you want to freeze it, separate into portions first. - Use freezer-safe bags to save space. When you’re ready to enjoy leftovers, here’s how to reheat without losing texture: - For best results, use a stovetop. - Add a splash of coconut milk to keep it moist. - Heat over low until warmed through. If you choose the microwave: - Place in a microwave-safe bowl. - Cover with a damp paper towel. - Heat for short bursts, stirring in between. You can store mango sticky rice pudding for a few days: - In the fridge, it lasts about three days. - Frozen, it can last up to a month. Watch for these signs of spoilage: - Off smell or sour taste. - Mold or unusual texture. - Discoloration on the mango slices. For the full recipe, check the earlier section. Enjoy your dessert! Mango Sticky Rice Pudding is a sweet dessert from Thailand. It combines sticky rice, coconut milk, and fresh mango. The dish has a rich history in Thai culture. It is often served during festivals and special occasions. The rice becomes sticky as it cooks, absorbing the creamy coconut milk. This dessert is loved for its balance of flavors. Yes, you can prepare Mango Sticky Rice Pudding in advance. Make the sticky rice and coconut sauce ahead of time. Store them separately in the fridge. When ready to serve, reheat the rice gently. Add the coconut sauce and fresh mango just before serving for the best taste. Glutinous rice is best for this dish. It has a high starch content, making it sticky. Regular rice will not give you the same texture. Glutinous rice absorbs the coconut milk well and holds its shape. Look for “sweet rice” or “sticky rice” in stores. To make the dish creamier, adjust the coconut milk ratio. Use more coconut milk in the mix. Start with 1 ½ cups and add a little more if needed. Make sure to stir well to blend it into the rice. You can also let the rice sit longer in the coconut milk for extra creaminess. You can find great Mango Sticky Rice Pudding at many Thai restaurants. Look for places that focus on authentic Thai dishes. Local markets may also sell this dessert. Ask for recommendations from friends or check online reviews. Enjoying it fresh from a local spot is a delightful experience. Mango sticky rice pudding is a delightful treat, blending glutinous rice, coconut milk, and fresh mango. This dish shines when you use quality ingredients and follow the proper techniques. My tips and variations help you customize it to your taste. Remember to store leftovers correctly and enjoy them later. With this guide, you can master a beloved dish that never fails to impress. Enjoy creating this treat for yourself and others!

Mango Sticky Rice Pudding Simple Dessert Delight

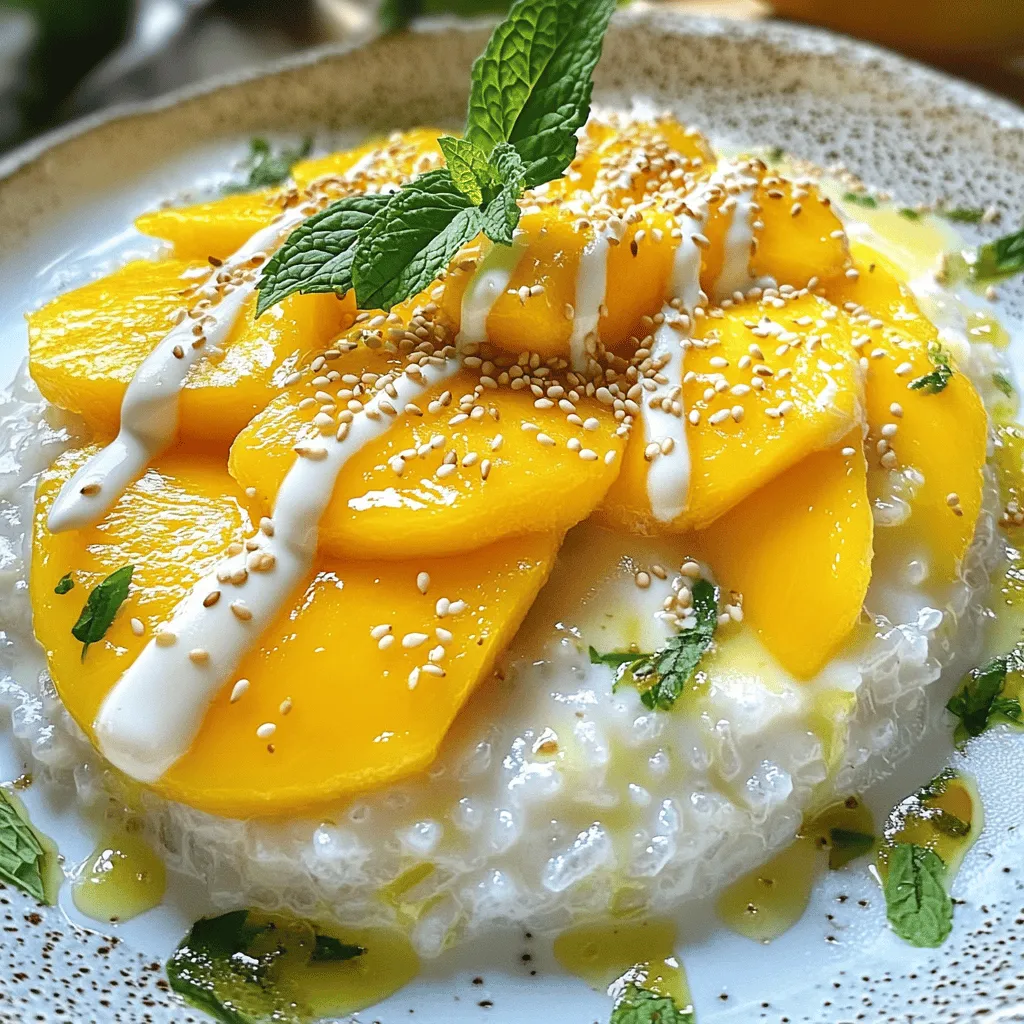
Are you ready to learn how to make Mango Sticky Rice Pudding? This simple dessert is a true crowd-pleaser. Imagine

To make Buffalo Cauliflower Bites, you need a few key ingredients: - 1 medium head of cauliflower, cut into bite-sized florets - 1 cup all-purpose flour - 1 teaspoon garlic powder - 1 teaspoon onion powder - 1 teaspoon smoked paprika - 1/2 teaspoon cayenne pepper (adjust for spice level) - 1 cup water (or plant-based milk for creaminess) - 1 cup buffalo sauce (store-bought or homemade) - 2 tablespoons olive oil - Salt and pepper to taste These ingredients come together to create a tasty and healthy snack. The cauliflower gives you a great base, while the flour and spices form a crispy coating. The buffalo sauce adds that famous kick of flavor, and the olive oil helps everything bake to perfection. I love to serve my Buffalo Cauliflower Bites with fresh veggies. Celery and carrot sticks add a nice crunch. They also help cool down the heat from the buffalo sauce. For dipping, you can choose blue cheese or ranch dressing. Both bring extra creaminess and flavor. When you serve these bites, you create a fun and vibrant snack spread that everyone will enjoy. For the full recipe, check out the detailed instructions! First, preheat your oven to 450°F (230°C). This helps the bites get crispy. Line a baking sheet with parchment paper. This keeps the bites from sticking and makes cleanup easy. Next, grab a large mixing bowl. In it, whisk together the flour, garlic powder, onion powder, smoked paprika, cayenne pepper, salt, and pepper. This mix gives the bites great flavor. Gradually add water or plant-based milk to the dry ingredients. Whisk until the batter is smooth. Now it's time to coat the florets. Dip each cauliflower floret into the batter. Make sure each piece gets an even coat. Then, place the coated florets on the lined baking sheet. Bake the cauliflower for 20 to 25 minutes. Halfway through, flip the florets. This ensures they cook evenly. When they are golden and crispy, take them out. While the cauliflower bakes, mix the buffalo sauce with olive oil in a separate bowl. Once the cauliflower comes out of the oven, toss the hot florets in the buffalo sauce mixture. Make sure they are well-coated. Return the coated cauliflower to the baking sheet. Bake them again for another 10 to 15 minutes. This makes the sauce bubble and caramelize. When done, take them out and let them cool slightly before serving. For the full recipe, check above. Enjoy these tasty and healthy bites! To get crispy cauliflower, start with dry florets. Pat them with a towel. This helps the batter stick well. Use a hot oven, set at 450°F (230°C). Bake for a full 25 minutes, flipping halfway through. For extra crunch, bake them a little longer after coating with buffalo sauce. Adjusting spice levels is easy. If you want more heat, add more cayenne pepper. Taste the batter before coating the cauliflower. You can also mix in hot sauce for extra flavor. For milder bites, skip the cayenne. Serving your bites well makes them more fun. Place the cauliflower on a big platter. Add fresh herbs like parsley or cilantro for color. Pair with fresh celery and carrot sticks for crunch. Don’t forget the dip! Set out a bowl of blue cheese or ranch dressing. This adds a cool touch to the spicy bites. You can also use yogurt for a lighter option. For a fun twist, try adding sliced green onions or sesame seeds as a garnish. For the full recipe, check out the detailed steps I provided earlier. {{image_2}} You can switch up the flavor of your Buffalo Cauliflower Bites easily. Do you love heat? Use spicy buffalo sauce. It adds a strong kick. If you prefer less heat, go for mild buffalo sauce. It still packs flavor but won’t burn your tongue. You can also play with different seasoning blends. Try adding lemon zest for a fresh twist. Or, mix in some cumin for a smoky flavor. Garlic lovers can add more garlic powder to enhance that savory taste. Making these bites fit your diet is simple. For a gluten-free option, swap all-purpose flour with gluten-free flour. This change keeps the batter light while ensuring it’s safe for those with gluten issues. Want to make it vegan? Use plant-based milk instead of water in the batter. This tweak gives your bites a creamy texture without dairy. You still get that crunchy outside and soft inside, all while keeping it plant-based. If you're ready to dive into the full experience, check out the Full Recipe. Enjoy playing with these variations to find your perfect bite! To store leftovers, let the Buffalo Cauliflower Bites cool down. Place them in an airtight container. Make sure to keep them in the fridge. They will stay fresh for about three days. If you want to keep them longer, you can freeze them. Just make sure to wrap them well in plastic wrap or foil. This helps prevent freezer burn. To reheat, you want them crispy again. The best method is to use the oven. Preheat your oven to 350°F (175°C). Spread the bites on a baking sheet. Bake for about 10 to 15 minutes. This helps them regain their crunch. You can also use an air fryer for quick reheating. Set it to 350°F (175°C) and cook for 5 to 7 minutes. Both methods work well to keep your Buffalo Cauliflower Bites tasty. For the full recipe, you can check the details above. Can I make Buffalo Cauliflower Bites in advance? Yes, you can make Buffalo Cauliflower Bites ahead of time. Prepare the bites and bake them, then let them cool. Store them in an airtight container in the fridge. When you are ready to eat, reheat them in the oven at 350°F (175°C) for about 10 minutes. This keeps them crispy and delicious. What can I serve with Buffalo Cauliflower Bites? Buffalo Cauliflower Bites pair well with several items. I love serving them with fresh celery sticks and carrot sticks. They add a nice crunch and contrast. You can also offer blue cheese or ranch dressing for dipping. This adds a creamy touch that balances the spice. How do I make homemade buffalo sauce for the recipe? Making homemade buffalo sauce is simple. You can mix 1/2 cup of hot sauce with 1/4 cup of melted butter. For a twist, add a dash of garlic powder or cayenne pepper. Adjust the heat level to your liking. This sauce is perfect for tossing the baked cauliflower bits. For more details, check the Full Recipe. Buffalo Cauliflower Bites are easy and tasty. You need just a few ingredients: cauliflower, flour, and sauce. Follow simple steps to coat and bake them for crispiness. Don't forget to try different flavor options and adjust spice to fit your taste. Store leftovers in the fridge and reheat them for the best results. With all these tips, you can enjoy this delicious snack anytime!

Buffalo Cauliflower Bites Tasty and Healthy Snack

Looking for a tasty and healthy snack? Buffalo Cauliflower Bites are the perfect choice! These little bites pack a punch

- Orzo pasta: This small pasta looks like rice. It cooks quickly and absorbs flavors well. You get a creamy texture that pairs perfectly with the sauce. - Vegetable broth: This broth is key for adding depth to the dish. It enhances the flavor without overpowering. Use a good-quality broth for the best taste. - Garlic, cream, and Parmesan cheese: Garlic gives a rich aroma and a savory kick. Cream makes the sauce smooth and rich, while Parmesan adds a salty, nutty flavor. Together, they create a delightful sauce. - Herbs and flavors: You can add fresh basil, thyme, or rosemary for a flavor boost. They add freshness and brightness to the dish. - Substitutions: If you need a dairy-free option, use coconut cream and a dairy-free cheese. You can also swap orzo for gluten-free pasta if needed. - Cookware: A medium saucepan works best for boiling the broth and cooking orzo. A large skillet is great for making the sauce. - Utensils: You’ll need a wooden spoon for stirring and a measuring cup to measure ingredients. A colander helps to drain the pasta easily. This blog post covered how to create a delicious orzo dish. We explored key ingredients like vegetable broth, garlic, and Parmesan. You learned cooking techniques and tips for perfect texture and flavor. We also discussed variations for different diets and seasonal veggies. In conclusion, with the right ingredients and a bit of practice, you can master this recipe. Enjoy experimenting and making it your own!

Creamy Garlic Parmesan Orzo Delightful Pasta Dish

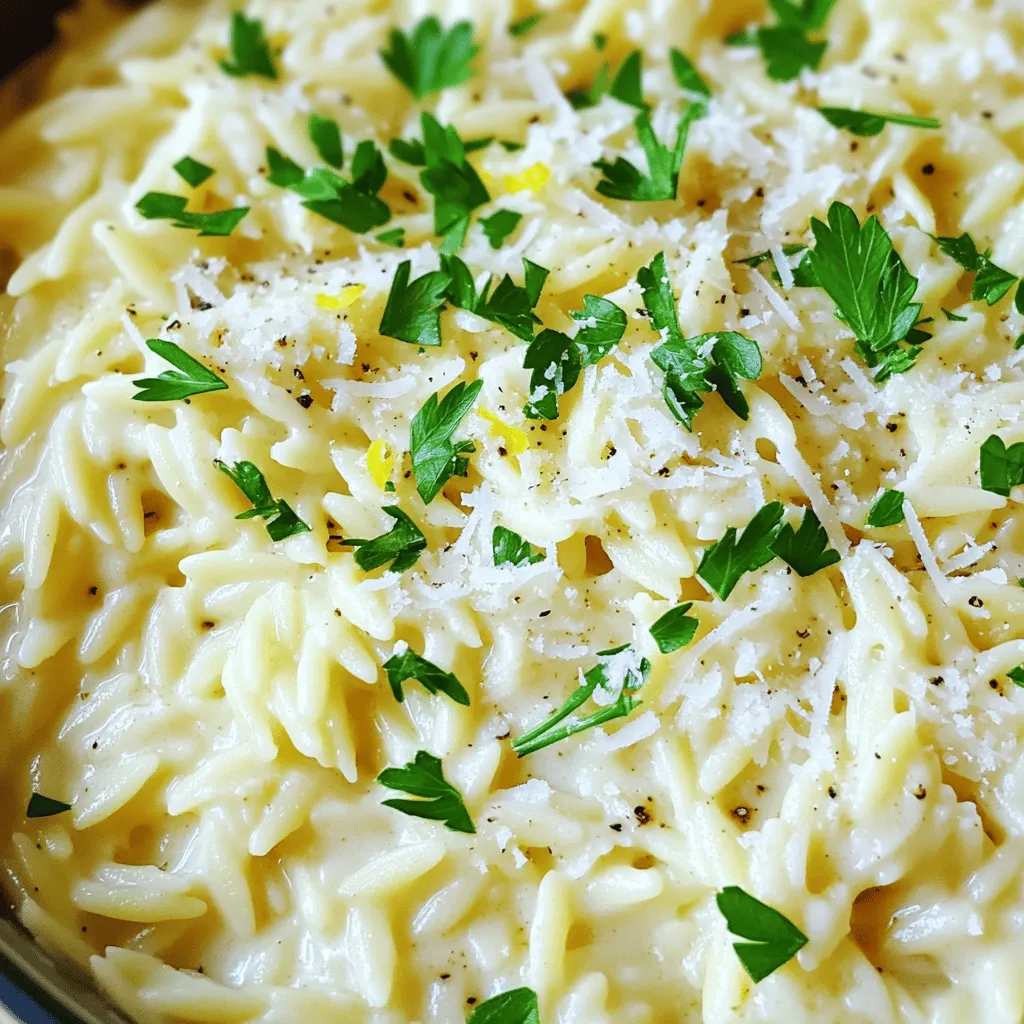
Are you ready to elevate your pasta night? Creamy Garlic Parmesan Orzo is a delightful dish that combines rich flavors

For the best baked teriyaki salmon, you need a few key items. Here’s what you will need: - 4 salmon fillets (skin on, about 6 oz each) - 1/4 cup soy sauce - 2 tablespoons honey - 2 tablespoons rice vinegar - 1 tablespoon sesame oil - 2 tablespoons fresh orange juice - 1 teaspoon grated fresh ginger - 1 garlic clove, minced - 1 teaspoon cornstarch (optional, for thickness) These ingredients work together to create a rich and flavorful dish that you’ll love. The marinade is the heart of this recipe. It gives the salmon its sweet and savory taste. The soy sauce brings saltiness. Honey adds a touch of sweetness. Rice vinegar gives it a nice tang. Sesame oil adds a nutty flavor, while fresh orange juice brightens the dish. The ginger and garlic give it depth. If you want a thicker sauce, mix in cornstarch. This will help coat the salmon nicely. To make your dish even more appealing, consider these garnishes: - Sesame seeds for a nutty crunch - Sliced green onions for freshness These simple additions make your baked teriyaki salmon look even more delicious. You can also serve it over rice or quinoa for a full meal. First, set your oven to 400°F (200°C). Preheating ensures even cooking. This step is key for a perfectly baked salmon. In a bowl, mix together the soy sauce, honey, rice vinegar, sesame oil, fresh orange juice, ginger, and minced garlic. Whisk until it blends well. If you want a thicker sauce, add cornstarch and stir until it dissolves. This marinade gives the salmon a tasty glaze. Take your salmon fillets and place them in a dish or a resealable bag. Pour the marinade over the salmon. Let it soak for at least 15 minutes. If you have more time, marinate for an hour in the fridge. This makes the salmon flavorful and juicy. Grease a baking dish lightly with cooking spray or olive oil. Remove the salmon from the marinade and place it skin side down in the dish. Pour some marinade over the top. Bake in your preheated oven for 12-15 minutes. The salmon is done when it flakes easily with a fork. For a nice finish, you can broil the salmon for 2-3 minutes at the end. Switch your oven to broil and keep a watchful eye. This step adds great caramelization but can burn quickly. Once your salmon is cooked, let it rest for a couple of minutes. Garnish with sesame seeds and sliced green onions. For a great plate, serve the salmon on a bed of steamed rice or quinoa. Add some sautéed broccoli or asparagus for color and nutrition. This makes your dish look as good as it tastes! When picking salmon, look for fresh fillets with bright color. The skin should be shiny and moist. I prefer wild-caught salmon for its rich taste. Farmed salmon can work too, but check for high-quality sources. Ask your fishmonger for advice if you’re unsure. To get that perfect flaky texture, do not overcook the salmon. Bake it for just 12-15 minutes at 400°F (200°C). The fish should easily flake with a fork when done. Let it rest for a couple of minutes after baking. This waiting time helps keep the moisture in. The teriyaki sauce can be a bit sweet. You can change the flavor by adding more soy sauce or honey. For a tangy twist, add extra orange juice. Taste the sauce before marinating the fish. Adjust until it’s just right for you. This will make your dish more enjoyable. Remember, your taste buds are the best judge! For the complete recipe, check out the Full Recipe link. {{image_2}} You can brighten the dish with citrus. Try using lemon or lime juice. These fruits add a fresh zing to the teriyaki sauce. They also cut through the richness of the salmon. For a sweet touch, add some zest. Grate the peel of the citrus and mix it in. This will enhance the flavor even more. If you want to switch it up, consider other proteins. Chicken breast works well with the same teriyaki sauce. Just adjust the cooking time since chicken takes longer. You can also use tofu for a plant-based option. Tofu absorbs flavors nicely and becomes tender when cooked. Adding veggies can make your meal even more colorful. Try bell peppers, zucchini, or snap peas. Toss them in the marinade with the salmon. They will roast beautifully in the oven. You can also serve them on the side for extra crunch. Using vegetables adds nutrition and makes the dish more filling. Store leftover salmon in an airtight container. Make sure it cools to room temperature first. Keep it in the fridge for up to three days. If you want it to last longer, consider freezing it. To reheat, preheat your oven to 350°F (175°C). Place the salmon on a baking sheet. Cover it loosely with foil to keep it moist. Heat for about 10-15 minutes, or until warm. You can also use a microwave. Heat on medium power for 1-2 minutes. If you have extra salmon, freezing is a great choice. Wrap each fillet tightly in plastic wrap. Then place them in a freezer bag. Make sure to remove as much air as possible. Frozen salmon can last for up to three months. To use, thaw it in the fridge overnight before reheating. You can pair baked teriyaki salmon with many sides. I love serving it with rice or quinoa. Steamed broccoli or asparagus adds a nice crunch. A simple salad with fresh greens also works well. Try adding some sliced oranges for extra flavor. To thicken the marinade, you can add cornstarch. Mix one teaspoon of cornstarch with a little water. Stir it into the marinade until it dissolves. This will give your sauce a nice, rich texture. Yes, you can use frozen salmon. Just make sure to thaw it first. Place it in the fridge overnight or run it under cold water. Once thawed, follow the recipe as you would with fresh salmon. The salmon is done when it flakes easily with a fork. You can also check the internal temperature. It should reach 145°F (63°C). If you have a meat thermometer, this can help ensure perfect cooking. You can find the full recipe here. It includes all the steps and tips to make this dish delicious! Baked teriyaki salmon is simple and tasty. We covered essential ingredients, from marinades to garnishes. I shared clear steps, like marinating and baking. I also provided tips to ensure a flaky texture. You can explore variations to keep it exciting, and storage ideas help keep leftovers fresh. Remember, adding citrus or different proteins can change the dish. This delicious meal is easy to make and enjoy. Cook with confidence, and share your creations with friends or family!

Baked Teriyaki Salmon Flavorful and Easy Recipe

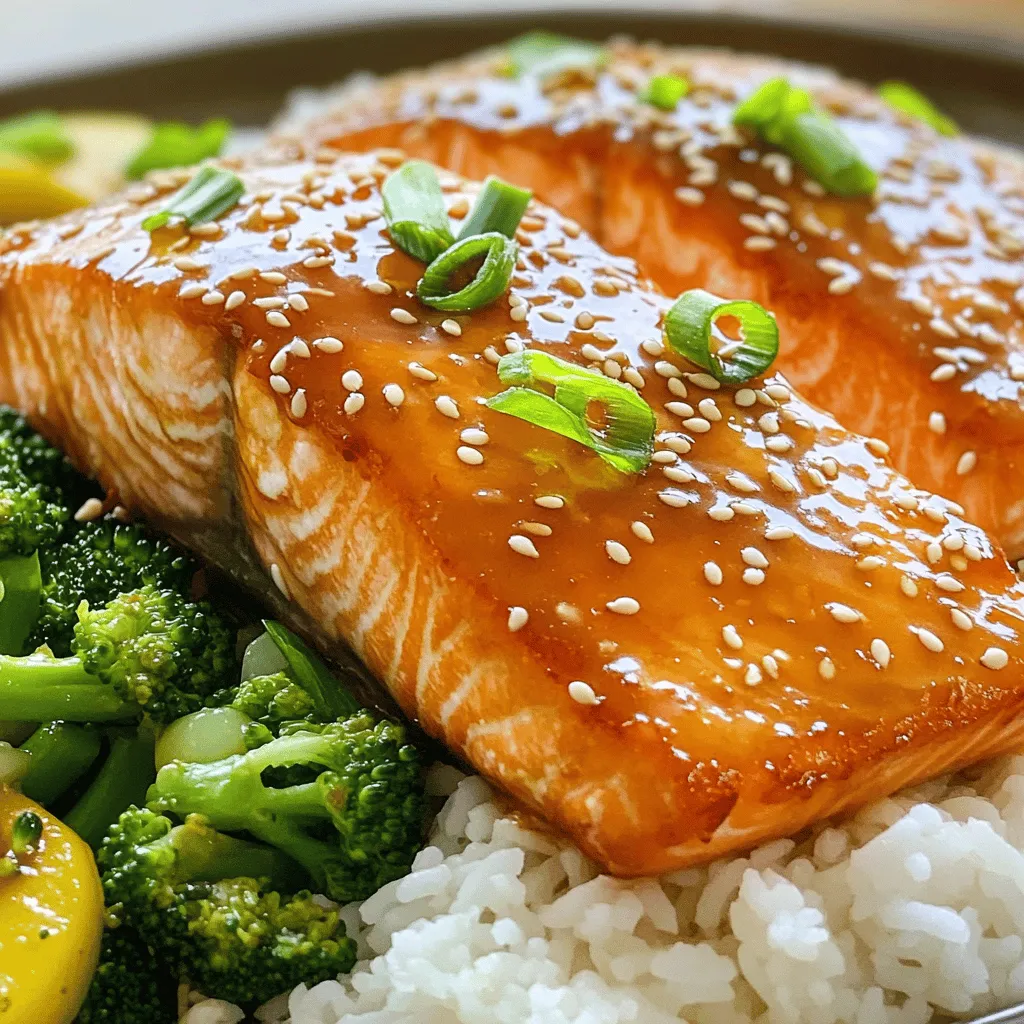
Are you ready to impress at dinner with a dish that’s both tasty and easy? Baked teriyaki salmon brings bold

Older posts
Newer posts
← Previous Page1 … Page3 Page4 Page5 … Page237 Next →
© 2025 Chef Taling • Built with GeneratePress

Welcom to cheftaling.com

Dive into delicious recipes and culinary inspiration at Chef Taling, crafted by Chef Taling. Unleash the joy of cooking with simple, step-by-step recipes and professional tips.

Our Policies

  • Privacy Policy
  • GDPR Policy
  • Terms Of Use
  • Copyright Policy
  • Cookie Policy
  • Disclaimer

More Information​

  • Home
  • Contact
  • About
  • Dinner
  • Appetizer
  • Desserts
©2025, Chef Taling Privacy Policy Back To Top