Chef Taling

  • Home
  • Recipe Index
    • Desserts
    • Dinner
    • Appetizer
    • Drinks
  • About
  • Contact
  • Privacy Policy
menu icon
go to homepage
  • Home
  • Recipe Index
    • Desserts
    • Dinner
    • Appetizer
    • Drinks
  • About
  • Contact
  • Privacy Policy

search icon
Homepage link
  • Home
  • Recipe Index
    • Desserts
    • Dinner
    • Appetizer
    • Drinks
  • About
  • Contact
  • Privacy Policy

×

Air Fryer Crispy Lemon Pepper Wings Quick and Easy Recipe

Published: Sep 17, 2025 · by Taling · Leave a Comment

WANT TO SAVE THIS RECIPE?

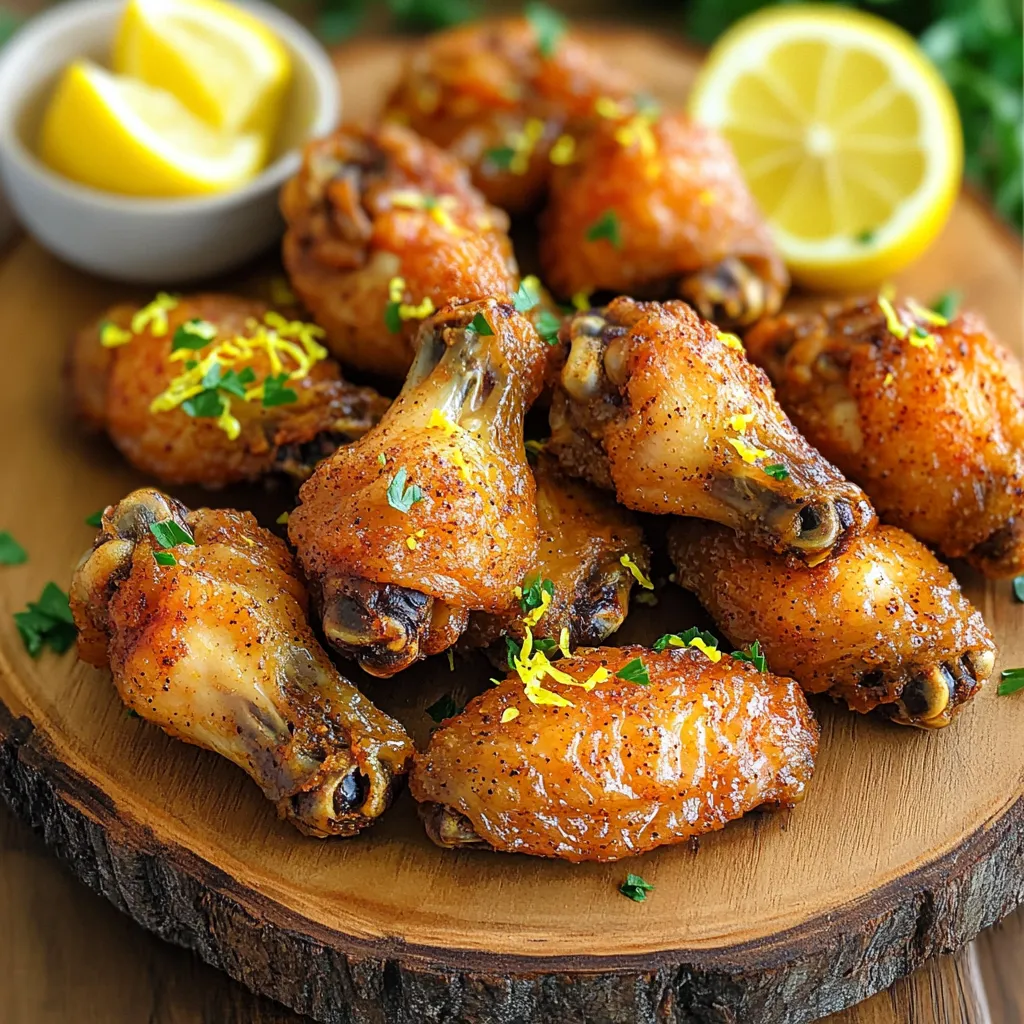
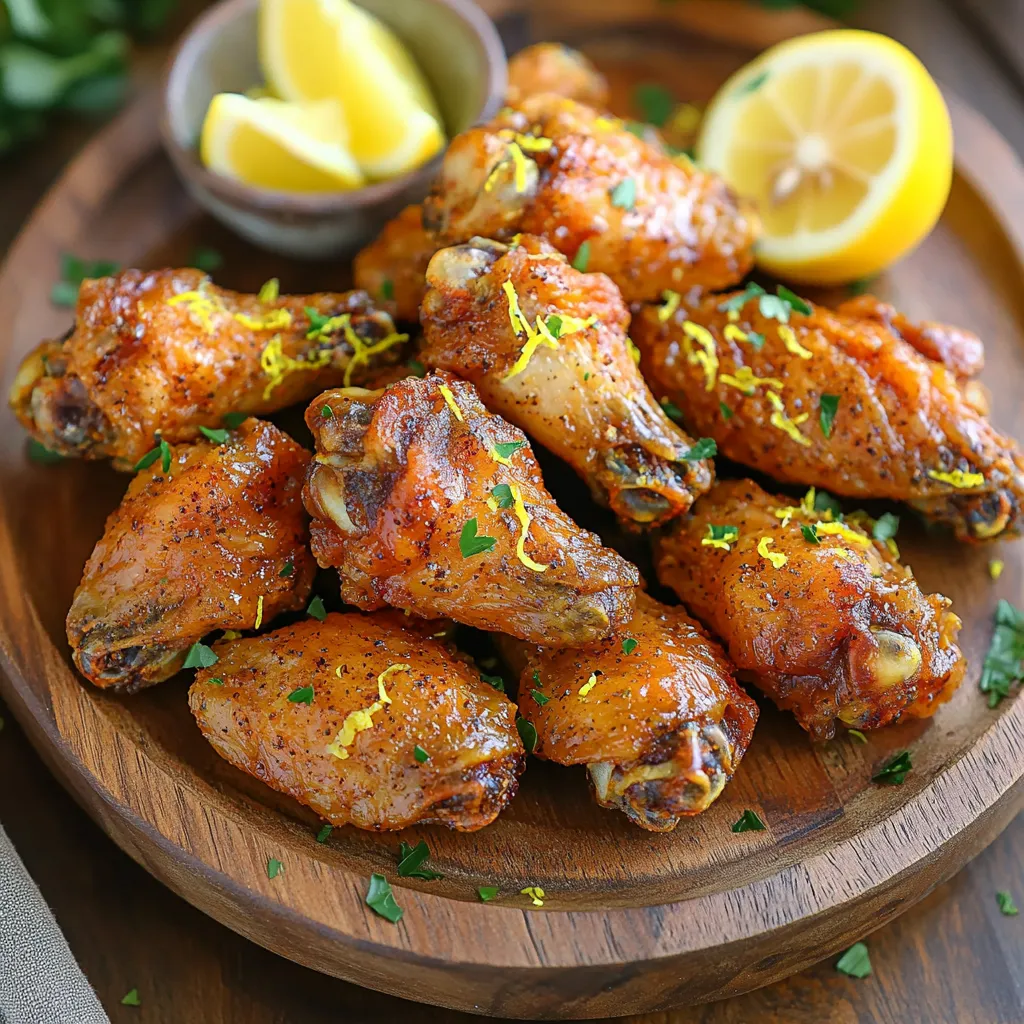
Get ready to elevate your snack game with my Air Fryer Crispy Lemon Pepper Wings. This quick and easy recipe packs a zesty punch that will wow your taste buds. With just a few simple ingredients, you’ll learn how to make wings that are crispy outside and juicy inside. Whether for game day or a cozy night in, these wings are perfect for any occasion. Let’s dive into the deliciousness!

- 2 lbs chicken wings Chicken wings are the star of this dish. I love using fresh wings for the best taste. You can find them at your local grocery store or butcher shop. - 2 tablespoons olive oil - 1 tablespoon lemon zest (freshly grated) - 2 tablespoons lemon juice (freshly squeezed) - 1 tablespoon black pepper - 2 teaspoons garlic powder - 1 teaspoon onion powder - 1 teaspoon paprika - 1 teaspoon salt - ½ teaspoon cayenne pepper (optional for extra heat) The marinade gives these wings their bold flavor. Olive oil helps the spices stick. Lemon zest and juice add a bright kick. Black pepper and cayenne pepper bring heat, while garlic and onion powders add depth. Paprika gives a nice color, and salt enhances all the flavors. - Fresh parsley, chopped (for garnish) Chopped parsley makes a beautiful garnish. It adds a fresh touch and bright color to the wings. You can skip this if you prefer, but it makes a nice presentation! Start with 2 pounds of chicken wings. First, pat them dry with paper towels. This makes the wings crispy. Remove any extra moisture. A dry wing cooks better in the air fryer. In a large bowl, mix 2 tablespoons of olive oil, 1 tablespoon of lemon zest, and 2 tablespoons of lemon juice. Add 1 tablespoon of black pepper, 2 teaspoons of garlic powder, 1 teaspoon of onion powder, 1 teaspoon of paprika, and 1 teaspoon of salt. If you want heat, add ½ teaspoon of cayenne pepper. Stir this well to combine. Add the chicken wings to the bowl. Toss them in the marinade until they are coated. If you have time, let them sit for 30 minutes in the fridge. This helps the wings soak up the flavor. Preheat your air fryer to 380°F (193°C) for about 5 minutes. Place the wings in the air fryer basket in a single layer. Do not overcrowd them. Cook the wings for 25 to 30 minutes. Flip them halfway through cooking. This helps them cook evenly. Once the wings are golden brown, they are ready. Carefully remove them from the air fryer. Let them rest for a few minutes. This helps keep them crispy. Before serving, garnish with fresh parsley for a nice touch. Enjoy your crispy lemon pepper wings! Air frying can make your wings crispy without too much oil. Here are some tips: - Dry the wings well: Use paper towels to remove moisture. This helps them get crispy. - Preheat the air fryer: Always preheat to 380°F (193°C) before cooking. It ensures even cooking. - Do not overcrowd: Place wings in a single layer. This helps them cook evenly and get crispy. Marinating your wings is key to great taste. Here's how to do it right: - Use fresh ingredients: Fresh lemon juice and zest give the best flavor. - Marinate time: Let wings sit in the marinade for at least 30 minutes. For deeper taste, try 2 hours. - Toss well: Make sure every wing is coated. This helps each bite burst with flavor. Cooking time can vary based on wing size. Here are some adjustments: - Smaller wings: If your wings are smaller, check them at 20 minutes. - Larger wings: For bigger wings, you may need up to 35 minutes. - Check for doneness: Wings should be golden brown and crispy. A meat thermometer should read 165°F (74°C) inside. Use these tips for tasty, crispy lemon pepper wings every time! {{image_2}} To make spicy lemon pepper wings, add more heat. Use 1 to 2 teaspoons of cayenne pepper. You can also add hot sauce to the marinade. This gives the wings a fiery kick. Mix the hot sauce with olive oil, lemon zest, and the other spices. The result is a zesty, spicy treat that packs a punch. For a sweet twist, try honey lemon pepper wings. Add 2 tablespoons of honey to the marinade. The honey adds a nice sweetness that balances the tart lemon. It caramelizes during cooking, giving a lovely glaze. This version is perfect for those who love sweet and savory flavors. If you enjoy fresh herbs, go for herb-infused wings. Add a mix of dried herbs like thyme, oregano, or rosemary. Just 1 teaspoon of each will enhance the flavor. You can also use fresh herbs if you have them on hand. This variation adds a fragrant aroma and a burst of freshness to your wings. To store leftover wings, let them cool first. Place the wings in an airtight container. Use parchment paper between layers to keep them from sticking. They can stay fresh in the fridge for up to three days. Make sure to seal them well to avoid drying out. When you want to eat the leftover wings, preheat your air fryer to 350°F (175°C). Place the wings in the basket in a single layer. Reheat for about 8-10 minutes. Flip them halfway for even heating. This method keeps them crispy and delicious. If you want to save wings for later, freezing is a great option. First, let them cool completely. Then, arrange the wings in a single layer on a baking sheet. Freeze them for about an hour until firm. After that, transfer them to a freezer bag and seal tightly. They can last up to three months in the freezer. When ready to enjoy, thaw them in the fridge overnight before reheating. To cook wings in the air fryer, you need about 25 to 30 minutes. Set the air fryer to 380°F (193°C). Flip the wings halfway through cooking. This ensures they cook evenly and get that nice golden color. Yes, you can make these wings in an oven. Preheat your oven to 425°F (218°C). Place the wings on a baking sheet lined with parchment paper. Bake for about 40 to 45 minutes, flipping them halfway through. They won’t be as crispy as in the air fryer but will still taste great. Serve lemon pepper wings hot for the best taste. You can place them on a platter with fresh parsley on top. Pair them with dipping sauces like ranch or blue cheese. They make a great appetizer or snack for parties! We explored how to create delicious chicken wings using an air fryer. You learned about the right ingredients, from wings to marinades, and how to make them pop with flavor. I shared tips for air frying and achieving that perfect crispiness. We also discussed tasty variations and how to store leftovers. In closing, mastering these steps lets you enjoy great wings anytime. Whether for a game day or a family dinner, these tips will make you a pro at wing-making.

Ingredients

Chicken Wings

  1. 2 lbs chicken wings

Chicken wings are the star of this dish. I love using fresh wings for the best taste. You can find them at your local grocery store or butcher shop.

Marinade Components

  1. 2 tablespoons olive oil
  2. 1 tablespoon lemon zest (freshly grated)
  3. 2 tablespoons lemon juice (freshly squeezed)
  4. 1 tablespoon black pepper
  5. 2 teaspoons garlic powder
  6. 1 teaspoon onion powder
  7. 1 teaspoon paprika
  8. 1 teaspoon salt
  9. ½ teaspoon cayenne pepper (optional for extra heat)

The marinade gives these wings their bold flavor. Olive oil helps the spices stick. Lemon zest and juice add a bright kick. Black pepper and cayenne pepper bring heat, while garlic and onion powders add depth. Paprika gives a nice color, and salt enhances all the flavors.

Optional Ingredients

  1. Fresh parsley, chopped (for garnish)

Chopped parsley makes a beautiful garnish. It adds a fresh touch and bright color to the wings. You can skip this if you prefer, but it makes a nice presentation!

Step-by-Step Instructions

Preparing the Chicken Wings

Start with 2 pounds of chicken wings. First, pat them dry with paper towels. This makes the wings crispy. Remove any extra moisture. A dry wing cooks better in the air fryer.

Making the Marinade

In a large bowl, mix 2 tablespoons of olive oil, 1 tablespoon of lemon zest, and 2 tablespoons of lemon juice. Add 1 tablespoon of black pepper, 2 teaspoons of garlic powder, 1 teaspoon of onion powder, 1 teaspoon of paprika, and 1 teaspoon of salt. If you want heat, add ½ teaspoon of cayenne pepper. Stir this well to combine.

Air Frying Process

Add the chicken wings to the bowl. Toss them in the marinade until they are coated. If you have time, let them sit for 30 minutes in the fridge. This helps the wings soak up the flavor. Preheat your air fryer to 380°F (193°C) for about 5 minutes. Place the wings in the air fryer basket in a single layer. Do not overcrowd them.

Cook the wings for 25 to 30 minutes. Flip them halfway through cooking. This helps them cook evenly.

Achieving Crispiness

Once the wings are golden brown, they are ready. Carefully remove them from the air fryer. Let them rest for a few minutes. This helps keep them crispy. Before serving, garnish with fresh parsley for a nice touch. Enjoy your crispy lemon pepper wings!

Tips & Tricks

Best Practices for Air Frying

Air frying can make your wings crispy without too much oil. Here are some tips:

  1. Dry the wings well: Use paper towels to remove moisture. This helps them get crispy.
  2. Preheat the air fryer: Always preheat to 380°F (193°C) before cooking. It ensures even cooking.
  3. Do not overcrowd: Place wings in a single layer. This helps them cook evenly and get crispy.

How to Marinate for Maximum Flavor

Marinating your wings is key to great taste. Here's how to do it right:

  1. Use fresh ingredients: Fresh lemon juice and zest give the best flavor.
  2. Marinate time: Let wings sit in the marinade for at least 30 minutes. For deeper taste, try 2 hours.
  3. Toss well: Make sure every wing is coated. This helps each bite burst with flavor.

Cooking Time Adjustments

Cooking time can vary based on wing size. Here are some adjustments:

  1. Smaller wings: If your wings are smaller, check them at 20 minutes.
  2. Larger wings: For bigger wings, you may need up to 35 minutes.
  3. Check for doneness: Wings should be golden brown and crispy. A meat thermometer should read 165°F (74°C) inside.

Use these tips for tasty, crispy lemon pepper wings every time!

Variations

Spicy Lemon Pepper Wings

To make spicy lemon pepper wings, add more heat. Use 1 to 2 teaspoons of cayenne pepper. You can also add hot sauce to the marinade. This gives the wings a fiery kick. Mix the hot sauce with olive oil, lemon zest, and the other spices. The result is a zesty, spicy treat that packs a punch.

Honey Lemon Pepper Wings

For a sweet twist, try honey lemon pepper wings. Add 2 tablespoons of honey to the marinade. The honey adds a nice sweetness that balances the tart lemon. It caramelizes during cooking, giving a lovely glaze. This version is perfect for those who love sweet and savory flavors.

Herb-Infused Wings

If you enjoy fresh herbs, go for herb-infused wings. Add a mix of dried herbs like thyme, oregano, or rosemary. Just 1 teaspoon of each will enhance the flavor. You can also use fresh herbs if you have them on hand. This variation adds a fragrant aroma and a burst of freshness to your wings.

Storage Info

How to Store Leftover Wings

To store leftover wings, let them cool first. Place the wings in an airtight container. Use parchment paper between layers to keep them from sticking. They can stay fresh in the fridge for up to three days. Make sure to seal them well to avoid drying out.

Reheating Instructions

When you want to eat the leftover wings, preheat your air fryer to 350°F (175°C). Place the wings in the basket in a single layer. Reheat for about 8-10 minutes. Flip them halfway for even heating. This method keeps them crispy and delicious.

Freezing Tips

If you want to save wings for later, freezing is a great option. First, let them cool completely. Then, arrange the wings in a single layer on a baking sheet. Freeze them for about an hour until firm. After that, transfer them to a freezer bag and seal tightly. They can last up to three months in the freezer. When ready to enjoy, thaw them in the fridge overnight before reheating.

FAQs

How long to cook wings in the air fryer?

To cook wings in the air fryer, you need about 25 to 30 minutes. Set the air fryer to 380°F (193°C). Flip the wings halfway through cooking. This ensures they cook evenly and get that nice golden color.

Can I make these wings without an air fryer?

Yes, you can make these wings in an oven. Preheat your oven to 425°F (218°C). Place the wings on a baking sheet lined with parchment paper. Bake for about 40 to 45 minutes, flipping them halfway through. They won’t be as crispy as in the air fryer but will still taste great.

What is the best way to serve lemon pepper wings?

Serve lemon pepper wings hot for the best taste. You can place them on a platter with fresh parsley on top. Pair them with dipping sauces like ranch or blue cheese. They make a great appetizer or snack for parties!

We explored how to create delicious chicken wings using an air fryer. You learned about the right ingredients, from wings to marinades, and how to make them pop with flavor. I shared tips for air frying and achieving that perfect crispiness. We also discussed tasty variations and how to store leftovers.

In closing, mastering these steps lets you enjoy great wings anytime. Whether for a game day or a family dinner, these tips will make you a pro at wing-making.

- 2 lbs chicken wings Chicken wings are the star of this dish. I love using fresh wings for the best taste. You can find them at your local grocery store or butcher shop. - 2 tablespoons olive oil - 1 tablespoon lemon zest (freshly grated) - 2 tablespoons lemon juice (freshly squeezed) - 1 tablespoon black pepper - 2 teaspoons garlic powder - 1 teaspoon onion powder - 1 teaspoon paprika - 1 teaspoon salt - ½ teaspoon cayenne pepper (optional for extra heat) The marinade gives these wings their bold flavor. Olive oil helps the spices stick. Lemon zest and juice add a bright kick. Black pepper and cayenne pepper bring heat, while garlic and onion powders add depth. Paprika gives a nice color, and salt enhances all the flavors. - Fresh parsley, chopped (for garnish) Chopped parsley makes a beautiful garnish. It adds a fresh touch and bright color to the wings. You can skip this if you prefer, but it makes a nice presentation! Start with 2 pounds of chicken wings. First, pat them dry with paper towels. This makes the wings crispy. Remove any extra moisture. A dry wing cooks better in the air fryer. In a large bowl, mix 2 tablespoons of olive oil, 1 tablespoon of lemon zest, and 2 tablespoons of lemon juice. Add 1 tablespoon of black pepper, 2 teaspoons of garlic powder, 1 teaspoon of onion powder, 1 teaspoon of paprika, and 1 teaspoon of salt. If you want heat, add ½ teaspoon of cayenne pepper. Stir this well to combine. Add the chicken wings to the bowl. Toss them in the marinade until they are coated. If you have time, let them sit for 30 minutes in the fridge. This helps the wings soak up the flavor. Preheat your air fryer to 380°F (193°C) for about 5 minutes. Place the wings in the air fryer basket in a single layer. Do not overcrowd them. Cook the wings for 25 to 30 minutes. Flip them halfway through cooking. This helps them cook evenly. Once the wings are golden brown, they are ready. Carefully remove them from the air fryer. Let them rest for a few minutes. This helps keep them crispy. Before serving, garnish with fresh parsley for a nice touch. Enjoy your crispy lemon pepper wings! Air frying can make your wings crispy without too much oil. Here are some tips: - Dry the wings well: Use paper towels to remove moisture. This helps them get crispy. - Preheat the air fryer: Always preheat to 380°F (193°C) before cooking. It ensures even cooking. - Do not overcrowd: Place wings in a single layer. This helps them cook evenly and get crispy. Marinating your wings is key to great taste. Here's how to do it right: - Use fresh ingredients: Fresh lemon juice and zest give the best flavor. - Marinate time: Let wings sit in the marinade for at least 30 minutes. For deeper taste, try 2 hours. - Toss well: Make sure every wing is coated. This helps each bite burst with flavor. Cooking time can vary based on wing size. Here are some adjustments: - Smaller wings: If your wings are smaller, check them at 20 minutes. - Larger wings: For bigger wings, you may need up to 35 minutes. - Check for doneness: Wings should be golden brown and crispy. A meat thermometer should read 165°F (74°C) inside. Use these tips for tasty, crispy lemon pepper wings every time! {{image_2}} To make spicy lemon pepper wings, add more heat. Use 1 to 2 teaspoons of cayenne pepper. You can also add hot sauce to the marinade. This gives the wings a fiery kick. Mix the hot sauce with olive oil, lemon zest, and the other spices. The result is a zesty, spicy treat that packs a punch. For a sweet twist, try honey lemon pepper wings. Add 2 tablespoons of honey to the marinade. The honey adds a nice sweetness that balances the tart lemon. It caramelizes during cooking, giving a lovely glaze. This version is perfect for those who love sweet and savory flavors. If you enjoy fresh herbs, go for herb-infused wings. Add a mix of dried herbs like thyme, oregano, or rosemary. Just 1 teaspoon of each will enhance the flavor. You can also use fresh herbs if you have them on hand. This variation adds a fragrant aroma and a burst of freshness to your wings. To store leftover wings, let them cool first. Place the wings in an airtight container. Use parchment paper between layers to keep them from sticking. They can stay fresh in the fridge for up to three days. Make sure to seal them well to avoid drying out. When you want to eat the leftover wings, preheat your air fryer to 350°F (175°C). Place the wings in the basket in a single layer. Reheat for about 8-10 minutes. Flip them halfway for even heating. This method keeps them crispy and delicious. If you want to save wings for later, freezing is a great option. First, let them cool completely. Then, arrange the wings in a single layer on a baking sheet. Freeze them for about an hour until firm. After that, transfer them to a freezer bag and seal tightly. They can last up to three months in the freezer. When ready to enjoy, thaw them in the fridge overnight before reheating. To cook wings in the air fryer, you need about 25 to 30 minutes. Set the air fryer to 380°F (193°C). Flip the wings halfway through cooking. This ensures they cook evenly and get that nice golden color. Yes, you can make these wings in an oven. Preheat your oven to 425°F (218°C). Place the wings on a baking sheet lined with parchment paper. Bake for about 40 to 45 minutes, flipping them halfway through. They won’t be as crispy as in the air fryer but will still taste great. Serve lemon pepper wings hot for the best taste. You can place them on a platter with fresh parsley on top. Pair them with dipping sauces like ranch or blue cheese. They make a great appetizer or snack for parties! We explored how to create delicious chicken wings using an air fryer. You learned about the right ingredients, from wings to marinades, and how to make them pop with flavor. I shared tips for air frying and achieving that perfect crispiness. We also discussed tasty variations and how to store leftovers. In closing, mastering these steps lets you enjoy great wings anytime. Whether for a game day or a family dinner, these tips will make you a pro at wing-making.

Air Fryer Crispy Lemon Pepper Wings

Get ready to impress your guests with Air Fryer Crispy Lemon Pepper Wings! This easy recipe combines juicy chicken wings with zesty lemon and bold spices for a flavor explosion. Discover how to achieve that perfect crispiness in your air fryer with simple steps and minimal prep. Perfect as an appetizer or snack, these wings are sure to be a hit! Click to explore the full recipe and elevate your next gathering!
Print Recipe Pin Recipe

Ingredients
  

2 lbs chicken wings

2 tablespoons olive oil

1 tablespoon lemon zest (freshly grated)

2 tablespoons lemon juice (freshly squeezed)

1 tablespoon black pepper

2 teaspoons garlic powder

1 teaspoon onion powder

1 teaspoon paprika

1 teaspoon salt

½ teaspoon cayenne pepper (optional for extra heat)

Fresh parsley, chopped (for garnish)

Instructions
 

Start by patting the chicken wings dry with paper towels. This helps achieve crispiness during air frying.

    In a large bowl, combine the olive oil, lemon zest, lemon juice, black pepper, garlic powder, onion powder, paprika, salt, and cayenne pepper. Mix well to create a marinade.

      Add the chicken wings to the bowl and toss them in the marinade until they are evenly coated. For best results, let the wings marinate for at least 30 minutes in the refrigerator or up to 2 hours for a more intense flavor.

        Preheat your air fryer to 380°F (193°C) for about 5 minutes.

          Place the marinated wings in the air fryer basket in a single layer, ensuring they are not overcrowded for even cooking.

            Air fry the wings for 25-30 minutes, flipping them halfway through, until they are golden brown and crispy.

              Once cooked, carefully remove the wings from the air fryer and let them rest for a few minutes.

                Garnish with freshly chopped parsley before serving.

                  Prep Time: 10 mins | Total Time: 40 mins | Servings: 4

                    - Enjoy these crispy, flavorful wings as a delicious appetizer or party snack!

                      Related Recipes

                      • To make your chipotle chicken quesadillas, gather these key ingredients: - 2 cups cooked chicken, shredded - 1 tablespoon chipotle sauce (or more for extra heat) - 1 cup shredded cheddar cheese - 1 cup shredded mozzarella cheese - 4 large flour tortillas - 1 bell pepper, sliced (any color) - 1 small red onion, thinly sliced - 1 tablespoon olive oil - Salt and pepper to taste - Sour cream and guacamole for serving - Cooked chicken: You can use rotisserie chicken for quick prep. - Chipotle sauce: Adjust the amount based on your spice level. - Cheeses: Feel free to mix different cheeses for unique flavors. - Tortillas: Corn tortillas work well for a gluten-free option. - Bell pepper: Use any color you like; each has its own taste. - Onion: Red onion adds sweetness, but yellow or white works too. - Olive oil: You can swap this with vegetable oil if needed. For this recipe, you'll need: - A large skillet for cooking - A mixing bowl for combining ingredients - A spatula for flipping the quesadillas - A cutting board and knife for slicing veggies - A serving platter for presentation First, grab a mixing bowl. Add 2 cups of shredded chicken. Pour in 1 tablespoon of chipotle sauce. Mix until the chicken is fully coated. If you like heat, add more sauce. This mixture packs a punch of flavor. Next, heat a large skillet over medium heat. Add 1 tablespoon of olive oil. Once hot, toss in the sliced bell pepper and red onion. Sauté them for about 3-4 minutes. They should soften slightly. Season with salt and pepper to taste. The colors and smells will fill your kitchen. Now, take a large flour tortilla. On one half, layer a quarter of the chicken mixture. Top it with a mix of cheddar and mozzarella cheese. Add some of the sautéed vegetables on top. Fold the tortilla in half. Place it in the heated skillet. Cook for 2-3 minutes on each side. The tortilla should turn golden and crispy, and the cheese should melt. Repeat this with the remaining tortillas. Once done, let them cool for a minute. Cut them into wedges and serve. Enjoy your tasty quesadillas! To get crispy quesadillas, heat your skillet well. Use medium heat, not high. This helps the tortilla cook evenly. Add just enough oil to coat the pan. When you cook, press down lightly on the quesadilla with a spatula. This helps it crisp up. Flip the quesadilla carefully. Watch for a golden color before you take it out. If you love heat, add more chipotle sauce. Mix it well with the chicken. For milder quesadillas, use less sauce. You can also add sweet peppers to balance the spice. If someone finds it too spicy, serve them with sour cream. This cools down the heat and adds flavor. When serving, cut your quesadillas into wedges. Arrange them in a fan shape on a plate. This looks nice and invites people to grab a piece. Add small bowls of sour cream and guacamole in the center. Sprinkle fresh cilantro on top for color. This makes your dish pop and looks appetizing! {{image_2}} You can switch up the chicken for other proteins. Try cooked shrimp or beef. You can also use pulled pork for a tasty twist. Just make sure to mix in chipotle sauce as you do with chicken. This keeps that smoky flavor. Each protein will add its own unique taste to the quesadilla. For a vegetarian option, skip the chicken. Load the quesadilla with black beans, corn, and sautéed veggies. You can use bell peppers, zucchini, or mushrooms. If you want a vegan version, use plant-based cheese and omit sour cream. You can also try avocado for creaminess. This way, you keep the richness without dairy. Cheddar and mozzarella are great, but feel free to mix it up. Try pepper jack for some heat, or even feta for a tangy touch. If you want to keep it dairy-free, look for vegan cheese options. They melt well and add flavor. Mixing different cheeses adds depth and makes each bite more exciting. To store leftover quesadillas, let them cool first. Place them in an airtight container. Make sure to separate layers with parchment paper. This helps keep them from sticking together. Store in the fridge for up to 3 days. To reheat quesadillas, use a skillet. Heat it over medium heat. Place the quesadilla in the skillet and cover with a lid. This helps the cheese melt without burning the tortilla. Heat for about 2-3 minutes on each side. You can also use a microwave. Just place it on a plate and heat for 30-45 seconds. But know that the tortilla might get soft. To freeze quesadillas, wrap each one in plastic wrap. Then, place them in a freezer bag. Squeeze out as much air as possible. This keeps them fresh. You can freeze them for up to 2 months. To reheat, let them thaw overnight in the fridge. Then, cook as described above for best taste. No, you cannot use raw chicken directly. Raw chicken needs cooking first. Using cooked chicken makes these quesadillas quick and safe. If you have raw chicken, cook it fully before shredding. Then, mix it with the chipotle sauce. You can serve several tasty sides. Here are a few ideas: - Sour cream - Guacamole - Salsa - Fresh cilantro - A simple salad These add flavor and balance to your meal. If you don’t have a skillet, you can use an oven or microwave. For the oven: 1. Preheat to 400°F (200°C). 2. Assemble your quesadilla on a baking sheet. 3. Bake for 10 minutes, flipping halfway. In the microwave, heat on a plate for 1-2 minutes. The cheese should melt. Enjoy! This article covered how to make tasty chipotle chicken quesadillas. We discussed the needed ingredients, cooking steps, and helpful tips for success. You learned easy ways to add your favorites and store leftovers. Whether you want crispy quesadillas or spicy variations, these ideas help. With practice, you'll impress everyone at your table. Enjoy cooking and try new flavors. Your next meal can be fun and delicious!
                        Chipotle Chicken Quesadillas in 15 Minutes Recipe
                      • - 1 lb Brussels sprouts - 3 tablespoons olive oil - 4 cloves garlic - 1/2 cup grated Parmesan cheese - 1 teaspoon garlic powder - 1/2 teaspoon red pepper flakes (optional) - Salt and pepper to taste - Fresh parsley for garnish Gathering the right ingredients is key to making Air Fryer Garlic Parmesan Brussels sprouts. Start with fresh Brussels sprouts, about 1 pound. Trim the ends and slice them in half. This helps them cook evenly. Next, you’ll need 3 tablespoons of olive oil. This oil gives the sprouts a nice crisp and flavor. You will also want 4 cloves of garlic, minced finely. Garlic adds a rich, savory taste. For that cheesy goodness, grab 1/2 cup of grated Parmesan cheese. This cheese melts beautifully and creates a delicious crust. For seasoning, you’ll need 1 teaspoon of garlic powder. This extra boost of garlic flavor is a must! If you like some heat, add 1/2 teaspoon of red pepper flakes. Adjust salt and pepper to your taste. Finally, don’t forget fresh parsley. Chop some up to sprinkle on top. It adds a nice pop of color and freshness to your dish. With these ingredients, you’ll create a tasty and healthy side dish that everyone will love! - First, preheat your air fryer to 375°F (190°C). This step is key for crispy sprouts. - Next, take 1 lb of Brussels sprouts. Trim the ends and halve them. This helps them cook evenly. - In a large bowl, add the halved Brussels sprouts. - Pour in 3 tablespoons of olive oil. - Then, add 4 minced garlic cloves, 1 teaspoon of garlic powder, and 1/2 teaspoon of red pepper flakes if you like some heat. - Season with salt and pepper to taste. - Toss everything together until the sprouts are well coated. - Place Brussels sprouts in the air fryer basket in a single layer. This ensures they cook well. - Air fry for about 12-15 minutes at 375°F. - Shake the basket halfway through to ensure even cooking. They should turn golden and crispy. - Once done, remove the sprouts and sprinkle 1/2 cup of grated Parmesan cheese on top. - Toss gently to let the cheese melt and stick to the sprouts. To get the best results, place your Brussels sprouts in a single layer. This helps them cook evenly and get crispy. If you pile them up, some may not cook right. If you want extra crunch, adjust the cooking time. Start with 12 minutes, then check. If you like them crispier, add a few more minutes. Just keep an eye on them to avoid burning. You can boost the flavor by adding extra seasonings. Try smoked paprika or lemon zest for a fresh twist. For the cheese, use a good quality Parmesan. Grated Parmesan melts well and adds a rich taste. If you want something sharper, try aged Parmesan. It adds a nice depth to the dish. You can also mix in some pecorino for a different flavor. {{image_2}} You can switch up the flavor of your Brussels sprouts. Try adding spices like paprika or cumin. Fresh herbs like thyme or rosemary also work well. If you want a smoky taste, add some smoked paprika. You can even mix in crispy bacon bits. Bacon adds a nice salty crunch. Feel free to toss in other veggies too. Carrots or bell peppers can add color and sweetness. Just remember to cut them to a similar size for even cooking. If you're looking for a vegan option, there are great cheese substitutes. Nutritional yeast gives a cheesy flavor without dairy. You can also use vegan Parmesan cheese. Check the label to ensure it fits your diet. For a creamy touch, you can drizzle a vegan dressing after cooking. This keeps your dish rich and flavorful without dairy. Enjoy these tasty options that fit your needs! To keep your Brussels sprouts fresh, use airtight containers. Glass or plastic containers work well. Store the leftovers in the fridge. They stay good for up to three days. After that, the taste and texture may change. To reheat your Brussels sprouts, use the air fryer again. Set it to 350°F (175°C). Heat for about 5 minutes. This keeps them crispy. You can also use the oven. Just spread them out on a baking sheet and heat for 10 minutes. Avoid the microwave. It can make them soggy. To make your Brussels sprouts crispy, follow these steps: - Use fresh Brussels sprouts and trim them well. - Halve them to expose more surface area. - Toss them with enough olive oil. - Keep them in a single layer in the air fryer. - Shake the basket halfway through cooking. This method helps them cook evenly, leading to a nice, crispy texture. Yes, you can prepare Brussels sprouts ahead of time. Follow these tips: - Toss them with olive oil and seasonings. - Store them in an airtight container in the fridge. - Cook them in the air fryer right before serving. Cooking them fresh keeps them crispy and tasty. Pair these Brussels sprouts with a variety of dishes: - Serve them with grilled chicken or fish for protein. - Add them to a salad for extra crunch. - They complement pasta dishes nicely. - Use them as a side for any holiday meal. These sprouts add flavor and texture to many plates. In this post, I covered how to make Air Fryer Garlic Parmesan Brussels sprouts. We explored the main ingredients, steps for preparation, and cooking tips for achieving a crispy finish. Remember, customizing with different flavors can take this dish to new heights. Whether you choose to add bacon or make it vegan, the options are endless. Store leftovers properly and follow reheating tips for the best taste. Enjoy this healthy side dish that is easy to prepare and always delicious.
                        Air Fryer Garlic Parmesan Brussels Sprouts Delight
                      • To make Air Fryer Honey Garlic Brussels Sprouts, gather these key items: - 1 lb Brussels sprouts, trimmed and halved - 3 tablespoons honey - 2 tablespoons soy sauce - 2 cloves garlic, minced - 1 tablespoon olive oil - Salt and pepper to taste - 1 teaspoon sesame seeds (for garnish) If you want to amp up the taste, consider these options: - Red pepper flakes for a spicy kick You can swap some ingredients without losing flavor: - Use maple syrup instead of honey for a vegan option. - Tamari can replace soy sauce for a gluten-free version. - Coconut oil works well in place of olive oil. To make the honey garlic sauce, grab a large bowl. Add 3 tablespoons of honey. Next, pour in 2 tablespoons of soy sauce. Then, add 2 minced cloves of garlic. Follow this with 1 tablespoon of olive oil. Season with salt and pepper to taste. Mix everything well until it blends nicely. This sauce is sweet, salty, and packed with flavor. Now, it’s time to coat the Brussels sprouts. Take 1 pound of trimmed and halved Brussels sprouts. Add them to the bowl with the honey garlic sauce. Toss the sprouts gently until each one is fully coated. Make sure no sprout is left dry. This step is key for flavor and caramelization. Preheat your air fryer to 375°F (190°C). This step helps the sprouts cook evenly. Place the coated Brussels sprouts in the air fryer basket in a single layer. Don’t crowd the basket; it may take two batches. Air fry for 15-18 minutes. Shake the basket halfway through to ensure even cooking. The sprouts should turn crispy and caramelized when done. After cooking, transfer them to a serving dish. Drizzle any leftover sauce over the top. Sprinkle sesame seeds for a nice touch. If you like heat, add red pepper flakes for a spicy kick. Enjoy your crunchy delight! To get the best crunch, you must start with fresh sprouts. Look for bright green, firm Brussels sprouts. Trim and halve them evenly to ensure they cook well. The honey garlic sauce adds flavor, but too much moisture can make them soggy. Keep the sauce light. If you notice extra liquid, drain it before cooking. Preheat your air fryer to 375°F (190°C). This step helps the Brussels sprouts cook evenly. Place them in a single layer to let hot air circulate. If your air fryer is small, cook in batches. Shake the basket halfway through to help with even browning. Check for doneness after 15 minutes. They should be crispy and have a nice caramel color. These honey garlic Brussels sprouts shine on their own or as a side dish. They pair well with grilled chicken or fish. For a twist, add red pepper flakes for heat. You can also sprinkle some extra sesame seeds for a nice finish. Serve them warm in a decorative bowl with a drizzle of honey on top. This not only looks great but also adds more sweetness. {{image_2}} If you want some heat, try adding red pepper flakes. Just sprinkle them into the sauce. This spice brings a nice kick to your sweet dish. You can adjust the amount based on your taste. For a bolder flavor, consider adding some sriracha sauce to the mix too. It blends well with honey and garlic. You can swap honey for other sweeteners. Maple syrup is a great choice. It adds a rich flavor that pairs nicely with Brussels sprouts. Agave nectar is another option if you want a vegan twist. Each sweetener gives a different taste, so feel free to experiment. Brussels sprouts are not the only veggies you can use. Try adding broccoli or cauliflower for more color. Slice carrots or bell peppers for a sweet addition. Just remember to cut them to a similar size. This ensures even cooking in the air fryer. Mixing vegetables can create a fun and tasty medley. To store leftover Brussels sprouts, first let them cool. Place them in a container with a lid. You can keep them in the fridge for up to three days. Make sure they are sealed tightly to keep them fresh. When you are ready to eat the leftovers, you can reheat them in the air fryer. Set the air fryer to 350°F (175°C). Heat for about 5 to 7 minutes. This will help them regain some crunch. You can also use a microwave, but this may make them soggy. If you want to freeze Brussels sprouts, place them in a freezer-safe bag. Remove as much air as you can before sealing. They will stay good for about three months. When you're ready to cook them, thaw them in the fridge overnight before reheating in the air fryer. This will help keep their texture. Yes, you can use frozen Brussels sprouts. Just keep in mind that they may not get as crispy. I suggest thawing them first. Pat them dry with a towel. This helps remove excess moisture. Then, toss them in your honey garlic sauce and air fry as usual. You can tell the Brussels sprouts are done when they are crispy and golden brown. They should be tender inside. Check them at around 15 minutes. If they need more time, give them a few extra minutes. Shake the basket halfway through cooking for even crispiness. These Brussels sprouts pair well with many dishes. Try them with grilled chicken or salmon. They also go great with rice or quinoa. You can serve them as a side dish at dinner or even as an appetizer. The sweet and savory flavors make them a hit with everyone! This guide covered all you need to know about making honey garlic Brussels sprouts. You learned about essential ingredients, easy steps, and useful tips for cooking. We explored tasty variations and how to store leftovers, ensuring you can enjoy these sprouts later. Remember, air frying gives a crisp outside and tender inside. Use these ideas to make your dish unique. Experiment confidently, and enjoy your meals with great flavors and textures.
                        Air Fryer Honey Garlic Brussels Sprouts Crunchy Delight
                      • - 2 ripe avocados - 1 cup cherry tomatoes, halved - 1 cup fresh mozzarella balls, drained - 1/4 cup fresh basil leaves, chopped - 2 tablespoons balsamic glaze - 1 tablespoon olive oil - Salt and pepper to taste Using high-quality ingredients makes a big difference. Fresh avocados give a creamy texture. Ripe cherry tomatoes add sweetness. Choose mozzarella balls that are fresh and soft. Fresh basil leaves bring bright flavor. Balsamic glaze should be thick and rich. When you pick top ingredients, your dish shines. Caprese stuffed avocados are not just tasty; they are healthy too. Avocados are full of good fats. They help your heart and keep you full. Cherry tomatoes add vitamins C and K. Mozzarella brings protein and calcium. This dish is light but satisfying. Plus, it's a good source of fiber. Enjoying this treat is a smart choice for your meal. Start by cutting the avocados in half lengthwise. Use a sharp knife for this. Carefully remove the pit with a spoon or knife. Make sure to be gentle. Next, scoop out a bit of the avocado flesh. This creates space for your filling. Chop the scooped-out flesh into small pieces. Set these aside for later use. In a mixing bowl, combine one cup of halved cherry tomatoes. Add one cup of fresh mozzarella balls that you drained. Toss in the chopped basil leaves and the small pieces of avocado you set aside. Drizzle two tablespoons of olive oil over the mix. Sprinkle salt and pepper to taste. Gently mix everything together. This step is key to blending the flavors. Grab your avocado halves. Spoon the Caprese salad mixture into each half. Fill them generously, but don’t overstuff. Drizzle balsamic glaze over the top for added flavor. This will make the dish shine. You can serve right away, or chill for up to 15 minutes. Chilling helps the flavors meld together nicely. Place the stuffed avocados on a platter for a beautiful presentation. Garnish with extra basil leaves and a drizzle of balsamic glaze. Enjoy your tasty treat! To find the perfect avocado, look for a few key signs. First, check the skin. It should be dark and slightly bumpy. Gently squeeze the avocado; it should yield just a bit but not feel mushy. If it feels hard, it is not ripe yet. You can also check the stem. If it pops off easily and is green underneath, the avocado is ripe. Avoid any with large dark spots or dents, as these may indicate overripeness or spoilage. Caprese stuffed avocados are a great treat for many occasions. You can serve them as a light lunch, a savory snack, or a colorful appetizer. Pair them with crusty bread or tortilla chips for added crunch. These stuffed avocados also shine at parties. Just prepare the filling ahead of time and stuff them just before serving. This keeps them fresh and tasty. Presentation is key to making your dish stand out. Place the stuffed avocados on a bright platter to catch the eye. Garnish them with extra basil leaves for a pop of color. A light drizzle of balsamic glaze adds shine and elegance. For added flair, sprinkle some sea salt on top. This enhances the flavors while making your dish look gourmet. {{image_2}} You can switch the cheese for a unique taste. Try feta for a tangy kick. Goat cheese adds creaminess and flavor. If you want a stronger taste, use aged cheddar. Each cheese brings a different twist to your Caprese stuffed avocados. Want a filling dish? Add protein like grilled chicken or shrimp. Diced turkey or ham also work well. You can even mix in chickpeas for a plant-based option. This makes the meal more balanced and satisfying. Make the most of seasonal produce. In summer, use fresh peaches or mangoes for sweetness. In the fall, add roasted butternut squash for warmth. Winter calls for citrus like orange or grapefruit to brighten the dish. Each seasonal swap keeps the flavors fresh and exciting. To keep your Caprese stuffed avocados fresh, store them in an airtight container. This helps prevent browning. If possible, keep the avocado halves separate from the salad mix. You can also sprinkle lemon juice on the avocado flesh to slow down browning. Aim to eat leftovers within a day for the best taste. Stuffed avocados are best enjoyed fresh. However, they can last in the fridge for about 1 day. If you store them properly, you may get an extra 24 hours. After that, the taste and texture may decline. Always check for freshness before eating. Reheating stuffed avocados is not recommended. They taste best cold or at room temperature. If you need to eat them warm, try to just warm the filling gently. Avoid using a microwave, as it can make the avocado mushy. Instead, use a low oven for a short time. Caprese stuffed avocados are a great dish for your health. They offer healthy fats from avocados. The fresh mozzarella adds protein and calcium. Cherry tomatoes provide vitamins A and C. Basil gives you antioxidants. This dish is low in carbs and high in flavor. Eating this meal can help you feel full longer. Yes, you can prepare parts of this recipe ahead of time. You can mix the Caprese salad mixture a few hours in advance. Just keep it in the fridge until you're ready to serve. However, I recommend waiting to stuff the avocados until right before you eat. This keeps the avocados fresh and green. You can get creative with your stuffing! Adding grilled chicken can make it heartier. You could also use different cheeses, like feta or goat cheese. For a spicy kick, consider adding jalapeños. You might even include nuts for a crunchy texture. The options are endless, so feel free to experiment! In this blog post, we explored the ingredients for Caprese stuffed avocados and their quality. We also covered step-by-step instructions on how to prepare and assemble this dish. You learned tips for choosing ripe avocados and how to present your plates beautifully. Variations offered ways to customize the recipe, making it your own. In my final thoughts, this dish is not just tasty; it’s also flexible and fun. Enjoy creating it for yourself and your loved ones!
                        Caprese Stuffed Avocados Flavorful and Healthy Treat

                      WANT TO SAVE THIS RECIPE?

                      Leave a Reply Cancel reply

                      Your email address will not be published. Required fields are marked *

                      Recipe Rating


                      Hi I’m Taling

                      I love sharing perfected dishes from my kitchen. I’m sure they’ll earn a spot in your heart. Let’s savor this journey together!.

                      More about me

                      Recent Desserts

                      • - 2 cups all-purpose flour - 1 teaspoon baking powder - ½ teaspoon baking soda - ¼ teaspoon salt - 1 teaspoon ground cinnamon For the base, we start with the dry ingredients. All-purpose flour gives the bars their structure. Baking powder and baking soda help them rise. Salt enhances the flavors and balances sweetness. Cinnamon adds warmth and spice, making each bite comforting and delicious. - ½ cup unsalted butter, softened - 1 cup brown sugar, packed - ½ cup granulated sugar - 2 large eggs - 2 teaspoons vanilla extract Next, we move to the wet ingredients. Softened butter creates a rich base. Brown sugar adds moisture and deep flavor, while granulated sugar sweetens without overpowering. Eggs bind everything together, and vanilla adds a lovely aroma. These ingredients blend to create a smooth batter. - 1 ½ cups peeled and diced apples (about 2 medium apples) - ½ cup chopped walnuts (optional) - 1 cup powdered sugar (for glaze) - 2 tablespoons maple syrup Finally, we have the stars of our recipe. Diced apples bring freshness and texture. Walnuts add a crunchy touch, but they are optional. For the glaze, powdered sugar mixes with maple syrup to create a sweet topping. This glaze ties everything together, making the bars shine. First, preheat your oven to 350°F (175°C). This gets your oven ready for baking. Next, grease a 9x13-inch baking pan. Use butter or cooking spray. Then, line the pan with parchment paper. Leave some paper hanging over the edges. This makes it easy to lift out the bars later. In a medium bowl, whisk together the dry ingredients. Combine 2 cups of all-purpose flour, 1 teaspoon of baking powder, ½ teaspoon of baking soda, ¼ teaspoon of salt, and 1 teaspoon of ground cinnamon. Make sure the mix is even. This blend gives your bars great flavor and helps them rise. In a large bowl, cream ½ cup of softened unsalted butter with 1 cup of packed brown sugar and ½ cup of granulated sugar. Mix until light and fluffy. This takes about 3 to 4 minutes. The air you whip in gives the bars a nice texture. Now, add 2 large eggs, one at a time. Mix well after each egg. Then, stir in 2 teaspoons of vanilla extract. After that, gradually add your dry mix to the wet ingredients. Blend until just combined. Do not over-mix; this keeps your bars tender. Finally, fold in 1 ½ cups of peeled and diced apples and ½ cup of chopped walnuts, if you like. Pour the batter into your prepared baking pan. Spread it out evenly. Bake for 25 to 30 minutes. To check if they are done, insert a toothpick into the center. If it comes out clean, the bars are ready. While the bars bake, whisk together 1 cup of powdered sugar and 2 tablespoons of maple syrup in a small bowl. Mix until smooth. This glaze adds a sweet touch to your apple bars. When the bars cool, drizzle the glaze over them for that perfect finish. To get the best texture, avoid over-mixing the batter. When you mix too much, the bars can turn out tough. Mix until just combined. This keeps the bars soft and chewy. The creaming step is key. Cream the butter and sugars together until light and fluffy. This step adds air and helps the bars rise nicely. For a lovely presentation, arrange the bars on a platter. Sprinkle some cinnamon or chopped walnuts on top. You can also add a small bowl of extra maple syrup for drizzling. Pair these bars with a warm cup of tea or coffee. A scoop of vanilla ice cream makes a great side too. You can add fun flavors to the batter. Try mixing in spices like nutmeg or ginger for a warm taste. Walnuts add a nice crunch, but you can also use pecans or almonds. If you want more fruit, toss in some raisins or dried cranberries. These little additions make the bars even more delicious. {{image_2}} The best apples for baking include Granny Smith, Honeycrisp, and Fuji. Granny Smith apples give a nice tart flavor. Honeycrisp apples are sweet and juicy. Fuji apples provide a great crunch. Using a mix of these apples can enhance the taste. Always choose firm apples. Soft apples can make your bars mushy. If you want to switch up the glaze, consider using cream cheese frosting. Mix cream cheese, butter, and powdered sugar for a rich taste. You can also use a simple lemon glaze. Just mix lemon juice and powdered sugar. This gives a bright flavor. Try a caramel sauce if you want something sweet and sticky. Each glaze adds its own twist to the bars. Walnuts add a nice crunch, but you can use other nuts too. Pecans, almonds, or hazelnuts work well. If you love chocolate, mix in chocolate chips. Dried fruits like raisins or cranberries also add great flavor. These options let you create your own unique apple bars. Feel free to experiment and find your favorite mix. Store your maple glazed apple bars at room temperature for up to three days. Keep them in an airtight container to keep them moist. If your kitchen is warm, refrigerate them to prevent spoilage. But, note that refrigeration can make them a bit dense. To freeze the bars, let them cool completely first. Wrap each bar in plastic wrap. Then, place them in a freezer bag or container. They can stay fresh in the freezer for up to three months. When you want to eat one, thaw it overnight in the fridge. Reheat it in the microwave for about 20 seconds for a warm treat. These delicious bars stay fresh for about three days at room temperature. In the fridge, they last about a week. If you freeze them, they can hold their flavor and texture for three months. Enjoy them while they are fresh for the best taste! Yes, you can use other sweeteners. Brown sugar gives a rich flavor. You might try coconut sugar for a similar taste. Honey or maple syrup can work too, but adjust the liquid in the recipe. Just keep in mind that each sweetener changes the final taste and texture. The best apples are firm and sweet. I recommend Honeycrisp, Granny Smith, or Fuji apples. Honeycrisp adds sweetness and crunch. Granny Smith gives a nice tartness. Fuji is juicy and sweet. Mixing two types can add depth to the flavor. Yes, you can! Use a gluten-free all-purpose flour blend. Look for one with xanthan gum for better texture. Almond flour or oat flour can also work. Just remember that baking time might change slightly. Check the bars after 25 minutes. Insert a toothpick into the center. If it comes out clean, they are done. The edges should look golden brown. If it’s still wet, bake a few more minutes, then check again. In this post, we covered the key ingredients and steps to make delicious apple bars. We discussed dry and wet ingredients, baking tips, and ways to enhance flavor. You learned about different apple varieties and glaze options. Enjoy experimenting with the recipe and making it your own. Baking is fun and rewarding. Share your tasty results with friends and family!
                        Maple Glazed Apple Bars Irresistible Flavor Delight
                      • To make Cottage Cheese Chocolate Mousse, you need simple ingredients that pack a punch. Here’s what you’ll need: - 1 cup cottage cheese (low-fat or fat-free) - ¼ cup unsweetened cocoa powder - ¼ cup honey or maple syrup - ¼ cup Greek yogurt - 1 teaspoon vanilla extract - ¼ cup dark chocolate chips (dairy-free if needed) - Pinch of salt - Fresh berries for garnish (optional) Each ingredient plays a role in making this mousse rich and flavorful. The cottage cheese adds protein and creaminess, while cocoa powder brings that deep chocolate flavor. Honey or maple syrup sweetens the mix, balancing the cocoa's bitterness. Greek yogurt contributes a smooth texture, and vanilla extract enhances the overall taste. Dark chocolate chips add a delightful melt-in-your-mouth experience. Finally, a pinch of salt rounds out the flavors. Fresh berries can add a pop of color and freshness when serving. Gather these ingredients, and you’re ready to whip up a high-protein dessert that satisfies your chocolate cravings! - Combining Ingredients in Blender Start by adding the cottage cheese, cocoa powder, honey (or maple syrup), Greek yogurt, vanilla extract, and a pinch of salt into your blender. Blend these ingredients until they are smooth and creamy. Make sure to scrape down the sides of the blender. This helps mix everything well. - Melting Dark Chocolate Chips Next, take your dark chocolate chips and place them in a microwave-safe bowl. Heat them in the microwave in 30-second bursts. Stir the chocolate in between. Keep going until it is fully melted and smooth. Let it cool for a moment before using it. - Folding Chocolate into Mousse Gently fold the melted chocolate into the cottage cheese mixture. Use a spatula to mix carefully. You want to keep it light and airy, so don’t stir too hard. Make sure the chocolate is mixed in well. - Spoon into Serving Glasses Once your mixture is ready, take it and spoon it into serving glasses or bowls. You can use any glass you like. Make sure to leave some space at the top for garnishing later. - Refrigeration Time Now, place the glasses in the fridge. Let the mousse chill for at least 30 minutes. This helps it set and become firmer. The longer it sits, the better the flavors meld together, so feel free to wait longer if you can! To get the best mousse, blending is key. Use a blender or food processor. This helps mix everything well. Start with the cottage cheese, cocoa, honey, Greek yogurt, and vanilla. Blend until smooth. Scrape down the sides to get all the lumps out. Next, melt the dark chocolate chips. Do this in the microwave at 30-second intervals. Stir in between each interval. This keeps the chocolate from burning. Once smooth, let it cool a bit before adding it to the mixture. For garnishing, fresh fruits work great. Berries like strawberries, raspberries, or blueberries add color and taste. They make your mousse look pretty and taste fresh. You can also add nuts or coconut flakes for crunch. Nuts like almonds or walnuts add a nice texture. Coconut flakes give a tropical flair. Just sprinkle them on top before serving. {{image_2}} You can swap honey or maple syrup for agave or stevia. These options lower the sugar. Agave has a mild taste and mixes well. Stevia is very sweet, so use less. Both sweeteners work great in this mousse. For a sugar-free option, try using erythritol. It adds sweetness without the calories. Make sure to adjust the amount based on your taste. Your mousse will still be rich and creamy! Want to make your mousse unique? Adding espresso powder gives it a coffee kick. Just a teaspoon can enhance the chocolate flavor. It’s perfect for coffee lovers. You can also infuse the mousse with mint or orange zest. Add a few drops of mint extract or the zest of an orange. Both choices add a fresh twist. They brighten up the rich chocolate flavor. Try these variations to find your favorite! To keep your mousse fresh, use an airtight container. Glass or plastic containers work well. Make sure the lid seals tightly. This helps prevent air from getting in. You want to keep the mousse creamy and smooth. Store it in the fridge for up to three days. If you don’t eat it all, it will still taste great! Can you freeze cottage cheese mousse? Yes, you can freeze it! However, the texture might change a bit. It may become a little grainy after thawing. If you want to freeze it, spoon it into small containers. Leave some space at the top because it expands. For thawing instructions, place the container in the fridge overnight. This helps it thaw slowly. If you're in a hurry, you can set it at room temperature for about 30 minutes. Stir before serving to help bring back the creaminess. Enjoy your mousse even days later! Yes, cottage cheese is very healthy. It is rich in protein, which helps build and repair muscles. One cup of low-fat cottage cheese has about 28 grams of protein. That’s more than many other dairy options. It also has calcium, which supports strong bones. You can use other cheeses, but the taste and texture will change. Cream cheese can give a rich flavor. Ricotta can also work, but it will be less smooth. Always choose cheeses that blend well to keep your mousse creamy. The mousse lasts about three to five days in the fridge. Store it in an airtight container to keep it fresh. If you want to enjoy it later, make sure to eat it within this time. In this blog post, I shared how to make a delicious cottage cheese mousse. We covered the ingredients, step-by-step instructions, and key tips for perfecting the recipe. Remember, blending well and melting chocolate smoothly are important. You can also vary the flavors with sweeteners or fruits. This mousse is not just tasty; it's also healthy. With the right storage, it lasts for days. Enjoy your treat and get creative with the toppings!
                        Cottage Cheese Chocolate Mousse High Protein Delight
                      • To make pumpkin chocolate chip blondies, you’ll need these key ingredients: - 1 cup pumpkin puree - ½ cup unsalted butter, melted - 1 cup brown sugar - ½ cup granulated sugar - 2 large eggs - 1 teaspoon vanilla extract - 2 cups all-purpose flour - 1 teaspoon baking powder - 1 teaspoon baking soda - 1 teaspoon ground cinnamon - ½ teaspoon nutmeg - ¼ teaspoon salt - 1 cup chocolate chips (semi-sweet or dark) - ½ cup chopped nuts (optional) You can make these blondies even better with a few add-ins. Consider using: - White chocolate chips for a creamy twist. - Dried cranberries for a tart flavor. - Shredded coconut for a chewy texture. - Pumpkin seeds for a crunchy bite. These add-ins can change the taste and look of your blondies. If you need to substitute some ingredients, here are a few options: - Instead of pumpkin puree, use mashed sweet potato. - Replace unsalted butter with coconut oil for a dairy-free option. - If you don’t have brown sugar, use an equal amount of granulated sugar. - For a gluten-free option, try almond flour or a gluten-free blend. These swaps can help you tailor the recipe to fit your needs while keeping it tasty. Start by preheating your oven to 350°F (175°C). This step is key for even baking. Next, grab an 8x8-inch baking pan. Grease it lightly to help the blondies release easily. Line the bottom and sides with parchment paper. Leave some paper hanging over the edges. This makes it easy to lift your blondies out later. In a large bowl, combine your melted butter, brown sugar, and granulated sugar. Whisk them together until smooth. Then, add the pumpkin puree, eggs, and vanilla extract. Mix well until everything is blended. In a separate bowl, whisk together the flour, baking powder, baking soda, ground cinnamon, nutmeg, and salt. This mix of dry ingredients helps the blondies rise. Gradually fold the dry mix into the pumpkin blend. Be gentle here! Overmixing can make the blondies tough. Finally, fold in the chocolate chips and any nuts if you want. Now, pour your batter into the greased and lined baking pan. Use a spatula to smooth the top. Place it in your preheated oven. Bake for 25-30 minutes. Check for doneness by inserting a toothpick in the center. It should come out clean or with a few moist crumbs. Once baked, let the blondies cool in the pan for about 10 minutes. Use the parchment paper to lift them out. Set them on a wire rack to cool completely. After that, cut them into squares and enjoy your tasty treat! To bake perfect pumpkin chocolate chip blondies, follow these tips. Use room temperature ingredients. This helps the batter mix well. Measure flour correctly. Too much flour can make blondies dry. Use a light hand when mixing. This keeps your blondies soft and chewy. Overmixing can make your blondies tough. Mix until the dry ingredients just blend in. You want to see some streaks of flour. Then, gently fold in the chocolate chips. This keeps the texture light and fluffy. Remember, less is more when it comes to mixing! To keep your blondies fresh, store them in an airtight container. They stay soft for up to five days. If you want to keep them longer, freeze them. Wrap each blondie in plastic wrap, then place them in a freezer bag. They can last up to three months in the freezer. Enjoy them straight from the freezer for a cold treat! {{image_2}} You can make these blondies your own by adding fun mix-ins. Try swapping in white chocolate chips for a sweet twist. You can also use butterscotch chips for a buttery flavor. Dried cranberries or raisins add a nice chewiness. If you want a crunch, add some chopped pecans or walnuts. These options keep the taste fresh and exciting. To make gluten-free blondies, swap the all-purpose flour for a gluten-free blend. Many brands work well and keep the texture nice. For a vegan version, replace the eggs with flax eggs. Mix one tablespoon of ground flaxseed with three tablespoons of water. Let it sit for a few minutes to thicken. You can also use coconut oil instead of butter for a dairy-free treat. These swaps make the recipe fit more diets. Seasonal spices can really enhance the flavor. In fall, add more cinnamon or some allspice. A pinch of cloves gives a warm touch. In winter, consider using peppermint extract for a festive flavor. For nuts, try adding pumpkin seeds for a seasonal crunch. You can even sprinkle some sea salt on top before baking for a sweet and salty mix. These variations keep your blondies unique and delicious! To keep your pumpkin chocolate chip blondies fresh, store them in an airtight container. This helps lock in moisture and flavor. Place parchment paper between layers to avoid sticking. Keep them at room temperature for up to three days. If you want to store them for longer, use the freezer. Freezing blondies is easy. First, let them cool completely. Cut them into squares and wrap each piece in plastic wrap. Then, place the wrapped squares in a freezer bag. Remove as much air as possible before sealing. These can last for up to three months in the freezer. When you want to enjoy them, thaw them in the fridge or at room temperature. These blondies stay tasty for about a week at room temperature. If you refrigerate them, they may last a bit longer, about ten days. However, expect some changes in texture. Freezing helps maintain their taste and softness over time. Enjoy these sweet treats whenever you crave something delicious! Yes, you can use fresh pumpkin. First, cook the pumpkin until soft. Then, blend it into a smooth puree. Make sure to drain any excess water. This will prevent your batter from becoming too wet. Fresh pumpkin adds a nice flavor. If you lack brown sugar, use granulated sugar. To mimic brown sugar, add a bit of molasses. For each cup of white sugar, add one tablespoon of molasses. This change will keep your blondies sweet and moist. You can also use coconut sugar as a substitute. To check if your blondies are ready, insert a toothpick into the center. If it comes out clean or with a few moist crumbs, they are done. The edges should look set and slightly golden. Don’t overbake them; they will continue to cook as they cool. This article covered everything you need to make tasty pumpkin chocolate chip blondies. We explored the key ingredients, helpful tips, and alternative options. You can mix in new flavors or substitute for health needs. Storing leftovers and understanding baking times are easy with the advice we shared. Trust these insights to bake with confidence. Enjoy your delicious blondies and have fun experimenting!
                        Pumpkin Chocolate Chip Blondies Tasty Fall Treat
                      • To make caramel apple monkey bread, you need a few key ingredients. Here’s the list: - 3 cans (16.5 oz each) refrigerated biscuit dough - 3 apples (peeled, cored, and diced) - 1 cup caramel sauce (store-bought or homemade) - ½ cup brown sugar - 1 teaspoon ground cinnamon - ½ cup butter (melted) - ½ cup chopped walnuts or pecans (optional) - Whipped cream (optional, for serving) Each ingredient plays a role in creating the rich, sweet flavor of this dish. The biscuit dough serves as a soft base. The apples add freshness and texture. Caramel sauce brings sweetness and gooeyness. Brown sugar and cinnamon create warmth and spice. Butter adds richness, and nuts give a nice crunch. If you want to switch things up, you can skip the nuts or use a different type of apple. Granny Smith apples work well for a tart flavor, while Honeycrisp apples add sweetness. Make sure to gather everything before you start cooking. This will help you stay organized and make the process smooth. Enjoy preparing this delightful treat! - Preheat your oven to 350°F (175°C) and grease a bundt pan well. - In a bowl, mix the brown sugar and cinnamon. Set it aside for later. - Open the biscuit dough and cut each biscuit into fourths. Roll each piece into a ball. - In another bowl, mix the diced apples with half of the caramel sauce. Stir well. - Layer half of the biscuit balls in the bundt pan. Then add half of the apple mixture. - Sprinkle any remaining cinnamon-sugar over the apples for extra flavor. - Add the rest of the biscuit balls on top of the apples. Then, layer the remaining apples. - Pour the melted butter evenly over the layers. Drizzle the rest of the caramel sauce on top. - If using nuts, sprinkle them over the top now. - Bake in your preheated oven for about 30 to 35 minutes. Look for a golden brown color. - Once done, take it out and let it cool for about 10 minutes. Then invert it onto a platter. - Drizzle any remaining caramel sauce over the monkey bread. Serve warm, adding whipped cream if you like it. To ensure even cooking through your caramel apple monkey bread, keep a few things in mind. First, cut the biscuit dough into even pieces. This helps them cook at the same rate. Layer the dough balls and apples carefully. Avoid packing them too tightly in the bundt pan. This allows heat to circulate well. When choosing the best apples for baking, look for firm varieties. Granny Smith apples are tart and hold their shape well. Honeycrisp apples add a sweet touch and great texture. Avoid soft apples, as they may turn mushy in the oven. Get creative when serving caramel apple monkey bread! You can pull it apart and serve it warm on a platter. For a fun twist, drizzle extra caramel sauce on top before serving. Add a scoop of whipped cream or a sprinkle of cinnamon for extra flavor. Pair the monkey bread with warm apple cider for a cozy treat. A scoop of vanilla ice cream also makes a delightful addition. To store leftovers, wrap the monkey bread tightly in plastic wrap. You can also place it in an airtight container. Keep it in the fridge for up to three days. This helps keep it fresh and tasty. For reheating, place slices in the microwave for 15 to 20 seconds. This warms it up and keeps it soft. If you prefer a crispier texture, reheat in the oven at 350°F for about 10 minutes. {{image_2}} You can make your caramel apple monkey bread even better! Try adding spices like nutmeg or ginger. A splash of vanilla or almond extract adds a lovely touch. You can also swap out the nuts. Try almonds or pecans instead of walnuts. Adding dried fruits, like cranberries or raisins, gives a nice twist. If you're looking for lighter options, use low-fat biscuit dough. You can also replace the butter with unsweetened applesauce. This keeps the flavor but cuts some calories. For gluten-free needs, there are great gluten-free biscuit mixes. These make it easy to enjoy this treat without worry. Seasonal fruits can change the game! In fall, add pears or even pumpkin. For summer, peaches or cherries work great. You can also top it with a sprinkle of crushed candy canes during the holidays. Another idea is to drizzle chocolate sauce instead of caramel for a fun change! You can store your monkey bread in two ways: refrigeration or at room temperature. If you plan to eat it within two days, keeping it at room temperature works well. Just make sure to wrap it tightly in plastic wrap. For longer storage, refrigeration is best. It stays fresh in the fridge for about five days. If you want to save some for later, freezing is a great option. Cut the monkey bread into portions that suit your needs. Wrap each piece well in plastic wrap and then in aluminum foil. This helps keep it fresh. When you're ready to enjoy it, thaw it overnight in the fridge. Reheat it in the oven at 350°F (175°C) for about 10-15 minutes until warm. Use airtight containers for the best results. Glass or plastic containers with tight lids work great. Make sure to avoid containers that trap moisture. This helps prevent spoilage and keeps your monkey bread tasty. If you notice any extra moisture, add a paper towel inside the container. This will help absorb it and keep your treat fresh longer. Can I use homemade biscuit dough instead? Yes, you can use homemade biscuit dough. Just ensure it is well chilled. This will help it rise and stay fluffy during baking. Homemade dough can add a personal touch to the recipe. How do I know when monkey bread is done baking? You will know it's done when the top is golden brown. A toothpick inserted in the center should come out clean. The dough should feel firm, not gooey. Can I make this recipe ahead of time? Yes, you can prep the monkey bread a day before. Layer the ingredients in the bundt pan and cover it. Just bake it the next day when you are ready. What can I substitute for caramel sauce? You can use butterscotch sauce or chocolate sauce. Maple syrup can work, too, but it will change the flavor slightly. Alternatives for nuts in the recipe If you prefer no nuts, leave them out. You can also use seeds, like pumpkin seeds. They will add a nice crunch without being overpowering. How should I serve caramel apple monkey bread? Serve it warm, right from the oven. Drizzle extra caramel sauce on top for a sweet touch. A dollop of whipped cream can add a nice creaminess. Can I serve it cold or should it be warm? It is best served warm. The gooey caramel and soft bread taste great when fresh. Serving it cold will change the texture. Caramel apple monkey bread is fun and easy to make. We covered the key ingredients, baking steps, and serving tips. Remember, you can customize flavors to make it your own. Try using different fruits or nuts. Perfect for any occasion, this treat always brings joy. Store it properly to keep it fresh. I hope you enjoy making and sharing this delicious recipe. You will impress family and friends with your skills. Happy baking!
                        Caramel Apple Monkey Bread Delightful and Easy Recipe

                      Recent Drinks

                      • - 1 ripe banana - 2 tablespoons natural peanut butter - 1 cup unsweetened almond milk (or any milk of choice) - 1 scoop vanilla protein powder (plant-based or whey) - 1 tablespoon chia seeds - 1 teaspoon honey (optional for sweetness) - A pinch of cinnamon - Ice cubes (optional, for a thicker texture) Gather these simple items before you start. A ripe banana gives natural sweetness and creaminess. Use two tablespoons of natural peanut butter for a rich flavor. Almond milk is my go-to, but any milk you love works great. The protein powder adds a boost of nutrition. Choose vanilla to match the banana. Chia seeds are tiny but mighty. They add fiber and help keep you full. If you like it sweeter, add honey, but it’s not a must. A pinch of cinnamon brings warmth and depth to this drink. For a thicker texture, toss in some ice cubes. This smoothie is flexible, so feel free to mix and match based on your taste. Now, let's blend it all together! 1. Start by peeling the ripe banana. Break it into small chunks. 2. In a blender, combine the banana chunks, natural peanut butter, almond milk, protein powder, chia seeds, and a pinch of cinnamon. 3. If you like a colder and thicker smoothie, add some ice cubes. 1. Blend all the ingredients on high speed. Keep blending until you have a smooth and creamy mix. 2. Stop the blender and taste your smoothie. If you want it sweeter, add honey. Blend again for a few seconds to mix. 1. Pour the smoothie into a tall glass. Enjoy it right away for the best taste and creaminess. 2. For a fun twist, you can top it with extra chia seeds or banana slices. This makes it look pretty too! To get the perfect texture, use a ripe banana. A ripe banana makes the smoothie creamy. Add ice cubes if you want it thicker. If you prefer a smoother drink, blend longer. Scrape the sides of the blender to mix all the ingredients well. This ensures a silky-smooth result. If your smoothie tastes too bland, add honey or more banana. Start with a teaspoon of honey. Blend and taste again. You can always add more honey if needed. This way, you control the sweetness to match your taste. Remember, ripe bananas also add natural sweetness. Use a high-speed blender for the best results. A strong blender breaks down the ingredients quickly. If you have a less powerful blender, blend in stages. Start with the liquids first, then add the solids. This helps everything mix better. Make sure your blender is clean for the best flavor. {{image_2}} You can switch the peanut butter for other nut butters. Almond butter offers a nutty taste. Cashew butter is creamy and sweet. Sunflower seed butter is a great choice for allergies. Each nut butter brings its own flavor and health benefits. Experiment to find your favorite. You can add many fruits to the smoothie. Frozen berries add sweetness and color. Spinach or kale boosts nutrition without changing the taste. Try mango for a tropical twist. Each fruit adds vitamins and makes the smoothie fun. Mix and match to discover new flavors. Choosing the right protein powder is key. Plant-based powders are great for vegan diets. Whey protein is popular for muscle recovery. Look for flavors that match your taste, like chocolate or vanilla. The right powder can enhance the smoothie’s flavor and nutrition. Test different types to see what you prefer. Store any leftover smoothie in an airtight container. You want to keep it fresh. Place it in the fridge right after making it. It will stay good for about one day. When you are ready to drink it again, shake or stir well. This helps mix any settled ingredients. You can freeze your smoothie for later. Pour it into ice cube trays or freezer-safe bags. This way, you can grab a portion whenever you want. To use, thaw the smoothie overnight in the fridge. You can also blend it again for a fresh taste. In the fridge, your smoothie lasts about 24 hours. In the freezer, it can last up to three months. Just remember, the sooner you drink it, the better the taste and texture will be! Yes, this smoothie is gluten-free. All the ingredients listed are naturally free from gluten. The peanut butter, banana, almond milk, protein powder, chia seeds, and honey do not contain gluten. Always check labels if you use store-bought items to confirm they are gluten-free. Absolutely! To make this smoothie vegan, simply use plant-based protein powder. Ensure your peanut butter is also free from animal products. Replace honey with maple syrup or agave nectar for sweetness. All other ingredients are already vegan-friendly. This smoothie offers many health benefits. It provides protein from the peanut butter and protein powder, which helps build muscle. Bananas add potassium, good for heart health. Chia seeds are packed with fiber, aiding digestion. Almond milk is low in calories and rich in vitamins. Yes, you can use various milk types. Cow’s milk will add creaminess and protein. Soy milk is a great option for extra protein. Coconut milk gives a tropical flavor. Each milk option changes the taste and texture slightly, so choose what you enjoy best. This smoothie recipe combines simple ingredients for great taste and nutrition. You learned step-by-step how to prepare it and tips for perfect texture. Variations let you customize your drink to fit your taste. Remember to store leftovers properly for later enjoyment. Smoothies can be healthy and fun. Try new mixtures to find what you love best. Keep experimenting and enjoy your delicious creations!
                        Peanut Butter Banana Protein Smoothie Easy Recipe
                      • To make a delicious Turmeric Golden Milk Latte, gather these simple ingredients: - 2 cups almond milk (or your preferred milk) - 1 teaspoon ground turmeric - ½ teaspoon ground ginger - ¼ teaspoon cinnamon - 1 tablespoon honey or maple syrup (adjust to taste) - Pinch of black pepper - ½ teaspoon vanilla extract - Optional: a sprinkle of nutmeg for garnish - Almond Milk: This milk is low in calories and rich in vitamins. It helps with heart health. - Turmeric: This spice has curcumin, known for its anti-inflammatory properties. It may help improve brain function. - Ginger: Ginger can help with digestion and nausea. It adds a nice warmth to the drink. - Cinnamon: This spice is rich in antioxidants. It may help lower blood sugar and improve heart health. - Honey or Maple Syrup: Both sweeteners can boost energy. They also provide antioxidants. - Black Pepper: This spice enhances turmeric absorption. It makes the drink more effective. - Vanilla Extract: It adds flavor and can help reduce stress. - Nutmeg: This spice is optional, but it adds warmth and a nice aroma. - Milk Options: You can use oat milk, soy milk, or coconut milk for different flavors. - Sweeteners: If you prefer, try agave syrup or stevia as sugar-free options. - Spices: Experiment with cardamom or cloves for added flavor. - Nutmeg: You can skip it if you don't like nutmeg, or use a touch of cocoa powder instead. 1. Start by taking a small saucepan. 2. Add 2 cups of almond milk to the pan. 3. Measure and add 1 teaspoon of ground turmeric. 4. Next, add ½ teaspoon of ground ginger. 5. Sprinkle in ¼ teaspoon of cinnamon. 6. Sweeten your drink with 1 tablespoon of honey or maple syrup. 7. Don't forget a pinch of black pepper for better absorption of turmeric. 8. Lastly, add ½ teaspoon of vanilla extract. 9. Whisk all the ingredients well in the pan. 10. Place the saucepan on medium heat. 11. Gently warm the mixture while stirring often. 12. Keep an eye on it; do not let it boil. 13. After about 5-7 minutes, it should be hot enough. 14. Remove the pan from heat and let it cool slightly. 15. If you want a frothy drink, use a milk frother or whisk it quickly. 16. Pour the golden milk into your favorite mugs. 17. Optionally, sprinkle a bit of nutmeg on top for a nice touch. 18. Serve warm and enjoy this comforting drink! - Always use a whisk to blend the spices into the milk. - Whisking helps mix the turmeric and other spices evenly. - When heating, keep the heat low to avoid scalding the milk. - Stir often to prevent sticking at the bottom of the pan. - If you see steam but no bubbles, you are at the right temperature. - A milk frother works wonders for a smooth, frothy finish. - If you don’t have a frother, whisk vigorously by hand. - Frothing adds air, giving the latte a creamy feel. - The more you froth, the lighter and fluffier your drink will become. - For an extra touch, froth some almond milk separately and top your latte with it. You can mix spices to make your turmeric latte tastier. Try adding a pinch of nutmeg or a dash of cardamom. These spices add warmth to the drink. You can also use fresh ginger instead of ground ginger. This will give your latte a bright, zesty kick. Just remember, fresh ginger may need more time to steep. Many people rush the heating process. Always warm your milk slowly over medium heat. If you boil it, the spices can lose flavor. Another mistake is not blending the spices well. Make sure to whisk the mixture thoroughly. This helps avoid clumps of turmeric or ginger. Lastly, avoid skipping the black pepper. It helps your body absorb turmeric better. Sweetness is personal. Start with one tablespoon of honey or maple syrup. Taste your latte and add more if you like it sweeter. For creaminess, use full-fat coconut milk for a richer feel. Almond milk is lighter but still delicious. You can also mix almond and coconut milk for the best of both worlds. {{image_2}} You can easily make this latte vegan. Just use almond milk, coconut milk, or oat milk. These milks work great in this recipe. They keep the drink creamy and delicious. If you want a nut-free option, oat milk is the best choice. It blends well with turmeric and spices. To make an iced version, start with brewed turmeric milk. Follow the same steps but let it cool. Pour over ice instead of serving warm. This drink is refreshing on hot days. You can also add some ice cream for a treat! You can mix and match flavors for fun. Try adding matcha for a green twist. This adds a fresh taste and boosts energy. You can also use cocoa for a chocolatey version. The cocoa pairs well with turmeric and spices. For a special touch, add a dash of vanilla extract. This enhances the overall flavor and aroma. To store leftover turmeric golden milk, let it cool first. Then, pour it into an airtight container. Keep it in the fridge for up to three days. This way, you can enjoy the drink again without losing its flavor. When reheating your golden milk, do it gently. Pour it into a small saucepan. Heat it over low to medium heat. Stir it often to avoid burning. Never let it boil, as this can change the taste and texture. You can also use a microwave. Heat in short bursts, stirring in between. Turmeric golden milk lasts about three days in the fridge. Check for signs of spoilage. If it smells sour or has any mold, discard it. Always trust your senses. If it looks or smells off, it’s best to throw it away. Turmeric has many health benefits. It is known for its bright yellow color and active compound called curcumin. Curcumin may help reduce inflammation. It can also support joint health. Some studies suggest it may boost your mood. Turmeric might even help with digestion. Drinking turmeric may also support your immune system. Yes, you can use any milk you like. Almond milk is great, but coconut milk adds creaminess. Oat milk is a good choice for a thicker texture. If you prefer dairy, whole or skim milk works too. Just remember, different types of milk will change the flavor a bit. To make this recipe sugar-free, skip the honey or maple syrup. You can use a sugar substitute like stevia or monk fruit instead. These options will give you sweetness without the calories. Just adjust the amount to your taste. Yes, it is safe for most people to have turmeric daily. Using it in cooking or drinks is a great way to enjoy its benefits. However, if you have health issues or take certain medications, check with a doctor first. Moderation is key, as with any food. In this blog post, we explored the ingredients and health benefits of Turmeric Golden Milk. I shared step-by-step instructions for making it frothy and delicious. We also discovered tips, tricks, and variations to enhance your drink. Proper storage and reheating advice can help you enjoy leftovers. Remember, turmeric offers many health benefits, so enjoy this drink often. Use alternative ingredients if you prefer. With these ideas, you can create the perfect golden milk to suit your taste and health needs. Enjoy your journey to wellness!
                        Turmeric Golden Milk Latte Simple and Creamy Recipe
                      • - 1 ripe mango, peeled and diced - 1 cup fresh pineapple chunks - 1 banana, sliced - 1 cup coconut water (or regular water) - ½ cup plain Greek yogurt (or dairy-free alternative) - 1 tablespoon honey or agave syrup (optional) - A handful of fresh mint leaves (for garnish) - Ice cubes (optional) The key to a delicious mango pineapple smoothie lies in its fresh ingredients. You want ripe fruits for the best flavor. The mango should feel soft when you squeeze it gently. Pineapples should smell sweet and fruity. This smoothie combines sweet mango, tangy pineapple, and creamy banana. Coconut water adds hydration, while Greek yogurt gives it a nice creaminess. You can add honey for extra sweetness if you like. Mint leaves add a refreshing touch when you serve it. Each ingredient plays a role in making this smoothie flavorful and refreshing. Trust me, using fresh ingredients will make a big difference in taste! To make this smoothie, start by gathering your main ingredients. You need a ripe mango, fresh pineapple, and a banana. 1. In a blender, combine the diced mango, pineapple chunks, and banana slices. This mix brings a burst of tropical flavor. 2. Next, add one cup of coconut water to the blender. This not only hydrates but also adds a refreshing twist. 3. For creaminess, pour in half a cup of plain Greek yogurt. If you want it sweeter, drizzle in one tablespoon of honey or agave syrup. 4. Blend on high until the mixture is smooth and creamy. If you like your smoothie chilled, toss in a few ice cubes and blend again until they are fully mixed in. 5. After blending, taste your smoothie. If it needs to be sweeter or thicker, add more honey or coconut water as needed. Once your smoothie is ready, it’s time to serve it. I recommend using tall glasses to show off the vibrant color. For a fun touch, garnish each glass with a few fresh mint leaves on top. This not only looks nice but also adds a fresh aroma. Enjoy your delicious Mango Pineapple Smoothie! For the Full Recipe, please refer back to the ingredient list and instructions. To get your smoothie just right, focus on creaminess. Use ripe fruits like mango and banana. The Greek yogurt adds a nice, smooth texture. If you want a richer taste, try full-fat yogurt. For a lighter feel, use low-fat or dairy-free yogurt. Adjust the thickness by adding more liquid. Coconut water is great for this. If your smoothie is too thick, just pour in a bit more. Blend again until it’s just how you like it. If you want a thicker smoothie, add more banana or ice cubes. Boosting flavor can take your smoothie to the next level. Try adding spices like cinnamon or ginger. These spices not only add warmth but also great health benefits. A dash of cinnamon can make the smoothie taste cozy. A pinch of ginger gives it a nice kick. You can also use flavored yogurts for extra taste. Vanilla or coconut yogurt work well. If you want sweetness, think about honey or agave syrup. These can make your smoothie more enjoyable. For a fun twist, try adding a splash of vanilla extract. It will add a lovely aroma to your drink. For a full taste experience, explore the [Full Recipe]. {{image_2}} You can change the fruit in your smoothie to keep it fresh. Adding strawberries or blueberries gives a sweet twist. These berries add a nice color and taste. You can also try using other tropical fruits like papaya or kiwi. These fruits bring new flavors and nutrients to your drink. Each fruit will change the smoothie’s taste and make it unique. If you want a dairy-free smoothie, swap the Greek yogurt for a plant-based option. Almond, coconut, or soy yogurt works well. These alternatives keep your smoothie creamy without dairy. For sweeteners, you can use maple syrup or agave syrup for a vegan choice. These options add sweetness while keeping your drink plant-based. Enjoy the fruity goodness in many ways! Don't forget to check the Full Recipe for more ideas. You may have some smoothie left after making your Mango Pineapple Smoothie. To keep it fresh, use a glass jar or a BPA-free plastic container. Seal it tightly to prevent air from spoiling the flavor. Store it in the fridge for up to 24 hours. After that, it may lose some taste and texture. If you want to enjoy the smoothie later, freezing is a great option. Pour the smoothie into ice cube trays or freezer-safe bags. Leave some space in the bags for expansion. You can freeze it for up to three months. When you’re ready to drink it, take out what you need. Thaw it in the fridge overnight or blend it straight from the freezer for a slushy treat. Enjoy your refreshing Mango Pineapple Smoothie anytime! Yes, you can make this smoothie ahead of time. If you want to save it, store it in an airtight container. Keep it in the fridge for up to one day. The smoothie may separate, so stir it well before you drink it. If you don’t have coconut water, use regular water or fruit juice instead. Fruit juice can add a nice flavor. You can also try almond milk for a creamier touch. Just remember, the taste will change a bit based on what you use. To make the smoothie thicker, add more Greek yogurt or a banana. You can also use frozen fruit instead of fresh. Frozen fruit gives you a nice, thick texture. Just blend it well, and you’ll get a creamy drink. Yes, this smoothie is great for kids! It is packed with fruits and tastes sweet. You can adjust the sweetness by adding less honey. The bright colors and fresh flavors will appeal to children, making it a fun treat. You can find the Full Recipe for the Tropical Bliss Mango Pineapple Smoothie above in this article. This will guide you through every step to create your own refreshing drink. This blog post covers a simple and tasty smoothie recipe. You learned about the key ingredients and their nutritional benefits. I provided steps to prepare and serve the smoothie perfectly. Tips for texture and flavor help you make it your own. You can explore variations to suit your tastes or dietary needs. Don’t forget storage tips to keep leftovers fresh. Enjoy your smoothie making journey. It’s all about trying new things and having fun!
                        Mango Pineapple Smoothie Refreshing and Flavorful Blend
                      • - 2 packets of frozen açaí puree - 1 ripe banana - 1 cup of fresh pineapple chunks - 1 cup of coconut milk (or any non-dairy milk) - 1 tablespoon of honey or agave syrup (optional) For a vibrant tropical taste, the main ingredients are key. Açaí puree brings rich color and flavor. It is full of antioxidants. Bananas add creaminess and natural sweetness. Fresh pineapple gives a bright, juicy touch. Coconut milk offers a smooth base. You can use any non-dairy milk you prefer. Honey or agave syrup adds sweetness if needed. - Sliced kiwi - Coconut flakes - Granola - Chia seeds - Fresh berries (e.g., strawberries, blueberries) Toppings make your smoothie bowl pop! Sliced kiwi adds a zesty kick. Coconut flakes give it a tropical crunch. Granola provides texture and flavor. Chia seeds offer extra nutrients. Fresh berries, like strawberries and blueberries, add color and taste. You can mix and match these toppings for a fun look. For the full recipe, please refer to the section above. 1. Blend the ingredients Start by adding the frozen açaí puree, ripe banana, fresh pineapple chunks, and coconut milk into a blender. If you want it sweeter, you can add honey or agave syrup. Blend this mixture on high speed until it becomes creamy and smooth. 2. Adjust consistency with coconut milk If your smoothie is too thick, just add a bit more coconut milk. Blend again until you reach the texture you want. This step is key to making your smoothie bowl enjoyable. 3. Pour into a bowl Once blended, carefully pour the smoothie mixture into a bowl. Make sure to use a large enough bowl to hold all the goodness. 4. Add toppings creatively Now comes the fun part! Arrange your toppings, such as sliced kiwi, coconut flakes, granola, chia seeds, and fresh berries, over the smoothie. Try to create a colorful pattern. I love making a circular design to highlight all the vibrant colors. - Tips for presentation Use a shallow bowl to show off your beautiful toppings. You can also sprinkle some extra coconut flakes around the edge for a nice touch. A colorful presentation makes your smoothie bowl more fun to eat. - Recommended serving utensils Serve your smoothie bowl with a regular spoon. If you want to make it more special, use a wooden spoon or a cute, colorful one. Enjoy your tropical treat right away to keep it fresh and tasty. For the full recipe, refer to the earlier sections. To make a great smoothie bowl, start with ripe fruits. Ripe fruits taste better and add natural sweetness. Look for bananas that are yellow with some brown spots. When it comes to pineapples, choose ones that smell sweet. It ensures they are juicy and fresh. Blending is key to your smoothie bowl. You want a smooth and creamy texture. If your mix is too thick, add more coconut milk. Blend again until you reach the right consistency. A good blend makes your bowl enjoyable and easy to eat. A colorful topping arrangement makes your smoothie bowl pop. Use fresh berries, sliced kiwi, and coconut flakes. Lay them out in a pattern. A circular design looks appealing and fun. To elevate your smoothie bowl's look, use bowls with interesting shapes. Tall bowls or wide, shallow ones can change the game. Garnish with a sprinkle of chia seeds for a fancy touch. This not only looks great but adds a bit of crunch too. {{image_2}} You can change the non-dairy milk for this smoothie. Almond, soy, or oat milk work well. Each milk adds a different taste. Try using seasonal fruits too. Mango, papaya, or berries add a fresh twist. You can mix and match to find your favorite blend. Want more nutrients? Add spinach or kale to your smoothie. They blend well and boost health. You won’t even taste them! For extra energy, stir in nut butter or protein powder. Both will make your smoothie more filling. They add great flavor too! You can also experiment with different combinations to find the best taste for you. To store leftovers, place your smoothie bowl in the fridge. Use a tight container to keep it fresh. Glass or BPA-free plastic works well for storage. I prefer glass because it keeps flavors better. You can freeze smoothie bowls for later. Just pour the mixture into an airtight container. Leave some space at the top, as it will expand when frozen. To defrost, place it in the fridge overnight. If you’re in a rush, you can use the microwave. Just heat it in short bursts to avoid cooking. Enjoy your tropical treat later with ease! For the recipe, check out the Full Recipe. What is açaí and what are its benefits? Açaí is a small, dark purple berry from Brazil. It is full of antioxidants, which help fight free radicals in the body. Açaí is also rich in fiber, promoting good digestion. Plus, it has healthy fats that support heart health. You can enjoy its fruity taste in many dishes. Can I make this smoothie bowl ahead of time? Yes! You can prepare the smoothie mix and store it in the fridge for up to 24 hours. Just remember to keep the toppings separate. This way, your bowl stays fresh and tasty. How can I make this recipe vegan or gluten-free? To make it vegan, use agave syrup instead of honey. For gluten-free, ensure your granola and any other toppings are gluten-free. Most fruits and coconut milk are naturally gluten-free, so you’re all set! Can I substitute açaí with other fruits? Yes, you can! If you can’t find açaí, try using frozen berries like blueberries or strawberries. These fruits will add sweetness and a burst of color to your bowl. What to do if the smoothie is too thick? If your smoothie is too thick, just add a little more coconut milk. Blend again until you reach your desired creaminess. This will make it easier to pour and enjoy. How to fix a smoothie bowl that tastes too bland? If your smoothie bowl lacks flavor, try adding a splash of vanilla extract or a pinch of salt. You can also mix in a bit of honey or agave syrup for sweetness. Adjust the toppings to add more taste and texture. This article covers how to make a delicious açaí smoothie bowl. You learned about the key ingredients, easy steps for preparation, and creative topping ideas. I shared tips to improve taste and presentation, plus fun variations to try. Don’t forget storage techniques to keep your bowl fresh. With all this information, you can enjoy a tasty and nutritious treat anytime. Get creative with your favorites and make this recipe truly yours. Enjoy every bite!
                        Tropical Acai Smoothie Bowl Energizing Healthy Treat

                      Footer

                      ↑ back to top

                      More information

                      • Drinks
                      • Appetizer
                      • Dinner
                      • Desserts
                      • About
                      • Contact
                      • Privacy Policy

                      Our Policies

                      • Privacy Policy
                      • GDPR Policy
                      • Terms Of Use
                      • Copyright Policy
                      • Cookie Policy
                      • Disclaimer

                      Copyright © 2025 cheftaling