Looking for a crunchy, tasty snack that’s easy to make? Try my Air Fryer Chickpea Snack Crunch! With just a few ingredients like canned chickpeas and your favorite spices, you can whip up a savory treat that fits any diet. I’ll walk you through each simple step to achieve the perfect crispiness. Let’s dive into this delicious, healthy recipe that will keep you coming back for more!
Why I Love This Recipe
- Simple Ingredients: This recipe requires just a few pantry staples, making it easy to whip up any time you crave a healthy snack.
- Crispy Texture: The air fryer gives the chickpeas a delightful crunch that satisfies your snack cravings without the guilt of traditional frying.
- Customizable Flavors: You can easily adjust the spices to suit your taste or even try different flavor profiles for variety.
- Healthy Snacking: Chickpeas are packed with protein and fiber, making this crunchy treat not only delicious but also nutritious.
Ingredients
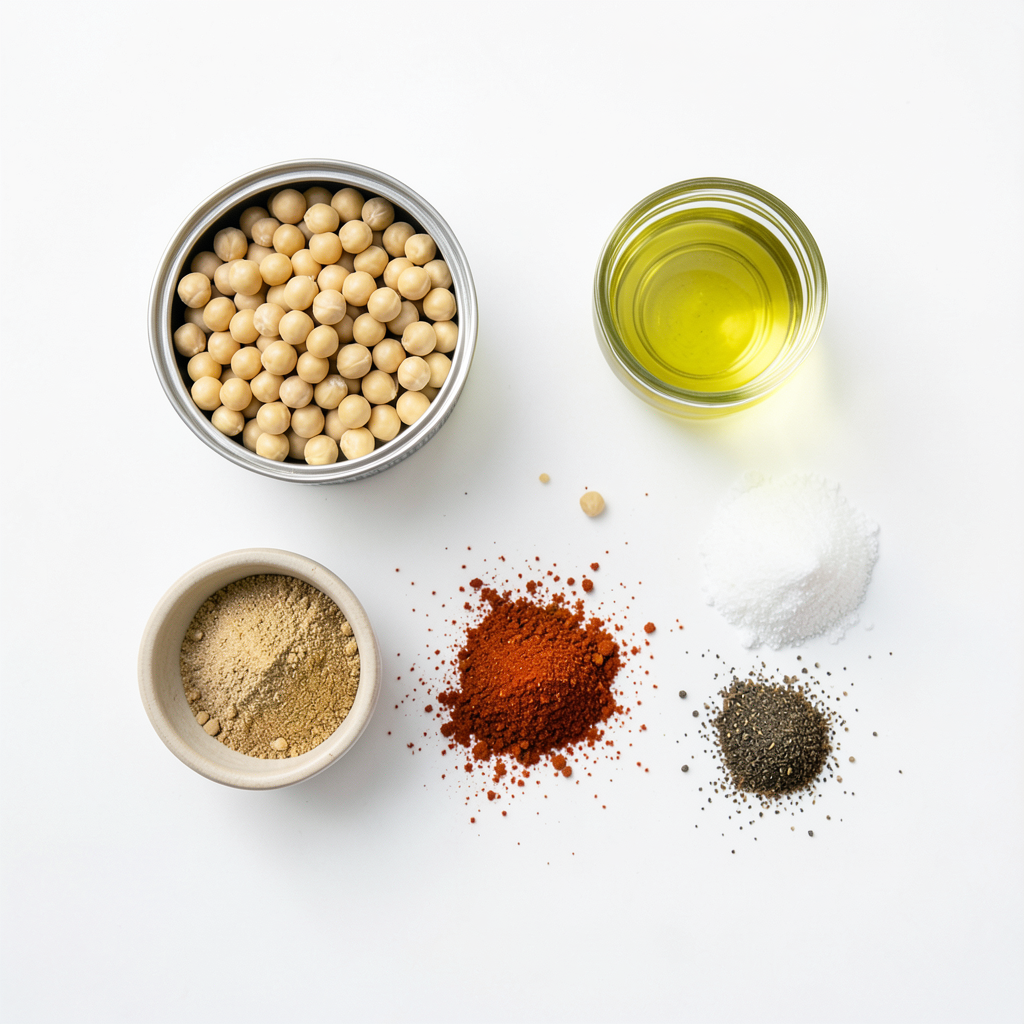
List of Ingredients
- Canned chickpeas
- Olive oil
- Seasoning spices:
- Garlic powder
- Smoked paprika
- Cumin
- Salt
- Black pepper
- Cayenne pepper (optional for heat)
Optional Add-ins
- Fresh herbs for garnish
- Additional spices for customization
Gathering the right ingredients is key to a great snack. I always choose canned chickpeas for ease. They are packed with protein and fiber, making them a healthy choice. Just a can of 15 ounces will do.
For flavor, I use a mix of spices. Garlic powder gives a nice kick, while smoked paprika adds depth. Cumin offers earthiness, and salt enhances all the flavors. Black pepper adds a hint of spice, and cayenne pepper can bring heat if you like it.
I drizzle in some olive oil to help the spices stick. You can add fresh herbs to garnish. I love using parsley or cilantro for a fresh look. You can also mix in other spices to make it your own. The options are endless!
Step-by-Step Instructions
Preheating the Air Fryer
Preheating your air fryer to 400°F (200°C) is key to getting crispy chickpeas. I recommend setting it for about 5 minutes. This step helps the chickpeas cook evenly. When the air fryer is hot, it creates the right crunch.
Preparing the Chickpeas
Start by draining and rinsing a can of chickpeas. Once rinsed, pat them dry. Use a paper towel to remove excess moisture. This step is very important. If the chickpeas are wet, they won’t get crispy. Dry chickpeas allow for better seasoning and crunch.
Seasoning the Chickpeas
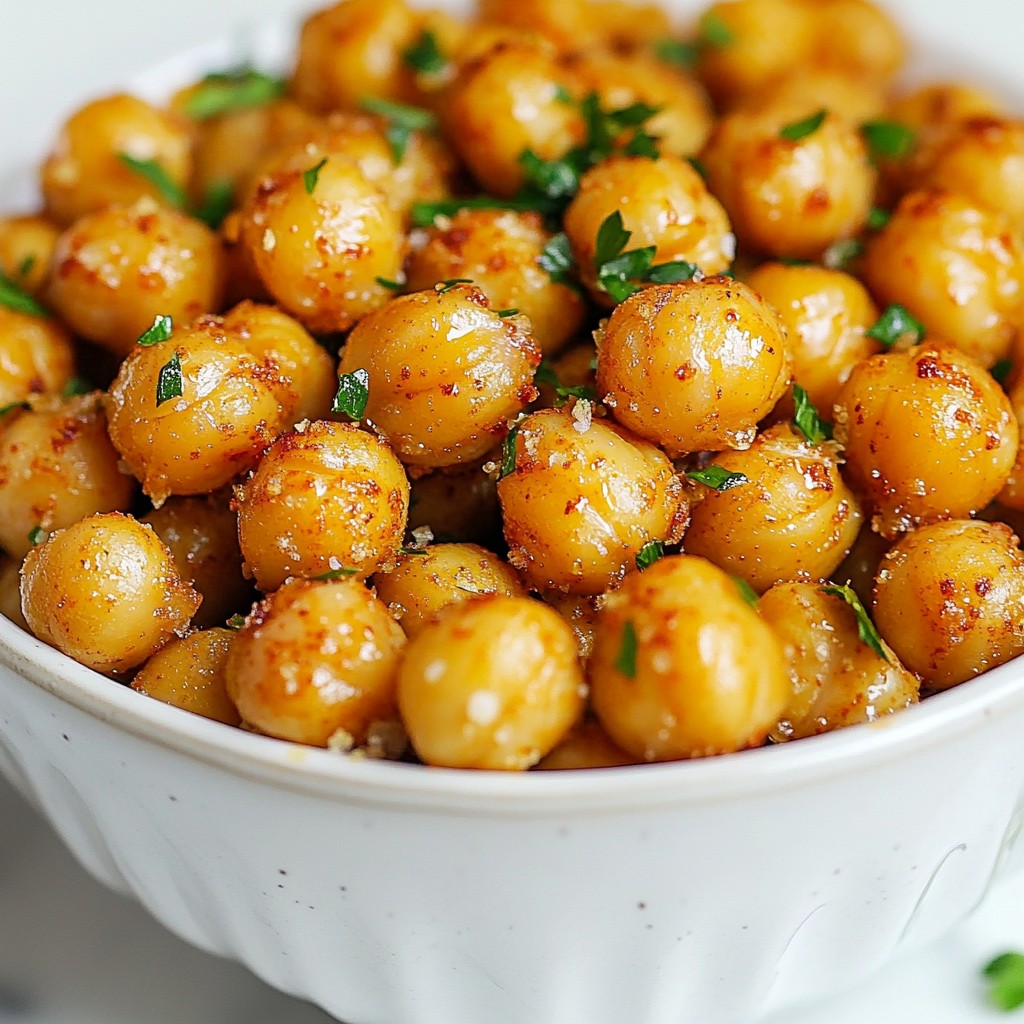
In a mixing bowl, combine the dried chickpeas with olive oil and spices. Use 1 tablespoon of olive oil, 1 teaspoon of garlic powder, 1 teaspoon of smoked paprika, 1 teaspoon of cumin, 1/2 teaspoon of salt, 1/4 teaspoon of black pepper, and a pinch of cayenne pepper if you like heat. Toss the chickpeas well. Make sure each chickpea is evenly coated with the spices for full flavor.
Air Frying Process
Carefully place the seasoned chickpeas in the air fryer basket. Spread them out in a single layer. Avoid overcrowding to ensure they get crispy. Air fry for 15-20 minutes. Halfway through, shake the basket to help the chickpeas cook evenly. You’ll know they are done when they turn a golden brown color and feel crispy. Let them cool for a few minutes before serving. Adjust the seasoning if you want more flavor.
Tips & Tricks
Achieving Optimal Crispiness
To get your chickpeas nice and crispy, space them well in the air fryer. If they are too close, they will steam instead of crisp. Spread them out in a single layer. This helps air circulate around each chickpea.
Different air fryers may cook at different rates. Start with 15 minutes, but check them often. If they need more time, add a few minutes. Look for a golden brown color to know they are done.
Flavor Enhancements
Spice up your chickpeas with different seasonings. Try adding lemon zest for brightness. Mix in some curry powder for a warm flavor. Or, use Italian herbs for a twist.
Pair your chickpeas with dips like hummus or guacamole. They also work great in salads or as a topping for soups. This adds extra flavor and texture to your meals.
Serving Suggestions
Serve your crunchy chickpeas in a fun bowl. Add fresh herbs like parsley or cilantro for color. This makes your dish pop!
You can also use these chickpeas in meals. Toss them in salads or mix them with grains. They make a great snack on their own, too. Enjoy their crunch anytime!
Pro Tips
- Dry Chickpeas Well: Make sure to pat the chickpeas completely dry before seasoning them. This step is crucial for achieving that perfect crunch.
- Even Layer: When placing the chickpeas in the air fryer, ensure they are in a single layer and not overcrowded. This allows for even cooking and crispiness.
- Experiment with Spices: Feel free to customize the spice mix to your taste. Try adding nutritional yeast for a cheesy flavor or your favorite herbs for a unique twist.
- Store for Freshness: If you have leftovers, store them in an airtight container at room temperature. They can become soft in the fridge, so enjoy them fresh!
Variations
Different Spice Combinations
You can change the flavor of your chickpeas easily. For a Mediterranean twist, try using herbs like oregano and thyme. This mix gives a bright, fresh taste. If you like heat, add more cayenne pepper or some chili powder. You can also use curry powder for a warm, earthy flavor. The options are endless!
Alternative Cooking Methods
While air frying gives a great crunch, you can also roast chickpeas in the oven. Set the oven to 425°F (220°C). Spread the chickpeas on a baking sheet and roast for 25-30 minutes. Make sure to stir them halfway through. This method takes longer but still gets tasty results.
Dietary Modifications
Chickpeas are naturally gluten-free and vegan, making them perfect for many diets. If you watch your salt, use less or a salt substitute. You can still enjoy the flavor without too much sodium. Always check labels on canned chickpeas to ensure they fit your dietary needs.
Storage Info
Best Storage Practices
To keep your air fryer chickpea snack crunch fresh, choose the right container. Use an airtight glass jar or a plastic container with a tight seal. This helps keep moisture out. Avoid paper bags, as they let air in. After cooling, store the chickpeas at room temperature. If you plan to eat them later, keep them away from sunlight. This will help maintain their crunchy texture.
Shelf Life
When stored properly, your chickpea snacks can stay fresh for up to a week. Check them for any signs of spoilage. If they smell off or feel soft, toss them out. They should stay crunchy and flavorful for the best experience.
Reheating Tips
If you want to reheat your chickpeas, do it right to keep their crunch. Use your air fryer for the best results. Preheat it to 350°F (175°C) and air fry for about 5 minutes. This will help revive their crispiness. You can also use an oven set at the same temperature. Avoid using a microwave, as it can make them soggy. Enjoy your tasty snack!
FAQs
Can I use dried chickpeas instead of canned?
Yes, you can use dried chickpeas. First, soak them overnight in water. This helps them soften. Next, cook them in boiling water for about 1 to 1.5 hours. Drain and rinse the cooked chickpeas. Once they cool, follow the recipe as normal. Using dried chickpeas takes more time, but they can taste fresher.
Why are my chickpeas not getting crispy?
Several reasons can cause this issue. First, excess moisture can prevent crispiness. Be sure to dry the chickpeas well before cooking. Second, overcrowding the air fryer basket can lead to steaming instead of frying. Always spread the chickpeas in a single layer. Lastly, not cooking them long enough can also keep them soft. Make sure to air fry them until they turn golden brown.
Are air-fried chickpeas healthy?
Absolutely! Air-fried chickpeas are a healthy snack. They are high in protein and fiber, which keeps you full. A serving of chickpeas contains about 120 calories, 6 grams of protein, and 5 grams of fiber. They are also low in fat when you use minimal oil. This makes them a smart choice for snacking or adding to meals.
What air fryer temperature is best for chickpeas?
The best temperature for air-frying chickpeas is 400°F (200°C). This high heat helps them crisp up nicely. If your air fryer has different settings, check the manual. Some models may need slight adjustments. Always keep an eye on your chickpeas as they cook to avoid burning.
Air-fried chickpeas are a tasty and healthy snack. We explored the key ingredients and their preparation. Preheating the air fryer ensures crispiness. Properly rinsing and seasoning the chickpeas makes a big difference. Use tips for optimal results and variations to suit your taste. You can enjoy these crunchy treats in many ways. With simple storage methods, they stay fresh longer. With this guide, you can make delicious air-fried chickpeas that impress. Enjoy experimenting and make this snack your own!