Introduction
As summer rolls in, so do the vibrant colors and flavors of the season. One dish that embodies this spirit perfectly is fried corn on the cob. This delicious treat has become a favorite among food enthusiasts, picnic-goers, and barbecue lovers alike. The combination of juicy, sweet corn, crispy coating, and savory spices creates a flavor explosion that tantalizes the taste buds and evokes memories of summer days spent outdoors.
Fried corn on the cob is not just a dish; it’s an experience. Whether served at a backyard gathering or a local fair, it’s a hands-on treat that encourages sharing and enjoyment. The golden, crispy exterior contrasts beautifully with the tender kernels inside, making each bite a delightful mix of textures. This dish is versatile too; it can serve as a snack, side dish, or even a main attraction at your summer cookouts.
In this article, we’ll explore the delicious world of fried corn on the cob, focusing on the ingredients that make it special and the preparation steps involved to create this seasonal favorite.
Understanding the Ingredients
Every great dish starts with quality ingredients, and fried corn on the cob is no exception. Each component plays a vital role in creating the perfect balance of flavor and texture. Let’s delve into the key ingredients that make this corn dish a delight.
Fresh Corn: The Star of the Show
When it comes to fried corn on the cob, the most crucial element is undoubtedly the corn itself. Selecting the freshest corn is essential for achieving the best flavor. Look for ears of corn that are plump, firm, and have bright green husks. The silk should be slightly sticky and golden, indicating that the corn is fresh. Avoid any ears that appear dried out or have darkened husks, as these can indicate age and reduced sweetness.
The flavor profile of fresh corn is unparalleled. When in season, sweet corn bursts with natural sugars, offering a sweet, earthy taste that complements the savory coating perfectly. Fresh corn is typically available from late spring through early fall, making summer the ideal time to enjoy this dish. If you have access to local farmers’ markets, you’ll often find the freshest options available.
The Buttermilk Bath
Soaking the corn in a buttermilk bath is a game-changer in this recipe. Buttermilk not only tenderizes the kernels but also infuses them with a rich, tangy flavor that elevates the overall taste of the dish. The acidity in buttermilk allows the corn to absorb flavors better, resulting in a more delicious final product.
For those who may not have buttermilk on hand, there are several alternatives. You can easily create a substitute by mixing one cup of milk with one tablespoon of vinegar or lemon juice and letting it sit for about 5 to 10 minutes. This will mimic the acidity and texture of buttermilk, ensuring your corn remains flavorful and tender.
Creating the Perfect Coating
The crispy coating is what truly sets fried corn on the cob apart. The flour mixture is where the magic happens, transforming plain corn into a delightful treat. The blend of spices in the coating contributes significantly to the overall flavor profile.
- Paprika: Adds a mild smokiness and a beautiful color, enhancing the visual appeal of the dish.
- Garlic Powder: Provides a savory depth, complementing the sweetness of the corn.
- Cayenne Pepper: Introduces a kick of heat, balancing the sweetness and creating a more complex flavor.
- Salt and Black Pepper: Essential for enhancing the natural flavors of the corn and the spices.
Together, these ingredients create a well-rounded coating that brings out the best in the corn, making each bite a delectable experience.
Preparation Steps Explained
Now that we’ve covered the ingredients, let’s walk through the preparation steps involved in making fried corn on the cob. Following these guidelines will ensure your dish is a success.
Prepping the Corn
The first step in preparing fried corn on the cob is to properly husk and cut the corn. Begin by removing the green husk and silk from the ears of corn. It can be helpful to twist the husk to break it away from the cob, making the process easier. Once husked, you’ll want to cut the corn into manageable pieces for frying.
Typically, cutting the corn into halves or thirds works well, depending on the size of the ears. This allows for even cooking and makes it easier to handle when frying. Each piece should be uniform in size to ensure consistent cooking and a delightful presentation.
Soaking: The Flavor Infusion
Once the corn is prepped and cut, it’s time to soak it in the buttermilk bath. The ideal soaking time is around 30 minutes to 1 hour, allowing the corn to absorb the flavors deeply. This step not only enhances the taste but also ensures that the corn remains moist during frying, preventing it from drying out.
For those who prefer a more intense flavor, soaking for a longer period—up to two hours—can yield even better results. Just be cautious not to over-soak, as this can make the corn too soft and alter its texture. The key is to find the perfect balance between flavor infusion and maintaining the corn’s natural crunch.
By carefully selecting fresh ingredients and following these preparation steps, you’re well on your way to creating a mouthwatering fried corn on the cob delight that will impress your family and friends. Stay tuned for the next part of the article, where we will dive into the frying process and tips for achieving the perfect crispy finish.
Coating the Corn: Techniques for Success
Achieving the perfect coating for Fried Corn on the Cob Delight is crucial to ensure that each bite delivers maximum flavor and crunch. Start by preparing your flour mixture, which typically consists of all-purpose flour, cornstarch, and seasonings of your choice. To apply the coating evenly, it’s essential to work in small batches. Begin by rolling each cob in the flour mixture, ensuring that each side is thoroughly covered.
One effective technique is to use a large, shallow dish for the coating. This allows you to roll the corn cobs easily without creating a mess. Gently press the flour mixture onto the corn to help it adhere better, and shake off any excess flour. To avoid clumps, make sure to mix the dry ingredients well before use, and consider sifting them to create a finer texture. For added flavor, you might incorporate spices such as paprika, garlic powder, or cayenne pepper into the flour mixture, which will ensure that every bite is seasoned perfectly.
Frying the Corn: Safety and Technique
When it comes to frying, oil temperature is key. Preheat your oil to around 350°F (175°C) for optimal frying conditions. This temperature allows the corn to cook quickly while developing a beautiful golden-brown crust. If the oil is too cool, the corn will absorb excess oil and become greasy; if it’s too hot, the exterior may burn before the inside cooks through.
Frying in batches is equally important for achieving that desired crispiness. Adding too many cobs to the pot at once can lower the oil temperature significantly, resulting in soggy corn. Instead, fry just a few cobs at a time, allowing sufficient space for the hot oil to circulate. This method not only ensures even cooking but also allows you to monitor the corn closely, making it easier to remove them when they are perfectly cooked.
The Perfect Fry: Timing and Texture
Timing is everything when frying corn on the cob. Typically, you should fry the corn for about 3 to 5 minutes, depending on the size of the cobs and the oil temperature. The ideal corn should be golden brown, indicating that it is cooked through and the coating is crisp. Keep a close eye on the corn, and use visual cues to determine doneness. A light crunch should be audible when you gently tap on the surface, and the color should be consistent across the entire cob.
When the corn is finished frying, it can be beneficial to use a slotted spoon or tongs to remove it from the oil. This will allow excess oil to drip off, ensuring your final product is not overly greasy.
Draining and Serving: Making It Presentable
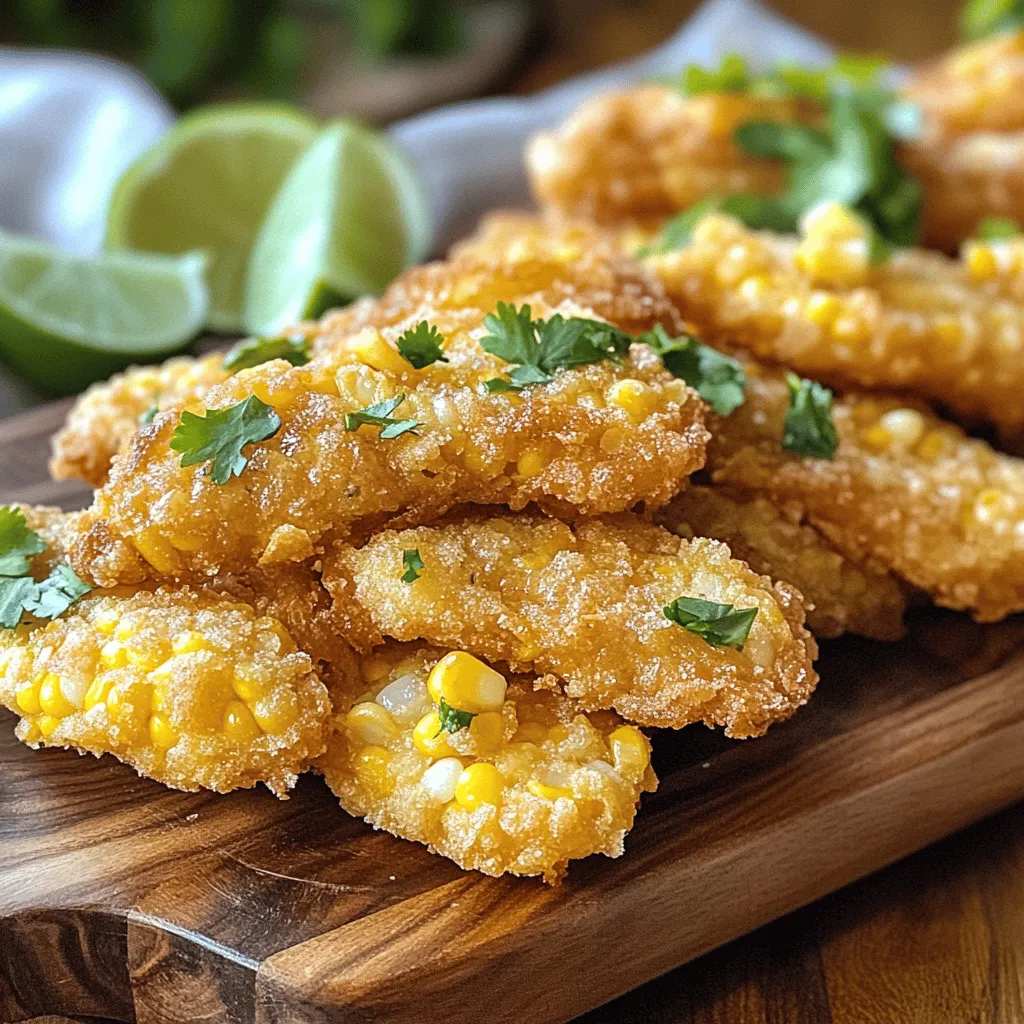
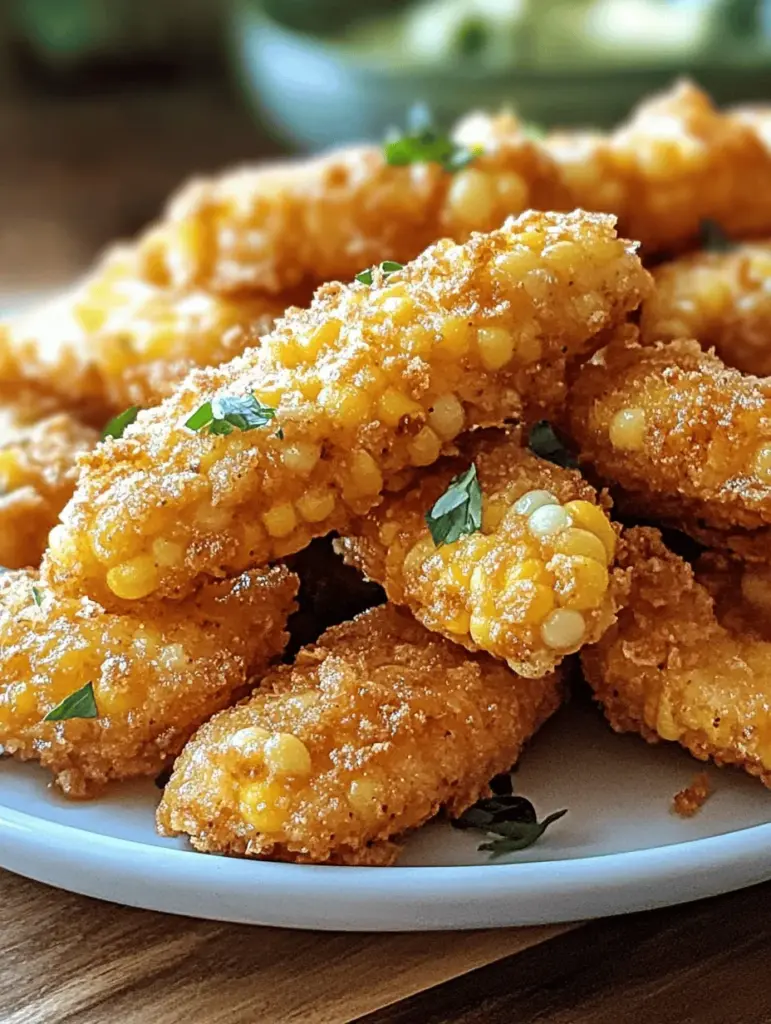
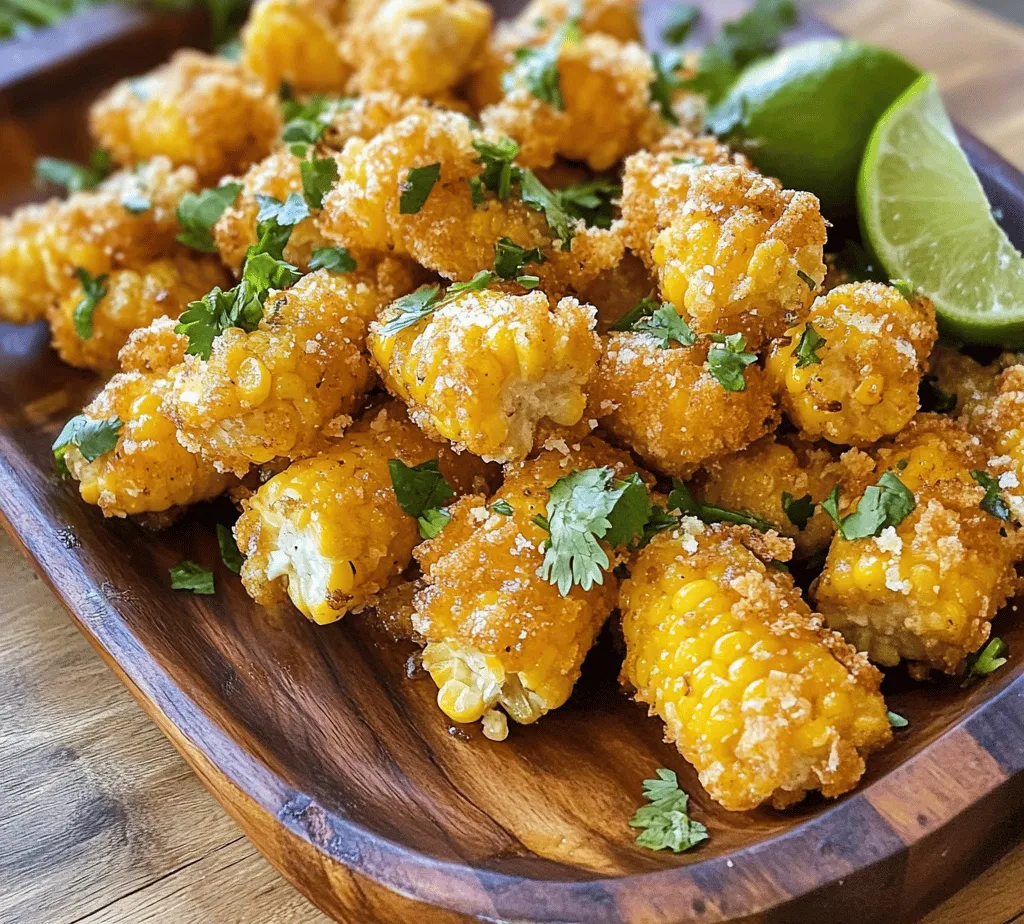
Once your Fried Corn on the Cob Delight is ready, it’s essential to drain any excess oil. Place the fried cobs on a plate lined with paper towels or a wire rack. This step helps to remove any leftover oil, yielding a crispier result.
Presenting your fried corn attractively can enhance the overall dining experience. Consider arranging the cobs on a serving platter, perhaps leaning them against each other for a casual yet appealing display. You can garnish the dish with fresh herbs, such as chopped cilantro or parsley, to add a pop of color and freshness. A sprinkle of sea salt or a dash of your favorite spice blend can also elevate the visual appeal and flavor of the dish.
Flavor Pairings and Variations
Fried Corn on the Cob Delight is a versatile dish that pairs well with a variety of flavors. You can experiment with different coatings by adding grated cheese to the flour mixture, like Parmesan or cotija, for a cheesy twist. Alternatively, consider a spicy coating by incorporating chili powder or crushed red pepper flakes for those who enjoy a kick.
In addition to coatings, consider serving the corn with complementary dips. A creamy ranch or spicy mayo can provide a delightful contrast to the crispy corn. For a more adventurous palate, try a tangy buffalo sauce or a zesty chimichurri to enhance the flavor profile.
Herb Garnishes for Freshness
Fresh herbs can dramatically elevate the flavors of your Fried Corn on the Cob. Cilantro and parsley are excellent choices that add brightness and a touch of earthiness to the dish. Simply chop the herbs finely and sprinkle them over the corn just before serving.
If you’re looking for other herb options, consider using dill for a refreshing taste or basil for a slightly sweet note. Each herb can transform the dish and pair beautifully with the rich, fried corn.
Serving Suggestions with Lime
One of the simplest yet most effective ways to enhance the flavor of your fried corn is by serving it with lime wedges. The acidity of the lime juice cuts through the richness of the fried coating, adding a zesty brightness that makes each bite more enjoyable. Simply squeeze fresh lime juice over the corn just before eating, or provide wedges on the side for guests to use as desired.
In addition to lime, you can explore other dipping sauces that complement the flavors of the corn. A tangy salsa verde can bring a refreshing element, while a sweet chili sauce adds a delightful contrast. For those who enjoy a bit of heat, try serving with a spicy chipotle sauce for a smoky flavor.
Conclusion
Making Fried Corn on the Cob Delight at home is a rewarding culinary experience that results in a deliciously crispy and flavorful treat. This dish is not only simple to prepare but also offers endless opportunities for customization, allowing you to experiment with various flavors, coatings, and garnishes. Whether you’re enjoying it at a summer barbecue, a picnic, or as a delightful snack, this fried corn is sure to be a hit with family and friends.
As you gather around the table, savor the process of cooking and sharing this delightful dish. The joy of Fried Corn on the Cob Delight lies in its ability to bring people together, creating cherished memories over good food and laughter. So gather your ingredients, heat that oil, and indulge in this irresistible treat that embodies the essence of summer gatherings. Enjoy every crispy bite!
