Chef Taling

  • Home
  • Recipe Index
    • Desserts
    • Dinner
    • Appetizer
    • Drinks
  • About
  • Contact
  • Privacy Policy
menu icon
go to homepage
  • Home
  • Recipe Index
    • Desserts
    • Dinner
    • Appetizer
    • Drinks
  • About
  • Contact
  • Privacy Policy

search icon
Homepage link
  • Home
  • Recipe Index
    • Desserts
    • Dinner
    • Appetizer
    • Drinks
  • About
  • Contact
  • Privacy Policy

×

Honey Garlic Shrimp & Broccoli Sheet Pan Delight

Published: Sep 18, 2025 · by Taling · Leave a Comment

WANT TO SAVE THIS RECIPE?

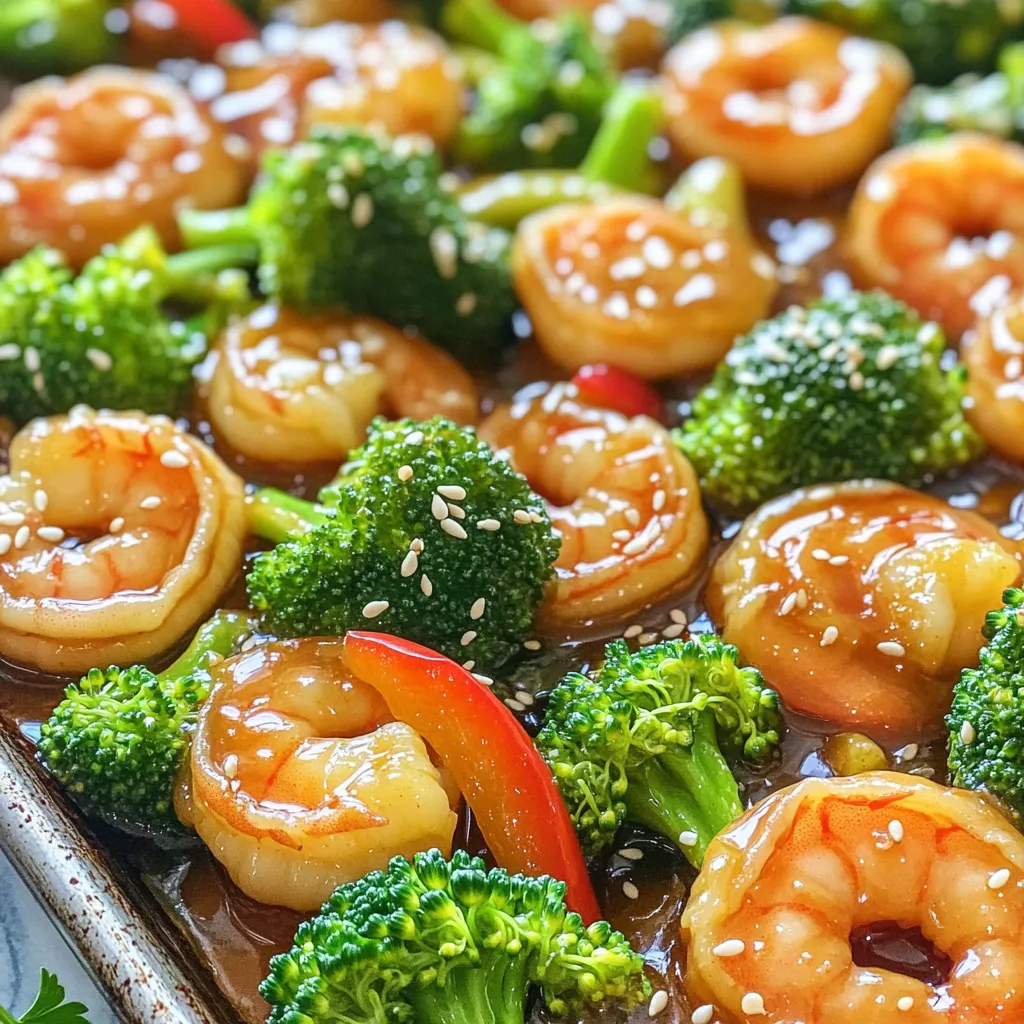
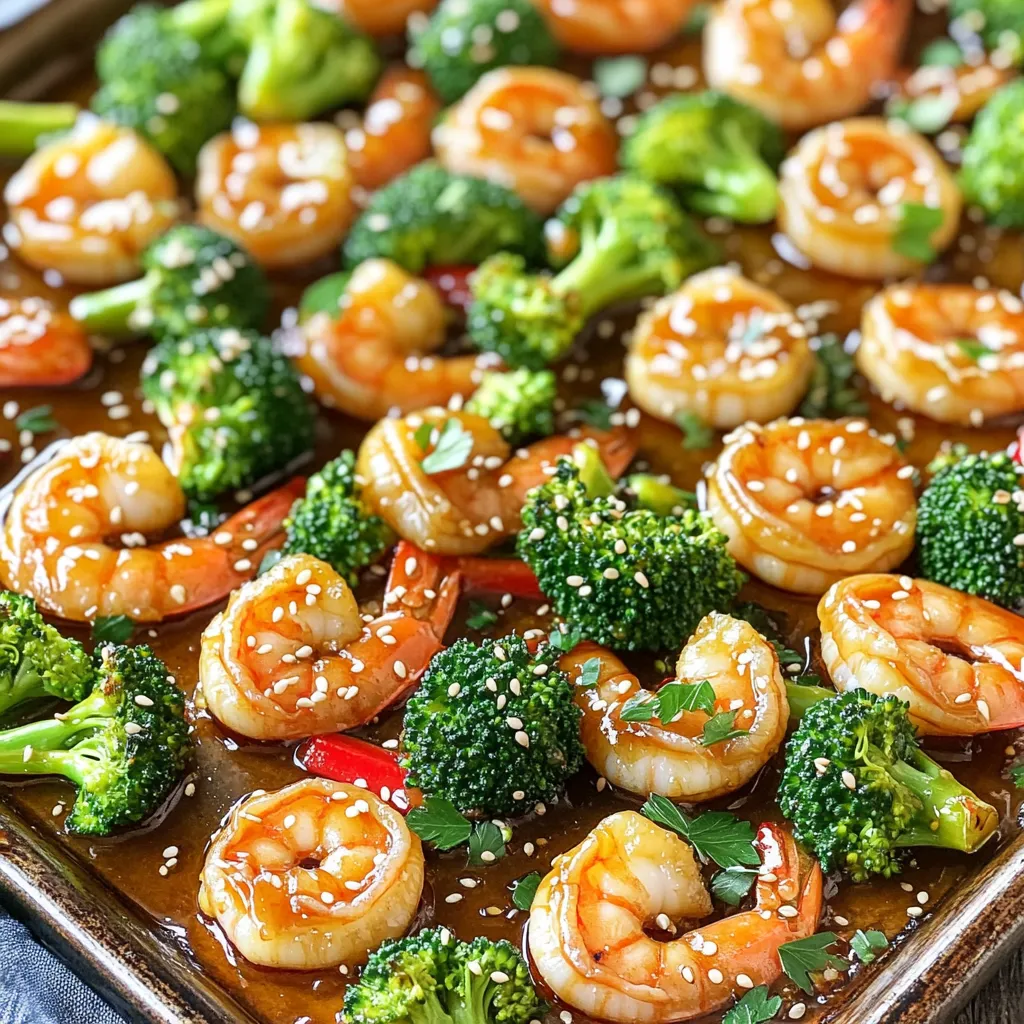
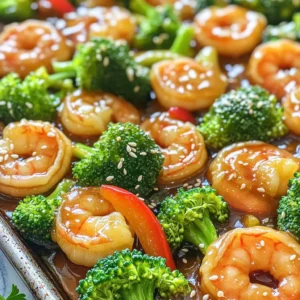
Looking for a quick and tasty dinner? Our Honey Garlic Shrimp & Broccoli Sheet Pan Delight is the answer! This simple recipe combines juicy shrimp, crisp broccoli, and vibrant bell peppers in a sweet and savory marinade. It's all baked on a single pan, making cleanup a breeze. Whether you're a busy parent or a food lover, this dish will impress with its flavor and ease. Ready to dive in? Let’s get cooking!

- 1 lb large shrimp, peeled and deveined - 2 cups broccoli florets - 1 red bell pepper, sliced - 4 cloves garlic, minced - ¼ cup honey - 3 tablespoons soy sauce (or tamari for gluten-free) - 2 tablespoons olive oil - 1 tablespoon sesame oil - 1 teaspoon grated fresh ginger - ½ teaspoon crushed red pepper flakes (optional) - Salt and pepper to taste - Sesame seeds for garnish - Fresh parsley or cilantro for garnish For this dish, measuring correctly is key. Use: - 1 pound of shrimp. This gives four servings. - 2 cups of broccoli florets. Fresh is best for crunch. - 1 red bell pepper. Slice it thin for even cooking. - 4 cloves of garlic, minced finely. This adds great flavor. For fresh produce, look for bright colors. The broccoli should be firm. Choose a red bell pepper that feels heavy for its size. Avoid any with soft spots or blemishes. Fresh ingredients make all the difference in taste! 1. Preheating the oven: Set your oven to 400°F (200°C). This step helps cook everything evenly. A hot oven ensures that your shrimp and broccoli roast perfectly. 2. Making the marinade: In a mixing bowl, whisk together: - 4 cloves garlic, minced - ¼ cup honey - 3 tablespoons soy sauce - 2 tablespoons olive oil - 1 tablespoon sesame oil - 1 teaspoon grated fresh ginger - ½ teaspoon crushed red pepper flakes (if you like a bit of heat) Save about 2 tablespoons of this marinade in another bowl. You will use it later as a finishing glaze. 1. Marinating the shrimp: Add 1 lb of large, peeled shrimp to the bowl with the marinade. Toss the shrimp well to coat them evenly. Let them sit for at least 10 minutes. This time allows the shrimp to soak up all the tasty flavors. 2. Arranging vegetables and shrimp on the sheet pan: On a sheet pan, place 2 cups of broccoli florets and sliced red bell pepper. Drizzle with olive oil and sprinkle with salt and pepper. Toss the veggies to coat them well. Spread the marinated shrimp evenly over the vegetables. This helps everything cook together nicely. 3. Baking and broiling times: Place the sheet pan in the preheated oven. Bake for 12-15 minutes. The shrimp should turn pink and opaque, and the broccoli should be tender-crisp. After baking, drizzle the reserved marinade over the shrimp and veggies. Switch your oven to broil for an extra 2-3 minutes. This step caramelizes the glaze, adding more flavor to your dish. To achieve perfect shrimp texture, start with fresh or thawed shrimp. Avoid overcooking, as shrimp can become tough. Cook them until they turn pink, about 12-15 minutes in the oven. Marinating for at least 10 minutes helps them soak up flavor without losing their texture. For tender-crisp broccoli, cut the florets into even pieces. This ensures they cook evenly. Toss them with olive oil, salt, and pepper before baking. Bake until they are bright green and just tender. Broiling them at the end gives a nice finish. Want to jazz up your dish? Add spices like paprika or garlic powder for depth. Try fresh herbs like thyme or basil for a twist. You could also mix in some lime juice for a zesty kick. To adjust sweetness, add more honey for a sweeter taste. If you prefer less sweetness, use less honey or add vinegar for balance. For spice, increase the crushed red pepper flakes or add sriracha to the marinade. Always taste as you go! {{image_2}} You can easily change some veggies in this dish. Snap peas and carrots work well. They add crunch and color. You can also use bell peppers of any color for a fun twist. If you need a gluten-free option, use tamari instead of soy sauce. It has a similar taste but is safe for those avoiding gluten. Coconut aminos can be another great swap. It’s sweeter and less salty. Want to cut carbs? You can swap the shrimp for chicken or tofu. These options fit well into low-carb or ketogenic diets. Just be sure to adjust cooking times for chicken. Tofu cooks faster than shrimp. For a vegan version, replace shrimp with chickpeas or mushrooms. Both soak up the honey garlic flavor well. Use maple syrup instead of honey for sweetness. This keeps it plant-based and delicious. To store leftovers, let the dish cool first. Place the shrimp and broccoli in an airtight container. You can keep it in the fridge for up to three days. Use glass or plastic containers that seal well. This keeps the flavors fresh and prevents spills. To reheat, the best method is using the oven. Preheat the oven to 350°F (175°C). Place the leftovers on a baking sheet. Heat for about 10-15 minutes until warm. This helps keep the shrimp juicy and broccoli crisp. You can also transform leftovers into a new meal. Try adding the shrimp and broccoli to a salad or mix them into fried rice. Both options give you a fun twist on the original dish! How long should I marinate shrimp? You should marinate the shrimp for at least 10 minutes. This time lets the shrimp soak up the flavors. If you have more time, you can marinate them for up to 30 minutes. Just don’t go too long, or the shrimp might become too soft. Can I use frozen shrimp instead of fresh? Yes, you can use frozen shrimp. Just make sure to thaw them first. Run them under cold water for about 10 minutes. Pat them dry before marinating. This helps the marinade stick better. What sides pair well with Honey Garlic Shrimp & Broccoli? This dish goes well with rice or quinoa. You can also serve it with a fresh salad. For a hearty meal, add some bread or noodles. The flavors mix well and make a complete meal. What's the best way to adjust this recipe for larger servings? To adjust for larger servings, simply double the ingredients. Use two sheet pans if needed. Make sure the shrimp and veggies are in a single layer for even cooking. Keep an eye on the cooking time, as it may vary. How can I make this a low-sodium dish? To make this dish low-sodium, use low-sodium soy sauce or tamari. You can also cut the amount of soy sauce in half. Add more honey or ginger to boost the flavor without the salt. This blog post covered all key steps to make a delicious Honey Garlic Shrimp and Broccoli. You learned about the main ingredients, preparation process, and cooking methods. We also shared helpful tips for perfect texture and flavor. Plus, you discovered variations and storage information for leftovers. Cooking should be fun and easy. With these tips, you can create a dish your family will love. Enjoy experimenting and make it your own!

Ingredients

List of Main Ingredients

  1. 1 lb large shrimp, peeled and deveined
  2. 2 cups broccoli florets
  3. 1 red bell pepper, sliced
  4. 4 cloves garlic, minced
  5. ¼ cup honey
  6. 3 tablespoons soy sauce (or tamari for gluten-free)
  7. 2 tablespoons olive oil
  8. 1 tablespoon sesame oil
  9. 1 teaspoon grated fresh ginger
  10. ½ teaspoon crushed red pepper flakes (optional)
  11. Salt and pepper to taste
  12. Sesame seeds for garnish
  13. Fresh parsley or cilantro for garnish

Measuring and Preparation Notes

For this dish, measuring correctly is key. Use:

  1. 1 pound of shrimp. This gives four servings.
  2. 2 cups of broccoli florets. Fresh is best for crunch.
  3. 1 red bell pepper. Slice it thin for even cooking.
  4. 4 cloves of garlic, minced finely. This adds great flavor.

For fresh produce, look for bright colors. The broccoli should be firm. Choose a red bell pepper that feels heavy for its size. Avoid any with soft spots or blemishes. Fresh ingredients make all the difference in taste!

Step-by-Step Instructions

Preparation Process

1. Preheating the oven: Set your oven to 400°F (200°C). This step helps cook everything evenly. A hot oven ensures that your shrimp and broccoli roast perfectly.

2. Making the marinade: In a mixing bowl, whisk together:

  1. 4 cloves garlic, minced
  2. ¼ cup honey
  3. 3 tablespoons soy sauce
  4. 2 tablespoons olive oil
  5. 1 tablespoon sesame oil
  6. 1 teaspoon grated fresh ginger
  7. ½ teaspoon crushed red pepper flakes (if you like a bit of heat)

Save about 2 tablespoons of this marinade in another bowl. You will use it later as a finishing glaze.

Cooking the Dish

1. Marinating the shrimp: Add 1 lb of large, peeled shrimp to the bowl with the marinade. Toss the shrimp well to coat them evenly. Let them sit for at least 10 minutes. This time allows the shrimp to soak up all the tasty flavors.

2. Arranging vegetables and shrimp on the sheet pan: On a sheet pan, place 2 cups of broccoli florets and sliced red bell pepper. Drizzle with olive oil and sprinkle with salt and pepper. Toss the veggies to coat them well. Spread the marinated shrimp evenly over the vegetables. This helps everything cook together nicely.

3. Baking and broiling times: Place the sheet pan in the preheated oven. Bake for 12-15 minutes. The shrimp should turn pink and opaque, and the broccoli should be tender-crisp. After baking, drizzle the reserved marinade over the shrimp and veggies. Switch your oven to broil for an extra 2-3 minutes. This step caramelizes the glaze, adding more flavor to your dish.

Tips & Tricks

Cooking Tips

To achieve perfect shrimp texture, start with fresh or thawed shrimp. Avoid overcooking, as shrimp can become tough. Cook them until they turn pink, about 12-15 minutes in the oven. Marinating for at least 10 minutes helps them soak up flavor without losing their texture.

For tender-crisp broccoli, cut the florets into even pieces. This ensures they cook evenly. Toss them with olive oil, salt, and pepper before baking. Bake until they are bright green and just tender. Broiling them at the end gives a nice finish.

Flavor Enhancements

Want to jazz up your dish? Add spices like paprika or garlic powder for depth. Try fresh herbs like thyme or basil for a twist. You could also mix in some lime juice for a zesty kick.

To adjust sweetness, add more honey for a sweeter taste. If you prefer less sweetness, use less honey or add vinegar for balance. For spice, increase the crushed red pepper flakes or add sriracha to the marinade. Always taste as you go!

Variations

Ingredient Substitutions

You can easily change some veggies in this dish. Snap peas and carrots work well. They add crunch and color. You can also use bell peppers of any color for a fun twist.

If you need a gluten-free option, use tamari instead of soy sauce. It has a similar taste but is safe for those avoiding gluten. Coconut aminos can be another great swap. It’s sweeter and less salty.

Dietary Modifications

Want to cut carbs? You can swap the shrimp for chicken or tofu. These options fit well into low-carb or ketogenic diets. Just be sure to adjust cooking times for chicken. Tofu cooks faster than shrimp.

For a vegan version, replace shrimp with chickpeas or mushrooms. Both soak up the honey garlic flavor well. Use maple syrup instead of honey for sweetness. This keeps it plant-based and delicious.

Storage Info

Refrigeration Tips

To store leftovers, let the dish cool first. Place the shrimp and broccoli in an airtight container. You can keep it in the fridge for up to three days. Use glass or plastic containers that seal well. This keeps the flavors fresh and prevents spills.

Reheating Instructions

To reheat, the best method is using the oven. Preheat the oven to 350°F (175°C). Place the leftovers on a baking sheet. Heat for about 10-15 minutes until warm. This helps keep the shrimp juicy and broccoli crisp.

You can also transform leftovers into a new meal. Try adding the shrimp and broccoli to a salad or mix them into fried rice. Both options give you a fun twist on the original dish!

FAQs

Common User Questions

How long should I marinate shrimp?

You should marinate the shrimp for at least 10 minutes. This time lets the shrimp soak up the flavors. If you have more time, you can marinate them for up to 30 minutes. Just don’t go too long, or the shrimp might become too soft.

Can I use frozen shrimp instead of fresh?

Yes, you can use frozen shrimp. Just make sure to thaw them first. Run them under cold water for about 10 minutes. Pat them dry before marinating. This helps the marinade stick better.

What sides pair well with Honey Garlic Shrimp & Broccoli?

This dish goes well with rice or quinoa. You can also serve it with a fresh salad. For a hearty meal, add some bread or noodles. The flavors mix well and make a complete meal.

Additional Recipe Queries

What's the best way to adjust this recipe for larger servings?

To adjust for larger servings, simply double the ingredients. Use two sheet pans if needed. Make sure the shrimp and veggies are in a single layer for even cooking. Keep an eye on the cooking time, as it may vary.

How can I make this a low-sodium dish?

To make this dish low-sodium, use low-sodium soy sauce or tamari. You can also cut the amount of soy sauce in half. Add more honey or ginger to boost the flavor without the salt.

This blog post covered all key steps to make a delicious Honey Garlic Shrimp and Broccoli. You learned about the main ingredients, preparation process, and cooking methods. We also shared helpful tips for perfect texture and flavor. Plus, you discovered variations and storage information for leftovers.

Cooking should be fun and easy. With these tips, you can create a dish your family will love. Enjoy experimenting and make it your own!

- 1 lb large shrimp, peeled and deveined - 2 cups broccoli florets - 1 red bell pepper, sliced - 4 cloves garlic, minced - ¼ cup honey - 3 tablespoons soy sauce (or tamari for gluten-free) - 2 tablespoons olive oil - 1 tablespoon sesame oil - 1 teaspoon grated fresh ginger - ½ teaspoon crushed red pepper flakes (optional) - Salt and pepper to taste - Sesame seeds for garnish - Fresh parsley or cilantro for garnish For this dish, measuring correctly is key. Use: - 1 pound of shrimp. This gives four servings. - 2 cups of broccoli florets. Fresh is best for crunch. - 1 red bell pepper. Slice it thin for even cooking. - 4 cloves of garlic, minced finely. This adds great flavor. For fresh produce, look for bright colors. The broccoli should be firm. Choose a red bell pepper that feels heavy for its size. Avoid any with soft spots or blemishes. Fresh ingredients make all the difference in taste! 1. Preheating the oven: Set your oven to 400°F (200°C). This step helps cook everything evenly. A hot oven ensures that your shrimp and broccoli roast perfectly. 2. Making the marinade: In a mixing bowl, whisk together: - 4 cloves garlic, minced - ¼ cup honey - 3 tablespoons soy sauce - 2 tablespoons olive oil - 1 tablespoon sesame oil - 1 teaspoon grated fresh ginger - ½ teaspoon crushed red pepper flakes (if you like a bit of heat) Save about 2 tablespoons of this marinade in another bowl. You will use it later as a finishing glaze. 1. Marinating the shrimp: Add 1 lb of large, peeled shrimp to the bowl with the marinade. Toss the shrimp well to coat them evenly. Let them sit for at least 10 minutes. This time allows the shrimp to soak up all the tasty flavors. 2. Arranging vegetables and shrimp on the sheet pan: On a sheet pan, place 2 cups of broccoli florets and sliced red bell pepper. Drizzle with olive oil and sprinkle with salt and pepper. Toss the veggies to coat them well. Spread the marinated shrimp evenly over the vegetables. This helps everything cook together nicely. 3. Baking and broiling times: Place the sheet pan in the preheated oven. Bake for 12-15 minutes. The shrimp should turn pink and opaque, and the broccoli should be tender-crisp. After baking, drizzle the reserved marinade over the shrimp and veggies. Switch your oven to broil for an extra 2-3 minutes. This step caramelizes the glaze, adding more flavor to your dish. To achieve perfect shrimp texture, start with fresh or thawed shrimp. Avoid overcooking, as shrimp can become tough. Cook them until they turn pink, about 12-15 minutes in the oven. Marinating for at least 10 minutes helps them soak up flavor without losing their texture. For tender-crisp broccoli, cut the florets into even pieces. This ensures they cook evenly. Toss them with olive oil, salt, and pepper before baking. Bake until they are bright green and just tender. Broiling them at the end gives a nice finish. Want to jazz up your dish? Add spices like paprika or garlic powder for depth. Try fresh herbs like thyme or basil for a twist. You could also mix in some lime juice for a zesty kick. To adjust sweetness, add more honey for a sweeter taste. If you prefer less sweetness, use less honey or add vinegar for balance. For spice, increase the crushed red pepper flakes or add sriracha to the marinade. Always taste as you go! {{image_2}} You can easily change some veggies in this dish. Snap peas and carrots work well. They add crunch and color. You can also use bell peppers of any color for a fun twist. If you need a gluten-free option, use tamari instead of soy sauce. It has a similar taste but is safe for those avoiding gluten. Coconut aminos can be another great swap. It’s sweeter and less salty. Want to cut carbs? You can swap the shrimp for chicken or tofu. These options fit well into low-carb or ketogenic diets. Just be sure to adjust cooking times for chicken. Tofu cooks faster than shrimp. For a vegan version, replace shrimp with chickpeas or mushrooms. Both soak up the honey garlic flavor well. Use maple syrup instead of honey for sweetness. This keeps it plant-based and delicious. To store leftovers, let the dish cool first. Place the shrimp and broccoli in an airtight container. You can keep it in the fridge for up to three days. Use glass or plastic containers that seal well. This keeps the flavors fresh and prevents spills. To reheat, the best method is using the oven. Preheat the oven to 350°F (175°C). Place the leftovers on a baking sheet. Heat for about 10-15 minutes until warm. This helps keep the shrimp juicy and broccoli crisp. You can also transform leftovers into a new meal. Try adding the shrimp and broccoli to a salad or mix them into fried rice. Both options give you a fun twist on the original dish! How long should I marinate shrimp? You should marinate the shrimp for at least 10 minutes. This time lets the shrimp soak up the flavors. If you have more time, you can marinate them for up to 30 minutes. Just don’t go too long, or the shrimp might become too soft. Can I use frozen shrimp instead of fresh? Yes, you can use frozen shrimp. Just make sure to thaw them first. Run them under cold water for about 10 minutes. Pat them dry before marinating. This helps the marinade stick better. What sides pair well with Honey Garlic Shrimp & Broccoli? This dish goes well with rice or quinoa. You can also serve it with a fresh salad. For a hearty meal, add some bread or noodles. The flavors mix well and make a complete meal. What's the best way to adjust this recipe for larger servings? To adjust for larger servings, simply double the ingredients. Use two sheet pans if needed. Make sure the shrimp and veggies are in a single layer for even cooking. Keep an eye on the cooking time, as it may vary. How can I make this a low-sodium dish? To make this dish low-sodium, use low-sodium soy sauce or tamari. You can also cut the amount of soy sauce in half. Add more honey or ginger to boost the flavor without the salt. This blog post covered all key steps to make a delicious Honey Garlic Shrimp and Broccoli. You learned about the main ingredients, preparation process, and cooking methods. We also shared helpful tips for perfect texture and flavor. Plus, you discovered variations and storage information for leftovers. Cooking should be fun and easy. With these tips, you can create a dish your family will love. Enjoy experimenting and make it your own!

Honey Garlic Shrimp & Broccoli Sheet Pan

Indulge in the delicious flavors of sticky honey garlic shrimp and broccoli delight! This easy, 30-minute recipe combines succulent shrimp, vibrant broccoli, and a sweet-savory glaze that will tantalize your taste buds. Perfect for a weeknight dinner or impressing guests, this dish is both healthy and satisfying. Don't miss out on creating this flavor-packed meal—click through to explore the full recipe and make your kitchen a culinary paradise!
Print Recipe Pin Recipe

Ingredients
  

1 lb large shrimp, peeled and deveined

2 cups broccoli florets

1 red bell pepper, sliced

4 cloves garlic, minced

¼ cup honey

3 tablespoons soy sauce (or tamari for gluten-free)

2 tablespoons olive oil

1 tablespoon sesame oil

1 teaspoon grated fresh ginger

½ teaspoon crushed red pepper flakes (optional)

Salt and pepper to taste

Sesame seeds for garnish

Fresh parsley or cilantro for garnish

Instructions
 

Preheat the Oven: Preheat your oven to 400°F (200°C).

    Prepare the Marinade: In a mixing bowl, whisk together the minced garlic, honey, soy sauce, olive oil, sesame oil, grated ginger, and crushed red pepper flakes if using. Reserve about 2 tablespoons of the marinade in a separate bowl to use as a finishing glaze.

      Marinate the Shrimp: Add the shrimp to the bowl with the marinade and toss to coat evenly. Allow it to marinate for at least 10 minutes to soak in the flavors.

        Prepare the Vegetables: On a sheet pan, arrange the broccoli florets and sliced red bell pepper. Drizzle with olive oil, season with salt and pepper, and toss to coat.

          Arrange on Sheet Pan: Spread the marinated shrimp over the vegetables on the sheet pan in a single layer for even cooking.

            Bake: Place the sheet pan in the preheated oven and bake for 12-15 minutes or until the shrimp are pink and cooked through, and the broccoli is tender-crisp.

              Glaze and Broil: Drizzle the reserved marinade over the shrimp and vegetables and switch the oven to broil. Broil for an additional 2-3 minutes to caramelize the glaze for extra flavor.

                Serve: Remove from the oven and let cool slightly. Garnish with sesame seeds and chopped parsley or cilantro before serving.

                  Prep Time: 15 minutes | Total Time: 30 minutes | Servings: 4

                    Related Recipes

                    • - 1 lb boneless chicken thighs, cut into bite-sized pieces - 1/2 cup cornstarch - 1/2 cup all-purpose flour - 2 large eggs, beaten - 1/2 cup vegetable oil (for frying) The chicken thighs bring a juicy and rich flavor. I prefer thighs over breasts for this recipe. They stay tender and absorb the sauce beautifully. The cornstarch and flour coating gives the chicken a crispy crunch. - 2 tablespoons soy sauce - 2 tablespoons rice vinegar - 1 tablespoon hoisin sauce - 2 tablespoons sugar - 1 tablespoon sesame oil - 3 cloves garlic, minced - 1 inch piece ginger, grated - 2-3 dried red chilies (adjust for heat preference) The sauce makes this dish sing! Soy sauce gives it saltiness. Rice vinegar adds a nice tang. Hoisin sauce brings sweetness and depth. Garlic and ginger add warmth and richness. The dried red chilies allow you to control the heat, making it just right for you. - 3 green onions, sliced (for garnish) - Optional toppings like sesame seeds Garnishes are key to a great presentation. Green onions add a fresh crunch on top. Sesame seeds are another great option for a bit of texture. They also look lovely on the plate. To start, combine cornstarch and flour in a bowl. This mix gives the chicken a crunchy crust. Take your chicken pieces, dip them in the beaten eggs, and then coat them well in the flour mix. Make sure each piece is covered. This coating is key for crispiness. If you skip this step, the chicken may turn out soggy. Next, heat vegetable oil in a skillet over medium-high heat. The oil needs to be hot enough for frying. If it’s too cool, the chicken will absorb too much oil. Once hot, add the chicken in batches. Fry each batch for about 5 to 7 minutes. Look for a golden brown color on the outside. Remove the chicken and place it on a paper towel to drain excess oil. Now, let’s prepare the sauce. In a small bowl, whisk together soy sauce, rice vinegar, hoisin sauce, sugar, sesame oil, garlic, and ginger. Mix until smooth. In the same skillet, discard most of the oil, leaving just about a tablespoon. Add dried red chilies and sauté for 30 seconds to unlock their flavor. Pour in your sauce mix and bring it to a gentle simmer. Finally, add the fried chicken back into the skillet. Toss everything together to coat the chicken evenly. Let it simmer for another 2 to 3 minutes. This step allows the sauce to thicken and cling to the chicken nicely. To get that perfect crunch, double-coat your chicken. First, dip it in beaten egg. Then, roll it in a mix of cornstarch and flour. The two layers help create a crispy shell. For frying, heat your oil to about 350°F. This temperature cooks the chicken well and keeps it golden and crunchy. Fry in batches to avoid crowding. This keeps the oil hot and helps the chicken fry evenly. To make your dish pop, adjust the heat using red chilies. Start with two dried chilies and taste as you go. You can always add more if you like it spicier. Adding extra garlic and ginger boosts the flavor too. Try using four cloves of garlic instead of three. Grated ginger adds warmth and depth. Both ingredients bring a fresh zing that enhances your dish. Serving General Tso’s Chicken is all about the visuals. Plate it over a mound of fluffy steamed rice. Drizzle some extra sauce on top for added flavor. Garnish with sliced green onions to add a fresh, vibrant touch. You can also sprinkle sesame seeds for extra crunch. The colors and textures make your dish look just as good as it tastes! {{image_2}} You can make this dish lighter by using chicken breast. Chicken breast has less fat than thighs. It still tastes great when cooked right. Another healthy swap is baking instead of frying. Preheat your oven to 400°F. Coat the chicken like usual, then bake on a lined sheet. Bake for about 20 minutes, or until crispy. Want to add color and nutrition? Try adding vegetables! Bell peppers and broccoli work well. They add crunch and flavor. Toss them in when you cook the sauce for a few minutes. You can also play with the sauce. Swap hoisin sauce for teriyaki or sweet chili sauce. Each sauce brings a unique twist to the dish. For gluten-free options, use gluten-free soy sauce. This keeps the flavor but makes it safe for gluten-sensitive folks. If you want a vegetarian or vegan version, try using tofu or tempeh. Cut it into cubes, coat it, and follow the same frying steps. Use a vegan sauce by swapping regular soy sauce for a plant-based version. Store leftovers in an airtight container. This keeps them fresh and tasty. Make sure the chicken cools before sealing. When reheating, use a skillet over medium heat. This helps restore the crispiness. You can also microwave, but it may make the chicken soggy. For best results, add a splash of water to steam it slightly. To freeze General Tso’s Chicken, let it cool completely first. Place the chicken in a freezer-safe bag. Remove as much air as possible to prevent freezer burn. It’s best to freeze it without sauce. When ready to eat, thaw it overnight in the fridge. Reheat in a skillet for the best texture. You can also microwave it on low power. In the fridge, General Tso’s Chicken lasts about 3 to 4 days. Always check for signs of spoilage. Look for a strange smell or color changes. If the chicken feels slimy, it’s best to discard it. Keeping track of dates helps you enjoy your meal safely. This General Tso’s Chicken stands out for a few key reasons. First, I use fresh chicken thighs, which give a juicier bite. Takeout often uses lower-quality meats that can be dry. The coating, made of cornstarch and flour, adds a great crunch that takeout lacks. I fry the chicken until it’s golden brown, ensuring crispiness that is hard to beat. The sauce blends soy sauce, rice vinegar, hoisin sauce, and fresh garlic and ginger. This mix adds layers of flavor that you simply won’t find in many takeout versions. Plus, I control the heat with dried red chilies, so you can adjust it to your taste. Finally, the use of sesame oil brings a nutty depth, making each bite more delightful. Absolutely! Meal prepping this dish is a great idea. You can cut the chicken and coat it in the flour mixture a day ahead. Store it in the fridge, and it will be ready to fry when you need it. You can also make the sauce in advance. Just mix all the sauce ingredients, and keep it in a jar in the fridge. When it’s time to eat, fry the chicken, heat the sauce, and combine them. This way, you have a quick meal ready to go. If you prefer less heat, you can easily adjust the spice level. Start by using fewer dried red chilies. Just one or two can give nice flavor without too much heat. Another option is to remove the seeds from the chilies. The seeds hold most of the spice, so skipping them can really tone it down. You can also add a touch more sugar to balance the heat. Lastly, serve it with rice, which helps to cool down the dish. Enjoy your meal at your preferred spice level! You now have a complete guide to making General Tso’s Chicken. From selecting the best ingredients to achieving perfect crispiness, each step adds to its flavor. Don't forget to experiment with variations to suit your taste. Proper storage ensures your leftovers last longer and taste great. With these tips, you can make a delicious dish that beats takeout. Enjoy your cooking adventure and savor every bite of your homemade meal!
                      General Tso’s Chicken Better Than Takeout Delight
                    • - 12 oz cheese tortellini (fresh or frozen) - 1 cup sun-dried tomatoes (packed in oil, drained and roughly chopped) - 3 cups vegetable broth - 1 cup heavy cream - 1 cup fresh spinach leaves For this dish, cheese tortellini serves as the base. You can use fresh or frozen tortellini. Sun-dried tomatoes add a rich, tangy flavor. They come packed in oil, which helps to enhance the taste of the sauce. Vegetable broth gives the meal depth and warmth. Heavy cream makes the dish creamy and rich. Fresh spinach adds color and nutrients, making it a balanced meal. - 2 cloves garlic, minced - 1 teaspoon Italian seasoning - Salt and pepper to taste - ¼ cup grated Parmesan cheese (plus extra for serving) - 2 tablespoons olive oil Garlic brings a savory aroma to the dish. Italian seasoning adds classic flavor, enhancing the overall taste. Salt and pepper balance the flavors. Grated Parmesan cheese gives a salty finish. Olive oil not only cooks the garlic but also adds richness. These simple seasonings make the tortellini shine. Use fresh, high-quality ingredients for the best results. First, take a large pot and heat 2 tablespoons of olive oil over medium heat. Add 2 cloves of minced garlic to the pot. Sauté the garlic for 1-2 minutes. You want it fragrant, not burnt. Next, add 1 cup of sun-dried tomatoes that are packed in oil. Cook them for about 2 minutes, stirring often. This step builds a great flavor base for the dish. After the sun-dried tomatoes are ready, pour in 3 cups of vegetable broth. Bring this mixture to a simmer. Once it starts bubbling, add 12 oz of cheese tortellini. Sprinkle in 1 teaspoon of Italian seasoning. Stir gently to mix everything well. Cook for 5-7 minutes or until the tortellini is al dente. Keep stirring occasionally to prevent sticking. Now, lower the heat and slowly stir in 1 cup of heavy cream. This makes the dish rich and creamy. Add 1 cup of fresh spinach leaves next. Cook for another 2-3 minutes until the spinach wilts. Lastly, stir in ¼ cup of grated Parmesan cheese. Season with salt and pepper to taste. Let it sit for a couple of minutes to thicken slightly before serving. How to achieve al dente tortellini To cook tortellini perfectly, follow the package instructions closely. Usually, it takes about 5-7 minutes. Taste a piece to check for doneness. It should be firm yet tender. If you cook it too long, it becomes mushy. Stir gently while it cooks to keep it from sticking. Timing for adding spinach Add the spinach at the end of cooking. After stirring in the cream, let it cook for 2-3 minutes. This allows the spinach to wilt nicely while keeping its bright color. If you add it too early, it can lose flavor and texture. Suggestions for garlic preparation Use fresh garlic for the best taste. Mince it finely to release its oils. Sauté it in olive oil until fragrant but not burnt. This step builds a strong flavor base for your dish. You can also try roasting the garlic for a sweeter taste. Alternative spices to elevate the dish Try adding a pinch of red pepper flakes for heat. Fresh herbs like basil or parsley can add freshness. You can also experiment with a dash of lemon juice for brightness. These small changes can make your meal more exciting. {{image_2}} You can switch up the veggies in this dish. Try using kale or mushrooms instead of spinach. Both add a nice twist to the flavor. Kale gives a hearty bite, while mushrooms add umami. If you're in the mood for a different pasta, you can choose any shape you like. Bowtie or penne work well too. Just make sure to adjust the cooking time based on the pasta you select. To make this meal gluten-free, use gluten-free tortellini. Many brands offer tasty options. You can also swap the heavy cream for coconut milk or a nut-based cream for a dairy-free version. If you want a vegetarian dish, stick with the cheese tortellini. For a vegan option, use vegan tortellini and skip the cheese on top. You can still enjoy all the rich flavors! To keep your leftover Sun-Dried Tomato Tortellini tasty, store it in the fridge. Use an airtight container to avoid drying out. This meal stays fresh for about 3 to 4 days in the fridge. If you want to save it longer, freeze it. Place it in a freezer-safe container. It can last for up to 3 months in the freezer. When it's time to eat your leftovers, reheat them gently. The best way is to use a pot on low heat. Stir often to keep the texture nice. You can also use the microwave. Heat it in short bursts, stirring in between. This helps avoid overcooking. For a fun twist, serve it with a fresh salad or garlic bread. This adds crunch and flavor to your meal! If you don’t have sun-dried tomatoes, try roasted red peppers. They add a sweet and smoky flavor. You can also use fresh tomatoes. Just chop them finely and cook them longer to get a similar taste. For a tangy twist, consider using olives. They bring a nice salty punch to your dish. Yes, you can prepare parts of this meal ahead. Cook the tortellini and store it in the fridge. Keep the sun-dried tomato mix separate until you are ready to serve. This will keep the flavors fresh. When you want to eat, combine everything in a pot. Heat it gently and stir in the cream and spinach. To change the serving size, you can easily scale the ingredients. For more servings, just double everything. If you need fewer, halve the amounts. Use a measuring cup for accuracy. This way, you keep the flavors balanced. Always keep an eye on the cooking time, as it may change slightly based on the amount you make. This recipe highlights cheese tortellini's rich flavors with fresh spinach and sun-dried tomatoes. We explored easy steps to prepare the dish, from sautéing garlic to adding cream and seasoning. I shared tips for perfect cooking and variations that suit different diets. You can enjoy leftovers and keep them fresh. Remember, cooking is all about experimenting and adapting. With this dish, have fun and make it your own. Each bite can bring comfort and joy to your meals. Enjoy your cooking journey and share your creations!
                      Sun-Dried Tomato Tortellini One Pot Easy Dinner Meal
                    • For this hearty chicken noodle soup, you'll need: - 1 pound boneless, skinless chicken breasts - 4 cups low-sodium chicken broth - 2 cups water - 2 cups carrots, sliced - 2 cups celery, diced - 1 medium onion, chopped - 3 cloves garlic, minced - 1 teaspoon dried thyme - 1 teaspoon dried parsley - 1 teaspoon black pepper - 1 bay leaf - 8 ounces egg noodles - 2 tablespoons olive oil - Salt to taste These ingredients work together to create a warm and filling dish. You can add your own twist to the soup with these options: - Fresh parsley for garnish - Lemon juice for a bright flavor - A dash of hot sauce for heat - Kale or spinach for extra greens - Different herbs like rosemary or oregano Feel free to mix and match these ingredients to suit your taste. If you're missing an item, here are some easy swaps: - Chicken breasts can be replaced with thighs for more flavor. - Use vegetable broth instead of chicken broth for a vegetarian option. - If you have frozen carrots or celery, they work well too. - Wide noodles or even rice can replace egg noodles. - Olive oil can be swapped with butter for a richer taste. These substitutions can help you make the soup even if you run low on ingredients. Enjoy crafting your perfect bowl! First, get your slow cooker ready. Add 2 tablespoons of olive oil to the pot. Next, chop 1 medium onion and mince 3 cloves of garlic. Toss them in the slow cooker. Now, slice 2 cups of carrots and dice 2 cups of celery. Add these to the pot, too. Stir the veggies well to mix them. This step builds a great base for your soup. Now, we need the star of the show: chicken. Take 1 pound of boneless, skinless chicken breasts. Place them on top of the veggies. Then, pour in 4 cups of low-sodium chicken broth. Add 2 cups of water next, covering everything completely. This makes sure the chicken stays moist and tender. Now, it's time to spice things up. Add 1 teaspoon each of dried thyme, dried parsley, and black pepper. Toss in 1 bay leaf for extra flavor. Stir gently to mix in the spices. Cover your slow cooker. You can cook on low for 6 to 8 hours or on high for 3 to 4 hours. I recommend low heat for deeper flavors. You’ll know it’s done when the chicken is tender. After cooking, take out the chicken. Shred it with two forks and return it to the pot. Next, add 8 ounces of egg noodles to the soup. Cover the slow cooker again. Cook on high for an additional 20 to 30 minutes until the noodles are al dente. Taste your soup and adjust the salt as needed. Don’t forget to remove the bay leaf! To boost the flavor of your hearty chicken noodle soup, use low-sodium broth. This gives you control over the salt level. Adding fresh herbs like thyme and parsley really brightens the dish. Sautéing the onion and garlic in olive oil before adding them to the slow cooker adds depth. The bay leaf brings a lovely aroma. Let the soup cook low and slow for rich, deep flavors. Shredding chicken can be simple. After cooking, let the chicken rest for a few minutes. This keeps it juicy. Use two forks to pull apart the chicken. You can also use your hands for a more personal touch. Shred it into bite-sized pieces so it mixes well with the soup. This step makes the soup feel hearty and filling. To get the best texture from your noodles, add them at the right time. Wait until the chicken is shredded and returned to the pot. Cook the noodles on high for 20 to 30 minutes. This timing keeps them al dente, not mushy. If you want extra bite, try adding a few more noodles. They soak up flavor and add heartiness to each bowl. {{image_2}} To make a creamy version, add one cup of heavy cream at the end. Stir it in after you add the noodles. This gives the soup a rich and smooth taste. You can also use half-and-half for a lighter option. The creaminess pairs well with the chicken and veggies. It turns the soup into a cozy treat. You can add many vegetables for more nutrition. Try adding peas, corn, or spinach. These veggies cook quickly and add color. Chop them small so they blend well. You can toss them in during the last 30 minutes of cooking. They will keep their crunch and flavor. This is a great way to sneak in healthy greens. For a gluten-free version, swap egg noodles for rice or gluten-free pasta. Brown rice takes longer to cook, so add it early. If using gluten-free pasta, check the package for cooking time. You might need to add them later to avoid mushiness. Always check labels to ensure all ingredients are gluten-free. This way, everyone can enjoy the soup without worries. After you enjoy your hearty chicken noodle soup, let it cool first. Use an airtight container for storage. This helps keep the soup fresh. Store it in the fridge for up to three days. If you want to save it longer, consider freezing it. To reheat, pour the soup into a pot. Heat it over medium heat. Stir often until it warms through. You can also use a microwave. Pour the soup into a safe bowl, cover it, and heat for about two minutes. Stir and check if it’s hot enough. To freeze, first cool the soup completely. Then, pour it into freezer-safe bags or containers. Leave some space at the top, as the soup may expand. Label each bag with the date. You can freeze it for up to three months. When ready to eat, thaw it overnight in the fridge before reheating. Yes, you can use frozen chicken. Just add it directly to the slow cooker. You may need to increase the cooking time by one hour. Always make sure the chicken reaches 165°F to ensure it is safe to eat. Using frozen chicken works well because it simmers in the broth, keeping it moist and tender. To thicken your soup, you have a few options. One way is to add a cornstarch slurry. Mix one tablespoon of cornstarch with one tablespoon of cold water. Stir this mix into the soup and let it cook for a few more minutes. You can also add more egg noodles or mash some of the vegetables in the soup. This adds body and richness to the dish without changing the flavor too much. Pairing side dishes with chicken noodle soup is easy! Here are some great options: - Crusty bread or rolls for dipping - A fresh green salad for a light touch - Grilled cheese sandwiches for a classic combo - Crackers for a crunchy texture These sides enhance the soup and make the meal feel complete. Enjoy experimenting with these combinations! This blog post covered all you need to know for making chicken noodle soup. We looked at ingredients, how to cook, and added helpful tips. I shared ways to personalize your soup and even offered storage advice. Now you have the skills to create a warm bowl of goodness any time! Enjoy the process and share it with others. Soup brings comfort and joy, so let's get cooking!
                      Hearty Chicken Noodle Soup Slow Cooker Delight
                    • - 12 ounces pasta (penne or fusilli) - 2 cups fresh spinach, roughly chopped - 1 cup ricotta cheese - 1 cup vegetable broth - 1 cup milk (dairy or non-dairy) - 1 cup grated Parmesan cheese - 2 cloves garlic, minced - 1 tablespoon olive oil - 1 teaspoon dried oregano - 1/2 teaspoon red pepper flakes (optional) - Salt and pepper to taste The main ingredients for this dish are simple yet full of flavor. I love using penne or fusilli pasta because they hold sauce well. Fresh spinach adds a bright green color and a healthy touch. Ricotta cheese gives the dish a creamy texture and rich taste. Next, we have the additional ingredients. Vegetable broth adds depth. Milk adds creaminess, whether you choose dairy or a non-dairy option. Don't forget the grated Parmesan cheese. It melts beautifully and adds a savory note. Seasonings bring everything together. Minced garlic offers a great aroma. Olive oil helps sauté the garlic, building flavor right from the start. Dried oregano adds a warm, earthy taste. Red pepper flakes bring a hint of heat, but it’s optional. Finish with salt and pepper to make the flavors pop. With these ingredients, you are on your way to a delicious creamy spinach ricotta pasta dish, all made in one pot! 1. First, heat 1 tablespoon of olive oil in a large pot over medium heat. 2. Add 2 cloves of minced garlic and sauté for 1 minute. You want it fragrant but not browned. 3. Next, add 12 ounces of pasta, your choice of penne or fusilli, to the pot. 4. Pour in 1 cup of vegetable broth and 1 cup of milk. Stir well to mix. 1. Bring the mixture to a gentle boil. Once boiling, reduce the heat and let it simmer. 2. Cook the pasta according to package instructions until it is al dente. This usually takes about 8 to 10 minutes. Stir occasionally to prevent sticking. 3. When the pasta is nearly done, stir in 2 cups of roughly chopped spinach, 1 cup of ricotta cheese, and 1 teaspoon of dried oregano. 4. Mix well so all the ingredients combine. Cook for an extra 2 to 3 minutes until the spinach wilts and the ricotta warms up. 1. Now, stir in 1 cup of grated Parmesan cheese. If you like heat, add 1/2 teaspoon of red pepper flakes. 2. Season with salt and pepper to taste. Mix until everything is combined. 3. Remove the pot from heat and let it sit for a couple of minutes. This helps thicken the dish before you serve it. To prevent pasta from sticking, stir it often while it cooks. Make sure to use enough water in the pot. A little olive oil can also help. To achieve the right creaminess, add the ricotta cheese after the pasta is almost done. If the pasta seems thick, pour in a splash of milk. This will make it smooth and rich. For presentation, serve the pasta in deep bowls. This adds a nice touch. Top with extra grated Parmesan and a sprinkle of black pepper. For color, add a few fresh spinach leaves on top. You can add herbs and spices to boost flavor. Consider fresh basil or parsley for a fresh kick. A pinch of nutmeg also pairs well with ricotta. Adjust the richness by using different cheeses. Try mixing in mozzarella for a stretchier texture or feta for a tangy twist. This can change the dish's taste and texture nicely. {{image_2}} You can change the pasta shape to fit your taste. Penne and fusilli work well, but you can try shells, rotini, or even gluten-free pasta. Each shape holds the sauce differently, giving you a new experience. If you want a lighter option, swap ricotta for cottage cheese or cream cheese. Both will give your dish a creamy texture. Cottage cheese has a milder flavor. Cream cheese adds a rich taste. Try them and see what you like best! Want to make your meal heartier? Add some protein! Cooked chicken or shrimp blends well. Just toss them in with the pasta as it cooks. If you prefer plant-based options, try adding beans like chickpeas or white beans. They add fiber and taste great with spinach. You can make this dish even more exciting with extra ingredients. Sun-dried tomatoes add a sweet and tangy kick. Artichokes bring a unique flavor that pairs well with the cheese. Mushrooms add a nice earthy taste. Don’t forget about spice! If you like heat, add red pepper flakes or a dash of hot sauce. You can adjust the spice to fit your taste buds, making each meal special. To keep your creamy spinach ricotta pasta fresh, follow these tips: - Let the pasta cool down to room temperature. - Store leftovers in an airtight container. - Refrigerate within two hours of cooking. - Consume within 3-4 days for best quality. When reheating, you want to avoid dry pasta. Here’s how: - Use a microwave-safe dish with a lid. Add a splash of milk. - Heat in short bursts, stirring often. This keeps it moist. - Alternatively, reheat on the stove over low heat. Stir in a little milk to restore creaminess. Freezing is a great option for meal prep. Here’s what to do: - Let the pasta cool completely before freezing. - Portion it into freezer-safe containers. Leave space for expansion. - It can last for up to 3 months in the freezer. - To thaw, move it to the fridge overnight. Reheat as mentioned above. To make this dish vegan, you can swap the cheese and milk. Use cashew cheese or almond cream instead of ricotta. For milk, try almond, soy, or oat milk. These options still keep it creamy and flavorful. You can also add nutritional yeast for a cheesy taste. It gives a nice flavor and adds vitamins. Make sure to check the labels for any hidden animal products. Yes, frozen spinach works well! It is easy to use and saves time. Just thaw and squeeze out excess water. This helps avoid a watery pasta dish. To incorporate frozen spinach, add it to the pot along with the pasta. Use it in the last few minutes of cooking. This way, it heats through without overcooking. This pasta pairs nicely with a side salad or garlic bread. A fresh green salad adds a nice crunch and balances the creaminess. You can also serve it with grilled vegetables for added flavor. Try zucchini, bell peppers, or asparagus. These options add color and taste to your meal. Enjoy your pasta with a glass of white wine for a special touch! In this post, I shared a delicious recipe for creamy spinach ricotta pasta. We explored key ingredients, cooking steps, and tips to enhance flavors. Remember, you can personalize this dish with different proteins or cheeses. Whether you enjoy it fresh or save leftovers, this meal is sure to please. Use this guide to create a quick, tasty dinner that everyone will love. Happy cooking!
                      Creamy Spinach Ricotta Pasta One Pot Delight

                    WANT TO SAVE THIS RECIPE?

                    Leave a Reply Cancel reply

                    Your email address will not be published. Required fields are marked *

                    Recipe Rating


                    Hi I’m Taling

                    I love sharing perfected dishes from my kitchen. I’m sure they’ll earn a spot in your heart. Let’s savor this journey together!.

                    More about me

                    Recent Desserts

                    • - 2 cups all-purpose flour - 1 teaspoon baking powder - ½ teaspoon baking soda - ¼ teaspoon salt - 1 teaspoon ground cinnamon For the base, we start with the dry ingredients. All-purpose flour gives the bars their structure. Baking powder and baking soda help them rise. Salt enhances the flavors and balances sweetness. Cinnamon adds warmth and spice, making each bite comforting and delicious. - ½ cup unsalted butter, softened - 1 cup brown sugar, packed - ½ cup granulated sugar - 2 large eggs - 2 teaspoons vanilla extract Next, we move to the wet ingredients. Softened butter creates a rich base. Brown sugar adds moisture and deep flavor, while granulated sugar sweetens without overpowering. Eggs bind everything together, and vanilla adds a lovely aroma. These ingredients blend to create a smooth batter. - 1 ½ cups peeled and diced apples (about 2 medium apples) - ½ cup chopped walnuts (optional) - 1 cup powdered sugar (for glaze) - 2 tablespoons maple syrup Finally, we have the stars of our recipe. Diced apples bring freshness and texture. Walnuts add a crunchy touch, but they are optional. For the glaze, powdered sugar mixes with maple syrup to create a sweet topping. This glaze ties everything together, making the bars shine. First, preheat your oven to 350°F (175°C). This gets your oven ready for baking. Next, grease a 9x13-inch baking pan. Use butter or cooking spray. Then, line the pan with parchment paper. Leave some paper hanging over the edges. This makes it easy to lift out the bars later. In a medium bowl, whisk together the dry ingredients. Combine 2 cups of all-purpose flour, 1 teaspoon of baking powder, ½ teaspoon of baking soda, ¼ teaspoon of salt, and 1 teaspoon of ground cinnamon. Make sure the mix is even. This blend gives your bars great flavor and helps them rise. In a large bowl, cream ½ cup of softened unsalted butter with 1 cup of packed brown sugar and ½ cup of granulated sugar. Mix until light and fluffy. This takes about 3 to 4 minutes. The air you whip in gives the bars a nice texture. Now, add 2 large eggs, one at a time. Mix well after each egg. Then, stir in 2 teaspoons of vanilla extract. After that, gradually add your dry mix to the wet ingredients. Blend until just combined. Do not over-mix; this keeps your bars tender. Finally, fold in 1 ½ cups of peeled and diced apples and ½ cup of chopped walnuts, if you like. Pour the batter into your prepared baking pan. Spread it out evenly. Bake for 25 to 30 minutes. To check if they are done, insert a toothpick into the center. If it comes out clean, the bars are ready. While the bars bake, whisk together 1 cup of powdered sugar and 2 tablespoons of maple syrup in a small bowl. Mix until smooth. This glaze adds a sweet touch to your apple bars. When the bars cool, drizzle the glaze over them for that perfect finish. To get the best texture, avoid over-mixing the batter. When you mix too much, the bars can turn out tough. Mix until just combined. This keeps the bars soft and chewy. The creaming step is key. Cream the butter and sugars together until light and fluffy. This step adds air and helps the bars rise nicely. For a lovely presentation, arrange the bars on a platter. Sprinkle some cinnamon or chopped walnuts on top. You can also add a small bowl of extra maple syrup for drizzling. Pair these bars with a warm cup of tea or coffee. A scoop of vanilla ice cream makes a great side too. You can add fun flavors to the batter. Try mixing in spices like nutmeg or ginger for a warm taste. Walnuts add a nice crunch, but you can also use pecans or almonds. If you want more fruit, toss in some raisins or dried cranberries. These little additions make the bars even more delicious. {{image_2}} The best apples for baking include Granny Smith, Honeycrisp, and Fuji. Granny Smith apples give a nice tart flavor. Honeycrisp apples are sweet and juicy. Fuji apples provide a great crunch. Using a mix of these apples can enhance the taste. Always choose firm apples. Soft apples can make your bars mushy. If you want to switch up the glaze, consider using cream cheese frosting. Mix cream cheese, butter, and powdered sugar for a rich taste. You can also use a simple lemon glaze. Just mix lemon juice and powdered sugar. This gives a bright flavor. Try a caramel sauce if you want something sweet and sticky. Each glaze adds its own twist to the bars. Walnuts add a nice crunch, but you can use other nuts too. Pecans, almonds, or hazelnuts work well. If you love chocolate, mix in chocolate chips. Dried fruits like raisins or cranberries also add great flavor. These options let you create your own unique apple bars. Feel free to experiment and find your favorite mix. Store your maple glazed apple bars at room temperature for up to three days. Keep them in an airtight container to keep them moist. If your kitchen is warm, refrigerate them to prevent spoilage. But, note that refrigeration can make them a bit dense. To freeze the bars, let them cool completely first. Wrap each bar in plastic wrap. Then, place them in a freezer bag or container. They can stay fresh in the freezer for up to three months. When you want to eat one, thaw it overnight in the fridge. Reheat it in the microwave for about 20 seconds for a warm treat. These delicious bars stay fresh for about three days at room temperature. In the fridge, they last about a week. If you freeze them, they can hold their flavor and texture for three months. Enjoy them while they are fresh for the best taste! Yes, you can use other sweeteners. Brown sugar gives a rich flavor. You might try coconut sugar for a similar taste. Honey or maple syrup can work too, but adjust the liquid in the recipe. Just keep in mind that each sweetener changes the final taste and texture. The best apples are firm and sweet. I recommend Honeycrisp, Granny Smith, or Fuji apples. Honeycrisp adds sweetness and crunch. Granny Smith gives a nice tartness. Fuji is juicy and sweet. Mixing two types can add depth to the flavor. Yes, you can! Use a gluten-free all-purpose flour blend. Look for one with xanthan gum for better texture. Almond flour or oat flour can also work. Just remember that baking time might change slightly. Check the bars after 25 minutes. Insert a toothpick into the center. If it comes out clean, they are done. The edges should look golden brown. If it’s still wet, bake a few more minutes, then check again. In this post, we covered the key ingredients and steps to make delicious apple bars. We discussed dry and wet ingredients, baking tips, and ways to enhance flavor. You learned about different apple varieties and glaze options. Enjoy experimenting with the recipe and making it your own. Baking is fun and rewarding. Share your tasty results with friends and family!
                      Maple Glazed Apple Bars Irresistible Flavor Delight
                    • To make Cottage Cheese Chocolate Mousse, you need simple ingredients that pack a punch. Here’s what you’ll need: - 1 cup cottage cheese (low-fat or fat-free) - ¼ cup unsweetened cocoa powder - ¼ cup honey or maple syrup - ¼ cup Greek yogurt - 1 teaspoon vanilla extract - ¼ cup dark chocolate chips (dairy-free if needed) - Pinch of salt - Fresh berries for garnish (optional) Each ingredient plays a role in making this mousse rich and flavorful. The cottage cheese adds protein and creaminess, while cocoa powder brings that deep chocolate flavor. Honey or maple syrup sweetens the mix, balancing the cocoa's bitterness. Greek yogurt contributes a smooth texture, and vanilla extract enhances the overall taste. Dark chocolate chips add a delightful melt-in-your-mouth experience. Finally, a pinch of salt rounds out the flavors. Fresh berries can add a pop of color and freshness when serving. Gather these ingredients, and you’re ready to whip up a high-protein dessert that satisfies your chocolate cravings! - Combining Ingredients in Blender Start by adding the cottage cheese, cocoa powder, honey (or maple syrup), Greek yogurt, vanilla extract, and a pinch of salt into your blender. Blend these ingredients until they are smooth and creamy. Make sure to scrape down the sides of the blender. This helps mix everything well. - Melting Dark Chocolate Chips Next, take your dark chocolate chips and place them in a microwave-safe bowl. Heat them in the microwave in 30-second bursts. Stir the chocolate in between. Keep going until it is fully melted and smooth. Let it cool for a moment before using it. - Folding Chocolate into Mousse Gently fold the melted chocolate into the cottage cheese mixture. Use a spatula to mix carefully. You want to keep it light and airy, so don’t stir too hard. Make sure the chocolate is mixed in well. - Spoon into Serving Glasses Once your mixture is ready, take it and spoon it into serving glasses or bowls. You can use any glass you like. Make sure to leave some space at the top for garnishing later. - Refrigeration Time Now, place the glasses in the fridge. Let the mousse chill for at least 30 minutes. This helps it set and become firmer. The longer it sits, the better the flavors meld together, so feel free to wait longer if you can! To get the best mousse, blending is key. Use a blender or food processor. This helps mix everything well. Start with the cottage cheese, cocoa, honey, Greek yogurt, and vanilla. Blend until smooth. Scrape down the sides to get all the lumps out. Next, melt the dark chocolate chips. Do this in the microwave at 30-second intervals. Stir in between each interval. This keeps the chocolate from burning. Once smooth, let it cool a bit before adding it to the mixture. For garnishing, fresh fruits work great. Berries like strawberries, raspberries, or blueberries add color and taste. They make your mousse look pretty and taste fresh. You can also add nuts or coconut flakes for crunch. Nuts like almonds or walnuts add a nice texture. Coconut flakes give a tropical flair. Just sprinkle them on top before serving. {{image_2}} You can swap honey or maple syrup for agave or stevia. These options lower the sugar. Agave has a mild taste and mixes well. Stevia is very sweet, so use less. Both sweeteners work great in this mousse. For a sugar-free option, try using erythritol. It adds sweetness without the calories. Make sure to adjust the amount based on your taste. Your mousse will still be rich and creamy! Want to make your mousse unique? Adding espresso powder gives it a coffee kick. Just a teaspoon can enhance the chocolate flavor. It’s perfect for coffee lovers. You can also infuse the mousse with mint or orange zest. Add a few drops of mint extract or the zest of an orange. Both choices add a fresh twist. They brighten up the rich chocolate flavor. Try these variations to find your favorite! To keep your mousse fresh, use an airtight container. Glass or plastic containers work well. Make sure the lid seals tightly. This helps prevent air from getting in. You want to keep the mousse creamy and smooth. Store it in the fridge for up to three days. If you don’t eat it all, it will still taste great! Can you freeze cottage cheese mousse? Yes, you can freeze it! However, the texture might change a bit. It may become a little grainy after thawing. If you want to freeze it, spoon it into small containers. Leave some space at the top because it expands. For thawing instructions, place the container in the fridge overnight. This helps it thaw slowly. If you're in a hurry, you can set it at room temperature for about 30 minutes. Stir before serving to help bring back the creaminess. Enjoy your mousse even days later! Yes, cottage cheese is very healthy. It is rich in protein, which helps build and repair muscles. One cup of low-fat cottage cheese has about 28 grams of protein. That’s more than many other dairy options. It also has calcium, which supports strong bones. You can use other cheeses, but the taste and texture will change. Cream cheese can give a rich flavor. Ricotta can also work, but it will be less smooth. Always choose cheeses that blend well to keep your mousse creamy. The mousse lasts about three to five days in the fridge. Store it in an airtight container to keep it fresh. If you want to enjoy it later, make sure to eat it within this time. In this blog post, I shared how to make a delicious cottage cheese mousse. We covered the ingredients, step-by-step instructions, and key tips for perfecting the recipe. Remember, blending well and melting chocolate smoothly are important. You can also vary the flavors with sweeteners or fruits. This mousse is not just tasty; it's also healthy. With the right storage, it lasts for days. Enjoy your treat and get creative with the toppings!
                      Cottage Cheese Chocolate Mousse High Protein Delight
                    • To make pumpkin chocolate chip blondies, you’ll need these key ingredients: - 1 cup pumpkin puree - ½ cup unsalted butter, melted - 1 cup brown sugar - ½ cup granulated sugar - 2 large eggs - 1 teaspoon vanilla extract - 2 cups all-purpose flour - 1 teaspoon baking powder - 1 teaspoon baking soda - 1 teaspoon ground cinnamon - ½ teaspoon nutmeg - ¼ teaspoon salt - 1 cup chocolate chips (semi-sweet or dark) - ½ cup chopped nuts (optional) You can make these blondies even better with a few add-ins. Consider using: - White chocolate chips for a creamy twist. - Dried cranberries for a tart flavor. - Shredded coconut for a chewy texture. - Pumpkin seeds for a crunchy bite. These add-ins can change the taste and look of your blondies. If you need to substitute some ingredients, here are a few options: - Instead of pumpkin puree, use mashed sweet potato. - Replace unsalted butter with coconut oil for a dairy-free option. - If you don’t have brown sugar, use an equal amount of granulated sugar. - For a gluten-free option, try almond flour or a gluten-free blend. These swaps can help you tailor the recipe to fit your needs while keeping it tasty. Start by preheating your oven to 350°F (175°C). This step is key for even baking. Next, grab an 8x8-inch baking pan. Grease it lightly to help the blondies release easily. Line the bottom and sides with parchment paper. Leave some paper hanging over the edges. This makes it easy to lift your blondies out later. In a large bowl, combine your melted butter, brown sugar, and granulated sugar. Whisk them together until smooth. Then, add the pumpkin puree, eggs, and vanilla extract. Mix well until everything is blended. In a separate bowl, whisk together the flour, baking powder, baking soda, ground cinnamon, nutmeg, and salt. This mix of dry ingredients helps the blondies rise. Gradually fold the dry mix into the pumpkin blend. Be gentle here! Overmixing can make the blondies tough. Finally, fold in the chocolate chips and any nuts if you want. Now, pour your batter into the greased and lined baking pan. Use a spatula to smooth the top. Place it in your preheated oven. Bake for 25-30 minutes. Check for doneness by inserting a toothpick in the center. It should come out clean or with a few moist crumbs. Once baked, let the blondies cool in the pan for about 10 minutes. Use the parchment paper to lift them out. Set them on a wire rack to cool completely. After that, cut them into squares and enjoy your tasty treat! To bake perfect pumpkin chocolate chip blondies, follow these tips. Use room temperature ingredients. This helps the batter mix well. Measure flour correctly. Too much flour can make blondies dry. Use a light hand when mixing. This keeps your blondies soft and chewy. Overmixing can make your blondies tough. Mix until the dry ingredients just blend in. You want to see some streaks of flour. Then, gently fold in the chocolate chips. This keeps the texture light and fluffy. Remember, less is more when it comes to mixing! To keep your blondies fresh, store them in an airtight container. They stay soft for up to five days. If you want to keep them longer, freeze them. Wrap each blondie in plastic wrap, then place them in a freezer bag. They can last up to three months in the freezer. Enjoy them straight from the freezer for a cold treat! {{image_2}} You can make these blondies your own by adding fun mix-ins. Try swapping in white chocolate chips for a sweet twist. You can also use butterscotch chips for a buttery flavor. Dried cranberries or raisins add a nice chewiness. If you want a crunch, add some chopped pecans or walnuts. These options keep the taste fresh and exciting. To make gluten-free blondies, swap the all-purpose flour for a gluten-free blend. Many brands work well and keep the texture nice. For a vegan version, replace the eggs with flax eggs. Mix one tablespoon of ground flaxseed with three tablespoons of water. Let it sit for a few minutes to thicken. You can also use coconut oil instead of butter for a dairy-free treat. These swaps make the recipe fit more diets. Seasonal spices can really enhance the flavor. In fall, add more cinnamon or some allspice. A pinch of cloves gives a warm touch. In winter, consider using peppermint extract for a festive flavor. For nuts, try adding pumpkin seeds for a seasonal crunch. You can even sprinkle some sea salt on top before baking for a sweet and salty mix. These variations keep your blondies unique and delicious! To keep your pumpkin chocolate chip blondies fresh, store them in an airtight container. This helps lock in moisture and flavor. Place parchment paper between layers to avoid sticking. Keep them at room temperature for up to three days. If you want to store them for longer, use the freezer. Freezing blondies is easy. First, let them cool completely. Cut them into squares and wrap each piece in plastic wrap. Then, place the wrapped squares in a freezer bag. Remove as much air as possible before sealing. These can last for up to three months in the freezer. When you want to enjoy them, thaw them in the fridge or at room temperature. These blondies stay tasty for about a week at room temperature. If you refrigerate them, they may last a bit longer, about ten days. However, expect some changes in texture. Freezing helps maintain their taste and softness over time. Enjoy these sweet treats whenever you crave something delicious! Yes, you can use fresh pumpkin. First, cook the pumpkin until soft. Then, blend it into a smooth puree. Make sure to drain any excess water. This will prevent your batter from becoming too wet. Fresh pumpkin adds a nice flavor. If you lack brown sugar, use granulated sugar. To mimic brown sugar, add a bit of molasses. For each cup of white sugar, add one tablespoon of molasses. This change will keep your blondies sweet and moist. You can also use coconut sugar as a substitute. To check if your blondies are ready, insert a toothpick into the center. If it comes out clean or with a few moist crumbs, they are done. The edges should look set and slightly golden. Don’t overbake them; they will continue to cook as they cool. This article covered everything you need to make tasty pumpkin chocolate chip blondies. We explored the key ingredients, helpful tips, and alternative options. You can mix in new flavors or substitute for health needs. Storing leftovers and understanding baking times are easy with the advice we shared. Trust these insights to bake with confidence. Enjoy your delicious blondies and have fun experimenting!
                      Pumpkin Chocolate Chip Blondies Tasty Fall Treat
                    • To make caramel apple monkey bread, you need a few key ingredients. Here’s the list: - 3 cans (16.5 oz each) refrigerated biscuit dough - 3 apples (peeled, cored, and diced) - 1 cup caramel sauce (store-bought or homemade) - ½ cup brown sugar - 1 teaspoon ground cinnamon - ½ cup butter (melted) - ½ cup chopped walnuts or pecans (optional) - Whipped cream (optional, for serving) Each ingredient plays a role in creating the rich, sweet flavor of this dish. The biscuit dough serves as a soft base. The apples add freshness and texture. Caramel sauce brings sweetness and gooeyness. Brown sugar and cinnamon create warmth and spice. Butter adds richness, and nuts give a nice crunch. If you want to switch things up, you can skip the nuts or use a different type of apple. Granny Smith apples work well for a tart flavor, while Honeycrisp apples add sweetness. Make sure to gather everything before you start cooking. This will help you stay organized and make the process smooth. Enjoy preparing this delightful treat! - Preheat your oven to 350°F (175°C) and grease a bundt pan well. - In a bowl, mix the brown sugar and cinnamon. Set it aside for later. - Open the biscuit dough and cut each biscuit into fourths. Roll each piece into a ball. - In another bowl, mix the diced apples with half of the caramel sauce. Stir well. - Layer half of the biscuit balls in the bundt pan. Then add half of the apple mixture. - Sprinkle any remaining cinnamon-sugar over the apples for extra flavor. - Add the rest of the biscuit balls on top of the apples. Then, layer the remaining apples. - Pour the melted butter evenly over the layers. Drizzle the rest of the caramel sauce on top. - If using nuts, sprinkle them over the top now. - Bake in your preheated oven for about 30 to 35 minutes. Look for a golden brown color. - Once done, take it out and let it cool for about 10 minutes. Then invert it onto a platter. - Drizzle any remaining caramel sauce over the monkey bread. Serve warm, adding whipped cream if you like it. To ensure even cooking through your caramel apple monkey bread, keep a few things in mind. First, cut the biscuit dough into even pieces. This helps them cook at the same rate. Layer the dough balls and apples carefully. Avoid packing them too tightly in the bundt pan. This allows heat to circulate well. When choosing the best apples for baking, look for firm varieties. Granny Smith apples are tart and hold their shape well. Honeycrisp apples add a sweet touch and great texture. Avoid soft apples, as they may turn mushy in the oven. Get creative when serving caramel apple monkey bread! You can pull it apart and serve it warm on a platter. For a fun twist, drizzle extra caramel sauce on top before serving. Add a scoop of whipped cream or a sprinkle of cinnamon for extra flavor. Pair the monkey bread with warm apple cider for a cozy treat. A scoop of vanilla ice cream also makes a delightful addition. To store leftovers, wrap the monkey bread tightly in plastic wrap. You can also place it in an airtight container. Keep it in the fridge for up to three days. This helps keep it fresh and tasty. For reheating, place slices in the microwave for 15 to 20 seconds. This warms it up and keeps it soft. If you prefer a crispier texture, reheat in the oven at 350°F for about 10 minutes. {{image_2}} You can make your caramel apple monkey bread even better! Try adding spices like nutmeg or ginger. A splash of vanilla or almond extract adds a lovely touch. You can also swap out the nuts. Try almonds or pecans instead of walnuts. Adding dried fruits, like cranberries or raisins, gives a nice twist. If you're looking for lighter options, use low-fat biscuit dough. You can also replace the butter with unsweetened applesauce. This keeps the flavor but cuts some calories. For gluten-free needs, there are great gluten-free biscuit mixes. These make it easy to enjoy this treat without worry. Seasonal fruits can change the game! In fall, add pears or even pumpkin. For summer, peaches or cherries work great. You can also top it with a sprinkle of crushed candy canes during the holidays. Another idea is to drizzle chocolate sauce instead of caramel for a fun change! You can store your monkey bread in two ways: refrigeration or at room temperature. If you plan to eat it within two days, keeping it at room temperature works well. Just make sure to wrap it tightly in plastic wrap. For longer storage, refrigeration is best. It stays fresh in the fridge for about five days. If you want to save some for later, freezing is a great option. Cut the monkey bread into portions that suit your needs. Wrap each piece well in plastic wrap and then in aluminum foil. This helps keep it fresh. When you're ready to enjoy it, thaw it overnight in the fridge. Reheat it in the oven at 350°F (175°C) for about 10-15 minutes until warm. Use airtight containers for the best results. Glass or plastic containers with tight lids work great. Make sure to avoid containers that trap moisture. This helps prevent spoilage and keeps your monkey bread tasty. If you notice any extra moisture, add a paper towel inside the container. This will help absorb it and keep your treat fresh longer. Can I use homemade biscuit dough instead? Yes, you can use homemade biscuit dough. Just ensure it is well chilled. This will help it rise and stay fluffy during baking. Homemade dough can add a personal touch to the recipe. How do I know when monkey bread is done baking? You will know it's done when the top is golden brown. A toothpick inserted in the center should come out clean. The dough should feel firm, not gooey. Can I make this recipe ahead of time? Yes, you can prep the monkey bread a day before. Layer the ingredients in the bundt pan and cover it. Just bake it the next day when you are ready. What can I substitute for caramel sauce? You can use butterscotch sauce or chocolate sauce. Maple syrup can work, too, but it will change the flavor slightly. Alternatives for nuts in the recipe If you prefer no nuts, leave them out. You can also use seeds, like pumpkin seeds. They will add a nice crunch without being overpowering. How should I serve caramel apple monkey bread? Serve it warm, right from the oven. Drizzle extra caramel sauce on top for a sweet touch. A dollop of whipped cream can add a nice creaminess. Can I serve it cold or should it be warm? It is best served warm. The gooey caramel and soft bread taste great when fresh. Serving it cold will change the texture. Caramel apple monkey bread is fun and easy to make. We covered the key ingredients, baking steps, and serving tips. Remember, you can customize flavors to make it your own. Try using different fruits or nuts. Perfect for any occasion, this treat always brings joy. Store it properly to keep it fresh. I hope you enjoy making and sharing this delicious recipe. You will impress family and friends with your skills. Happy baking!
                      Caramel Apple Monkey Bread Delightful and Easy Recipe

                    Recent Drinks

                    • - 1 ripe banana - 2 tablespoons natural peanut butter - 1 cup unsweetened almond milk (or any milk of choice) - 1 scoop vanilla protein powder (plant-based or whey) - 1 tablespoon chia seeds - 1 teaspoon honey (optional for sweetness) - A pinch of cinnamon - Ice cubes (optional, for a thicker texture) Gather these simple items before you start. A ripe banana gives natural sweetness and creaminess. Use two tablespoons of natural peanut butter for a rich flavor. Almond milk is my go-to, but any milk you love works great. The protein powder adds a boost of nutrition. Choose vanilla to match the banana. Chia seeds are tiny but mighty. They add fiber and help keep you full. If you like it sweeter, add honey, but it’s not a must. A pinch of cinnamon brings warmth and depth to this drink. For a thicker texture, toss in some ice cubes. This smoothie is flexible, so feel free to mix and match based on your taste. Now, let's blend it all together! 1. Start by peeling the ripe banana. Break it into small chunks. 2. In a blender, combine the banana chunks, natural peanut butter, almond milk, protein powder, chia seeds, and a pinch of cinnamon. 3. If you like a colder and thicker smoothie, add some ice cubes. 1. Blend all the ingredients on high speed. Keep blending until you have a smooth and creamy mix. 2. Stop the blender and taste your smoothie. If you want it sweeter, add honey. Blend again for a few seconds to mix. 1. Pour the smoothie into a tall glass. Enjoy it right away for the best taste and creaminess. 2. For a fun twist, you can top it with extra chia seeds or banana slices. This makes it look pretty too! To get the perfect texture, use a ripe banana. A ripe banana makes the smoothie creamy. Add ice cubes if you want it thicker. If you prefer a smoother drink, blend longer. Scrape the sides of the blender to mix all the ingredients well. This ensures a silky-smooth result. If your smoothie tastes too bland, add honey or more banana. Start with a teaspoon of honey. Blend and taste again. You can always add more honey if needed. This way, you control the sweetness to match your taste. Remember, ripe bananas also add natural sweetness. Use a high-speed blender for the best results. A strong blender breaks down the ingredients quickly. If you have a less powerful blender, blend in stages. Start with the liquids first, then add the solids. This helps everything mix better. Make sure your blender is clean for the best flavor. {{image_2}} You can switch the peanut butter for other nut butters. Almond butter offers a nutty taste. Cashew butter is creamy and sweet. Sunflower seed butter is a great choice for allergies. Each nut butter brings its own flavor and health benefits. Experiment to find your favorite. You can add many fruits to the smoothie. Frozen berries add sweetness and color. Spinach or kale boosts nutrition without changing the taste. Try mango for a tropical twist. Each fruit adds vitamins and makes the smoothie fun. Mix and match to discover new flavors. Choosing the right protein powder is key. Plant-based powders are great for vegan diets. Whey protein is popular for muscle recovery. Look for flavors that match your taste, like chocolate or vanilla. The right powder can enhance the smoothie’s flavor and nutrition. Test different types to see what you prefer. Store any leftover smoothie in an airtight container. You want to keep it fresh. Place it in the fridge right after making it. It will stay good for about one day. When you are ready to drink it again, shake or stir well. This helps mix any settled ingredients. You can freeze your smoothie for later. Pour it into ice cube trays or freezer-safe bags. This way, you can grab a portion whenever you want. To use, thaw the smoothie overnight in the fridge. You can also blend it again for a fresh taste. In the fridge, your smoothie lasts about 24 hours. In the freezer, it can last up to three months. Just remember, the sooner you drink it, the better the taste and texture will be! Yes, this smoothie is gluten-free. All the ingredients listed are naturally free from gluten. The peanut butter, banana, almond milk, protein powder, chia seeds, and honey do not contain gluten. Always check labels if you use store-bought items to confirm they are gluten-free. Absolutely! To make this smoothie vegan, simply use plant-based protein powder. Ensure your peanut butter is also free from animal products. Replace honey with maple syrup or agave nectar for sweetness. All other ingredients are already vegan-friendly. This smoothie offers many health benefits. It provides protein from the peanut butter and protein powder, which helps build muscle. Bananas add potassium, good for heart health. Chia seeds are packed with fiber, aiding digestion. Almond milk is low in calories and rich in vitamins. Yes, you can use various milk types. Cow’s milk will add creaminess and protein. Soy milk is a great option for extra protein. Coconut milk gives a tropical flavor. Each milk option changes the taste and texture slightly, so choose what you enjoy best. This smoothie recipe combines simple ingredients for great taste and nutrition. You learned step-by-step how to prepare it and tips for perfect texture. Variations let you customize your drink to fit your taste. Remember to store leftovers properly for later enjoyment. Smoothies can be healthy and fun. Try new mixtures to find what you love best. Keep experimenting and enjoy your delicious creations!
                      Peanut Butter Banana Protein Smoothie Easy Recipe
                    • To make a delicious Turmeric Golden Milk Latte, gather these simple ingredients: - 2 cups almond milk (or your preferred milk) - 1 teaspoon ground turmeric - ½ teaspoon ground ginger - ¼ teaspoon cinnamon - 1 tablespoon honey or maple syrup (adjust to taste) - Pinch of black pepper - ½ teaspoon vanilla extract - Optional: a sprinkle of nutmeg for garnish - Almond Milk: This milk is low in calories and rich in vitamins. It helps with heart health. - Turmeric: This spice has curcumin, known for its anti-inflammatory properties. It may help improve brain function. - Ginger: Ginger can help with digestion and nausea. It adds a nice warmth to the drink. - Cinnamon: This spice is rich in antioxidants. It may help lower blood sugar and improve heart health. - Honey or Maple Syrup: Both sweeteners can boost energy. They also provide antioxidants. - Black Pepper: This spice enhances turmeric absorption. It makes the drink more effective. - Vanilla Extract: It adds flavor and can help reduce stress. - Nutmeg: This spice is optional, but it adds warmth and a nice aroma. - Milk Options: You can use oat milk, soy milk, or coconut milk for different flavors. - Sweeteners: If you prefer, try agave syrup or stevia as sugar-free options. - Spices: Experiment with cardamom or cloves for added flavor. - Nutmeg: You can skip it if you don't like nutmeg, or use a touch of cocoa powder instead. 1. Start by taking a small saucepan. 2. Add 2 cups of almond milk to the pan. 3. Measure and add 1 teaspoon of ground turmeric. 4. Next, add ½ teaspoon of ground ginger. 5. Sprinkle in ¼ teaspoon of cinnamon. 6. Sweeten your drink with 1 tablespoon of honey or maple syrup. 7. Don't forget a pinch of black pepper for better absorption of turmeric. 8. Lastly, add ½ teaspoon of vanilla extract. 9. Whisk all the ingredients well in the pan. 10. Place the saucepan on medium heat. 11. Gently warm the mixture while stirring often. 12. Keep an eye on it; do not let it boil. 13. After about 5-7 minutes, it should be hot enough. 14. Remove the pan from heat and let it cool slightly. 15. If you want a frothy drink, use a milk frother or whisk it quickly. 16. Pour the golden milk into your favorite mugs. 17. Optionally, sprinkle a bit of nutmeg on top for a nice touch. 18. Serve warm and enjoy this comforting drink! - Always use a whisk to blend the spices into the milk. - Whisking helps mix the turmeric and other spices evenly. - When heating, keep the heat low to avoid scalding the milk. - Stir often to prevent sticking at the bottom of the pan. - If you see steam but no bubbles, you are at the right temperature. - A milk frother works wonders for a smooth, frothy finish. - If you don’t have a frother, whisk vigorously by hand. - Frothing adds air, giving the latte a creamy feel. - The more you froth, the lighter and fluffier your drink will become. - For an extra touch, froth some almond milk separately and top your latte with it. You can mix spices to make your turmeric latte tastier. Try adding a pinch of nutmeg or a dash of cardamom. These spices add warmth to the drink. You can also use fresh ginger instead of ground ginger. This will give your latte a bright, zesty kick. Just remember, fresh ginger may need more time to steep. Many people rush the heating process. Always warm your milk slowly over medium heat. If you boil it, the spices can lose flavor. Another mistake is not blending the spices well. Make sure to whisk the mixture thoroughly. This helps avoid clumps of turmeric or ginger. Lastly, avoid skipping the black pepper. It helps your body absorb turmeric better. Sweetness is personal. Start with one tablespoon of honey or maple syrup. Taste your latte and add more if you like it sweeter. For creaminess, use full-fat coconut milk for a richer feel. Almond milk is lighter but still delicious. You can also mix almond and coconut milk for the best of both worlds. {{image_2}} You can easily make this latte vegan. Just use almond milk, coconut milk, or oat milk. These milks work great in this recipe. They keep the drink creamy and delicious. If you want a nut-free option, oat milk is the best choice. It blends well with turmeric and spices. To make an iced version, start with brewed turmeric milk. Follow the same steps but let it cool. Pour over ice instead of serving warm. This drink is refreshing on hot days. You can also add some ice cream for a treat! You can mix and match flavors for fun. Try adding matcha for a green twist. This adds a fresh taste and boosts energy. You can also use cocoa for a chocolatey version. The cocoa pairs well with turmeric and spices. For a special touch, add a dash of vanilla extract. This enhances the overall flavor and aroma. To store leftover turmeric golden milk, let it cool first. Then, pour it into an airtight container. Keep it in the fridge for up to three days. This way, you can enjoy the drink again without losing its flavor. When reheating your golden milk, do it gently. Pour it into a small saucepan. Heat it over low to medium heat. Stir it often to avoid burning. Never let it boil, as this can change the taste and texture. You can also use a microwave. Heat in short bursts, stirring in between. Turmeric golden milk lasts about three days in the fridge. Check for signs of spoilage. If it smells sour or has any mold, discard it. Always trust your senses. If it looks or smells off, it’s best to throw it away. Turmeric has many health benefits. It is known for its bright yellow color and active compound called curcumin. Curcumin may help reduce inflammation. It can also support joint health. Some studies suggest it may boost your mood. Turmeric might even help with digestion. Drinking turmeric may also support your immune system. Yes, you can use any milk you like. Almond milk is great, but coconut milk adds creaminess. Oat milk is a good choice for a thicker texture. If you prefer dairy, whole or skim milk works too. Just remember, different types of milk will change the flavor a bit. To make this recipe sugar-free, skip the honey or maple syrup. You can use a sugar substitute like stevia or monk fruit instead. These options will give you sweetness without the calories. Just adjust the amount to your taste. Yes, it is safe for most people to have turmeric daily. Using it in cooking or drinks is a great way to enjoy its benefits. However, if you have health issues or take certain medications, check with a doctor first. Moderation is key, as with any food. In this blog post, we explored the ingredients and health benefits of Turmeric Golden Milk. I shared step-by-step instructions for making it frothy and delicious. We also discovered tips, tricks, and variations to enhance your drink. Proper storage and reheating advice can help you enjoy leftovers. Remember, turmeric offers many health benefits, so enjoy this drink often. Use alternative ingredients if you prefer. With these ideas, you can create the perfect golden milk to suit your taste and health needs. Enjoy your journey to wellness!
                      Turmeric Golden Milk Latte Simple and Creamy Recipe
                    • - 1 ripe mango, peeled and diced - 1 cup fresh pineapple chunks - 1 banana, sliced - 1 cup coconut water (or regular water) - ½ cup plain Greek yogurt (or dairy-free alternative) - 1 tablespoon honey or agave syrup (optional) - A handful of fresh mint leaves (for garnish) - Ice cubes (optional) The key to a delicious mango pineapple smoothie lies in its fresh ingredients. You want ripe fruits for the best flavor. The mango should feel soft when you squeeze it gently. Pineapples should smell sweet and fruity. This smoothie combines sweet mango, tangy pineapple, and creamy banana. Coconut water adds hydration, while Greek yogurt gives it a nice creaminess. You can add honey for extra sweetness if you like. Mint leaves add a refreshing touch when you serve it. Each ingredient plays a role in making this smoothie flavorful and refreshing. Trust me, using fresh ingredients will make a big difference in taste! To make this smoothie, start by gathering your main ingredients. You need a ripe mango, fresh pineapple, and a banana. 1. In a blender, combine the diced mango, pineapple chunks, and banana slices. This mix brings a burst of tropical flavor. 2. Next, add one cup of coconut water to the blender. This not only hydrates but also adds a refreshing twist. 3. For creaminess, pour in half a cup of plain Greek yogurt. If you want it sweeter, drizzle in one tablespoon of honey or agave syrup. 4. Blend on high until the mixture is smooth and creamy. If you like your smoothie chilled, toss in a few ice cubes and blend again until they are fully mixed in. 5. After blending, taste your smoothie. If it needs to be sweeter or thicker, add more honey or coconut water as needed. Once your smoothie is ready, it’s time to serve it. I recommend using tall glasses to show off the vibrant color. For a fun touch, garnish each glass with a few fresh mint leaves on top. This not only looks nice but also adds a fresh aroma. Enjoy your delicious Mango Pineapple Smoothie! For the Full Recipe, please refer back to the ingredient list and instructions. To get your smoothie just right, focus on creaminess. Use ripe fruits like mango and banana. The Greek yogurt adds a nice, smooth texture. If you want a richer taste, try full-fat yogurt. For a lighter feel, use low-fat or dairy-free yogurt. Adjust the thickness by adding more liquid. Coconut water is great for this. If your smoothie is too thick, just pour in a bit more. Blend again until it’s just how you like it. If you want a thicker smoothie, add more banana or ice cubes. Boosting flavor can take your smoothie to the next level. Try adding spices like cinnamon or ginger. These spices not only add warmth but also great health benefits. A dash of cinnamon can make the smoothie taste cozy. A pinch of ginger gives it a nice kick. You can also use flavored yogurts for extra taste. Vanilla or coconut yogurt work well. If you want sweetness, think about honey or agave syrup. These can make your smoothie more enjoyable. For a fun twist, try adding a splash of vanilla extract. It will add a lovely aroma to your drink. For a full taste experience, explore the [Full Recipe]. {{image_2}} You can change the fruit in your smoothie to keep it fresh. Adding strawberries or blueberries gives a sweet twist. These berries add a nice color and taste. You can also try using other tropical fruits like papaya or kiwi. These fruits bring new flavors and nutrients to your drink. Each fruit will change the smoothie’s taste and make it unique. If you want a dairy-free smoothie, swap the Greek yogurt for a plant-based option. Almond, coconut, or soy yogurt works well. These alternatives keep your smoothie creamy without dairy. For sweeteners, you can use maple syrup or agave syrup for a vegan choice. These options add sweetness while keeping your drink plant-based. Enjoy the fruity goodness in many ways! Don't forget to check the Full Recipe for more ideas. You may have some smoothie left after making your Mango Pineapple Smoothie. To keep it fresh, use a glass jar or a BPA-free plastic container. Seal it tightly to prevent air from spoiling the flavor. Store it in the fridge for up to 24 hours. After that, it may lose some taste and texture. If you want to enjoy the smoothie later, freezing is a great option. Pour the smoothie into ice cube trays or freezer-safe bags. Leave some space in the bags for expansion. You can freeze it for up to three months. When you’re ready to drink it, take out what you need. Thaw it in the fridge overnight or blend it straight from the freezer for a slushy treat. Enjoy your refreshing Mango Pineapple Smoothie anytime! Yes, you can make this smoothie ahead of time. If you want to save it, store it in an airtight container. Keep it in the fridge for up to one day. The smoothie may separate, so stir it well before you drink it. If you don’t have coconut water, use regular water or fruit juice instead. Fruit juice can add a nice flavor. You can also try almond milk for a creamier touch. Just remember, the taste will change a bit based on what you use. To make the smoothie thicker, add more Greek yogurt or a banana. You can also use frozen fruit instead of fresh. Frozen fruit gives you a nice, thick texture. Just blend it well, and you’ll get a creamy drink. Yes, this smoothie is great for kids! It is packed with fruits and tastes sweet. You can adjust the sweetness by adding less honey. The bright colors and fresh flavors will appeal to children, making it a fun treat. You can find the Full Recipe for the Tropical Bliss Mango Pineapple Smoothie above in this article. This will guide you through every step to create your own refreshing drink. This blog post covers a simple and tasty smoothie recipe. You learned about the key ingredients and their nutritional benefits. I provided steps to prepare and serve the smoothie perfectly. Tips for texture and flavor help you make it your own. You can explore variations to suit your tastes or dietary needs. Don’t forget storage tips to keep leftovers fresh. Enjoy your smoothie making journey. It’s all about trying new things and having fun!
                      Mango Pineapple Smoothie Refreshing and Flavorful Blend
                    • - 2 packets of frozen açaí puree - 1 ripe banana - 1 cup of fresh pineapple chunks - 1 cup of coconut milk (or any non-dairy milk) - 1 tablespoon of honey or agave syrup (optional) For a vibrant tropical taste, the main ingredients are key. Açaí puree brings rich color and flavor. It is full of antioxidants. Bananas add creaminess and natural sweetness. Fresh pineapple gives a bright, juicy touch. Coconut milk offers a smooth base. You can use any non-dairy milk you prefer. Honey or agave syrup adds sweetness if needed. - Sliced kiwi - Coconut flakes - Granola - Chia seeds - Fresh berries (e.g., strawberries, blueberries) Toppings make your smoothie bowl pop! Sliced kiwi adds a zesty kick. Coconut flakes give it a tropical crunch. Granola provides texture and flavor. Chia seeds offer extra nutrients. Fresh berries, like strawberries and blueberries, add color and taste. You can mix and match these toppings for a fun look. For the full recipe, please refer to the section above. 1. Blend the ingredients Start by adding the frozen açaí puree, ripe banana, fresh pineapple chunks, and coconut milk into a blender. If you want it sweeter, you can add honey or agave syrup. Blend this mixture on high speed until it becomes creamy and smooth. 2. Adjust consistency with coconut milk If your smoothie is too thick, just add a bit more coconut milk. Blend again until you reach the texture you want. This step is key to making your smoothie bowl enjoyable. 3. Pour into a bowl Once blended, carefully pour the smoothie mixture into a bowl. Make sure to use a large enough bowl to hold all the goodness. 4. Add toppings creatively Now comes the fun part! Arrange your toppings, such as sliced kiwi, coconut flakes, granola, chia seeds, and fresh berries, over the smoothie. Try to create a colorful pattern. I love making a circular design to highlight all the vibrant colors. - Tips for presentation Use a shallow bowl to show off your beautiful toppings. You can also sprinkle some extra coconut flakes around the edge for a nice touch. A colorful presentation makes your smoothie bowl more fun to eat. - Recommended serving utensils Serve your smoothie bowl with a regular spoon. If you want to make it more special, use a wooden spoon or a cute, colorful one. Enjoy your tropical treat right away to keep it fresh and tasty. For the full recipe, refer to the earlier sections. To make a great smoothie bowl, start with ripe fruits. Ripe fruits taste better and add natural sweetness. Look for bananas that are yellow with some brown spots. When it comes to pineapples, choose ones that smell sweet. It ensures they are juicy and fresh. Blending is key to your smoothie bowl. You want a smooth and creamy texture. If your mix is too thick, add more coconut milk. Blend again until you reach the right consistency. A good blend makes your bowl enjoyable and easy to eat. A colorful topping arrangement makes your smoothie bowl pop. Use fresh berries, sliced kiwi, and coconut flakes. Lay them out in a pattern. A circular design looks appealing and fun. To elevate your smoothie bowl's look, use bowls with interesting shapes. Tall bowls or wide, shallow ones can change the game. Garnish with a sprinkle of chia seeds for a fancy touch. This not only looks great but adds a bit of crunch too. {{image_2}} You can change the non-dairy milk for this smoothie. Almond, soy, or oat milk work well. Each milk adds a different taste. Try using seasonal fruits too. Mango, papaya, or berries add a fresh twist. You can mix and match to find your favorite blend. Want more nutrients? Add spinach or kale to your smoothie. They blend well and boost health. You won’t even taste them! For extra energy, stir in nut butter or protein powder. Both will make your smoothie more filling. They add great flavor too! You can also experiment with different combinations to find the best taste for you. To store leftovers, place your smoothie bowl in the fridge. Use a tight container to keep it fresh. Glass or BPA-free plastic works well for storage. I prefer glass because it keeps flavors better. You can freeze smoothie bowls for later. Just pour the mixture into an airtight container. Leave some space at the top, as it will expand when frozen. To defrost, place it in the fridge overnight. If you’re in a rush, you can use the microwave. Just heat it in short bursts to avoid cooking. Enjoy your tropical treat later with ease! For the recipe, check out the Full Recipe. What is açaí and what are its benefits? Açaí is a small, dark purple berry from Brazil. It is full of antioxidants, which help fight free radicals in the body. Açaí is also rich in fiber, promoting good digestion. Plus, it has healthy fats that support heart health. You can enjoy its fruity taste in many dishes. Can I make this smoothie bowl ahead of time? Yes! You can prepare the smoothie mix and store it in the fridge for up to 24 hours. Just remember to keep the toppings separate. This way, your bowl stays fresh and tasty. How can I make this recipe vegan or gluten-free? To make it vegan, use agave syrup instead of honey. For gluten-free, ensure your granola and any other toppings are gluten-free. Most fruits and coconut milk are naturally gluten-free, so you’re all set! Can I substitute açaí with other fruits? Yes, you can! If you can’t find açaí, try using frozen berries like blueberries or strawberries. These fruits will add sweetness and a burst of color to your bowl. What to do if the smoothie is too thick? If your smoothie is too thick, just add a little more coconut milk. Blend again until you reach your desired creaminess. This will make it easier to pour and enjoy. How to fix a smoothie bowl that tastes too bland? If your smoothie bowl lacks flavor, try adding a splash of vanilla extract or a pinch of salt. You can also mix in a bit of honey or agave syrup for sweetness. Adjust the toppings to add more taste and texture. This article covers how to make a delicious açaí smoothie bowl. You learned about the key ingredients, easy steps for preparation, and creative topping ideas. I shared tips to improve taste and presentation, plus fun variations to try. Don’t forget storage techniques to keep your bowl fresh. With all this information, you can enjoy a tasty and nutritious treat anytime. Get creative with your favorites and make this recipe truly yours. Enjoy every bite!
                      Tropical Acai Smoothie Bowl Energizing Healthy Treat

                    Footer

                    ↑ back to top

                    More information

                    • Drinks
                    • Appetizer
                    • Dinner
                    • Desserts
                    • About
                    • Contact
                    • Privacy Policy

                    Our Policies

                    • Privacy Policy
                    • GDPR Policy
                    • Terms Of Use
                    • Copyright Policy
                    • Cookie Policy
                    • Disclaimer

                    Copyright © 2025 cheftaling