
Do you crave a sweet treat that captures the essence of fall? Look no further than my Apple Cider Pound Cake with Glaze! This moist, flavorful cake blends the warm spices of cinnamon and nutmeg with tangy apple cider, creating an irresistible dessert. Ready to impress your friends and family? In this guide, I’ll walk you through each easy step to make this delightful cake, along with tips and variations to customize it just for you!
Ingredients
Dry Ingredients
- 1 ½ cups all-purpose flour
- 1 teaspoon baking powder
- ½ teaspoon baking soda
- ½ teaspoon salt
- 1 teaspoon ground cinnamon
- ½ teaspoon ground nutmeg
Wet Ingredients
- ½ cup unsalted butter, softened
- 1 cup granulated sugar
- 2 large eggs
- ½ cup apple cider
- 1 tablespoon vanilla extract
Additional Ingredients
- 1 cup finely diced apples (like Granny Smith or Honeycrisp)
- For the glaze:
- 1 cup powdered sugar
- 2 tablespoons apple cider
- 1 tablespoon milk
- ¼ teaspoon cinnamon
This recipe blends sweet apples and warm spices. The dry ingredients create a strong base for the cake. I use all-purpose flour for the best texture. Baking powder and baking soda help the cake rise well. A pinch of salt brings out the flavors. Ground cinnamon and nutmeg add that cozy fall taste.
In the wet ingredients, I combine softened butter and sugar. This mix makes the cake light and sweet. Eggs bring richness and help bind the cake. Apple cider adds moisture and flavor. A touch of vanilla gives a warm aroma.
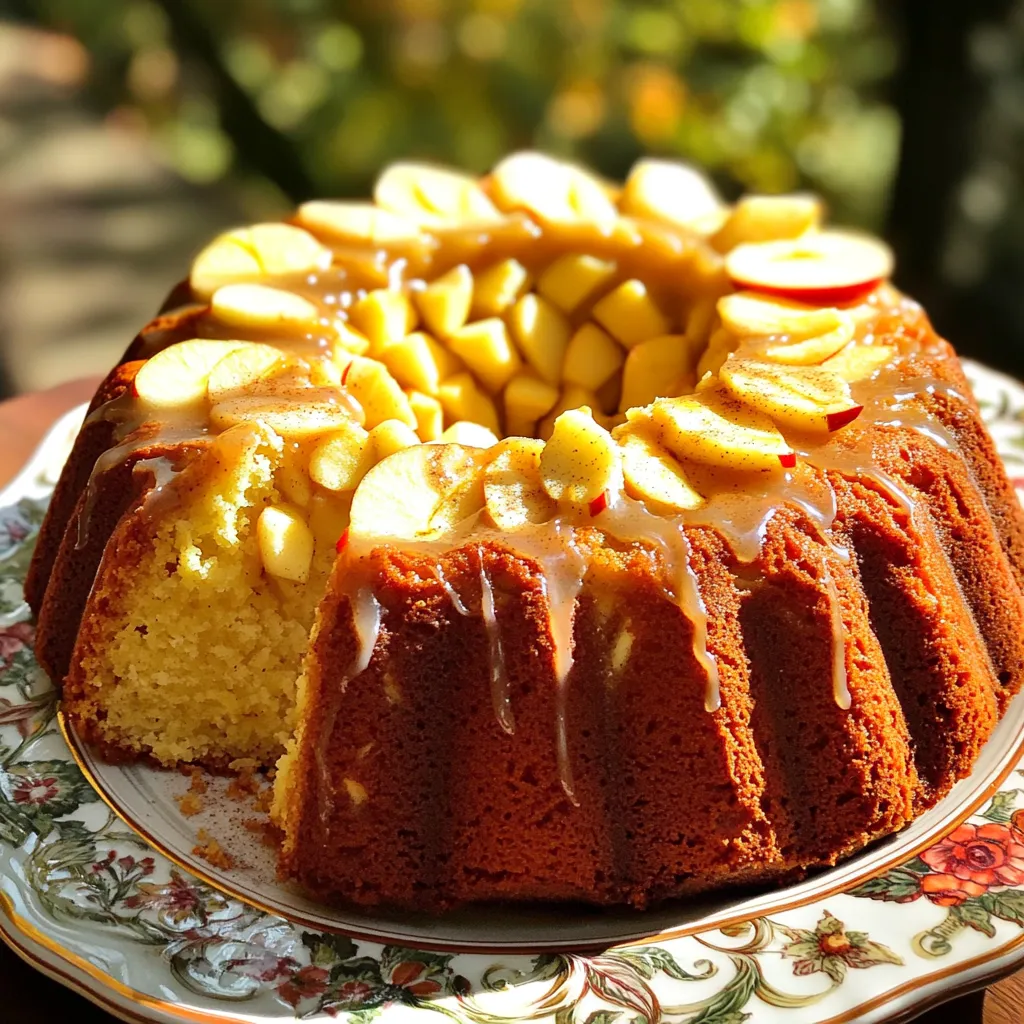
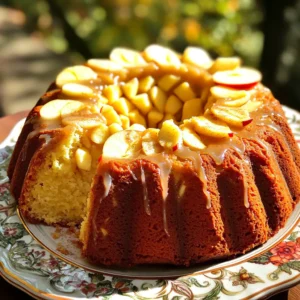
The additional ingredients are where the magic happens. Finely diced apples add texture and sweetness. For the glaze, I mix powdered sugar, apple cider, and milk. A hint of cinnamon ties it all together. This glaze adds a nice finish to the cake.
Step-by-Step Instructions
Preparing the Oven and Pan
First, preheat your oven to 350°F (175°C). This step warms the oven for the best bake. While the oven heats, grease and flour your bundt pan or loaf pan. Greasing helps the cake come out easily. Flouring adds another layer of protection against sticking.
Making the Batter
In a medium bowl, mix the dry ingredients. Combine 1 ½ cups of flour, 1 teaspoon of baking powder, ½ teaspoon of baking soda, ½ teaspoon of salt, 1 teaspoon of cinnamon, and ½ teaspoon of nutmeg. Set this mix aside.
In a large bowl, beat ½ cup of softened butter and 1 cup of sugar together. Use an electric mixer for about 3-4 minutes until the mix is light and fluffy. Next, add 2 large eggs one at a time. Mix well after each egg. Stir in ½ cup of apple cider and 1 tablespoon of vanilla extract.
Now, slowly fold in your dry mix until just combined. Be careful not to overmix. This keeps the cake light and fluffy. Gently add 1 cup of finely diced apples. This gives the cake a nice texture and flavor.
Baking the Cake
Pour the batter into your prepared pan. Smooth the top with a spatula. Bake in your preheated oven for about 50-60 minutes. Check for doneness by inserting a toothpick into the center. If it comes out clean, your cake is ready.
Cooling and Glazing
Let the cake cool in the pan for about 15 minutes. This helps it firm up. After that, transfer it to a wire rack to cool completely.
While the cake cools, prepare your glaze. In a bowl, whisk together 1 cup of powdered sugar, 2 tablespoons of apple cider, 1 tablespoon of milk, and ¼ teaspoon of cinnamon. Mix until smooth. You can adjust the thickness by adding more sugar or cider.
Once the cake is cool, drizzle the glaze over the top evenly. Let it set for a few minutes before slicing. Enjoy this tasty treat!
Tips & Tricks
Baking Tips
- Ensuring the cake rises properly: Use fresh baking powder and soda. They help the cake rise. Make sure your butter is soft, but not melted. This adds air to the batter.
- Avoiding overmixing: Mix the batter until just combined. Overmixing makes the cake dense. Gently fold in the diced apples at the end.
- Testing for doneness: Insert a toothpick into the center of the cake. If it comes out clean, your cake is done. If it has batter on it, bake for a few more minutes.
Glaze Tips
- Adjusting glaze consistency: If your glaze is too thick, add a little more apple cider. If it’s too thin, add more powdered sugar. Aim for a pourable yet thick glaze.
- Tips for an even glaze application: Drizzle the glaze in a back-and-forth motion over the cooled cake. This helps cover every slice.
Presentation Tips
- Garnishing suggestions: Top the cake with thin apple slices for a fresh look. A sprinkle of cinnamon adds warmth and color.
- Serving recommendations: Serve slices on a decorative plate. Pair it with a scoop of vanilla ice cream for a delightful treat.

Variations
Flavor Variations
You can make this cake even better! Try adding nuts like walnuts or pecans. They give a nice crunch and extra flavor. You can also mix in raisins or dried cranberries. Both add sweetness and chewiness. These little changes make each bite fun and tasty.
Gluten-Free Option
Want a gluten-free cake? No problem! Just swap the all-purpose flour for a gluten-free blend. Many stores offer these blends. They work well in most recipes. Be sure to check the package for the right amount. This way, everyone can enjoy a slice!
Dairy-Free Option
If you need a dairy-free cake, it's easy to adjust. Use dairy-free butter and choose a milk alternative, like almond or oat milk. This keeps the cake moist and delicious without dairy. You won’t miss the butter or milk in this treat. It still tastes amazing!
Storage Info
Storing the Cake
You can keep your Apple Cider Pound Cake at room temperature. Wrap it in plastic wrap. Place it in an airtight container. This keeps it fresh for up to three days. Avoid direct sunlight. If your kitchen is warm, consider refrigerating it.
Refrigeration helps the cake last longer. Keep the cake in an airtight container. It can stay fresh for about a week. Just remember, the fridge can dry it out. So, eat it within a week for the best taste.
Freezing the Cake
Freezing is a great option if you want to save some cake. First, let the cake cool completely. Wrap it tightly in plastic wrap. Then, place it in a freezer-safe bag. You can freeze it for up to three months.
When you’re ready to enjoy it, take it out of the freezer. Place it in the fridge overnight to thaw. If you need it fast, leave it at room temperature for a few hours.
Shelf Life
Your Apple Cider Pound Cake lasts about three days at room temp. In the fridge, it can last about a week. If you freeze it, it lasts for three months.
Look for signs of spoilage. If the cake smells bad or has mold, throw it away. A dry texture can also mean it's time to toss it. Always check before enjoying your tasty treat!
FAQs
How do I know when my Apple Cider Pound Cake is done?
To check if the cake is done, use these signs:
- The cake is golden brown on top.
- A toothpick inserted in the center comes out clean.
- The cake pulls away from the sides of the pan.
You can test for doneness by inserting a toothpick in the center. If it comes out clean, your cake is ready. If there is batter on the toothpick, bake it a little longer.
Can I use different types of apples for this recipe?
Yes, you can use different types of apples in this recipe. I recommend these apple varieties:
- Granny Smith: They add a nice tartness.
- Honeycrisp: They are sweet and juicy.
- Fuji: They bring a firm texture and sweetness.
Feel free to mix different apples for added flavor. Each type will give a unique taste to your cake.
How can I make this cake ahead of time?
You can make this cake ahead of time with these tips:
- Bake the cake and let it cool completely.
- Wrap it tightly in plastic wrap or foil.
- Store it at room temperature for up to three days.
If you want to keep it longer, you can freeze it. Just thaw it overnight in the fridge before serving.
What can I serve with Apple Cider Pound Cake?
This cake pairs well with many sides and drinks:
- A scoop of vanilla ice cream.
- Whipped cream on top.
- A hot cup of spiced cider.
- A drizzle of caramel sauce.
These options will enhance the flavors of the cake and create a warm, cozy experience.
This blog post shared a simple and fun way to make Apple Cider Pound Cake. We covered the key ingredients, step-by-step instructions, and helpful tips. You learned about flavor variations and storage options to keep your cake fresh. Finally, I answered common questions you might have. With these steps, you can enjoy a delicious cake for any occasion. Now, grab your ingredients and start baking! You will love the results.


Leave a Reply