Chef Taling

  • Home
  • Recipe Index
    • Desserts
    • Dinner
    • Appetizer
    • Drinks
  • About
  • Contact
  • Privacy Policy
menu icon
go to homepage
  • Home
  • Recipe Index
    • Desserts
    • Dinner
    • Appetizer
    • Drinks
  • About
  • Contact
  • Privacy Policy

search icon
Homepage link
  • Home
  • Recipe Index
    • Desserts
    • Dinner
    • Appetizer
    • Drinks
  • About
  • Contact
  • Privacy Policy

×

Creamy Pesto Tortellini Skillet Delightful Dinner

Published: Sep 14, 2025 · by Natalie · Leave a Comment

WANT TO SAVE THIS RECIPE?

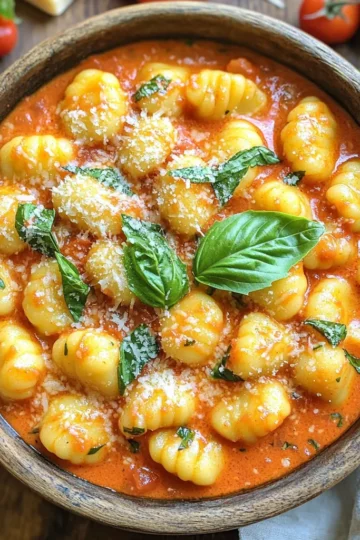
Are you ready for a quick and tasty dinner? My Creamy Pesto Tortellini Skillet is the answer! This dish brings together cheesy tortellini, fresh spinach, and vibrant cherry tomatoes, all coated in rich, creamy pesto. In just a few simple steps, you can impress your family and friends without spending hours in the kitchen. Let’s dive into this delightful recipe that everyone will love!

- 1 package (16 oz) refrigerated cheese tortellini - 1 cup heavy cream - 1 cup fresh basil pesto - 1 cup cherry tomatoes, halved - 1 cup spinach, roughly chopped - ½ cup grated Parmesan cheese - 1 tablespoon olive oil - 2 cloves garlic, minced - Fresh basil leaves for garnish - Large skillet - Cooking utensils For this creamy pesto tortellini skillet, you need some key ingredients. The cheese tortellini is the star of this dish. It adds a nice, soft texture. Heavy cream makes the sauce rich and smooth. Fresh basil pesto gives it that vibrant flavor. Cherry tomatoes add sweetness and color. Spinach offers a touch of green and nutrition. If you want to boost the flavor, consider adding some grated Parmesan cheese. It melts well and adds depth. Olive oil is great for cooking the garlic and tomatoes. Minced garlic adds a lovely aroma. Lastly, fresh basil leaves make a nice garnish. For equipment, a large skillet works best. You need enough space for all the tasty ingredients. Also, gather your cooking utensils like spatulas and a measuring cup. With these essential items, you’ll be ready to make a delightful dinner. - Heat 1 tablespoon of olive oil in a large skillet over medium heat. - Add 2 minced garlic cloves to the hot oil. Sauté for about 1 minute until it smells good. - Now, add 1 cup of halved cherry tomatoes. Cook for 3 to 4 minutes. Stir often until they get soft. - Next, stir in 1 cup of roughly chopped spinach. Cook until the spinach wilts, which takes about 2 minutes. - Pour in 1 cup of heavy cream. Bring it to a gentle simmer. - Then, stir in 1 cup of fresh basil pesto. Mix it well to combine. - Add 1 package (16 oz) of cheese tortellini to the skillet. Cook it as the package says, usually 3 to 5 minutes. Watch for it to float. - Sprinkle in ½ cup of grated Parmesan cheese. Stir gently to mix and let it melt. - Finally, add salt and pepper to taste. Adjust to your liking before serving. To get the best sauce, aim for a creamy texture. Add the heavy cream slowly. Stir it gently as you combine it with the pesto. You want it smooth, not too thick. If it feels too thick, add a splash of water or broth. This keeps it light and rich. Cooking the tortellini right is key. Follow the package instructions closely. Usually, it takes about 3-5 minutes. Look for the tortellini to float to the top. This means they are done. You want them soft but still firm, not mushy. Drain them well before adding to the sauce. Pair your creamy pesto tortellini with a fresh salad. A simple green salad with vinaigrette works well. You can also serve it with crusty bread. This helps soak up the extra sauce. For garnishing, fresh basil leaves are a must. They add color and a fresh taste. You might sprinkle more grated Parmesan on top. This gives an extra flavor boost. To take the taste up a notch, add fresh herbs. Chopped parsley or thyme works great. You can also stir in some red pepper flakes for heat. Just a pinch can change the whole dish. If you want a twist, try different ingredients. Swap the heavy cream for coconut milk for a lighter option. Use sun-dried tomatoes instead of fresh for a deeper flavor. This lets you get creative while keeping it delicious. {{image_2}} You can easily make this dish vegetarian. Just skip the cheese tortellini with meat. Use cheese tortellini instead. To make it vegan, use vegan tortellini and coconut cream. You can also find dairy-free pesto to keep the flavor. For gluten-free options, choose gluten-free tortellini. Many stores offer this choice now. Feel free to swap out tortellini types. You can use spinach, mushroom, or even chicken tortellini for a twist. If you want a different sauce, try Alfredo or arrabbiata. You can mix it up and add your favorite flavors. Experimenting with sauces can lead to exciting new tastes. Add seasonal veggies for a fresh touch. In summer, use zucchini or bell peppers. In fall, try squash or kale. These veggies not only taste good but also look pretty. You can also adjust for holidays. Add cranberries for Thanksgiving or red and green peppers for Christmas. This can make your dish festive and fun. To store leftovers properly, let the dish cool first. Transfer it to an airtight container. Make sure to seal it tightly. Place it in the fridge within two hours. This keeps the flavors fresh. Consume the leftovers within 3 to 4 days for the best taste. Freezing is simple. First, let the dish cool completely. Portion it into freezer-safe containers. Leave some space at the top for expansion. Seal the containers well to avoid freezer burn. When ready to eat, thaw overnight in the fridge. Reheat in a skillet over low heat, adding a splash of cream if needed. In the fridge, creamy pesto tortellini lasts about 3 to 4 days. In the freezer, it can last up to 2 to 3 months. Always check for any off smells or changes in texture before eating. Yes, you can use frozen tortellini. Just cook it a bit longer. Follow the package instructions for the best results. Frozen tortellini usually takes about 5-8 minutes to cook. To add spice, include red pepper flakes. You can also mix in hot sauce or diced jalapeños. Start with a little and adjust to your taste. This way, you control the heat level. If the sauce is thick, add a splash of broth or water. Stir well to combine. You can also add more cream for a richer taste. Adjust until you reach your desired consistency. Yes, you can use half-and-half or whole milk. These options will make the dish lighter but still creamy. For a dairy-free choice, try coconut cream or a plant-based milk. Yes, this dish is great for meal prep. Cook it ahead and store in containers. Just reheat when ready to eat. It tastes great for up to three days in the fridge. This recipe for creamy pesto tortellini is simple and tasty. You learned about key ingredients and how to prepare them step by step. You can also explore various adaptations to fit your needs. Remember to check refrigeration and freezing tips for leftovers. This dish can please many taste buds, so try it for your next meal! Enjoy the process and have fun in the kitchen.

Ingredients

List of Essential Ingredients

  1. 1 package (16 oz) refrigerated cheese tortellini
  2. 1 cup heavy cream
  3. 1 cup fresh basil pesto
  4. 1 cup cherry tomatoes, halved
  5. 1 cup spinach, roughly chopped

Optional Ingredients for Extra Flavor

  1. ½ cup grated Parmesan cheese
  2. 1 tablespoon olive oil
  3. 2 cloves garlic, minced
  4. Fresh basil leaves for garnish

Equipment Required

  1. Large skillet
  2. Cooking utensils

For this creamy pesto tortellini skillet, you need some key ingredients. The cheese tortellini is the star of this dish. It adds a nice, soft texture. Heavy cream makes the sauce rich and smooth. Fresh basil pesto gives it that vibrant flavor. Cherry tomatoes add sweetness and color. Spinach offers a touch of green and nutrition.

If you want to boost the flavor, consider adding some grated Parmesan cheese. It melts well and adds depth. Olive oil is great for cooking the garlic and tomatoes. Minced garlic adds a lovely aroma. Lastly, fresh basil leaves make a nice garnish.

For equipment, a large skillet works best. You need enough space for all the tasty ingredients. Also, gather your cooking utensils like spatulas and a measuring cup. With these essential items, you’ll be ready to make a delightful dinner.

Step-by-Step Instructions

Preparing the Skillet

  1. Heat 1 tablespoon of olive oil in a large skillet over medium heat.
  2. Add 2 minced garlic cloves to the hot oil. Sauté for about 1 minute until it smells good.

Cooking the Vegetables

  1. Now, add 1 cup of halved cherry tomatoes. Cook for 3 to 4 minutes. Stir often until they get soft.
  2. Next, stir in 1 cup of roughly chopped spinach. Cook until the spinach wilts, which takes about 2 minutes.

Combining Key Ingredients

  1. Pour in 1 cup of heavy cream. Bring it to a gentle simmer.
  2. Then, stir in 1 cup of fresh basil pesto. Mix it well to combine.

Finishing Touches

  1. Add 1 package (16 oz) of cheese tortellini to the skillet. Cook it as the package says, usually 3 to 5 minutes. Watch for it to float.
  2. Sprinkle in ½ cup of grated Parmesan cheese. Stir gently to mix and let it melt.
  3. Finally, add salt and pepper to taste. Adjust to your liking before serving.

Tips & Tricks

Perfecting the Recipe

To get the best sauce, aim for a creamy texture. Add the heavy cream slowly. Stir it gently as you combine it with the pesto. You want it smooth, not too thick. If it feels too thick, add a splash of water or broth. This keeps it light and rich.

Cooking the tortellini right is key. Follow the package instructions closely. Usually, it takes about 3-5 minutes. Look for the tortellini to float to the top. This means they are done. You want them soft but still firm, not mushy. Drain them well before adding to the sauce.

Serving Suggestions

Pair your creamy pesto tortellini with a fresh salad. A simple green salad with vinaigrette works well. You can also serve it with crusty bread. This helps soak up the extra sauce.

For garnishing, fresh basil leaves are a must. They add color and a fresh taste. You might sprinkle more grated Parmesan on top. This gives an extra flavor boost.

Enhancing Flavor

To take the taste up a notch, add fresh herbs. Chopped parsley or thyme works great. You can also stir in some red pepper flakes for heat. Just a pinch can change the whole dish.

If you want a twist, try different ingredients. Swap the heavy cream for coconut milk for a lighter option. Use sun-dried tomatoes instead of fresh for a deeper flavor. This lets you get creative while keeping it delicious.

Variations

Dietary Adaptations

You can easily make this dish vegetarian. Just skip the cheese tortellini with meat. Use cheese tortellini instead. To make it vegan, use vegan tortellini and coconut cream. You can also find dairy-free pesto to keep the flavor. For gluten-free options, choose gluten-free tortellini. Many stores offer this choice now.

Ingredient Swaps

Feel free to swap out tortellini types. You can use spinach, mushroom, or even chicken tortellini for a twist. If you want a different sauce, try Alfredo or arrabbiata. You can mix it up and add your favorite flavors. Experimenting with sauces can lead to exciting new tastes.

Seasonal Variations

Add seasonal veggies for a fresh touch. In summer, use zucchini or bell peppers. In fall, try squash or kale. These veggies not only taste good but also look pretty. You can also adjust for holidays. Add cranberries for Thanksgiving or red and green peppers for Christmas. This can make your dish festive and fun.

Storage Info

Refrigeration Guidelines

To store leftovers properly, let the dish cool first. Transfer it to an airtight container. Make sure to seal it tightly. Place it in the fridge within two hours. This keeps the flavors fresh. Consume the leftovers within 3 to 4 days for the best taste.

Freezing Instructions

Freezing is simple. First, let the dish cool completely. Portion it into freezer-safe containers. Leave some space at the top for expansion. Seal the containers well to avoid freezer burn. When ready to eat, thaw overnight in the fridge. Reheat in a skillet over low heat, adding a splash of cream if needed.

Shelf Life

In the fridge, creamy pesto tortellini lasts about 3 to 4 days. In the freezer, it can last up to 2 to 3 months. Always check for any off smells or changes in texture before eating.

FAQs

Can I use frozen tortellini instead of refrigerated?

Yes, you can use frozen tortellini. Just cook it a bit longer. Follow the package instructions for the best results. Frozen tortellini usually takes about 5-8 minutes to cook.

How can I make this dish spicier?

To add spice, include red pepper flakes. You can also mix in hot sauce or diced jalapeños. Start with a little and adjust to your taste. This way, you control the heat level.

What can I do if the sauce is too thick?

If the sauce is thick, add a splash of broth or water. Stir well to combine. You can also add more cream for a richer taste. Adjust until you reach your desired consistency.

Can I replace heavy cream with a lighter option?

Yes, you can use half-and-half or whole milk. These options will make the dish lighter but still creamy. For a dairy-free choice, try coconut cream or a plant-based milk.

Is this recipe suitable for meal prep?

Yes, this dish is great for meal prep. Cook it ahead and store in containers. Just reheat when ready to eat. It tastes great for up to three days in the fridge.

This recipe for creamy pesto tortellini is simple and tasty. You learned about key ingredients and how to prepare them step by step. You can also explore various adaptations to fit your needs. Remember to check refrigeration and freezing tips for leftovers. This dish can please many taste buds, so try it for your next meal! Enjoy the process and have fun in the kitchen.

- 1 package (16 oz) refrigerated cheese tortellini - 1 cup heavy cream - 1 cup fresh basil pesto - 1 cup cherry tomatoes, halved - 1 cup spinach, roughly chopped - ½ cup grated Parmesan cheese - 1 tablespoon olive oil - 2 cloves garlic, minced - Fresh basil leaves for garnish - Large skillet - Cooking utensils For this creamy pesto tortellini skillet, you need some key ingredients. The cheese tortellini is the star of this dish. It adds a nice, soft texture. Heavy cream makes the sauce rich and smooth. Fresh basil pesto gives it that vibrant flavor. Cherry tomatoes add sweetness and color. Spinach offers a touch of green and nutrition. If you want to boost the flavor, consider adding some grated Parmesan cheese. It melts well and adds depth. Olive oil is great for cooking the garlic and tomatoes. Minced garlic adds a lovely aroma. Lastly, fresh basil leaves make a nice garnish. For equipment, a large skillet works best. You need enough space for all the tasty ingredients. Also, gather your cooking utensils like spatulas and a measuring cup. With these essential items, you’ll be ready to make a delightful dinner. - Heat 1 tablespoon of olive oil in a large skillet over medium heat. - Add 2 minced garlic cloves to the hot oil. Sauté for about 1 minute until it smells good. - Now, add 1 cup of halved cherry tomatoes. Cook for 3 to 4 minutes. Stir often until they get soft. - Next, stir in 1 cup of roughly chopped spinach. Cook until the spinach wilts, which takes about 2 minutes. - Pour in 1 cup of heavy cream. Bring it to a gentle simmer. - Then, stir in 1 cup of fresh basil pesto. Mix it well to combine. - Add 1 package (16 oz) of cheese tortellini to the skillet. Cook it as the package says, usually 3 to 5 minutes. Watch for it to float. - Sprinkle in ½ cup of grated Parmesan cheese. Stir gently to mix and let it melt. - Finally, add salt and pepper to taste. Adjust to your liking before serving. To get the best sauce, aim for a creamy texture. Add the heavy cream slowly. Stir it gently as you combine it with the pesto. You want it smooth, not too thick. If it feels too thick, add a splash of water or broth. This keeps it light and rich. Cooking the tortellini right is key. Follow the package instructions closely. Usually, it takes about 3-5 minutes. Look for the tortellini to float to the top. This means they are done. You want them soft but still firm, not mushy. Drain them well before adding to the sauce. Pair your creamy pesto tortellini with a fresh salad. A simple green salad with vinaigrette works well. You can also serve it with crusty bread. This helps soak up the extra sauce. For garnishing, fresh basil leaves are a must. They add color and a fresh taste. You might sprinkle more grated Parmesan on top. This gives an extra flavor boost. To take the taste up a notch, add fresh herbs. Chopped parsley or thyme works great. You can also stir in some red pepper flakes for heat. Just a pinch can change the whole dish. If you want a twist, try different ingredients. Swap the heavy cream for coconut milk for a lighter option. Use sun-dried tomatoes instead of fresh for a deeper flavor. This lets you get creative while keeping it delicious. {{image_2}} You can easily make this dish vegetarian. Just skip the cheese tortellini with meat. Use cheese tortellini instead. To make it vegan, use vegan tortellini and coconut cream. You can also find dairy-free pesto to keep the flavor. For gluten-free options, choose gluten-free tortellini. Many stores offer this choice now. Feel free to swap out tortellini types. You can use spinach, mushroom, or even chicken tortellini for a twist. If you want a different sauce, try Alfredo or arrabbiata. You can mix it up and add your favorite flavors. Experimenting with sauces can lead to exciting new tastes. Add seasonal veggies for a fresh touch. In summer, use zucchini or bell peppers. In fall, try squash or kale. These veggies not only taste good but also look pretty. You can also adjust for holidays. Add cranberries for Thanksgiving or red and green peppers for Christmas. This can make your dish festive and fun. To store leftovers properly, let the dish cool first. Transfer it to an airtight container. Make sure to seal it tightly. Place it in the fridge within two hours. This keeps the flavors fresh. Consume the leftovers within 3 to 4 days for the best taste. Freezing is simple. First, let the dish cool completely. Portion it into freezer-safe containers. Leave some space at the top for expansion. Seal the containers well to avoid freezer burn. When ready to eat, thaw overnight in the fridge. Reheat in a skillet over low heat, adding a splash of cream if needed. In the fridge, creamy pesto tortellini lasts about 3 to 4 days. In the freezer, it can last up to 2 to 3 months. Always check for any off smells or changes in texture before eating. Yes, you can use frozen tortellini. Just cook it a bit longer. Follow the package instructions for the best results. Frozen tortellini usually takes about 5-8 minutes to cook. To add spice, include red pepper flakes. You can also mix in hot sauce or diced jalapeños. Start with a little and adjust to your taste. This way, you control the heat level. If the sauce is thick, add a splash of broth or water. Stir well to combine. You can also add more cream for a richer taste. Adjust until you reach your desired consistency. Yes, you can use half-and-half or whole milk. These options will make the dish lighter but still creamy. For a dairy-free choice, try coconut cream or a plant-based milk. Yes, this dish is great for meal prep. Cook it ahead and store in containers. Just reheat when ready to eat. It tastes great for up to three days in the fridge. This recipe for creamy pesto tortellini is simple and tasty. You learned about key ingredients and how to prepare them step by step. You can also explore various adaptations to fit your needs. Remember to check refrigeration and freezing tips for leftovers. This dish can please many taste buds, so try it for your next meal! Enjoy the process and have fun in the kitchen.

Creamy Pesto Tortellini Skillet

Discover the ultimate Creamy Pesto Tortellini Skillet recipe that's quick, delicious, and sure to impress! With just a few simple ingredients like fresh basil pesto, cherry tomatoes, and cheese tortellini, you can whip up a stunning meal in just 20 minutes. Perfect for busy weeknights, this dish is creamy, flavorful, and packed with veggies. Click through to explore this easy recipe and treat yourself to a delightful dinner!
Print Recipe Pin Recipe

Ingredients
  

1 package (16 oz) refrigerated cheese tortellini

1 cup heavy cream

1 cup fresh basil pesto

1 cup cherry tomatoes, halved

1 cup spinach, roughly chopped

1 tablespoon olive oil

2 cloves garlic, minced

½ cup grated Parmesan cheese

Salt and pepper to taste

Fresh basil leaves for garnish

Instructions
 

In a large skillet, heat the olive oil over medium heat. Add minced garlic and sauté for about 1 minute until fragrant.

    Add the cherry tomatoes to the skillet and cook for 3-4 minutes, stirring occasionally, until they are soft and slightly blistered.

      Stir in the chopped spinach and cook until wilted, about 2 minutes.

        Add the heavy cream to the skillet, bring it to a gentle simmer, and then stir in the basil pesto until well combined.

          Add the cheese tortellini to the skillet and cook according to package instructions, usually around 3-5 minutes, until they float to the top and are heated through.

            Sprinkle in the grated Parmesan cheese, stirring gently to combine and let it melt into the sauce. Season with salt and pepper to taste.

              Remove from heat and garnish with fresh basil leaves before serving.

                Prep Time: 10 minutes | Total Time: 20 minutes | Servings: 4

                  Related Recipes

                  • - 1 package (16 oz) potato gnocchi - 1 tablespoon olive oil - 3 cloves garlic, minced - 1 can (14 oz) diced tomatoes (with juices) - 1 cup vegetable broth - 1 cup heavy cream - 1 teaspoon dried oregano - 1/2 teaspoon red pepper flakes (optional) - Salt and black pepper to taste - 1 cup fresh basil leaves, chopped - 1/2 cup grated Parmesan cheese These ingredients create a rich and creamy dish. The gnocchi acts as a perfect base. The tomatoes add a sweet and tangy flavor. Garlic brings warmth and depth. Cream gives it that luscious texture. - 1/2 teaspoon smoked paprika - Fresh herbs like thyme or parsley - Additional vegetables (spinach or mushrooms) These extras can enhance the dish. Smoked paprika adds a nice smokiness. Fresh herbs give more brightness. Adding veggies boosts nutrition and flavor. - Large pot or high-sided skillet - Wooden spoon or spatula - Measuring cups and spoons - Knife and cutting board Using the right tools makes cooking easier. A large pot helps mix everything well. A wooden spoon is great for stirring without scratching your pot. These tools help you create this dish smoothly. First, gather your ingredients. You will need: - 1 package (16 oz) potato gnocchi - 1 tablespoon olive oil - 3 cloves garlic, minced - 1 can (14 oz) diced tomatoes (with juices) - 1 cup vegetable broth - 1 cup heavy cream - 1 teaspoon dried oregano - 1/2 teaspoon red pepper flakes (optional for heat) - Salt and black pepper to taste - 1 cup fresh basil leaves, chopped - 1/2 cup grated Parmesan cheese (plus more for serving) Next, chop the fresh basil and mince the garlic. This will add great flavor. 1. Heat the olive oil in a large pot over medium heat. 2. Add the minced garlic and sauté. Watch it closely; you only need about 30 seconds. 3. Pour in the diced tomatoes, juices included. Stir and let them soften for 2-3 minutes. 4. Add the vegetable broth and heavy cream. Stir well and bring to a gentle simmer. 5. Mix in the oregano, red pepper flakes, salt, and black pepper. Let it simmer for 5 minutes. 6. Now, add the gnocchi. Stir gently to cover them in the sauce. Cover the pot and cook for 3-5 minutes. The gnocchi will float when done. 7. Stir in the chopped basil and Parmesan cheese. Keep stirring until the cheese melts and the sauce is creamy. 8. Finally, remove it from the heat. Give it a gentle stir before serving. - Keep an eye on the garlic. It can burn quickly, so stir it often. - When simmering, don’t rush. Let the flavors mix well. - If the gnocchi isn’t floating after 5 minutes, give it a couple more minutes. - Adjust the seasoning to your taste before serving. This dish is quick, easy, and perfect for a cozy meal. Enjoy the creamy goodness! To get that silky feel in your dish, use heavy cream. It adds rich texture. You can also blend in some of the pasta cooking water. This will help the sauce cling to the gnocchi. If you want it creamier, add more cream. Just remember, balance is key. You can boost the taste in many ways. Use fresh garlic instead of garlic powder. Fresh herbs like basil add great flavor. Add a squeeze of lemon juice for brightness. If you like heat, use more red pepper flakes. Experiment with different spices too, like paprika or thyme. Don’t rush the sautéing of garlic. It should be fragrant but not brown. If you overcook the gnocchi, they can become mushy. Keep an eye on them as they cook. Also, avoid skipping the salt. It brings out all the flavors in your dish. Finally, don’t forget to taste as you go. This will ensure your dish is just right. {{image_2}} You can easily make this dish vegetarian or vegan. For a vegetarian twist, use vegetable broth. Replace the heavy cream with coconut milk or cashew cream to keep it creamy and rich. For a vegan option, skip the Parmesan cheese or use a plant-based cheese. Fresh basil and garlic still add amazing flavor. Want to add protein? Chicken works great! Simply cook diced chicken in the pot before adding the garlic. You can also use Italian sausage for a spicy kick. Cook it until browned, then add garlic and follow the recipe. If you prefer seafood, shrimp can be a tasty addition. Just toss it in with the gnocchi and cook until pink. For a gluten-free version, choose gluten-free gnocchi. These are widely available in stores. The rest of the ingredients are naturally gluten-free. Just ensure your broth and any added cheese are also gluten-free. This way, everyone can enjoy this creamy dish without worry. To keep leftovers fresh, place them in an airtight container. Let the dish cool first. Store it in the fridge for up to three days. If you want to enjoy it later, use these tips. You can freeze One-Pot Creamy Tomato Basil Gnocchi. Use a freezer-safe container for best results. Make sure to leave some space at the top for expansion. It will last for about three months. Label the container with the date to track freshness. To reheat, thaw the gnocchi in the fridge overnight first. Heat it in a pot over medium heat. Add a splash of vegetable broth or cream to keep it creamy. Stir gently until it's warm throughout. You can also use a microwave. Heat it in 30-second bursts, stirring in between. Enjoy your delicious meal again! Yes, you can use store-bought gnocchi. It saves time and tastes great. Look for fresh or frozen options. Both work well in this recipe. You can find them in the pasta aisle or the freezer section at your grocery store. Fresh gnocchi cooks faster, so check the package for cooking times. To make this dish dairy-free, swap heavy cream for coconut milk or a dairy-free cream. Use nutritional yeast instead of Parmesan cheese for a cheesy flavor. You can also add a bit of lemon juice for tang. This keeps the dish creamy and rich, without dairy. This dish pairs well with a simple salad. A green salad with mixed greens and vinaigrette works nicely. You can also serve garlic bread for a crunchy side. For a heartier meal, add grilled chicken or shrimp. These options balance the creamy flavors of the gnocchi. This blog post covered everything you need to create a delicious one-pot creamy tomato basil gnocchi. We looked at the main and optional ingredients, discussed useful kitchen tools, and followed step-by-step instructions for making this dish. Tips helped you avoid common mistakes and added extra flavor. You saw different variations and learned how to store leftovers properly. With this knowledge, you can cook with confidence. Now, enjoy crafting your meals and impressing your friends and family!
                    One-Pot Creamy Tomato Basil Gnocchi Delight Recipe
                  • To make Minute Garlic Parmesan Pasta Skillet, you need a few key ingredients. Here’s a simple list: - Main ingredients: - 8 oz spaghetti or your favorite pasta - 4 cloves garlic, minced - 1/4 cup unsalted butter - Sauce components: - 1 cup heavy cream - 1 cup grated Parmesan cheese - Optional ingredients: - 1/2 tsp crushed red pepper flakes (for heat) - Zest of 1 lemon (for brightness) Using fresh garlic enhances the flavor. The butter adds richness, while heavy cream and Parmesan create a creamy sauce. If you like some spice, add red pepper flakes. The lemon zest gives a fresh touch that balances the dish. Gathering these ingredients ensures a quick and tasty meal. I love how easy it is to whip this up. This dish is perfect for busy days or a cozy night in. Enjoy the process of cooking and savor the flavors! First, fill a large pot with salted water. Bring it to a boil. Salt helps to flavor the pasta well. Add 8 oz of spaghetti or your favorite pasta. Cook it according to the package instructions until it is al dente. This usually takes about 8 to 10 minutes. When the pasta is done, save 1 cup of pasta water before draining. This water helps adjust the sauce later. Next, use the same pot to sauté the garlic. Melt 1/4 cup of unsalted butter over medium heat. Add 4 cloves of minced garlic and optional 1/2 tsp of crushed red pepper flakes. Cook for about 1 to 2 minutes. You want the garlic to smell great, but be careful not to burn it. Burnt garlic can ruin the dish. Now for the sauce! Pour in 1 cup of heavy cream and bring it to a gentle simmer. Stir in 1 cup of grated Parmesan cheese. Mix well until the cheese melts. This will take about 2 to 3 minutes. The sauce should thicken slightly. A smooth sauce is key for a great pasta dish. Time to combine! Add the drained pasta back to the pot. Toss it well with the creamy garlic Parmesan sauce. If the sauce seems too thick, add some of the reserved pasta water. Do this a little at a time until you reach your desired sauce thickness. This step makes a big difference in how the dish turns out. Finally, season the pasta with salt and black pepper to taste. Add the zest of 1 lemon for a fresh kick. Lemon zest brightens up the flavors and makes the dish more exciting. Finish by removing the pot from heat. Garnish with fresh parsley before serving. Enjoy your meal! - Use a large pot for boiling pasta. It helps cook evenly. - A pasta pot with a built-in strainer saves time when draining. - Chop garlic and parsley ahead of time. This makes cooking faster. - Measure out all ingredients before starting. This keeps things organized. - Serve pasta in shallow bowls for a nice look. - Top with extra Parmesan and parsley. This adds color and flavor. - Add a lemon wedge on the side. It brightens the dish. - Pair with a simple green salad. A fresh salad balances the meal. - Try adding fresh basil or oregano for more taste. - Consider using thyme for a warm flavor twist. - A splash of white wine can elevate the sauce. - Pair with a crisp white wine like Sauvignon Blanc. It complements garlic well. {{image_2}} You can easily add protein to your Minute Garlic Parmesan Pasta Skillet. Here’s how: - Chicken: Cook diced chicken in the skillet before adding garlic. Cook for about 6-8 minutes until no longer pink. Then add garlic and follow the recipe. - Shrimp: Sauté shrimp for 3-4 minutes. Make sure they turn pink. Then add garlic and continue with the recipe. - Tofu: Use firm tofu. Cube it and sauté for 5-7 minutes until golden. Add garlic next and proceed with the recipe. Cooking times for proteins can vary. Always check that chicken is cooked through. It should reach an internal temperature of 165°F. Shrimp should be opaque, and tofu should be crispy on the outside. If you want a vegetarian dish, try these substitutes: - Pasta: Use any pasta shape you like. Whole wheat or gluten-free options work well too. - Cream: Swap heavy cream with coconut cream for a vegan touch. Or use cashew cream for a lighter feel. - Cheese: Nutritional yeast can replace Parmesan. It gives a cheesy flavor without dairy. These changes keep the dish tasty while meeting your dietary needs. Feel free to swap out ingredients for variety: - Pasta Types: Try penne, fusilli, or even zoodles (zucchini noodles) for a fun twist. - Seasonal Vegetables: Add veggies like spinach, cherry tomatoes, or bell peppers. Cook them with the garlic for extra flavor. These swaps keep the meal fresh and exciting, perfect for any season! To store leftover garlic parmesan pasta, place it in an airtight container. This keeps it fresh and tasty. You should refrigerate it within two hours of cooking. The pasta stays good for up to three days. When reheating, use a skillet over low heat. Add a splash of reserved pasta water or cream. This keeps the sauce creamy and prevents it from drying out. Stir gently until heated through. If you want to freeze the dish, let it cool first. Then, transfer it to freezer-safe containers. Leave some space at the top, as the pasta will expand. Label each container with the date. It can last up to three months in the freezer. To thaw, move it to the fridge overnight. For quick thawing, place it in cold water. When ready to eat, reheat in a skillet over medium heat. Add a bit of reserved pasta water to help it regain its creamy texture. Stir often until hot. This dish is quick to make. It takes about 20 minutes total. You spend 5 minutes prepping ingredients. Cooking the pasta takes around 10 minutes. Sautéing the garlic and making the sauce adds another 5 minutes. Yes, you can swap the cheese! Try using mozzarella for a stretchier texture. Feta adds a tangy kick. You could also use Pecorino Romano for a sharper flavor. Each cheese gives a unique twist to the dish! This pasta pairs well with many sides. A crisp garden salad complements it nicely. Garlic bread adds a tasty touch. Roasted vegetables can add color and flavor too. You could even serve it with grilled chicken for protein. Absolutely! You can make this dish in advance. Store it in airtight containers in the fridge. It stays fresh for up to 3 days. Just reheat it on the stove or in the microwave. To keep it creamy, add a splash of water or cream when reheating. This post covered the key ingredients and steps for making delicious garlic Parmesan pasta. You learned how to cook pasta, sauté garlic, and create a smooth sauce. We also discussed ways to customize the dish with proteins, veggies, and herbs. Remember, cooking is about experimenting and having fun. Use these tips to create your version. Enjoy the dish and share it with friends!
                    Minute Garlic Parmesan Pasta Skillet Quick and Tasty Meal
                  • - Chicken and Marinade Components - 4 boneless, skinless chicken breasts - 1 cup fresh orange juice - 1/4 cup fresh lime juice - 2 tablespoons chili powder - 1 teaspoon cumin - 1 teaspoon garlic powder - 1 teaspoon onion powder - 1 teaspoon smoked paprika - 1/2 teaspoon salt - 1/2 teaspoon pepper - 1 tablespoon olive oil - Vegetables and Toppings - 1 red onion, diced - 1 bell pepper, diced (any color) - 1 can (15 oz) black beans, drained and rinsed - Fresh cilantro, chopped (for garnish) - Sliced avocado (for topping) - Taco Assembly Items - 12 small corn or flour tortillas - Lime wedges (for serving) Gathering these ingredients is the first step to making your tacos. The chicken and marinade create a zesty base. Fresh juices and spices bring life to the dish. The vegetables add crunch and flavor. The toppings elevate your tacos. Tortillas hold everything together. This combination makes a tasty meal that everyone will enjoy. - Mixing Juices and Spices: Start by grabbing a bowl. In it, mix 1 cup of fresh orange juice with 1/4 cup of fresh lime juice. Add 2 tablespoons of chili powder, 1 teaspoon of cumin, 1 teaspoon of garlic powder, 1 teaspoon of onion powder, and 1 teaspoon of smoked paprika. Finally, sprinkle in 1/2 teaspoon of salt and 1/2 teaspoon of pepper. Stir until it all blends well. - Ensuring Chicken Coating: Next, take 4 boneless, skinless chicken breasts and place them in your slow cooker. Drizzle 1 tablespoon of olive oil over the chicken. Then, pour the marinade you just mixed over the chicken. Make sure every piece is coated well. This step is key for great flavor. - Layering Ingredients: Now, scatter diced red onion and bell pepper over the chicken. This adds more flavor and color. The veggies will cook down and mix nicely with the chicken. - Cooking Time Options (Low and High): Cover the slow cooker with a lid. If you choose low heat, cook for 6-7 hours. For high heat, cook for 3-4 hours. The chicken should be tender and easy to shred when done. - Shredding the Chicken: When the cooking time is up, take two forks and shred the chicken right in the slow cooker. Mix it with the onions, peppers, and beans. This helps all the flavors come together. - Assembling the Tacos: Warm 12 small corn or flour tortillas in a skillet or microwave. Take each tortilla and fill it with the chili lime chicken mixture. Top with fresh chopped cilantro, sliced avocado, and a squeeze of lime juice. This adds a nice fresh taste to each bite. Enjoy! To keep the chicken moist, always use a good marinade. The mix of orange juice and lime juice works wonders. It adds flavor and keeps the chicken juicy. I suggest marinating the chicken for at least one hour. For the best taste, try to marinate it overnight. This allows the flavors to soak in deeply. Warming tortillas is key for great tacos. You can heat them in a dry skillet over medium heat. Just a minute on each side is perfect. You can also warm them in the microwave. Wrap them in a damp paper towel and heat for about 20-30 seconds. For the best tacos, choose corn or flour tortillas. Corn tortillas have a great taste and texture. Flour tortillas are soft and easy to fold. Both types work well, so pick what you like! Presentation can make your tacos shine. Serve them on a large platter. Add lime wedges around the tacos for color and flavor. A side of salsa or a fresh salad adds more excitement. You can also sprinkle some extra cilantro on top for a nice touch. {{image_2}} Alternative Proteins You can use different meats or even tofu. Try beef, turkey, or pork. For a vegetarian option, use chickpeas or lentils. Each swap adds its own twist to the flavor and texture. Seasonal Vegetables Options Feel free to mix in seasonal veggies. Zucchini, corn, or squash work well. These vegetables add crunch and extra nutrients to your tacos. You can also use spinach or kale for added greens. Spice Level Modifications If you want more heat, add jalapeños or a dash of cayenne. You could also use spicy chili powder. Adjust the spice to your liking. For milder flavors, skip the heat altogether. Different Marinade Ideas Experiment with different marinades. You can use mango juice instead of orange juice for sweetness. Try adding fresh herbs like cilantro or basil for extra layers of flavor. A splash of soy sauce can also give it a unique twist. Gluten-Free Alternatives Use corn tortillas instead of flour ones to keep it gluten-free. You can also serve the chicken over rice or in a salad for a gluten-free meal. Make sure to check labels on all ingredients. Vegan Options for the Recipe To make this dish vegan, swap the chicken for jackfruit or tofu. Use vegetable broth instead of juices for the marinade. These changes keep the bold flavors while making it plant-based. To store leftovers, place the chili lime chicken in an airtight container. This keeps the chicken fresh. Make sure to cool it to room temperature first. For best taste, use leftovers within 3 days. The shelf life of the prepared dish is about 3 days in the fridge. For freezing tacos, let them cool completely. Then, wrap each taco in plastic wrap. After that, place them in a freezer-safe bag. This helps keep them fresh for up to 3 months. When ready to eat, thaw tacos in the fridge overnight. Reheat in the oven at 350°F for about 15 minutes. You can prep the chicken and marinade in advance. Mix the marinade and coat the chicken. Store it in the fridge for up to 24 hours. This makes it easy to cook later. Use glass or BPA-free plastic containers for storage. They are best for keeping food fresh and safe. Yes, you can use frozen chicken. However, you must adjust the cooking time. When using frozen chicken, cook on high for about 5-6 hours. This ensures the chicken cooks through and remains tender. You can try many toppings! Here are some great options: - Fresh diced tomatoes - Shredded cheese like cheddar or cotija - Sour cream or Greek yogurt - Sliced jalapeños for a kick - Chopped green onions for added crunch To add more heat, you can: - Include diced jalapeños in the marinade. - Use spicy chili powder or cayenne pepper. - Serve with hot salsa or hot sauce on top. These changes will bring a nice kick to your tacos! Yes, you can use a regular pot. Just cook on low heat and cover it. Stir often to prevent sticking. The cooking time will be about 1.5 to 2 hours. Make sure the chicken cooks until it's tender enough to shred. These sides work great: - Mexican rice for a filling meal - Refried beans for a creamy touch - A fresh salad with lime dressing - Corn on the cob for sweetness These sides will complement your tacos perfectly! This blog post covered everything you need for delicious chili lime chicken tacos. We looked at the key ingredients and shared step-by-step cooking instructions. You learned tips to perfect the chicken and the best ways to serve tacos. Don't forget the variations that let you customize flavors and keep meals fresh. Finally, we shared smart storage ideas to enjoy leftovers or meal prep. Now, grab your ingredients and start cooking! You’re just a few steps away from tasty tacos. Enjoy your meal!
                    Slow Cooker Chili Lime Chicken Tacos Flavorful Delight
                  • - Chicken - 4 boneless, skinless chicken thighs - Vegetables - 2 cups broccoli florets - 1 red bell pepper, sliced - 1 yellow bell pepper, sliced - 1 medium red onion, sliced - Balsamic Glaze Components - 1/3 cup balsamic vinegar - 2 tablespoons honey - 2 tablespoons olive oil - 3 cloves garlic, minced - 1 teaspoon dried thyme - Salt and pepper to taste For this recipe, I make sure to use the right amounts. Here’s what you need: - Chicken: 4 thighs - Broccoli: 2 cups - Red bell pepper: 1 - Yellow bell pepper: 1 - Red onion: 1 medium - Balsamic vinegar: 1/3 cup - Honey: 2 tablespoons - Olive oil: 2 tablespoons - Garlic: 3 cloves - Thyme: 1 teaspoon - Salt and pepper: to taste - Fresh parsley for garnish (optional) Using fresh parsley adds a nice touch. It also makes the dish look pretty. With these ingredients, you’ll create a tasty meal that is both healthy and colorful! First, you need to preheat your oven to 425°F (220°C). This step is key for even cooking. While the oven heats up, grab a large sheet pan. Line it with parchment paper for easy cleanup. It also helps the food not stick. In a small bowl, whisk together the balsamic vinegar, honey, olive oil, minced garlic, dried thyme, salt, and pepper. This mixture creates a tasty glaze. Make sure to mix it well. The flavors blend together, giving your dish a rich taste. Now, place the chicken thighs on one side of the sheet pan. Pour half of the balsamic glaze over the chicken. Make sure each piece is coated well. On the other side, arrange the broccoli florets, sliced bell peppers, and red onion. Drizzle the rest of the glaze over the veggies. Toss them gently to coat evenly. Bake the pan in your preheated oven for 25-30 minutes. Check that the chicken reaches an internal temperature of 165°F (75°C). The vegetables should be tender and slightly caramelized. Once done, remove the pan from the oven. Let it sit for 5 minutes before serving. If you want, garnish with fresh parsley for a pop of color. Enjoy your meal! To ensure your chicken is juicy and safe to eat, check the internal temperature. Use a meat thermometer to confirm it reaches 165°F (75°C). Insert the thermometer into the thickest part of the thigh. If it reads 165°F, your chicken is done! Let it rest for a few minutes before serving. This helps keep the juices inside. To boost the flavor of your veggies, start with good seasoning. Use salt and pepper generously. A little olive oil helps too. Toss the vegetables in the balsamic glaze well. This adds sweetness and depth. For caramelization, roast them until they're soft and slightly brown. This brings out their natural sweetness and adds great texture. Meal prep can save you time during busy weeks. Chop your veggies a day ahead and store them in the fridge. You can also marinate the chicken in the balsamic glaze overnight. This gives the chicken more flavor and makes cooking easier. When it's time to cook, just toss everything on the sheet pan. Easy and quick! {{image_2}} You can change up the protein in this dish. Try using chicken breasts or turkey. For a meatless option, use firm tofu or chickpeas. Swap the veggies too. Instead of broccoli, try green beans or asparagus. You can also use zucchini or carrots. Mixing and matching makes this dish fun and new each time. This meal pairs well with many sides. Serve it over rice for a filling option. Quinoa adds a nutty taste and is healthy too. You can also enjoy it with crusty bread. The bread is perfect for soaking up the tasty glaze. Feel free to add a side salad for some crunch and freshness. Want to make it even tastier? Add spices like paprika or cumin. Fresh herbs like rosemary or basil can boost the flavor too. A squeeze of lemon juice brightens the dish. Try adding chili flakes for a spicy kick. These small changes can take your meal to the next level. To keep your sheet-pan balsamic glazed chicken and veggies fresh, store them in an airtight container. Place the chicken and veggies in the fridge within two hours of cooking. They will last up to three days. Label your container with the date. This way, you know when to eat them. When you're ready to enjoy leftovers, preheat your oven to 350°F (175°C). Place the chicken and veggies on a baking sheet. Cover them with foil to prevent drying. Heat for about 15-20 minutes or until warm. You can also reheat in the microwave if you’re short on time. Just heat for 1-2 minutes, checking often. If you want to save some for later, freezing is a great option! First, let the chicken and veggies cool completely. Then, place them in a freezer-safe bag or container. Remove as much air as possible before sealing. You can freeze them for up to three months. To reheat, thaw in the fridge overnight and then follow the reheating instructions. Bake the chicken for 25 to 30 minutes. The chicken is done when it reaches 165°F. Use a meat thermometer to check this. The veggies will cook nicely alongside the chicken. They will be tender and slightly caramelized. This cooking time makes it easy and quick. Yes, you can use frozen chicken and veggies. Just remember to adjust the cooking time. Frozen chicken may take longer to cook. Make sure it reaches the safe temperature of 165°F. For frozen veggies, they may need less time to cook. Keep an eye on them to avoid overcooking. You can serve this dish with many sides. Try rice for a filling option. Quinoa is also a great choice for a healthy twist. You can add a fresh salad for some crunch. Bread is nice for soaking up the glaze too. Choose what you like best to make your meal complete. This blog post covered the key ingredients, steps, and tips for making balsamic glazed chicken. We explored the main ingredients, including chicken and fresh veggies, and discussed how to prepare the dish. I shared useful cooking and flavor tips to help you succeed. In the end, this recipe is easy to adapt. You can switch ingredients and sides based on what you like. Enjoy your cooking and the delicious meal ahead!
                    Sheet-Pan Balsamic Glazed Chicken and Veggies Delight

                  WANT TO SAVE THIS RECIPE?

                  Leave a Reply Cancel reply

                  Your email address will not be published. Required fields are marked *

                  Recipe Rating


                  Hi I’m Taling

                  I love sharing perfected dishes from my kitchen. I’m sure they’ll earn a spot in your heart. Let’s savor this journey together!.

                  More about me

                  Recent Desserts

                  • - 1 ½ cups all-purpose flour - 1 teaspoon baking powder - ½ teaspoon baking soda - ½ teaspoon salt - 1 teaspoon ground cinnamon - ½ teaspoon ground nutmeg - ½ teaspoon ground ginger - 2 large eggs - 1 cup canned pumpkin puree - ½ cup brown sugar, packed - ½ cup granulated sugar - ½ cup vegetable oil - 1 teaspoon vanilla extract - 1 cup semi-sweet chocolate chips - ½ cup chopped walnuts (optional) For this recipe, it's key to measure carefully. Use a dry measuring cup for the flour. Spoon the flour into the cup and level it off. This helps avoid too much flour. If you don't have ground ginger, try using allspice or leave it out. You can swap the granulated sugar for coconut sugar for a richer flavor. If you need a nut-free version, skip the walnuts. Choose high-quality canned pumpkin puree. Look for brands that list pumpkin as the only ingredient. Fresh spices give a stronger flavor than old ones. For chocolate chips, semi-sweet is best, but dark chocolate also works well. If you can, use organic eggs and sugar for a cleaner taste. Quality ingredients make a big difference in flavor and texture. Start by heating your oven to 350°F (175°C). While it warms up, grab a 9x5 inch loaf pan. Grease it well with cooking spray or butter. This helps the loaf come out easily after baking. In a medium bowl, combine the all-purpose flour, baking powder, baking soda, salt, cinnamon, nutmeg, and ginger. Whisk these together until they blend well. This mix gives the loaf its great flavor and texture. In a large mixing bowl, crack the two eggs. Beat them lightly. Then, add the pumpkin puree, brown sugar, granulated sugar, vegetable oil, and vanilla extract. Mix these ingredients until they are smooth and well combined. This step is key for a moist loaf. Now, it's time to add the dry mix to your wet ingredients. Do this slowly and stir gently. You want to combine them without overmixing. Next, fold in the semi-sweet chocolate chips and, if you like, the chopped walnuts. Stir until they are evenly spread throughout the batter. Pour the batter into your prepared loaf pan. Use a spatula to smooth the top. Bake it in the oven for 55-65 minutes. To check if it's ready, insert a toothpick into the center. If it comes out clean, your loaf is done. Remove it from the oven and let it cool in the pan for about 10 minutes. Then, transfer it to a wire rack to cool completely. Enjoy your delicious creation! To make your pumpkin chocolate chip loaf perfect, avoid common baking mistakes. First, measure your flour correctly. Too much flour can make the cake dry. Use the spoon and level method for best results. Next, do not overmix your batter. Stir until just combined for a soft loaf. Finally, check your oven's temperature. An oven that is too hot can burn the edges. For a moist loaf, use canned pumpkin puree, not fresh pumpkin. Canned pumpkin gives a smooth texture. Adding eggs helps bind the ingredients and adds moisture. Use room temperature eggs for better mixing. The right balance of sugars also helps. Brown sugar adds moisture, while granulated sugar gives a nice rise. To elevate flavor, add spices like allspice or cloves. They give warmth to the loaf. You can also mix in nuts for crunch. Use walnuts for a rich texture. If you want a twist, try using dark chocolate chips instead of semi-sweet. For a fun touch, add a swirl of cream cheese in the batter before baking. This adds creaminess and a tangy kick. {{image_2}} To make a gluten-free version, swap regular flour with gluten-free all-purpose flour. This flour is easy to find and works well in most recipes. Use a blend that contains xanthan gum for the best results. Your loaf will still be moist and delicious. For a dairy-free loaf, replace the eggs with flax eggs. Mix one tablespoon of flaxseed meal with three tablespoons of water for each egg. Let it sit for five minutes to thicken. Also, use a dairy-free milk like almond or coconut milk instead of any dairy milk. You can get creative with add-ins. Try adding dried cranberries, chopped pecans, or even a swirl of cream cheese for a tangy twist. For toppings, sprinkle some cinnamon sugar before baking for a crunchy crust. A drizzle of caramel sauce on top makes it even more special! To keep your pumpkin chocolate chip loaf fresh, wrap it tightly. Use plastic wrap or aluminum foil. You can also place it in an airtight container. Store it at room temperature for up to three days. If you want it to last longer, refrigerate it. Just remember, cold air can dry it out. Freezing is a great way to save your loaf. Slice it first for easy serving later. Wrap each slice in plastic wrap, then place them in a freezer bag. Squeeze out the air to prevent freezer burn. You can freeze the loaf for up to three months. Label the bag with the date for easy tracking. To enjoy your loaf again, thaw it overnight in the fridge. For a warm treat, preheat your oven to 350°F (175°C). Place the loaf or slices on a baking sheet. Heat for about 10-15 minutes until warm. You can also use a microwave. Heat for 20-30 seconds per slice, but check often. Enjoy your delicious, warm pumpkin chocolate chip loaf! Yes, you can use fresh pumpkin. First, cook and puree your pumpkin. Make sure it is smooth and not too watery. Canned pumpkin is thicker, so adjust your other liquids if needed. You can make this recipe healthier by using whole wheat flour instead of all-purpose flour. You can also reduce the sugar by using applesauce or honey. For added fiber, mix in some ground flaxseed. The best way to check if the loaf is done is with a toothpick. Insert it into the center of the loaf. If it comes out clean or with a few crumbs, your loaf is ready. Yes, you can make mini loaves! Just divide the batter into smaller pans. Bake for about 20-30 minutes. Keep an eye on them to avoid overbaking. The cake will last about 2-3 days at room temperature. Make sure to store it in an airtight container. This helps keep it moist and fresh. In this post, we explored everything about making a pumpkin chocolate chip loaf cake. We covered the right ingredients, step-by-step instructions, and helpful tips for baking. You learned about variations and the best ways to store your cake. Baking can be fun and tasty with the right know-how. Now, you can enjoy this delicious treat on any occasion! Happy baking!
                    Pumpkin Chocolate Chip Loaf Cake Irresistible Recipe
                  • To make Apple Cider Donut Trifle Cups, you'll need: - 4 apple cider donuts, crumbled - 2 cups vanilla pudding - 1 cup whipped cream - 1 cup diced apples (preferably sweet varieties) - 1 teaspoon cinnamon - 2 tablespoons brown sugar These ingredients blend to create a sweet, layered dessert that brings joy to any gathering. Enhance your trifle cups with these garnishes: - Caramel sauce for drizzling - Thin apple slices for decoration - Crushed nuts for added crunch These little touches make your trifle cups look and taste even better! You can switch some ingredients if needed: - Use chocolate pudding instead of vanilla for a richer flavor. - Swap apple cider donuts for cinnamon donuts or sponge cake. - Try different apples, like tart Granny Smith or sweet Fuji. These substitutions allow you to customize the trifle to your taste and what you have on hand. Start by dicing your apples into small pieces. I prefer sweet apples for their taste. In a small bowl, mix the diced apples with one teaspoon of cinnamon and two tablespoons of brown sugar. This blend adds a warm, sweet flavor. Let the apples sit for about 10 minutes. This allows the sugar to draw out the juice from the apples. You will see a nice syrup form at the bottom of the bowl. Grab your clear cups or dessert glasses. Begin with a layer of crumbled apple cider donuts. Use about half of the donuts for the bottom layer. Next, spoon a layer of vanilla pudding over the donuts. Smooth it out with the back of your spoon for a nice look. After that, add a layer of whipped cream. You can use a piping bag for a fancy touch, or just spoon it on. Now, take your cinnamon-sugar apple mixture and spoon it over the whipped cream. Repeat the layering process. Start again with donut crumbles, then pudding, followed by whipped cream, and finally the apple mixture. Finish with a big dollop of whipped cream on top. If you want to make it special, drizzle some caramel sauce over the top. A sprinkle of cinnamon adds a nice touch, too. Enjoy this treat chilled for the best flavor! Make your trifle cups look great. Use clear cups to show off the layers. This makes it fun to see the bright apples, cream, and donuts. For a fancy touch, add a thin apple slice on the rim. A sprinkle of crushed nuts adds crunch and color. Serve the cups chilled for the best taste. To boost flavor, try adding nutmeg or ginger to the apple mix. These spices add warmth that pairs well with the sweet donuts. Drizzle some caramel sauce on top for extra sweetness. You can also swap the vanilla pudding for a butterscotch or pumpkin flavor. These changes can make the trifle even more special. One mistake is not letting the apples sit long enough. They need to sit so they can soak up the cinnamon and sugar. This step brings out their natural sweetness. Avoid overfilling the cups. Each layer should be even and not too packed. This helps keep each bite balanced and tasty. Lastly, don't skip the chilling step. Chilling helps the flavors blend and makes each bite creamy and smooth. {{image_2}} You can change your trifle cups with the seasons. In fall, use spiced donuts. In winter, try peppermint donuts for a festive twist. In spring, swap for lemon donuts to brighten the dish. Summer? Fresh berry toppings can add a burst of color and flavor. Each season brings new tastes to enjoy. To make this treat gluten-free, use gluten-free apple cider donuts. Check the label to be sure. For a vegan option, swap the pudding for a plant-based version and use coconut cream instead of whipped cream. You can still enjoy all the layers without missing any flavors. Mixing flavors can elevate your trifle. Add nutmeg for warmth or ginger for a kick. Try using different fruits like pears or berries. You can even mix in some nuts for crunch. These small changes can create a new favorite dessert every time. Store your Apple Cider Donut Trifle Cups in the fridge. Use an airtight container. They will stay fresh for about 2 to 3 days. Keep the whipped cream from getting too soft. If you notice it losing its shape, enjoy them quickly. Freezing is not the best option for these trifle cups. The texture of the whipped cream and pudding can change. If you must freeze them, separate the layers first. You can freeze the crumbled donuts and apple mixture. Just thaw them before layering again. These trifle cups taste best when served cold. Enjoy them the same day you make them. The flavors blend nicely after a few hours in the fridge. They are perfect for parties or gatherings, especially in autumn. Yes, you can use store-bought apple cider donuts. They save time and still taste great. Just crumble them up as you would with homemade ones. The flavor will still shine through in your trifle cups. You can store the trifle cups in the fridge for up to two days. Keep them covered to avoid drying out. After two days, the donuts may get soggy. You can use chocolate pudding or butterscotch pudding instead of vanilla. Both will add a fun twist to your trifle. If you want a lighter option, try Greek yogurt mixed with honey. Yes, you can use gluten-free apple cider donuts for this recipe. Check the store for gluten-free brands. Ensure the pudding and any other ingredients are gluten-free too. Yes, you can make this trifle ahead of time. Assemble it a day in advance and store it in the fridge. Just add the whipped cream and caramel sauce right before serving for the best taste. This blog covered key ingredients and how to prepare them for your trifle. I shared tips for better presentation and ways to adapt the recipe for different diets. Remember to store your trifle properly for the best taste. Enjoy experimenting with flavors and substitutes to make it your own. With these steps in mind, you can create a great dessert that impresses everyone!
                    Apple Cider Donut Trifle Cups Easy Seasonal Delight
                  • To make a delicious Cinnamon Streusel Coffee Cake, you will need: - 2 cups all-purpose flour - 1 cup granulated sugar - ½ cup unsalted butter, softened - 2 large eggs - 1 cup sour cream - 1 teaspoon vanilla extract - 1 teaspoon baking powder - ½ teaspoon baking soda - ½ teaspoon salt - 1 tablespoon ground cinnamon - ½ cup brown sugar, packed - ½ cup chopped walnuts or pecans (optional) - ¼ cup powdered sugar (for dusting) These ingredients come together to create a rich and moist cake with a crunchy topping. You can add extra flavor to your cake. Here are some ideas: - Chopped fruit: Try adding apples or pears for a fruity twist. - Chocolate chips: These add sweetness and richness. - More nuts: If you love nuts, add more walnuts or pecans. - Citrus zest: A bit of lemon or orange zest brightens up the flavor. Feel free to mix and match based on your taste! Choosing the best ingredients makes your cake taste great. Here are some tips: - Flour: Use fresh all-purpose flour. Check the date on the bag. - Butter: Choose high-quality unsalted butter for rich flavor. - Eggs: Fresh eggs make for a fluffier cake. Look for organic if possible. - Sour cream: A creamy, full-fat sour cream adds moisture. - Spices: Use fresh cinnamon for a strong and warm flavor. Good ingredients lead to a great outcome. Enjoy your baking! Start by preheating your oven to 350°F (175°C). This step ensures your cake bakes evenly. While the oven heats, grease and flour a 9x13-inch baking pan. This helps the cake come out easily after baking. It also prevents sticking. In a large mixing bowl, cream ½ cup of softened butter with 1 cup of granulated sugar. Mix until the mixture looks light and fluffy. This step adds air and helps your cake rise. Next, beat in 2 large eggs, one at a time. Make sure to mix well after each egg. Then, stir in 1 cup of sour cream and 1 teaspoon of vanilla extract. Mix until everything is combined. In a separate bowl, whisk together 2 cups of all-purpose flour, 1 teaspoon of baking powder, ½ teaspoon of baking soda, and ½ teaspoon of salt. Gradually add this dry mix to the wet mix. Stir gently until just combined. Be careful not to over-mix. This keeps the cake light. In a small bowl, mix together ½ cup of brown sugar and 1 tablespoon of ground cinnamon. If you like, add ½ cup of chopped walnuts or pecans for a nice crunch. Combine these ingredients well. Pour half of the batter into the prepared baking pan. Spread it evenly. Then, sprinkle half of the streusel mixture on top. Pour the remaining batter over this layer. Finally, finish with the last of the streusel mixture on top. Place the pan in the oven and bake for 30-35 minutes. Check if it’s done by inserting a toothpick into the center. If it comes out clean, your cake is ready. After baking, let the cake cool in the pan for about 10-15 minutes. Once cooled, dust the top with ¼ cup of powdered sugar. This adds a lovely touch and makes it look fancy. Now, you can cut it into squares. Enjoy your warm coffee cake! When making cinnamon streusel coffee cake, watch out for a few common errors. First, do not over-mix your batter. Mixing too much makes the cake dense. Second, make sure your oven is at the right temperature. An oven that is too hot can burn the cake, while one that is too cool will leave it soggy. Lastly, ensure you let the cake cool before dusting with powdered sugar. If you do this too soon, the sugar will melt and disappear. To get the perfect texture, use room-temperature ingredients. Cold butter or eggs can lead to uneven mixing. Also, make sure to measure your flour correctly. Too much flour can create a dry cake. Use the spoon and level method: spoon flour into your measuring cup and level it off with a knife. This will help you get the right amount. Lastly, bake until a toothpick comes out clean. This ensures your cake is moist and fluffy. Serve your coffee cake warm for the best taste. Pair it with a cup of coffee or tea for a lovely treat. You can also add fresh fruit, like berries or sliced bananas, on the side. If you want an extra touch, try adding a scoop of vanilla ice cream or whipped cream on top. This makes for a delightful dessert option! {{image_2}} You can easily skip the nuts in the cinnamon streusel. Just leave out the walnuts or pecans. This change makes the cake safe for those with nut allergies. It still tastes great! The streusel will be just as sweet and crunchy without them. You can switch things up for the seasons. Try adding pumpkin puree for a fall treat. Use one cup of pumpkin instead of sour cream. You can add pumpkin spice for extra flavor. For summer, add fresh apples. Chop them into small pieces and fold them into the batter. This adds a lovely fruity taste. If you want to change the topping, consider a cream cheese glaze. Mix cream cheese, powdered sugar, and a little milk. Drizzle it on top after the cake cools. For a lighter option, dust with extra powdered sugar or even cinnamon. Each choice gives your coffee cake a new twist! To keep your Cinnamon Streusel Coffee Cake fresh, store it in an airtight container. This will help it stay moist. You can also wrap it tightly in plastic wrap. Place it at room temperature for up to three days. If you want it to last longer, the fridge is a good option. Just know that it may dry out a bit. If you want to save some for later, freezing is a great choice. First, let the cake cool completely. Then, cut it into squares for easy serving. Wrap each square in plastic wrap. After that, place them in a freezer-safe bag. You can freeze the cake for up to three months. When you’re ready to eat, just pull out a piece. To enjoy your cake warm, reheating is simple. Preheat your oven to 350°F (175°C). Place the cake on a baking sheet. Cover it with foil to prevent it from drying out. Heat for about 10 to 15 minutes. You can also use the microwave. Heat for 15 to 20 seconds, but be careful not to make it tough. Enjoy your cake with a fresh cup of coffee! You can use plain yogurt as a sour cream substitute. It has a similar taste and texture. You can also use buttermilk or a mix of milk and vinegar. Each option keeps the cake moist and tasty. Yes, you can make this coffee cake vegan. Use plant-based butter and substitute eggs with flax eggs. Mix one tablespoon of ground flaxseed with three tablespoons of water to replace one egg. For sour cream, use unsweetened coconut yogurt or another dairy-free yogurt. Check the cake after 30 minutes. Insert a toothpick into the center. If it comes out clean or with a few crumbs, the cake is done. If wet batter sticks to the toothpick, bake for a few more minutes. Always let it cool before cutting. This blog post shared key steps to bake a great coffee cake. You learned about essential ingredients and fun add-ins to enhance flavor. We covered precise instructions, tips for perfect texture, and creative variations. Storing leftovers and reheating keep your cake fresh and tasty. Enjoying coffee cake brings family and friends together. With these tips, you can bake one that everyone will love. Happy baking!
                    Cinnamon Streusel Coffee Cake Simple and Delicious Treat
                  • - 1 cup almond butter - ½ cup coconut oil, melted - ¼ cup cocoa powder - ¼ cup maple syrup or honey - 1 teaspoon pure vanilla extract - ¼ teaspoon sea salt - ½ cup dark chocolate chips - ¼ cup chopped almonds (optional topping) Gather these simple ingredients. Each one plays a key role in flavor and texture. Almond butter gives a creamy base. Coconut oil helps things bind together while adding richness. Cocoa powder provides that deep chocolate taste. Maple syrup or honey adds just the right sweetness. Vanilla extract boosts all the flavors. Sea salt balances the sweetness and enhances taste. Dark chocolate chips are the final layer of joy. If you like, sprinkle chopped almonds on top for crunch. This mix will help you create a treat that feels indulgent yet simple. - In a mixing bowl, combine: - 1 cup almond butter - ½ cup melted coconut oil - ¼ cup cocoa powder - ¼ cup maple syrup or honey - 1 teaspoon pure vanilla extract - ¼ teaspoon sea salt - Stir the mixture until it is smooth and well combined. This step is key for a rich flavor. - Line a muffin tin with paper liners to keep the cups from sticking. - Spoon about 2 tablespoons of the almond butter mixture into each liner. Fill them halfway. Use the back of a spoon to press down gently for even layers. - Place the muffin tin in the freezer for 15 to 20 minutes. This helps the almond butter layer set. - While that freezes, melt ½ cup dark chocolate chips in a microwave-safe bowl. Heat in 30-second bursts, stirring until smooth. - Remove the muffin tin from the freezer. Pour the melted chocolate over the almond butter layer in each cup. - If you want, sprinkle with ¼ cup chopped almonds for a nice crunch. - Return the muffin tin to the freezer for another 30 minutes to let the chocolate set. - After they are set, remove the cups from the freezer and peel away the paper liners. Enjoy! - Use natural almond butter for a healthier option. This choice enhances flavor and nutrition. - Allow the chocolate to cool slightly before pouring over the almond butter. This helps keep the layers distinct. - Replace maple syrup with agave nectar for a vegan option. This change keeps the sweetness while meeting dietary needs. - Use other nut butters like peanut butter for a different flavor. Each nut butter brings its own unique taste and texture. {{image_2}} You can easily mix up the flavors. Adding a pinch of sea salt on top gives a nice touch. Salt balances the sweetness and enhances the chocolate. Another fun idea is to add shredded coconut into the almond butter mix. This adds a chewy texture and a tropical twist to your cups. You can adjust the taste and feel by changing the cocoa powder amount. Adding more cocoa powder gives a richer, deeper chocolate flavor. To add crunch, try topping your cups with different nuts or seeds. Chopped walnuts or sunflower seeds work well. Mixing these in can make the treat even more delicious! You can keep these no-bake chocolate almond butter cups in the freezer. Use an airtight container for best results. They will stay fresh for up to 2 months. When you want to enjoy them, simply thaw before serving. If you’re in a hurry, you can eat them straight from the freezer. They taste great cold! These cups are best enjoyed at room temperature. Let them sit out for a few minutes before serving. Avoid putting them in the microwave. Reheating can change their texture, and we want them to stay smooth and creamy. Enjoy your tasty treat! Yes, you can use peanut butter or cashew butter. Both options work well. Each nut butter adds a unique flavor. This gives you room to create your favorite taste. These cups can be stored in the freezer for up to 2 months. Just keep them in an airtight container. They will stay fresh and tasty. You can enjoy them whenever you like. Yes, they are quite healthy. They contain good fats from the nut butter and coconut oil. The maple syrup or honey adds natural sweetness. This makes them a guilt-free treat that tastes great! These no-bake chocolate almond butter cups are easy and fun to make. You only need a few ingredients and simple steps to get delicious results. Remember, you can swap ingredients to match your taste. Store them in your freezer for a sweet treat anytime. Enjoy this guilt-free snack without worry. You’ll love how satisfying they are and how quick they come together. Happy cooking!
                    No-Bake Chocolate Almond Butter Cups Delightfully Simple

                  Recent Drinks

                  • - 1 ripe banana - 2 tablespoons natural peanut butter - 1 cup unsweetened almond milk (or any milk of choice) - 1 scoop vanilla protein powder (plant-based or whey) - 1 tablespoon chia seeds - 1 teaspoon honey (optional for sweetness) - A pinch of cinnamon - Ice cubes (optional, for a thicker texture) Gather these simple items before you start. A ripe banana gives natural sweetness and creaminess. Use two tablespoons of natural peanut butter for a rich flavor. Almond milk is my go-to, but any milk you love works great. The protein powder adds a boost of nutrition. Choose vanilla to match the banana. Chia seeds are tiny but mighty. They add fiber and help keep you full. If you like it sweeter, add honey, but it’s not a must. A pinch of cinnamon brings warmth and depth to this drink. For a thicker texture, toss in some ice cubes. This smoothie is flexible, so feel free to mix and match based on your taste. Now, let's blend it all together! 1. Start by peeling the ripe banana. Break it into small chunks. 2. In a blender, combine the banana chunks, natural peanut butter, almond milk, protein powder, chia seeds, and a pinch of cinnamon. 3. If you like a colder and thicker smoothie, add some ice cubes. 1. Blend all the ingredients on high speed. Keep blending until you have a smooth and creamy mix. 2. Stop the blender and taste your smoothie. If you want it sweeter, add honey. Blend again for a few seconds to mix. 1. Pour the smoothie into a tall glass. Enjoy it right away for the best taste and creaminess. 2. For a fun twist, you can top it with extra chia seeds or banana slices. This makes it look pretty too! To get the perfect texture, use a ripe banana. A ripe banana makes the smoothie creamy. Add ice cubes if you want it thicker. If you prefer a smoother drink, blend longer. Scrape the sides of the blender to mix all the ingredients well. This ensures a silky-smooth result. If your smoothie tastes too bland, add honey or more banana. Start with a teaspoon of honey. Blend and taste again. You can always add more honey if needed. This way, you control the sweetness to match your taste. Remember, ripe bananas also add natural sweetness. Use a high-speed blender for the best results. A strong blender breaks down the ingredients quickly. If you have a less powerful blender, blend in stages. Start with the liquids first, then add the solids. This helps everything mix better. Make sure your blender is clean for the best flavor. {{image_2}} You can switch the peanut butter for other nut butters. Almond butter offers a nutty taste. Cashew butter is creamy and sweet. Sunflower seed butter is a great choice for allergies. Each nut butter brings its own flavor and health benefits. Experiment to find your favorite. You can add many fruits to the smoothie. Frozen berries add sweetness and color. Spinach or kale boosts nutrition without changing the taste. Try mango for a tropical twist. Each fruit adds vitamins and makes the smoothie fun. Mix and match to discover new flavors. Choosing the right protein powder is key. Plant-based powders are great for vegan diets. Whey protein is popular for muscle recovery. Look for flavors that match your taste, like chocolate or vanilla. The right powder can enhance the smoothie’s flavor and nutrition. Test different types to see what you prefer. Store any leftover smoothie in an airtight container. You want to keep it fresh. Place it in the fridge right after making it. It will stay good for about one day. When you are ready to drink it again, shake or stir well. This helps mix any settled ingredients. You can freeze your smoothie for later. Pour it into ice cube trays or freezer-safe bags. This way, you can grab a portion whenever you want. To use, thaw the smoothie overnight in the fridge. You can also blend it again for a fresh taste. In the fridge, your smoothie lasts about 24 hours. In the freezer, it can last up to three months. Just remember, the sooner you drink it, the better the taste and texture will be! Yes, this smoothie is gluten-free. All the ingredients listed are naturally free from gluten. The peanut butter, banana, almond milk, protein powder, chia seeds, and honey do not contain gluten. Always check labels if you use store-bought items to confirm they are gluten-free. Absolutely! To make this smoothie vegan, simply use plant-based protein powder. Ensure your peanut butter is also free from animal products. Replace honey with maple syrup or agave nectar for sweetness. All other ingredients are already vegan-friendly. This smoothie offers many health benefits. It provides protein from the peanut butter and protein powder, which helps build muscle. Bananas add potassium, good for heart health. Chia seeds are packed with fiber, aiding digestion. Almond milk is low in calories and rich in vitamins. Yes, you can use various milk types. Cow’s milk will add creaminess and protein. Soy milk is a great option for extra protein. Coconut milk gives a tropical flavor. Each milk option changes the taste and texture slightly, so choose what you enjoy best. This smoothie recipe combines simple ingredients for great taste and nutrition. You learned step-by-step how to prepare it and tips for perfect texture. Variations let you customize your drink to fit your taste. Remember to store leftovers properly for later enjoyment. Smoothies can be healthy and fun. Try new mixtures to find what you love best. Keep experimenting and enjoy your delicious creations!
                    Peanut Butter Banana Protein Smoothie Easy Recipe
                  • To make a delicious Turmeric Golden Milk Latte, gather these simple ingredients: - 2 cups almond milk (or your preferred milk) - 1 teaspoon ground turmeric - ½ teaspoon ground ginger - ¼ teaspoon cinnamon - 1 tablespoon honey or maple syrup (adjust to taste) - Pinch of black pepper - ½ teaspoon vanilla extract - Optional: a sprinkle of nutmeg for garnish - Almond Milk: This milk is low in calories and rich in vitamins. It helps with heart health. - Turmeric: This spice has curcumin, known for its anti-inflammatory properties. It may help improve brain function. - Ginger: Ginger can help with digestion and nausea. It adds a nice warmth to the drink. - Cinnamon: This spice is rich in antioxidants. It may help lower blood sugar and improve heart health. - Honey or Maple Syrup: Both sweeteners can boost energy. They also provide antioxidants. - Black Pepper: This spice enhances turmeric absorption. It makes the drink more effective. - Vanilla Extract: It adds flavor and can help reduce stress. - Nutmeg: This spice is optional, but it adds warmth and a nice aroma. - Milk Options: You can use oat milk, soy milk, or coconut milk for different flavors. - Sweeteners: If you prefer, try agave syrup or stevia as sugar-free options. - Spices: Experiment with cardamom or cloves for added flavor. - Nutmeg: You can skip it if you don't like nutmeg, or use a touch of cocoa powder instead. 1. Start by taking a small saucepan. 2. Add 2 cups of almond milk to the pan. 3. Measure and add 1 teaspoon of ground turmeric. 4. Next, add ½ teaspoon of ground ginger. 5. Sprinkle in ¼ teaspoon of cinnamon. 6. Sweeten your drink with 1 tablespoon of honey or maple syrup. 7. Don't forget a pinch of black pepper for better absorption of turmeric. 8. Lastly, add ½ teaspoon of vanilla extract. 9. Whisk all the ingredients well in the pan. 10. Place the saucepan on medium heat. 11. Gently warm the mixture while stirring often. 12. Keep an eye on it; do not let it boil. 13. After about 5-7 minutes, it should be hot enough. 14. Remove the pan from heat and let it cool slightly. 15. If you want a frothy drink, use a milk frother or whisk it quickly. 16. Pour the golden milk into your favorite mugs. 17. Optionally, sprinkle a bit of nutmeg on top for a nice touch. 18. Serve warm and enjoy this comforting drink! - Always use a whisk to blend the spices into the milk. - Whisking helps mix the turmeric and other spices evenly. - When heating, keep the heat low to avoid scalding the milk. - Stir often to prevent sticking at the bottom of the pan. - If you see steam but no bubbles, you are at the right temperature. - A milk frother works wonders for a smooth, frothy finish. - If you don’t have a frother, whisk vigorously by hand. - Frothing adds air, giving the latte a creamy feel. - The more you froth, the lighter and fluffier your drink will become. - For an extra touch, froth some almond milk separately and top your latte with it. You can mix spices to make your turmeric latte tastier. Try adding a pinch of nutmeg or a dash of cardamom. These spices add warmth to the drink. You can also use fresh ginger instead of ground ginger. This will give your latte a bright, zesty kick. Just remember, fresh ginger may need more time to steep. Many people rush the heating process. Always warm your milk slowly over medium heat. If you boil it, the spices can lose flavor. Another mistake is not blending the spices well. Make sure to whisk the mixture thoroughly. This helps avoid clumps of turmeric or ginger. Lastly, avoid skipping the black pepper. It helps your body absorb turmeric better. Sweetness is personal. Start with one tablespoon of honey or maple syrup. Taste your latte and add more if you like it sweeter. For creaminess, use full-fat coconut milk for a richer feel. Almond milk is lighter but still delicious. You can also mix almond and coconut milk for the best of both worlds. {{image_2}} You can easily make this latte vegan. Just use almond milk, coconut milk, or oat milk. These milks work great in this recipe. They keep the drink creamy and delicious. If you want a nut-free option, oat milk is the best choice. It blends well with turmeric and spices. To make an iced version, start with brewed turmeric milk. Follow the same steps but let it cool. Pour over ice instead of serving warm. This drink is refreshing on hot days. You can also add some ice cream for a treat! You can mix and match flavors for fun. Try adding matcha for a green twist. This adds a fresh taste and boosts energy. You can also use cocoa for a chocolatey version. The cocoa pairs well with turmeric and spices. For a special touch, add a dash of vanilla extract. This enhances the overall flavor and aroma. To store leftover turmeric golden milk, let it cool first. Then, pour it into an airtight container. Keep it in the fridge for up to three days. This way, you can enjoy the drink again without losing its flavor. When reheating your golden milk, do it gently. Pour it into a small saucepan. Heat it over low to medium heat. Stir it often to avoid burning. Never let it boil, as this can change the taste and texture. You can also use a microwave. Heat in short bursts, stirring in between. Turmeric golden milk lasts about three days in the fridge. Check for signs of spoilage. If it smells sour or has any mold, discard it. Always trust your senses. If it looks or smells off, it’s best to throw it away. Turmeric has many health benefits. It is known for its bright yellow color and active compound called curcumin. Curcumin may help reduce inflammation. It can also support joint health. Some studies suggest it may boost your mood. Turmeric might even help with digestion. Drinking turmeric may also support your immune system. Yes, you can use any milk you like. Almond milk is great, but coconut milk adds creaminess. Oat milk is a good choice for a thicker texture. If you prefer dairy, whole or skim milk works too. Just remember, different types of milk will change the flavor a bit. To make this recipe sugar-free, skip the honey or maple syrup. You can use a sugar substitute like stevia or monk fruit instead. These options will give you sweetness without the calories. Just adjust the amount to your taste. Yes, it is safe for most people to have turmeric daily. Using it in cooking or drinks is a great way to enjoy its benefits. However, if you have health issues or take certain medications, check with a doctor first. Moderation is key, as with any food. In this blog post, we explored the ingredients and health benefits of Turmeric Golden Milk. I shared step-by-step instructions for making it frothy and delicious. We also discovered tips, tricks, and variations to enhance your drink. Proper storage and reheating advice can help you enjoy leftovers. Remember, turmeric offers many health benefits, so enjoy this drink often. Use alternative ingredients if you prefer. With these ideas, you can create the perfect golden milk to suit your taste and health needs. Enjoy your journey to wellness!
                    Turmeric Golden Milk Latte Simple and Creamy Recipe
                  • - 1 ripe mango, peeled and diced - 1 cup fresh pineapple chunks - 1 banana, sliced - 1 cup coconut water (or regular water) - ½ cup plain Greek yogurt (or dairy-free alternative) - 1 tablespoon honey or agave syrup (optional) - A handful of fresh mint leaves (for garnish) - Ice cubes (optional) The key to a delicious mango pineapple smoothie lies in its fresh ingredients. You want ripe fruits for the best flavor. The mango should feel soft when you squeeze it gently. Pineapples should smell sweet and fruity. This smoothie combines sweet mango, tangy pineapple, and creamy banana. Coconut water adds hydration, while Greek yogurt gives it a nice creaminess. You can add honey for extra sweetness if you like. Mint leaves add a refreshing touch when you serve it. Each ingredient plays a role in making this smoothie flavorful and refreshing. Trust me, using fresh ingredients will make a big difference in taste! To make this smoothie, start by gathering your main ingredients. You need a ripe mango, fresh pineapple, and a banana. 1. In a blender, combine the diced mango, pineapple chunks, and banana slices. This mix brings a burst of tropical flavor. 2. Next, add one cup of coconut water to the blender. This not only hydrates but also adds a refreshing twist. 3. For creaminess, pour in half a cup of plain Greek yogurt. If you want it sweeter, drizzle in one tablespoon of honey or agave syrup. 4. Blend on high until the mixture is smooth and creamy. If you like your smoothie chilled, toss in a few ice cubes and blend again until they are fully mixed in. 5. After blending, taste your smoothie. If it needs to be sweeter or thicker, add more honey or coconut water as needed. Once your smoothie is ready, it’s time to serve it. I recommend using tall glasses to show off the vibrant color. For a fun touch, garnish each glass with a few fresh mint leaves on top. This not only looks nice but also adds a fresh aroma. Enjoy your delicious Mango Pineapple Smoothie! For the Full Recipe, please refer back to the ingredient list and instructions. To get your smoothie just right, focus on creaminess. Use ripe fruits like mango and banana. The Greek yogurt adds a nice, smooth texture. If you want a richer taste, try full-fat yogurt. For a lighter feel, use low-fat or dairy-free yogurt. Adjust the thickness by adding more liquid. Coconut water is great for this. If your smoothie is too thick, just pour in a bit more. Blend again until it’s just how you like it. If you want a thicker smoothie, add more banana or ice cubes. Boosting flavor can take your smoothie to the next level. Try adding spices like cinnamon or ginger. These spices not only add warmth but also great health benefits. A dash of cinnamon can make the smoothie taste cozy. A pinch of ginger gives it a nice kick. You can also use flavored yogurts for extra taste. Vanilla or coconut yogurt work well. If you want sweetness, think about honey or agave syrup. These can make your smoothie more enjoyable. For a fun twist, try adding a splash of vanilla extract. It will add a lovely aroma to your drink. For a full taste experience, explore the [Full Recipe]. {{image_2}} You can change the fruit in your smoothie to keep it fresh. Adding strawberries or blueberries gives a sweet twist. These berries add a nice color and taste. You can also try using other tropical fruits like papaya or kiwi. These fruits bring new flavors and nutrients to your drink. Each fruit will change the smoothie’s taste and make it unique. If you want a dairy-free smoothie, swap the Greek yogurt for a plant-based option. Almond, coconut, or soy yogurt works well. These alternatives keep your smoothie creamy without dairy. For sweeteners, you can use maple syrup or agave syrup for a vegan choice. These options add sweetness while keeping your drink plant-based. Enjoy the fruity goodness in many ways! Don't forget to check the Full Recipe for more ideas. You may have some smoothie left after making your Mango Pineapple Smoothie. To keep it fresh, use a glass jar or a BPA-free plastic container. Seal it tightly to prevent air from spoiling the flavor. Store it in the fridge for up to 24 hours. After that, it may lose some taste and texture. If you want to enjoy the smoothie later, freezing is a great option. Pour the smoothie into ice cube trays or freezer-safe bags. Leave some space in the bags for expansion. You can freeze it for up to three months. When you’re ready to drink it, take out what you need. Thaw it in the fridge overnight or blend it straight from the freezer for a slushy treat. Enjoy your refreshing Mango Pineapple Smoothie anytime! Yes, you can make this smoothie ahead of time. If you want to save it, store it in an airtight container. Keep it in the fridge for up to one day. The smoothie may separate, so stir it well before you drink it. If you don’t have coconut water, use regular water or fruit juice instead. Fruit juice can add a nice flavor. You can also try almond milk for a creamier touch. Just remember, the taste will change a bit based on what you use. To make the smoothie thicker, add more Greek yogurt or a banana. You can also use frozen fruit instead of fresh. Frozen fruit gives you a nice, thick texture. Just blend it well, and you’ll get a creamy drink. Yes, this smoothie is great for kids! It is packed with fruits and tastes sweet. You can adjust the sweetness by adding less honey. The bright colors and fresh flavors will appeal to children, making it a fun treat. You can find the Full Recipe for the Tropical Bliss Mango Pineapple Smoothie above in this article. This will guide you through every step to create your own refreshing drink. This blog post covers a simple and tasty smoothie recipe. You learned about the key ingredients and their nutritional benefits. I provided steps to prepare and serve the smoothie perfectly. Tips for texture and flavor help you make it your own. You can explore variations to suit your tastes or dietary needs. Don’t forget storage tips to keep leftovers fresh. Enjoy your smoothie making journey. It’s all about trying new things and having fun!
                    Mango Pineapple Smoothie Refreshing and Flavorful Blend
                  • - 2 packets of frozen açaí puree - 1 ripe banana - 1 cup of fresh pineapple chunks - 1 cup of coconut milk (or any non-dairy milk) - 1 tablespoon of honey or agave syrup (optional) For a vibrant tropical taste, the main ingredients are key. Açaí puree brings rich color and flavor. It is full of antioxidants. Bananas add creaminess and natural sweetness. Fresh pineapple gives a bright, juicy touch. Coconut milk offers a smooth base. You can use any non-dairy milk you prefer. Honey or agave syrup adds sweetness if needed. - Sliced kiwi - Coconut flakes - Granola - Chia seeds - Fresh berries (e.g., strawberries, blueberries) Toppings make your smoothie bowl pop! Sliced kiwi adds a zesty kick. Coconut flakes give it a tropical crunch. Granola provides texture and flavor. Chia seeds offer extra nutrients. Fresh berries, like strawberries and blueberries, add color and taste. You can mix and match these toppings for a fun look. For the full recipe, please refer to the section above. 1. Blend the ingredients Start by adding the frozen açaí puree, ripe banana, fresh pineapple chunks, and coconut milk into a blender. If you want it sweeter, you can add honey or agave syrup. Blend this mixture on high speed until it becomes creamy and smooth. 2. Adjust consistency with coconut milk If your smoothie is too thick, just add a bit more coconut milk. Blend again until you reach the texture you want. This step is key to making your smoothie bowl enjoyable. 3. Pour into a bowl Once blended, carefully pour the smoothie mixture into a bowl. Make sure to use a large enough bowl to hold all the goodness. 4. Add toppings creatively Now comes the fun part! Arrange your toppings, such as sliced kiwi, coconut flakes, granola, chia seeds, and fresh berries, over the smoothie. Try to create a colorful pattern. I love making a circular design to highlight all the vibrant colors. - Tips for presentation Use a shallow bowl to show off your beautiful toppings. You can also sprinkle some extra coconut flakes around the edge for a nice touch. A colorful presentation makes your smoothie bowl more fun to eat. - Recommended serving utensils Serve your smoothie bowl with a regular spoon. If you want to make it more special, use a wooden spoon or a cute, colorful one. Enjoy your tropical treat right away to keep it fresh and tasty. For the full recipe, refer to the earlier sections. To make a great smoothie bowl, start with ripe fruits. Ripe fruits taste better and add natural sweetness. Look for bananas that are yellow with some brown spots. When it comes to pineapples, choose ones that smell sweet. It ensures they are juicy and fresh. Blending is key to your smoothie bowl. You want a smooth and creamy texture. If your mix is too thick, add more coconut milk. Blend again until you reach the right consistency. A good blend makes your bowl enjoyable and easy to eat. A colorful topping arrangement makes your smoothie bowl pop. Use fresh berries, sliced kiwi, and coconut flakes. Lay them out in a pattern. A circular design looks appealing and fun. To elevate your smoothie bowl's look, use bowls with interesting shapes. Tall bowls or wide, shallow ones can change the game. Garnish with a sprinkle of chia seeds for a fancy touch. This not only looks great but adds a bit of crunch too. {{image_2}} You can change the non-dairy milk for this smoothie. Almond, soy, or oat milk work well. Each milk adds a different taste. Try using seasonal fruits too. Mango, papaya, or berries add a fresh twist. You can mix and match to find your favorite blend. Want more nutrients? Add spinach or kale to your smoothie. They blend well and boost health. You won’t even taste them! For extra energy, stir in nut butter or protein powder. Both will make your smoothie more filling. They add great flavor too! You can also experiment with different combinations to find the best taste for you. To store leftovers, place your smoothie bowl in the fridge. Use a tight container to keep it fresh. Glass or BPA-free plastic works well for storage. I prefer glass because it keeps flavors better. You can freeze smoothie bowls for later. Just pour the mixture into an airtight container. Leave some space at the top, as it will expand when frozen. To defrost, place it in the fridge overnight. If you’re in a rush, you can use the microwave. Just heat it in short bursts to avoid cooking. Enjoy your tropical treat later with ease! For the recipe, check out the Full Recipe. What is açaí and what are its benefits? Açaí is a small, dark purple berry from Brazil. It is full of antioxidants, which help fight free radicals in the body. Açaí is also rich in fiber, promoting good digestion. Plus, it has healthy fats that support heart health. You can enjoy its fruity taste in many dishes. Can I make this smoothie bowl ahead of time? Yes! You can prepare the smoothie mix and store it in the fridge for up to 24 hours. Just remember to keep the toppings separate. This way, your bowl stays fresh and tasty. How can I make this recipe vegan or gluten-free? To make it vegan, use agave syrup instead of honey. For gluten-free, ensure your granola and any other toppings are gluten-free. Most fruits and coconut milk are naturally gluten-free, so you’re all set! Can I substitute açaí with other fruits? Yes, you can! If you can’t find açaí, try using frozen berries like blueberries or strawberries. These fruits will add sweetness and a burst of color to your bowl. What to do if the smoothie is too thick? If your smoothie is too thick, just add a little more coconut milk. Blend again until you reach your desired creaminess. This will make it easier to pour and enjoy. How to fix a smoothie bowl that tastes too bland? If your smoothie bowl lacks flavor, try adding a splash of vanilla extract or a pinch of salt. You can also mix in a bit of honey or agave syrup for sweetness. Adjust the toppings to add more taste and texture. This article covers how to make a delicious açaí smoothie bowl. You learned about the key ingredients, easy steps for preparation, and creative topping ideas. I shared tips to improve taste and presentation, plus fun variations to try. Don’t forget storage techniques to keep your bowl fresh. With all this information, you can enjoy a tasty and nutritious treat anytime. Get creative with your favorites and make this recipe truly yours. Enjoy every bite!
                    Tropical Acai Smoothie Bowl Energizing Healthy Treat

                  Footer

                  ↑ back to top

                  More information

                  • Drinks
                  • Appetizer
                  • Dinner
                  • Desserts
                  • About
                  • Contact
                  • Privacy Policy

                  Our Policies

                  • Privacy Policy
                  • GDPR Policy
                  • Terms Of Use
                  • Copyright Policy
                  • Cookie Policy
                  • Disclaimer

                  Copyright © 2025 cheftaling