
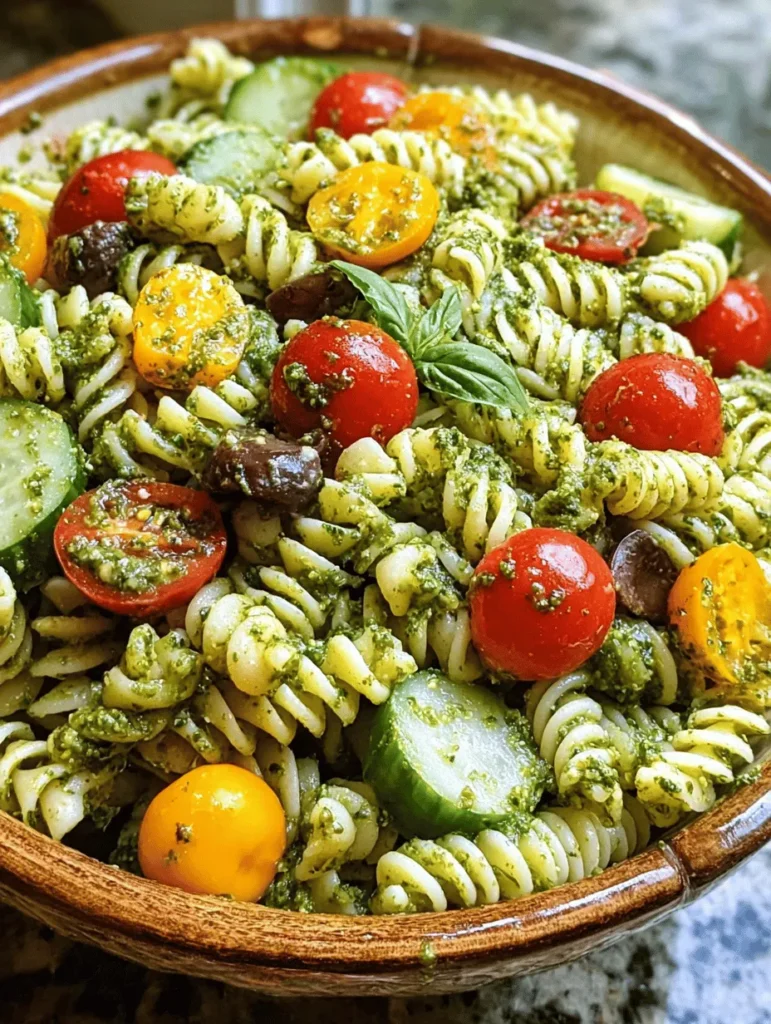
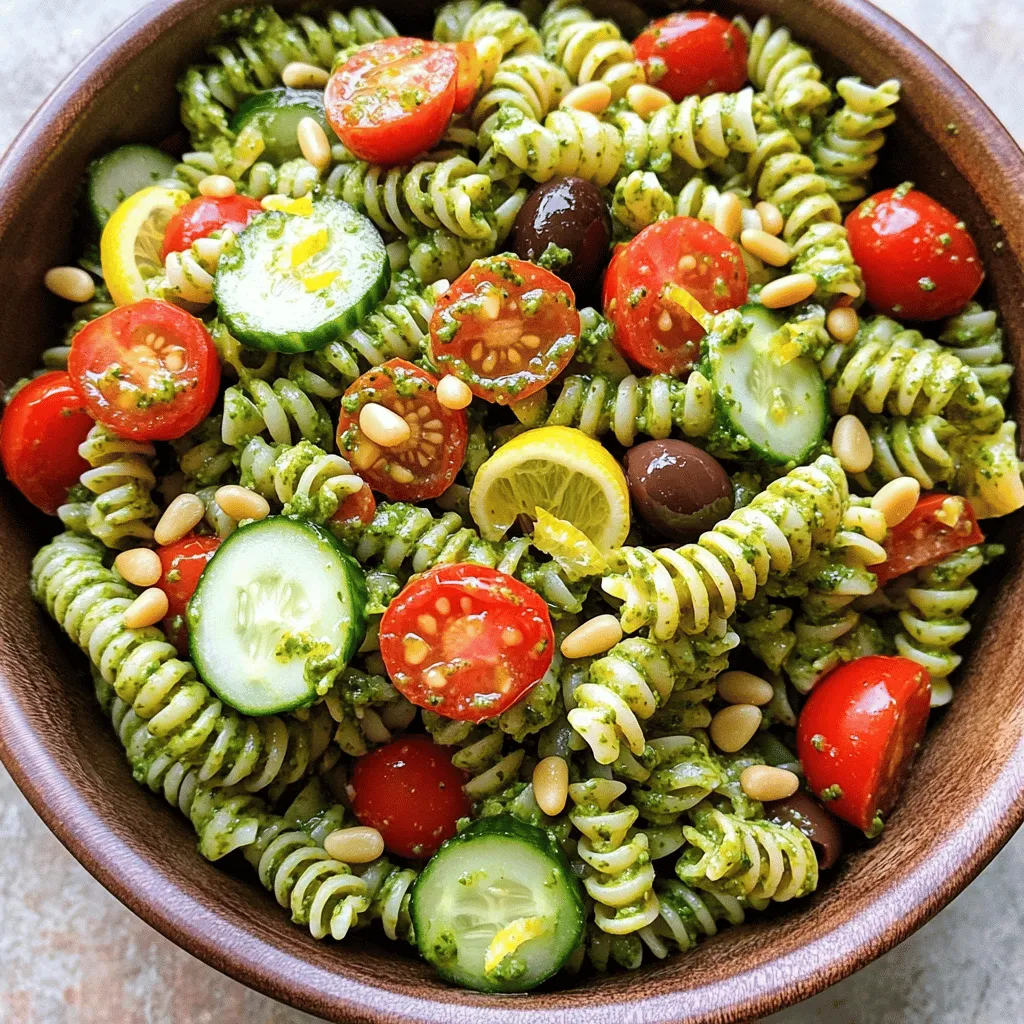
If you’re craving a vibrant and tasty dish, look no further! This Pesto Pasta Salad recipe combines fresh basil, tangy lemon, and hearty fusilli for a colorful meal that bursts with flavor. Perfect as a side or a main dish, it’s easily customizable to suit your tastes and dietary needs. Join me as we dive into the ingredients and step-by-step guide to creating this delicious salad that everyone will love!

Ingredients
List of Main Ingredients
- 12 oz (340g) fusilli pasta
- 1 cup fresh basil leaves
- ½ cup pine nuts (toasted)
- ½ cup grated Parmesan cheese
- 3 cloves garlic
- ½ cup extra virgin olive oil
- 1 cup cherry tomatoes, halved
- 1 cup cucumber, diced
- ¼ cup Kalamata olives, pitted and sliced
- Zest and juice of 1 lemon
To create a tasty pesto pasta salad, I use fresh and high-quality ingredients. The main ingredient, fusilli pasta, holds the sauce well. For my pesto, I blend fresh basil leaves, toasted pine nuts, garlic, and grated Parmesan cheese. This mix gives the salad a rich flavor. I then add extra virgin olive oil until the pesto is smooth.
Cherry tomatoes add a sweet burst, while cucumber adds a crunchy bite. Kalamata olives give the dish a salty taste. Finally, the lemon juice brightens every bite.
Optional Ingredients
- Protein additions (chicken, shrimp)
- Additional vegetables (bell peppers, zucchini)
- Fresh herbs (parsley, arugula)
You can make this salad even better by adding protein. Cooked chicken or shrimp works great. For more crunch, try adding bell peppers or zucchini. Fresh herbs like parsley or arugula can bring extra flavor and color.
Dietary Considerations
- Vegetarian options
- Gluten-free substitutions (gluten-free pasta)
- Nut-free variations
This salad is friendly for many diets. If you want a vegetarian option, skip the protein. You can also use gluten-free pasta to make it gluten-free. For those with nut allergies, simply leave out the pine nuts or use seeds instead.
Step-by-Step Instructions
Cooking the Pasta
To start, boil water in a large pot. Add salt to the water for flavor. Once it boils, add 12 oz of fusilli pasta. Cook it until al dente, which means it should be firm when you bite it. This usually takes about 8-10 minutes. After cooking, drain the pasta and rinse it under cold water. This stops the cooking and cools the pasta down.
Making the Pesto
Next, let’s make the pesto. Gather these ingredients for the pesto:
- 1 cup fresh basil leaves
- ½ cup toasted pine nuts
- ½ cup grated Parmesan cheese
- 3 cloves garlic
- ½ cup extra virgin olive oil
- Salt and pepper to taste
In a food processor, first add the basil leaves, pine nuts, Parmesan, and garlic. Pulse these until they are finely chopped. Now, with the processor running, slowly pour in the olive oil. This will help create a smooth texture. If your pesto is too thick, just add a bit more olive oil. Season it with salt and pepper to your taste.
Combining the Salad Ingredients
Now it’s time to combine everything. In a large bowl, add the cooled pasta, pesto, and these vegetables:
- 1 cup cherry tomatoes, halved
- 1 cup cucumber, diced
- ¼ cup Kalamata olives, pitted and sliced
Gently fold these ingredients together. Make sure the pasta is evenly coated with the pesto. This step is key for a full flavor in every bite.
Finishing Touches
For the last steps, add zest and juice from 1 lemon to the salad. This adds a nice brightness. Toss the salad again to mix the lemon flavor throughout. Then, cover the salad and chill it in the fridge for at least 30 minutes. Chilling helps the flavors deepen and meld together.Enjoy your fresh and flavorful pesto pasta salad!
Tips & Tricks
Perfecting your Pesto
To get the best pesto, start with good olive oil. If your pesto is too thick, add more olive oil. You can also swap out pine nuts for walnuts or almonds if you like. This gives a new taste and texture. Feel free to mix in different herbs too, like parsley or cilantro. Each choice changes the flavor.
Serving Suggestions
Pesto pasta salad pairs well with crusty bread or grilled meats. Serve it in a big bowl or on a nice platter. Add a sprinkle of Parmesan on top for a pretty finish. You can also toss in some extra cherry tomatoes to add color and freshness.
Meal Prep and Timing
You can make this salad ahead of time. It tastes even better after sitting for a while. Chill it in the fridge for at least 30 minutes before serving. This helps the flavors blend well. If you’re planning a party, prepare it a few hours early for easy serving.
Variations
Protein-Packed Options
You can make your pesto pasta salad even better by adding protein. Adding cooked chicken or shrimp gives it a tasty boost. Both options work well with the flavors of the pesto. If you want a vegetarian choice, try using tofu or chickpeas. Both add protein and make the salad filling.
Flavor Enhancements
You might want to spice up your salad a bit. Adding herbs like oregano or red pepper flakes can give it a nice kick. A touch of heat makes every bite exciting. You can also introduce a creamy element for richness. Cream cheese or ricotta can bring a smooth texture that pairs nicely with the pesto.
Seasonal Variations
Seasonal veggies can change the game. In summer, add fresh asparagus or sweet corn for a bright twist. In winter, roasted veggies like butternut squash can warm up the dish. Adapting your salad to the seasons keeps it fresh and fun. Try these ideas to make your pesto pasta salad a new favorite each time!
Storage Info
Refrigeration Tips
To store your pesto pasta salad, place it in an airtight container. This keeps it fresh and tasty. The salad stays good in the fridge for about 3 to 5 days. Make sure to check for any signs of spoilage, like off smells or changes in texture.
Freezing Guidelines
Can you freeze pesto pasta salad? Yes, but it may change a bit in texture. To freeze, put the salad in a freezer-safe container. Use it within 2 months for the best flavor. When you want to eat it, thaw it in the fridge overnight. After thawing, add fresh ingredients like tomatoes or cucumber for a crisp bite.
Reheating Instructions
Reheat pesto pasta salad gently. Use the microwave on low power or a stovetop with a little water. Stir often to heat it evenly. Avoid high heat to stop the pasta from getting soggy. This keeps your dish fresh and delicious, just like when you first made it.
FAQs
How do I make pesto pasta salad vegan?
To make pesto pasta salad vegan, swap out a few key ingredients. Replace the Parmesan cheese with nutritional yeast or a vegan cheese alternative. You can also use walnuts or sunflower seeds instead of pine nuts. These changes will keep the flavor rich and satisfying.
Can I use store-bought pesto?
Using store-bought pesto can save time. It’s convenient and often tasty. However, some brands may include preservatives or additives. If you prefer fresh flavors, making your own pesto is best. With homemade, you control the ingredients and taste.
How long can pesto pasta salad be stored?
Pesto pasta salad lasts about 3 to 5 days in the fridge. Store it in an airtight container. If you freeze it, it can last up to 3 months. Remember to thaw it in the fridge overnight before serving.
What can I serve with pesto pasta salad?
Pesto pasta salad pairs well with many sides. Consider grilled chicken, shrimp, or roasted vegetables. A simple green salad or crusty bread also complements the dish. These sides enhance the meal and add more flavor.
Is pesto pasta salad gluten-free?
Pesto pasta salad can be gluten-free if you use gluten-free pasta. There are many options available, such as chickpea or brown rice pasta. Be sure to check the labels to avoid any gluten. This way, everyone can enjoy the dish!
This blog post covered making a delicious pesto pasta salad. We discussed ingredients, cooking steps, and storage tips. Remember, you can customize your salad with proteins or seasonal veggies. Pesto pasta salad is both simple and adaptable. It fits various diets and can be made ahead of time. Enjoy experimenting with flavors and ingredients. With these details, you are ready to create a tasty dish that is perfect for any occasion. Happy cooking!

Leave a Reply