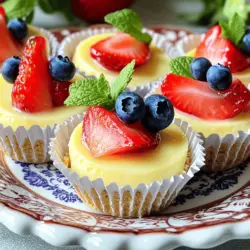
Craving something sweet and simple? Mini Cheesecake Bites are a perfect treat! With a creamy filling and a crunchy crust, these bites are fun to make and share. You only need a few ingredients, like cream cheese and graham crackers, plus optional toppings to wow your guests. Follow my step-by-step guide for tasty bites you’ll love! Get ready to impress at your next gathering with this easy recipe!
Ingredients
Main Ingredients for Mini Cheesecake Bites
- 1 cup graham cracker crumbs
- 4 tablespoons unsalted butter, melted
- 2 tablespoons sugar
- 8 oz cream cheese, softened
- 1/2 cup sugar
- 1 teaspoon vanilla extract
- 2 large eggs
- 1/2 cup sour cream
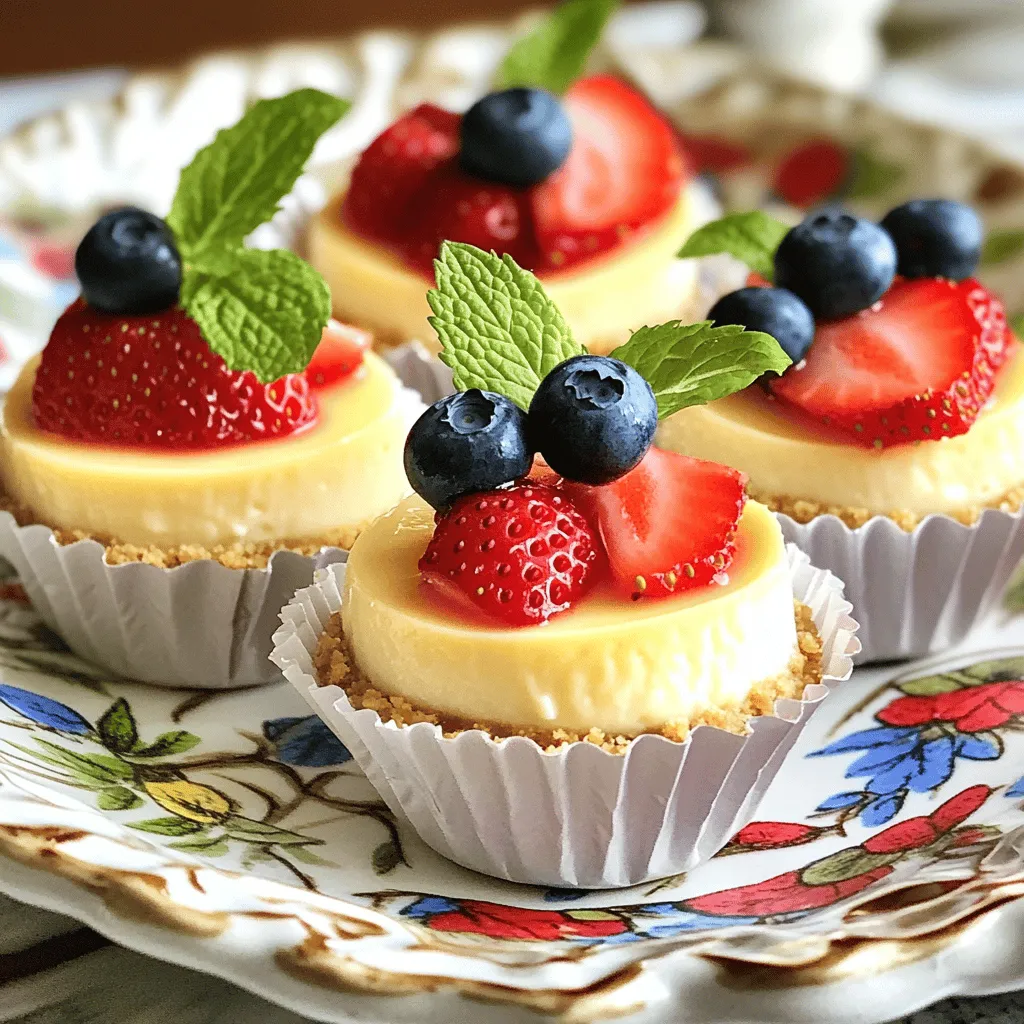
- 1/3 cup fresh fruit topping (e.g., strawberries, blueberries, or raspberries)
To create mini cheesecake bites, we start with a few key ingredients. First, the graham cracker crumbs give the crust a tasty, crunchy base. The butter and sugar help bind the crumbs. Then, cream cheese becomes the star of the show for that rich, creamy filling. Don’t forget the eggs and sour cream; they add a nice texture and flavor. Finally, fresh fruit toppings brighten each bite and add a pop of color.
Optional Garnishes
- Fresh mint leaves
- Additional toppings (whipped cream, chocolate drizzle)
Garnishes make your mini cheesecakes look even more appealing. Fresh mint leaves add a nice green touch. You can also use whipped cream or a drizzle of chocolate to make them extra special. These simple touches can impress your guests and make each bite feel like a treat.
Equipment Needed
- Mini muffin tin
- Mixing bowls
- Electric mixer
You will need some basic tools to make these cheesecake bites. A mini muffin tin is key for shaping the bites. Mixing bowls help combine the ingredients. An electric mixer makes it easy to beat the cream cheese until fluffy. Having these tools ready will ensure a smooth cooking process and delicious results.Enjoy the process and the tasty outcome!
Step-by-Step Instructions
Preparing the Crust
To start, mix graham cracker crumbs with melted butter and sugar. You want the crumbs to feel like wet sand. This helps the crust hold together.
Next, preheat your oven to 325°F (160°C). Line a mini muffin tin with paper liners or grease it lightly. Press about one tablespoon of the crumb mixture into each muffin cup. Make sure it’s compact. Bake the crust for five minutes until it turns slightly golden. After baking, let it cool.
Making the Cheesecake Filling
In a large bowl, beat softened cream cheese with an electric mixer. Mix it until it’s smooth and creamy. This should take about two to three minutes. Gradually add sugar and vanilla extract. Keep mixing until it all blends together.
Now, add two large eggs one at a time. Mix on low speed after each egg until it’s just combined. Next, stir in sour cream until the mixture is smooth.
Baking the Mini Cheesecakes
Spoon the cheesecake filling over the cooled crust. Fill each cup about three-quarters full. Bake them for about 15 to 18 minutes. The edges should be set, but the centers will still jiggle slightly.
Let the mini cheesecakes cool at room temperature for about 30 minutes. After that, refrigerate them for at least two hours to fully set. For the final touch, add fresh fruit on top before serving. Enjoy these tasty bites!
Tips & Tricks
Perfecting the Cheesecake Texture
To get the best texture, avoid over-mixing the batter. Over-mixing adds too much air, leading to cracks. Mix just until combined for a smooth finish.
Using room temperature ingredients is key. Cold cream cheese does not mix well. Let your cream cheese sit out for 30 minutes before you start. This helps create a creamy and rich filling.
Achieving a Smooth Top
Cooling your mini cheesecakes properly helps them set well. After baking, let them cool at room temperature for about 30 minutes. Then, refrigerate them for at least 2 hours. This keeps the tops smooth and prevents cracks.
For serving, use a decorative platter. Arrange the mini cheesecakes with fresh fruit on top. Garnish with mint leaves for a pop of color. This makes them look as good as they taste!
Enhancing Flavor
To boost the flavor, consider adding zest from lemons or limes. This brings a bright taste that lifts the cheesecake.
You can also use flavored extracts. Almond or coconut extracts add unique notes. Just a little goes a long way. Experiment with these options to find your favorite flavor combination.
Variations
Flavor Variations for Mini Cheesecake Bites
You can change the flavor of your mini cheesecake bites to match your mood. Chocolate mini cheesecakes are a crowd favorite. Just add melted chocolate to the cheesecake mix. This simple switch adds rich taste and a lovely dark color.
Fruit-flavored versions are also fun. Try lemon for a zesty kick or strawberry for sweet freshness. Just mix in fruit puree or zest right into the batter. You’ll get a fruity twist that brightens each bite.
Alternative Toppings
Toppings can make your mini cheesecakes even better. Consider nut toppings like pecans or almonds. They add a nice crunch and flavor contrast. Sprinkle some chopped nuts on top before serving for extra texture.
You can also use sauces. Drizzle caramel or chocolate sauce over each cheesecake bite. This adds sweetness and a glossy finish that looks great on your dessert table.
Dietary Adjustments
If you need to make dietary changes, you can still enjoy mini cheesecakes. For a gluten-free crust, swap out graham cracker crumbs for almond flour or gluten-free cookies. This way, everyone can enjoy your tasty treats.
If you want a vegan cheesecake, use cashew cream instead of cream cheese. Blend soaked cashews with coconut milk and a sweetener. This makes a creamy filling that tastes amazing, even without dairy.
Try these variations to create your perfect mini cheesecake bites.
Storage Info
How to Store Mini Cheesecake Bites
To keep your mini cheesecake bites fresh, place them in the fridge. Use an airtight container for best results. This keeps moisture out and prevents them from drying. If you don’t have an airtight container, cover them well with plastic wrap. Make sure they are cool before storing to avoid condensation.
Freezing Instructions
You can freeze mini cheesecake bites before or after baking. If you freeze them before baking, wrap each bite in plastic wrap. Then, place them in a freezer bag. This method helps maintain their texture. If you freeze them after baking, let them cool completely first. Then, use the same wrapping method.
To thaw, take them out of the freezer and place them in the fridge overnight. If you need them fast, you can leave them at room temperature for about an hour. Just be careful not to leave them out too long.
Shelf Life
These mini cheesecake bites last about 5 days in the fridge. Make sure to check for any signs of spoilage. If you see any mold or if they smell off, it’s best to toss them. A fresh mini cheesecake should look smooth and creamy. If it starts to dry out or crack, it’s time to say goodbye!
FAQs
Can I make Mini Cheesecake Bites in advance?
Yes, you can make Mini Cheesecake Bites ahead of time. I recommend making them a day before serving. This gives the flavors time to blend and enhances the taste. After baking, let them cool and chill in the fridge. Chilling helps set the cheesecake and makes it easier to serve.
What can I substitute for cream cheese?
If you need a dairy-free option, you can use vegan cream cheese. Other alternatives include cashew cream or silken tofu blended until smooth. These options maintain a creamy texture and work well in the recipe. Just remember to adjust the sweetness if needed.
How do I know when they are done baking?
You can check for doneness by looking at the edges. They should be set, while the center should still jiggle slightly. You can also gently touch the top. If it feels firm but soft, they are ready. Let them cool in the pan before transferring to the fridge. This helps keep their shape.
Mini cheesecakes are fun and easy to make. We covered key ingredients, like graham cracker crumbs and cream cheese. I provided clear steps for crafting the perfect bites, from making the crust to baking. Tips can help improve texture and add flavor. You can also enjoy various toppings and dietary options. These cheesecakes store well, and I shared my favorites for freezing. Try making them and impress your friends with your tasty treats! Enjoy the process and share your creations with others.