Cucumber Dill Yogurt Dip Flavorful and Fresh Delight

WANT TO SAVE THIS RECIPE?

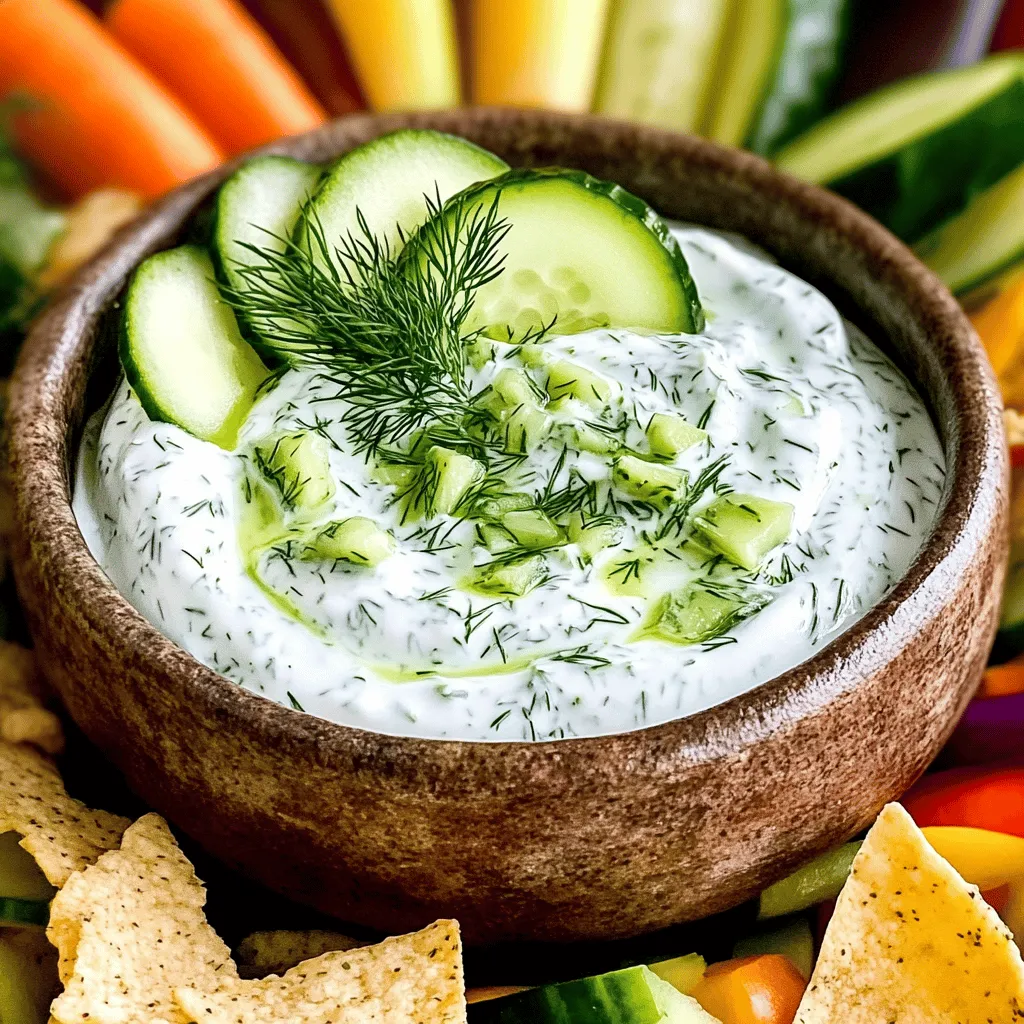
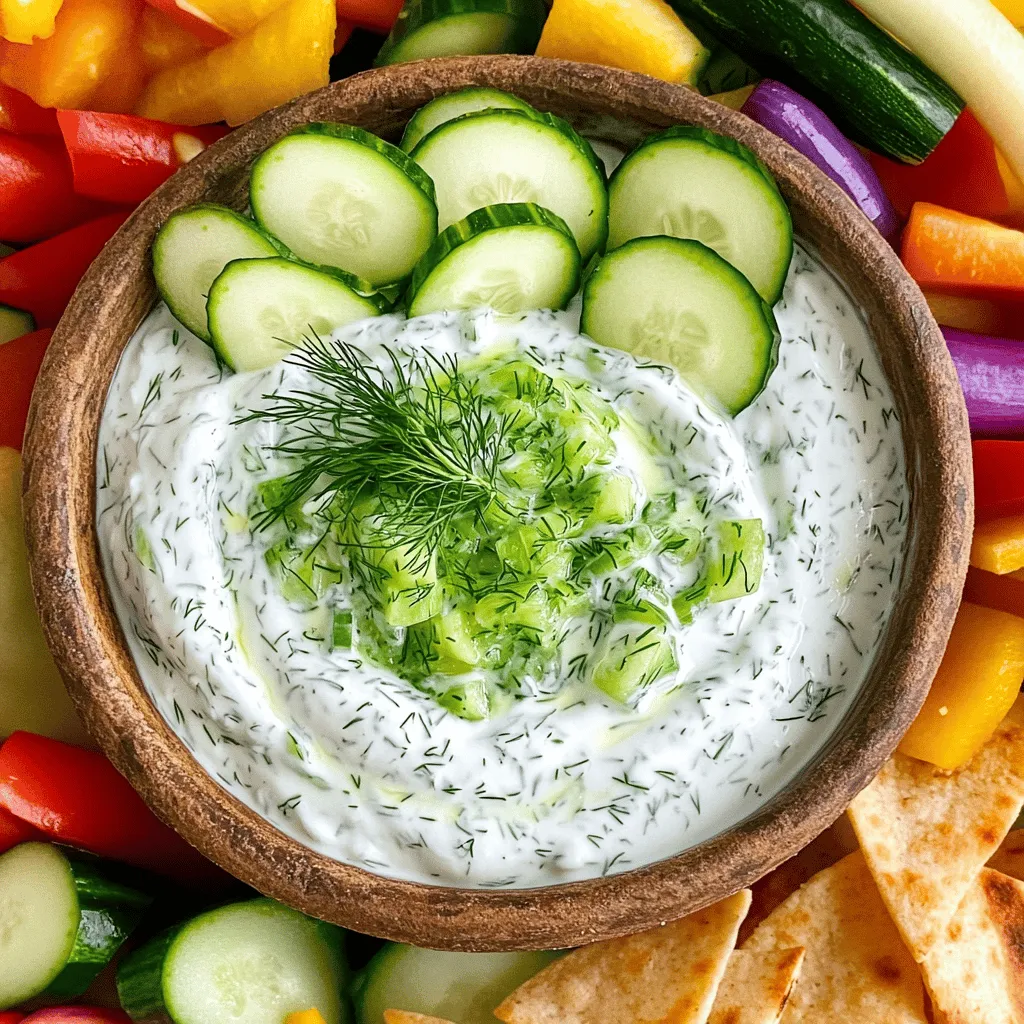
Looking for a quick, tasty dip that packs flavor and freshness? You’ve found it! This Cucumber Dill Yogurt Dip is easy to make and perfect for any gathering. With just a few simple ingredients, including crisp cucumbers and aromatic dill, you can whip up a creamy delight in no time. Get ready to impress your guests (or just treat yourself) with this refreshing dip! Let’s dive into the easy steps to create this snack.

Ingredients

Fresh Produce

– 1 large cucumber

– 2 tablespoons fresh dill

– 1 garlic clove

– 1 tablespoon lemon juice

Dairy and Extras

– 1 cup plain Greek yogurt

– 1 teaspoon olive oil

– Salt and pepper to taste

Notes on Ingredient Quality

Choosing the right cucumber is key for this dip. Look for firm, smooth cucumbers without blemishes. Fresh dill gives the best flavor. If you can’t find fresh dill, dried dill works too but won’t taste as bright. For the yogurt, use full-fat Greek yogurt to ensure a rich and creamy texture. Low-fat versions can be thinner and less tasty.

Step-by-Step Instructions

Preparing the Cucumber

To start, you need to grate the cucumber. Use a box grater or a food processor for this task. Grate the cucumber into a bowl, making sure to get all the green skin for flavor.

Next, you must squeeze out the moisture. Take the grated cucumber and place it in a clean kitchen towel or cheesecloth. Gather the edges and twist it to squeeze out as much water as possible. This step is key. If you skip it, your dip will be watery.

Mixing the Ingredients

Now, it’s time to mix. In a medium bowl, combine one cup of plain Greek yogurt with the squeezed cucumber. Stir them together well until they are fully blended.

Then, add in your fresh dill, minced garlic, lemon juice, and olive oil. Mix everything until it looks smooth and creamy. The dill adds a fresh taste that makes this dip special.

Final Touches

Season your dip with salt and pepper to taste. Start with a pinch of each and adjust as needed. Taste as you go to find the perfect balance.

For the best flavor, chill the dip in the refrigerator for at least 30 minutes. This resting time helps the flavors meld together. While you wait, get ready to serve it with fresh veggies or pita chips for a tasty snack. You can find the full recipe for this delightful dish above.

Tips & Tricks

Ensuring Creamy Texture

To make your Cucumber Dill Yogurt Dip smooth, start by draining the cucumber. Excess moisture can make your dip runny. Grate the cucumber and then squeeze it in a clean kitchen towel. This step is key for a perfect texture. If you want a creamier dip, you can also add a bit of sour cream or cream cheese. Both options will add richness and depth to your dip.

Enhancing Flavor

To boost your dip’s flavor, think about adding spices. A pinch of cumin or smoked paprika can add warmth. You can also try fresh herbs like mint or parsley for a twist. Adjust the acidity with lemon juice for a bright taste. This small change can lift the overall flavor. Taste your dip and adjust until it sings!

Serving Suggestions

This dip is super versatile! Serve it with fresh vegetables like carrots, celery, or bell peppers. Pita chips also make a crunchy pairing. You can even spread it on sandwiches for a tasty twist. It adds a fresh flavor that brightens up any meal. Get creative and enjoy this delightful dip in many ways!

For more detailed steps, check out the Full Recipe.

Variations

Healthier Alternatives

You can make this dip lighter by using low-fat yogurt. It keeps the flavor while cutting some calories. You might also try adding avocado. This fruit gives a creamy texture without extra dairy. Just mash it well and mix it in with your yogurt.

Flavor Infusions

Want to switch up the taste? Try using different fresh herbs. Mint or parsley can add a fun twist. You can also boost the flavor with spices. A bit of cumin or smoked paprika can add warmth and depth. Just sprinkle in a little to find your perfect balance.

Special Dietary Adjustments

If you need gluten-free options, serve this dip with fresh veggies or gluten-free crackers. For a vegan version, swap the yogurt for a plant-based alternative. Many brands offer great coconut or almond yogurts that work well. These choices let everyone enjoy this dip!

Storage Info

Refrigeration Guidance

Store your Cucumber Dill Yogurt Dip in an airtight container. This keeps the dip fresh and tasty. It can last in the fridge for about 3 to 5 days. Always check for any signs of spoilage before eating.

Freezing Tips

You can freeze Cucumber Dill Yogurt Dip, but it may change texture. To freeze, place the dip in a freezer-safe container. Leave some space at the top for expansion. When you’re ready to use it, thaw it in the fridge overnight. Mix well before serving for the best flavor.

Best Practices for Leftovers

If you have leftovers, try using them in a salad dressing or as a spread on sandwiches. You can also mix it into a pasta salad for extra creaminess. Always store leftovers in the fridge and consume within 3 to 5 days for safety. Remember to check for any off smells or changes in texture before use.

FAQs

How long does Cucumber Dill Yogurt Dip last in the fridge?

Cucumber Dill Yogurt Dip lasts about 3 to 5 days in the fridge. Store it in a tight container to keep it fresh. Over time, the dip may lose some of its crispness. To enjoy the best flavor, try to eat it within three days.

Can I make this dip ahead of time?

Yes, you can make this dip ahead of time. In fact, making it a day before can help the flavors mix better. Just keep it in the fridge in a sealed container. This way, it will be ready when you need it.

What can I serve with Cucumber Dill Yogurt Dip?

You can serve this dip with many tasty things. Here are some ideas:

– Fresh vegetables like carrots, celery, and bell peppers

– Pita chips or tortilla chips

– Crackers for a crunchy bite

– Use it as a spread on sandwiches or wraps

Is this recipe gluten-free?

Yes, this recipe is gluten-free. The main ingredients do not contain gluten. Just make sure to check any store-bought items, like chips or crackers, for gluten. Enjoy this dip with confidence on a gluten-free diet.

This blog post covered delicious Cucumber Dill Yogurt Dip. We explored fresh ingredients like cucumber, dill, and yogurt. You learned how to prep, mix, and add flavor. We shared tips to elevate the dip’s texture and suggested serving ideas. You can also alter recipes to fit your diet.

In summary, making this dip is easy and fun. With fresh ingredients and simple steps, you can impress anyone. Enjoy your dip with friends and family. Remember, small changes can make it unique!

- 1 large cucumber - 2 tablespoons fresh dill - 1 garlic clove - 1 tablespoon lemon juice - 1 cup plain Greek yogurt - 1 teaspoon olive oil - Salt and pepper to taste Choosing the right cucumber is key for this dip. Look for firm, smooth cucumbers without blemishes. Fresh dill gives the best flavor. If you can’t find fresh dill, dried dill works too but won’t taste as bright. For the yogurt, use full-fat Greek yogurt to ensure a rich and creamy texture. Low-fat versions can be thinner and less tasty. To start, you need to grate the cucumber. Use a box grater or a food processor for this task. Grate the cucumber into a bowl, making sure to get all the green skin for flavor. Next, you must squeeze out the moisture. Take the grated cucumber and place it in a clean kitchen towel or cheesecloth. Gather the edges and twist it to squeeze out as much water as possible. This step is key. If you skip it, your dip will be watery. Now, it's time to mix. In a medium bowl, combine one cup of plain Greek yogurt with the squeezed cucumber. Stir them together well until they are fully blended. Then, add in your fresh dill, minced garlic, lemon juice, and olive oil. Mix everything until it looks smooth and creamy. The dill adds a fresh taste that makes this dip special. Season your dip with salt and pepper to taste. Start with a pinch of each and adjust as needed. Taste as you go to find the perfect balance. For the best flavor, chill the dip in the refrigerator for at least 30 minutes. This resting time helps the flavors meld together. While you wait, get ready to serve it with fresh veggies or pita chips for a tasty snack. You can find the full recipe for this delightful dish above. To make your Cucumber Dill Yogurt Dip smooth, start by draining the cucumber. Excess moisture can make your dip runny. Grate the cucumber and then squeeze it in a clean kitchen towel. This step is key for a perfect texture. If you want a creamier dip, you can also add a bit of sour cream or cream cheese. Both options will add richness and depth to your dip. To boost your dip's flavor, think about adding spices. A pinch of cumin or smoked paprika can add warmth. You can also try fresh herbs like mint or parsley for a twist. Adjust the acidity with lemon juice for a bright taste. This small change can lift the overall flavor. Taste your dip and adjust until it sings! This dip is super versatile! Serve it with fresh vegetables like carrots, celery, or bell peppers. Pita chips also make a crunchy pairing. You can even spread it on sandwiches for a tasty twist. It adds a fresh flavor that brightens up any meal. Get creative and enjoy this delightful dip in many ways! For more detailed steps, check out the Full Recipe. {{image_2}} You can make this dip lighter by using low-fat yogurt. It keeps the flavor while cutting some calories. You might also try adding avocado. This fruit gives a creamy texture without extra dairy. Just mash it well and mix it in with your yogurt. Want to switch up the taste? Try using different fresh herbs. Mint or parsley can add a fun twist. You can also boost the flavor with spices. A bit of cumin or smoked paprika can add warmth and depth. Just sprinkle in a little to find your perfect balance. If you need gluten-free options, serve this dip with fresh veggies or gluten-free crackers. For a vegan version, swap the yogurt for a plant-based alternative. Many brands offer great coconut or almond yogurts that work well. These choices let everyone enjoy this dip! Store your Cucumber Dill Yogurt Dip in an airtight container. This keeps the dip fresh and tasty. It can last in the fridge for about 3 to 5 days. Always check for any signs of spoilage before eating. You can freeze Cucumber Dill Yogurt Dip, but it may change texture. To freeze, place the dip in a freezer-safe container. Leave some space at the top for expansion. When you're ready to use it, thaw it in the fridge overnight. Mix well before serving for the best flavor. If you have leftovers, try using them in a salad dressing or as a spread on sandwiches. You can also mix it into a pasta salad for extra creaminess. Always store leftovers in the fridge and consume within 3 to 5 days for safety. Remember to check for any off smells or changes in texture before use. Cucumber Dill Yogurt Dip lasts about 3 to 5 days in the fridge. Store it in a tight container to keep it fresh. Over time, the dip may lose some of its crispness. To enjoy the best flavor, try to eat it within three days. Yes, you can make this dip ahead of time. In fact, making it a day before can help the flavors mix better. Just keep it in the fridge in a sealed container. This way, it will be ready when you need it. You can serve this dip with many tasty things. Here are some ideas: - Fresh vegetables like carrots, celery, and bell peppers - Pita chips or tortilla chips - Crackers for a crunchy bite - Use it as a spread on sandwiches or wraps Yes, this recipe is gluten-free. The main ingredients do not contain gluten. Just make sure to check any store-bought items, like chips or crackers, for gluten. Enjoy this dip with confidence on a gluten-free diet. This blog post covered delicious Cucumber Dill Yogurt Dip. We explored fresh ingredients like cucumber, dill, and yogurt. You learned how to prep, mix, and add flavor. We shared tips to elevate the dip’s texture and suggested serving ideas. You can also alter recipes to fit your diet. In summary, making this dip is easy and fun. With fresh ingredients and simple steps, you can impress anyone. Enjoy your dip with friends and family. Remember, small changes can make it unique!

Cucumber Dill Yogurt Dip

Delight your taste buds with this refreshing Cucumber Dill Yogurt Dip! This easy recipe combines grated cucumber, creamy Greek yogurt, and fresh dill for a dip that's perfect with veggies, pita chips, or as a sandwich spread. In just 10 minutes of prep and a bit of chilling, you'll have a flavorful treat that's a hit at any gathering. Click through to explore the full recipe and impress your guests with this tasty dip!

Ingredients
  

1 large cucumber, grated and excess moisture squeezed out

1 cup plain Greek yogurt

2 tablespoons fresh dill, finely chopped

1 garlic clove, minced

1 tablespoon lemon juice

1 teaspoon olive oil

Salt and pepper to taste

Instructions
 

Begin by grating the cucumber using a box grater or food processor. Place the grated cucumber in a clean kitchen towel or cheesecloth and squeeze out as much moisture as possible. This will prevent your dip from becoming watery.

    In a medium bowl, combine the plain Greek yogurt and the squeezed grated cucumber. Mix well to combine.

      Add the finely chopped fresh dill, minced garlic, lemon juice, and olive oil to the bowl. Stir until all the ingredients are well incorporated.

        Season the dip with salt and pepper to taste; adjust the flavors as needed.

          For the best flavor, let the dip sit in the refrigerator for at least 30 minutes to allow the flavors to meld together.

            Serve chilled or at room temperature with fresh vegetables, pita chips, or as a sauce in sandwiches or wraps.

              Prep Time, Total Time, Servings: 10 min | 40 min (including chilling) | 4 servings

                - Presentation Tips: Transfer the dip to a serving bowl and garnish with a sprig of fresh dill and a few cucumber slices on top for an appealing look. Serve with an assortment of colorful vegetables arranged around the bowl for a beautiful presentation.

                  WANT TO SAVE THIS RECIPE?

                  Leave a Comment

                  Recipe Rating