Cheesy Garlic Knots Irresistible Flavor and Easy Recipe

WANT TO SAVE THIS RECIPE?

Are you ready to elevate your snack game with cheesy garlic knots? This easy recipe combines soft, warm dough with the rich flavors of garlic and gooey cheese. It’s perfect for any occasion, whether you’re hosting a party or enjoying a cozy night in. In this post, I’ll share the simple steps to create these irresistible bites and offer tips for delicious variations. Let’s get started on making the ultimate cheesy garlic knots!

Ingredients

List of Ingredients

– 1 package (1 lb) pizza dough (store-bought or homemade)

– 4 tablespoons unsalted butter, melted

– 3 cloves garlic, minced

– 1 teaspoon dried oregano

– 1 teaspoon dried parsley

– 1 cup shredded mozzarella cheese

– ½ cup grated Parmesan cheese

– Salt to taste

Ingredient Substitutions

You can change the pizza dough to a gluten-free type. This works well for those with gluten issues. For cheese, try a mix of gouda and cheddar for a richer flavor. You can also use vegan cheese for a plant-based option. Adjust herbs too! Use fresh herbs if you have them. Basil or thyme can bring a nice twist to the taste.

Step-by-Step Instructions

Preparation Steps

First, preheat your oven to 400°F (200°C). This temperature ensures a crispy outside and a gooey inside. Line a baking sheet with parchment paper to make cleanup easy. Next, roll out the pizza dough on a floured surface. Aim for a rectangle about ½ inch thick. This thickness helps the knots cook evenly. Once rolled, cut the dough into strips about 1 inch wide and 6 inches long. These strips will form your knots.

Shaping the Knots

Now comes the fun part—tying the knots. Take each strip and tie it into a knot. Tuck the ends underneath to keep them secure. This technique helps the knots hold their shape while baking. Place each knot on the prepared baking sheet, leaving some space between them. This space allows for even cooking and prevents them from sticking together.

Final Baking Process

Bake the knots in your preheated oven for 15 to 20 minutes. Keep an eye on them as they cook. You want them to turn golden brown with bubbling cheese. To check if they are done, look for a crispy texture and a lovely golden color. If you want an extra touch, drizzle any remaining garlic butter over the knots once they come out of the oven. Enjoy your cheesy garlic knots while they are warm for the best flavor and texture!

Tips & Tricks

Perfecting the Garlic Butter

To make garlic butter shine, use the right ingredient ratios. I find that 4 tablespoons of melted butter works well for rich flavor. Mix in 3 minced garlic cloves for a strong garlic kick. Adding 1 teaspoon of dried oregano and parsley gives it depth. You can also add a pinch of red pepper flakes for heat. This mix makes your knots burst with flavor.

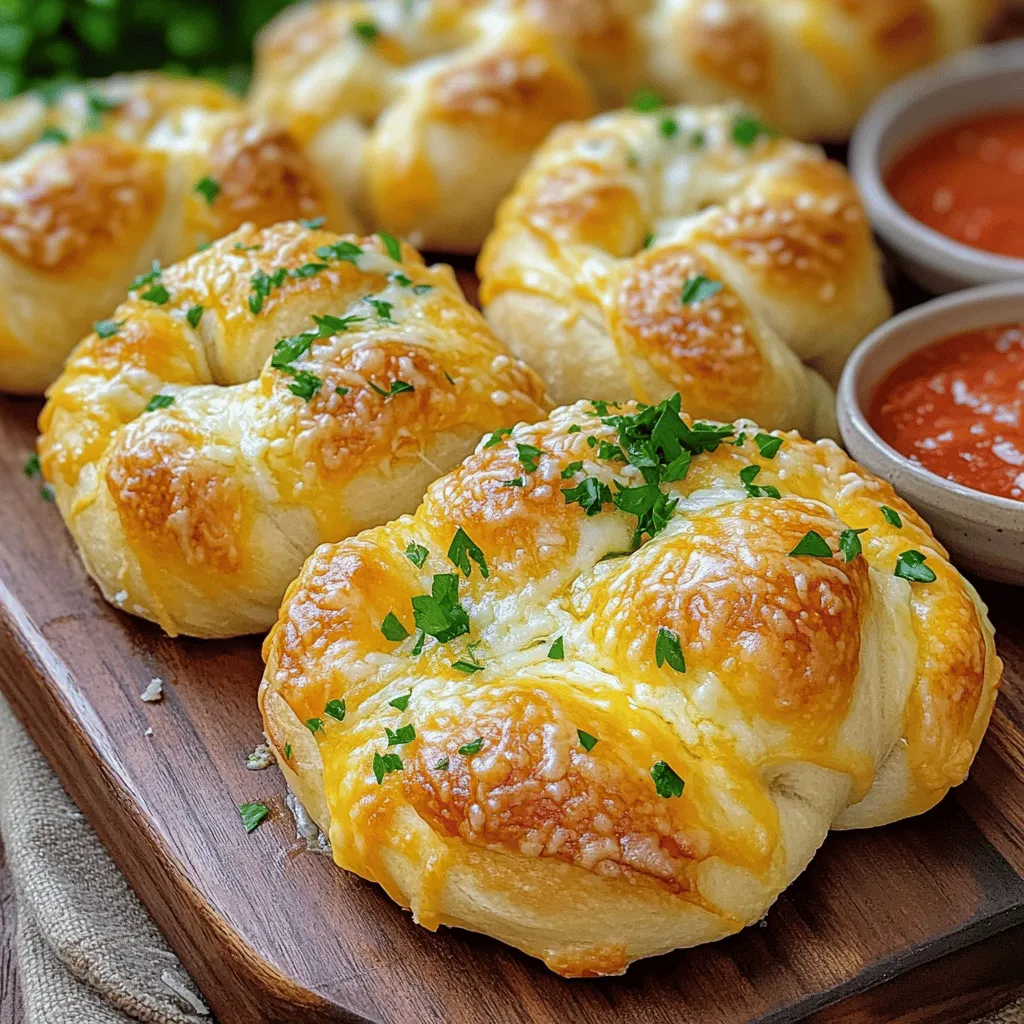
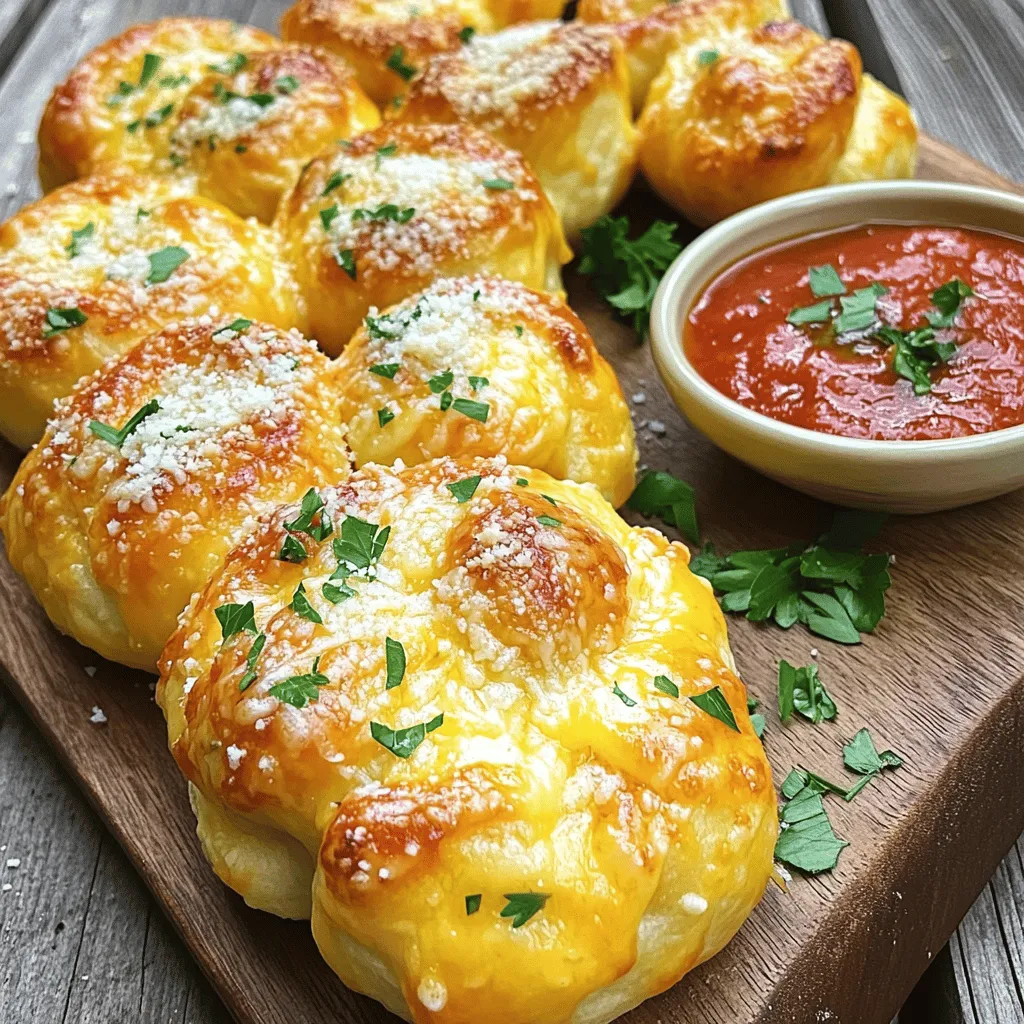
Presentation and Serving Suggestions

Serving cheesy garlic knots can be fun. I like to place them warm on a rustic wooden board. A sprinkle of fresh parsley makes them look nice. Pair them with a small bowl of marinara sauce for dipping. You can also serve them with ranch or garlic aioli for a tasty twist.

Cooking Mistakes to Avoid

Watch out for common baking pitfalls. If your knots are too dry, your dough might be overbaked. Always check them at 15 minutes. The cheese should melt perfectly. If you see it bubbling, you’re on the right track. Keep an eye on the color, too; golden brown means they’re ready.

Variations

Customizing Flavors

You can easily change up the classic cheesy garlic knots. Adding jalapeños gives them a spicy kick. Try using crushed red pepper for heat, too. You can also mix different cheeses. Cheddar or pepper jack adds a nice twist. Blend cheeses for unique flavors.

Healthier Alternatives

If you want a lighter option, use gluten-free pizza dough. Many brands offer great choices. You can also swap out cheese for lower-calorie versions. Look for part-skim mozzarella or dairy-free cheese. These swaps keep the taste while cutting calories.

Unique Pairings

Pair your cheesy garlic knots with tasty sides. A fresh salad or bruschetta works well. For drinks, try a light beer or sparkling water. These drinks balance the richness of garlic knots. You can even dip them in marinara sauce for extra flavor. Enjoy experimenting with different combinations!

Storage Info

How to Store Leftovers

To keep your cheesy garlic knots fresh, store them in the fridge in an airtight container. This method helps retain moisture and flavor. Make sure they cool down before sealing the container. If you want to freeze them, wrap each knot in plastic wrap and place them in a freezer bag. This protects them from freezer burn. For best results, use them within three months.

Reheating Techniques

When reheating, the oven is your best friend. Preheat it to 350°F (175°C) and place the knots on a baking sheet. Bake for about 10 minutes. This keeps them crispy and gooey. If using a microwave, heat in short bursts to avoid sogginess. A damp paper towel can help keep them soft while reheating.

Shelf Life

In the fridge, cheesy garlic knots last up to four days. If they start to smell off or look dry, it’s time to toss them. Freezing extends their life to about three months. Always check for signs of spoilage. If they look or smell unusual, it’s better to be safe and discard them.

FAQs

How to make cheesy garlic knots from scratch?

To make cheesy garlic knots, you start with pizza dough. You can use store-bought or make your own. First, roll out the dough into a rectangle. Cut it into strips about one inch wide and six inches long. Then, tie each strip into a knot. Tuck the ends underneath. Place the knots on a baking sheet. Mix melted butter with minced garlic, oregano, and parsley. Brush this mix on the knots. Top with mozzarella and Parmesan cheese. Bake until golden and bubbly. That’s it! You can find the full recipe to follow these steps in detail.

Can I make cheesy garlic knots ahead of time?

Yes, you can! Prepare the knots, but don’t bake them. Place the knots on a baking sheet and cover them with plastic wrap. Store them in the fridge for up to 24 hours. When ready, bake them straight from the fridge. You can also freeze the uncooked knots. Just freeze them on a baking sheet first, then transfer to a bag. They can last up to three months. When ready to eat, bake them from frozen, adding a few extra minutes to the time.

What are some popular dips for cheesy garlic knots?

Dipping sauces make cheesy garlic knots even better! Here are a few favorites:

– Marinara sauce for a classic touch.

– Ranch dressing for creaminess.

– Garlic butter for extra flavor.

– Pesto for a fresh twist.

These sauces add fun flavors and make each bite special.

Are there vegan versions of cheesy garlic knots?

Yes, you can easily make vegan cheesy garlic knots! Use vegan pizza dough instead of regular dough. For the cheese, try dairy-free mozzarella. You can also use nutritional yeast for a cheesy flavor. Use vegan butter in place of regular butter. All the other ingredients, like garlic and herbs, remain the same. This way, you can enjoy cheesy garlic knots even on a plant-based diet.

You learned how to make cheesy garlic knots from scratch. We covered every step, from ingredient prep to baking tips. I shared ways to customize flavors and suggested sides for serving. Knowing how to store and reheat these knots helps keep them fresh. You can easily swap ingredients if needed.

Enjoy making these tasty knots for friends or family. With simple steps, you can impress everyone at your next gathering. Happy cooking!

- 1 package (1 lb) pizza dough (store-bought or homemade) - 4 tablespoons unsalted butter, melted - 3 cloves garlic, minced - 1 teaspoon dried oregano - 1 teaspoon dried parsley - 1 cup shredded mozzarella cheese - ½ cup grated Parmesan cheese - Salt to taste You can change the pizza dough to a gluten-free type. This works well for those with gluten issues. For cheese, try a mix of gouda and cheddar for a richer flavor. You can also use vegan cheese for a plant-based option. Adjust herbs too! Use fresh herbs if you have them. Basil or thyme can bring a nice twist to the taste. Preparation Steps First, preheat your oven to 400°F (200°C). This temperature ensures a crispy outside and a gooey inside. Line a baking sheet with parchment paper to make cleanup easy. Next, roll out the pizza dough on a floured surface. Aim for a rectangle about ½ inch thick. This thickness helps the knots cook evenly. Once rolled, cut the dough into strips about 1 inch wide and 6 inches long. These strips will form your knots. Shaping the Knots Now comes the fun part—tying the knots. Take each strip and tie it into a knot. Tuck the ends underneath to keep them secure. This technique helps the knots hold their shape while baking. Place each knot on the prepared baking sheet, leaving some space between them. This space allows for even cooking and prevents them from sticking together. Final Baking Process Bake the knots in your preheated oven for 15 to 20 minutes. Keep an eye on them as they cook. You want them to turn golden brown with bubbling cheese. To check if they are done, look for a crispy texture and a lovely golden color. If you want an extra touch, drizzle any remaining garlic butter over the knots once they come out of the oven. Enjoy your cheesy garlic knots while they are warm for the best flavor and texture! To make garlic butter shine, use the right ingredient ratios. I find that 4 tablespoons of melted butter works well for rich flavor. Mix in 3 minced garlic cloves for a strong garlic kick. Adding 1 teaspoon of dried oregano and parsley gives it depth. You can also add a pinch of red pepper flakes for heat. This mix makes your knots burst with flavor. Serving cheesy garlic knots can be fun. I like to place them warm on a rustic wooden board. A sprinkle of fresh parsley makes them look nice. Pair them with a small bowl of marinara sauce for dipping. You can also serve them with ranch or garlic aioli for a tasty twist. Watch out for common baking pitfalls. If your knots are too dry, your dough might be overbaked. Always check them at 15 minutes. The cheese should melt perfectly. If you see it bubbling, you’re on the right track. Keep an eye on the color, too; golden brown means they’re ready. {{image_2}} You can easily change up the classic cheesy garlic knots. Adding jalapeños gives them a spicy kick. Try using crushed red pepper for heat, too. You can also mix different cheeses. Cheddar or pepper jack adds a nice twist. Blend cheeses for unique flavors. If you want a lighter option, use gluten-free pizza dough. Many brands offer great choices. You can also swap out cheese for lower-calorie versions. Look for part-skim mozzarella or dairy-free cheese. These swaps keep the taste while cutting calories. Pair your cheesy garlic knots with tasty sides. A fresh salad or bruschetta works well. For drinks, try a light beer or sparkling water. These drinks balance the richness of garlic knots. You can even dip them in marinara sauce for extra flavor. Enjoy experimenting with different combinations! To keep your cheesy garlic knots fresh, store them in the fridge in an airtight container. This method helps retain moisture and flavor. Make sure they cool down before sealing the container. If you want to freeze them, wrap each knot in plastic wrap and place them in a freezer bag. This protects them from freezer burn. For best results, use them within three months. When reheating, the oven is your best friend. Preheat it to 350°F (175°C) and place the knots on a baking sheet. Bake for about 10 minutes. This keeps them crispy and gooey. If using a microwave, heat in short bursts to avoid sogginess. A damp paper towel can help keep them soft while reheating. In the fridge, cheesy garlic knots last up to four days. If they start to smell off or look dry, it’s time to toss them. Freezing extends their life to about three months. Always check for signs of spoilage. If they look or smell unusual, it’s better to be safe and discard them. To make cheesy garlic knots, you start with pizza dough. You can use store-bought or make your own. First, roll out the dough into a rectangle. Cut it into strips about one inch wide and six inches long. Then, tie each strip into a knot. Tuck the ends underneath. Place the knots on a baking sheet. Mix melted butter with minced garlic, oregano, and parsley. Brush this mix on the knots. Top with mozzarella and Parmesan cheese. Bake until golden and bubbly. That’s it! You can find the full recipe to follow these steps in detail. Yes, you can! Prepare the knots, but don’t bake them. Place the knots on a baking sheet and cover them with plastic wrap. Store them in the fridge for up to 24 hours. When ready, bake them straight from the fridge. You can also freeze the uncooked knots. Just freeze them on a baking sheet first, then transfer to a bag. They can last up to three months. When ready to eat, bake them from frozen, adding a few extra minutes to the time. Dipping sauces make cheesy garlic knots even better! Here are a few favorites: - Marinara sauce for a classic touch. - Ranch dressing for creaminess. - Garlic butter for extra flavor. - Pesto for a fresh twist. These sauces add fun flavors and make each bite special. Yes, you can easily make vegan cheesy garlic knots! Use vegan pizza dough instead of regular dough. For the cheese, try dairy-free mozzarella. You can also use nutritional yeast for a cheesy flavor. Use vegan butter in place of regular butter. All the other ingredients, like garlic and herbs, remain the same. This way, you can enjoy cheesy garlic knots even on a plant-based diet. You learned how to make cheesy garlic knots from scratch. We covered every step, from ingredient prep to baking tips. I shared ways to customize flavors and suggested sides for serving. Knowing how to store and reheat these knots helps keep them fresh. You can easily swap ingredients if needed. Enjoy making these tasty knots for friends or family. With simple steps, you can impress everyone at your next gathering. Happy cooking!

Cheesy Garlic Knots

Get ready to indulge in the ultimate cheesy garlic knots that will elevate your snack game! With gooey mozzarella and Parmesan wrapped in buttery, garlic-infused dough, these irresistible bites are perfect for any occasion. Follow our simple recipe to whip up a batch in just 35 minutes. Perfect for parties or cozy nights in. Click through for the full recipe and impress your friends and family with your baking skills!

Ingredients
  

1 package (1 lb) pizza dough (store-bought or homemade)

4 tablespoons unsalted butter, melted

3 cloves garlic, minced

1 teaspoon dried oregano

1 teaspoon dried parsley

1 cup shredded mozzarella cheese

½ cup grated Parmesan cheese

Salt to taste

Instructions
 

Preheat your oven to 400°F (200°C) and line a baking sheet with parchment paper.

    Roll out the pizza dough on a floured surface into a rectangle about ½ inch thick.

      Cut the dough into strips about 1 inch wide and 6 inches long.

        Take each strip and tie it into a knot, tucking the ends underneath. Place the knots on the prepared baking sheet.

          In a small bowl, mix together the melted butter, minced garlic, oregano, parsley, and a pinch of salt.

            Brush the garlic butter mixture generously over each dough knot.

              Sprinkle the shredded mozzarella and grated Parmesan cheese over all the knots.

                Bake in the preheated oven for 15-20 minutes, or until the knots are golden brown and the cheese is bubbling.

                  Remove from the oven and drizzle with any remaining garlic butter. Let cool slightly before serving.

                    Prep Time: 15 minutes | Total Time: 35 minutes | Servings: 12 knots

                      - Presentation Tips: Serve the garlic knots warm on a rustic wooden board, garnished with fresh parsley and a small bowl of marinara sauce for dipping.

                        WANT TO SAVE THIS RECIPE?

                        Leave a Comment

                        Recipe Rating