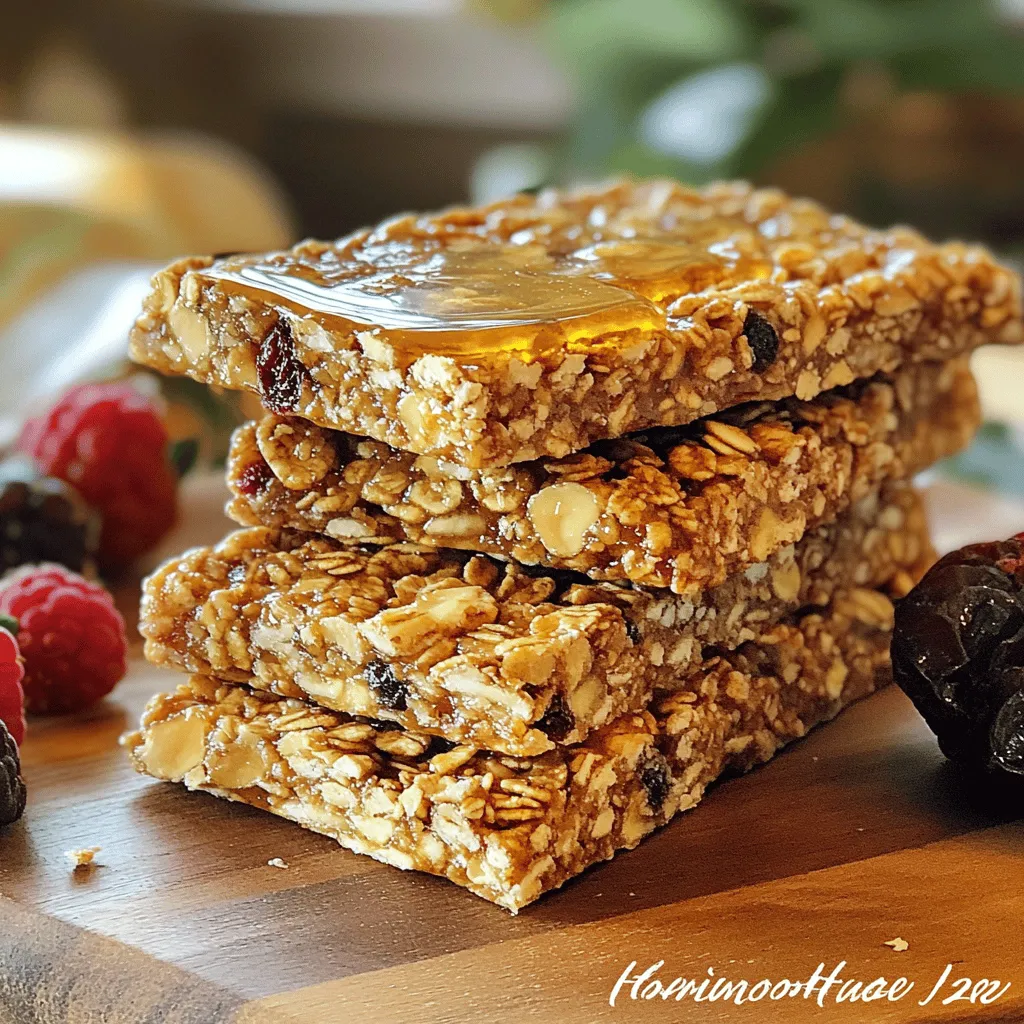
Are you ready to create a delicious and healthy snack? Homemade granola bars are easy to make and packed with nutrients. Whether you want to customize your bars with favorite ingredients or stick to traditional recipes, I’ve got you covered. In this guide, I’ll share simple steps, essential tips, and tasty variations. Let’s dive in and make your new go-to snack!
Ingredients
Key Ingredients for Homemade Granola Bars
To make delicious homemade granola bars, you need a few key ingredients. These are the stars of the recipe:
- 2 cups oats (rolled or quick)
- 1 cup mixed nuts (almonds, walnuts, pecans), chopped
- ½ cup nut butter (like almond or peanut butter)
- ½ cup honey or maple syrup
- ½ cup dried fruits (cranberries, raisins, or apricots), chopped
- ¼ cup sunflower seeds
- ¼ teaspoon salt
- 1 teaspoon vanilla extract
- ½ teaspoon cinnamon (optional)
These ingredients work together to create a tasty and satisfying snack. The oats form the base, while nuts add crunch and protein. Nut butter binds everything together, making the bars chewy.
Optional Add-Ins for Customization
You can easily customize your granola bars. Here are some fun add-ins to consider:
- Chocolate chips for sweetness
- Coconut flakes for a tropical twist
- Chia seeds for extra fiber
- Pumpkin seeds for a nutty flavor
- Spices like nutmeg or ginger for warmth
Feel free to mix and match! This way, you can create a new flavor every time you make them.
Nutritional Benefits of Each Ingredient
Let’s look at the health benefits of these ingredients:
- Oats: Rich in fiber, they help keep you full. They also support heart health.
- Nuts: Packed with healthy fats, they provide protein and keep your energy up.
- Nut Butter: Great for protein and healthy fats. It makes the bars creamy.
- Honey or Maple Syrup: Natural sweeteners provide energy. They also have antioxidants.
- Dried Fruits: They add natural sweetness and vitamins. They help with digestion too.
- Sunflower Seeds: High in vitamin E, they support skin health.
- Salt: Just a pinch enhances flavor, balancing the sweetness.
- Vanilla Extract: Adds a rich flavor without extra sugar.
- Cinnamon: This spice helps regulate blood sugar and adds warmth.
Each ingredient brings unique benefits. Together, they create a snack that is both tasty and good for you.
Step-by-Step Instructions
Preparation Steps for Crunchy Nutty Energy Granola Bars
To start, gather your ingredients. You will need oats, nuts, nut butter, honey, dried fruits, seeds, salt, vanilla, and cinnamon. Preheat your oven to 350°F (175°C). Line an 8×8-inch baking dish with parchment paper. Leave some paper hanging over the sides for easy removal later.
In a big bowl, mix oats, nuts, sunflower seeds, salt, and cinnamon. Stir them well to combine. In another bowl, blend the nut butter, honey, and vanilla until smooth. Pour this mixture over the dry ingredients. Mix until everything is coated nicely. Add the dried fruits and fold them in gently.
Baking Guidelines for Perfect Texture
Now, transfer your mixture into the prepared baking dish. Press it down firmly with a spatula. Make sure it’s even and compact. Bake in your preheated oven for 20 to 25 minutes. Look for the edges to turn golden brown. This step gives your bars the perfect crunchy texture.
Cooling and Storage Instructions
Once baked, take the dish out and let it cool completely for about an hour. Use the parchment paper to lift the granola out of the dish. Cut it into bars of your desired size. Store the bars in an airtight container. They stay fresh at room temperature for a week or in the fridge for longer. Enjoy your tasty homemade snack!
Tips & Tricks
Common Mistakes to Avoid When Making Granola Bars
One common mistake is not measuring ingredients correctly. Always use a scale or measuring cups. Another error is not pressing the mixture down enough. If you don’t pack it firmly, the bars won’t hold together. Avoid using too much liquid; it can make your bars soggy. Finally, don’t skip cooling time. Letting them cool helps them set properly.
How to Get the Right Consistency
For the best texture, balance wet and dry ingredients. Use enough nut butter and sweetener to bind everything. If your mixture seems dry, add a bit more honey or nut butter. You want it to feel sticky but not runny. Press the mixture firmly into the pan; this helps it stick together. Bake until golden brown edges appear for a crunchy bite.
Presentation Tips for Serving
For a stunning display, stack the bars or fan them out on a platter. Pair them with fresh fruit for color and freshness. You can also wrap each bar in parchment paper for a cute touch. This makes them easy to grab and eat. A sprinkle of nuts or seeds on top adds a nice finish too.

Variations
Vegan Granola Bar Recipe Option
You can easily make vegan granola bars. Just replace honey with maple syrup. Use almond or peanut butter, and ensure all your ingredients are plant-based. This keeps your snacks healthy and creamy without any animal products. The result is a tasty treat that everyone can enjoy.
Gluten-Free Granola Bar Recipe Option
To make gluten-free bars, choose oats labeled gluten-free. Most oats are safe, but cross-contamination can happen. Use gluten-free nut butter and check all your add-ins for gluten. This way, you keep your snacks safe for those with gluten allergies or sensitivities. Gluten-free granola bars can be just as crunchy and delicious.
Flavor Combinations to Try
Explore fun flavors by mixing and matching ingredients. Here are some ideas to spark your creativity:
- Chocolate Chip: Add dark chocolate chips for a sweet touch.
- Coconut: Mix in shredded coconut for a tropical vibe.
- Spicy: Sprinkle in a bit of cayenne pepper for a kick.
- Pumpkin Spice: Use pumpkin puree and spices for a fall flavor.
These tweaks can make your granola bars exciting and new.Enjoy your baking adventure!
Storage Info
Best Practices for Storing Granola Bars
To keep your granola bars fresh, store them in an airtight container. This keeps out air and moisture. You can place parchment paper between layers to avoid sticking. If you want to keep them crunchy, avoid refrigeration unless needed.
Freezing Granola Bars for Extended Freshness
If you want to save your bars for later, freezing is a great option. Wrap each bar tightly in plastic wrap. Then, place them in a freezer bag or container. They can last up to three months in the freezer. When you’re ready to enjoy them, just thaw at room temperature.
Shelf Life of Homemade Granola Bars
Homemade granola bars can last about a week at room temperature. If stored in the fridge, they stay fresh for two weeks. The ingredients used may affect freshness. For instance, nut butter can help keep them moist longer. Always check for any signs of spoilage before eating.
FAQs
Can I use different nuts or seeds?
Yes, you can use any nuts or seeds you like. Almonds, walnuts, or pecans work well. You can also try pumpkin seeds or chia seeds for a twist. Just chop them to a small size. This lets them mix well with the oats and binds nicely.
How do I make my granola bars chewier?
To make granola bars chewier, add more nut butter or honey. You can also include more dried fruits, like dates or figs. These ingredients add moisture. Press the mixture down firmly in the pan. This keeps the bars dense and chewy.
Are homemade granola bars healthier than store-bought?
Homemade granola bars are often healthier. You control the ingredients and avoid additives. Store-bought bars may have extra sugar or preservatives. With homemade bars, you can choose natural sweeteners. You also get to add your favorite nuts and fruits. This way, you enjoy a snack that fits your diet.
Making homemade granola bars is simple and fun. You learned about key ingredients and optional add-ins. Each ingredient offers unique health benefits, making your bars both tasty and nutritious. You now have step-by-step instructions to create the perfect crunchy texture. I also shared tips to avoid mistakes and enhance presentation. Explore variations like vegan or gluten-free options to match your diet. Finally, good storage keeps your bars fresh and delicious. Now, go ahead and enjoy your healthy, homemade granola bars!

