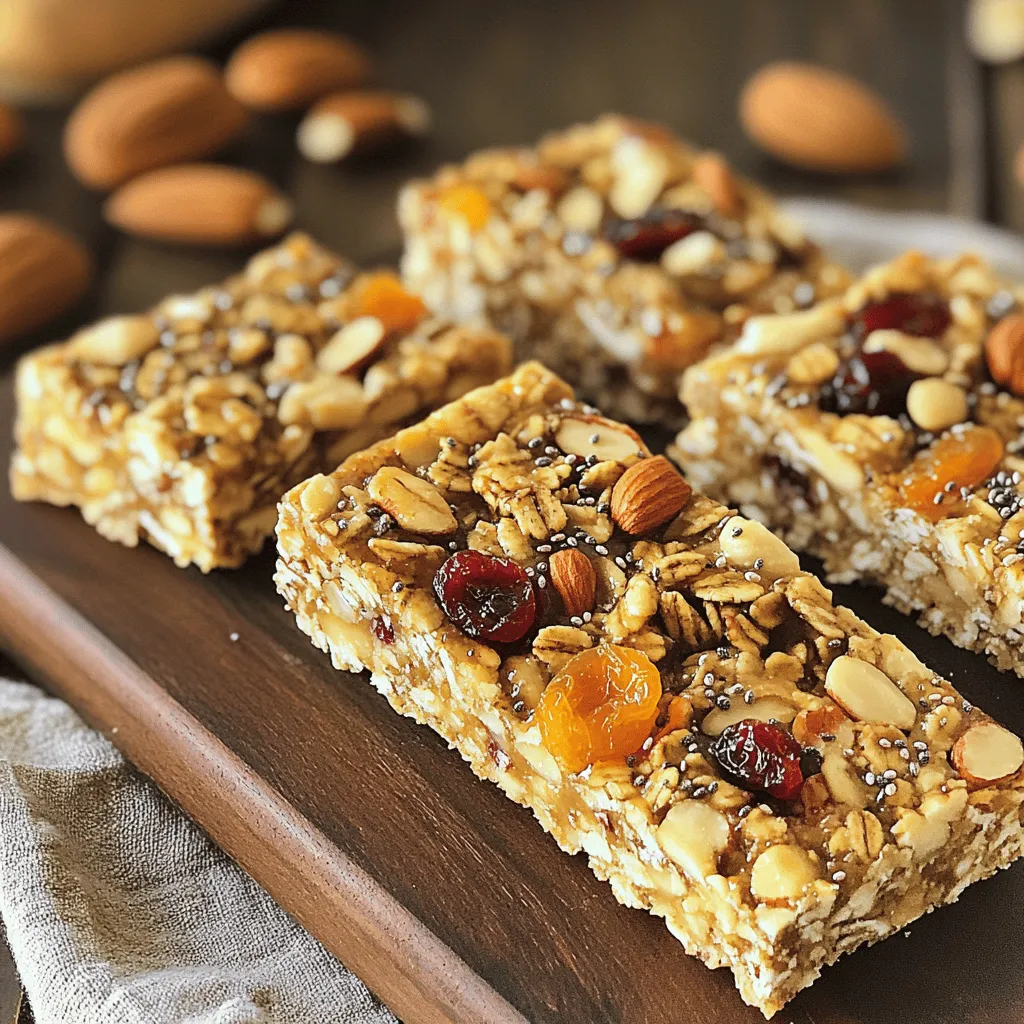
Are you tired of store-bought granola bars filled with mystery ingredients? Let’s change that! In this post, I’ll show you how to make healthy and simple homemade granola bars that are easy and fun. Say goodbye to artificial flavors and hello to wholesome, delicious snacks made just the way you like them! Grab your ingredients and let’s get started on this tasty journey!
Ingredients
Essential Ingredients for Homemade Granola Bars
- Rolled oats: These are the backbone of your bars. They provide fiber and energy. Oats help keep you full and satisfied.
- Mixed nuts: Almonds, walnuts, and pecans add crunch and healthy fats. They also offer protein, which is great for building muscle. Nuts provide antioxidants that help your body fight off illness.
- Nut butter: Almond or peanut butter adds creaminess. It binds everything together and offers more protein. Plus, it gives a rich flavor that makes your bars delicious.
Sweeteners and Flavor Enhancements
- Honey vs. Maple syrup: Both sweeteners add flavor. Honey is thicker and adds a floral note. Maple syrup has a unique taste and is less sweet. Choose what you enjoy most.
- Natural flavor extracts: Vanilla extract brightens your bars. It adds depth to the flavor without extra calories. You can also try almond or coconut extracts for fun twists.
Optional Add-ins for Customization
- Dried fruits: Cranberries, apricots, and raisins bring sweetness without refined sugars. They add vitamins and minerals, boosting your bars’ nutrition.
- Seeds: Chia, sunflower, or pumpkin seeds are great options. They add crunch and healthy fats. Seeds are also rich in fiber, helping with digestion.
For the full recipe, check out the Nutty Delight Granola Bars.
Step-by-Step Instructions
Overview of the Preparation Process
First, preheat your oven to 350°F (175°C). This step helps the granola bars bake evenly. Next, prepare an 8-inch square baking pan. Line it with parchment paper. This makes it easy to remove the bars later.
Mixing Dry Ingredients
In a large bowl, combine the rolled oats, chopped nuts, dried fruits, seeds, cinnamon, and salt. Mix these dry ingredients well. You want to achieve a good consistency. Make sure everything is evenly distributed. This helps each bite taste amazing.
Combining Wet and Dry Ingredients
In a microwave-safe bowl, mix the nut butter and honey (or maple syrup). Heat this mixture for 20-30 seconds. You want it melted and easy to stir. Add the vanilla extract to this mix. Stir until well combined.
Now, pour this wet mixture into the bowl with the dry ingredients. Use a spatula or your hands to mix everything together. You want all the ingredients coated uniformly.
After mixing, transfer the granola to your prepared baking pan. Press it down firmly and evenly. This step is key for the bars to hold together. Bake in your preheated oven for 20-25 minutes. Look for golden brown edges.
When they are done, cool the pan for about 10 minutes. Lift out the parchment paper and let them cool completely on a wire rack. Once cooled, cut them into bars. Enjoy your homemade granola bars! You can store them in an airtight container for up to a week.
Tips & Tricks
Ensuring Perfect Texture and Flavor
To keep your granola bars from crumbling, make sure to press the mixture firmly into the pan. A good, even press helps bind the ingredients together. Use a spatula or your hands to flatten the mix down. This step is key.
Balancing sweetness and nuttiness is easy. If you want it sweeter, add more honey or maple syrup. For a nuttier taste, increase the amount of mixed nuts. Experiment with the ratios until you find the right blend that you enjoy.
Common Mistakes to Avoid
Overmixing can lead to dry bars. Mix just until the dry ingredients are coated. Undermixing leaves pockets of dry oats, which can also affect the texture. Aim for a good balance.
Baking too long can make your bars hard. Keep an eye on them. They should be golden brown at the edges. If you’re unsure, test them by gently pressing the top. It should feel firm but not hard.
Enhancing Nutritional Value
You can easily add protein-rich ingredients to your bars. Consider adding protein powder or using seeds like chia or hemp. These add extra nutrition without changing the taste much.
Incorporating superfoods can also boost health benefits. Try mixing in ingredients like flaxseeds or goji berries. These give your bars a nutrient kick. Plus, they add unique flavors and textures. For the full recipe, check the Nutty Delight Granola Bars above.
Variations
Flavor Combinations to Try
You can play with flavors to make your granola bars fun and tasty. Here are two ideas:
- Chocolate chip granola bars: Add a half cup of dark chocolate chips to your mix. They melt slightly and add a rich taste.
- Spicy granola bars with cinnamon and nutmeg: Mix in one teaspoon of cinnamon and a pinch of nutmeg. This will give your bars a warm, cozy flavor.
Dietary Accommodations
If you have special dietary needs, you can still enjoy these bars. Here are some options:
- Gluten-free options: Use gluten-free oats and ensure your nut butter is also gluten-free. This way, everyone can enjoy them.
- Vegan substitutions: Replace honey with maple syrup to keep it vegan. Also, check that your nut butter contains no animal products.
Creative Mix-Ins
You can make these bars your own by adding unique flavors. Here are some fun ideas:
- Ideas for seasonal flavors: Add pumpkin spice in fall or coconut and lime in summer. These changes can keep things fresh and exciting.
- Suggestions for using leftovers: If you have nuts, seeds, or dried fruits left over, toss them in. It’s a great way to not waste food and make each batch special.
For the full recipe, check out Nutty Delight Granola Bars!
Storage Info
Best Practices for Storage
Store your homemade granola bars in an airtight container. This keeps them fresh and tasty. You can use glass jars or plastic containers. Make sure the lid is tight. This helps avoid moisture. Keep the container in a cool, dry place. Avoid spots near heat or humidity. These factors can make your bars go stale faster.
Shelf Life of Homemade Granola Bars
Homemade granola bars last about one week at room temperature. After that, they may lose their crunch. If you want to keep them longer, freezing is a great option. Wrap each bar in plastic wrap, then put them in a freezer bag. They can last up to three months in the freezer. Just pull one out when you need a snack!
Signs of Spoilage
Check your granola bars for signs of spoilage. If they smell off or look dry, it’s time to toss them. Also, if you see mold, throw them away immediately. To keep them fresh longer, always store them in an airtight container. This simple step makes a big difference. Enjoy your Nutty Delight Granola Bars knowing they stay good for days!
FAQs
How do I make granola bars without nut butter?
You can use alternatives like sunflower seed butter or coconut oil. These options work well and provide healthy fats. You can also try mashed bananas or applesauce for moisture. Just remember to adjust the sweetness if you add fruit.
Can I customize the sweetness level?
Yes, you can easily adjust the sweetness. Use less honey or maple syrup than the recipe calls for. You can also use sweeteners like agave or stevia. Just taste as you go to find your ideal level.
Are homemade granola bars healthy?
Homemade granola bars can be very healthy. They let you control what goes inside. You can choose whole grains, nuts, and seeds. These ingredients provide fiber and protein. Store-bought bars often have added sugars and preservatives.
What are some good add-ins for extra protein?
You can add ingredients like protein powder, hemp seeds, or Greek yogurt. These options boost protein without changing the taste much. Make sure to adjust the liquid in your recipe to keep the texture right.
Homemade granola bars are easy and fun to make. We explored key ingredients like oats, nuts, and sweeteners. Step-by-step, I shared how to mix, bake, and store them. You learned tips to avoid common mistakes and create unique flavors. Remember, customizations are endless, with options for dietary needs.
These bars are not just tasty; they’re a healthy snack. With fresh ingredients, you control what goes in. Enjoy making them your own!
