Cheesy Tennessee Onions Hot and Flavorful Delight

WANT TO SAVE THIS RECIPE?

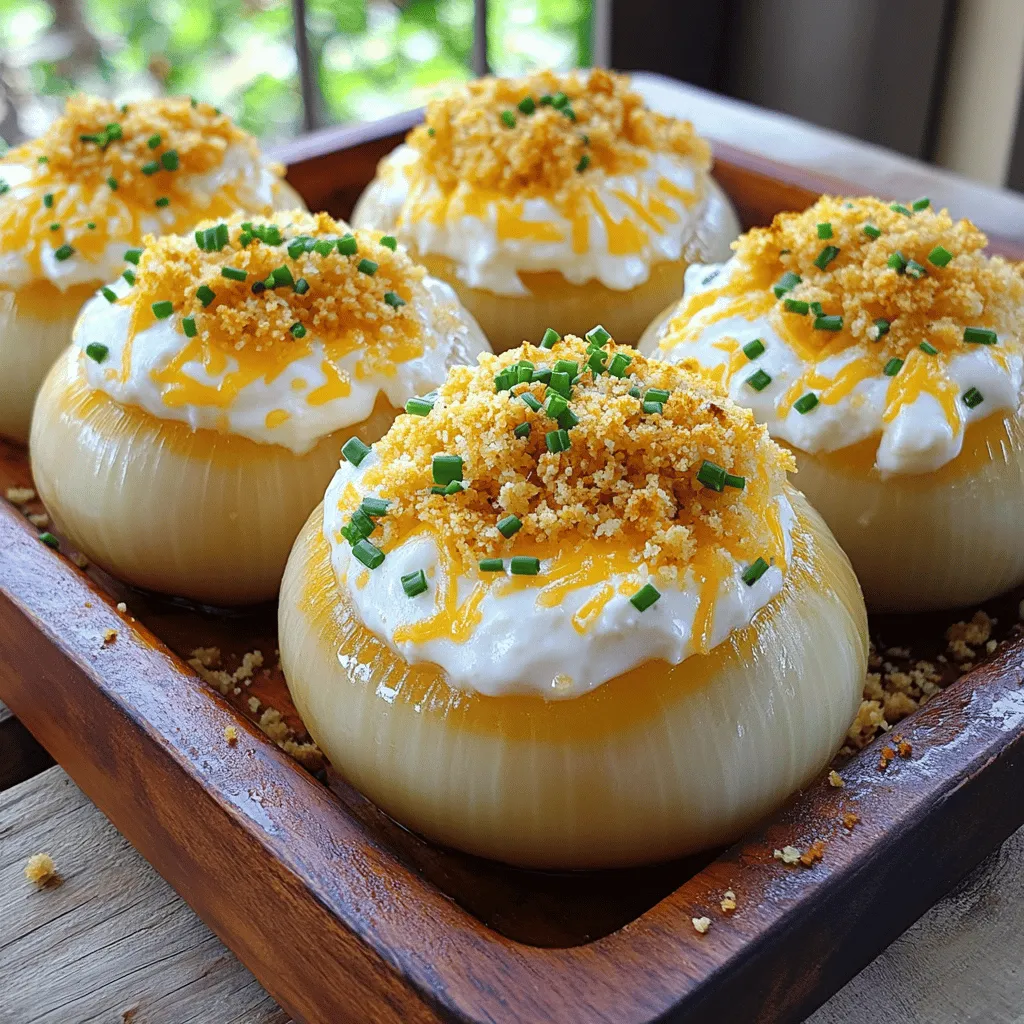
Are you ready for a mouthwatering treat? Cheesy Tennessee Onions are a hot and flavorful delight! These tasty bites boast a cheesy filling with the perfect blend of seasonings. In this post, I will guide you through easy steps to create this delicious dish. You’ll impress your family and friends with your cooking skills. Let’s jump in and make those onions sing with flavor!

Ingredients

List of Ingredients

– 4 large Vidalia onions

– 1 cup sharp cheddar cheese, grated

– 1 cup cream cheese, softened

– ½ cup sour cream

– 1 cup breadcrumbs

– 1 tablespoon garlic powder

– 1 tablespoon onion powder

– 1 teaspoon smoked paprika

– ½ teaspoon cayenne pepper (optional for heat)

– Salt and pepper to taste

– 2 tablespoons fresh chives, chopped (for garnish)

Optional Ingredients for Added Flavor

You can easily boost the taste of your cheesy Tennessee onions. Here are some great options:

– Crumbled bacon for a savory crunch

– Fresh herbs like thyme or rosemary for a fragrant touch

– Diced jalapeños for extra heat

These ingredients can add depth and fun to your dish. Feel free to mix and match to fit your taste.

Recommended Cheese Combinations

While sharp cheddar shines in this recipe, you can explore other cheese options too. Consider these combos:

– Gouda for a creamy and smoky flavor

– Monterey Jack for a milder, buttery taste

– Parmesan for a nutty, salty kick

Mixing different cheeses can create a rich and tasty filling. I recommend sticking to two or three types for balance. For the full recipe, check out the details above.

Step-by-Step Instructions

Preparation and Preheating

First, you need to preheat your oven to 375°F (190°C). This step is key for great baking. While the oven heats, grab your large Vidalia onions. Cut off the tops and scoop out the insides. Leave about a half-inch shell. Set the onion pulp aside for later use. This will add flavor to your cheesy filling.

Mixing the Cheesy Filling

In a medium bowl, mix together the cream cheese and sour cream. Add half of the grated sharp cheddar cheese. Stir well until the mixture is smooth. Now, finely chop the reserved onion pulp. Add it to the bowl along with garlic powder, onion powder, smoked paprika, cayenne pepper (if you want some heat), salt, and pepper. Mix everything until it’s all combined. This cheesy filling is what makes these onions so delicious!

Stuffing and Baking the Onions

Next, fill each onion shell with the cheesy mixture. Pack it in well for a great bite. In another bowl, combine the rest of the cheddar cheese with breadcrumbs and a pinch of salt and pepper. Sprinkle this mixture on top of the stuffed onions. Now, place them in a baking dish and cover it with aluminum foil. Bake for 30 minutes. After that, remove the foil and bake for another 15-20 minutes. Look for a golden brown top. Once the onions are tender, let them cool for a few moments before serving. Enjoy your cheesy Tennessee onions hot and flavorful! For more detailed steps, check the Full Recipe.

Tips & Tricks

How to Cut Onions Without Crying

To cut onions without tears, use a sharp knife. A sharp blade makes clean cuts. This reduces the release of irritants. You can also chill the onions first. Cold onions release fewer of these gases. Another trick is to cut under running water. The water captures the fumes and keeps them away from your eyes.

Best Baking Practices for Perfectly Tender Onions

To get tender onions, bake them covered at first. This traps steam and softens the onions. After about 30 minutes, uncover the dish. This browns the tops and adds flavor. Keep an eye on them as they bake. They should be soft but not mushy. If you want extra gooey cheese, bake a bit longer.

Make-Ahead Tips for Cheesy Tennessee Onions

You can prepare cheesy Tennessee onions a day ahead. Stuff the onion shells and cover them with foil. Store them in the fridge until you’re ready to bake. This saves time on busy days. Just add a few extra minutes to the baking time. This way, you enjoy hot and cheesy goodness right when you need it. For the full recipe, check back to ensure all steps are clear!

Variations

Adding Different Cheeses

You can change the cheese for a new taste. Try adding mozzarella for a stretchy texture. Gouda gives a nice, smoky flavor. Or use pepper jack for some spice. Mixing cheeses adds depth to the dish. Just remember, keep the same amount of cheese.

Spicing It Up with More Heat

If you like heat, add more cayenne pepper or red pepper flakes. You can also mix in diced jalapeños for a fresh kick. A dash of hot sauce in the cheesy mix can also work. Just taste as you go to find your perfect level of spice.

Vegetarian and Vegan Alternatives

For a vegetarian twist, replace the sour cream with Greek yogurt. You can also use plant-based cream cheese for a vegan version. Nutritional yeast adds a cheesy flavor without dairy. Use your favorite vegan cheese for a creamy texture. These swaps keep the dish tasty and fun!

Make sure to check out the Full Recipe for all the details!

Storage Info

How to Store Leftovers

To store leftovers, let the cheesy Tennessee onions cool first. Place them in an airtight container. Make sure to cover them well to keep them fresh. Store the container in the fridge. They will last for about 3 to 4 days. If you want to keep them longer, freezing is a great option.

Freezing Instructions for Cheesy Onions

You can freeze cheesy Tennessee onions for later enjoyment. First, let them cool completely. Then, wrap each onion in plastic wrap. Place the wrapped onions in a freezer-safe bag. Squeeze out as much air as possible. They will stay fresh in the freezer for up to 3 months. Remember to label the bag with the date.

Reheating Tips for Best Results

To reheat your cheesy onions, preheat your oven to 350°F (175°C). Remove the onions from the fridge or freezer. If frozen, let them thaw overnight in the fridge. Place the onions in a baking dish and cover with foil. Bake for about 20-25 minutes if cold from the fridge. If reheating from frozen, it may take around 30-40 minutes. Remove the foil for the last 10 minutes to crisp up the topping. Enjoy your delicious meal once more!

FAQs

How long to bake cheesy Tennessee onions?

You should bake cheesy Tennessee onions for a total of 45 to 50 minutes. Start by covering them with foil and baking for 30 minutes. After that, remove the foil and bake for another 15 to 20 minutes. This helps the tops get golden and crispy, while the onions stay tender.

Can I use other types of onions?

Yes, you can use other onions if you like. While Vidalia onions are sweet and soft, yellow or white onions work well too. Just keep in mind that they may have a sharper taste. Adjust the baking time if needed, as some onions may cook faster.

What to serve with cheesy Tennessee onions?

Cheesy Tennessee onions pair nicely with many dishes. You can serve them as a side with grilled meats or roasted vegetables. They also go well with a fresh salad or as part of a larger spread. For a fun twist, try serving them with a tasty dip or sauce on the side. If you want the full recipe for cheesy Tennessee onions, check out the details above.

This blog post covered the key aspects of making cheesy Tennessee onions. We explored the best ingredients and how to prepare them. You learned about mixing cheesy fillings, baking tips, and creative variations. I shared storage advice to keep leftovers fresh.

In closing, this dish stands out for its flavor and simplicity. Try it out and enjoy the cheesy goodness. You’ll impress everyone at your table with these tasty bites.

- 4 large Vidalia onions - 1 cup sharp cheddar cheese, grated - 1 cup cream cheese, softened - ½ cup sour cream - 1 cup breadcrumbs - 1 tablespoon garlic powder - 1 tablespoon onion powder - 1 teaspoon smoked paprika - ½ teaspoon cayenne pepper (optional for heat) - Salt and pepper to taste - 2 tablespoons fresh chives, chopped (for garnish) You can easily boost the taste of your cheesy Tennessee onions. Here are some great options: - Crumbled bacon for a savory crunch - Fresh herbs like thyme or rosemary for a fragrant touch - Diced jalapeños for extra heat These ingredients can add depth and fun to your dish. Feel free to mix and match to fit your taste. While sharp cheddar shines in this recipe, you can explore other cheese options too. Consider these combos: - Gouda for a creamy and smoky flavor - Monterey Jack for a milder, buttery taste - Parmesan for a nutty, salty kick Mixing different cheeses can create a rich and tasty filling. I recommend sticking to two or three types for balance. For the full recipe, check out the details above. First, you need to preheat your oven to 375°F (190°C). This step is key for great baking. While the oven heats, grab your large Vidalia onions. Cut off the tops and scoop out the insides. Leave about a half-inch shell. Set the onion pulp aside for later use. This will add flavor to your cheesy filling. In a medium bowl, mix together the cream cheese and sour cream. Add half of the grated sharp cheddar cheese. Stir well until the mixture is smooth. Now, finely chop the reserved onion pulp. Add it to the bowl along with garlic powder, onion powder, smoked paprika, cayenne pepper (if you want some heat), salt, and pepper. Mix everything until it’s all combined. This cheesy filling is what makes these onions so delicious! Next, fill each onion shell with the cheesy mixture. Pack it in well for a great bite. In another bowl, combine the rest of the cheddar cheese with breadcrumbs and a pinch of salt and pepper. Sprinkle this mixture on top of the stuffed onions. Now, place them in a baking dish and cover it with aluminum foil. Bake for 30 minutes. After that, remove the foil and bake for another 15-20 minutes. Look for a golden brown top. Once the onions are tender, let them cool for a few moments before serving. Enjoy your cheesy Tennessee onions hot and flavorful! For more detailed steps, check the Full Recipe. To cut onions without tears, use a sharp knife. A sharp blade makes clean cuts. This reduces the release of irritants. You can also chill the onions first. Cold onions release fewer of these gases. Another trick is to cut under running water. The water captures the fumes and keeps them away from your eyes. To get tender onions, bake them covered at first. This traps steam and softens the onions. After about 30 minutes, uncover the dish. This browns the tops and adds flavor. Keep an eye on them as they bake. They should be soft but not mushy. If you want extra gooey cheese, bake a bit longer. You can prepare cheesy Tennessee onions a day ahead. Stuff the onion shells and cover them with foil. Store them in the fridge until you’re ready to bake. This saves time on busy days. Just add a few extra minutes to the baking time. This way, you enjoy hot and cheesy goodness right when you need it. For the full recipe, check back to ensure all steps are clear! {{image_2}} You can change the cheese for a new taste. Try adding mozzarella for a stretchy texture. Gouda gives a nice, smoky flavor. Or use pepper jack for some spice. Mixing cheeses adds depth to the dish. Just remember, keep the same amount of cheese. If you like heat, add more cayenne pepper or red pepper flakes. You can also mix in diced jalapeños for a fresh kick. A dash of hot sauce in the cheesy mix can also work. Just taste as you go to find your perfect level of spice. For a vegetarian twist, replace the sour cream with Greek yogurt. You can also use plant-based cream cheese for a vegan version. Nutritional yeast adds a cheesy flavor without dairy. Use your favorite vegan cheese for a creamy texture. These swaps keep the dish tasty and fun! Make sure to check out the Full Recipe for all the details! To store leftovers, let the cheesy Tennessee onions cool first. Place them in an airtight container. Make sure to cover them well to keep them fresh. Store the container in the fridge. They will last for about 3 to 4 days. If you want to keep them longer, freezing is a great option. You can freeze cheesy Tennessee onions for later enjoyment. First, let them cool completely. Then, wrap each onion in plastic wrap. Place the wrapped onions in a freezer-safe bag. Squeeze out as much air as possible. They will stay fresh in the freezer for up to 3 months. Remember to label the bag with the date. To reheat your cheesy onions, preheat your oven to 350°F (175°C). Remove the onions from the fridge or freezer. If frozen, let them thaw overnight in the fridge. Place the onions in a baking dish and cover with foil. Bake for about 20-25 minutes if cold from the fridge. If reheating from frozen, it may take around 30-40 minutes. Remove the foil for the last 10 minutes to crisp up the topping. Enjoy your delicious meal once more! You should bake cheesy Tennessee onions for a total of 45 to 50 minutes. Start by covering them with foil and baking for 30 minutes. After that, remove the foil and bake for another 15 to 20 minutes. This helps the tops get golden and crispy, while the onions stay tender. Yes, you can use other onions if you like. While Vidalia onions are sweet and soft, yellow or white onions work well too. Just keep in mind that they may have a sharper taste. Adjust the baking time if needed, as some onions may cook faster. Cheesy Tennessee onions pair nicely with many dishes. You can serve them as a side with grilled meats or roasted vegetables. They also go well with a fresh salad or as part of a larger spread. For a fun twist, try serving them with a tasty dip or sauce on the side. If you want the full recipe for cheesy Tennessee onions, check out the details above. This blog post covered the key aspects of making cheesy Tennessee onions. We explored the best ingredients and how to prepare them. You learned about mixing cheesy fillings, baking tips, and creative variations. I shared storage advice to keep leftovers fresh. In closing, this dish stands out for its flavor and simplicity. Try it out and enjoy the cheesy goodness. You’ll impress everyone at your table with these tasty bites.

cheesy Tennessee Onions! Perfectly baked to perfection!

Indulge in the savory goodness of Cheesy Tennessee Onions, a hot and flavorful delight perfect for impressing guests! This easy recipe guides you through making delicious stuffed onions with a cheesy filling that blends sharp cheddar, cream cheese, and spices. Whether you like them spicy or prefer a milder taste, there are plenty of variations to explore. Click through now to master this mouthwatering dish and elevate your cooking game!

Ingredients
  

4 large Vidalia onions

1 cup sharp cheddar cheese, grated

1 cup cream cheese, softened

½ cup sour cream

1 cup breadcrumbs

1 tablespoon garlic powder

1 tablespoon onion powder

1 teaspoon smoked paprika

½ teaspoon cayenne pepper (optional for heat)

Salt and pepper to taste

2 tablespoons fresh chives, chopped (for garnish)

Instructions
 

Preheat your oven to 375°F (190°C).

    Slice off the tops of the Vidalia onions and carefully remove the insides, leaving about a 1/2-inch shell. Set the onion pulp aside for later.

      In a medium bowl, combine the cream cheese, sour cream, and half of the cheddar cheese. Mix well until smooth.

        Finely chop the reserved onion pulp and add it to the cream cheese mixture along with garlic powder, onion powder, smoked paprika, cayenne pepper (if using), salt, and pepper. Stir until everything is evenly combined.

          Fill each onion shell generously with the cheesy mixture.

            In a separate bowl, mix the remaining cheddar cheese with the breadcrumbs and a pinch of salt and pepper. Sprinkle this mixture on top of the stuffed onions.

              Place the stuffed onions in a baking dish and cover it with aluminum foil. Bake for 30 minutes.

                Remove the foil and bake for an additional 15-20 minutes, or until the tops are golden brown and the onions are tender.

                  Once done, let them cool for a few moments before serving.

                    Prep Time: 20 minutes | Total Time: 1 hour | Servings: 4

                      - Presentation Tips: Serve the cheesy Tennessee onions on a rustic wooden board and garnish with chopped chives for a pop of freshness.

                        WANT TO SAVE THIS RECIPE?

                        Leave a Comment

                        Recipe Rating