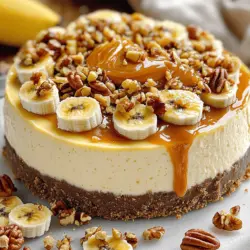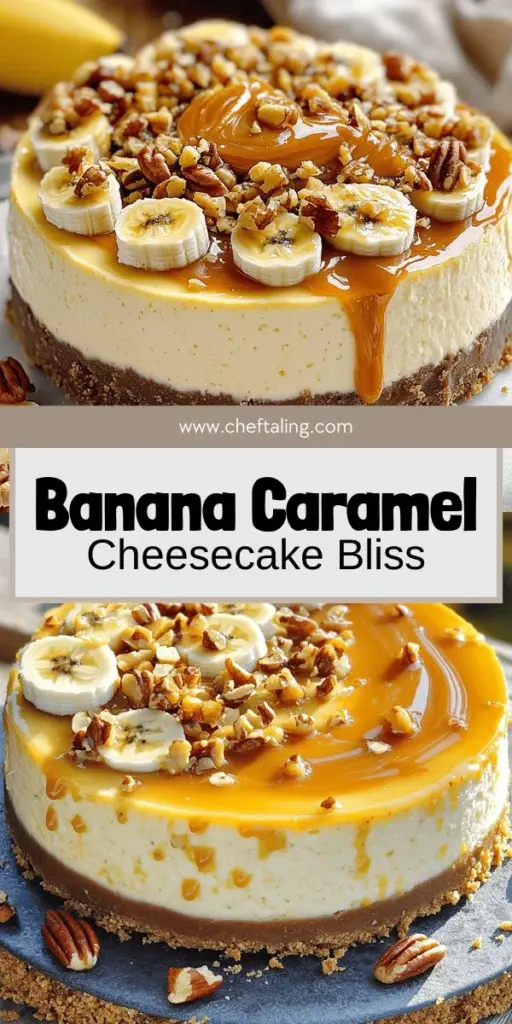
Get ready for a treat with my Irresistible Banana Caramel Nut Cheesecake! This dessert bursts with rich flavors that blend bananas, creamy cheesecake, and sweet caramel. Perfect for any special occasion or a simple family dinner, this recipe will wow your friends and loved ones. Join me as we dive into a step-by-step guide, ingredient tips, and creative variations that make this cheesecake a must-try!
Ingredients
Complete List of Ingredients
To make this Banana Caramel Nut Cheesecake, gather these items:
- 2 cups graham cracker crumbs
- 1/2 cup unsalted butter, melted
- 1 cup roasted mixed nuts (e.g., almonds, walnuts, pecans), finely chopped
- 3 (8 oz) packages cream cheese, softened
- 1 cup granulated sugar
- 1 teaspoon vanilla extract
- 2 ripe bananas, mashed
- 1/2 cup sour cream
- 3 large eggs
- 1/2 cup caramel sauce (store-bought or homemade)
- Extra chopped nuts for topping
- Banana slices for garnish (optional)
Ingredient Substitutions
You can swap some ingredients if needed:
- Use gluten-free graham crackers for a gluten-free crust.
- Coconut oil can replace unsalted butter for a dairy-free option.
- If you don’t have mixed nuts, use just one type, like walnuts or pecans.
- Greek yogurt can replace sour cream for a tangy twist.
- For a lower sugar option, use a sugar substitute in place of granulated sugar.
Equipment Needed
You will need a few tools to create this cheesecake:
- 9-inch springform pan for baking
- Mixing bowls for combining ingredients
- Electric mixer for smooth cheesecake filling
- Rubber spatula to scrape down the sides of the bowl
- Knife for swirling the caramel into the cheesecake
- Refrigerator for chilling the cheesecake before serving
Following these ingredient guidelines will help you create a delicious and creamy Banana Caramel Nut Cheesecake.
Step-by-Step Instructions
Preparing the Crust
Start by preheating your oven to 350°F (175°C). In a medium bowl, mix together the graham cracker crumbs, melted butter, and finely chopped nuts. Stir until the crumbs look moist and combined. Next, take a 9-inch springform pan and press the mixture firmly into the bottom. This forms a solid crust. Bake it for 10 minutes, then let it cool completely before adding the filling.
Making the Cheesecake Filling
In a large mixing bowl, use an electric mixer to beat the softened cream cheese. Mix on medium speed until it is smooth and creamy, which takes about 2-3 minutes. Gradually add the granulated sugar, beating until everything is well mixed. Next, stir in the vanilla extract and mashed bananas. Blend until the mixture is smooth. Add the sour cream and mix until combined. Then, add the eggs one by one. Mix on low speed until just combined. Be careful not to overmix, as this can make the texture less creamy.
Adding Caramel and Swirling
Now it’s time to add the caramel! Pour half of the cheesecake batter over your cooled crust. Drizzle half of the caramel sauce on top of this layer. Use a knife to swirl the caramel into the batter gently. Then, pour the rest of the cheesecake batter over the top. Drizzle the remaining caramel and create another swirl. This step adds a delicious caramel flavor throughout the cheesecake.
Tips & Tricks
How to Prevent Cracking
To avoid cracks, cool your cheesecake slowly. After baking, turn off the oven and crack the door. Let the cheesecake sit inside for one hour. This gradual cooling helps it set evenly. You can also bake a water bath. Place a pan of hot water in the oven. This keeps the oven moist and helps the cheesecake bake gently.
Achieving the Creamiest Texture
For a creamy cheesecake, use room temperature cream cheese. Cold cream cheese won’t mix well. Beat the cream cheese for a few minutes until smooth. Add sugar slowly to avoid lumps. Mix the bananas and sour cream in gently. Overmixing adds air, which can lead to cracks and a less creamy texture. Use low speed when adding eggs and mix just until combined.
Serving Suggestions
When serving, let the cheesecake sit at room temperature for about 30 minutes. This helps enhance the flavor and texture. Top with chopped nuts and banana slices. Drizzle extra caramel sauce on top for added sweetness. You can also pair it with whipped cream or vanilla ice cream for a delightful treat. For a fun twist, serve with a sprinkle of sea salt for contrast.
Variations
Flavor Customizations
You can easily change the flavors in this cheesecake. Try using different nuts, like cashews or hazelnuts. Adding a touch of cinnamon or nutmeg can enhance the warmth of the flavor. Want more chocolate? Mix in chocolate chips or drizzle chocolate sauce on top. You can also swap the bananas for other fruits, like ripe mango or berries, for a fresh twist. Each change gives the cheesecake a unique taste.
Healthier Ingredient Options
If you want a lighter version of this cheesecake, there are many ways to do it. Use low-fat cream cheese and Greek yogurt instead of sour cream. You can replace granulated sugar with honey or maple syrup for a natural sweetness. For the crust, try using almond flour instead of graham cracker crumbs. This still gives a crunchy texture but with fewer carbs. You can also reduce the amount of butter in the crust for a healthier base.
Creative Toppings
Toppings make your cheesecake fun and special. Try caramel popcorn for a crunchy surprise on top. You can also use toasted coconut flakes for a tropical touch. Fresh fruit like strawberries or blueberries adds a bright contrast. For chocolate lovers, drizzle chocolate sauce or sprinkle cocoa powder on top. Each topping brings a fresh look and taste to your cheesecake.
Storage Info
Best Ways to Store Cheesecake
Storing your Banana Caramel Nut Cheesecake right is key. First, let it cool completely. This step helps avoid moisture buildup. Once cooled, cover it tightly with plastic wrap. You can also use aluminum foil. Store it in the fridge for up to five days.
If you have leftovers, keep them in an airtight container. This method helps maintain its creamy texture and taste. Always slice off what you need. This way, the rest stays fresh.
Freezing Instructions
Want to keep it longer? Freezing works well! First, wrap the cheesecake in plastic wrap. Then, add a layer of aluminum foil. This double layer protects it from freezer burn. You can freeze it for about two months.
When you’re ready to enjoy it, move it to the fridge. Let it thaw overnight. This slow thaw keeps it creamy. Avoid thawing in the microwave, as it changes the texture.
Reheating Tips
Reheating cheesecake isn’t common, but you can warm it slightly. If you want a softer slice, place it at room temperature for 30 minutes. For a gentle warm-up, use your oven at 300°F (150°C) for about 10 minutes.
Keep an eye on it to prevent melting. Serve it warm for a different taste experience. Enjoy your delicious Banana Caramel Nut Cheesecake straight from the oven or chilled from the fridge.
FAQs
How long does Banana Caramel Nut Cheesecake last?
Banana Caramel Nut Cheesecake can last up to one week in the fridge. Store it in an airtight container to keep it fresh. If you want to freeze it, it can last for about three months. Just wrap it well in plastic wrap and foil.
Can I use ripe bananas for this recipe?
Yes, you can use ripe bananas. Ripe bananas add more natural sweetness and flavor. They mash easily and blend well into the cheesecake. Just make sure the bananas are not too brown, as that can affect the taste.
What can I substitute for cream cheese?
If you need a substitute for cream cheese, try using Greek yogurt or mascarpone cheese. They both have a creamy texture that works well in cheesecake. You can also use a vegan cream cheese if you want a dairy-free option. Just adjust the sugar to taste, as some substitutes may have different sweetness levels.
This blog post covered all you need for a delicious banana caramel nut cheesecake. We listed every ingredient and shared handy swaps. I walked you through each step, from making the crust to swirling in the caramel. You also learned tips for a smooth finish and fun ways to customize your cheesecake.
In the end, whether you are storing leftovers or making variations, you have the tools to succeed. Enjoy your cheesecake adventures, and remember to have fun with it!