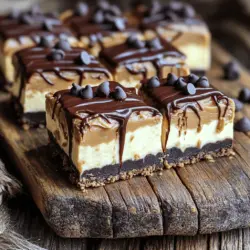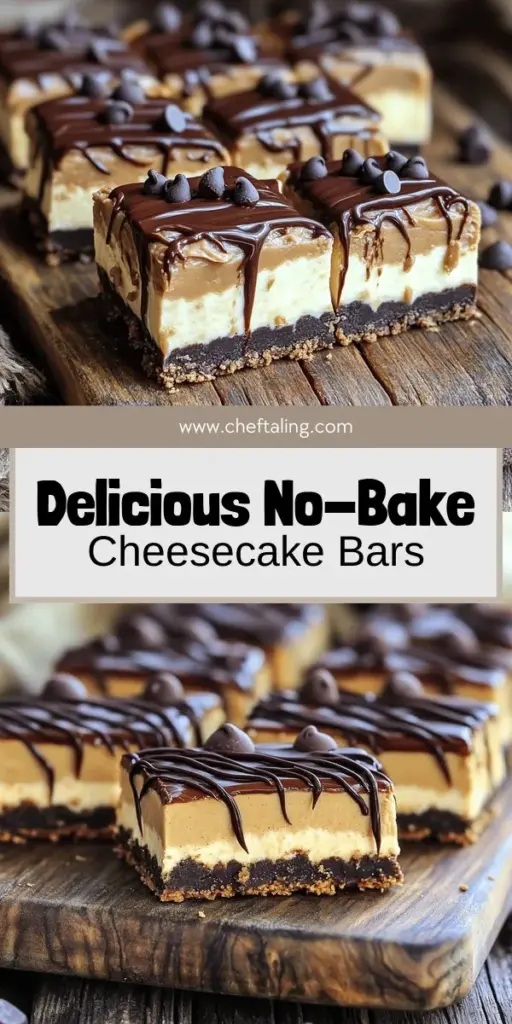
Craving a sweet treat that’s super easy to make? You’ll love my No-Bake Buckeye Cheesecake Bars! Combining a rich peanut butter layer with a creamy cheesecake, this dessert is both simple and delicious. Whether you need a quick snack or a show-stopping dessert for guests, these bars will impress. Let’s dive into the foolproof recipe that will have you enjoying this sweet delight in no time!
Ingredients
List of Ingredients
To make No-Bake Buckeye Cheesecake Bars, gather these ingredients:
- 1 ½ cups chocolate sandwich cookies (crushed)
- ½ cup unsalted butter, melted
- 1 cup creamy peanut butter
- 1 (8 oz) package cream cheese, softened
- 1 cup powdered sugar
- 1 teaspoon vanilla extract
- 1 cup whipped cream (or whipped topping)
- ½ cup semi-sweet chocolate chips (for topping)
- 1 tablespoon coconut oil (for topping)
Measurements and Substitutes
Each ingredient plays a key role. If you need substitutes, here are some ideas:
- For chocolate sandwich cookies, use graham crackers or Oreos for a similar taste.
- If you don’t have unsalted butter, salted butter works too; just skip added salt.
- You can swap creamy peanut butter for crunchy peanut butter for extra texture.
- For the cream cheese, try Greek yogurt for a lighter option.
- If you lack powdered sugar, granulated sugar blended until fine can work in a pinch.
- Use any non-dairy whipped topping if you want a dairy-free version.
- For the chocolate topping, dark chocolate chips can add a richer flavor.
Notes on Ingredient Quality
Using high-quality ingredients makes a big difference in taste. Consider these tips:
- Choose a good brand of chocolate sandwich cookies. Fresh cookies yield a better crust.
- Use real butter for the best flavor; it enhances the richness of the base.
- Select a smooth peanut butter without added sugars or oils for a clean taste.
- Ensure your cream cheese is fresh and at room temperature for easy mixing.
- Fresh whipped cream adds lightness and volume to the cheesecake layer.
- For the chocolate topping, use quality semi-sweet chocolate chips for a smooth melt.
These tips help you create the best No-Bake Buckeye Cheesecake Bars possible.
Step-by-Step Instructions
Preparing the Crust
To make the crust, grab a medium bowl. Combine 1 ½ cups of crushed chocolate sandwich cookies with ½ cup of melted unsalted butter. Mix well until it looks like wet sand. Now, press this mixture firmly into the bottom of a 9×9 inch square baking dish. Make sure it’s even and packed tight. Refrigerate it for 15 minutes to help it set.
Making the Peanut Butter Layer
For the peanut butter layer, get a large mixing bowl. Beat together 1 cup of creamy peanut butter, 1 (8 oz) package of softened cream cheese, 1 cup of powdered sugar, and 1 teaspoon of vanilla extract. Mix this until it’s smooth and creamy. This layer is rich and full of flavor.
Adding the Whipped Cream
Next, take 1 cup of whipped cream and gently fold it into the peanut butter mixture. Be careful not to deflate it. You want it to stay light and fluffy. Once combined, spread this mixture evenly over your chilled crust in the baking dish. This adds a nice, airy texture.
Chilling the Bars
Cover the dish tightly with plastic wrap. Refrigerate the bars for at least 4 hours. This step is crucial to let the cheesecake layer firm up. It will help when you cut the bars later.
Preparing the Chocolate Topping
Now, let’s make the chocolate topping. In a small microwave-safe bowl, mix ½ cup of semi-sweet chocolate chips with 1 tablespoon of coconut oil. Microwave this in 30-second bursts. Stir in between each burst until it’s fully melted and smooth. This will give your topping a nice shine.
Combining and Drizzling for Presentation
Once the cheesecake layer has set, take the bars out of the fridge. Drizzle your melted chocolate mixture over the top in a zigzag pattern. This adds a beautiful touch. Place the bars back in the fridge for another 30 minutes. This final chill allows the chocolate to set perfectly. After that, cut into squares and enjoy your tasty No-Bake Buckeye Cheesecake Bars!
Tips & Tricks
How to Achieve a Firm Cheesecake Layer
To get a firm cheesecake layer, chill it well. After making the peanut butter layer, spread it over the crust. Cover the dish and place it in the fridge for at least 4 hours. This time helps the mixture set properly. If you want a quicker option, freeze it for about 2 hours, but keep an eye on it. A firm layer holds its shape when you cut it.
Best Practices for Melting Chocolate
Melting chocolate can be tricky. Always use a microwave-safe bowl. Start with 30-second bursts in the microwave. Stir the chocolate between each interval. This method helps avoid burning. If you see any lumps, keep stirring until smooth. Adding a bit of coconut oil helps the chocolate stay shiny and pourable. This step makes it perfect for drizzling over your cheesecake bars.
Serving Suggestions to Enhance Flavor
To make your No-Bake Buckeye Cheesecake Bars even better, serve them chilled. Top each square with a sprinkle of sea salt. This touch contrasts the sweet flavors nicely. You could also add fresh berries for a fruity twist. If you like more crunch, crushed nuts on top work well too. These options add color and new flavors to each bite.

Variations
Alternative Flavor Combinations
You can change the flavors in your No-Bake Buckeye Cheesecake Bars. Try using different cookies for the crust. Chocolate chip cookies add sweetness, while graham crackers give a classic touch. You can also swap peanut butter for almond butter. This change gives a new taste while keeping a nutty flavor. For chocolate lovers, mix in cocoa powder to the cheesecake layer for a richer taste.
Vegan or Gluten-Free Modifications
To make these bars vegan, use dairy-free cream cheese and whipped topping. Swap the butter for coconut oil or vegan butter. For gluten-free bars, choose gluten-free chocolate sandwich cookies. This way, you can enjoy these treats without worry. These swaps keep the flavors bold while meeting dietary needs.
Creative Toppings and Add-ins
Toppings can elevate your No-Bake Buckeye Cheesecake Bars. You can sprinkle crushed nuts or mini chocolate chips on top. Drizzling caramel sauce adds sweetness and a fun look. You can also add a layer of fruit, like sliced strawberries, for freshness. Feel free to get creative! Mix in your favorite candies or add a layer of fudge on top for extra indulgence.
Each variation allows you to make this dessert your own.
Storage Info
Proper Storage Techniques
To keep your No-Bake Buckeye Cheesecake Bars fresh, store them in an airtight container. I recommend using a glass or plastic dish with a tight lid. This helps to prevent drying out and keeps the bars tasting great. If you have leftovers, make sure to place parchment paper between layers. This stops them from sticking.
Shelf Life Tips
These cheesecake bars can last up to five days in the fridge. However, I find they are best within the first three days. After that, the texture may change a bit. Keep an eye on them for any signs of spoilage, like an off smell or color. If you notice any changes, it’s best to toss them.
Freezing Instructions for Longer Storage
If you want to enjoy your No-Bake Buckeye Cheesecake Bars later, freezing is a great option. Cut the bars into squares and wrap each piece in plastic wrap. Then, place them in a freezer-safe bag or container. They can last for up to three months in the freezer. When you’re ready to eat them, take them out and let them thaw in the fridge overnight. You’ll still enjoy that creamy texture and rich flavor.
FAQs
What makes this cheesecake a no-bake recipe?
This cheesecake is no-bake because it does not need an oven. Instead, it sets in the refrigerator. The cream cheese and whipped cream mix creates a smooth filling. You just chill it until firm. This saves time and keeps it easy.
Can I use a different type of cookie for the crust?
Yes, you can choose other cookies for the crust. Graham crackers work well for a lighter taste. You might also try Oreo cookies for a chocolate twist. Just crush them and mix with melted butter, just like the original recipe.
How can I make the bars firmer if they are too soft?
If your bars are too soft, chill them longer in the fridge. You could also add more cream cheese to the mix. This will help the bars set better. Make sure to use the right amount of powdered sugar too. This keeps the filling thick and creamy.
What is the best way to cut cheesecake bars cleanly?
To cut cheesecake bars cleanly, use a sharp knife. Dip the knife in warm water before each cut. Wipe the knife with a towel after each slice. This helps avoid messy edges and keeps the bars looking nice.
Can I make these bars in advance?
Yes, you can make these bars ahead of time. They store well in the fridge for up to a week. Just cover them tightly with plastic wrap. You can also freeze them for longer storage. Thaw them in the fridge before serving.
We covered the key ingredients for a delicious no-bake cheesecake. You learned how to prepare each layer, from the crust to the toppings. Achieving a firm cheesecake, using the right chocolate, and serving it well can elevate the treat. If you want to try new flavors or need storage tips, I shared those too. Enjoy making these bars! They are simple, fun, and sure to impress anyone who tries them. Dive in and experiment to find your favorite combination!